★ AWSでサイト制作シリーズ
※ 「Railsでサイト制作」シリーズから「AWSでサイト制作」シリーズに改名しました😌
■ 今回のゴール
前回、独自ドメイン設定ができました。
ついでに今回は無料でSSL化したいと思います。
■ ELBを使う?
「AWS ssl 無料」で検索するとたくさん出てくるのが、
ELB(Elastic Load Balancing)を使う方法です。
なんだ全部AWSでまかなえるならそれがいいじゃん♪と思ったのですが…
今回は、無料でSSL証明書が利用できるAWS Certificate Manager(ACM)を使います。アジアパシフィック (東京)は、ELB(ロードバランサー)のみにACMを使用することができます。なので、ELBを利用していないと、無料のSSL証明書を使うことができません。ちなみに、ELBは有料で、デフォルトで月2000円くらい掛かります。
https://qiita.com/iwaseasahi/items/1687426add4124899fe3
● nginx+phpでサイトを構築している
● すでにELBやSESを利用している
● SSL証明書の更新がめんどうだ
● SSL証明書にお金をかけたくない
● SSL証明書で個人情報をさらしたくない
ELBを利用していないと余計なお金がかかるため上記以外の人はおすすめしません。
https://tokyo-engineer.com/aws_ssl_elb_ec2_nginx_ses_php/
どうやら約2000円/月かかる模様。
ELBを使う予定があるなら惜しい金額じゃないですが、
今回は学習メインなので極力無料で済ませたいですね…
ELBの利用は却下!
■ Let's Encryptを使う!
無料SSLといえば Let's Encrypt でしょ。
「aws Let's Encrypt」で検索すると情報出てきました!ホッ😄
仕事でさくらサーバーを使っていた時は、簡単に Let's Encrypt を利用できましたが…
AWSだとちょっと設定が必要みたいです。
こちらの記事を参考にして、Certbotを使って進めることにします。
【参考】https://qiita.com/sayama0402/items/011644191dfdbde9c646
■ certbotのインストール
EC2インスタンスにssh接続して、
// rootユーザーになる
$ sudo -i

// curlでcertbotをインストール
$ curl https://dl.eff.org/certbot-auto -o /usr/bin/certbot-auto
  % Total    % Received % Xferd  Average Speed   Time    Time     Time  Current
                                 Dload  Upload   Total   Spent    Left  Speed
100 62299  100 62299    0     0  96417      0 --:--:-- --:--:-- --:--:-- 96289

// 700権限を付与
$ chmod 700 /usr/bin/certbot-auto
■ SSL証明書を作成
Certbotを使ってSSL証明書を発行します。
$ certbot-auto certonly --webroot -w /var/app/current -d 【ドメイン名】 --email 【登録用メールアドレス】 -n --agree-tos --debug

Bootstrapping dependencies for Amazon... (you can skip this with --no-bootstrap)
yum は /usr/bin/yum です
yum はハッシュされています (/usr/bin/yum)
読み込んだプラグイン:priorities, update-motd, upgrade-helper
amzn-main                                                                      | 2.1 kB  00:00:00
amzn-updates                                                                   | 2.5 kB  00:00:00
パッケージ gcc-4.8.5-1.22.amzn1.noarch はインストール済みか最新バージョンです
パッケージ 1:openssl-1.0.2k-12.109.amzn1.x86_64 はインストール済みか最新バージョンです

...省略...

IMPORTANT NOTES:
 - The following errors were reported by the server:

   Domain: 【ドメイン名】
   Type:   unauthorized
   Detail: Invalid response from
   http://【ドメイン名】/.well-known/acme-challenge/【省略】:
   "<!DOCTYPE html>
   <html>
   <head>
     <title>The page you were looking for doesn't exist (404)</title>
     <meta name="viewport" content"

   To fix these errors, please make sure that your domain name was
   entered correctly and the DNS A/AAAA record(s) for that domain
   contain(s) the right IP address.
 - Your account credentials have been saved in your Certbot
   configuration directory at /etc/letsencrypt. You should make a
   secure backup of this folder now. This configuration directory will
   also contain certificates and private keys obtained by Certbot so
   making regular backups of this folder is ideal.
なんかガッツリエラーくらいました。
-w は /var/app/current だと思ったけど、違うのかな。
参考記事はApache使ってるけど、私はnginxだからな。
同じくnginxを使ってるこちらの記事だと、/usr/share/nginx/html になってました。
あと、--debug付与もいらないそうです。試してみましょ!
$ certbot-auto certonly --agree-tos --webroot -w /usr/share/nginx/html -d 【ドメイン名】 -m 【登録用メールアドレス】

Saving debug log to /var/log/letsencrypt/letsencrypt.log
Plugins selected: Authenticator webroot, Installer None
Obtaining a new certificate
Performing the following challenges:
http-01 challenge for 【ドメイン名】
Using the webroot path /usr/share/nginx/html for all unmatched domains.
Waiting for verification...
Cleaning up challenges
Failed authorization procedure. 【ドメイン名】 (http-01): urn:ietf:params:acme:error:unauthorized :: The client lacks sufficient authorization :: Invalid response from http://【ドメイン名】/.well-known/acme-challenge/【省略】: "<!DOCTYPE html>
<html>
<head>
  <title>The page you were looking for doesn't exist (404)</title>
  <meta name="viewport" content"

IMPORTANT NOTES:
 - The following errors were reported by the server:

   Domain: 【ドメイン名】
   Type:   unauthorized
   Detail: Invalid response from
   http://【ドメイン名】/.well-known/acme-challenge/xxxxx:
   "<!DOCTYPE html>
   <html>
   <head>
     <title>The page you were looking for doesn't exist (404)</title>
     <meta name="viewport" content"

   To fix these errors, please make sure that your domain name was
   entered correctly and the DNS A/AAAA record(s) for that domain
   contain(s) the right IP address.
またエラーです。
AレコードにちゃんとIPアドレス設定してね的なこと言ってる?してるよ!(おこ)
「Failed authorization procedure」で検索すると、
同じことでハマった先人たちの記事が出てきました。
以下、こちらの記事を参考にさせていただきます。
$ vi /etc/nginx/nginx.conf
i //インサートモードに変更
    server {
        listen       80 ;
        listen       [::]:80 ;
        server_name  【ドメイン名】; //localhostから修正
        root         /usr/share/nginx/html;

        # Load configuration files for the default server block.
        include /etc/nginx/default.d/*.conf;

        location ^~ /.well-known/acme-challenge/ { //追記
            root /usr/share/nginx/html; //追記
        }
esc //モード変更
:wq! //上書き保存して終了
$ service nginx restart //再起動
さぁ、再チャレンジ!
$ certbot-auto certonly --agree-tos --webroot -w /usr/share/nginx/html -d 【ドメイン名】 -m 【登録用メールアドレス】

Saving debug log to /var/log/letsencrypt/letsencrypt.log
Plugins selected: Authenticator webroot, Installer None
Obtaining a new certificate
Performing the following challenges:
http-01 challenge for 【ドメイン名】
Using the webroot path /usr/share/nginx/html for all unmatched domains.
Waiting for verification...
Cleaning up challenges

IMPORTANT NOTES:
 - Congratulations! Your certificate and chain have been saved at:
   /etc/letsencrypt/live/【ドメイン名】/fullchain.pem
   Your key file has been saved at:
   /etc/letsencrypt/live/【ドメイン名】/privkey.pem
   Your cert will expire on 2018-11-28. To obtain a new or tweaked
   version of this certificate in the future, simply run certbot-auto
   again. To non-interactively renew *all* of your certificates, run
   "certbot-auto renew"
 - If you like Certbot, please consider supporting our work by:

   Donating to ISRG / Let's Encrypt:   https://letsencrypt.org/donate
   Donating to EFF:                    https://eff.org/donate-le
おっ!うまくいったみたいです。
■ リダイレクト設定
Apacheだと.htaccessでhttpアクセスをhttpsにリダイレクトさせてましたが、
Nginxだとさっきのnginx.confで設定するらしいです。
$ vi /etc/nginx/nginx.conf
i //インサートモードに変更
    # httpの設定
    server {
        listen       80 ;
        server_name  【ドメイン名】;
        return 301 https://$host$request_uri;
    }

    # httpsの設定
    server {
        listen  443 ssl;
        server_name 【ドメイン名】;

        # SSL設定
        ssl_certificate /etc/letsencrypt/live/【ドメイン名】/fullchain.pem;
        ssl_certificate_key /etc/letsencrypt/live/【ドメイン名】/privkey.pem;
        ssl_protocols TLSv1 TLSv1.1 TLSv1.2;

        # location ^~ /.well-known/acme-challenge/ {
        #     root /usr/share/nginx/html;
        # }
esc //モード変更
:wq! //上書き保存して終了
$ service nginx restart //再起動
▽ リダイレクト成功!
ブラウザでhttpアクセスしてみたところ、無事httpsにリダイレクトされました!

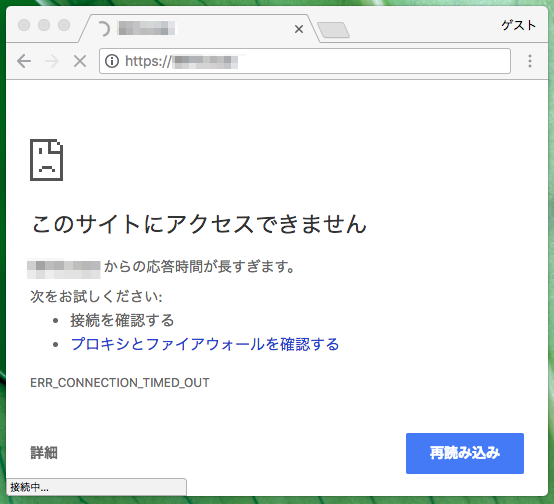
でも応答時間が長すぎるとのことでエラー。。。
■ セキュリティーグループを編集
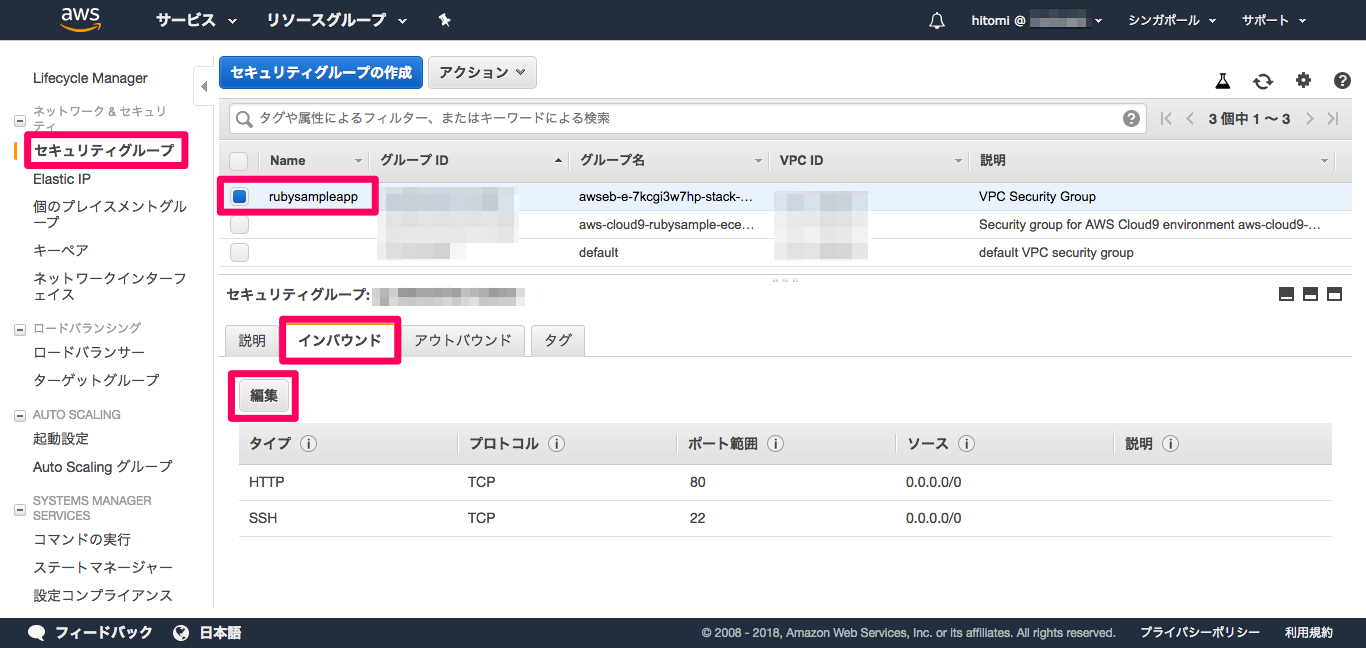
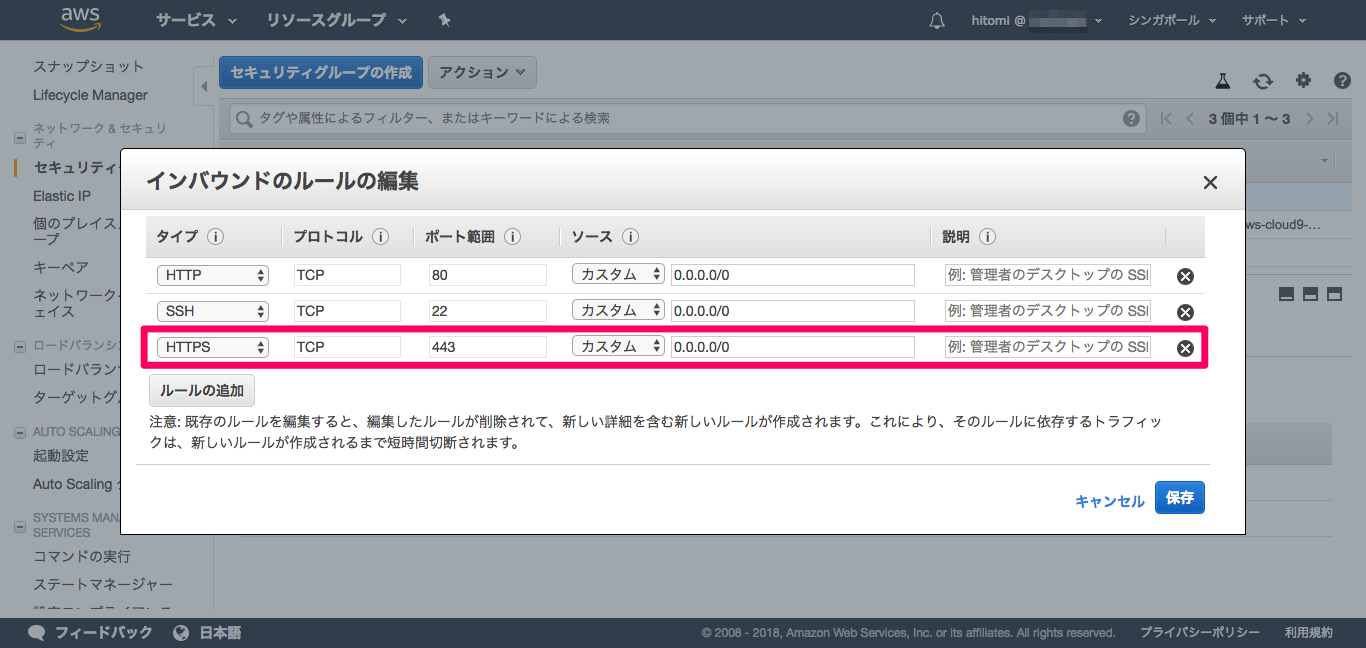
もしhttps://設定したドメイン で見れない場合は、「EC2」→ 「セキュリティーグループ」でインスタンスに適用しているグループの「インバウンド」の編集から以下を追加してあげればOKです。
https://qiita.com/sayama0402/items/011644191dfdbde9c646
なるほど、やってみます!
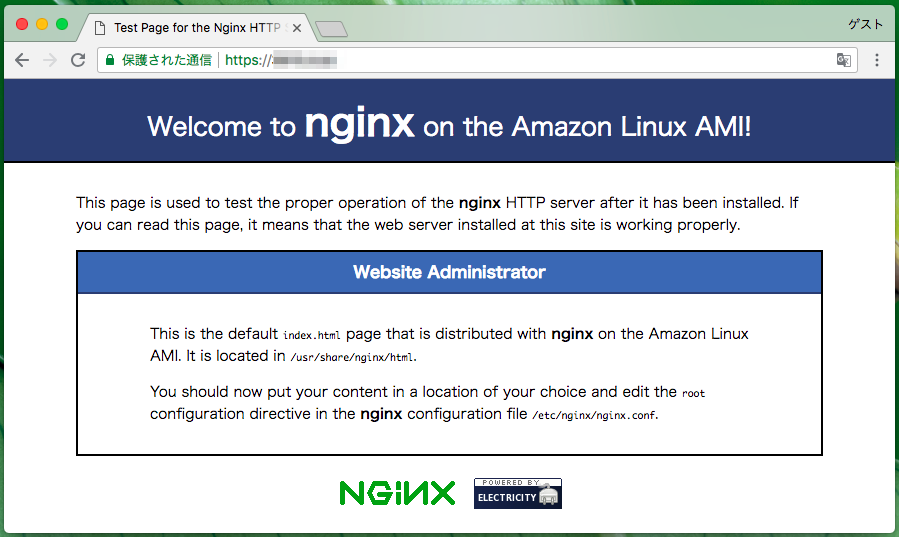
でも表示されるはずの Hello World! じゃなくて、Nginx のデフォルトページが出てます。。。
■ 一旦中止します😂
Amazon Linux AMIのnginxへようこそ!
このページは、インストール後のnginx HTTPサーバーの適切な操作をテストするために使用 されます。このページを読むことができれば、このサイトにインストールされているWebサーバーが正常に動作していることを意味します。

ウェブサイト管理者さんへ
これは、Amazon Linux AMIにnginxとともに配布されるデフォルトのindex.htmlページです。これは / usr / share / nginx / htmlにあります。
これで、あなたの選択した場所にコンテンツを置き、nginx 設定ファイル/etc/nginx/nginx.confにあるルート設定ディレクティブを編集する必要があります 。
たぶん
root /usr/share/nginx/html;じゃなくて
/etc/nginx/conf.d/webapp_healthd.conf の内容を反映させればいいんだろうけど
どーにもこーにもうまく行かなくて一旦中止!
寄り道でAWSの奥地まできてしまったけど、
時間がなくなってきたので本来やりたかったRubyの勉強に集中します!
書きかけを公開したくなかったけど知人に質問したいので置いておきますm(_ _)m


