はじめに
UbuntuにoneWEXのテスト環境を作った時の作業ログです。
とりあえず動かせる環境を作りたかったので、まずは細かいところはあまり気にせず構築しています。
Windows10上のVirtualBolx上にUbuntu入れて、そこにoneWEXを入れる感じです。
oneWEXというのはWatson Explorer Deep Analytics Edition に含まれるコンポーネントでdockerコンテナとして提供されています。
とりあえず動かす分にはサクッといけるかと思ったら意外と苦戦した...
関連記事
インストール関連
oneWEX導入メモ / Ubuntu編
oneWEX導入メモ / RHEL7.6 オフライン編
検索関連
oneWEX検証メモ - (0) 概要理解
oneWEX検証メモ - (1)ファイルシステムクローラーによるデータの取り込み / データセット、コレクションの作成
oneWEX検証メモ - (2)Windowsファイルシステムクローラーによるデータの取り込み
oneWEX検証メモ - (3)ContentMinerによる文書の検索
oneWEX検証メモ - (4)ApplicationBuilderによるWebアプリの作成と文書の検索
分析関連
oneWEX検証メモ - (5)ContentMinerによる分析 / ガイド付きモード
oneWEX検証メモ - (6)ContentMinerによる分析 / 各種"ID情報"をベースとした分析
API関連
oneWEX検証メモ - (7)REST API
参考情報
Watson Explorer Deep Analytics Edition 12.0.1の前提条件の確認
oneWEX - Compatibility Report
Ubuntu 16.04 LTS
Docker CE 17.09 and future versions, releases and fix packs
DiskSpace: 10GB
Memory: 16GB
CPU 64-bit (AMD64 or Intel 64) x86 system with eight or more cores of 2 GHz, or higher processor
マニュアル
oneWEX - knowledge center
※Memoryは16GB以上無いとインストール時にチェックされて失敗します(増設しておいて良かった...)。
コア数は4つしか割り当てなかったけど一応なんとか動いたようです。
セットアップ
環境情報
[H/W]
ThinkPad T480
Memory 24GB
[OS,S/W]
Windows10 (導入済み)
Oracle VirtualBox 6.0.8 (導入済み)
ここに、以下のものを入れていく。
Ubuntu 16.04.6 LTS
DockerCE 18.09.6
oneWex 12.0.2
Vagrant/Ubuntu
使ったことなかったので、Vagrantを使ってみることにする。
※ちなみに、Hyper-vとVirtualBoxは共存できないらしい。VirtualBoxは既に導入済みなのでそれをそのまま使う。
参考: Hyper-V/VirtualBoxと共存する
Vagrant
こちらからダウンロードしてインストール
Download Vagrant
以下のBoxから、ubuntu/xenial64 (official Ubuntu 16.04LTS Daily Build) を使うことにする
Discover Vagrant Boxes
参考: Windows10+VirtualBox+VagrantでDockerはじめました
仮想マシン作成
C:\y\Vagrant\ubuntu1604>vagrant init ubuntu/xenial64
A `Vagrantfile` has been placed in this directory. You are now
ready to `vagrant up` your first virtual environment! Please read
the comments in the Vagrantfile as well as documentation on
`vagrantup.com` for more information on using Vagrant.
起動
30分くらいかかったかな。
でもコマンド1発でOS起動までできるってステキです。
C:\y\Vagrant\ubuntu1604>vagrant up
Bringing machine 'default' up with 'virtualbox' provider...
==> default: Box 'ubuntu/xenial64' could not be found. Attempting to find and install...
    default: Box Provider: virtualbox
    default: Box Version: >= 0
==> default: Loading metadata for box 'ubuntu/xenial64'
    default: URL: https://vagrantcloud.com/ubuntu/xenial64
==> default: Adding box 'ubuntu/xenial64' (v20190613.1.0) for provider: virtualbox
    default: Downloading: https://vagrantcloud.com/ubuntu/boxes/xenial64/versions/20190613.1.0/providers/virtualbox.box
    default: Download redirected to host: cloud-images.ubuntu.com
    default:
==> default: Successfully added box 'ubuntu/xenial64' (v20190613.1.0) for 'virtualbox'!
==> default: Importing base box 'ubuntu/xenial64'...
==> default: Matching MAC address for NAT networking...
==> default: Checking if box 'ubuntu/xenial64' version '20190613.1.0' is up to date...
==> default: Setting the name of the VM: ubuntu1604_default_1560582489739_42009
Vagrant is currently configured to create VirtualBox synced folders with
the `SharedFoldersEnableSymlinksCreate` option enabled. If the Vagrant
guest is not trusted, you may want to disable this option. For more
information on this option, please refer to the VirtualBox manual:

  https://www.virtualbox.org/manual/ch04.html#sharedfolders

This option can be disabled globally with an environment variable:

  VAGRANT_DISABLE_VBOXSYMLINKCREATE=1

or on a per folder basis within the Vagrantfile:

  config.vm.synced_folder '/host/path', '/guest/path', SharedFoldersEnableSymlinksCreate: false
==> default: Clearing any previously set network interfaces...
==> default: Preparing network interfaces based on configuration...
    default: Adapter 1: nat
==> default: Forwarding ports...
    default: 22 (guest) => 2222 (host) (adapter 1)
==> default: Running 'pre-boot' VM customizations...
==> default: Booting VM...
==> default: Waiting for machine to boot. This may take a few minutes...
    default: SSH address: 127.0.0.1:2222
    default: SSH username: vagrant
    default: SSH auth method: private key
    default:
    default: Vagrant insecure key detected. Vagrant will automatically replace
    default: this with a newly generated keypair for better security.
    default:
    default: Inserting generated public key within guest...
    default: Removing insecure key from the guest if it's present...
    default: Key inserted! Disconnecting and reconnecting using new SSH key...
==> default: Machine booted and ready!
==> default: Checking for guest additions in VM...
    default: The guest additions on this VM do not match the installed version of
    default: VirtualBox! In most cases this is fine, but in rare cases it can
    default: prevent things such as shared folders from working properly. If you see
    default: shared folder errors, please make sure the guest additions within the
    default: virtual machine match the version of VirtualBox you have installed on
    default: your host and reload your VM.
    default:
    default: Guest Additions Version: 5.1.38
    default: VirtualBox Version: 6.0
==> default: Mounting shared folders...
    default: /vagrant => C:/y/Vagrant/ubuntu1604
SSHでログイン
C:\y\Vagrant\ubuntu1604>vagrant ssh
Welcome to Ubuntu 16.04.6 LTS (GNU/Linux 4.4.0-150-generic x86_64)

 * Documentation:  https://help.ubuntu.com
 * Management:     https://landscape.canonical.com
 * Support:        https://ubuntu.com/advantage

0 packages can be updated.
0 updates are security updates.


Last login: Sat Jun 15 09:56:45 2019 from 10.0.2.2
vagrant@ubuntu-xenial:~$
teratermで接続
参考:Vagrant で作った VM にやってはいけない2つのこと
秘密鍵の場所を確認
C:\y\Vagrant\ubuntu1604>vagrant ssh-config
Host default
  HostName 127.0.0.1
  User vagrant
  Port 2222
  UserKnownHostsFile /dev/null
  StrictHostKeyChecking no
  PasswordAuthentication no
  IdentityFile C:/y/Vagrant/ubuntu1604/.vagrant/machines/default/virtualbox/private_key
  IdentitiesOnly yes
  LogLevel FATAL
この秘密鍵を使用して、vagrantユーザーでログインできた!
補足
ちなみにコマンドプロンプトから明示的にsshコマンドで接続する場合...
C:\y\Vagrant\ubuntu1604>ssh -p 2222 -i C:/y/Vagrant/ubuntu1604/.vagrant/machines/default/virtualbox/private_key vagrant@localhost
OS起動後、VirtualBoxの管理コンソール起動してみると、実行中になってた。

一旦停止して、メモリ(16GB)、CPU割り当て(4コア)を増やす。
Docker CE
参考:
Get Docker CE for Ubuntu
Ubuntuにdockerをインストールする
上の公式手順に従う
Set up the repository
1.Update the apt package index:
vagrant@ubuntu-xenial:~$ sudo apt-get update
Get:1 http://security.ubuntu.com/ubuntu xenial-security InRelease [109 kB]
Hit:2 http://archive.ubuntu.com/ubuntu xenial InRelease
Get:3 http://archive.ubuntu.com/ubuntu xenial-updates InRelease [109 kB]
Get:4 http://security.ubuntu.com/ubuntu xenial-security/main amd64 Packages [670 kB]
Get:5 http://archive.ubuntu.com/ubuntu xenial-backports InRelease [107 kB]
Get:6 http://archive.ubuntu.com/ubuntu xenial/universe amd64 Packages [7,532 kB]
Get:7 http://security.ubuntu.com/ubuntu xenial-security/universe amd64 Packages [438 kB]
Get:8 http://security.ubuntu.com/ubuntu xenial-security/universe Translation-en [178 kB]
Get:9 http://security.ubuntu.com/ubuntu xenial-security/multiverse amd64 Packages [5,604 B]
Get:10 http://security.ubuntu.com/ubuntu xenial-security/multiverse Translation-en [2,676 B]
Get:11 http://archive.ubuntu.com/ubuntu xenial/universe Translation-en [4,354 kB]
Get:12 http://archive.ubuntu.com/ubuntu xenial/multiverse amd64 Packages [144 kB]
Get:13 http://archive.ubuntu.com/ubuntu xenial/multiverse Translation-en [106 kB]
Get:14 http://archive.ubuntu.com/ubuntu xenial-updates/main amd64 Packages [967 kB]
Get:15 http://archive.ubuntu.com/ubuntu xenial-updates/universe amd64 Packages [750 kB]
Get:16 http://archive.ubuntu.com/ubuntu xenial-updates/universe Translation-en [312 kB]
Get:17 http://archive.ubuntu.com/ubuntu xenial-updates/multiverse amd64 Packages [16.7 kB]
Get:18 http://archive.ubuntu.com/ubuntu xenial-updates/multiverse Translation-en [8,440 B]
Get:19 http://archive.ubuntu.com/ubuntu xenial-backports/main amd64 Packages [7,280 B]
Get:20 http://archive.ubuntu.com/ubuntu xenial-backports/main Translation-en [4,456 B]
Get:21 http://archive.ubuntu.com/ubuntu xenial-backports/universe amd64 Packages [7,804 B]
Get:22 http://archive.ubuntu.com/ubuntu xenial-backports/universe Translation-en [4,184 B]
Fetched 15.8 MB in 1min 7s (235 kB/s)
Reading package lists... Done
2.Install packages to allow apt to use a repository over HTTPS:
vagrant@ubuntu-xenial:~$ sudo apt-get install \
>     apt-transport-https \
>     ca-certificates \
>     curl \
>     gnupg-agent \
>     software-properties-common
Reading package lists... Done
Building dependency tree
Reading state information... Done
apt-transport-https is already the newest version (1.2.32).
ca-certificates is already the newest version (20170717~16.04.2).
curl is already the newest version (7.47.0-1ubuntu2.13).
software-properties-common is already the newest version (0.96.20.8).
The following additional packages will be installed:
  libassuan0 libnpth0 pinentry-curses
Suggested packages:
  pinentry-doc
The following NEW packages will be installed:
  gnupg-agent libassuan0 libnpth0 pinentry-curses
0 upgraded, 4 newly installed, 0 to remove and 0 not upgraded.
Need to get 314 kB of archives.
After this operation, 1,202 kB of additional disk space will be used.
Do you want to continue? [Y/n] Y
Get:1 http://archive.ubuntu.com/ubuntu xenial/main amd64 libassuan0 amd64 2.4.2-2 [34.6 kB]
Get:2 http://archive.ubuntu.com/ubuntu xenial/main amd64 pinentry-curses amd64 0.9.7-3 [31.2 kB]
Get:3 http://archive.ubuntu.com/ubuntu xenial/main amd64 libnpth0 amd64 1.2-3 [7,998 B]
Get:4 http://archive.ubuntu.com/ubuntu xenial-updates/main amd64 gnupg-agent amd64 2.1.11-6ubuntu2.1 [240 kB]
Fetched 314 kB in 1s (171 kB/s)
Selecting previously unselected package libassuan0:amd64.
(Reading database ... 54233 files and directories currently installed.)
Preparing to unpack .../libassuan0_2.4.2-2_amd64.deb ...
Unpacking libassuan0:amd64 (2.4.2-2) ...
Selecting previously unselected package pinentry-curses.
Preparing to unpack .../pinentry-curses_0.9.7-3_amd64.deb ...
Unpacking pinentry-curses (0.9.7-3) ...
Selecting previously unselected package libnpth0:amd64.
Preparing to unpack .../libnpth0_1.2-3_amd64.deb ...
Unpacking libnpth0:amd64 (1.2-3) ...
Selecting previously unselected package gnupg-agent.
Preparing to unpack .../gnupg-agent_2.1.11-6ubuntu2.1_amd64.deb ...
Unpacking gnupg-agent (2.1.11-6ubuntu2.1) ...
Processing triggers for libc-bin (2.23-0ubuntu11) ...
Processing triggers for man-db (2.7.5-1) ...
Setting up libassuan0:amd64 (2.4.2-2) ...
Setting up pinentry-curses (0.9.7-3) ...
Setting up libnpth0:amd64 (1.2-3) ...
Setting up gnupg-agent (2.1.11-6ubuntu2.1) ...
Processing triggers for libc-bin (2.23-0ubuntu11) ...
3.Add Docker’s official GPG key:
vagrant@ubuntu-xenial:~$ curl -fsSL https://download.docker.com/linux/ubuntu/gpg | sudo apt-key add -
OK
vagrant@ubuntu-xenial:~$ sudo apt-key fingerprint 0EBFCD88
pub   4096R/0EBFCD88 2017-02-22
      Key fingerprint = 9DC8 5822 9FC7 DD38 854A  E2D8 8D81 803C 0EBF CD88
uid                  Docker Release (CE deb) <docker@docker.com>
sub   4096R/F273FCD8 2017-02-22
4.Use the following command to set up the stable repository. To add the nightly or test repository, add the word nightly or test (or both) after the word stable in the commands below. Learn about nightly and test channels.
vagrant@ubuntu-xenial:~$ lsb_release -cs
xenial
vagrant@ubuntu-xenial:~$ sudo add-apt-repository \
>    "deb [arch=amd64] https://download.docker.com/linux/ubuntu \
>    $(lsb_release -cs) \
>    stable"
Install Docker CE
1.Update the apt package index.
vagrant@ubuntu-xenial:~$ sudo apt-get update
Get:1 https://download.docker.com/linux/ubuntu xenial InRelease [66.2 kB]
Get:2 https://download.docker.com/linux/ubuntu xenial/stable amd64 Packages [8,482 B]
Hit:3 http://archive.ubuntu.com/ubuntu xenial InRelease
Hit:4 http://security.ubuntu.com/ubuntu xenial-security InRelease
Hit:5 http://archive.ubuntu.com/ubuntu xenial-updates InRelease
Hit:6 http://archive.ubuntu.com/ubuntu xenial-backports InRelease
Fetched 74.7 kB in 1s (64.4 kB/s)
Reading package lists... Done
2.Install the latest version of Docker CE and containerd, or go to the next step to install a specific version:
vagrant@ubuntu-xenial:~$ sudo apt-get install docker-ce docker-ce-cli containerd.io
Reading package lists... Done
Building dependency tree
Reading state information... Done
The following additional packages will be installed:
  aufs-tools cgroupfs-mount libltdl7 pigz
Suggested packages:
  mountall
The following NEW packages will be installed:
  aufs-tools cgroupfs-mount containerd.io docker-ce docker-ce-cli libltdl7 pigz
0 upgraded, 7 newly installed, 0 to remove and 0 not upgraded.
Need to get 50.5 MB of archives.
After this operation, 243 MB of additional disk space will be used.
Do you want to continue? [Y/n] Y
Get:1 https://download.docker.com/linux/ubuntu xenial/stable amd64 containerd.io amd64 1.2.5-1 [19.9 MB]
Get:2 http://archive.ubuntu.com/ubuntu xenial/universe amd64 pigz amd64 2.3.1-2 [61.1 kB]
Get:3 http://archive.ubuntu.com/ubuntu xenial/universe amd64 aufs-tools amd64 1:3.2+20130722-1.1ubuntu1 [92.9 kB]
Get:4 http://archive.ubuntu.com/ubuntu xenial/universe amd64 cgroupfs-mount all 1.2 [4,970 B]
Get:5 http://archive.ubuntu.com/ubuntu xenial/main amd64 libltdl7 amd64 2.4.6-0.1 [38.3 kB]
Get:6 https://download.docker.com/linux/ubuntu xenial/stable amd64 docker-ce-cli amd64 5:18.09.6~3-0~ubuntu-xenial [13.0 MB]
Get:7 https://download.docker.com/linux/ubuntu xenial/stable amd64 docker-ce amd64 5:18.09.6~3-0~ubuntu-xenial [17.4 MB]
Fetched 50.5 MB in 14s (3,523 kB/s)
Selecting previously unselected package pigz.
(Reading database ... 54272 files and directories currently installed.)
Preparing to unpack .../pigz_2.3.1-2_amd64.deb ...
Unpacking pigz (2.3.1-2) ...
Selecting previously unselected package aufs-tools.
Preparing to unpack .../aufs-tools_1%3a3.2+20130722-1.1ubuntu1_amd64.deb ...
Unpacking aufs-tools (1:3.2+20130722-1.1ubuntu1) ...
Selecting previously unselected package cgroupfs-mount.
Preparing to unpack .../cgroupfs-mount_1.2_all.deb ...
Unpacking cgroupfs-mount (1.2) ...
Selecting previously unselected package containerd.io.
Preparing to unpack .../containerd.io_1.2.5-1_amd64.deb ...
Unpacking containerd.io (1.2.5-1) ...
Selecting previously unselected package docker-ce-cli.
Preparing to unpack .../docker-ce-cli_5%3a18.09.6~3-0~ubuntu-xenial_amd64.deb ...
Unpacking docker-ce-cli (5:18.09.6~3-0~ubuntu-xenial) ...
Selecting previously unselected package docker-ce.
Preparing to unpack .../docker-ce_5%3a18.09.6~3-0~ubuntu-xenial_amd64.deb ...
Unpacking docker-ce (5:18.09.6~3-0~ubuntu-xenial) ...
Selecting previously unselected package libltdl7:amd64.
Preparing to unpack .../libltdl7_2.4.6-0.1_amd64.deb ...
Unpacking libltdl7:amd64 (2.4.6-0.1) ...
Processing triggers for man-db (2.7.5-1) ...
Processing triggers for libc-bin (2.23-0ubuntu11) ...
Processing triggers for ureadahead (0.100.0-19.1) ...
Processing triggers for systemd (229-4ubuntu21.21) ...
Setting up pigz (2.3.1-2) ...
Setting up aufs-tools (1:3.2+20130722-1.1ubuntu1) ...
Setting up cgroupfs-mount (1.2) ...
Setting up containerd.io (1.2.5-1) ...
Setting up docker-ce-cli (5:18.09.6~3-0~ubuntu-xenial) ...
Setting up docker-ce (5:18.09.6~3-0~ubuntu-xenial) ...
update-alternatives: using /usr/bin/dockerd-ce to provide /usr/bin/dockerd (dockerd) in auto mode
Setting up libltdl7:amd64 (2.4.6-0.1) ...
Processing triggers for libc-bin (2.23-0ubuntu11) ...
Processing triggers for ureadahead (0.100.0-19.1) ...
Processing triggers for systemd (229-4ubuntu21.21) ...
バージョン確認
vagrant@ubuntu-xenial:~$ docker version
Client:
 Version:           18.09.6
 API version:       1.39
 Go version:        go1.10.8
 Git commit:        481bc77
 Built:             Sat May  4 02:35:27 2019
 OS/Arch:           linux/amd64
 Experimental:      false
Got permission denied while trying to connect to the Docker daemon socket at unix:///var/run/docker.sock: Get http://%2Fvar%2Frun%2Fdocker.sock/v1.39/version: dial unix /var/run/docker.sock: connect: permission denied
Hello world
vagrant@ubuntu-xenial:~/docker_test$ sudo docker run hello-world
Unable to find image 'hello-world:latest' locally
latest: Pulling from library/hello-world
1b930d010525: Pull complete
Digest: sha256:41a65640635299bab090f783209c1e3a3f11934cf7756b09cb2f1e02147c6ed8
Status: Downloaded newer image for hello-world:latest

Hello from Docker!
This message shows that your installation appears to be working correctly.

To generate this message, Docker took the following steps:
 1. The Docker client contacted the Docker daemon.
 2. The Docker daemon pulled the "hello-world" image from the Docker Hub.
    (amd64)
 3. The Docker daemon created a new container from that image which runs the
    executable that produces the output you are currently reading.
 4. The Docker daemon streamed that output to the Docker client, which sent it
    to your terminal.

To try something more ambitious, you can run an Ubuntu container with:
 $ docker run -it ubuntu bash

Share images, automate workflows, and more with a free Docker ID:
 https://hub.docker.com/

For more examples and ideas, visit:
 https://docs.docker.com/get-started/
補足
参考:
Dockerでよく使うコマンドまとめ
Docker ライフサイクル 概要図 & 環境複製手順
稼働確認 systemctl
vagrant@ubuntu-xenial:~$ systemctl status docker
● docker.service - Docker Application Container Engine
   Loaded: loaded (/lib/systemd/system/docker.service; enabled; vendor preset: enabled)
   Active: active (running) since Sat 2019-06-15 10:40:32 UTC; 16min ago
     Docs: https://docs.docker.com
 Main PID: 3990 (dockerd)
   CGroup: /system.slice/docker.service
           mq3990 /usr/bin/dockerd -H fd:// --containerd=/run/containerd/containerd.sock
imageリスト
vagrant@ubuntu-xenial:~$ sudo docker ps -a
CONTAINER ID        IMAGE               COMMAND             CREATED             STATUS                      PORTS               NAMES
8fcc80ffdeee        hello-world         "/hello"            19 minutes ago      Exited (0) 19 minutes ago                       recursing_hoover
oneWEXのインストール(Consoleモード) => 失敗編
※Consoleモードでのインストールをしたかったのだが、途中で断念...
インストーラー(xxx.tar)を入手してtarを解凍
vagrant@ubuntu-xenial:/vagrant/Inst_Image$ ls
IBM_WATSON_EXPLORER_DEEP_ANALYTIC.tar  one-wex-installer-linux.bin
インストール => NG
vagrant@ubuntu-xenial:/vagrant/Inst_Image$ ./one-wex-installer-linux.bin -i console
Preparing to install
WARNING: /tmp does not have enough disk space! Attempting to use /home/vagrant for install base and tmp dir.

WARNING! The amount of /home/vagrant disk space required to perform this installation is greater than what is available. Please free up at least 2678132 kilobytes in /home/vagrant and attempt this installation again.
ディスクの空きが足りないようで、おこられた。
vagrant@ubuntu-xenial:/vagrant/Inst_Image$ df -m
Filesystem     1M-blocks   Used Available Use% Mounted on
udev                3983      0      3983   0% /dev
tmpfs                799      9       790   2% /run
/dev/sda1           9862   1273      8574  13% /
tmpfs               3992      0      3992   0% /dev/shm
tmpfs                  5      0         5   0% /run/lock
tmpfs               3992      0      3992   0% /sys/fs/cgroup
vagrant           943459 249084    694376  27% /vagrant
tmpfs                799      0       799   0% /run/user/1000
ディスク追加
デフォルトだと10GBでディスクサイズが設定されているので100Gに増やす
ただ、vmdkでイメージが作られているので、それだと素直に拡張できないらしい。
参考: VirtualBox - 仮想ディスク(vmdkファイル)のサイズを変更(リサイズ)
vdiファイルとしてコピーして、そいつを拡張し、さらにそいつをvmdkとしてコピーする、という方法を取る必要がある。めんどいな...
(この手順はここでは省略)
で、その後、Ubuntu再起動して確認
(あれ?勝手に増えてるな。以前RHELでやったときはfdiskで拡張しないといけなかったのだが。賢いな...)
vagrant@ubuntu-xenial:~$ df -m
Filesystem     1M-blocks   Used Available Use% Mounted on
udev                3983      0      3983   0% /dev
tmpfs                799      9       790   2% /run
/dev/sda1          99204   1276     97912   2% /
tmpfs               3992      0      3992   0% /dev/shm
tmpfs                  5      0         5   0% /run/lock
tmpfs               3992      0      3992   0% /sys/fs/cgroup
vagrant           943459 250647    692813  27% /vagrant
tmpfs                799      0       799   0% /run/user/1000
インストールのリトライ (=> 一時中断)
vagrant@ubuntu-xenial:/vagrant/Inst_Image$ ./one-wex-installer-linux.bin -i console
Preparing to install
Extracting the JRE from the installer archive...
Unpacking the JRE...
Extracting the installation resources from the installer archive...
Configuring the installer for this system's environment...

Launching installer...

===============================================================================
Choose Locale...
----------------

    1- Dansk
    2- Deutsch
  ->3- English
    4- Espanol
    5- Francais
    6- Italiano
    7- Nederlands
    8- Norsk
    9- Portugues
   10- Portugues  (Brasil)
   11- Suomi
   12- Svenska
あれ?日本語ない。というか日本語ロケール入ってないのか。一旦抜けてまずはそっちをインストールしないと。
一時中断。
日本語ロケール設定
vagrant@ubuntu-xenial:/vagrant/Inst_Image$ sudo apt-get install -y language-pack-ja
Reading package lists... Done
Building dependency tree
Reading state information... Done
The following additional packages will be installed:
  language-pack-ja-base
The following NEW packages will be installed:
  language-pack-ja language-pack-ja-base
0 upgraded, 2 newly installed, 0 to remove and 0 not upgraded.
Need to get 3,163 kB of archives.
After this operation, 14.8 MB of additional disk space will be used.
Get:1 http://archive.ubuntu.com/ubuntu xenial-updates/main amd64 language-pack-ja-base all 1:16.04+20160627 [2,016 kB]
Get:2 http://archive.ubuntu.com/ubuntu xenial-updates/main amd64 language-pack-ja all 1:16.04+20171210 [1,147 kB]
Fetched 3,163 kB in 13s (230 kB/s)
Selecting previously unselected package language-pack-ja-base.
(Reading database ... 54562 files and directories currently installed.)
Preparing to unpack .../language-pack-ja-base_1%3a16.04+20160627_all.deb ...
Unpacking language-pack-ja-base (1:16.04+20160627) ...
Selecting previously unselected package language-pack-ja.
Preparing to unpack .../language-pack-ja_1%3a16.04+20171210_all.deb ...
Unpacking language-pack-ja (1:16.04+20171210) ...
Replacing files in old package language-pack-ja-base (1:16.04+20160627) ...
Setting up language-pack-ja (1:16.04+20171210) ...
Setting up language-pack-ja-base (1:16.04+20160627) ...
Generating locales (this might take a while)...
  ja_JP.UTF-8... done
Generation complete.

vagrant@ubuntu-xenial:/vagrant/Inst_Image$ sudo update-locale LANG=ja_JP.UTF-8
シェル起動し直し。
vagrant@ubuntu-xenial:~$ locale
LANG=ja_JP.UTF-8
LANGUAGE=
LC_CTYPE="ja_JP.UTF-8"
LC_NUMERIC="ja_JP.UTF-8"
LC_TIME="ja_JP.UTF-8"
LC_COLLATE="ja_JP.UTF-8"
LC_MONETARY="ja_JP.UTF-8"
LC_MESSAGES="ja_JP.UTF-8"
LC_PAPER="ja_JP.UTF-8"
LC_NAME="ja_JP.UTF-8"
LC_ADDRESS="ja_JP.UTF-8"
LC_TELEPHONE="ja_JP.UTF-8"
LC_MEASUREMENT="ja_JP.UTF-8"
LC_IDENTIFICATION="ja_JP.UTF-8"
LC_ALL=

vagrant@ubuntu-xenial:~$ aaa
コマンド 'aaa' は見つかりませんでした。もしかして:
 コマンド 'jaaa' - パッケージ 'jaaa' (universe)
 コマンド 'aa' - パッケージ 'astronomical-almanac' (universe)
 コマンド 'aha' - パッケージ 'aha' (universe)
 コマンド 'ara' - パッケージ 'ara' (universe)
aaa: コマンドが見つかりません
ふむ、日本語になった。
インストールのリトライ(=>NG)
vagrant@ubuntu-xenial:/vagrant/Inst_Image$ ./one-wex-installer-linux.bin -i console
インストールの準備
インストーラー アーカイブから JRE を抽出しています...
JRE を展開しています...
インストーラー アーカイブからインストール リソースを抽出しています...
このシステム環境のインストーラーを構成しています...

インストーラーを起動しています...

===============================================================================
ロケールを選択...
----------

    1- English
  ->2- 日本語

ロケールの番号を選択:

=======================================================

インストーラー ユーザー インターフェイス モードはサポートされていません。

Unable to load and to prepare the installer in console or silent mode.

=======================================================
は?
調査/トライ&エラー
こういう障害がある。
参考: Cannot install oneWEX with "Unable to load and to prepare the installer in console or silent mode." message on RHEL 7
RHELとなってるが、Ubuntuでも同じだろうか。
とりあえずOpenJDK8の最新入れる。
vagrant@ubuntu-xenial:/vagrant/Inst_Image$ sudo apt-get install openjdk-8-jre

vagrant@ubuntu-xenial:/vagrant/Inst_Image$ java -version
openjdk version "1.8.0_212"
OpenJDK Runtime Environment (build 1.8.0_212-8u212-b03-0ubuntu1.16.04.1-b03)
OpenJDK 64-Bit Server VM (build 25.212-b03, mixed mode)
/etc/fonts/local.conf が無かったので、上の障害情報のガイドに従い作成。=>でもNG
インストーラーには、恐らくInaltallAnywhereを使ってるっぽいので、JVMの明示指定方法を調べる。(oneWEXのマニュアルにはこの辺ちゃんと載ってない)
https://helpnet.flexerasoftware.com/installanywhere2017/roottopic.htm#helplibrary/ia_ref_command_line_launcher.htm#reference-part2_4211107119_1092141%3FTocPath%3DReference%7CCommand-Line%2520Reference%7C_____4
JVMを明示指定してインストールしてみるが、同じエラーでNG
./one-wex-installer-linux.bin LAX_VM /etc/alternatives/java -i console
Oracle JDK8の最新入れてみる
vagrant@ubuntu-xenial:/opt/oracle/java/jdk1.8.0_211/bin$ ./java -version
java version "1.8.0_211"
Java(TM) SE Runtime Environment (build 1.8.0_211-b12)
Java HotSpot(TM) 64-Bit Server VM (build 25.211-b12, mixed mode)
JVMを明示指定してインストールしてみるが、同じエラーでNG
vagrant@ubuntu-xenial:/vagrant/Inst_Image$ ./one-wex-installer-linux.bin -i console LAX_VM /opt/oracle/java/jdk1.8.0_211/bin/java
うぐぐ、埒が明かない。
デスクトップモードに切り替えてGUIでやることにする...
/etc/fonts/local.confは削除しておく。
oneWEXのインストール(GUIモード)
デスクトップの準備
デスクトップモードへ切替
参考 http://tadaoyamaoka.hatenablog.com/entry/2018/01/10/233519
ランレベルの制御は、systemctl でできるらしい。
参考 https://blog.amedama.jp/entry/2017/06/07/221816
現在の状況を見ると、ランレベル5になってる
vagrant@ubuntu-xenial:/etc/fonts$ systemctl get-default
graphical.target
でも、desktopのパッケージはインストールされていない状態
vagrant@ubuntu-xenial:~$ dpkg -l | grep desktop
(なし)
GNOME入れることにする
参考 https://lab4ict.com/system/archives/820#i-5
$ sudo apt-get update
$ sudo apt-get install ubuntu-gnome-desktop
=> 1時間以上かかる...
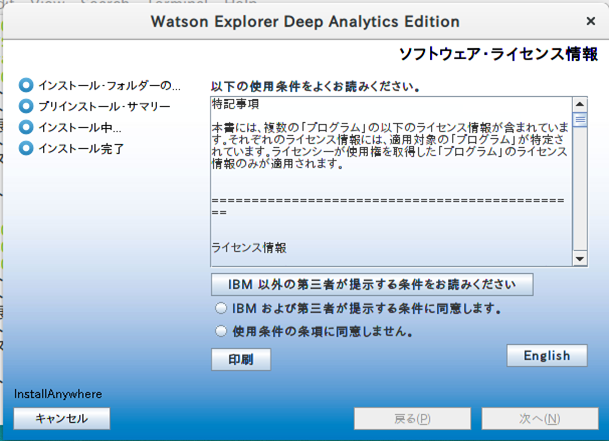
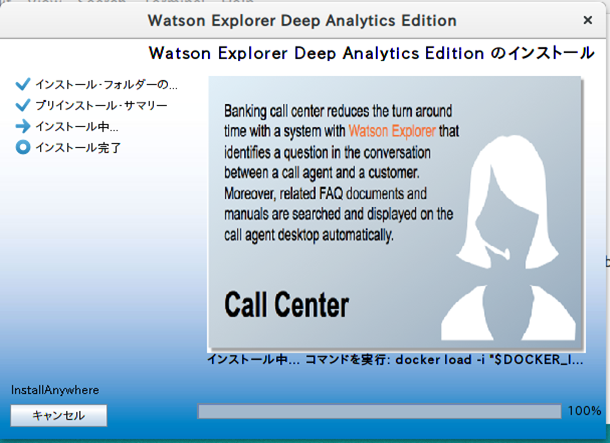
GUIモードでインストール
$ sudo ./one-wex-installer-linux.bin
メモリが少ないとここで怒られる。
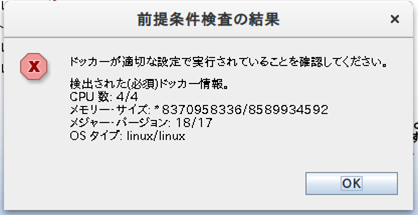
仮想マシンのメモリ割り当てが少なかったので、16GBに増やしてリブート後、リトライ
進んだ。ていうか、メモリの前提はシビアに見られるのね… CPUの前提は8コア以上になっていて、4コアしか割り当ててないのだが、そっちはOKだった。
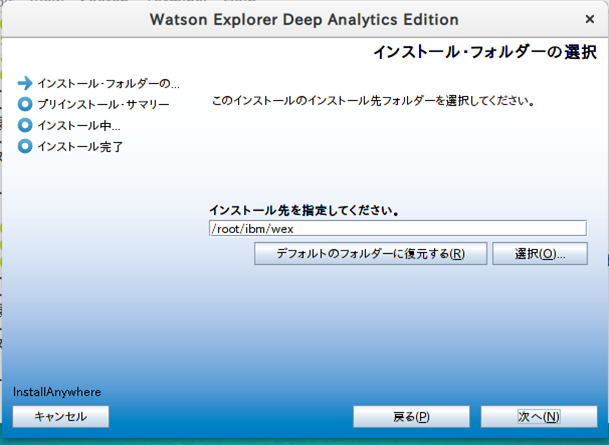
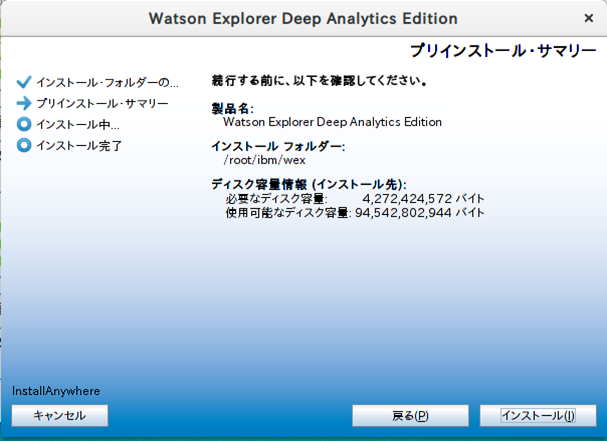
=>デフォルトのまま進めたら、/root/ibm/wexにインストールされてしまった….
ここは/opt/ibm/wexに変えた方がよかったな….
oneWEX起動
vagrant@ubuntu-xenial:~$ sudo /root/ibm/wex/bin/wexdocker.sh
FFQC5306I システムを停止しています...
FFQC5302I システムを始動しています...

vagrant@ubuntu-xenial:~$ netstat -an | grep 443
tcp6       0      0 :::443                  :::*                    LISTEN
443ポートがListenされていることは確認できた
dockerイメージの確認。
vagrant@ubuntu-xenial:/root/ibm/wex/bin$ sudo docker ps -a
CONTAINER ID        IMAGE                   COMMAND                  CREATED             STATUS                    PORTS                  NAMES
c0cb91192090        ibm-wex-ee:12.0.2.417   "/opt/ibm/wex/sbin/e…"   2 hours ago         Up 2 hours                0.0.0.0:443->443/tcp   wex12dae
8fcc80ffdeee        hello-world             "/hello"                 46 hours ago        Exited (0) 46 hours ago                          recursing_hoover
Vagrant設定変更
ホストOSのブラウザからアクセスできるように、ポートフォワードの設定
Vagrantfileに以下を追記して再起動
config.vm.network :forwarded_port, guest: 443, host: 443
接続確認
ブラウザから接続確認
Admin Console
https://localhost:443/admin/
Content Miner
https://localhost:443/miner/
App Builder
https://localhost:443/builder/
それぞれ接続できればOK!