はじめに
オーケストレーションツールであるKubernetesに触れてみます。
ここではMinikube環境作成 & yamlを使用しないでPodの作成/起動などを試してみます。
※余談ですが...
新しい所をお勉強しているとどういう読み方が一般的なのかよく分からないことが多いですね。
なんとなくこんな感じ?
Kubernetes: クーバネティス (伸ばす?伸ばさない?)
Minikube: ミニクベ (上を伸ばして読んでいるのでずっとミニクーベと読んでたのだが、ミニクベが主流?)
kubectl: クベコントロール (伸ばす?伸ばさない?これも伸ばしてたけど伸ばさないのが主流?)
関連記事
コンテナ型仮想化技術 Study01 / Docker基礎
コンテナ型仮想化技術 Study02 / Docker レジストリ
コンテナ型仮想化技術 Study03 / Docker Compose
コンテナ型仮想化技術 Study04 / Minikube & kubectl簡易操作
コンテナ型仮想化技術 Study05 / Pod操作
コンテナ型仮想化技術 Study06 / ReplicaSet, Deployment, Service
コンテナ型仮想化技術 Study06' / Kubernetesネットワーク問題判別
コンテナ型仮想化技術 Study07 / ストレージ
コンテナ型仮想化技術 Study08 / Statefulset, Ingress
コンテナ型仮想化技術 Study09 / Helm
参考情報
Kubernetesドキュメント
kubectl Commands Reference
Kubernetes入門
Kubernetesのしくみ やさしく学ぶ 内部構造とアーキテクチャー
数時間で完全理解!わりとゴツいKubernetesハンズオン!!
環境構築
WindowsのVirtualBox上に、Ubuntu+Docker+Minikubeの環境を作ります。環境は、Git + Vagrantを使って構築します。
VirtualBox, Vagrant, Gitはそれぞれインストール済みの前提です。
インストール
c:\y\Vagrant>VBoxManage -v
6.0.8r130520

c:\y\Vagrant>vagrant -v
Vagrant 2.2.4

c:\y\Vagrant>git version
git version 2.21.0.windows.1
環境は、以下に公開されているものを使います。
vagrant-minikube
c:\y\Vagrant>git clone https://github.com/takara9/vagrant-minikube
Cloning into 'vagrant-minikube'...
remote: Enumerating objects: 44, done.
remote: Total 44 (delta 0), reused 0 (delta 0), pack-reused 44
Unpacking objects: 100% (44/44), done.

c:\y\Vagrant\vagrant-minikube>vagrant up
Bringing machine 'minikube' up with 'virtualbox' provider...
==> minikube: Importing base box 'ubuntu/xenial64'...
==> minikube: Matching MAC address for NAT networking...
==> minikube: Checking if box 'ubuntu/xenial64' version '20190613.1.0' is up to date...
==> minikube: Setting the name of the VM: vagrant-minikube_minikube_1572412488421_7553
==> minikube: Clearing any previously set network interfaces...
==> minikube: Preparing network interfaces based on configuration...
    minikube: Adapter 1: nat
    minikube: Adapter 2: hostonly
==> minikube: Forwarding ports...
    minikube: 22 (guest) => 2222 (host) (adapter 1)
==> minikube: Running 'pre-boot' VM customizations...
==> minikube: Booting VM...
==> minikube: Waiting for machine to boot. This may take a few minutes...
    minikube: SSH address: 127.0.0.1:2222
    minikube: SSH username: vagrant
    minikube: SSH auth method: private key
    minikube:
    minikube: Vagrant insecure key detected. Vagrant will automatically replace
    minikube: this with a newly generated keypair for better security.
    minikube:
    minikube: Inserting generated public key within guest...
    minikube: Removing insecure key from the guest if it's present...
    minikube: Key inserted! Disconnecting and reconnecting using new SSH key...
==> minikube: Machine booted and ready!
==> minikube: Checking for guest additions in VM...
    minikube: The guest additions on this VM do not match the installed version of
    minikube: VirtualBox! In most cases this is fine, but in rare cases it can
    minikube: prevent things such as shared folders from working properly. If you see
    minikube: shared folder errors, please make sure the guest additions within the
    minikube: virtual machine match the version of VirtualBox you have installed on
    minikube: your host and reload your VM.
    minikube:
    minikube: Guest Additions Version: 5.1.38
    minikube: VirtualBox Version: 6.0
==> minikube: Setting hostname...
==> minikube: Configuring and enabling network interfaces...
==> minikube: Mounting shared folders...
    minikube: /vagrant => C:/y/Vagrant/vagrant-minikube
==> minikube: Running provisioner: ansible_local...
    minikube: Installing Ansible...
Vagrant has automatically selected the compatibility mode '2.0'
according to the Ansible version installed (2.8.6).

Alternatively, the compatibility mode can be specified in your Vagrantfile:
https://www.vagrantup.com/docs/provisioning/ansible_common.html#compatibility_mode
    minikube: Running ansible-playbook...

PLAY [minikube] ****************************************************************

TASK [Gathering Facts] *********************************************************
ok: [minikube]

TASK [Add Docker GPG key] ******************************************************
changed: [minikube]

TASK [Add Docker APT repository] ***********************************************
changed: [minikube]

TASK [Install packages] ********************************************************
[WARNING]: Could not find aptitude. Using apt-get instead
changed: [minikube]

TASK [Install Docker-CE] *******************************************************
changed: [minikube]

TASK [usermod -aG docker vagrant] **********************************************
changed: [minikube]

TASK [Set sysctl] **************************************************************
changed: [minikube]
[WARNING]: The value 1 (type int) in a string field was converted to u'1' (type
string). If this does not look like what you expect, quote the entire value to
ensure it does not change.

TASK [Add GlusterFS Repository] ************************************************
changed: [minikube]

TASK [Install GlusterFS] *******************************************************
changed: [minikube]

TASK [download] ****************************************************************
changed: [minikube]

TASK [download] ****************************************************************
changed: [minikube]

TASK [start Minikube temporary] ************************************************
changed: [minikube]

TASK [waiting] *****************************************************************
changed: [minikube]

TASK [stopping Minikube] *******************************************************
changed: [minikube]

TASK [waiting] *****************************************************************
changed: [minikube]

TASK [shell] *******************************************************************
changed: [minikube]

TASK [shell] *******************************************************************
changed: [minikube]
[WARNING]: Consider using the file module with owner rather than running
'chown'.  If you need to use command because file is insufficient you can add
'warn: false' to this command task or set 'command_warnings=False' in
ansible.cfg to get rid of this message.

TASK [shell] *******************************************************************
changed: [minikube]

TASK [shell] *******************************************************************
changed: [minikube]

TASK [change path] *************************************************************
changed: [minikube]
[WARNING]: Consider using the replace, lineinfile or template module rather
than running 'sed'.  If you need to use command because replace, lineinfile or
template is insufficient you can add 'warn: false' to this command task or set
'command_warnings=False' in ansible.cfg to get rid of this message.

PLAY RECAP *********************************************************************
minikube                   : ok=20   changed=19   unreachable=0    failed=0    skipped=0    rescued=0    ignored=0
※最初、vagrant upを実行したら、ansibleのインストールの辺りで以下のようなエラーが出た。
Cannot add PPA: 'ppa:~ansible/ubuntu/ansible'.
ERROR: '~ansible' user or team does not exist.
VPNで会社のネットワークに接続していたのが良くなかったらしい。VPN接続やめてリトライしたらうまくいった。
sshで作成されたUbuntuに入って確認。
c:\y\Vagrant\vagrant-minikube>vagrant ssh
Welcome to Ubuntu 16.04.6 LTS (GNU/Linux 4.4.0-150-generic x86_64)

 * Documentation:  https://help.ubuntu.com
 * Management:     https://landscape.canonical.com
 * Support:        https://ubuntu.com/advantage

88 packages can be updated.
38 updates are security updates.

New release '18.04.3 LTS' available.
Run 'do-release-upgrade' to upgrade to it.


vagrant@minikube:~$ docker version
Client:
 Version:           18.06.2-ce
 API version:       1.38
 Go version:        go1.10.3
 Git commit:        6d37f41
 Built:             Sun Feb 10 03:48:06 2019
 OS/Arch:           linux/amd64
 Experimental:      false

Server:
 Engine:
  Version:          18.06.2-ce
  API version:      1.38 (minimum version 1.12)
  Go version:       go1.10.3
  Git commit:       6d37f41
  Built:            Sun Feb 10 03:46:30 2019
  OS/Arch:          linux/amd64
  Experimental:     false

vagrant@minikube:~$ minikube version
minikube version: v1.5.1
commit: 4df684c4cc2bd9dc9979cd5dbb44bdfa410850b4
dockerとminikubeがインストールされたUbuntu環境ができあがりました!
このゲストOSに対しては、ホストOSからIPアドレス"172.16.10.10"で接続できるよう構成されています(ホストオンリーアダプター経由)。
基本操作
起動
vagrant@minikube:~$ sudo minikube start
😄  minikube v1.5.1 on Ubuntu 16.04 (vbox/amd64)
💡  Tip: Use 'minikube start -p <name>' to create a new cluster, or 'minikube delete' to delete this one.
🔄  Starting existing none VM for "minikube" ...
⌛  Waiting for the host to be provisioned ...
🐳  Preparing Kubernetes v1.16.2 on Docker 18.06.2-ce ...
🔄  Relaunching Kubernetes using kubeadm ...
🤹  Configuring local host environment ...

⚠️  The 'none' driver provides limited isolation and may reduce system security and reliability.
⚠️  For more information, see:
👉  https://minikube.sigs.k8s.io/docs/reference/drivers/none/

⚠️  kubectl and minikube configuration will be stored in /home/vagrant
⚠️  To use kubectl or minikube commands as your own user, you may need to relocate them. For example, to overwrite your own settings, run:

    ▪ sudo mv /home/vagrant/.kube /home/vagrant/.minikube $HOME
    ▪ sudo chown -R $USER $HOME/.kube $HOME/.minikube

💡  This can also be done automatically by setting the env var CHANGE_MINIKUBE_NONE_USER=true
⌛  Waiting for: apiserver
🏄  Done! kubectl is now configured to use "minikube"
⚠️  /usr/local/bin/kubectl is version 1.13.4, and is incompatible with Kubernetes 1.16.2. You will need to update /usr/local/bin/kubectl or use 'minikube kubectl' to connect with this cluster

vagrant@minikube:~$ kubectl get node
NAME       STATUS   ROLES    AGE   VERSION
minikube   Ready    master   15h   v1.16.2
停止
vagrant@minikube:~$ sudo minikube stop
✋  Stopping "minikube" in none ...
🛑  "minikube" stopped.
ステータス確認
停止中
vagrant@minikube:~$ sudo minikube status
host: Stopped
kubelet:
apiserver:
kubeconfig:
稼働中
vagrant@minikube:~$ sudo minikube status
host: Running
kubelet: Running
apiserver: Running
kubeconfig: Configured
ダッシュボード
アドオン機能の"heapster", "metrics-server"を有効化する。
vagrant@minikube:~$ sudo minikube addons enable heapster
✅  heapster was successfully enabled

vagrant@minikube:~$ sudo minikube addons enable metrics-server
✅  metrics-server was successfully enabled

vagrant@minikube:~$ sudo minikube addons list
- addon-manager: enabled
- dashboard: enabled
- default-storageclass: enabled
- efk: disabled
- freshpod: disabled
- gvisor: disabled
- heapster: enabled
- helm-tiller: disabled
- ingress: disabled
- ingress-dns: disabled
- logviewer: disabled
- metrics-server: enabled
- nvidia-driver-installer: disabled
- nvidia-gpu-device-plugin: disabled
- registry: disabled
- registry-creds: disabled
- storage-provisioner: enabled
- storage-provisioner-gluster: disabled
起動
vagrant@minikube:~$ sudo minikube dashboard --url
🔌 Enabling dashboard ...
🤔 Verifying dashboard health ...
🚀 Launching proxy ...
🤔 Verifying proxy health ...
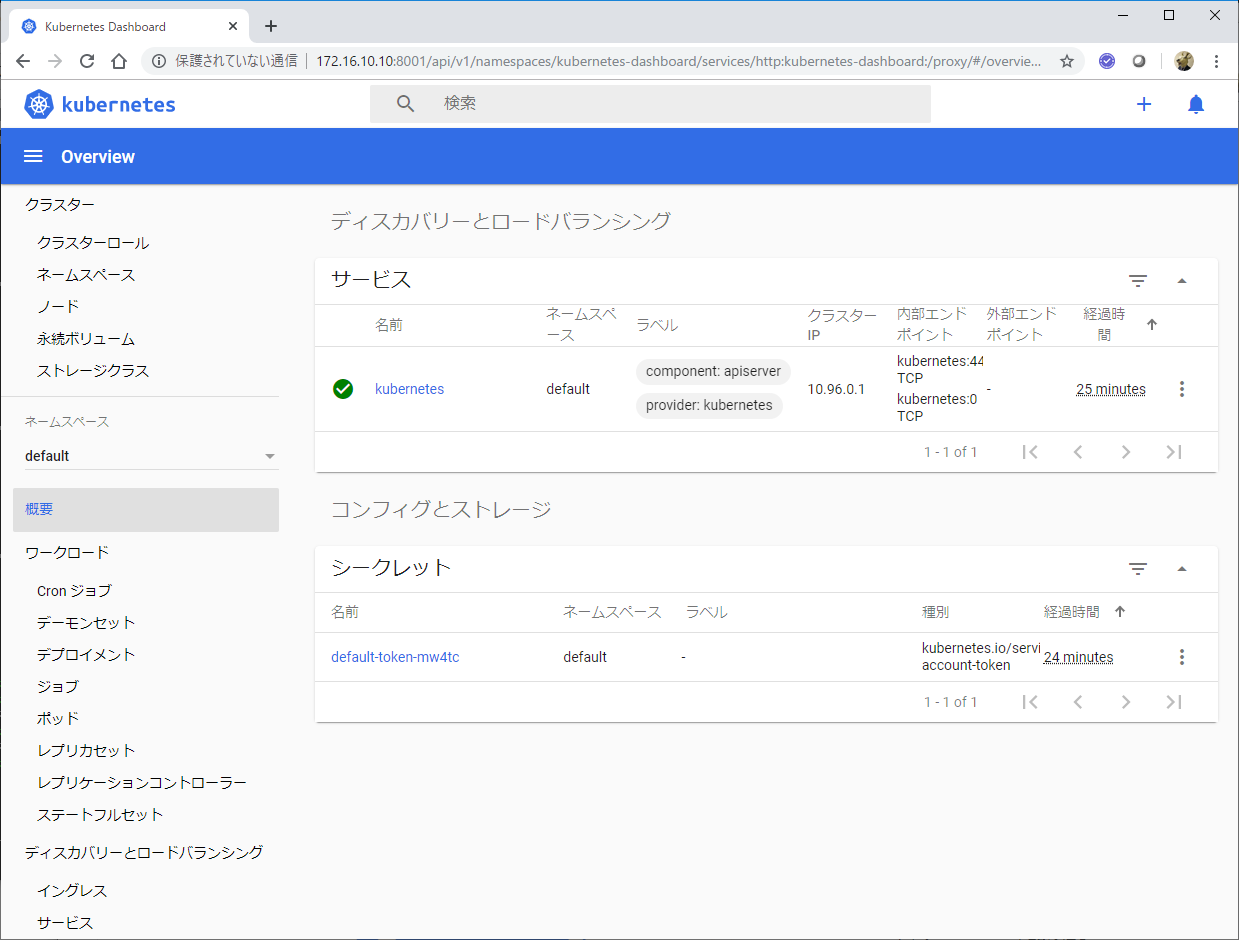
http://127.0.0.1:46626/api/v1/namespaces/kubernetes-dashboard/services/http:kubernetes-dashboard:/proxy/
K8sクラスタ外部からアクセスするためのプロキシ起動
vagrant@minikube:~$ kubectl proxy --address="0.0.0.0" -p 8001 --accept-hosts='^*$' -n kube-system
Starting to serve on [::]:8001
ホストOSのブラウザからダッシュボードにアクセス(以下のURLでアクセス)
http://172.16.10.10:8001/api/v1/namespaces/kubernetes-dashboard/services/http:kubernetes-dashboard:/proxy/
Kubernetesクラスタ環境の操作
各種情報確認
vagrant@minikube:~$ kubectl version
Client Version: version.Info{Major:"1", Minor:"13", GitVersion:"v1.13.4", GitCommit:"c27b913fddd1a6c480c229191a087698aa92f0b1", GitTreeState:"clean", BuildDate:"2019-02-28T13:37:52Z", GoVersion:"go1.11.5", Compiler:"gc", Platform:"linux/amd64"}
Server Version: version.Info{Major:"1", Minor:"16", GitVersion:"v1.16.2", GitCommit:"c97fe5036ef3df2967d086711e6c0c405941e14b", GitTreeState:"clean", BuildDate:"2019-10-15T19:09:08Z", GoVersion:"go1.12.10", Compiler:"gc", Platform:"linux/amd64"}

vagrant@minikube:~$ kubectl cluster-info
Kubernetes master is running at https://10.0.2.15:8443
KubeDNS is running at https://10.0.2.15:8443/api/v1/namespaces/kube-system/services/kube-dns:dns/proxy

To further debug and diagnose cluster problems, use 'kubectl cluster-info dump'.

vagrant@minikube:~$ kubectl get node
NAME       STATUS   ROLES    AGE   VERSION
minikube   Ready    master   15h   v1.16.2
Podの作成/実行
hello-worldを動かしてみる。
vagrant@minikube:~$ kubectl run hello-world --image=hello-world -it --restart=Never

Hello from Docker!
This message shows that your installation appears to be working correctly.

To generate this message, Docker took the following steps:
 1. The Docker client contacted the Docker daemon.
 2. The Docker daemon pulled the "hello-world" image from the Docker Hub.
    (amd64)
 3. The Docker daemon created a new container from that image which runs the
    executable that produces the output you are currently reading.
 4. The Docker daemon streamed that output to the Docker client, which sent it
    to your terminal.

To try something more ambitious, you can run an Ubuntu container with:
 $ docker run -it ubuntu bash

Share images, automate workflows, and more with a free Docker ID:
 https://hub.docker.com/

For more examples and ideas, visit:
 https://docs.docker.com/get-started/
とりあえず動いたっぽいが...。
以下のようなPodが作成されている。
service/kubernetesはデフォルトで作成されているオブジェクトっぽい。
vagrant@minikube:~$ kubectl get all
NAME              READY   STATUS      RESTARTS   AGE
pod/hello-world   0/1     Completed   0          13m

NAME                 TYPE        CLUSTER-IP   EXTERNAL-IP   PORT(S)   AGE
service/kubernetes   ClusterIP   10.96.0.1    <none>        443/TCP   15h
kubectl run は、オプション指定によって裏で作成されるオブジェクトが変わってくるらしい。今回実行したコマンドでは--restart=Neverオプションを指定しており、この場合、Podが作成されて実行されるらしい。
Podって複数のコンテナをまとめた単位だって言ってる割りには、1つのdockerイメージを指定してpodを作成しているようにみえる。このコマンドは「1コンテナだけのPodを簡易的に作成して実行するもの」っていう特殊な位置づけなのかな???
...と思ったら、以下のような記述があった。
https://kubernetes.io/ja/docs/concepts/workloads/pods/pod-overview/
単一のコンテナを稼働させるPod : いわゆる「1Pod1コンテナ」 構成のモデルは、最も一般的なKubernetesのユースケースです。
このケースでは、ユーザーはPodを単一のコンテナのラッパーとして考えることができ、Kubernetesはコンテナを直接扱うというよりは、Podを管理することになります。
ふうむ、1Pod 1コンテナ構成の方が一般的で、むしろ複数コンテナを1Podに含める構成の方が特殊(派生形?)ということか。
ちなみに1Podに複数コンテナを含めるパターンについては、こういう記事がある。
The Distributed System ToolKit: Patterns for Composite Containers
さて、Podを再度実行してみる。
vagrant@minikube:~$ kubectl run hello-world --image=hello-world -it --restart=Never
Error from server (AlreadyExists): pods "hello-world" already exists
"既にあるよ" ということで怒られた。kubectlの場合、docker container startみたいに、既存のものをスタートさせるというコマンドは無いらしい。そもそも"停止"という考えが無く、"run" か "delete" しかない。作って、起動して、終了したら破棄し、また起動したければ作成してから起動、という流れになるらしい。
まぁ、Kubernetesの環境の場合、Podをこういう風に手動で実行するというのは通常運用では行われないと思われ、恐らく開発/テスト時に使われる操作なのだと思います。
一旦削除してから起動するとOK
vagrant@minikube:~$ kubectl delete pod hello-world
pod "hello-world" deleted

vagrant@minikube:~$ kubectl get pod
No resources found.

vagrant@minikube:~$ kubectl run hello-world --image=hello-world -it --restart=Never

Hello from Docker!
This message shows that your installation appears to be working correctly.

To generate this message, Docker took the following steps:
 1. The Docker client contacted the Docker daemon.
 2. The Docker daemon pulled the "hello-world" image from the Docker Hub.
    (amd64)
 3. The Docker daemon created a new container from that image which runs the
    executable that produces the output you are currently reading.
 4. The Docker daemon streamed that output to the Docker client, which sent it
    to your terminal.

To try something more ambitious, you can run an Ubuntu container with:
 $ docker run -it ubuntu bash

Share images, automate workflows, and more with a free Docker ID:
 https://hub.docker.com/

For more examples and ideas, visit:
 https://docs.docker.com/get-started/
DeploymentコントローラーによるPodの実行
hello-worldという名前でDeploymentタイプのコントローラーを作成してみます。
vagrant@minikube:~$ kubectl create deployment hello-world --image hello-world
deployment.apps/hello-world created
作成されたオブジェクトを見てみます。
vagrant@minikube:~$ kubectl get all
NAME                               READY   STATUS             RESTARTS   AGE
pod/hello-world                    0/1     Completed          0          128m
pod/hello-world-79b7944dbb-sn2d4   0/1     CrashLoopBackOff   6          6m32s

NAME                 TYPE        CLUSTER-IP   EXTERNAL-IP   PORT(S)   AGE
service/kubernetes   ClusterIP   10.96.0.1    <none>        443/TCP   19h

NAME                          READY   UP-TO-DATE   AVAILABLE   AGE
deployment.apps/hello-world   0/1     1            0           6m32s

NAME                                     DESIRED   CURRENT   READY   AGE
replicaset.apps/hello-world-79b7944dbb   1         1         0       6m32s
以下のオブジェクトが作成されています。
- deployment.apps/hello-world
- replicaset.apps/hello-world-xxx
- pod/hello-world-xxx-yyy
ここで実行されるコンテナは、常駐のサービスを提供するものではなく、メッセージを出力して終了してしまうものなので、勝手に再起動が繰り返されている状態になっています。(PodのRESTARTSのカウントが増えていく)
こういうアプリを実行するには、Deploymentタイプのコントローラーはマッチしないので、一旦削除。
vagrant@minikube:~$ kubectl delete deployment hello-world
deployment.apps "hello-world" deleted

vagrant@minikube:~$ kubectl get all
NAME              READY   STATUS      RESTARTS   AGE
pod/hello-world   0/1     Completed   0          135m

NAME                 TYPE        CLUSTER-IP   EXTERNAL-IP   PORT(S)   AGE
service/kubernetes   ClusterIP   10.96.0.1    <none>        443/TCP   19h
nginxのサーバーを実行するコンテナを含むPodを作成し、それをDeploymentコントローラーから実行する構成を作成してみます。
webserverという名前で、nginxのコンテナーを含むPodを管理するDeploymentコントローラーを作成します。
vagrant@minikube:~$ kubectl create deployment webserver --image=nginx
deployment.apps/webserver created

vagrant@minikube:~$ kubectl get all
NAME                            READY   STATUS      RESTARTS   AGE
pod/hello-world                 0/1     Completed   0          4h31m
pod/webserver-d698d7bd6-rntmr   1/1     Running     0          16s

NAME                 TYPE        CLUSTER-IP   EXTERNAL-IP   PORT(S)   AGE
service/kubernetes   ClusterIP   10.96.0.1    <none>        443/TCP   21h

NAME                        READY   UP-TO-DATE   AVAILABLE   AGE
deployment.apps/webserver   1/1     1            1           16s

NAME                                  DESIRED   CURRENT   READY   AGE
replicaset.apps/webserver-d698d7bd6   1         1         1       16s
Deploymentを作成すると、Replicasetも合わせて作成されるようで、デフォルトではPodの数が1に設定されています。これを5に増やしてみます。
vagrant@minikube:~$ kubectl scale --replicas 5 deployment/webserver
deployment.apps/webserver scaled

vagrant@minikube:~$ kubectl get all
NAME                            READY   STATUS      RESTARTS   AGE
pod/hello-world                 0/1     Completed   0          4h43m
pod/webserver-d698d7bd6-89sxf   1/1     Running     0          22s
pod/webserver-d698d7bd6-mkpdp   1/1     Running     0          22s
pod/webserver-d698d7bd6-p26bb   1/1     Running     0          22s
pod/webserver-d698d7bd6-rmnmj   1/1     Running     0          22s
pod/webserver-d698d7bd6-rntmr   1/1     Running     0          11m

NAME                 TYPE        CLUSTER-IP   EXTERNAL-IP   PORT(S)   AGE
service/kubernetes   ClusterIP   10.96.0.1    <none>        443/TCP   21h

NAME                        READY   UP-TO-DATE   AVAILABLE   AGE
deployment.apps/webserver   5/5     5            5           11m

NAME                                  DESIRED   CURRENT   READY   AGE
replicaset.apps/webserver-d698d7bd6   5         5         5       11m
pod/webserver-xxx-yyy というPodが5つ起動しました!
上のPodのうち、2つを強制的に削除してみます。
vagrant@minikube:~$ kubectl delete pod webserver-d698d7bd6-89sxf webserver-d698d7bd6-mkpdp
pod "webserver-d698d7bd6-89sxf" deleted
pod "webserver-d698d7bd6-mkpdp" deleted
その後、再度状況を見てみると、上の2つのPodは別の名前で勝手に再作成されて起動してきたのが確認できます。
vagrant@minikube:~$ kubectl get po
NAME                        READY   STATUS      RESTARTS   AGE
hello-world                 0/1     Completed   0          4h50m
webserver-d698d7bd6-6jqkf   1/1     Running     0          15s
webserver-d698d7bd6-8kc4n   1/1     Running     0          15s
webserver-d698d7bd6-p26bb   1/1     Running     0          7m53s
webserver-d698d7bd6-rmnmj   1/1     Running     0          7m53s
webserver-d698d7bd6-rntmr   1/1     Running     0          19m
このDeploymentコントローラーは削除しておく。
vagrant@minikube:~$ kubectl delete deployment webserver
deployment.apps "webserver" deleted

vagrant@minikube:~$ kubectl get all
NAME              READY   STATUS      RESTARTS   AGE
pod/hello-world   0/1     Completed   0          4h53m

NAME                 TYPE        CLUSTER-IP   EXTERNAL-IP   PORT(S)   AGE
service/kubernetes   ClusterIP   10.96.0.1    <none>        443/TCP   21h
Deploymentコントローラーを削除すると、関連するReplicaset, Podも削除される。
JobコントローラーによるPodの実行
nginxのような常駐のサーバープロセスが稼働するコンテナではなく、hello-worldのようなバッチ処理を行うコンテナを実行したい場合は、Jobコントローラーで制御するのがよさそうです。
hello-worldコンテナを含むPodを管理するJobコントローラーを作成。
vagrant@minikube:~$ kubectl create job hello-world --image=hello-world
job.batch/hello-world created

vagrant@minikube:~$ kubectl get all
NAME                    READY   STATUS      RESTARTS   AGE
pod/hello-world         0/1     Completed   0          5h11m
pod/hello-world-kdhgh   0/1     Completed   0          10s

NAME                 TYPE        CLUSTER-IP   EXTERNAL-IP   PORT(S)   AGE
service/kubernetes   ClusterIP   10.96.0.1    <none>        443/TCP   22h

NAME                    COMPLETIONS   DURATION   AGE
job.batch/hello-world   1/1           8s         10s
以下のオブジェクトが作成されました。
- job.batch/hello-world
- pod/hello-world-xxx
Podの一時的な利用
K8sクラスターの中から色々と動作確認をしたいケースが多々あります。一時的にコンテナ作ってテストするの同じように、一時的にPod作ってクラスター内での動作確認を行うということはよくあります。
busyboxイメージを基にした一時的Podの利用例
vagrant@minikube:~$ kubectl run busybox --image=busybox -it --rm --restart=Never sh
If you don't see a command prompt, try pressing enter.
/ #
--restart=Neverを指定することでPod終了時に勝手に起動しなくなります。--rmで終了時に破棄されます。
上で稼働中のPodに別のシェルを接続する場合
vagrant@minikube:~$ kubectl describe pod busybox
Name:               busybox
Namespace:          default
Priority:           0
PriorityClassName:  <none>
Node:               minikube/10.0.2.15
Start Time:         Thu, 12 Dec 2019 00:42:23 +0000
Labels:             run=busybox
Annotations:        <none>
Status:             Running
IP:                 172.17.0.13
Containers:
  busybox:
    Container ID:  docker://9fd0ad3fd6fbc062d99a8ba907b6cee30226ca8fa04100361d246c34ef7a39c1
    Image:         busybox
    Image ID:      docker-pullable://busybox@sha256:1828edd60c5efd34b2bf5dd3282ec0cc04d47b2ff9caa0b6d4f07a21d1c08084
    Port:          <none>
    Host Port:     <none>
    Args:
      sh
    State:          Running
      Started:      Thu, 12 Dec 2019 00:42:29 +0000
    Ready:          True
    Restart Count:  0
    Environment:    <none>
    Mounts:
      /var/run/secrets/kubernetes.io/serviceaccount from default-token-mw4tc (ro)
Conditions:
  Type              Status
  Initialized       True
  Ready             True
  ContainersReady   True
  PodScheduled      True
Volumes:
  default-token-mw4tc:
    Type:        Secret (a volume populated by a Secret)
    SecretName:  default-token-mw4tc
    Optional:    false
QoS Class:       BestEffort
Node-Selectors:  <none>
Tolerations:     node.kubernetes.io/not-ready:NoExecute for 300s
                 node.kubernetes.io/unreachable:NoExecute for 300s
Events:
  Type    Reason     Age        From               Message
  ----    ------     ----       ----               -------
  Normal  Scheduled  <unknown>  default-scheduler  Successfully assigned default/busybox to minikube
  Normal  Pulling    3m7s       kubelet, minikube  Pulling image "busybox"
  Normal  Pulled     3m2s       kubelet, minikube  Successfully pulled image "busybox"
  Normal  Created    3m2s       kubelet, minikube  Created container busybox
  Normal  Started    3m2s       kubelet, minikube  Started container busybox

vagrant@minikube:~$ kubectl exec busybox -c busybox -it sh
/ #
-cでコンテナ名を指定します。
busyboxというPod上で動いているbusyboxというコンテナに接続してshを実行しています。
busyboxの場合、Podで動いているコンテナは1つだけなので、今回の場合-cは省略可能ですが、例として載せています。Pod内のコンテナはkubectl describe pod で確認できます。
おわりに
とりあえず簡易的なKubernetes環境作れて、それっぽい操作ができることは分かったので、以降、各リソースについての操作をもう少し細かく見ていこうと思います。