Chapters
📘 Chapter #1
📗 Chapter #1-1 継続的インテグレーション(CI)構築
📗 Chapter #1-2 継続的インテグレーション(CI)手順
📘 Chapter #2
📗 Chapter #2-1 VB6で使用する 環境設定
📗 Chapter #2-2 VB6で使用する プロジェクトの追加
📘 Chapter #A
📗 Chapter #A-1 バージョンアップ TFS 2018 Update 1 → Update 3、検索サービスの分割
📗 Chapter #A-2 バージョンアップ 2019→2019 Update1
TL;DR
- Azure DevOps Server 2019から、Azure DevOps Server 2019 Update 1(Update 1.1 Patch 2)へのバージョンアップ手順を記載する
- アップグレード手順に従い、作業を実施する。
- 検索サーバーのElastic Searchの更新も必要だった。
既存環境
サーバー1:Azure DevOps Server 2019
- CPU:vCPU x 2(2.6 GHz Xeon 相当)
- メモリ:12 GiB
サーバー2:検索&ビルドサーバー
- CPU:vCPU x 2(2.1 GHz Xeon 相当)
- メモリ:8 GiB
手順
1. 調査
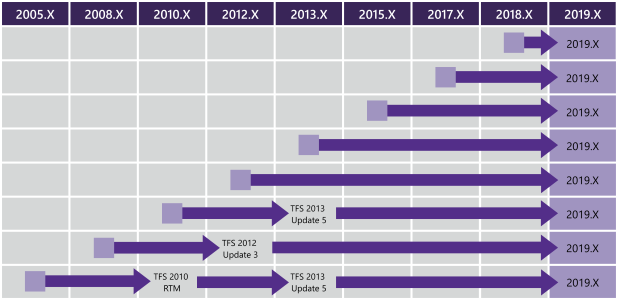
1.1. アップグレードパスの確認
アップグレードパスに問題ないかを確認。今回は2019→2019 Update 1なので問題ありませんでした。
引用元:https://docs.microsoft.com/en-us/azure/devops/server/upgrade/get-started?view=azure-devops
1.2. データのクリーンアップ
不要なテスト、ビルドの削除を行う作業。今回は行いません。
1.3. 環境要件の確認
今回検索サーバーを使用しており元々マルチサーバーとしているため、特に問題ありませんでした。500人以上で同時に使用する場合は、もっと要件が厳しくなります。
2. サーバー1 ステップ1/2(インストールと設定(検索サービス設定画面まで))
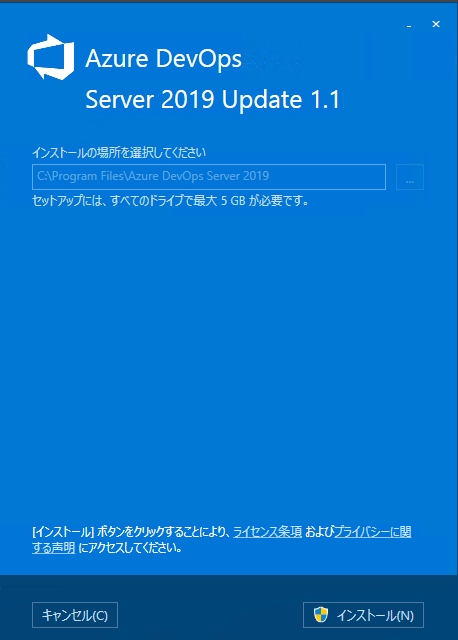
2.1 下記ページからダウンロードする
2.2 Azure DevOps Serverがインストールされたサーバーで実行する
2.3 [インストール]で続行
インストールには1時間程度かかりました。
2.4 サーバー構成ウイザード
2.4.1. サーバー構成ウイザードが起動
自動でサーバー構成ウイザードが起動します。
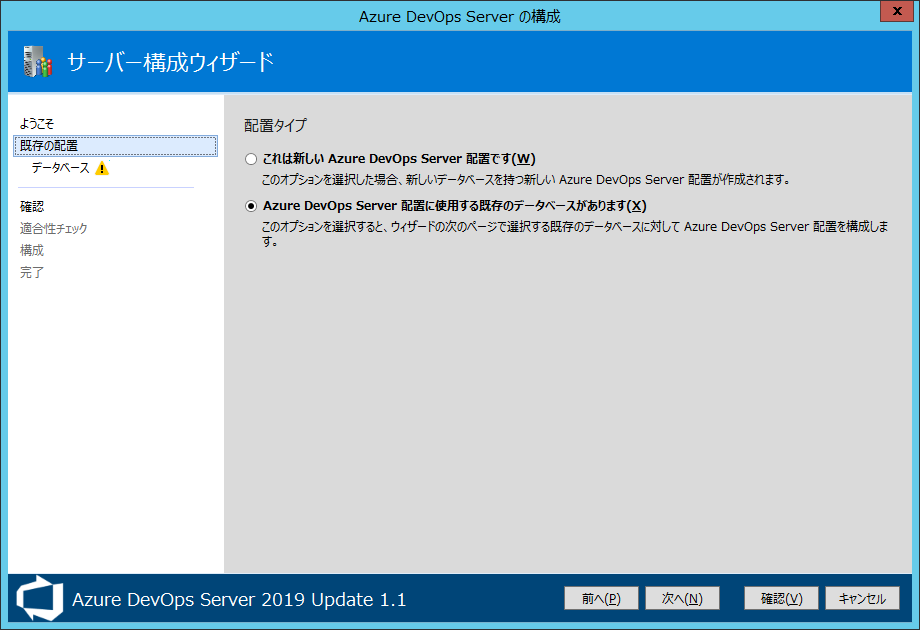
2.4.2. 「Azure DevOps Server 配置に使用する既存のデータベースがあります」を選択
今回はアップグレードのため「Azure DevOps Server 配置に使用する既存のデータベースがあります」を選択します。
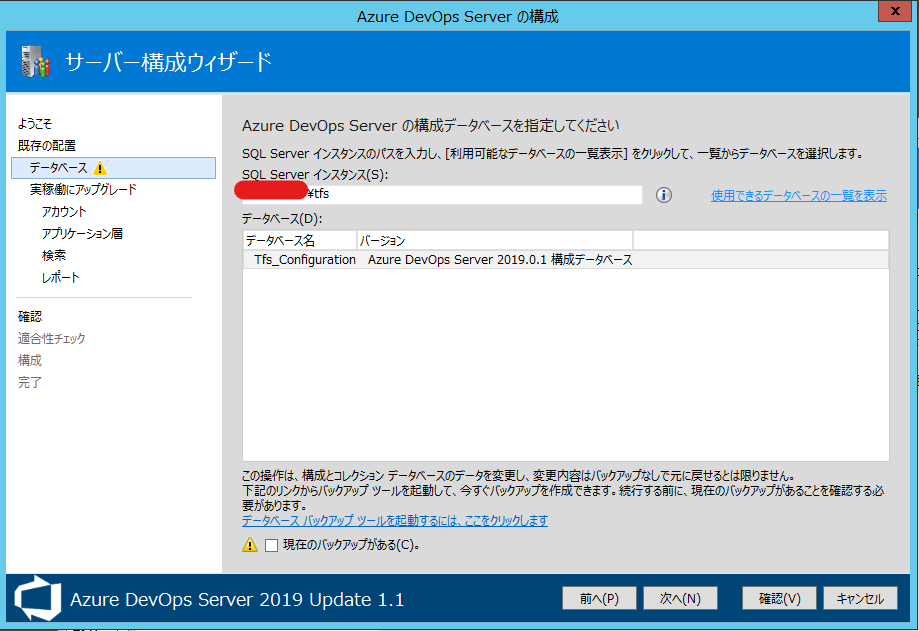
2.4.3. 構成データベースの選択
構成データベースを確認し選択します。
この際、現在のバックアップを行っていることを確認し「現在のバックアップがある」にチェックする必要があります。
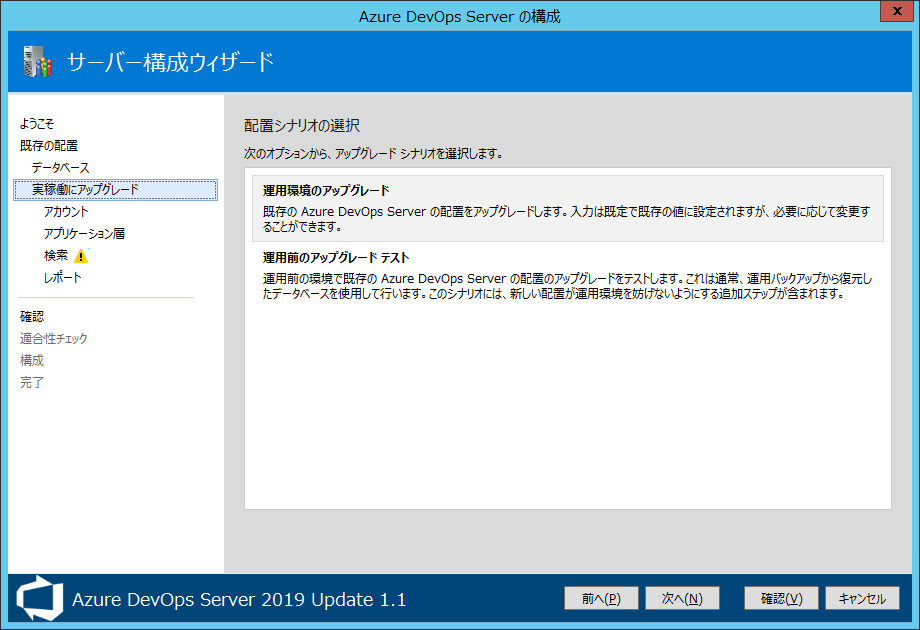
2.4.4. 配置シナリオの選択
すぐにアップグレードするのか、アップグレードテストを行うのかを確認することができます。
ここではすぐにアップグレードするため「運用環境のアップグレード」を選択します。
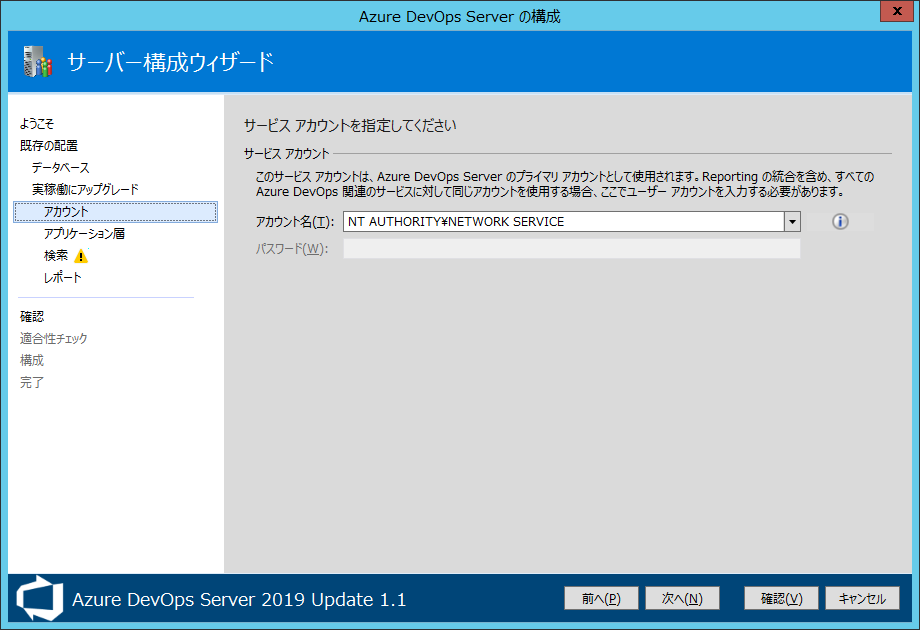
2.4.5. アカウント
サービスアカウントを設定します。既定値のまま続行します。
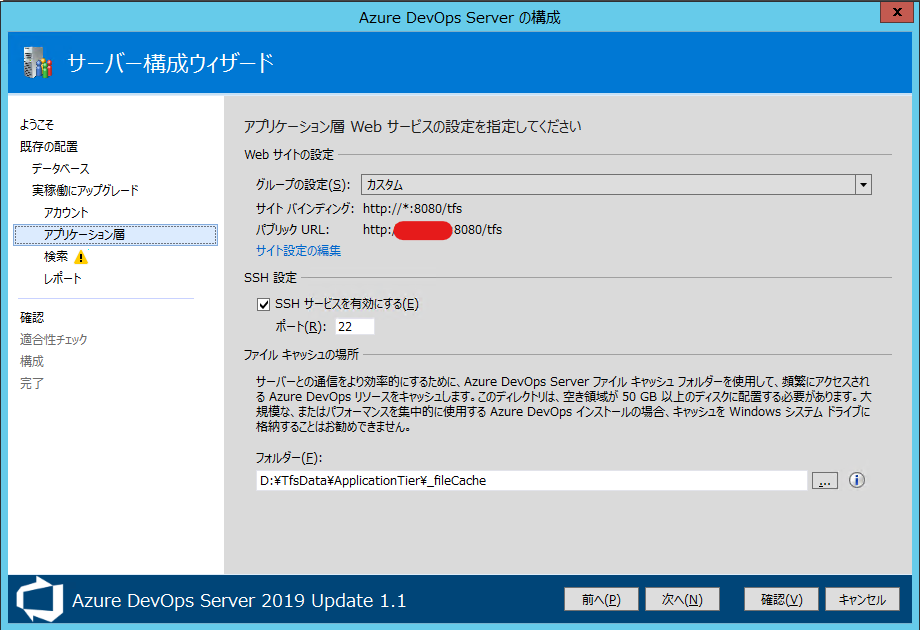
2.4.6. アプリケーション層
必要に応じてWebサービスの設定を変更します。
今回の環境ではファイルキャッシュのドライブを変更していますので、設定が変わっていないことを確認しそのまま続行します。
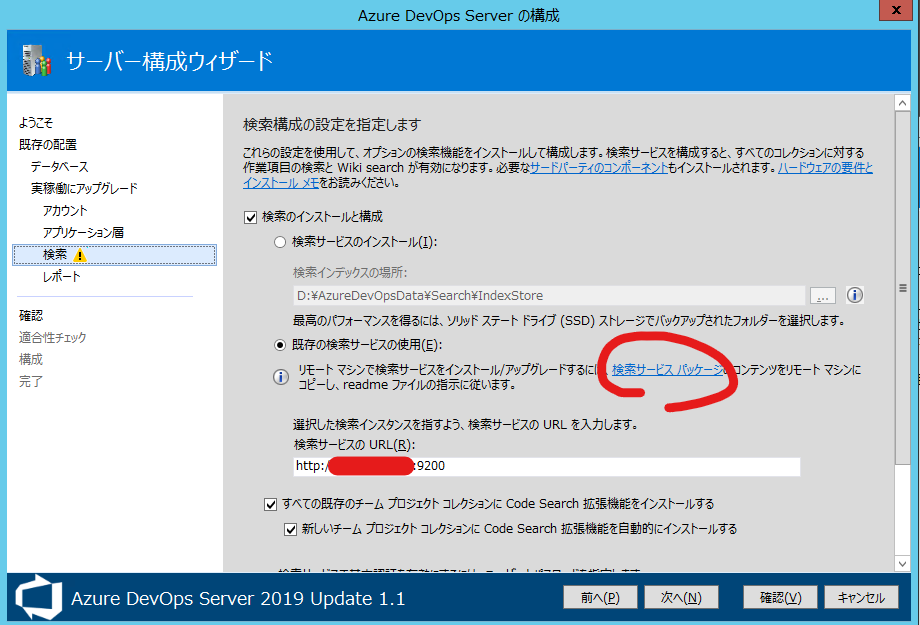
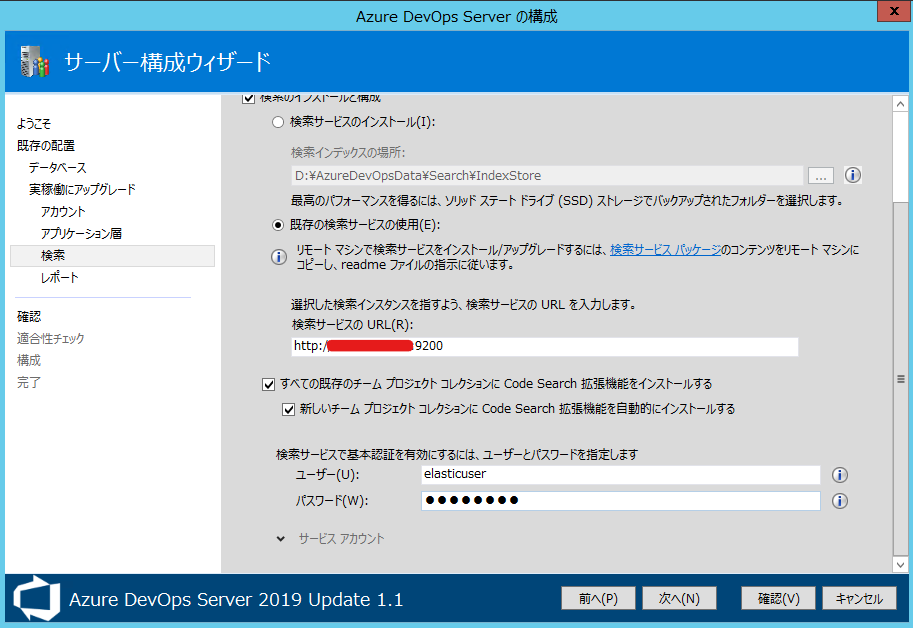
2.4.7 検索
今回はリモートサーバー(サーバー2)で検索を行っています。
リモートサーバーもバージョンアップが必要なため、[検索サービスパッケージ]をクリックして、サーバー2にてインストールを行います。
3. サーバー2 検索サービスのインストール
3.1. 検索サービスパッケージのコピー
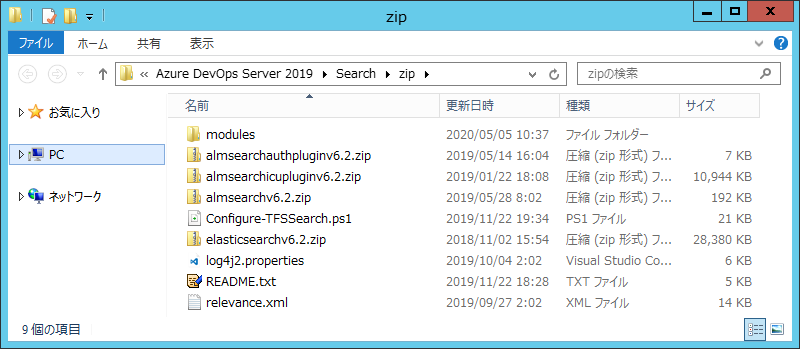
2.4.7の[検索サービスパッケージ]でサーバー1のzipフォルダーが開きます。
このzipフォルダーを、サーバー2にコピーします。今回はC:\tempにコピーしました。
3.2. 前提条件の確認
README.txtで前提条件を確認します
3.2.1. Javaのバージョンの確認
ensure you have Oracle JRE 7 Update 55 or higher, or JRE 8 Update 20 or higher installedとあるので、インストールされているJavaのバージョンと環境変数の設定を確認します。
ただし、インストール時の最終確認前の記述ではensure you have Java 8 (Update 111 or higher) installedとあるので、実際に要求されるバージョンはこちらが正しいようです。
3.2.2. アップグレードの方法
Update from TFS 2018 Update 2 (or higher) to version Azure DevOps Server 2019 Update 1, when search is configured on a separate server, requires a reinstallation of search.
上記から、TFS 2018 Update2以上、かつサーバーが分割されているため、アップデートは行えず、再インストール(削除とインストール)が必要なことがわかります。
3.3. 削除とインストール
3.3.1. PowerShellの起動
C:\tempでPowerShellを起動します。
3.3.2. 削除
削除のために以下のコマンドを起動します。
※.\を付加する必要があります。
.\Configure-TFSSearch.ps1 -Operation remove
削除が正しく終了したことを確認します。
~
[VERBOSE]: Elasticsearch has been removed
[VERBOSE]: Removing folder at: C:\ES\elasticsearchv5
[VERBOSE]: Preserving current data at: C:\ESDATA
3.3.3. インストール
インストールを行います。
※.\を付加する必要があります。
新規インストールではないため、環境変数「SEARCH_ES_INDEX_PATH」が設定済みであることは確認済みです。
.\Configure-TFSSearch.ps1 -Operation install -TFSSearchInstallPath C:\ES -TFSSearchIndexPath $env:SEARCH_ES_INDEX_PATH
ユーザー名の入力が求められます。あらかじめ考慮しておいたユーザーを入力します。
[INFO]:
Provide a valid user name to enable basic authentication in elasticsearch.

User should be between 8 and 64 characters long and should contain alphanumeric and underscore characters.

User? >:
パスワードの入力が求められます。あらかじめ考慮しておいたパスワードを入力します。
[INFO]:
Provide a valid password to enable basic authentication in elasticsearch.

Password should be between 8 and 64 characters long.

Please enter your password:
Javaの条件等を確認し続行します。Readme.txtに記載のバージョンと異なる(新しい)のでご注意ください。
[INFO]: This script will install and configure Elasticsearch and associated plugins on this machine to be used by Code Search in Azure DevOps Server. For more information read:
https://go.microsoft.com/fwlink/?linkid=2042172

**Note: This is a customized version of Elasticsearch, fine-tuned for Code Search on Azure DevOps Server.

Before you proceed, ensure you have Java 8 (Update 111 or higher) installed and that the JAVA_HOME variable is pointing to the Java installation directory. Read Java installation notes for more details:
https://go.microsoft.com/fwlink/?linkid=2064530
Continue ? (Y/N) > :
正常終了したことを確認します。
Updated elasticsearch version in windows registry: 6.2.4の行のバージョンを確認してください。
実は1度古いバージョンを誤って再度インストールし適合性チェックに失敗したのですが、その際Elasticsearch version found: 5.4.1, supported version: 6.2.4というログが残っていました。
[VERBOSE]: Waiting for the Windows service: elasticsearch-service-x64 to start ...
[VERBOSE]: Elasticsearch was successfully started.
[VERBOSE]: Updated elasticsearch version in windows registry: 6.2.4
[INFO]:
Installation & Configuration of Code Search service is now complete!!

[INFO]:
** IMPORTANT: Elasticsearch does not support HTTPS **
Please follow the guidance here to secure the code search service, including setting firewall rules:
https://go.microsoft.com/fwlink/?linkid=825214

[INFO]: Your Search service URL is:
[INFO]: http://yourserver:yourport
[INFO]:
Point your TFS instance to this Search Service instance via the Search Configuration wizard.

[WARNING]: Firewall profile 'Private' is Disabled
[WARNING]: Firewall profile 'Public' is Disabled
3.3.4. ファイアウォール
設定したポート(既定9200)に関するファイアウォールを必要に応じて設定する必要があります。
4. サーバー1 ステップ2/2(設定(検索サービス設定画面から))
4.1. 検索
サーバー1で中断した設定の続きを行います。
サーバー2で設定したアドレス、ユーザー、およびパスワードを指定します。
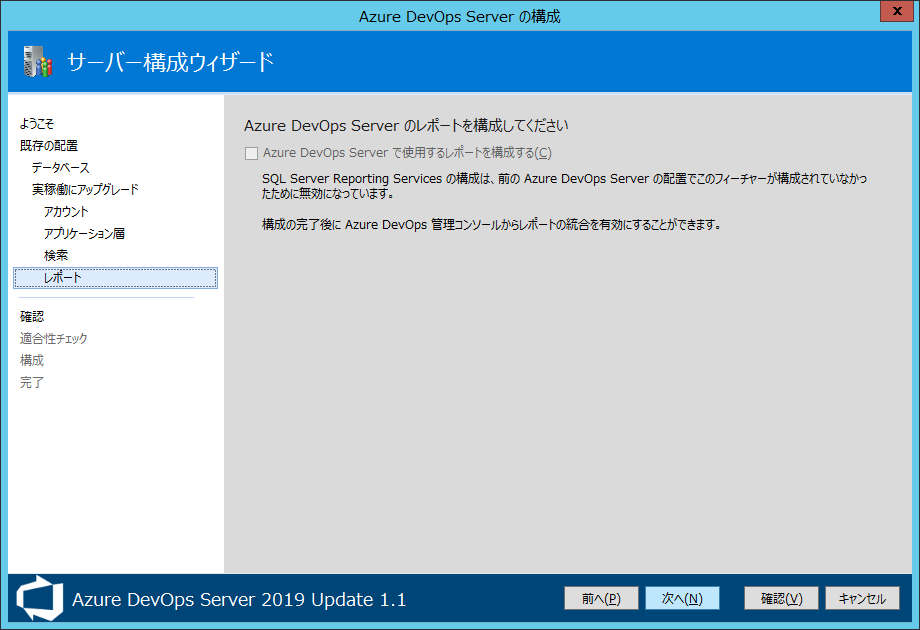
4.2. レポート
今回はReporting Serviceを有効にしていなかったため構成しませんが、後から有効にすることもできるようです。
4.3. 確認
最終確認を行い次へを押すと適合性チェックが行われます。
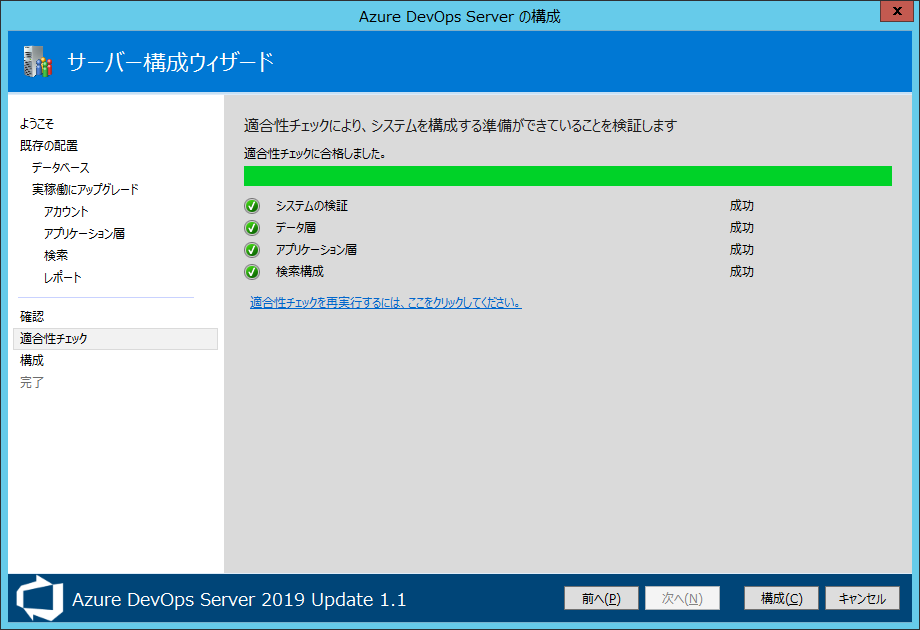
4.4. 適合性チェック
適合性チェックを行い、構成を実行します。検索サービスの更新(再インストール)を行っていなかった場合は、ここでエラーが表示されます。
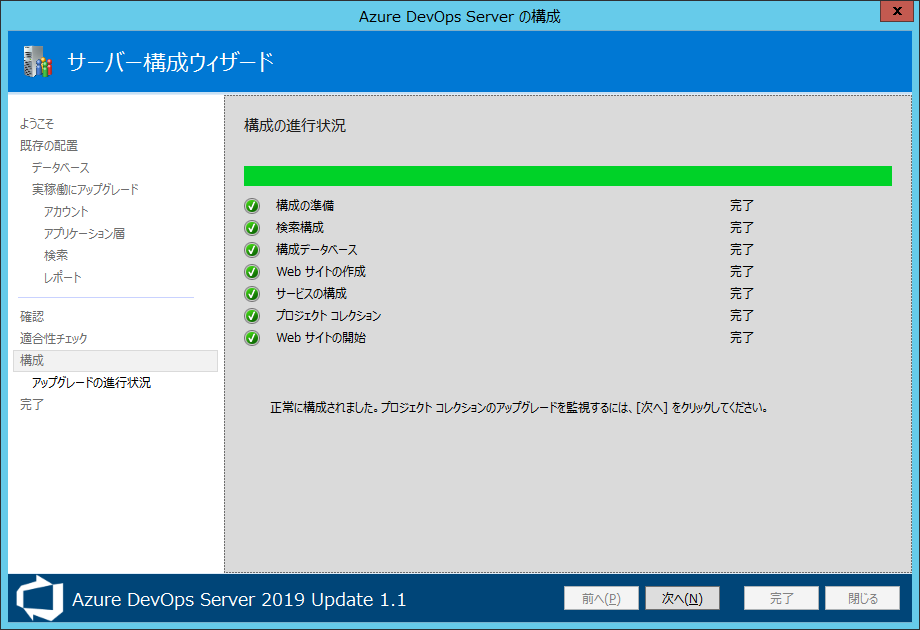
4.5. 構成完了
5. 動作確認
5.1. Visual Studio 2019
-
Gitの接続
- 最新バージョンの取得
-
TFVCの接続
- 最新バージョンの取得
- チェックアウト
- チェックイン
- コードレビュー
5.2. Visual Studio 2010
-
リポジトリ接続互換性のためのモジュールのインストールが必要
Visual Studio 2010 SP1 Team Foundation Server Compatibility GDR
-
TFVCの接続
- 最新バージョンの取得
- チェックアウト
- チェックイン
5.3. VB6
-
必要な設定は実行済みであることを想定
-
TFVCの接続
- 最新バージョンの取得
- チェックアウト
- チェックイン
