Django + SQLAlchemy + SQLite3 / PostgreSQLでWebアプリを作成する
はじめに
Mac環境の記事ですが、Windows環境も同じ手順になります。環境依存の部分は読み替えてお試しください。
目的
この記事を最後まで読むと、次のことができるようになります。
- Djangoフレームワークでアプリを作成する
- SQLAlchemyを用いてモデルをデザインする
- SQLite3とPostgreSQLの設定/操作を理解する
- Herokuへデプロイするための設定を理解する
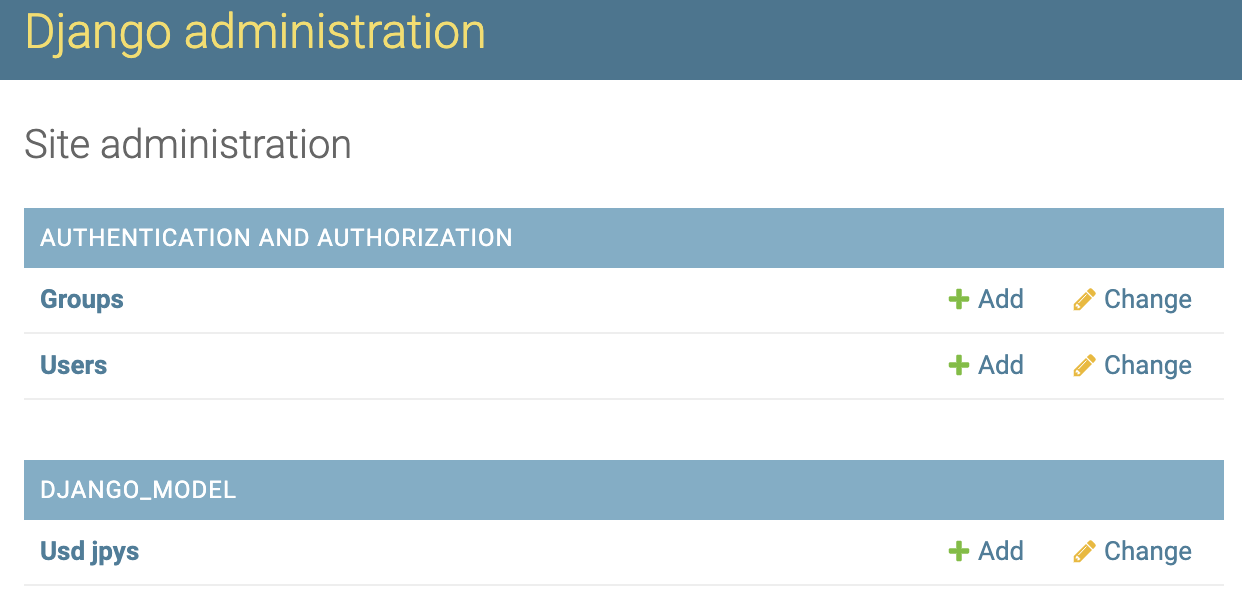
Django Admin


SQLite3
~> select * from django_model_usdjpy;
1|2019-11-24 14:10:41.880980|108.621
2|2019-11-24 14:10:48.033484|108.621
3|2019-11-24 14:10:52.669491|108.621
PostgreSQL
~# select * from django_model_usdjpy;
 id |         time_stamp         | usd_jpy
----+----------------------------+---------
  1 | 2019-11-24 14:05:37.248352 | 108.621
  2 | 2019-11-24 14:05:45.342350 | 108.621
  3 | 2019-11-24 14:05:51.683454 | 108.621
(3 rows)
関連する記事
実行環境
| 環境 | Ver. |
|---|---|
| macOS Mojave | 10.14.6 |
| Python | 3.7.3 |
| dj-database-url | 0.5.0 |
| django-heroku | 0.3.1 |
| Django | 2.2.7 |
| gunicorn | 20.0.2 |
| psycopg2 | 2.8.4 |
| pytz | 2019.3 |
| requests | 2.22.0 |
| selenium | 3.141.0 |
| SQLAlchemy | 1.3.11 |
| sqlparse | 0.3.0 |
| whitenoise | 4.1.4 |
ソースコード
実際に実装内容やソースコードを追いながら読むとより理解が深まるかと思います。是非ご活用ください。
シナリオと前提条件
- 毎時00分にYahoo!ファイナンスのFXチャート・レートから米ドル/円を取得してDBへ登録する。
- SQLite3およびPostgreSQLはインストール済みとする。
事前準備
Djangoプロジェクトの作成
~$ django-admin startproject <project_name> .
~$ python manage.py startapp <app_name>
SQLite3でエラーが出る場合(pyenv環境)
SQLite3をインストールしているにも関わらずエラーとなる場合があります。Python環境にSQLite3が組み込まれていない可能性がありますので、パスを通して再インストールしましょう。
~$ CFLAGS="-I$(xcrun --show-sdk-path)/usr/include" pyenv install 3.7.3
psycopg2のインストールでエラーが出る場合(venv環境)
パスを通してインストールしましょう。
~$ xcode-select --install
~$ env LDFLAGS="-I/usr/local/opt/openssl/include -L/usr/local/opt/openssl/lib" pip install psycopg2
ファイル構成
python-django
├── Procfile
├── common
│   ├── scheduler.py
│   └── utility.py
├── compare_project
│   ├── __init__.py
│   ├── settings.py
│   ├── urls.py
│   └── wsgi.py
├── django_model
│   ├── __init__.py
│   ├── admin.py
│   ├── apps.py
│   ├── models.py
│   ├── tests.py
│   └── views.py
├── manage.py
├── requirements.txt
├── runtime.txt
└── sqlalchemy_model
    ├── __init__.py
    ├── admin.py
    ├── apps.py
    ├── models.py
    ├── tests.py
    └── views.py
Djangoモデル(django_model)
Djangoモデルの定義
# ~省略~

class UsdJpy(models.Model):
    time_stamp = models.CharField(max_length=128)
    usd_jpy = models.CharField(max_length=128)

# ~省略~
Djangoモデルのデータ書き込み
# ~省略~

def _insert_usd_jpy(time_stamp, usd_jpy):
    logger.info('time_stamp={}, usd_jpy={}'.format(time_stamp, usd_jpy))
    record = UsdJpy(time_stamp=time_stamp, usd_jpy=usd_jpy)
    record.save()

# ~省略~
Djangoモデルのマイグレーション
~$ python manage.py makemigrations django_model
~$ python manage.py migrate
SQLAlchemyモデル(sqlalchemy_model)
SQLAlchemyモデルの定義
# ~省略~

class UsdJpy(Base):
    __tablename__ = 'sqlalchemy_model_usdjpy'
    id = Column(Integer, primary_key=True, autoincrement=True)
    time_stamp = Column('time_stamp', String(128))
    usd_jpy = Column('usd_jpy', String(128))

# ~省略~
SQLAlchemyモデルのデータ書き込み
# ~省略~

def _insert_usd_jpy(time_stamp, usd_jpy):
    logger.info('time_stamp={}, usd_jpy={}'.format(time_stamp, usd_jpy))
    record = UsdJpy(time_stamp=time_stamp, usd_jpy=usd_jpy)
    Session.add(record)
    Session.commit()

# ~省略~
SQLAlchemyモデルのマイグレーション
~$ python manage.py migrate
~$ python sqlalchemy_model/models.py
SQLAlchemyの留意点
Django Adminサイトに対応していないため、ブラウザ上からデータの確認や編集ができません。そのため、データベースにアクセスして操作する必要があります。
SQLite3
SQLite3の設定
# ~省略~

if DB_SELECTED == 'sqlite3':
    DB_ENGINE = 'django.db.backends.sqlite3'
    DB_NAME = 'db.sqlite3'
    DB_URI = 'sqlite:///{}'.format(DB_NAME)

    DATABASES = {
        'default': {
            'ENGINE': DB_ENGINE,
            'NAME': os.path.join(BASE_DIR, DB_NAME),
        }
    }

# ~省略~
SQLite3のマイグレーション
-
データベースのマイグレーション
migration.sh~$ python manage.py makemigrations <model> ~$ python manage.py migrate -
Django Adminの作成
runserver.sh~$ python manage.py createsuperuser -
アプリの起動
runserver.sh~$ python manage.py runserver -
レコードの削除
delete_records.sh~$ sqlite3 <database_name> ~> .table ~> delete from <table_name>; ~> delete from sqlite_sequence where name='<table_name>'; ~> .quit
PostgreSQL
PostgreSQLの設定
# ~省略~

if DB_SELECTED == 'postgresql':
    DB_ENGINE = 'django.db.backends.postgresql_psycopg2'
    DB_PORT = '5432'
    DB_OPTIONS = {}

    if IS_HEROKU_SUPPORTED:
        DB_NAME = '<heroku name>'
        DB_USER = '<heroku user>'
        DB_PASSWORD = '<heroku password>'
        DB_HOST = '<heroku host>'
    else:
        DB_NAME = 'db.postgresql_psycopg2'
        DB_USER = 'nsuhara'
        DB_PASSWORD = 'nsuhara'
        DB_HOST = '127.0.0.1'

    DB_URI = 'postgresql://{}:{}@{}/{}'.format(DB_USER,
                                               DB_PASSWORD, DB_HOST, DB_NAME)

    DATABASES = {
        'default': {
            'ENGINE': DB_ENGINE,
            'NAME': DB_NAME,
            'USER': DB_USER,
            'PASSWORD': DB_PASSWORD,
            'HOST': DB_HOST,
            'PORT': DB_PORT,
            'OPTIONS': DB_OPTIONS,
        },
    }

# ~省略~
PostgreSQLのマイグレーション
-
サービスの起動/停止(Brew環境)
brew_services_postgresql.sh~$ brew services start postgresql ~$ brew services stop postgresql -
PostgreSQLユーザの作成
createuser.sh~$ createuser -a -d -U <user_name> ~$ psql -c "ALTER USER <user_name> WITH PASSWORD '<user_name>'" -
データベースの作成
createdb.sh~$ createdb <database_name> -O <owner_name> -
データベースのマイグレーション
migration.sh~$ python manage.py makemigrations <model> ~$ python manage.py migrate -
Django Adminの作成
runserver.sh~$ python manage.py createsuperuser -
アプリの起動
runserver.sh~$ python manage.py runserver -
レコードの削除
delete_records.sh~$ psql -U <user_name> -d <database_name> ~# \dt ~# select * from <table_name>; ~# delete from <table_name>; ~# select setval ('<table_name>_id_seq', 1, false); ~# \q
Herokuデプロイ
Herokuパッケージのインストール
pipでdjango-herokuをインストールします。settings.pyにセットアップのコードを追記します。
~$ pip install django-heroku
# ~省略~

try:
    import django_heroku
    IS_HEROKU_SUPPORTED = True
except ImportError:
    IS_HEROKU_SUPPORTED = False

# ~省略~

if IS_HEROKU_SUPPORTED:
    django_heroku.settings(locals())

# ~省略~
Herokuの留意点
-
PostgreSQLのインストール
Resources > Add-onsからHeroku Postgresを追加します。
-
PostgreSQLの設定
Heroku Postgres > Settings > **View Credentials…**からDBパラメータの確認ができます。
- Host
- Database
- User
- Port
- Password
- URI
- Heroku CLI
-
Heroku環境でPythonコマンドを実行する場合の記述
heroku.sh~$ heroku run python <command>heroku_sample.sh~$ heroku run python manage.py migrate -
.gitignoreの設定
.gitignoreにmigrationsを記述するとモデルのマイグレーションができないため記述しないこと。