17
20

Delete article

Deleted articles cannot be recovered.

Draft of this article would be also deleted.

Are you sure you want to delete this article?

More than 5 years have passed since last update.

Heroku SchedulerでPythonを定期実行する

Posted at

Heroku SchedulerでPythonを定期実行する

はじめに

Mac環境の記事ですが、Windows環境も同じ手順になります。環境依存の部分は読み替えてお試しください。

目的

この記事を最後まで読むと、次のことができるようになります。

  • Heroku Schedulerを使ってPythonを定期実行する

Schedulerの設定

毎時00分にPythonを実行する。
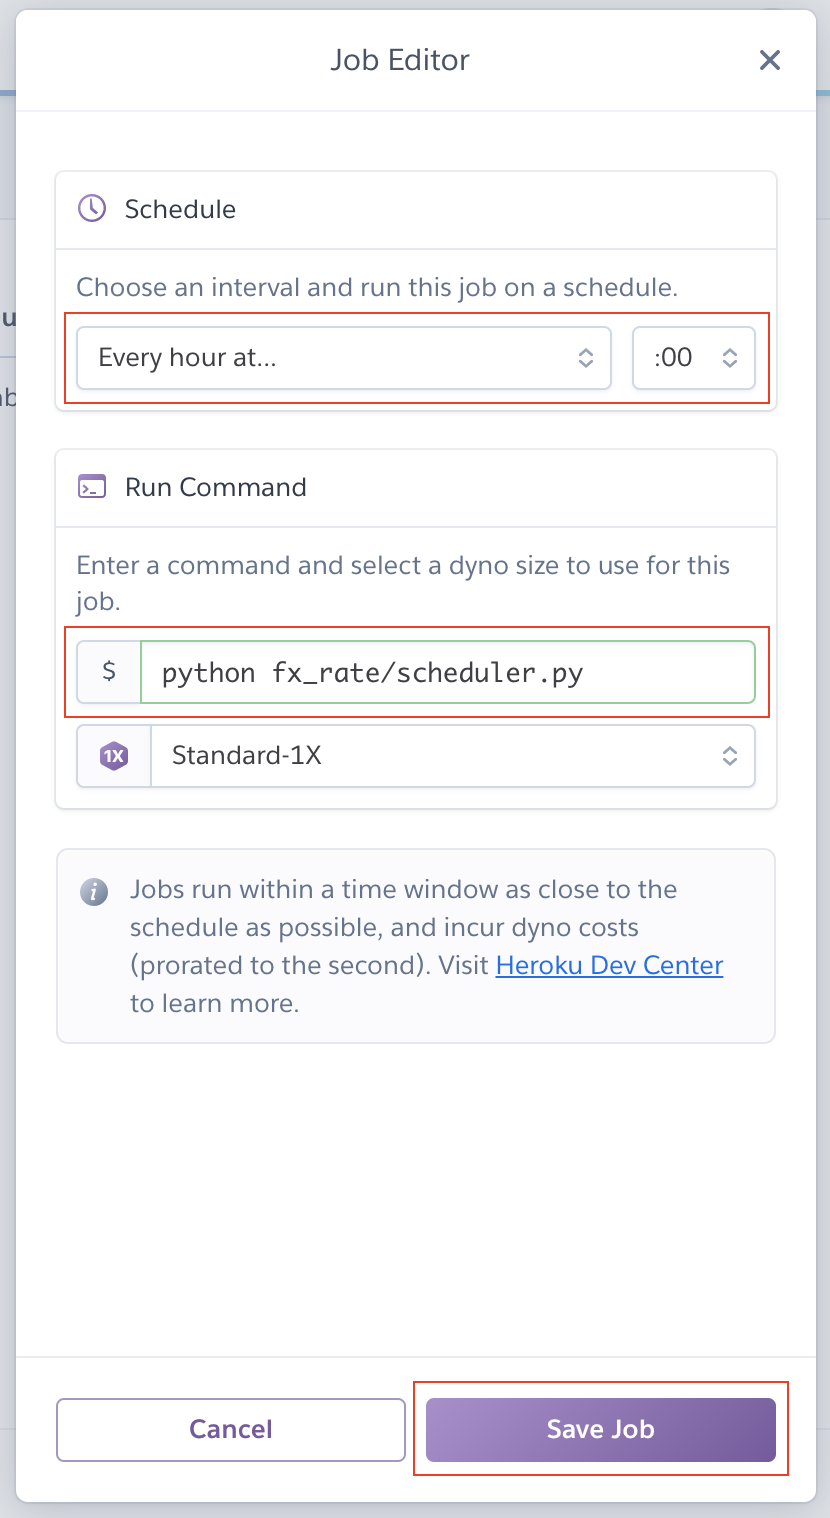
スクリーンショット 2019-11-16 21.11.16.png

関連する記事

実行環境

環境 Ver.
macOS Mojave 10.14.6
Python 3.7.3

ソースコード

実際に実装内容やソースコードを追いながら読むとより理解が深まるかと思います。是非ご活用ください。

GitHub

シナリオと前提条件

  1. 毎時00分にYahoo!ファイナンスのFXチャート・レートから米ドル/円を取得してログ出力する。

事前準備

FXレートAPIの作成

  1. Heroku + Selenium + ChromeでWEBプロセスを自動化するを参照して作成する

Schedulerのセットアップ

Schedulerの登録

本プロセスは事前にクレジットカードの登録が必要となります。(無料枠でも登録が必要となります)

  1. Resources > Add-onsセクションのFind more add-onsをクリックします。

    スクリーンショット 2019-11-16 21.05.28.png
  2. Heroku Schedulerをクリックします。

    スクリーンショット 2019-11-16 21.06.25.png
  3. Install Heroku Schedulerをクリックします。

    スクリーンショット 2019-11-16 21.06.43.png
  4. App to provision toアプリケーション名を入力します。

    スクリーンショット 2019-11-16 21.07.57.png スクリーンショット 2019-11-16 21.09.14.png
  5. Scheduleに実行周期を設定します。Run CommandにPythonの実行コマンドを設定します。

    スクリーンショット 2019-11-16 21.11.16.png
17
20
0

Register as a new user and use Qiita more conveniently

  1. You get articles that match your needs
  2. You can efficiently read back useful information
  3. You can use dark theme
What you can do with signing up
17
20

Delete article

Deleted articles cannot be recovered.

Draft of this article would be also deleted.

Are you sure you want to delete this article?