Heroku + Selenium + ChromeでWEBプロセスを自動化する
はじめに
Mac環境の記事ですが、Windows環境も同じ手順になります。環境依存の部分は読み替えてお試しください。
目的
この記事を最後まで読むと、次のことができるようになります。
- SeleniumとChromeDriverを使ってWEBプロセスを自動化する
- HerokuにChromeとDriverを設定する
WEBプロセスの自動化
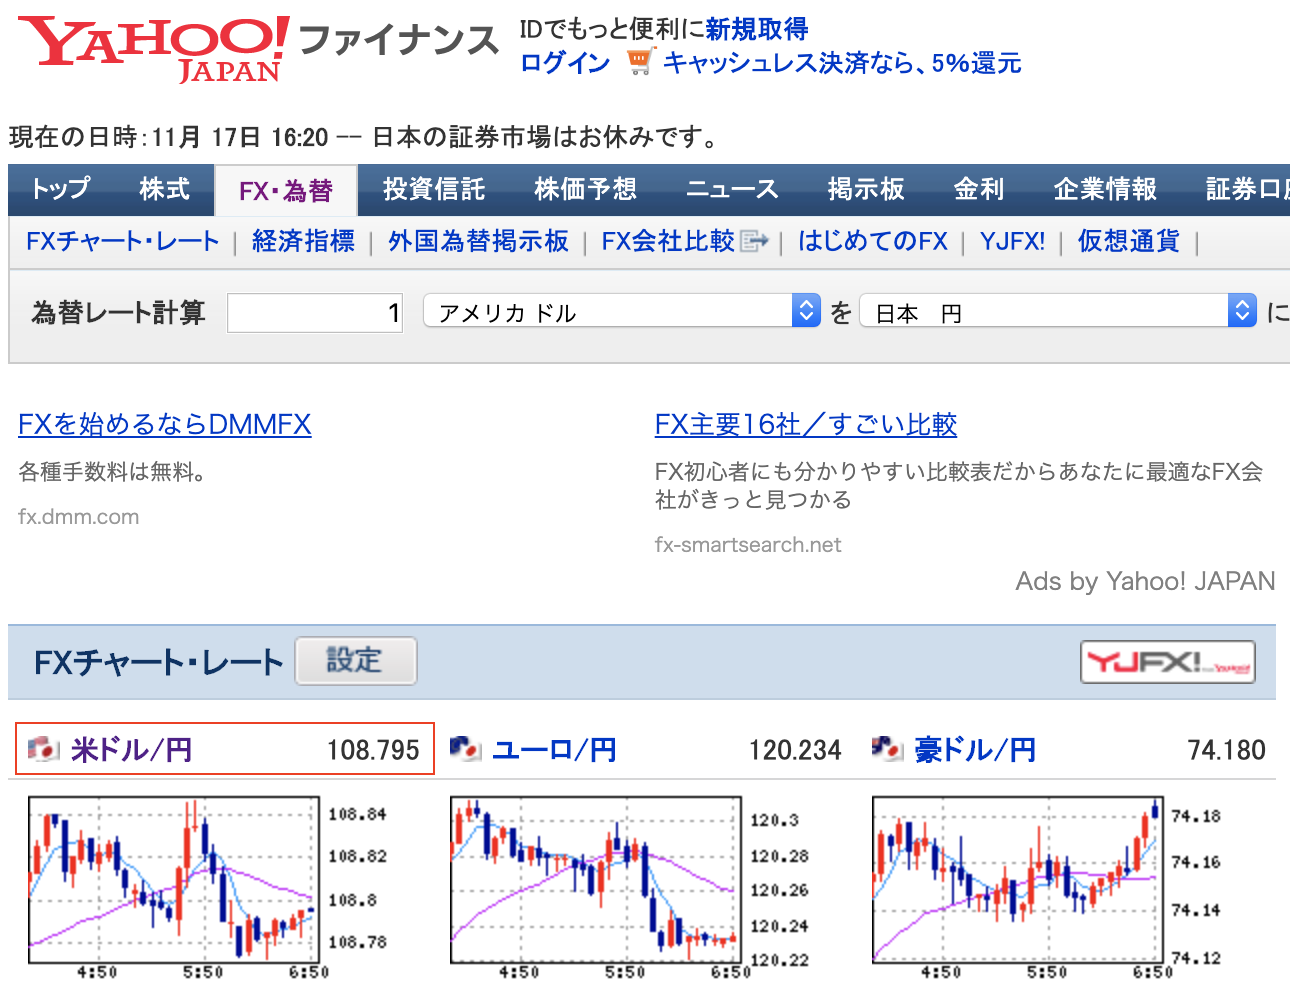
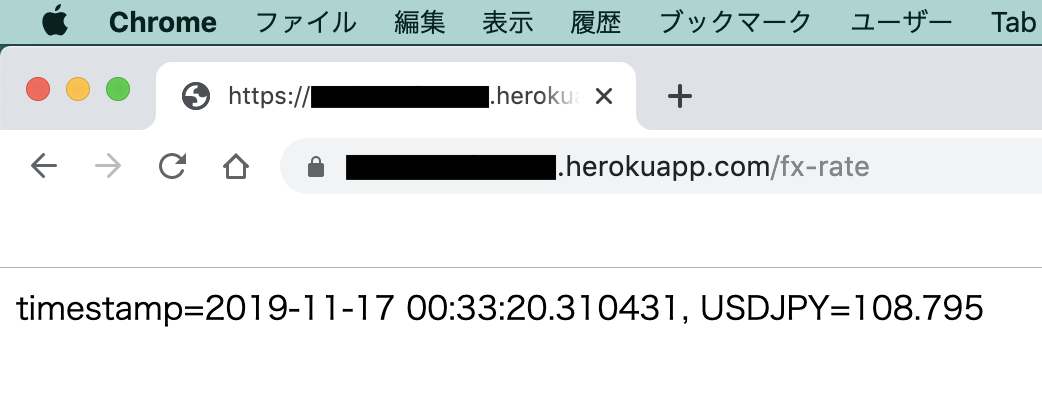
Yahoo!ファイナンスのFXチャート・レートから米ドル/円を取得して表示する。
| ブラウザから手動で表示 | 自動で取得したデータを表示 |
|---|---|
 |
 |
関連する記事
実行環境
| 環境 | Ver. |
|---|---|
| macOS Mojave | 10.14.6 |
| Python | 3.7.3 |
| Flask | 1.1.1 |
| selenium | 3.141.0 |
| chromedrive | 78.0.3904.70 |
| google-chrome | 78.0.3904.97 |
ソースコード
実際に実装内容やソースコードを追いながら読むとより理解が深まるかと思います。是非ご活用ください。
シナリオと前提条件
- Yahoo!ファイナンスのFXチャート・レートから米ドル/円を取得して表示する。
- MySQLやPostgreSQLに保存することを想定していますが、自動化の説明を目的としますのでDB関連はスコープ外とします。
- APIフレームワークはFlaskを採用します。
自動プロセスの作成
Python API構成
tree.sh
python-Selenium
  ├── fx_rate
  │   ├── __init__.py
  │   └── utility.py
  └── main.py
APIメインフレーム
main.py
import datetime
import logging
import os

from flask import Flask

from fx_rate.utility import get_fx_rate

logging.basicConfig(level=logging.INFO)
logger = logging.getLogger(__name__)

app = Flask(__name__)


@app.route('/fx-rate', methods=['GET'])
def get():
    usd_jpy = get_fx_rate()
    res = 'timestamp={}, USDJPY={}'.format(
        datetime.datetime.utcnow() + datetime.timedelta(hours=9), usd_jpy)
    logger.info(res)
    return res, 200


if __name__ == '__main__':
    host = os.getenv('HOST', '0.0.0.0')
    port = int(os.getenv('PORT', 5000))
    app.run(host=host, port=port, debug=True)
FXレート取得
utility.py
import datetime

from selenium import webdriver
from selenium.webdriver.chrome.options import Options
from selenium.webdriver.common.by import By


def get_fx_rate():
    options = Options()
    options.add_argument('--headless')
    driver = webdriver.Chrome(options=options)
    driver.get('https://info.finance.yahoo.co.jp/fx/')
    usd_jpy = driver.find_element(By.ID, 'USDJPY_top_bid').text
    driver.quit()
    return usd_jpy


if __name__ == '__main__':
    usd_jpy = get_fx_rate()
    print('timestamp={}, USDJPY={}'.format(datetime.datetime.utcnow() +
                                           datetime.timedelta(hours=9), usd_jpy))
Herokuの設定
ChromeとDriverの設定
Settings > BuildpacksセクションのAdd buildpackから以下を追加します。

| Buildpack | URL |
|---|---|
| chromedrive | https://github.com/heroku/heroku-buildpack-chromedriver.git |
| google-chrome | https://github.com/heroku/heroku-buildpack-google-chrome.git |
Herokuへデプロイすると自動でインストールされます。事前にご登録ください。すでにデプロイ済みやソースコードを変更せずに再デプロイする場合は、以下の空コミットをお試しください。
allow_empty.sh
~$ git commit --allow-empty -m "allow empty commit"
~$ git push heroku master
Driverバージョンの設定
通常は設定不要です。Chromeがバージョンアップしたときなど、chromedriveとgoogle-chromeでバージョンが異なる場合は、chromedriveのバージョンを指定する必要があります。
- Settings > Config VarsセクションのReveal Config Varsをクリックします。
- KEYとVALUEを入力してAddをクリックします。

| KEY | VALUE |
|---|---|
| CHROMEDRIVER_VERSION | サポートバージョン (例: 78.0.3904.70) |