連載を通して簡単なブログアプリを作成しつつ Go/GAE について学んでいきます。
今回は リモートデバッグ についての説明です。
- Part 1. 『GO / Cloud SDK のインストール』
- Part 2. 『GOPATH』
- Part 3. 『プロジェクトの作成』
- Part 4. 『ディレクトリ構成』
- Part 5. 『Visual Studio Code』
- Part 6. 『Hello World』
- Part 7. 『リモートデバッグ』 ← イマココ
- Part 8. 『デプロイ』
- Part 9. 『Makefile』
- Part 10. 『Circle CI』
- Part 11. 『Dependency Injection』
- Part 12. 『ローカルDB with Docker』
- Part 13. 『gorm』
- Part 14. 『Cloud SQL』
- Part 15. 『Cloud SQL Proxy』
- Part 16. 『HTML』
- Part 17. 『CSS/JS』
- Part 18. 『Google Analytics』
- Part 19. 『Google Search Console』
- Part 20. 『A/B テスト』
- Part 21. 『ユーザーの作成』
- Part 22. 『Firebase Auth』
- Part 23. 『記事の作成』
- Part 24. 『コメントの作成』
- Part 25. 『ページネーション』
リモートデバッグ
VS Code と App Engine ローカル開発サーバーでリモートデバッグができるようにします。
ポイントは次の通りです。
- VS Code でデバッグ用の設定ファイルを作る
- サーバー起動時に
--go_debugging=Trueをオプションで渡す - Go の Debugger である
delveをインストールする (インストール済み) -
delveコマンドを用いて Debugger をサーバーにアタッチする
まずは VS Code のデバッグ用設定ファイルを作成します。
touch .vscode/launch.json
.vscode/launch.json
{
  "version": "0.2.0",
  "configurations": [
    {
      "name": "Connect to server",
      "type": "go",
      "request": "launch",
      "mode": "remote",
      "remotePath": "${workspaceFolder}",
      "port": 2345,
      "host": "127.0.0.1",
      "program": "${workspaceFolder}",
      "env": {},
      "args": []
    }
  ]
}
次にサーバーを起動します。
dev_appserver.py module/blog/main/app.yaml --support_datastore_emulator=False --go_debugging=True
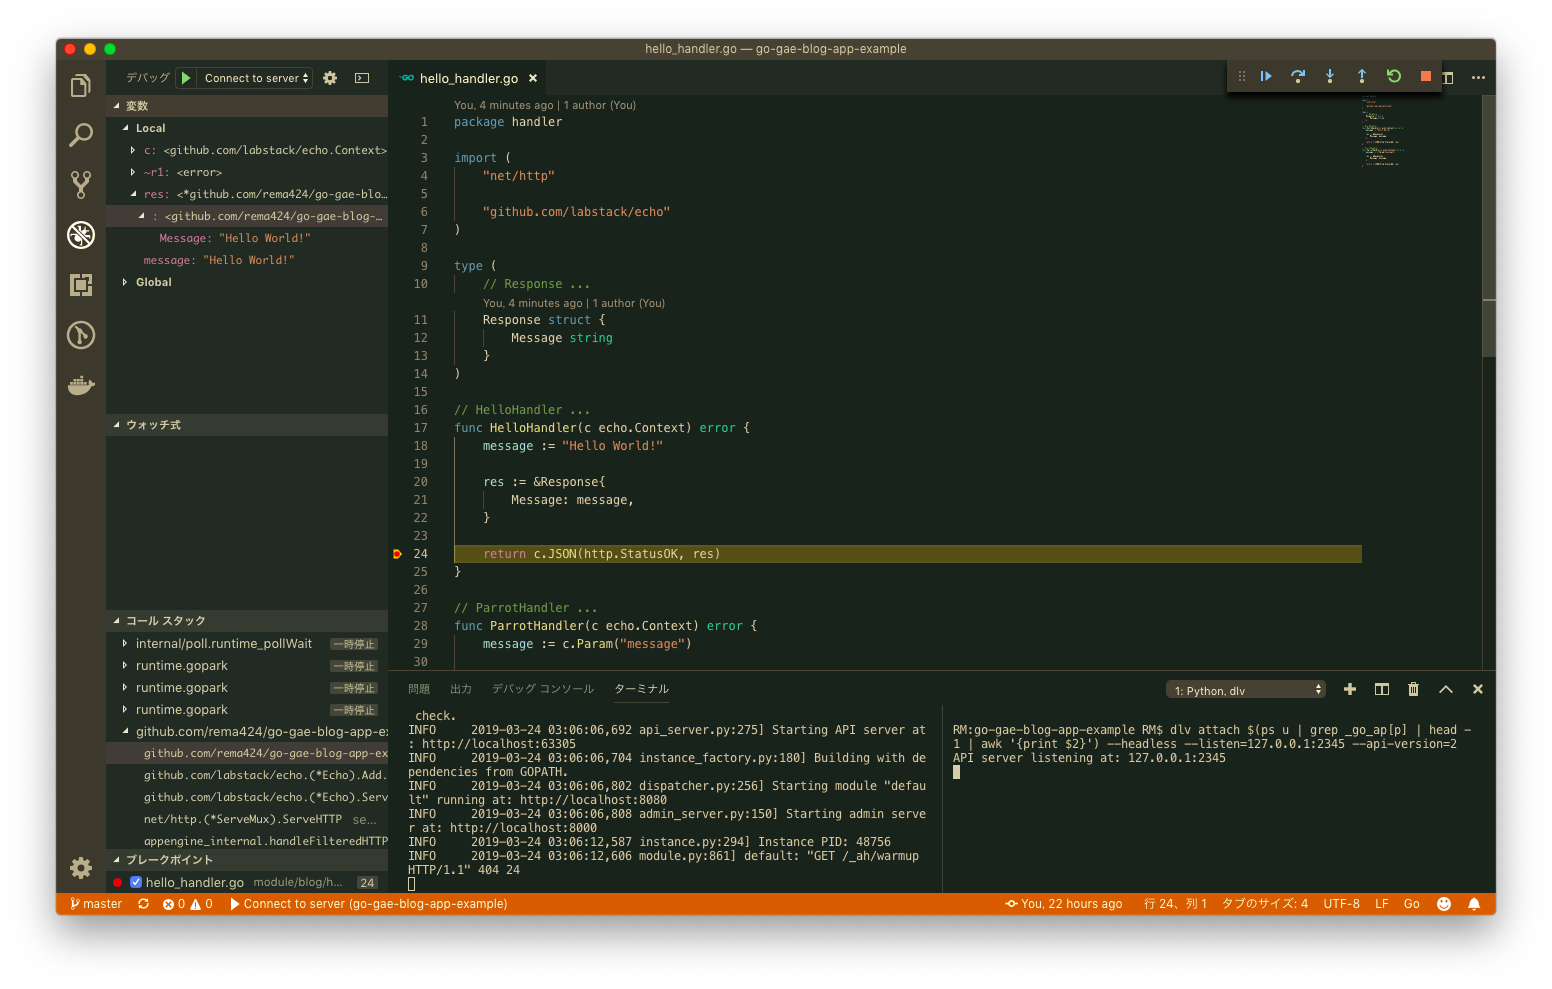
サーバーが起動したらターミナルをもう 1 枚開いて Debugger をアタッチします。
VS Code であればターミナルの分割 (Command + Alt + Ctrl + \) を使うのが便利です。
dlv attach $(ps u | grep _go_ap[p] | head -1 | awk '{print $2}') --headless --listen=127.0.0.1:2345 --api-version=2
次に VS Code 上でブレークポイントを設置します。
デバッグを開始 (F5) します。
この状態でブラウザから localhost:8080 にアクセスすると、ブレークポイントでプログラムがストップします。
ローカル開発用サーバーのオプション | Google Cloud
おわりに
次回のテーマは『デプロイ』です。
よかったら Twitter フォローしてね。@_rema424
