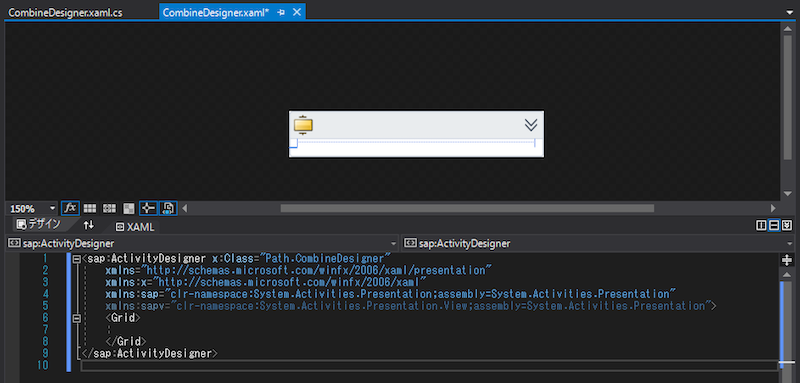
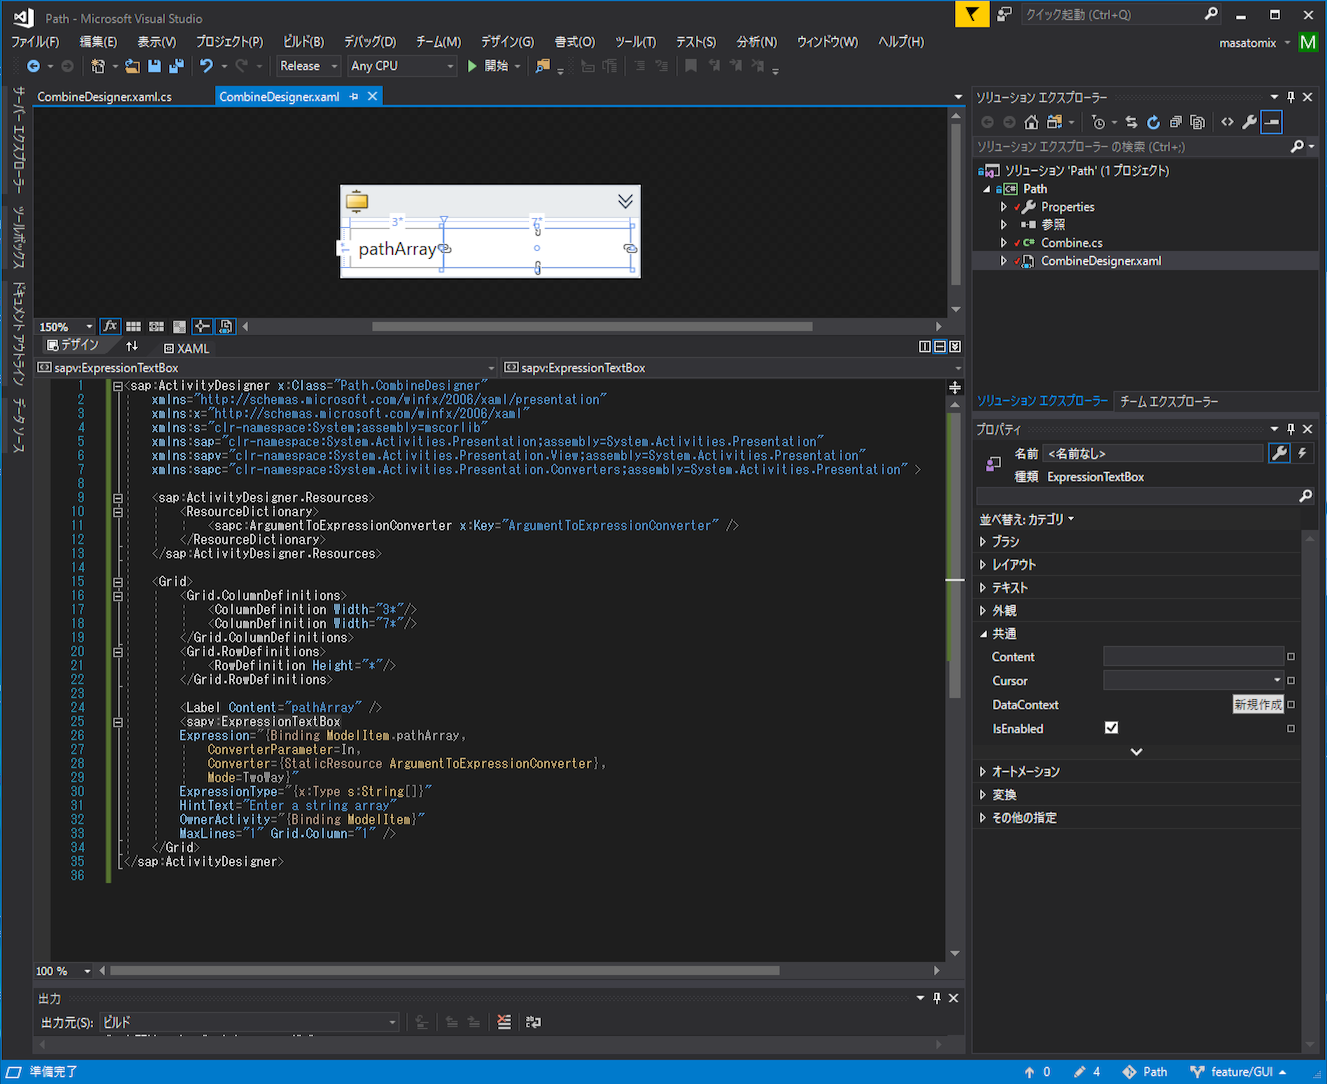
さて UiPath Studioで使用するカスタムアクティビティの作成方法 で、
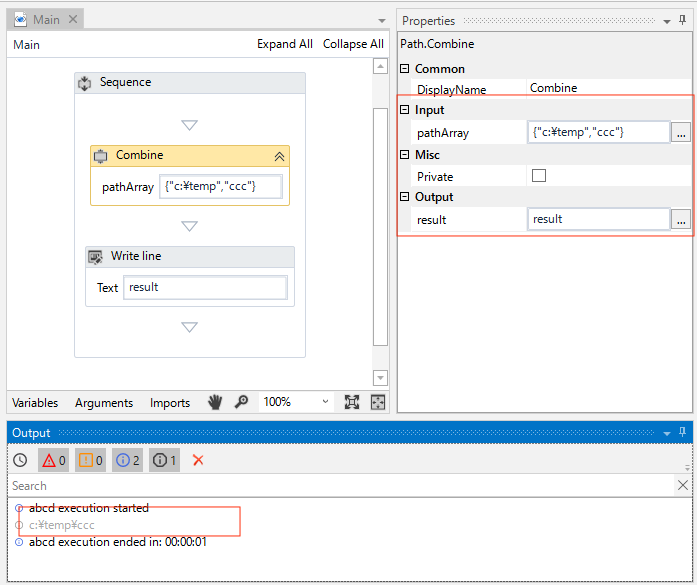
こんな感じのUiPath 用アクティビティを作ろうとしていましたが、そのつづきです。
前回までで、GUIを持たないアクティビティ
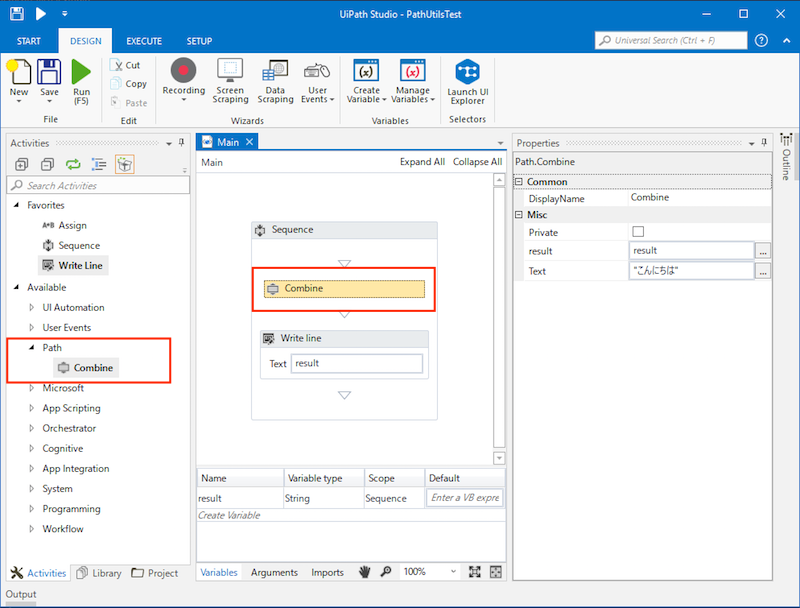
が、Hello world するところまでをやりました。
今回は
- C#のコード側でXAMLを指定して、アクティビティとGUIの紐付け
- そのGUIをXAMLで構築
- パスを連結する実際のロジック作成
- バージョンをインクリメントしてnupkgの再パッケージング
をやっていきます。
Visual Studio 側での作業
前回作成済みの Visual Studio のプロジェクトを使用します。もしくは、前回の成果物は
https://github.com/masatomix/UiPath_Path/tree/0.0.1 に配置してあります。
アクティビティとGUIの紐付け
C#のコード側でXAMLを指定して、アクティビティとGUIの紐付けをおこないます。
パスを連結するCombineアクティビティの実体は C#の Combine.csでした。このクラスにGUIはこのXAMLで構築しますよっていう属性(JavaでいうAnnotationですかねコレ)を追記します。具体的には以下の通り。
using System;
using System.Collections.Generic;
using System.Linq;
using System.Text;
using System.Activities;
using System.ComponentModel;

namespace Path
{
    [Designer(typeof(CombineDesigner))]   // 追記
    public sealed class Combine : CodeActivity
    {
        // 文字列型のアクティビティ入力引数を定義します
        public InArgument<string> Text { get; set; }

        public OutArgument<String> result { get; set; }  // 追記

        // アクティビティが値を返す場合は、CodeActivity<TResult> から派生して、
        // Execute メソッドから値を返します。
        protected override void Execute(CodeActivityContext context)
        {
            // テキスト型の入力引数のランタイム値を取得します
            string text = context.GetValue(this.Text);
            result.Set(context, text + " Hello world.");  // 追記
        }
    }
}
GUIクラス(デザイナのクラス)は CombineDesigner ですよっていう属性
[Designer(typeof(CombineDesigner))]
を追記しました。
ロジック作成
パスを連結する実際のロジックを作成します。
またまた Combine.csに追記ですが、具体的には以下の通り。
using System;
using System.Collections.Generic;
using System.Linq;
using System.Text;
using System.Activities;
using System.ComponentModel;

namespace Path
{

    [Designer(typeof(CombineDesigner))]
    public sealed class Combine : CodeActivity
    {
        [Category("Input")]
        [RequiredArgument]
        [Description("stringの配列で、連結したいファイルパスを記述します。")]
        public InArgument<String[]> pathArray { get; set; }

        [Category("Output")]
        public OutArgument<String> result { get; set; }

        // アクティビティが値を返す場合は、CodeActivity<TResult> から派生して、
        // Execute メソッドから値を返します。
        protected override void Execute(CodeActivityContext context)
        {
            var paths = pathArray.Get(context);
            var combine = System.IO.Path.Combine(paths);
            result.Set(context, combine);
        }
    }
}
先ほどのDesigner属性に加え、プロパティに属性を追加しています。
ひとつめは
[Category("Input")] // UiPath Studio上の Inputカテゴリに表示するって意味
[RequiredArgument] // UiPath Studio上 必須のプロパティ
[Description("stringの配列で、連結したいファイルパスを記述します。")] // UiPath Studioに表示される説明
public InArgument<String[]> pathArray { get; set; }  // パラメタはstring配列
ふたつめは
[Category("Output")]  // UiPath Studio上の Outputカテゴリに表示するって意味
public OutArgument<String> result { get; set; } // 戻り値はstring
ロジックは以下の通り。単純に、引数のpathArrayからstring配列を取り出しC#のSystem.IO.Path のメソッドでパスを生成してresult変数に結果をセットしました。
protected override void Execute(CodeActivityContext context)
{
  var paths = pathArray.Get(context);
  var combine = System.IO.Path.Combine(paths);
  result.Set(context, combine);
}
以上でアクティビティの実体であるCombine.csの作成は完了です。
nupkgの再パッケージング
GUIをいじる前に復習を兼ねて、バージョンをインクリメントしてから再度ビルドして、nupkgを再パッケージングします。
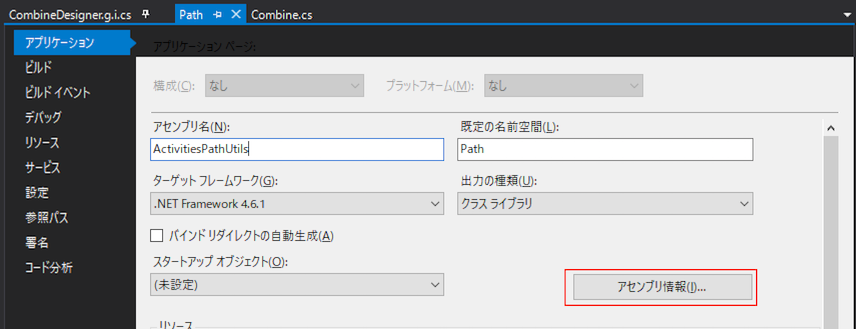
アセンブリ情報のバージョンをインクリメントするため、ソリューションエクスプローラを右クリックして プロパティを選択
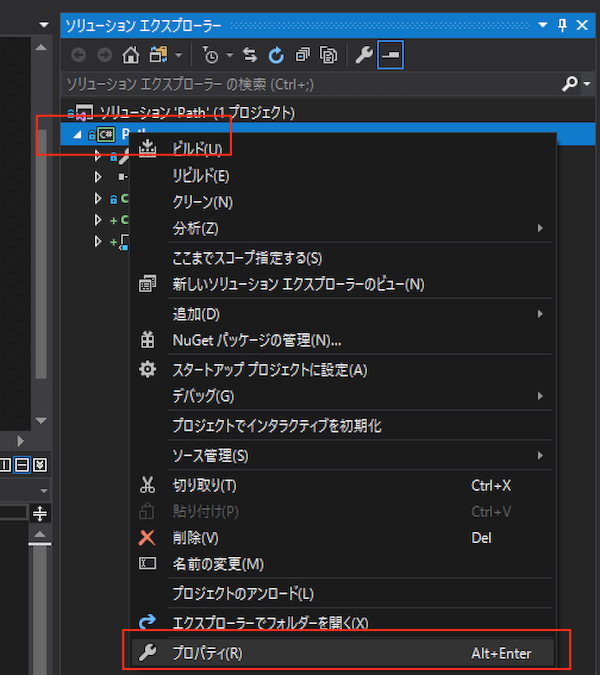
アセンブリバージョンが、0.0.1.0になっていると思いますので、0.0.2.0へ変更します。
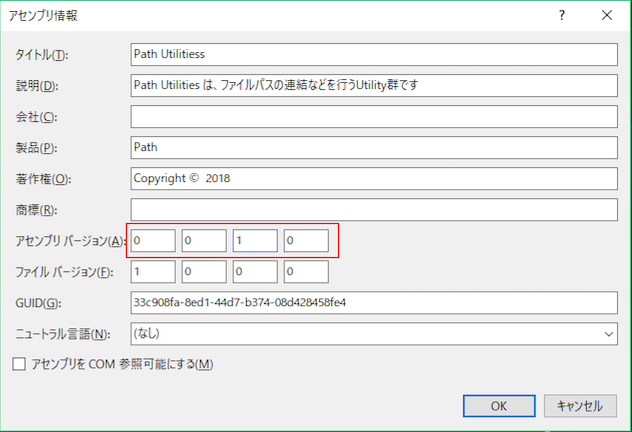
で、再ビルドです。ビルドはStudio上で「ビルド >> ソリューションのクリーン」と「ビルド >> ソリューションのクリーン」を選択。
最後にnupkgのパッケージングは、nuget.exe です。下記のコマンドを実行。
Z:\git\Path\Path> nuget.exe pack Path.csproj -Prop Configuration=Release
'Path.csproj' からパッケージをビルドしています。
MSBuild auto-detection: using msbuild version '15.8.169.51996' from 'C:\Program Files (x86)\Microsoft Visual Studio\2017\Community\MSBuild\15.0\bin'.
'V:\git\Path\Path\bin\Release' のファイルをパックしています。
メタデータに 'Path.nuspec' を使用しています。
Successfully created package 'V:\git\Path\Path\ActivitiesPathUtils.0.0.2.nupkg'.
警告: NU5101: The assembly 'lib\ActivitiesPathUtils.dll' is placed directly under 'lib' folder. It is recommended that assemblies be placed inside a framework-specific folder. Move it into a framework-specific folder.
警告: NU5102: The value "Summary of changes made in this release of the package." for ReleaseNotes is a sample value and should be removed. Replace it with an appropriate value or remove it and rebuild your package.

V:\git\Path\Path>
新しいバージョンとしてさっきインクリメントした 0.0.2のnupkgである、ActivitiesPathUtils.0.0.2.nupkg が出来たと表示されればOKですね。
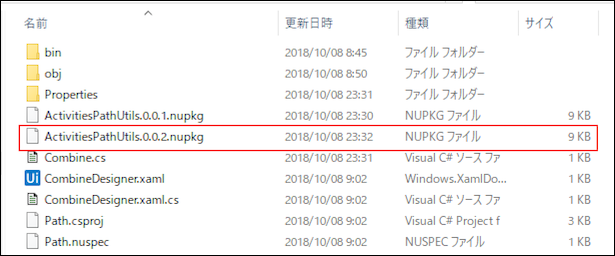
うん実際にありそうです。
UiPath Studio側でアクティビティを更新
UiPath Studio側で、アクティビティをUpdateして、UiPath Studioの再起動を行います。
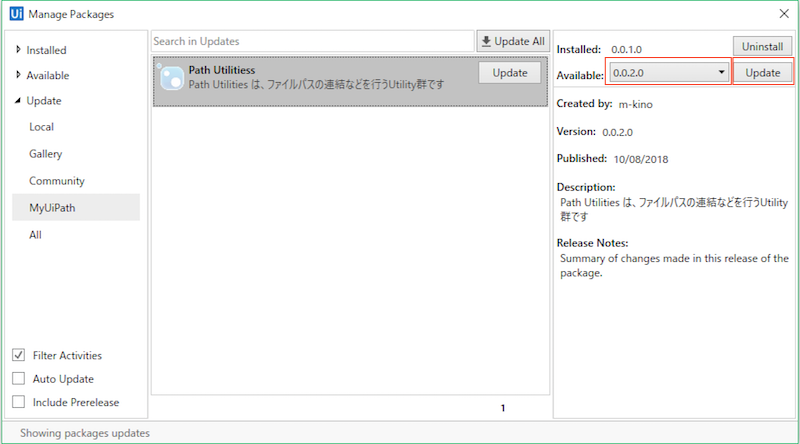
アクティビティが更新されたので、アクティビティペインにあるCombineアクティビティをまたまたドラッグアンドドロップしてみます。
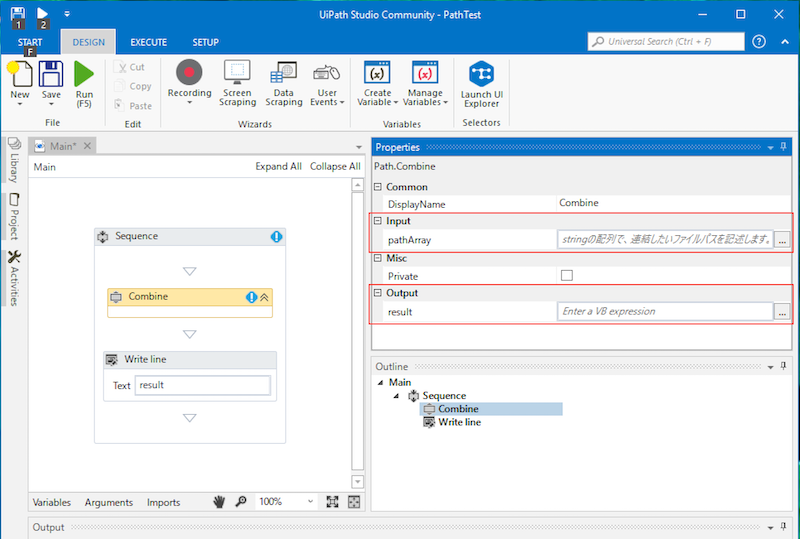
想定通り、InputカテゴリとOutputカテゴリが追加され、それぞれにプロパティが定義されました。
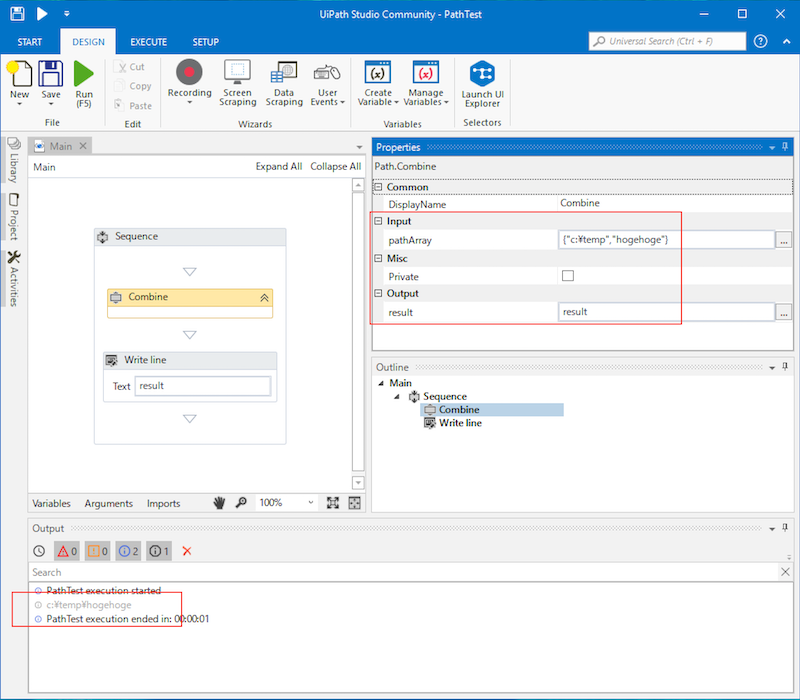
さてアクティビティを実行してみます。結果のキャプチャが薄くてわかりにくいですが、 c:\temp\hogehoge が得られました。
アクティビティのGUIを、XAMLで構築
最後というかようやくですが、、アクティビティのGUIをCombineDesigner.xaml で構築します。
<sap:ActivityDesigner x:Class="Path.CombineDesigner"
    xmlns="http://schemas.microsoft.com/winfx/2006/xaml/presentation"
    xmlns:x="http://schemas.microsoft.com/winfx/2006/xaml"
    xmlns:sap="clr-namespace:System.Activities.Presentation;assembly=System.Activities.Presentation"
    xmlns:sapv="clr-namespace:System.Activities.Presentation.View;assembly=System.Activities.Presentation">
    <Grid>

    </Grid>
</sap:ActivityDesigner>
初期状態は上記の通りGridに何も書いていないのですが、ここに「VB式を入れることが可能なコントロール、ExpressionTextBox」などを貼り付けていきます。
(参考: アクティビティ デザイナー (Custom Activity Designer) )
<sap:ActivityDesigner x:Class="Path.CombineDesigner"
    xmlns="http://schemas.microsoft.com/winfx/2006/xaml/presentation"
    xmlns:x="http://schemas.microsoft.com/winfx/2006/xaml"
    xmlns:s="clr-namespace:System;assembly=mscorlib"
    xmlns:sap="clr-namespace:System.Activities.Presentation;assembly=System.Activities.Presentation"
    xmlns:sapv="clr-namespace:System.Activities.Presentation.View;assembly=System.Activities.Presentation"
    xmlns:sapc="clr-namespace:System.Activities.Presentation.Converters;assembly=System.Activities.Presentation" >

    <sap:ActivityDesigner.Resources>
        <ResourceDictionary>
            <sapc:ArgumentToExpressionConverter x:Key="ArgumentToExpressionConverter" />
        </ResourceDictionary>
    </sap:ActivityDesigner.Resources>

    <Grid>
        <Grid.ColumnDefinitions>
            <ColumnDefinition Width="3*"/>
            <ColumnDefinition Width="7*"/>
        </Grid.ColumnDefinitions>
        <Grid.RowDefinitions>
            <RowDefinition Height="*"/>
        </Grid.RowDefinitions>

        <Label Content="pathArray" />
        <sapv:ExpressionTextBox
        Expression="{Binding ModelItem.pathArray,
            ConverterParameter=In,
            Converter={StaticResource ArgumentToExpressionConverter},
            Mode=TwoWay}"
        ExpressionType="{x:Type s:String[]}"
        HintText="Enter a string array"
        OwnerActivity="{Binding ModelItem}"
        MaxLines="1" Grid.Column="1" />
    </Grid>
</sap:ActivityDesigner>
Gridタグでレイアウトを定義し、左側に「pathArray」というラベルを、右側に ExpressionTextBox を配置します。
ExpressionTextBox タグでは、配置されるテキストボックスの定義情報を記述していきますが、
Expression="{Binding ModelItem.pathArray,
            ConverterParameter=In,
            Converter={StaticResource ArgumentToExpressionConverter},
            Mode=TwoWay}"
の ModelItem.pathArray が、Combine.csの public InArgument<String[]> pathArray にマッピングを定義してるっぽいです。
ExpressionType="{x:Type s:String[]}"
は、その型を指定しているようです。
このようにしてGUI上のテキストボックスの値と、UiPath Studio上のプロパティペインにあるテキストボックスの相互バインディングをしている事が分かります。
GUIの構築は以上です。。
nupkgの再パッケージング
さあ、再度ビルド。バージョンを 0.0.3にして再度nupkgを作成、そして UiPath Studioに配置しましょう。
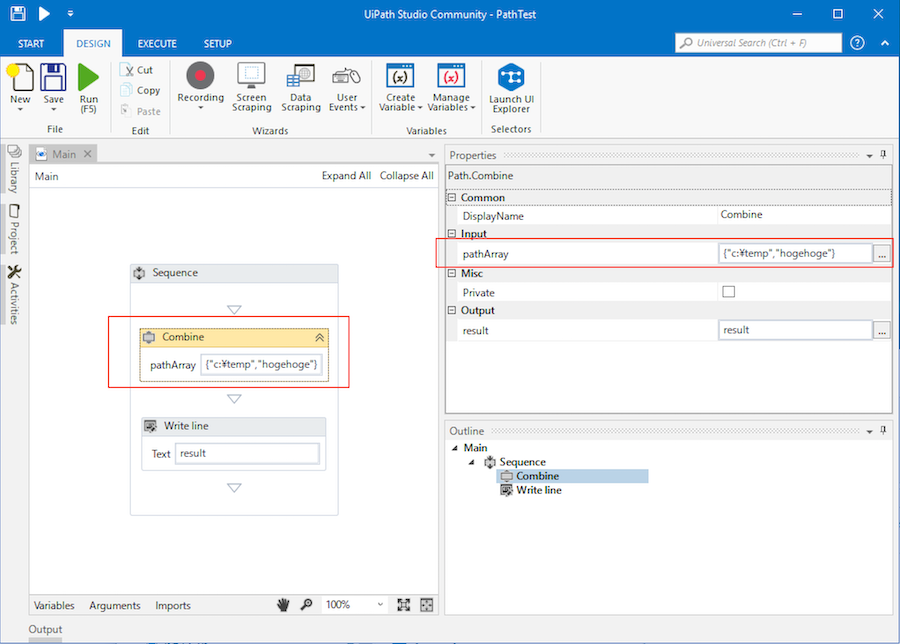
おお、、シーケンスのところのアクティビティのGUIにテキストボックスが表示されました!GUIでの編集がプロパティペインのところに反映されること、逆に、プロパティペインで修正した内容がGUI上のテキストボックスにも反映されること、を確認しておきましょう。
おつかれさまでした。
長かったですが UiPath Studioで稼働するカスタムアクティビティのGUIを、Visual Studioで作成することができましたね。。
ソースコード
https://github.com/masatomix/UiPath_Path/tree/0.0.3
に配置しました。
ちなみに前回記事 完了時点のコードは
https://github.com/masatomix/UiPath_Path/tree/0.0.1
です
関連リンク
- UiPath Studioで使用するカスタムアクティビティの作成方法 事前の環境構築とかは、前回記事にご参照ください
- 【UiPath】カスタムアクティビティの作成(事前準備と実践初級) いつも参考にさせていただいています。感謝します!
- 【UiPath】カスタムアクティビティのプロパティを見える化する 感謝!
- プライベートなnugetパッケージを作る
- UiPath Studio 2018.3 Early access - Beta release をさわってみた2 (カスタムアクティビティ) 2018.3方式のカスタムアクティビティ作成は、Visual Studio方式を置き換えるモノではなさそうとわかったきっかけ。。
- UiPath/Community.Activities UiPathの中のヒト(?)が公開してるサンプル
- アクティビティ デザイナー (Custom Activity Designer)
- Windows Workflow Foundation × UiPath カスタムアクティビティ × 自分的作成時の注意点
以下、後日もすこし調べたさいに情報源になったサイトのリンクです
- カスタム アクティビティ デザイナーでの ExpressionTextBox の使用 このサイトにあるリンク:Windows Communication Foundation (WCF) and Windows Workflow Foundation (WF) Samples for .NET Framework 4 からサンプルをダウンロードすると、MultiAssignDesigner.xaml ってファイルがあって、、ソレが参考になります。
- ScriptActivityDesigner.xaml FileDialog をだすサンプル
- カスタム アクティビティ デザイナーおよびテンプレートの使用 Collapsed/Expanded のやり方や、ComboBoxのサンプルなど。
