PlayCanvasで2D Screenに YouTubeのビデオを埋め込む
最近、PlayCanvasの2D Screen機能を使用してYouTubeのビデオを埋め込みたいなと思うことが多かったので、YouTubeの埋め込み機能をPlayCanvasで使用するための方法を紹介します。
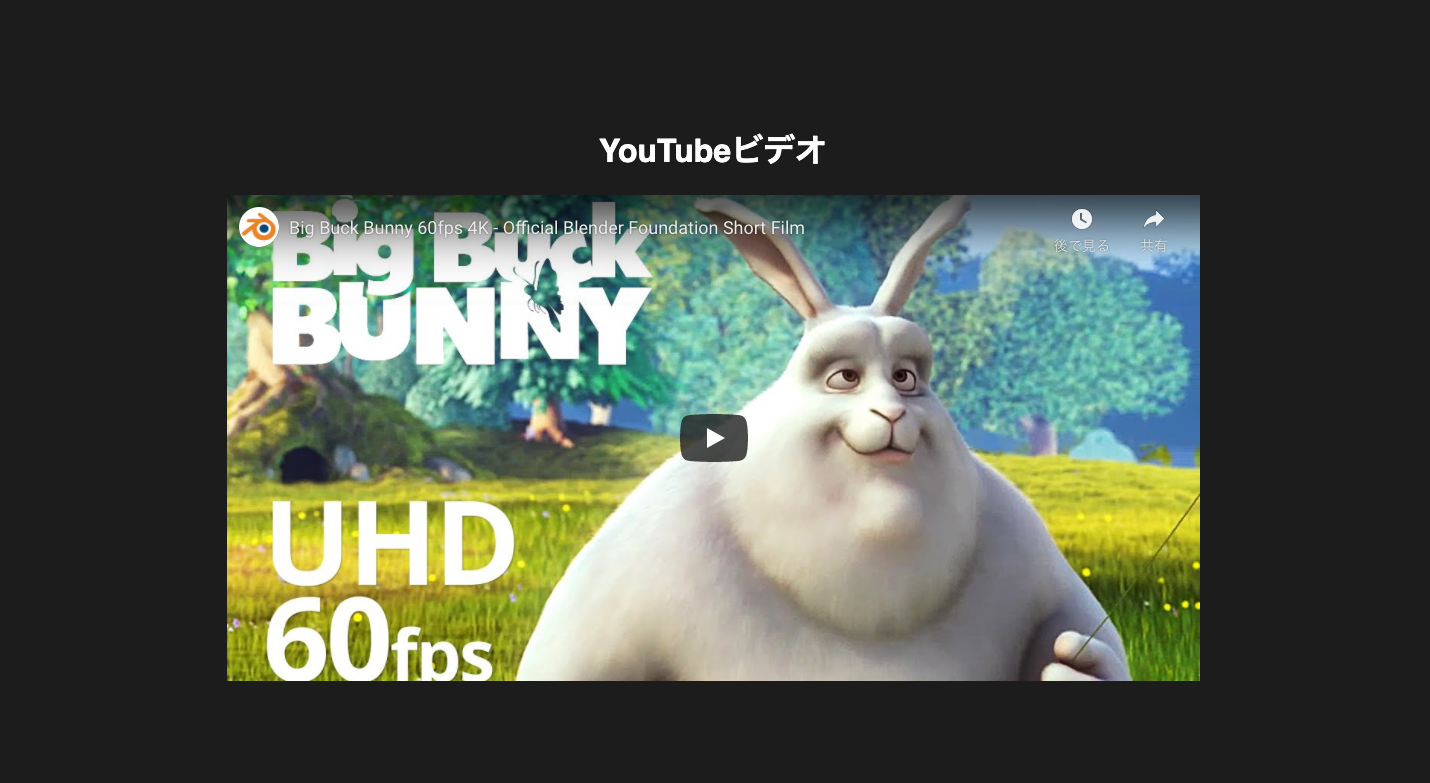
実行結果はこちらになります。
「Big Buck Bunny」を読み込んでいます。
https://playcanv.as/p/wheFl8iO/
プロジェクトについて
今回のプロジェクトのシーンはこちらになります。
https://playcanvas.com/project/725582/
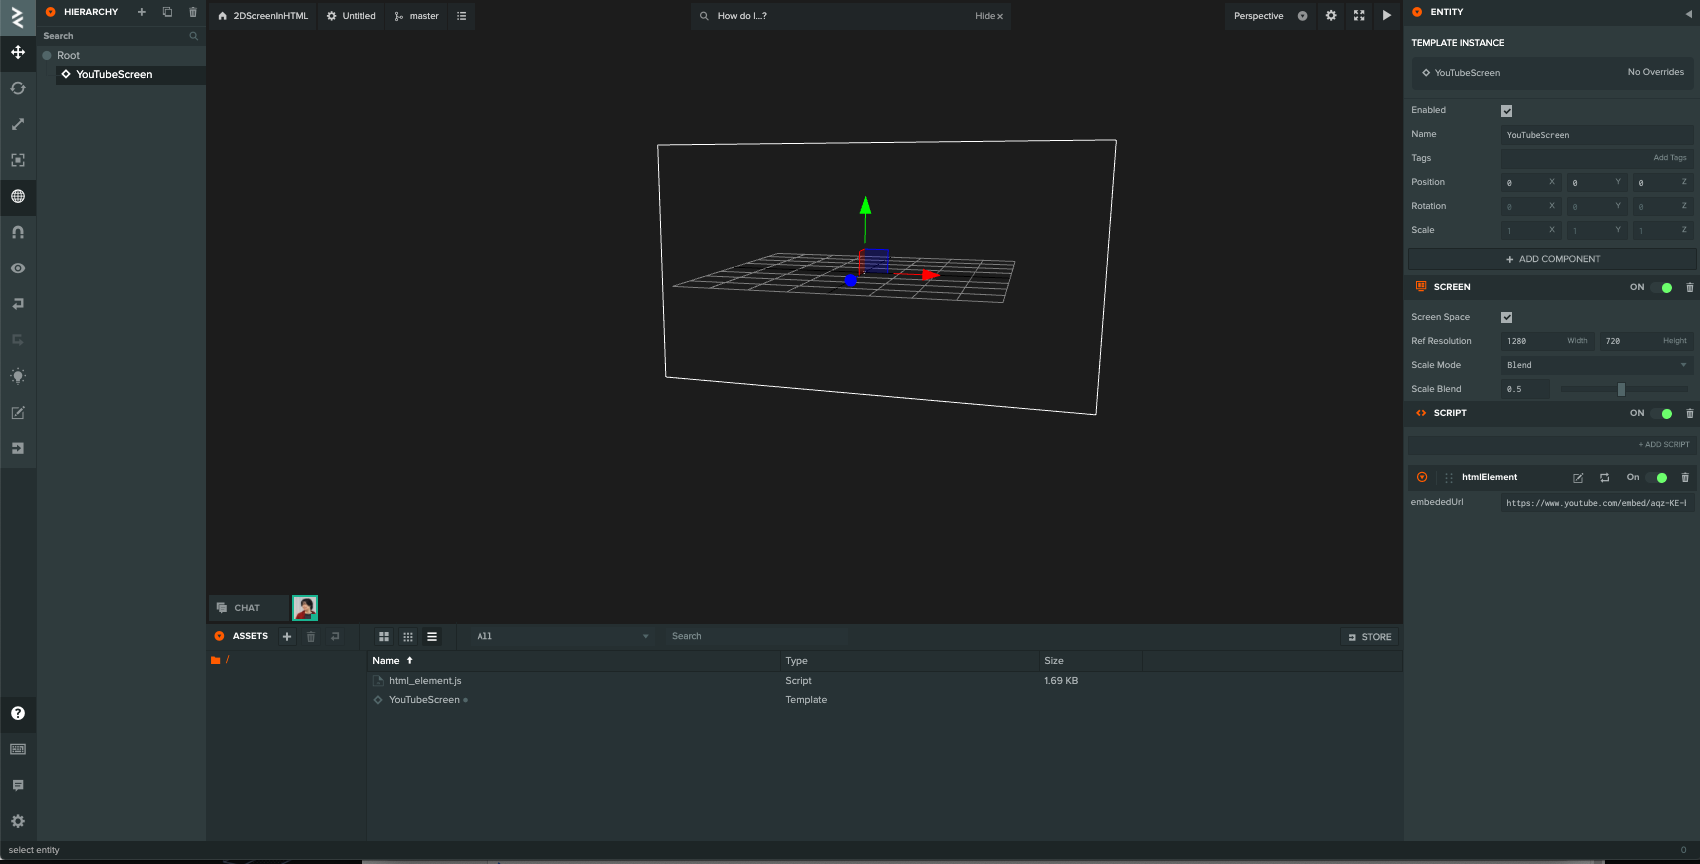
完成したシーンの構成は2D Screenのみを配置しています。
-Root
--2D Screen
シーンを構築する
1. 2D Screenを追加
左上のHIERARCHYにある+をクリックし、User Interface → 2D Screenを選択してスクリーンを追加します。
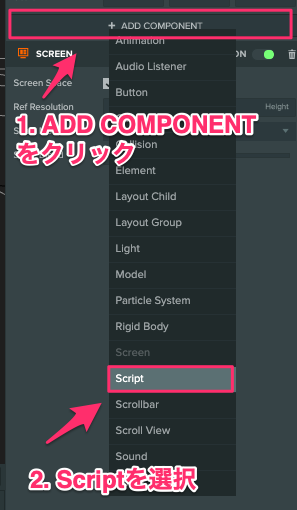
2. SCRIPTコンポーネントを追加
次は、SCRIPTコンポーネントを追加します。
2D Screenを追加した状態でSCRIPTの追加をします。
- ADD COMPONENTをクリック
- Scriptコンポーネントを追加
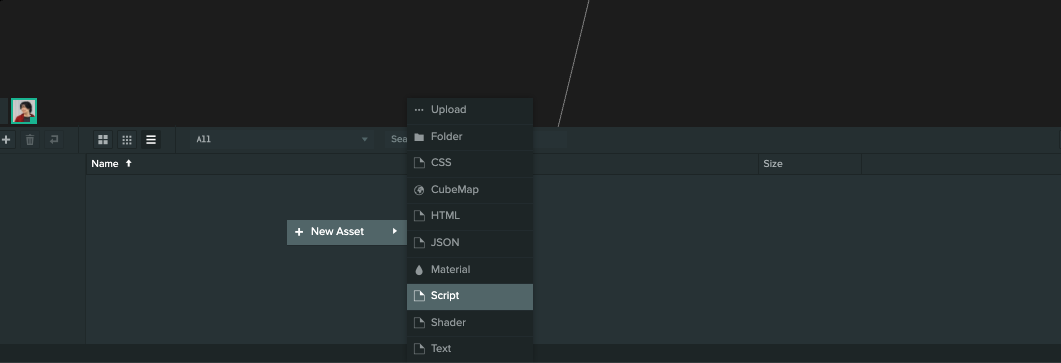
3. プロジェクトにスクリプトを追加する
次にスクリプトを追加します。
- 画面の下にある
ASSETSを右クリック - New AssetからScriptを選択
- html-element.jsで作成
4. スクリプトを記述
作成したhtml-element.jsをクリックし開かれたコードエディタ下記のコードを記述します。
- スクリプトを記述
- Ctrl + s(Macの場合はCOMMAND + s)で保存
/*jshint esversion: 6, asi: true, laxbreak: true*/
const HtmlElement = pc.createScript('htmlElement');
HtmlElement.attributes.add("embededUrl", {"type": "string", default: "https://www.youtube.com/embed/aqz-KE-bpKQ"});

HtmlElement.prototype.initialize = function() {
  if(this.app.touch){
    this.app.touch.on(pc.EVENT_TOUCHEND, () => {
        this.entity.enabled = false
    })
  }
  this.app.mouse.on(pc.EVENT_MOUSEDOWN, () => {
      this.entity.enabled = false
  })


  this.once("enable", () => {
      this.show()
  })

  this.once("disable",() => {
      this.hide()
  });

  this.show()

 };


HtmlElement.prototype.hide = function() {
    document.getElementById("youtube-element").remove();
}

HtmlElement.prototype.show = function() {
    const {x: width, y:height} = this.entity.screen.resolution;
    const style = `
    <style>
    #youtube-element .html-element {
        width: ${width}px;
        height: ${height}px;
        position:absolute;
        display:flex;
        flex: 1;
        background:transparent;
        z-index:5;
        color: #fff;
        justify-content:center;
        align-items:center;
        flex-direction:column;
    };
    </style>`;
    const html =`
    <div id="youtube-element">
        ${style}
        <div class="html-element">
                <h1 class="text">YouTubeビデオ</h1>
                <iframe width=${width  *0.64} height=${width * 0.32} src="${this.embededUrl}" frameborder="0" allow="accelerometer; autoplay; clipboard-write; encrypted-media; gyroscope; picture-in-picture" allowfullscreen></iframe>
        </div>
    </div>
  `
  const body = document.getElementsByTagName("body")[0]
  body.insertAdjacentHTML("afterbegin", html);
}
スクリプトをエンテティに適用
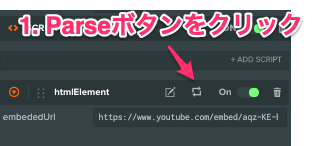
SCRIPTコンポーネントを追加した2Dスクリーンに、記述したコードを適用します。
- SCRIPTコンポーネントのADD SCRIPTからhtmlElementを選択
- Parseボタンをクリック
これでスクリプトの記述ができました。
embededUrlにYouTubeの共有→埋め込みを押した際に表示されるリンクを入力することで動画の埋め込みができるようになります。
実行結果:
https://playcanv.as/p/wheFl8iO/
今回の記事で、意見、質問などが有りましたら @mxcn3までお願いします。
PlayCanvas開発で参考になりそうな記事の一覧です。 - [PlayCanvasのコードエディターでes6に対応する](https://qiita.com/yushimatenjin/items/a61a21c64c1c1a550dd4) - [Gulpのプラグインを書いたらPlayCanvasでの開発がめちゃくちゃ便利になった](https://qiita.com/yushimatenjin/items/5f0f178e8a4ba4a5ee57) - [PlayCanvas Editorに外部スクリプトを読み込む新機能が追加されたので開発方法を考える。- Reduxを組み込む](https://qiita.com/yushimatenjin/items/7a64220cceac66843d7d) - [React Native + PlayCanvasを使ってスマートフォンゲームを爆速で生み出す](https://qiita.com/yushimatenjin/items/7c7ad5d35473c11f32f2) - [PlayCanvasのエディター上でHTML, CSSを組み込む方法](https://qiita.com/yushimatenjin/items/814b4a32db53397219df) - [日本PlayCanvasユーザー会 - Slack](https://join.slack.com/t/playcanvasjphq/shared_invite/zt-9aihkaep-TNA04tqgvYDFhBJABLLckw) その他関連PlayCanvasのユーザー会のSlackを作りました!
少しでも興味がありましたら、ユーザー同士で解決・PlayCanvasを推進するためのSlackを作りましたので、もしよろしければご参加ください!
