「PublishでWebサイトを構築する」は6部構成です。
記事を順番に読み進めると、PublishでWebサイトが構築できるようになります。
第1部: セットアップ&使い方
第2部: カスタムテーマの作成
第3部: プラグインのインストール ←イマココ
第4部: プラグインの作成(未投稿)
第5部: ツイートボタンの表示
第6部: はてなブックマークボタンの表示
はじめに
Publishでプラグインをインストールする方法を紹介します。
本記事では例として SplashPublishPlugin をインストールします。
こちらはSwiftのコードをシンタックスハイライトするプラグインです。
環境
- OS:macOS Monterey 12.2.1
- Xcode:13.3 (13E113)
- Swift:5.6
- Publish:0.8.0
- SplashPublishPlugin:0.1.0
パッケージの追加
まず Package.swift の依存関係にプラグインのパッケージを追加します。
// swift-tools-version:5.6

import PackageDescription

let package = Package(
    name: "WebsiteSample",
    products: [
        .executable(
            name: "WebsiteSample",
            targets: ["WebsiteSample"]
        ),
    ],
    dependencies: [
        .package(url: "https://github.com/johnsundell/publish.git", from: "0.8.0"),
+       .package(url: "https://github.com/johnsundell/splashpublishplugin", from: "0.1.0"),
    ],
    targets: [
        .executableTarget(
            name: "WebsiteSample",
            dependencies: [
                .product(name: "Publish", package: "publish"),
+               .product(name: "SplashPublishPlugin", package: "splashpublishplugin"),
            ]
        ),
    ]
)
Package.swift を保存し、エラーが発生しなかったら追加に成功しています。
プラグインのインストール
プラグインのインストールは .installPlugin(_:) で行います。
先ほど追加したパッケージをインポートし、 .installPlugin() の引数に指定します。
+ import SplashPublishPlugin

try WebsiteSample().publish(using: [
+   .installPlugin(.splash(withClassPrefix: "")),
    .addMarkdownFiles(),
    .copyResources(),
    .generateHTML(withTheme: .uhooi),
    .generateRSSFeed(including: [.posts]),
    .generateSiteMap(),
    .deploy(using: .gitHub("uhooi/website-sample-output", useSSH: false))
])
SplashPublishPlugin はMarkdownファイルが処理される前にインストールする必要があるので、 .addMarkdownFiles() より前に記述します。
テーマの更新
プラグインによってはテーマを更新する必要があります。
SplashPublishPlugin はCSSを更新しないとシンタックスハイライトされません。
サンプル があるので、本記事ではそのまま使います。
まずサンプルのCSSを Resources フォルダ以下に格納します。
私は Resources に SplashPublishPlugin フォルダを作成し、サンプルの名前( sundellsColors.css )のまま格納しました。
次に追加したCSSを適用するため、テーマのSwiftファイルを更新します。
シンタックスハイライトは記事のみで使うので、 makeItemHTML(for:context:) が返すHTMLにCSSを適用します。
extension Theme {
    static var uhooi: Self {
        Theme(
            htmlFactory: UhooiHTMLFactory(),
            resourcePaths: [
                "Resources/UhooiTheme/styles.css",
+               "Resources/SplashPublishPlugin/sundellsColors.css",
            ]
        )
    }
}

private struct UhooiHTMLFactory<Site: Website>: HTMLFactory {
    // ...
    func makeItemHTML(for item: Item<Site>,
                      context: PublishingContext<Site>) throws -> HTML {
        HTML(
            .lang(context.site.language),
-           .head(for: item, on: context.site),
+           .head(for: item, on: context.site, stylesheetPaths: [
+               "/styles.css",
+               "/sundellsColors.css",
+           ]),
        // ...
    }
    // ...
}
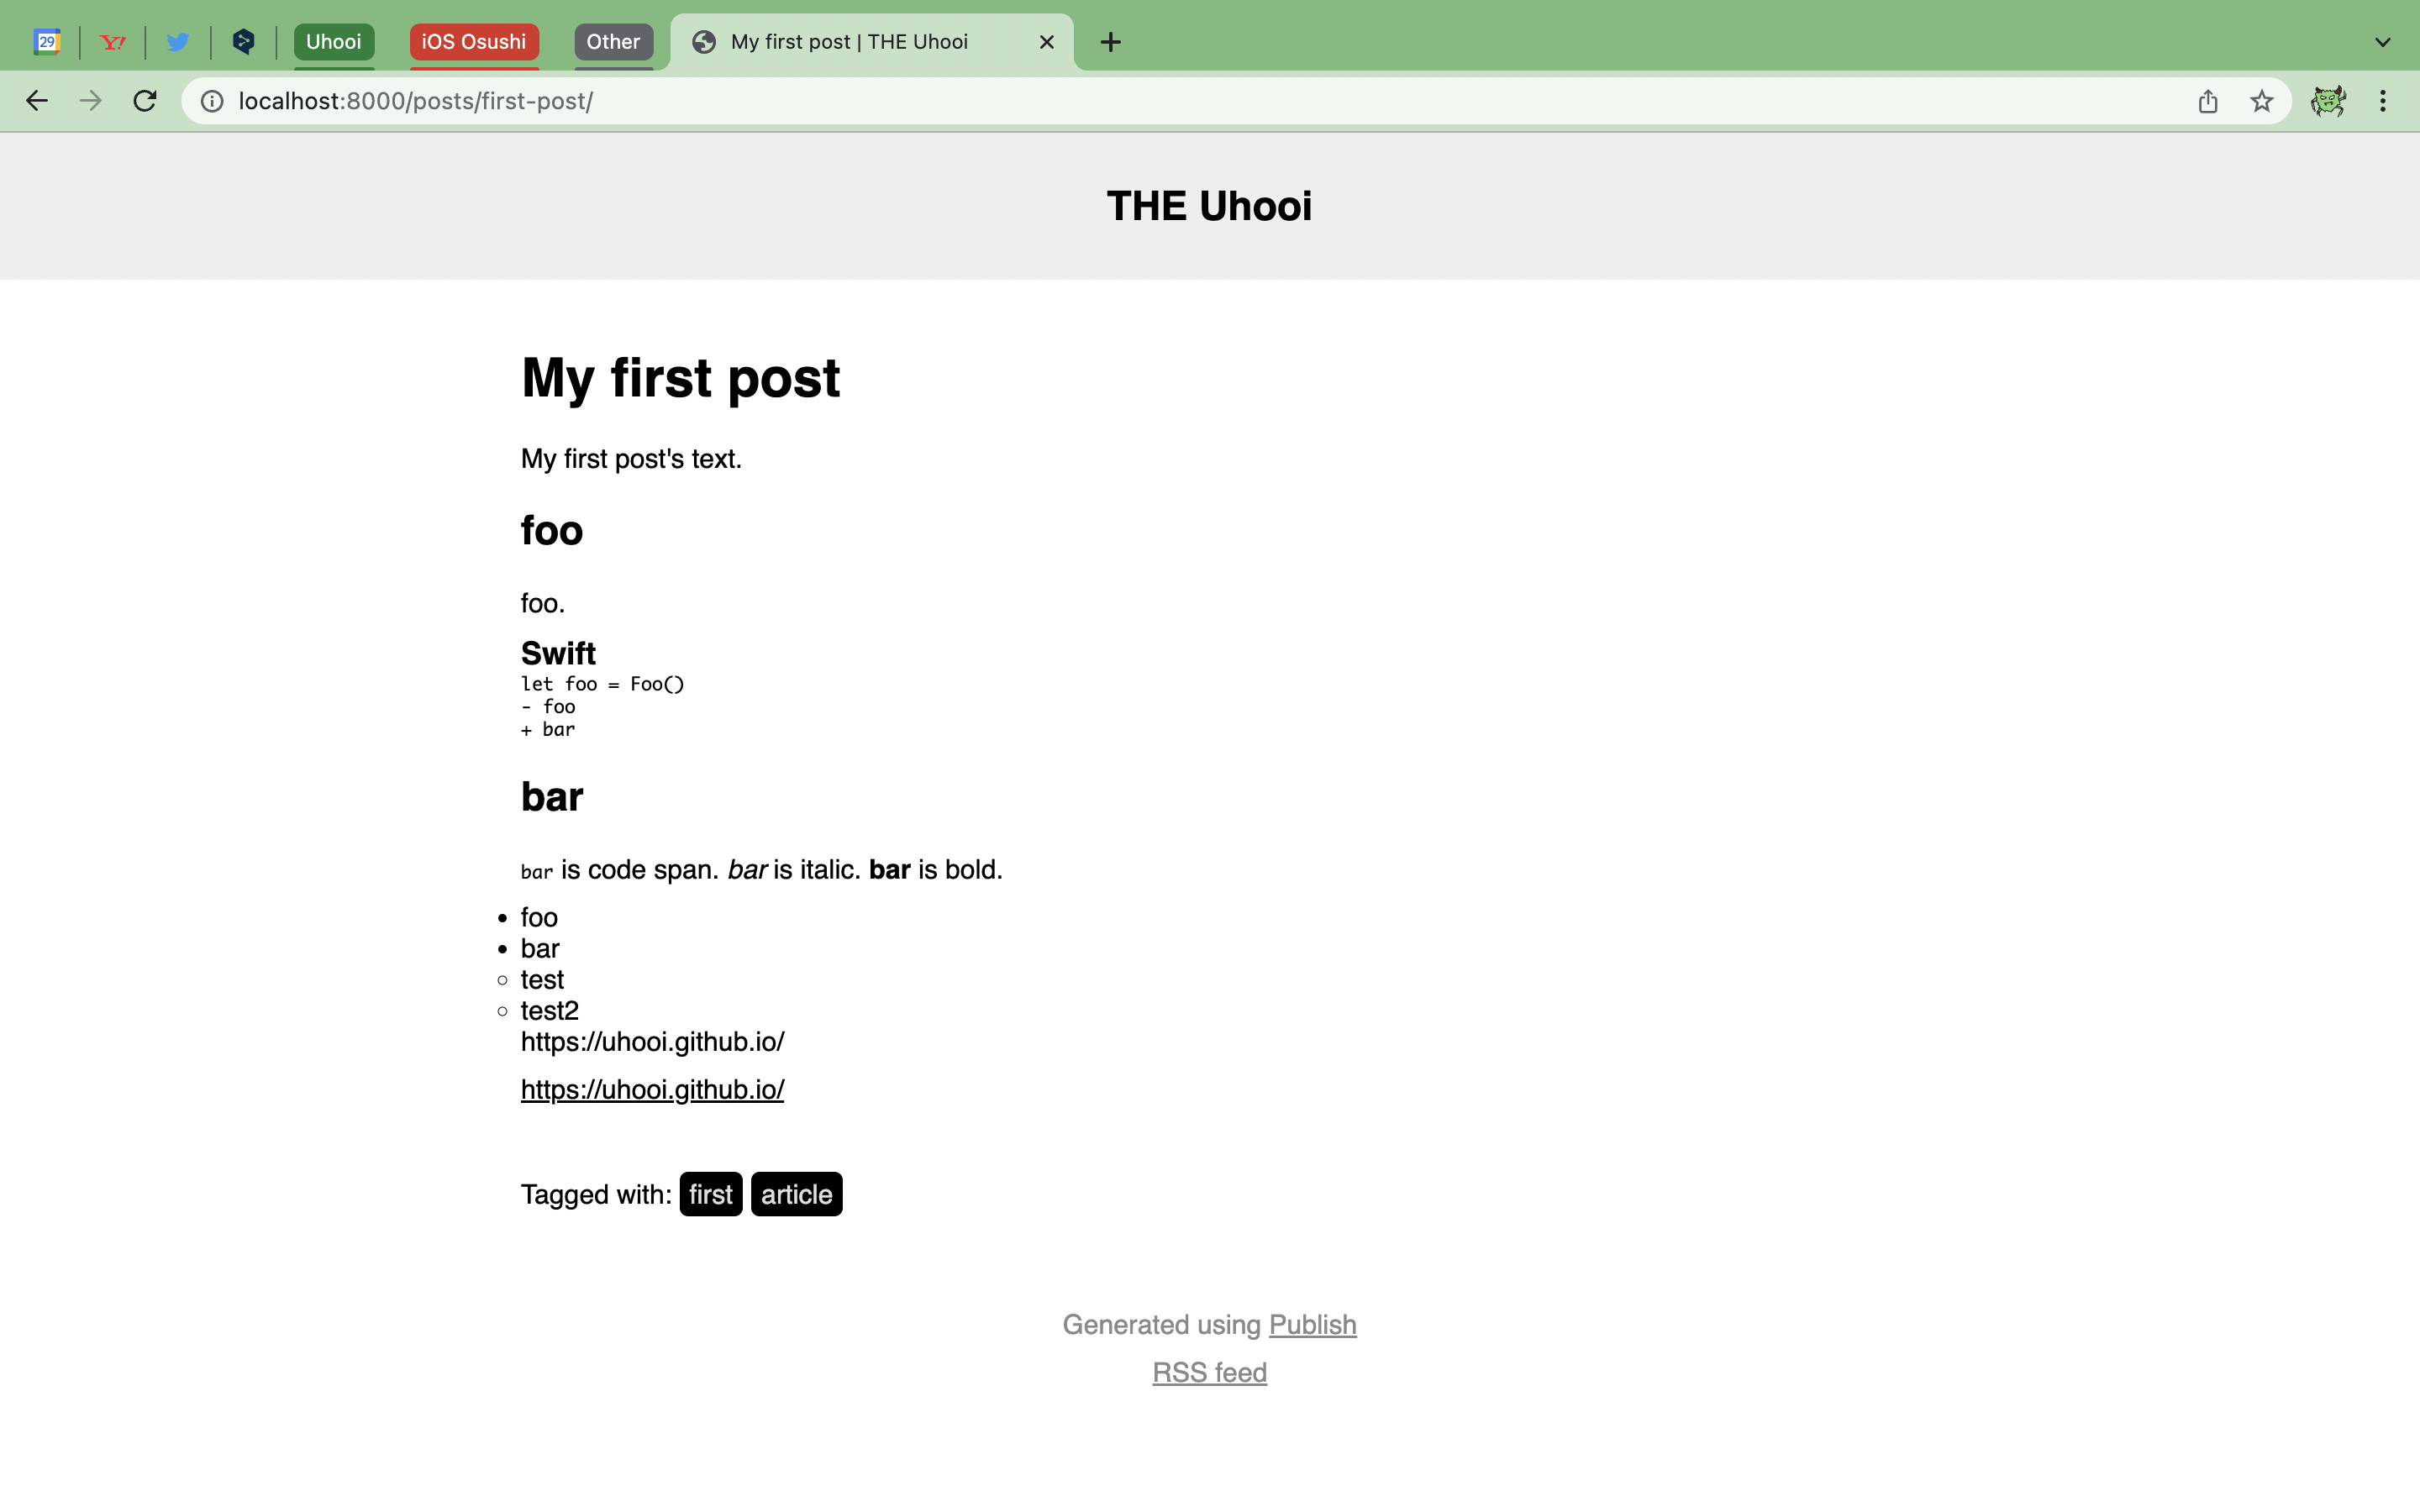
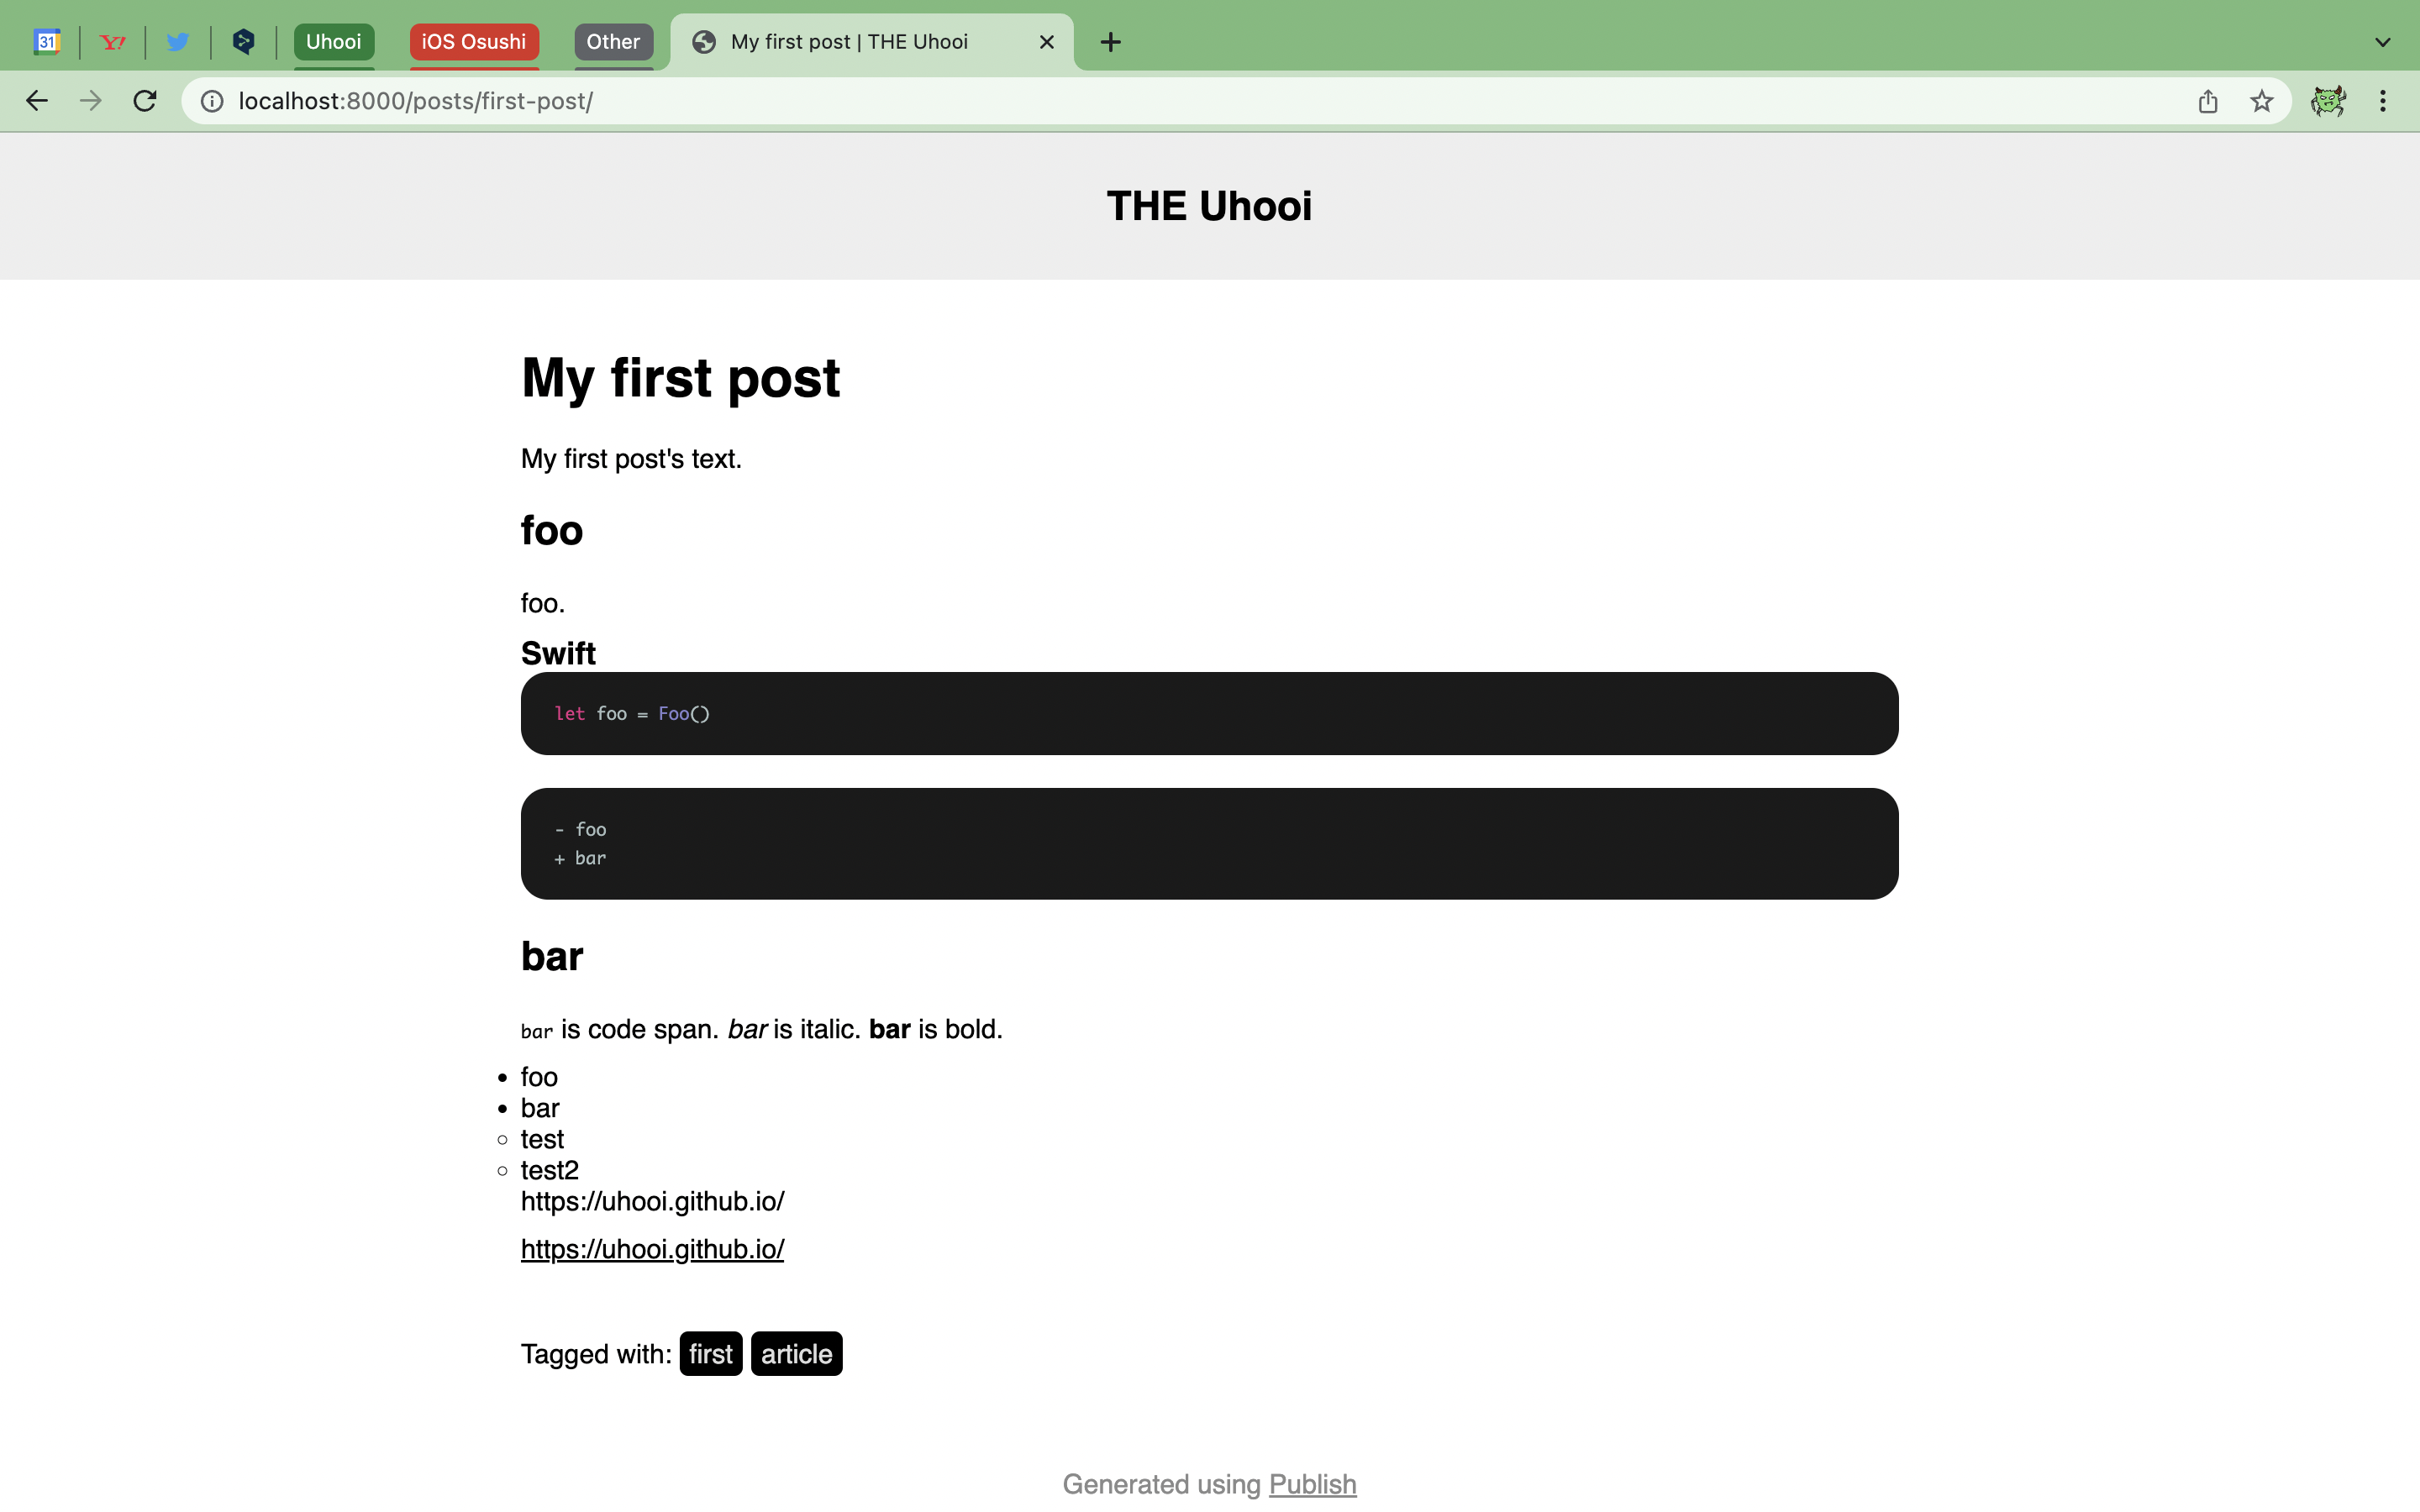
publish-cli run を実行してWebサイトを確認します。
| Before | After |
|---|---|
 |
 |
Swiftのコードがシンタックスハイライトされました。
CSSを適用したのでDiffのコードもスタイルが変わっていますが、シンタックスハイライトはされません。
おわりに
これでPublishのプラグインをインストールできました!
トピックに publish-plugin が付いているとPublishのプラグインが見つけやすいとのことです。
以下のリンクからプラグインを探せるので、必要に応じてインストールしましょう ![]()
https://github.com/topics/publish-plugin?l=swift