「PublishでWebサイトを構築する」は6部構成です。
記事を順番に読み進めると、PublishでWebサイトが構築できるようになります。
第1部: セットアップ&使い方
第2部: カスタムテーマの作成
第3部: プラグインのインストール
第4部: プラグインの作成(未投稿)
第5部: ツイートボタンの表示
第6部: はてなブックマークボタンの表示 ←イマココ
はじめに
Publishで記事にはてなブックマークボタンを表示する方法を紹介します。
環境
- OS:macOS Monterey 12.2.1
- Xcode:13.3 (13E113)
- Swift:5.6
- Publish:0.8.0
はてなブックマークボタンのHTMLの把握
まずはてなブックマークボタンのHTMLを把握し、生成後のイメージを掴みます。
詳細は以下の記事をご参照ください。
実装
HTML構築処理の更新
テーマのHTML構築処理を更新し、はてなブックマークボタンを配置します。
private struct IosOsushiHTMLFactory<Site: Website>: HTMLFactory {
    func makeItemHTML(for item: Item<Site>, context: PublishingContext<Site>) throws -> HTML {
        HTML(
            .lang(context.site.language),
            .head(for: item, on: context.site),
            .body(
                .script(.async(), .src("https://platform.twitter.com/widgets.js")),
+               .script(.async(), .src("https://b.st-hatena.com/js/bookmark_button.js")),
                .class("item-page"),
                .components {
                    SiteHeader(context: context, selectedSelectionID: item.sectionID)
                    Wrapper {
                        Article {
                            Div {
                                TweetButton(item: item, site: context.site)
+                               HatebButton()
                            }
                            .class("share-buttons")
                            Div(item.content.body).class("content")
                            Span("Tagged with: ")
                            ItemTagList(item: item, site: context.site)
                        }
                    }
                    SiteFooter()
                }
            )
        )
    }

+   private struct HatebButton: Component {
+       var body: Component {
+           Link(url: "https://b.hatena.ne.jp/entry/") {
+               Image(
+                   url: "https://b.st-hatena.com/images/v4/public/entry-button/button-only@2x.png",
+                   description: "このエントリーをはてなブックマークに追加"
+               )
+               .attribute(named: "width", value: "20")
+               .attribute(named: "height", value: "20")
+               .style("border: none;")
+           }
+           .class("hatena-bookmark-button")
+           .data(named: "hatena-bookmark-layout", value: "basic-label-counter")
+           .data(named: "hatena-bookmark-lang", value: "ja")
+           .attribute(named: "title", value: "このエントリーをはてなブックマークに追加")
+       }
+   }
}
ボタン間にマージンを付けます。
今回は flex と column-gap で実現しました。
小さい画面のために、長い場合は折り返しを発生させ( flex-wrap: wrap; )、行間にもマージンを付けています( row-gap: 5px; )。
.share-buttons {
+   display: flex;
+   flex-wrap: wrap;
+   row-gap: 5px;
+   column-gap: 5px;
    margin-bottom: 10px;
}
.style() や .data(named:value:) など、用意されている属性はそれを使って指定し、用意されていない属性は .attribute(named:value:) で指定するようにしています。
<script> では問題なく動いたので type や charset を指定していません。
もし明示的に指定したほうがいい場合はご指摘いただけると嬉しいです。
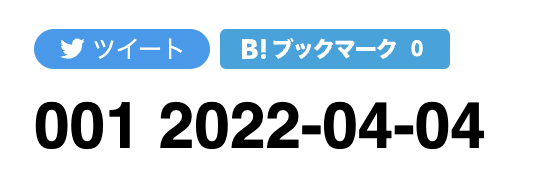
publish-cli run を実行し、記事の上部にはてなブックマークボタンが表示されたらOKです。
おわりに
これで記事にはてなブックマークボタンを表示できました!
