親記事
Laravel 5.7で基本的なCRUDを作る - Qiita
メールを送信できるようにする
まずは、Laravelでメールを送信できるようにします。
メール送信の設定
Yahoo!メールまたはGmailのSMTPを利用して、ローカル環境と本番環境の両方でメールを送信します。
Yahoo!メールの場合
MAIL_DRIVER=smtp
MAIL_HOST=smtp.mail.yahoo.co.jp
MAIL_PORT=587
MAIL_USERNAME=<Yahooのユーザー名>
MAIL_PASSWORD=<Yahooのパスワード>
MAIL_ENCRYPTION=
MAIL_FROM_ADDRESS=<Yahooのユーザー名>@yahoo.co.jp
MAIL_FROM_NAME=demo-laravel-crud
※平文で送らないとエラーになるので、MAIL_ENCRYPTIONは空欄にします。
Gmailの場合
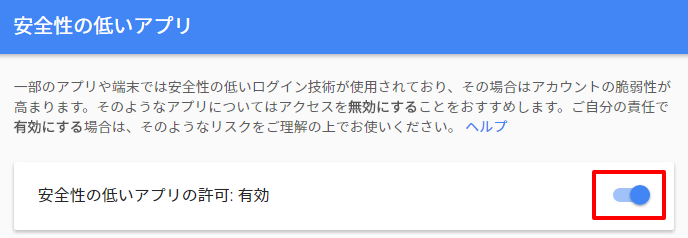
「安全性の低いアプリの許可」を有効にしなければなりません。
メール送信に使いたいGoogleアカウントでログインした上で、下記のページを開いてください。
![]() https://myaccount.google.com/lesssecureapps
https://myaccount.google.com/lesssecureapps

MAIL_DRIVER=smtp
MAIL_HOST=smtp.gmail.com
MAIL_PORT=587
MAIL_USERNAME=<Gmailアドレス>
MAIL_PASSWORD=<Googleのパスワード>
MAIL_ENCRYPTION=tls
MAIL_FROM_ADDRESS=<Gmailアドレス>
MAIL_FROM_NAME=demo-laravel-crud
送信の確認
実際にパスワードリセットのリンクをクリックしてもいいのですが、tinkerなら手軽に確認できます。
YahooとGmail両方を試す場合、.envを変更したらtinkerを一旦exitで終了してください。
# tinkerを起動
> php artisan tinker

# メールを送信。「null」と表示されれば成功。数分後には実際にメールが届く。
>>> Mail::raw('test mail', function($message) {$message->to('<送信先アドレス>')->subject('Test');});
=> null
![]() Laravel5.1でgmail経由でメール送信 - Qiita
Laravel5.1でgmail経由でメール送信 - Qiita
どうしても送信に失敗する場合は、問題を切り分けるためにLaravelが利用しているswiftmailer単体でテストすることをおすすめします。
私の場合は、Yahoo!では対応していないTLSで暗号化しようとして失敗し続けていました。
![]() swiftmailerでメールを送る (Gmail, Yahoo!メール経由)
swiftmailerでメールを送る (Gmail, Yahoo!メール経由)
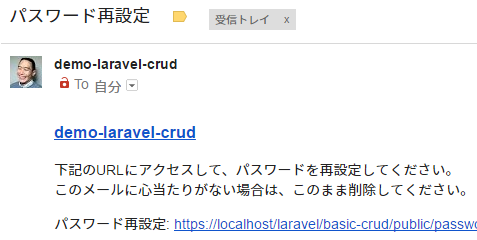
独自のテンプレートで日本語のメール文を作る
下記を参考に進めていきます。
![]() Laravel5.4でパスワード再設定メールテンプレートをカスタマイズ 一言多いプログラマーの独り言
Laravel5.4でパスワード再設定メールテンプレートをカスタマイズ 一言多いプログラマーの独り言
独自の通知クラスを作る
![]() readouble.com: 通知の作成
readouble.com: 通知の作成
下記を実行してapp/Notifications/CustomPasswordReset.phpを生成してください。
> php artisan make:notification CustomPasswordReset
Userモデルのメソッドを上書きする
![]() readouble.com: リセットメールのカスタマイズ
readouble.com: リセットメールのカスタマイズ
下記のようにsendPasswordResetNotification()メソッドを追記することで、Userモデルの親の
Illuminate\Foundation\Auth\Userクラスが利用している
Illuminate\Auth\Passwords\CanResetPasswordトレイトで定義されている同名のメソッドを上書きします。
// 忘れずにインポートすること
use App\Notifications\CustomPasswordReset;

class User extends Authenticatable
{
    (中略)

    /**
     * パスワードリセット通知の送信
     *
     * @param  string  $token
     * @return void
     */
    public function sendPasswordResetNotification($token)
    {
        $this->notify(new CustomPasswordReset($token));
    }
通知クラスを編集する
下記のように修正します。
+use Illuminate\Auth\Notifications\ResetPassword;

 class CustomPasswordReset extends Notification
 {
+    /** @var string */
+    public $token;
+
     /**
      * Create a new notification instance.
      *
+     * @param  string  $token
      * @return void
      */
-    public function __construct()
+    public function __construct($token)
     {
+        $this->token = $token;
     }

     public function toMail($notifiable)
     {
         return (new MailMessage)
-                    ->line('The introduction to the notification.')
-                    ->action('Notification Action', url('/'))
-                    ->line('Thank you for using our application!');
+                    ->subject(__('Reset Password'))
+                    ->view('emails.reset')
+                    ->action(__('Reset Password'), url('password/reset', $this->token));
     }
メール本文を作る
下記のデフォルトのテンプレートを参考にして、新しくビューファイルを作ります。
![]() laravel/framework/src/Illuminate/Notifications/resources/views/email.blade.php
laravel/framework/src/Illuminate/Notifications/resources/views/email.blade.php
<h3>
    <a href="{{ config('app.url') }}">{{ config('app.name') }}</a>
</h3>
<p>
    {{ __('Click link below and reset password.') }}<br>
    {{ __('If you did not request a password reset, no further action is required.') }}
</p>
<p>
    {{ $actionText }}: <a href="{{ $actionUrl }}">{{ $actionUrl }}</a>
</p>
