0. はじめに
この記事のベースとなっているRuntime23.1は新規では作成できなくなっています。Runtime24.1の記事は以下です。
IBMの基盤モデルSlateのカスタムモデルをデプロイする Runtime24.1 - Qiita
以下、一応Runtime23.1の記事も履歴として残しておきます。
watsonx.aiの学習済みモデルのSlateでカスタムモデルをWatson Studioで作成し、外部アプリからの実行を可能にするためにWatson Machine Learning(WML)にファンクションでラップしてデプロイします。
サンプルソースとデータ
- テスト環境
- python 3.10.9
- NLP+DO Runtime 23.1
- CP4DaaS
- jp-tok
1. 事前準備
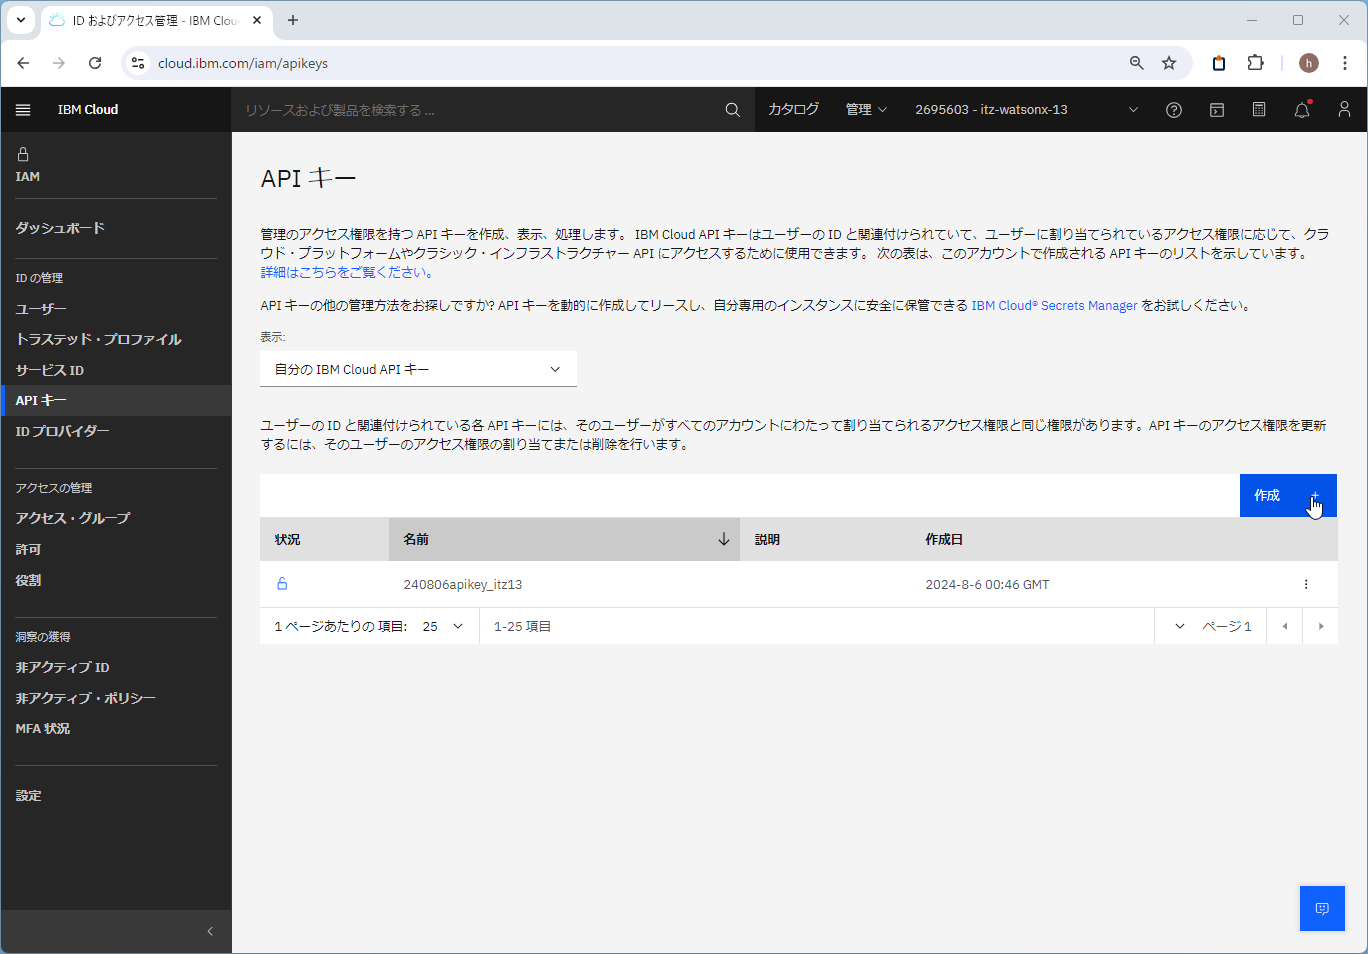
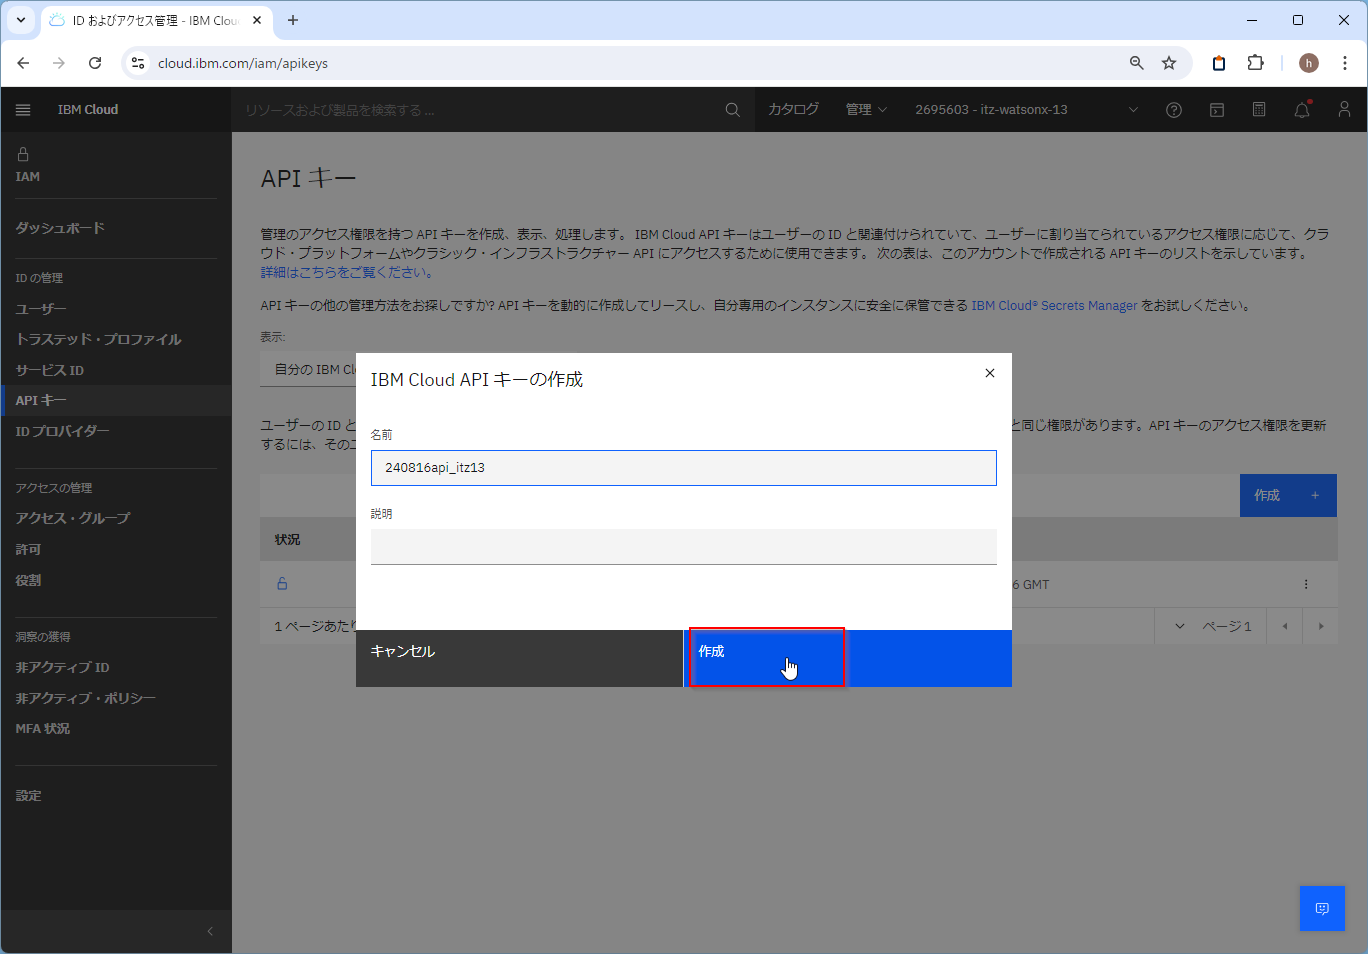
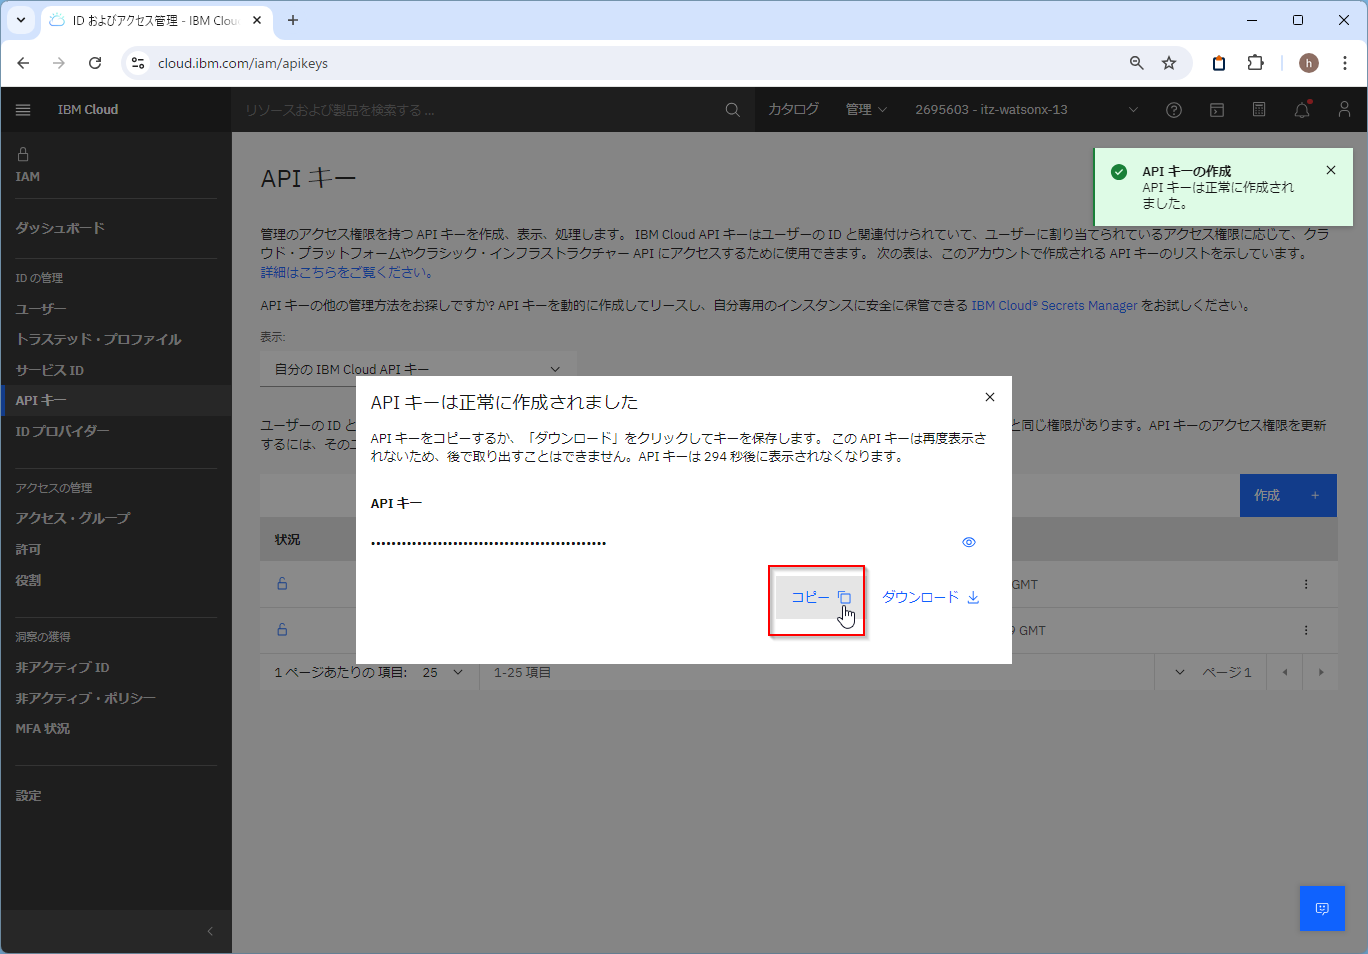
1-1. APIキーの作成
Python関数の操作をibm_watsonx_aiのAPIで行うのでAPIキーが必要です。
IAMのAPIキーのメニューから「作成」でAPIキーを作ります。
https://cloud.ibm.com/iam/apikeys

1-2. デプロイメント・スペースの作成
デプロイメント・スペースの管理のページから「新規デプロイメント・スペース」を作ります。
https://jp-tok.dataplatform.cloud.ibm.com/ml-runtime/spaces?context=cpdaas

任意の名前を付け、紐づけるWatson Machine Learningのサービスを選択し、作成します。

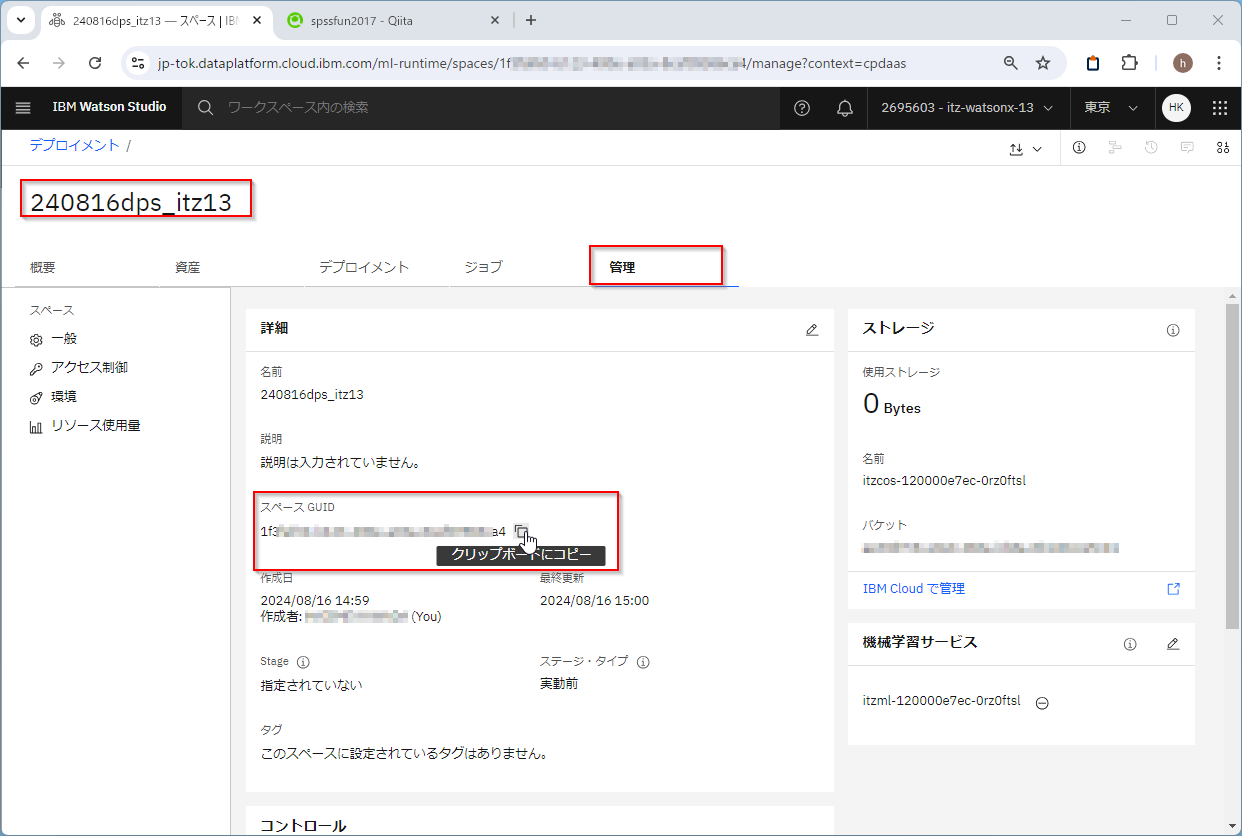
作成したデプロイメント・スペースの「管理」タブを開き、スペースGUIDをコピーしておきます。
2. Slateのカスタムモデルの作成
学習データsentiment.csvをアップロードしておきます。
Watson NLPを利用できる環境が必要なので、Watson Studioで、ランタイムに「NLP+DO Runtime23.1 on Python 3.10」を選んでNotebookを作成してください(2024/10/21時点ではRuntime 24.1が最新でしたがうまく動かなかったので23.1を選びました)。
「コード・スニペット」を選び、「データの読み取り」をクリックします。

「プロジェクトからデータを選択します」をクリックします。

「pandas DataFrame」を選び「セルにコードを挿入」します。
df_1のpandas DataFrameに読み込むコードが自動生成されます。
テキストに対して「ポジティブ」か「ネガティブ」かのlabelのついたデータです。

この@Jungobuさんの記事を参考にカスタムモデルを作ります
CSVをJSONに変換します。labelsは事前に配列に変換しておきます。
def prepare_data(df):
    # textカラムと分類カテゴリの*labels*が必要
    df_out = df[['text', 'labels']].reset_index(drop=True)
    # labels列は配列でなければなりません (1つしかない場合でも同様)
    df_out['labels'] = df_out['labels'].map(lambda label: [label,])
    return df_out

train_df = prepare_data(df_1)
train_json_file = './train_data.json'
train_df.to_json(train_json_file, orient='records')
以下のコードでSlateのカスタム学習モデルを作成します。pretrained-model_slate.153m.distilled_many_transformer_multilingual_uncasedをベースの学習済みモデルとして選んでいます。他にも事前学習済みのモデルがあるので、用途に応じて選ぶことができます。
ここはnum_train_epochs=25の設定にもよりますが、それなりに時間がかかります。私がテストしたときには約15分かかりました。
import watson_nlp

from watson_nlp.blocks.classification.transformer import Transformer
from watson_core.data_model.streams.resolver import DataStreamResolver


# 学習データからデータストリームを作成
data_stream_resolver = DataStreamResolver(target_stream_type=list, expected_keys={'text': str, 'labels': list})
train_stream = data_stream_resolver.as_data_stream(train_json_file)

# 学習済みのSlateモデルをロード
pretrained_model_resource = watson_nlp.load('pretrained-model_slate.153m.distilled_many_transformer_multilingual_uncased')

# Slateのカスタムモデルを作成。学習回数はnum_train_cpochsで指定
classification_model = Transformer.train(train_stream, pretrained_model_resource, num_train_epochs=25)
カスタムモデルで分類をテストしてみます。
text = 'ディスプレイは色鮮やかで、映画やゲームを楽しむのに最適です。'
slate_preds = classification_model.run(text)
slate_preds
うまくポジティブに分類されています。
{
  "classes": [
    {
      "class_name": "ポジティブ",
      "confidence": 0.9874120950698853
    },
    {
      "class_name": "ネガティブ",
      "confidence": 0.012587935663759708
    }
  ],
  "producer_id": {
    "name": "Transformer-based Text Classifier",
    "version": "0.0.1"
  }
}
3. 関数のデプロイ
3-1. 環境設定
先につくったAPIキーとWMLのエンドポイントを使って、APIクライアントを作ります。
エンドポイントの情報は以下にあります。今回はtokyoのWatson Machine Learningサービスのデプロイメントスペースを使ったのでtokyoのエンドポイントを選びました。
api_key = 'PASTE YOUR API_KEY HERE'
#url = 'PASTE YOUR ENDPOINT HERE'
# tokyo Public endpoint
url = 'https://jp-tok.ml.cloud.ibm.com'
space_id = 'PASTE YOUR SPACE ID HERE'

from ibm_watsonx_ai import APIClient
from ibm_watsonx_ai import Credentials

#APIキーを使用してクライアントを作成する
credentials = Credentials(
    api_key = api_key,
    url= url
)

client = APIClient(credentials)
次にPython関数をデプロイするデプロイメント・スペースを指定します。
先ほど作ったデプロイメント・スペースのGUIDを入力します。
デプロイメントスペースのAPIクライアントを作ります。
client_space = APIClient(credentials, space_id = space_id)
3-2. モデルのシリアライズと保存
classification_modelをpickleでシリアライズします。
import pickle
modelpickle='classification_model.pickle'

with open(modelpickle', 'wb') as f:
    pickle.dump(classification_model, f)
client_space.data_assets.createでデプロイメント・スペースに保存します。
input_assest_detail=client_space.data_assets.create(name=modelpickle,file_path=modelpickle)
以下でアセットIDを取得します。
print(input_assest_detail['metadata']['asset_id'])
c7acd4e6-a65c-401e-9240-d14675ddfc49
3-3. 関数の作成
この記事を参考にして、関数でラッピングして、デプロイします。
-
APIClientでWMLのデプロイメントスペースに接続しています。 -
modelpickle_assest_idはハードコードするか、client_space.data_assets.list().query('NAME== @modelpickle')['ASSET_ID'][0]で名前をつかって取得します。 -
client_space.data_assets.downloadでデプロイメントスペースからカスタムモデルをpickleでダウンロードします。 -
classified_model = pickle.load(f)でモデルをロードします。 -
def score(payload)で関数を定義して、classified_model.runでカスタムモデルで分類結果を取得しています。
def classifyContext():
    import watson_nlp
    import os
    import pickle

    api_key = 'PASTE YOUR PLATFORM API KEY HERE'
    url = 'PASTE YOUR ENDPOINT HERE'
    #url = 'https://jp-tok.ml.cloud.ibm.com'
    space_id = 'PASTE YOUR SPACE ID HERE'

    modelpickle='classification_model.pickle'
    #modelpickle_assest_id='c7acd4e6-a65c-401e-9240-d14675ddfc49'


    # watsonxクライアントの接続
    from ibm_watsonx_ai import APIClient
    from ibm_watsonx_ai import Credentials
    credentials = Credentials(
        api_key = api_key,
        url= url
    )

    client_space = APIClient(credentials, space_id = space_id)
    # modelのpickleのIDを名前から取得
    modelpickle_assest_id=client_space.data_assets.list().query('NAME== @modelpickle')['ASSET_ID'][0]
    # デプロイメントスペースからダウンロード
    client_space.data_assets.download(modelpickle_assest_id,modelpickle)

    #ダウンロード確認
    if(os.path.isfile(modelpickle) == True):
         print('Download OK')
    else:
         print('Download Failed')


    # pickleからモデルを復元
    with open(modelpickle, 'rb') as f:
        classified_model = pickle.load(f)

    # スコアリングファンクション
    def score(payload):
        #カスタムモデルでの分類
        c_prediction = classified_model.run(payload['input_data'][0]["values"][0][0])
        return {'predictions': [c_prediction.to_dict()]}

    return score
WMLにデプロイする前にローカルでテストしてみます。
response = classifyContext()({
    "input_data": [{
        "values" :[["ディスプレイは色鮮やかで、映画やゲームを楽しむのに最適です。"]]
    }]
})
import pprint
pprint.pprint(response["predictions"])
ポジティブに分類できています。
[{'classes': [{'class_name': 'ポジティブ', 'confidence': 0.9943501353263855},
              {'class_name': 'ネガティブ', 'confidence': 0.00564983207732439}],
  'producer_id': {'name': 'Transformer-based Text Classifier',
                  'version': '0.0.1'}}]
3-4. Python 関数のアップロード
作成したPython 関数classifyContextをDeployment Spaceにアップロードします。
まず、Python関数classifyContextを実行するソフトウェア仕様を選びます。
マニュアルに一覧があります。
ここでは、「NLP+DO Runtime23.1 on Python 3.10」のWatson Studioのランタイムをつかってモデルを作成したので、runtime-23.1-py3.10を使います。watson_nlpも含まれていました。ソフトウェア仕様のIDを取得します。
sw_spec_uid = client.software_specifications.get_uid_by_name("runtime-23.1-py3.10")
関数my_deployable_functionをclient_space.repository.store_functionでデプロイメント・スペースに保存します。
meta_props = {
    client.repository.FunctionMetaNames.NAME: "Slate Test Simple",
    client.repository.FunctionMetaNames.SOFTWARE_SPEC_UID: sw_spec_uid
}

function_details = client_space.repository.store_function(meta_props=meta_props, function=classifyContext)
function_id = client_space.repository.get_function_id(function_details)
Webのデプロイメント・スペースの管理コンソールでみると「資産」タブに関数が登録されていることがわかります。
3-5. オンライン デプロイメントを作成する
client_space.deployments.createでオンラインデプロイメントを作成し、登録したPython関数をWebサービスとしてスコアリング実行可能にします。ここではHARDWARE_SPECにSを選んでいます。「2 個の vCPU と 8 GB RAM」になります。スペックはここにのっています。
metadata = {
    client_space.deployments.ConfigurationMetaNames.NAME: "Deployment of function Slate Test Simple",
    client_space.deployments.ConfigurationMetaNames.HARDWARE_SPEC: { 'name': 'S'},
    client_space.deployments.ConfigurationMetaNames.ONLINE: {}
}

function_deployment_details  = client_space.deployments.create(function_id, meta_props=metadata)
以下のように作成されました。これでWebサービスでのスコアリング実行が可能になりました。
######################################################################################

Synchronous deployment creation for id: '8f82a5fd-d4a4-4dd7-9372-4d0fd0187dba' started

######################################################################################


initializing
Note: online_url and serving_urls are deprecated and will be removed in a future release. Use inference instead.
.....
ready


-----------------------------------------------------------------------------------------------
Successfully finished deployment creation, deployment_id='13c1791e-9460-4576-bffd-5893c89127c6'
-----------------------------------------------------------------------------------------------
Webのデプロイメント・スペースの管理コンソールでみると「デプロイメント」タブに関数が登録されていることがわかります。

デプロイメントIDを取得します。
deployment_id=function_deployment_details['metadata']['id']
print(deployment_id)
13c1791e-9460-4576-bffd-5893c89127c6
Webのデプロイメント・スペースの管理コンソールではデプロイメントIDやソフトウェア仕様やハードウェア仕様も確認できます。

3-6. スコアリング実行
client_space.deployments.score メソッドを使用して、スコアリング レコードを Web サービス デプロイメントに送信できます。
scoring_payload = {
    "input_data": [{
        "values" :[["ディスプレイは色鮮やかで、映画やゲームを楽しむのに最適です。"]]
    }]
}

response = client_space.deployments.score(deployment_id, scoring_payload)
import pprint
pprint.pprint(response["predictions"])
以下のように結果を得ることができました。
[{'classes': [{'class_name': 'ポジティブ', 'confidence': 0.9943501353263855},
              {'class_name': 'ネガティブ', 'confidence': 0.00564983207732439}],
  'producer_id': {'name': 'Transformer-based Text Classifier',
                  'version': '0.0.1'}}]
4 アプリからのスコアリング
pythonのアプリからも同様にスコアリング可能です。
ibm_watsonx_aiをpipで導入してください。
py -m pip install ibm_watsonx_ai
スコアリングのみを行うpythonコードは以下です。api_key, url, space_id, deployment_idを指定してください。
# 環境設定
import pprint
from ibm_watsonx_ai import Credentials
from ibm_watsonx_ai import APIClient
api_key = 'PASTE YOUR PLATFORM API KEY HERE'
url = 'PASTE YOUR ENDPOINT HERE'
#url = 'https://jp-tok.ml.cloud.ibm.com'

space_id = 'PASTE YOUR SPACE ID HERE'
deployment_id = 'PASTE YOUR DEPLOYMENT ID HERE'


# WMLへの接続
credentials = Credentials(
    api_key=api_key,
    url=url
)

client_space = APIClient(credentials, space_id=space_id)

# 分類したい文章
scoring_payload = {
    "input_data": [{
        "values": [["ディスプレイは色鮮やかで、映画やゲームを楽しむのに最適です。"]]
    }]
}

# 分類実行
response = client_space.deployments.score(deployment_id, scoring_payload)
pprint.pprint(response["predictions"])
PS python.exe c:/02ScoreSlateCustomModel.py
[{'classes': [{'class_name': 'ポジティブ', 'confidence': 0.9907686114311218},
              {'class_name': 'ネガティブ', 'confidence': 0.00923138577491045}],
  'producer_id': {'name': 'Transformer-based Text Classifier',
                  'version': '0.0.1'}}]
参考
IBMの基盤モデルSlateでカスタム分類モデルを試してみた #Watson-Studio - Qiita
Watson Machine LearningにPython関数をデプロイする #watsonx.ai - Qiita
独自のモデルの作成 — Docs | IBM watsonx
関数のデプロイ - Docs | IBM Cloud Pak for Data as a Service
Watson Machine Learning での Python 関数のデプロイ - Docs | IBM Cloud Pak for Data as a Service


