This article is written in English. Japanese Version is here.
Introduction
Structural Analysis Tutorial in the Era of AlphaFold2: Steps 0-1 Flow of X-ray Crystallographic Analysis and Construction of the Analytical Environment
Introduction
The introduction of AlphaFold2 has brought global attention to protein structure like never before. Not only those like the author who have earned degrees in protein X-ray crystallographic analysis, but also researchers from other fields are attempting to pioneer new sciences using protein structures. The understanding of life phenomena, diseases, the development of innovative medicines, pesticides, food, and the development of proteins as materials, among other areas where proteins play a role, the importance of their structure has been ever-increasing, and the high-precision predicted structures output by AlphaFold2 are likely to further accelerate the progress of science.
However, no matter how high-precision the structures output by AlphaFold2 are, they are only 'predicted structures'. After forming a hypothesis with a 'predicted structure', in many cases, a 'structure determination by experiment' awaits for verification. Ironically, with the emergence of AlphaFold2, many non-specialists will likely need to determine the structure experimentally in the future.
This article anticipates such a future and presents a basic tutorial on structural analysis using the most representative method of protein structure determination, 'X-ray crystallographic analysis'. We would be delighted if you could get your hands on mastering the basics of X-ray crystallographic analysis.
Target Audience and Objectives of this Article
The target audience for this article includes researchers, graduate students, and undergraduate students who are not experts in protein X-ray crystallography, with the aim to enable them to determine structure from diffraction images in protein X-ray crystallographic analysis. It is assumed that the reader has some familiarity with executing Bash commands in a Linux environment.
In this article, we deliver a tutorial on protein structure analysis in a series of four installments. This is the first installment.
Also, this article is completely open. Whether at schools, research institutions, or companies, we would be delighted if you could spread this article and use it for educational purposes. However, we have not abandoned copyright.
Table of Contents
- Step.0 The flow of structure determination (this article)
- Step.1 Installing analytical software (this article)
- Step.2 Checking diffraction images and calculating structure factors
- Step.3 Finding initial phases
- Step.4 Structure refinement and validation
Computing Environment Needed for Protein X-ray Crystallographic Analysis
From my experience, the following computing environment is suitable for protein X-ray crystallographic analysis. It requires computer power, so it's important not to attempt it on a Raspberry Pi or similar device.
- OS
- Linux, such as Ubuntu, CentOS (strongly recommended)
- MacOSX
- Windows 10/11 (use either the native environment or a Linux environment on WSL2)
- CPU: > 4 cores (recommended: > 16 cores)
- Main Memory: > 16 GB (recommended: > 32 GB)
- Storage: > 50 GB (about 12 GB for software installation, data sets 20 - 30 GB/crystal)
- GPU: Not essential (recommended: equipped with a GPU)
Github Repository
We have uploaded representative files related to this tutorial to Github. We hope it will serve as a useful reference.
Step 0: Workflow for Structural Determination
In protein X-ray crystallography, have you ever wondered about the process of determining structure? Since Max Perutz established the method of protein X-ray crystal structure analysis in 1959, he basic approach has not changed at all1. If we were to concisely express the protein X-ray crystallography method, it would be "a method to determine the structure of a protein by deriving an electron density map $\rho (xyz)$ from the experimental data of X-ray analysis (i.e., the structure factor, $F(hkl)$), and fitting the amino acids to this map". Below is the fundamental equation that associates the structure factor $F(hkl)$ and the electron density $\rho (xyz)$, the basis of protein X-ray crystallography.
\rho (xyz) = \Sigma_h \Sigma_k \Sigma_l \frac{1}{V} | F(hkl) | \exp [ -2 \pi i (hx + ky + lz) + i \alpha (hkl) ]
In the equation, $F(hkl)$ is the structure factor derived from diffraction images. V is the volume of the crystal unit cell, which is also derived from experimental data. $hkl$ represents the Miller indices, while $xyz$ denotes the coordinates in real space2. However, the challenge lies in the phase $\alpha (hkl)$. To derive the electron density map $\rho (xyz)$ required for building the protein model, we need the phase $\alpha (hkl)$, but even the latest 2D detectors used in diffraction experiments cannot directly capture information on the phase $\alpha (hkl)$. Thus, ßit's necessary to derive the phase $\alpha (hkl)$ from calculations or other experiments, a situation known as the phase problem.
The phase problem is one of the most challenging issues in protein X-ray crystallography. Several methods have been devised to overcome this hurdle, with the most common and straightforward being the Molecular Replacement (MR) method, which uses similar protein structures. In the MR method, protein structures registered in the PDB are often used as input. With the growing number of protein structures available in the PDB, the range of applicable cases is expanding. Furthermore, with the advent of AlphaFold2 last year, it is now possible to generate fairly accurate initial phases (rough phase information for constructing a protein model structure) with a high probability by using its predicted structures as input for the MR method3. This tutorial will also utilize the predicted structures from AlphaFold2.
Once the initial phase is obtained, the protein model structure is fitted like a puzzle in the 3D space to the electron density map $\rho (xyz)$. However, it is not merely a matter of fitting; as the model structure is built, the phase $\alpha (hkl)$ is refined (which improves the electron density map $\rho (xyz)$), and based on that, the protein structure is gradually corrected. This process, in which the fitting of amino acids and phase calculations are repeated to find the best value of the phase $\alpha (hkl)$ while refining the structure, is referred to as "structure refinement".
Finally, we check whether the derived structure is suitable as a protein structure (structural validity verification), and we conclude the structural determination.
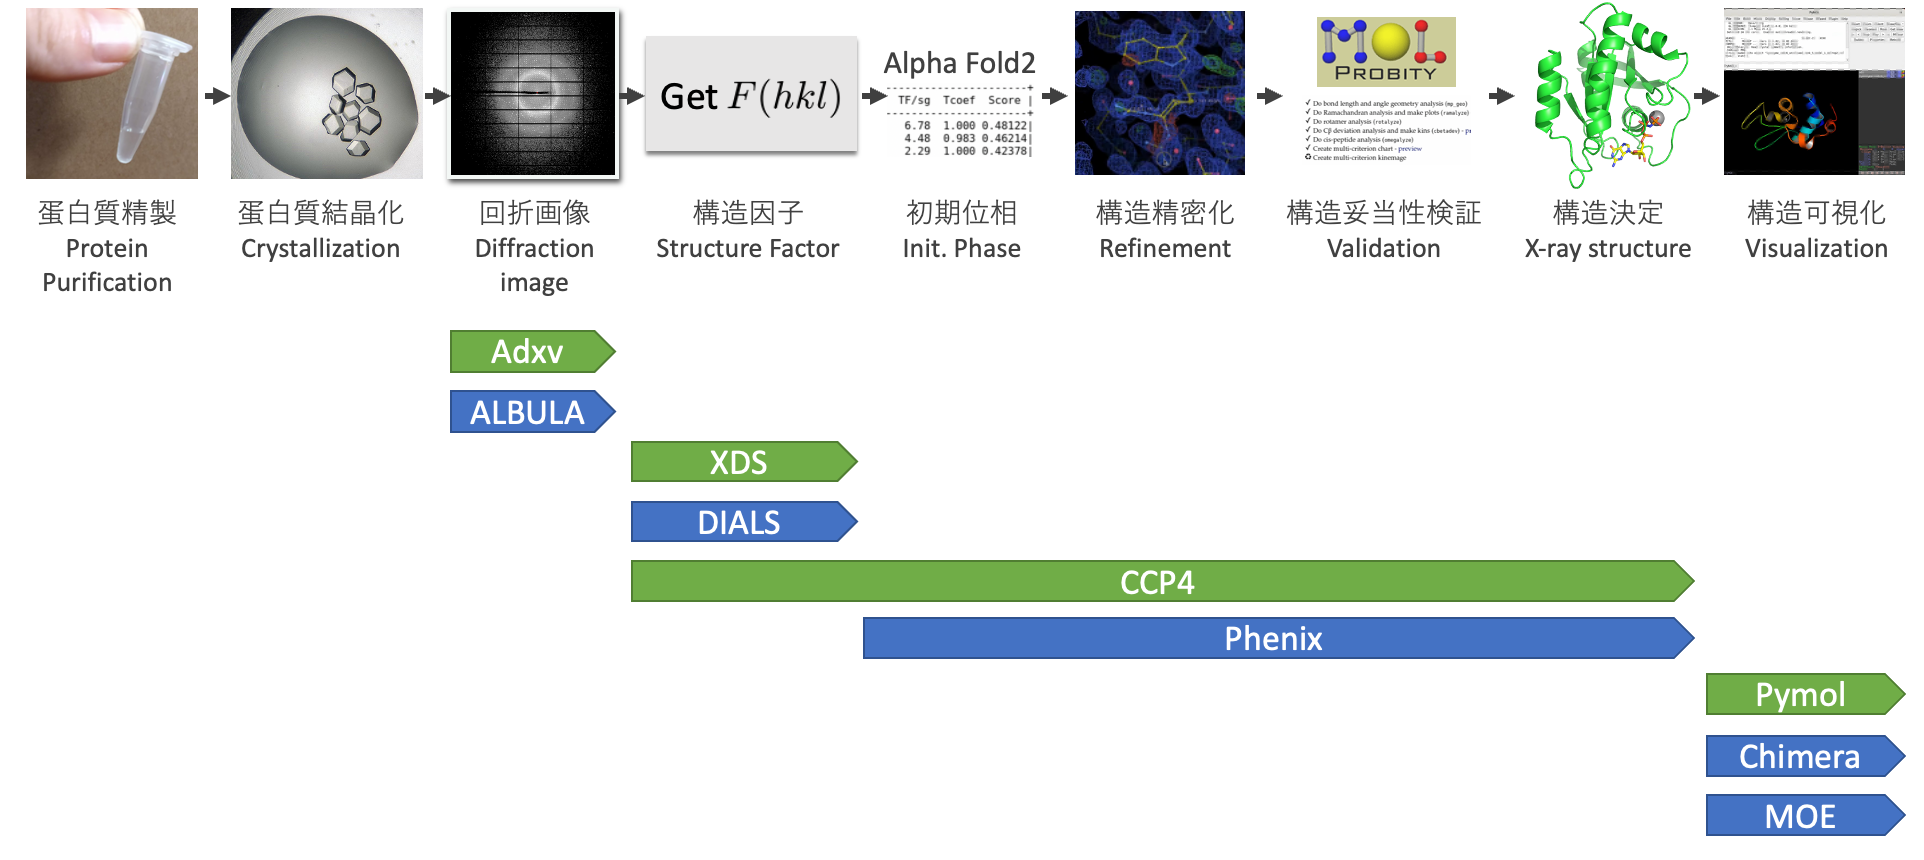
The above steps are summarized in the following figure:

In this tutorial, we will cover from the diffraction image to the structural determination shown in the above figure. The processes before this, from protein purification to diffraction images, involve areas such as biochemistry, protein crystal creation, synchrotron radiation, and so on, which require separate areas of expertise. Therefore, these will not be addressed in this tutorial4.
The data needed for structural analysis are ①a dataset of diffraction images and ②information about the protein sequence. In this tutorial, we will be determining the structure of Lysozyme, which can be said to be the "Hello World" structure in the world of structural biology5. The acquisition of each type of data is as follows:
| Data | Download URL | Note |
|---|---|---|
| Diffraction Image | Integrated Resource for Reproducibility in Macromolecular Crystallography, NIH, nsls2_fmx_20161122_lys_266 | Data collected for beamline tuning purposes at beamline 17-ID-2 of the National Synchrotron Light Source, a synchrotron facility in the United States. Approximately 13GB in size. |
| Amino Acid Sequence | UniProt, P00698 LYSC_CHICK | Click the "Download" button in the "Sequence" section, and save the sequence from the 19th residue to the end under an appropriate text file name (e.g., lysozyme.fasta). Below is the sequence of Lysozyme from the 19th residue to the end for your reference. |
KVFGRCELAAAMKRHGLDNYRGYSLGNWVCAAKFESNFNTQATNRNTDGSTDYGILQINSRWWCNDGRTPGSRNLCNIPCSALLSSDITASVNCAKKIVSDGNGMNAWVAWRNRCKGTDVQAWIRGCRL
Step.1 Building the Analysis Environment
Step.1-1 Software used for X-ray crystal structure analysis
The more historical the research field, the more classic software exists as a norm. In line with this, there is no software in protein X-ray crystal structure analysis that can cover everything. From the numerous existing software, this tutorial will use four essential software considered the gold standard. Basically, non-commercial use is free6.
The list of software used in this tutorial is shown below. If you install all the software, not just the essential software (highlighted in green), you will hardly have any trouble when doing structure analysis in practice7. The coverage of each software in each process of protein X-ray crystal structure analysis, and the details of each software, are noted.
| Required | Step | Software Name | Function | License | URL |
|---|---|---|---|---|---|
| ✓ | Diffraction Image | Adxv | Diffraction image viewer (compatible with various detector manufacturers) | Free | https://www.scripps.edu/tainer/arvai/adxv.html |
| Diffraction Image | ALBULA | Diffraction image viewer (genuine product of industry-standard detector manufacturer Dectris) | Check required | https://www.dectris.com/support/downloads/software/ | |
| ✓ | Structure Factor | XDS | Calculates structure factor $F(hkl)$ from diffraction image | Free for non-profit. For commercial use: license required. | https://xds.mr.mpg.de/ (Wiki: https://strucbio.biologie.uni-konstanz.de/xdswiki/index.php/Installation) |
| Structure Factor | DIALS | Calculates structure factor $F(hkl)$ from diffraction image | BSD-3 | https://dials.github.io/ | |
| ✓ | Structure Factor, Initial Phase, Refinement, Validation | CCP4 | A de facto standard software suite for protein structure determination. | Free for academic use, paid for commercial use | https://www.ccp4.ac.uk/ |
| Initial Phase, Refinement, Validation | Phenix | A de facto standard software suite for protein structure along with CCP4. The download requires affiliation information4. | Free for academic use, paid for commercial use | https://phenix-online.org/ | |
| ✓ | Structure Visualization | Pymol | Standard protein structure visualization program. The official version is subscription-based for non-students/teachers. The OSS version is free for commercial use, so we recommend installing the OSS version for starters. | Paid for official version, Free for OSS version | Official version: https://pymol.org/2/, OSS version: https://github.com/schrodinger/pymol-open-source |
| Structure Visualization | Chimera | Standard protein structure visualization program. Provides a different flavour compared to Pymol. | Free for non-commercial use, Paid for commercial use | https://www.cgl.ucsf.edu/chimera/ | |
| Structure Visualization | MOE | Visualization, editing, and analysis software often used by bioinformaticians working with proteins. It's overkill to use this software for visualization alone. | Paid | https://www.chemcomp.com/Products.htm |
Step.1-2 Computational Environment
Protein X-ray crystallography has traditionally developed in a Linux-based computational environment. Although there are now many software that run on Windows, sadly, there are still many instances where problems occur in the GUI environment8. Therefore, the author would like to recommend running it in a pure Linux environment (such as Ubuntu) or on a Mac. Of course, it can run to some extent in the Linux environment on Windows' WSL2, but there were issues with the GUI software Coot in the author's environment.
In this tutorial, to reduce environment setup troubles due to the author's computational environment, we will create a Linux environment on a VM (Virtual Machine) in the cloud and perform various processes on it. Of course, if you have Linux installed on your PC, you should be able to perform structural analysis without any problems by following this tutorial. In fact, because we will be handling 3D structures in the step of structure refinement, we strongly recommend installing Linux on a local PC equipped with a GPU9.
Step.1-3 Setting up a Computational Environment on Google Cloud Platform (GCP) (Skippable)
The author has a personal preference10 for using GCP for cloud services, hence, we will set up a VM on GCP in this tutorial. Of course, once you create an instance on another VM like AWS, you can set up your environment in exactly the same way. If you already have a Linux environment on your local PC or similar, please feel free to skip this step.
- Register on GCP and create a VM in the Compute Engine with the following specifications. We use a high number of cores (24) for the CPU because the computation that derives structure factors from diffraction images requires a lot of CPU power.
- N1 instance (vCPU: 24 cores, Memory: 32GB)
- Storage: 200GB balanced
- Instance type: Spot
- OS: Ubuntu20.04LTE
- (Cost: approximately $100/month)
For those who are using GCP for the first time, you can use up to $300 for free over 90 days. As this tutorial essentially finishes in a day, the cost should be less than $5 (the cost depends on the user).
2. Once your instance is up, use the following commands to install the Ubuntu Desktop environment.
# Update and upgrade apt
$ sudo apt update
$ sudo apt upgrade

# Install Desktop environment
$ sudo apt install ubuntu-desktop
...
3. Establish a way to access the GUI environment using Chrome's Remote Desktop (Reference: GCP Official Page).
4. Once you can see Ubuntu's desktop from Chrome, your instance setup is complete.
Step.1-4 Installing Adxv
Next, install the various software needed to execute this tutorial in your computing environment. If you set up a GCP Compute Engine environment in Step.1-3, install the following software groups in that environment.
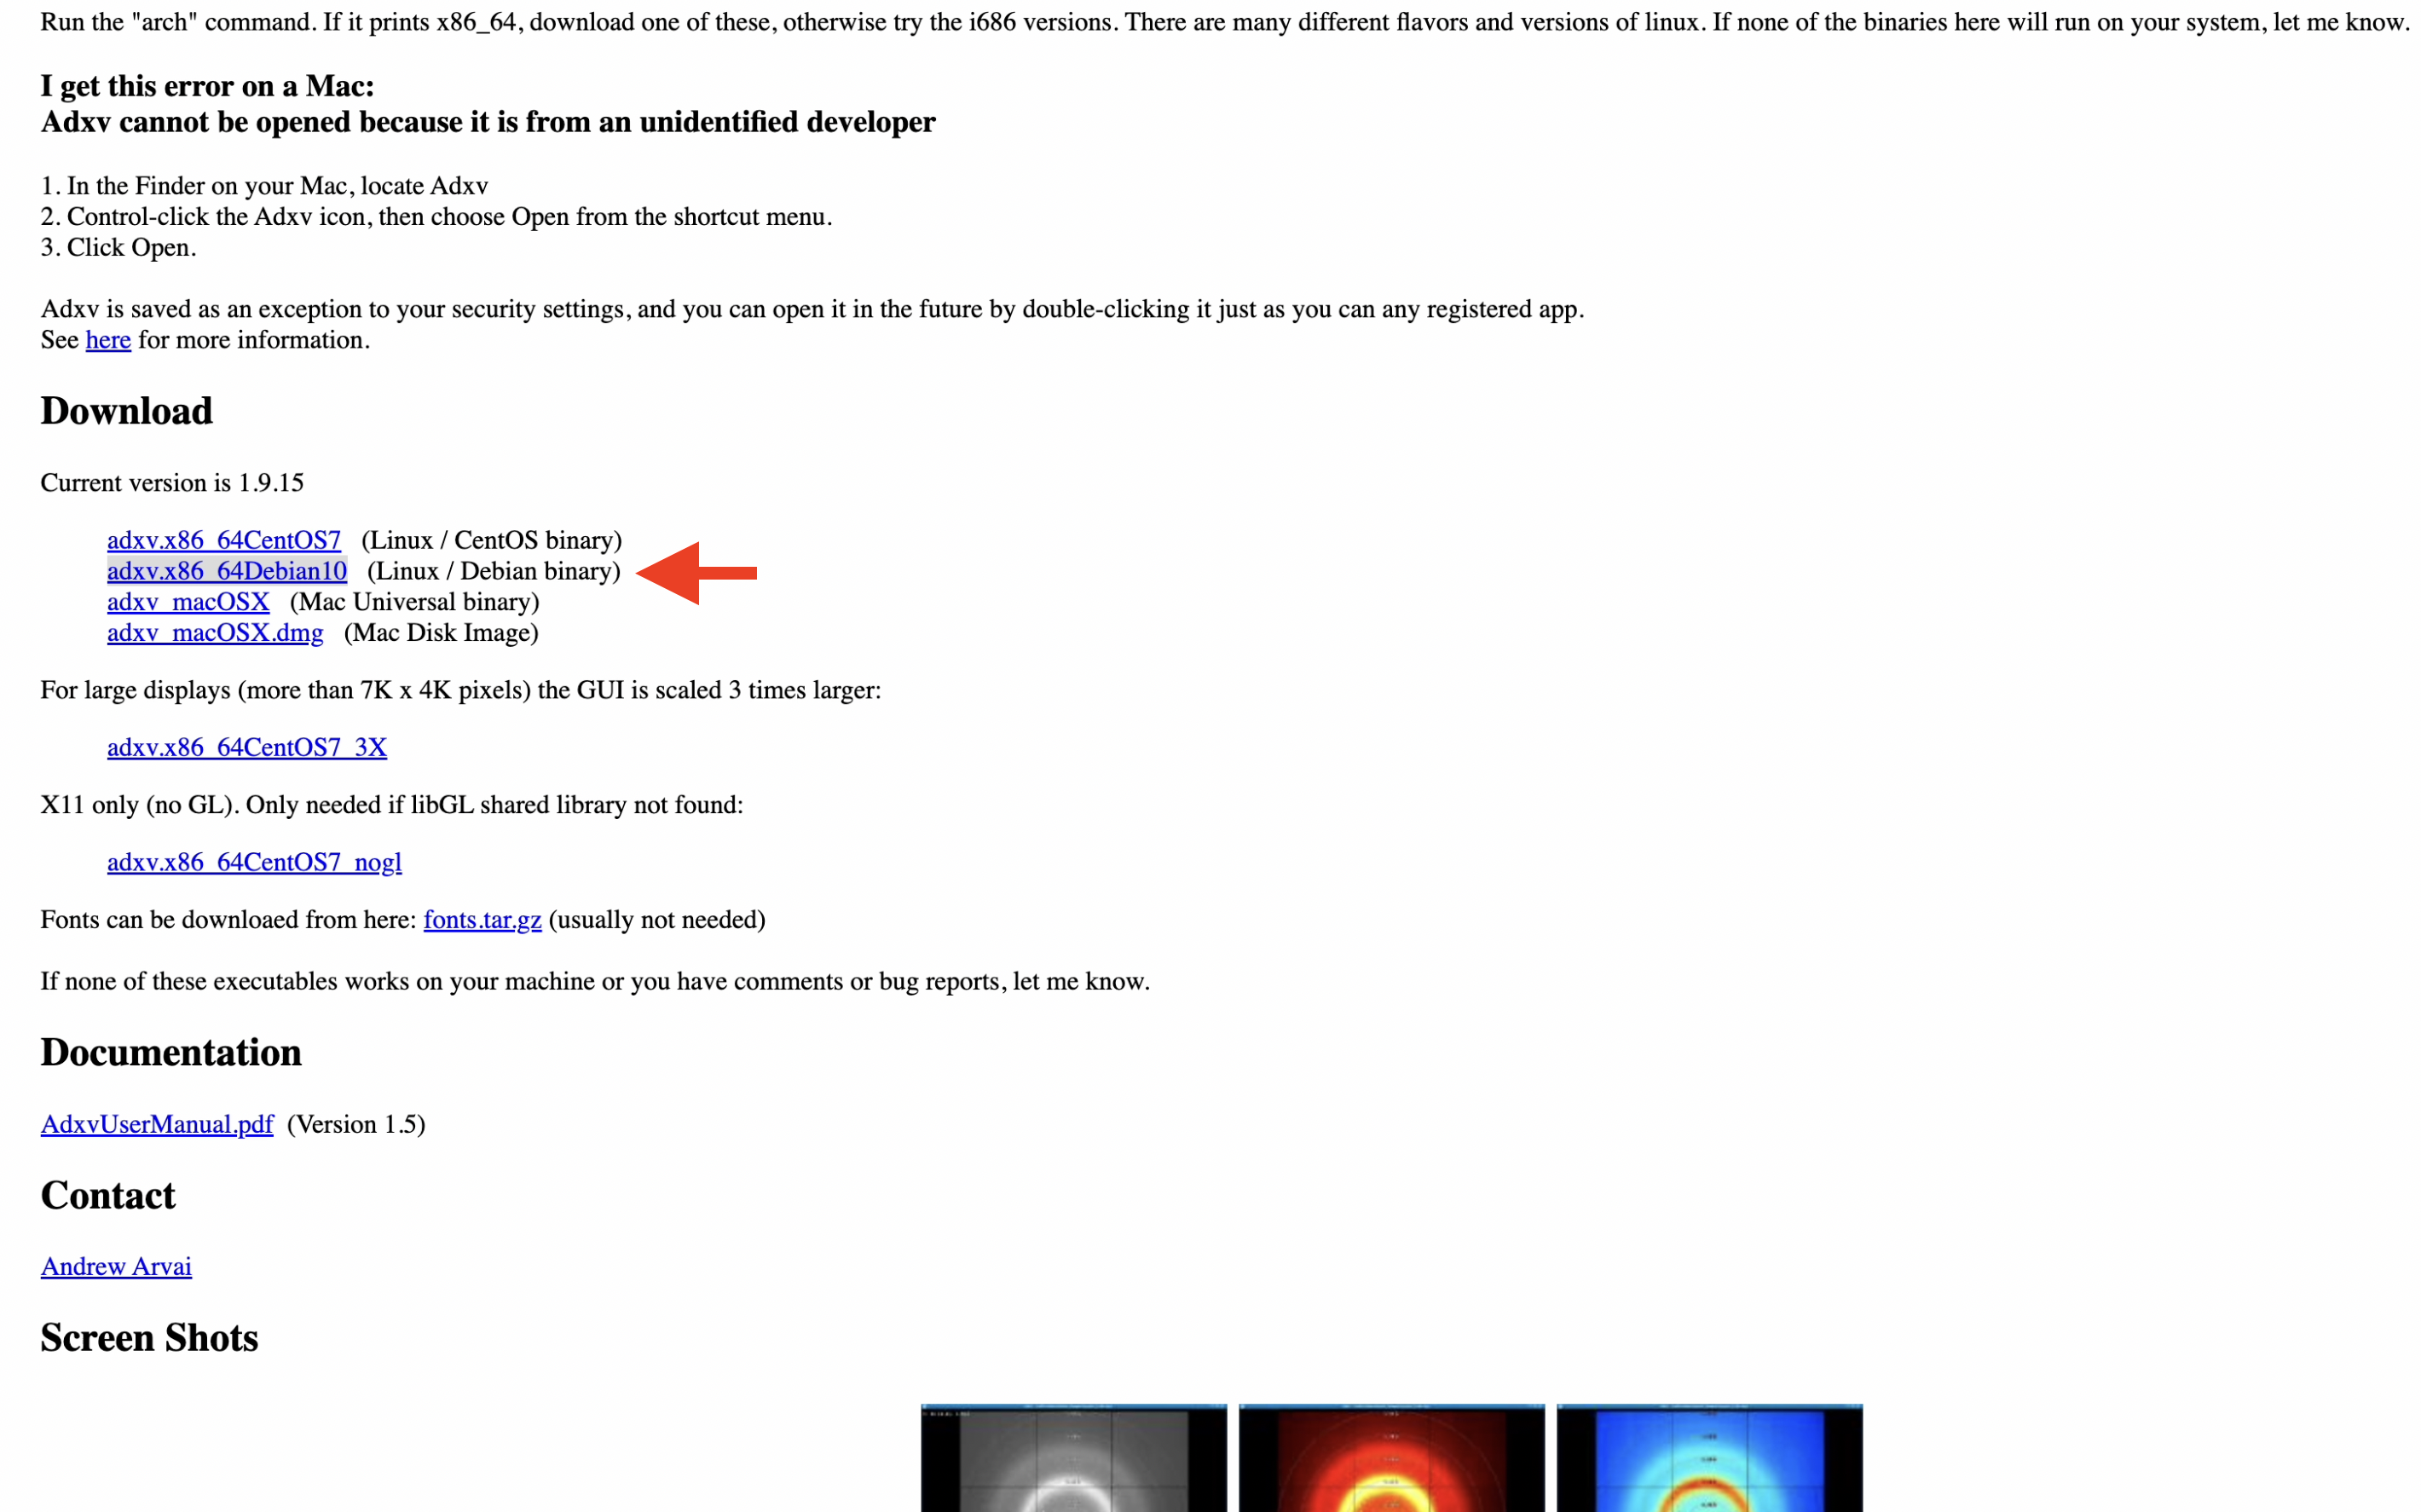
1. Download the appropriate version of Adxv for your environment from the Adxv page. In this tutorial environment, we use the Ubuntu 20.04 LTE instance built on GCP, so we select and download "adxv.x86_64Debian10".
2. Add a symbolic link to a folder that already has a path (for example, /usr/local/bin) so that typing "adxv" will start it.
# Move the adxv binary file from the download folder to your preferred folder.
$ mv <Download_folder_path>/adxv.x86_64Debian10 <your_favorite_folder_path>/adxv.x86_64Debian10

# Grant execution rights to the adxv binary file.
$ chmod u+x <your_favorite_folder_path>/adxv.x86_64Debian10

# Add a symbolic link to the adxv binary file in a folder with a path.
$ sudo ln -s <your_favorite_folder_path>/adxv.x86_64Debian10 /usr/local/bin/adxv
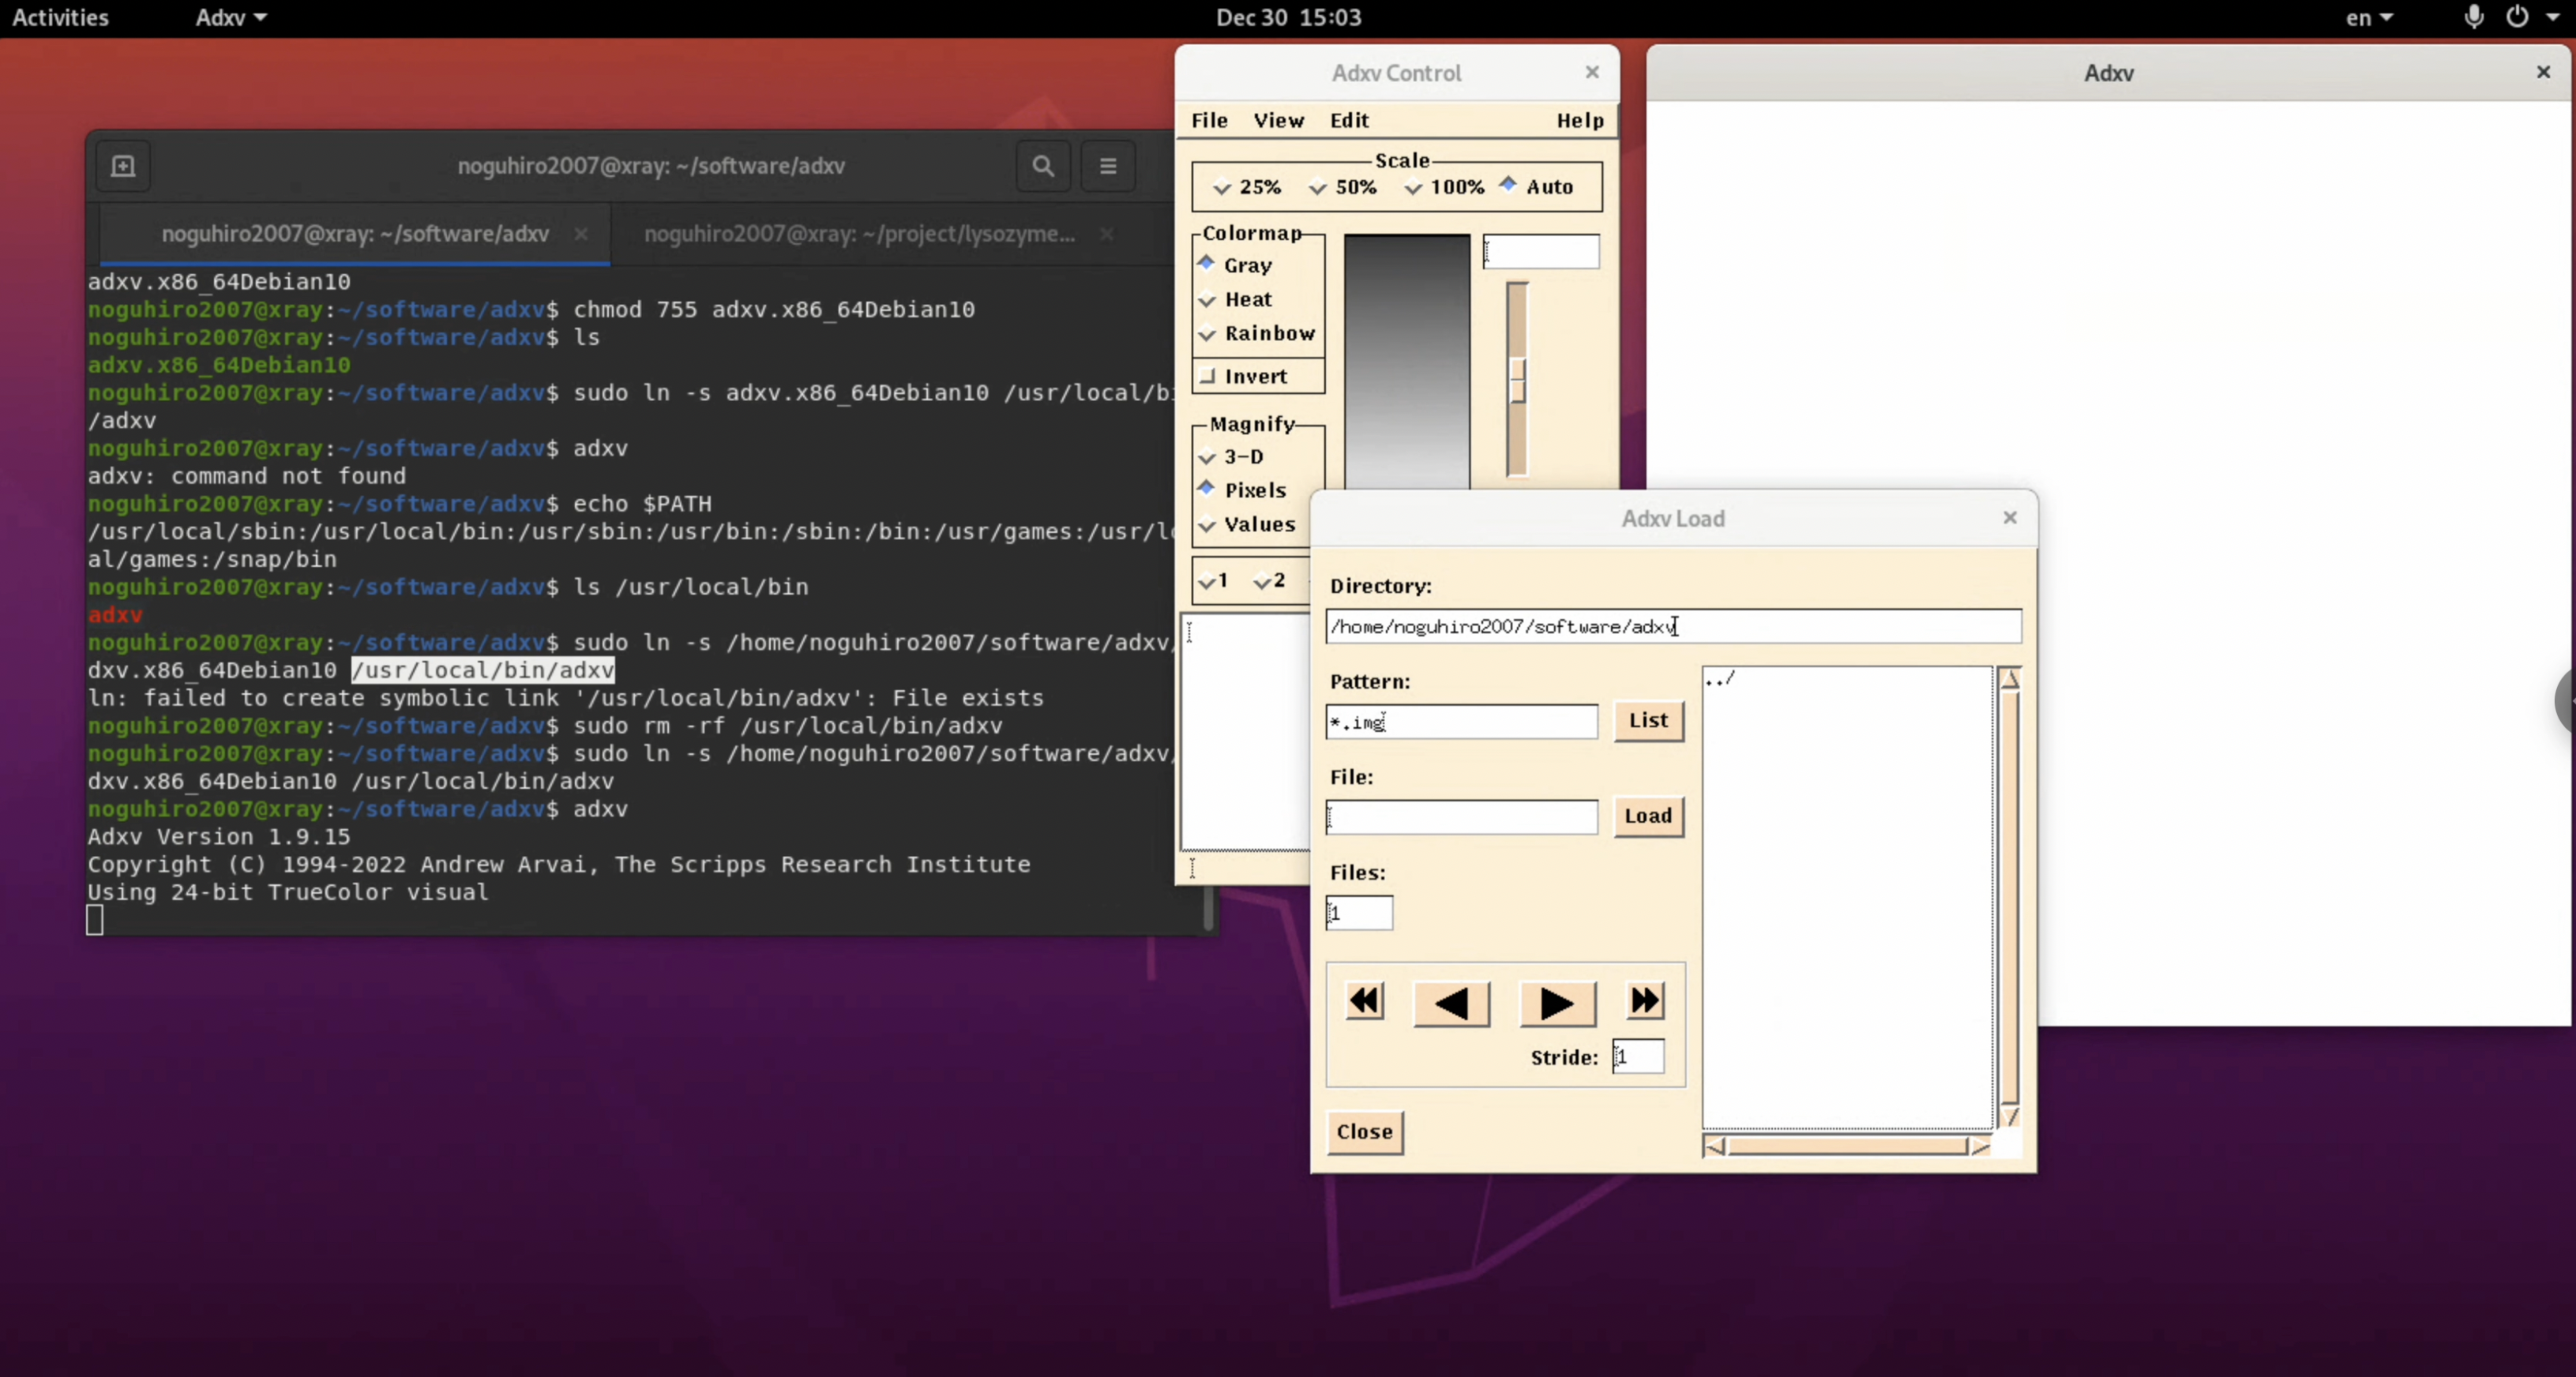
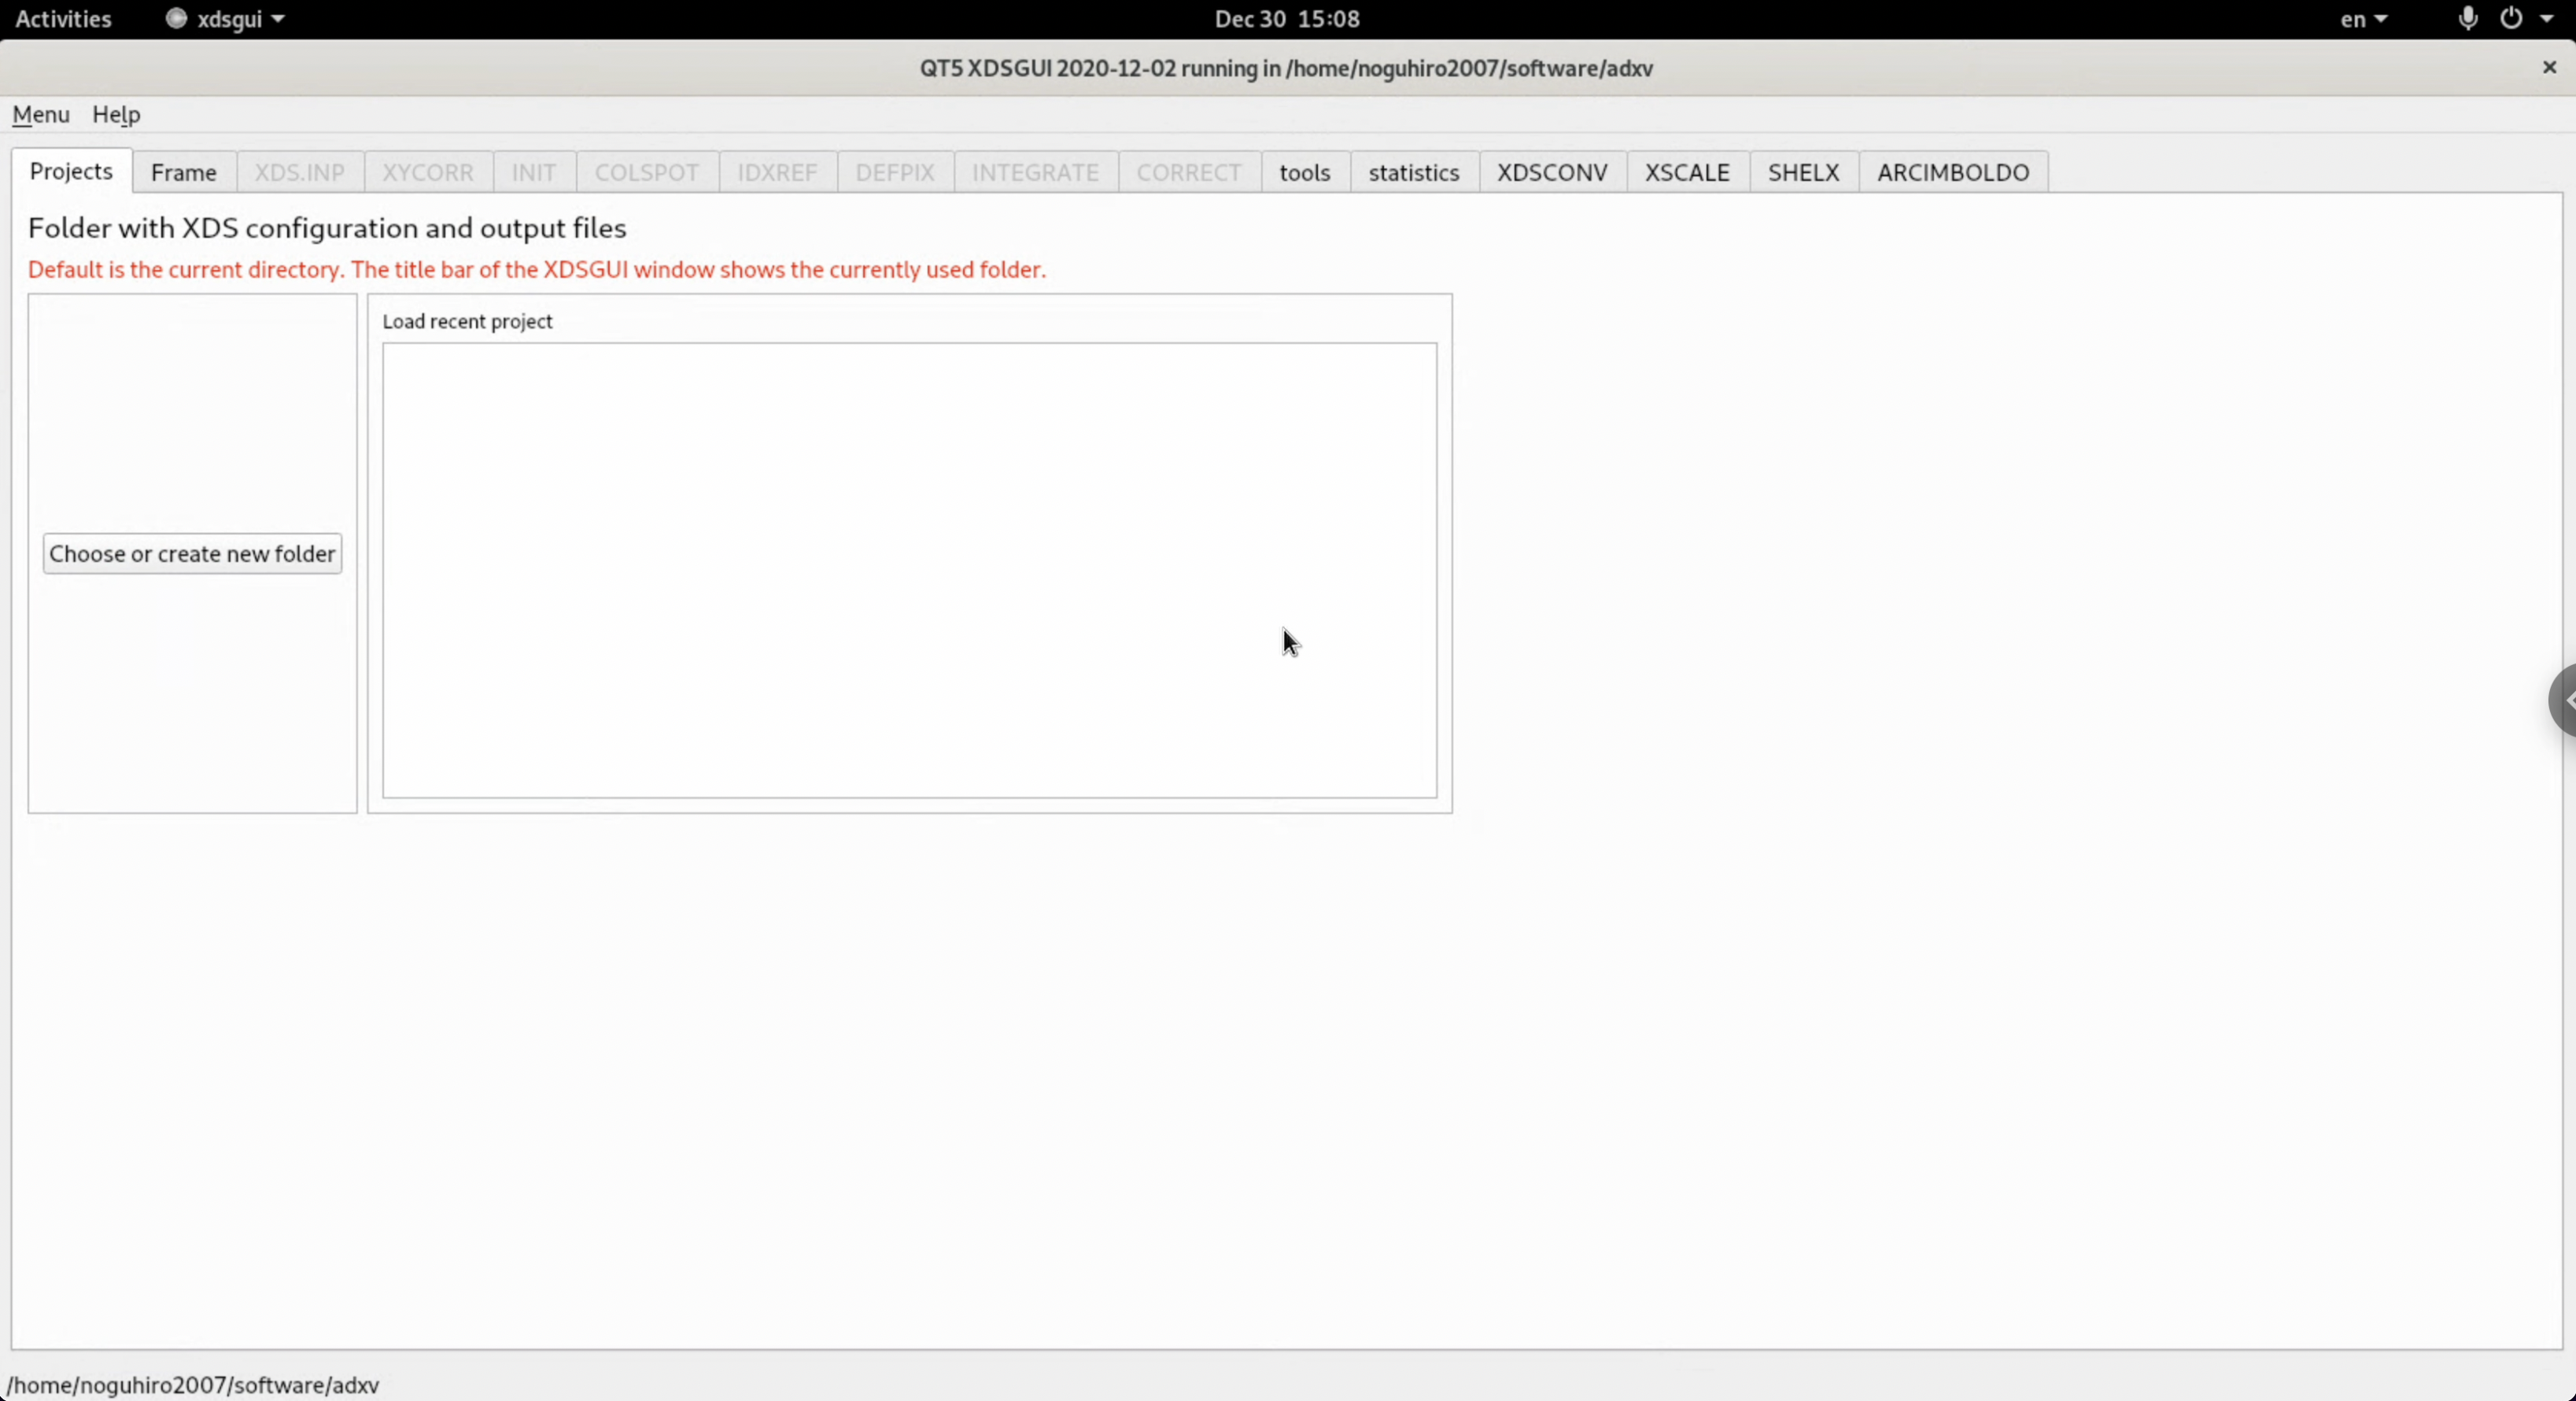
3. Type "adxv" and check if adxv starts up successfully. If it starts up like in the figure, the installation is complete.
$ adxv
Step.1-5 Installing XDS
XDS is a CUI-based X-ray structure analysis diffraction image processing program with a long history. You write the processing content in a processing instruction file (XDS.INP) and execute it. However, creating the XDS.INP from scratch can be challenging for beginners because it includes detailed diffraction experiment information about detectors and so forth. Therefore, it is typical to install and use a script that automatically generates this file. Additionally, it is common to install other auxiliary programs that improve usability altogether. In this tutorial, we will install the auxiliary scripts and programs together.
- Generally, follow the XDS Install wiki to install XDS and other related software groups that include additional features altogether. For this tutorial environment using Ubuntu20.04LTE, follow the Linux installation procedure.
## Gain root privileges
$ sudo -i

## Install XDS (execute with root privileges)
cd /usr/local/bin
wget -O- https://xds.mr.mpg.de/XDS-INTEL64_Linux_x86_64.tar.gz | tar xzvf -
ln -sf XDS-INTEL64_Linux_x86_64/* .

## Install other XDS add-ons altogether (execute with root privileges)
wget -N https://strucbio.biologie.uni-konstanz.de/pub/linux_bin/get_folder.sh
chmod +x get_folder.sh
./get_folder.sh
In this tutorial environment, the following error occurred in get_folder.sh.
check Unix tools that generate_XDS.INP may need -
python not found
strings not found
Follow the instructions to install Python and strings.
# Python installation
$ sudo apt install python3 python3-dev

# Strings installation
$ sudo apt install binutils
2.If xdsgui starts when you input it, the installation is successful.
$ xdsgui
In this case, our tutorial environment complained that libQt5OpenGL.so.5 was missing. Accordingly, we install the corresponding library following the XDS Install wiki.

$ sudo apt install libqt5gui5 libqt5printsupport5 libqt5opengl5
Step 1-6: Installing CCP4
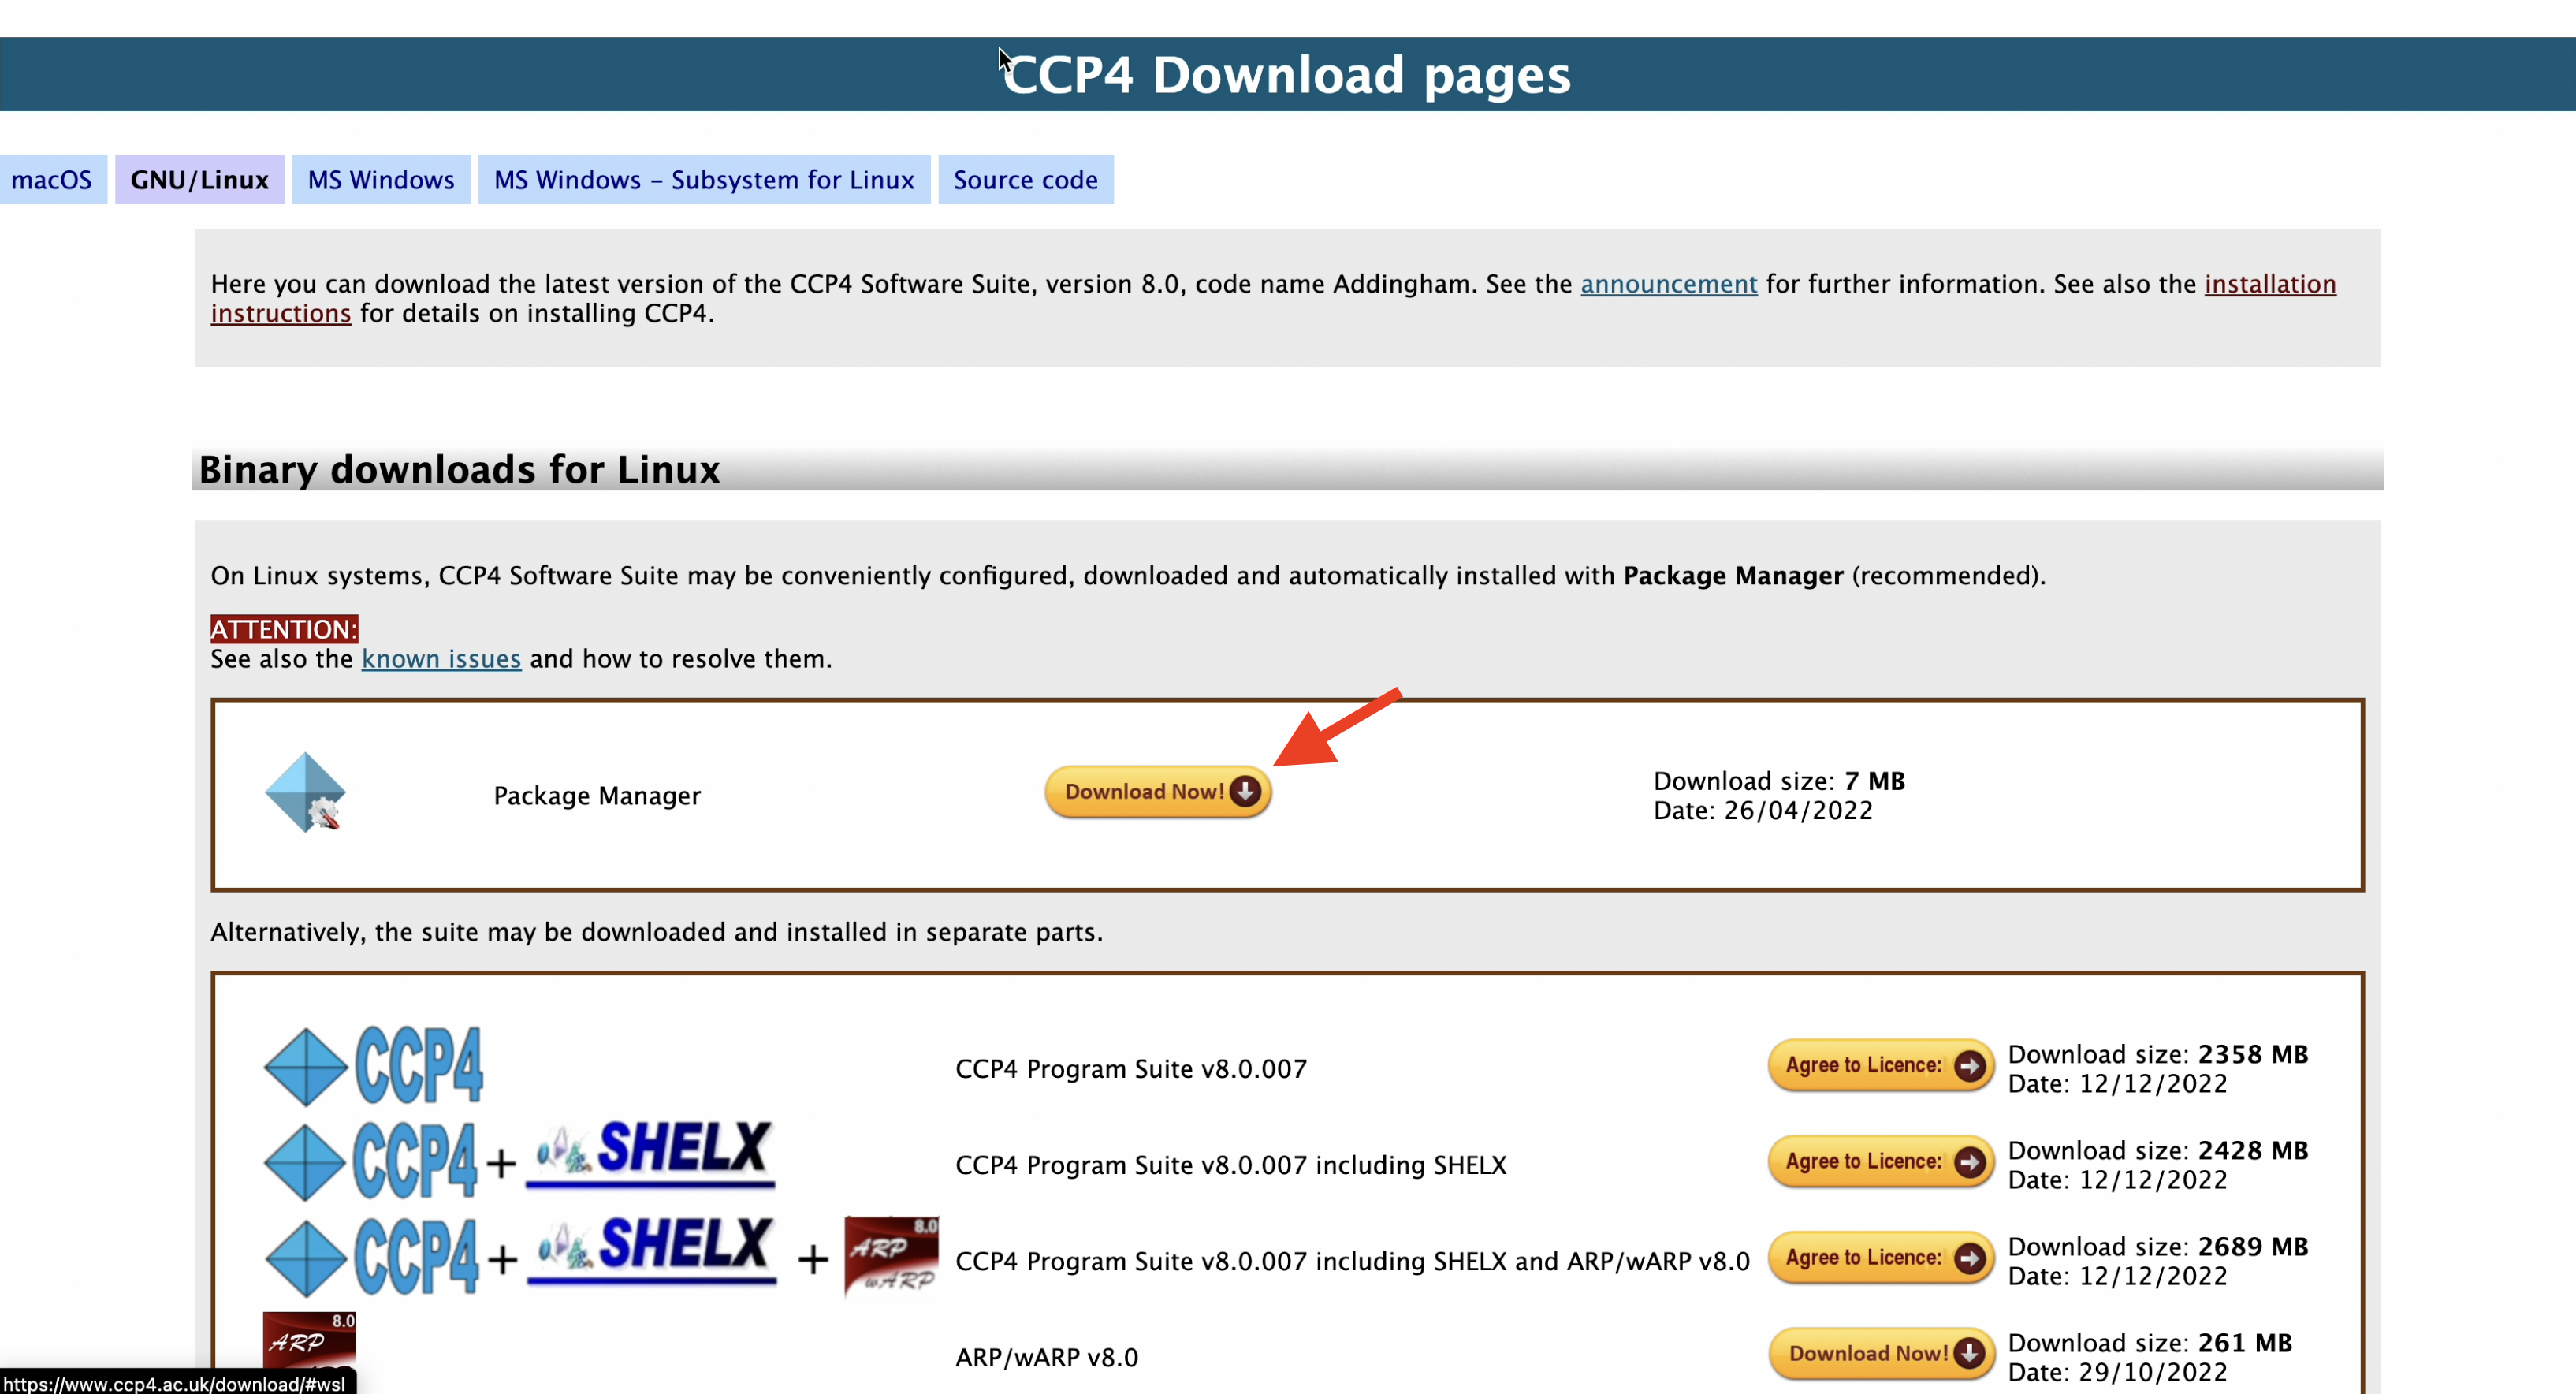
- Download the appropriate version for your computing environment from the CCP4 download site. In this tutorial, we will be using the Ubuntu20.04 environment, so we will choose the "Package Manager" under "GNU/Linux" and download the installer.
2. Start the Package Manager and initiate the installation.
# Unpack the downloaded file.
$ tar -zxvf <path_for_download_folder>/linux-x86_64_ccp4-<version>-setup.tar.gz
# Example: $ tar -zxvf ~/Download/linux-x86_64_ccp4-8.0-setup.tar.gz

# Run the unpacked file.
$ <path_for_download_folder>/ccp4-<version>-setup
# Example: $ ~/Download/ccp4-8.0-setup
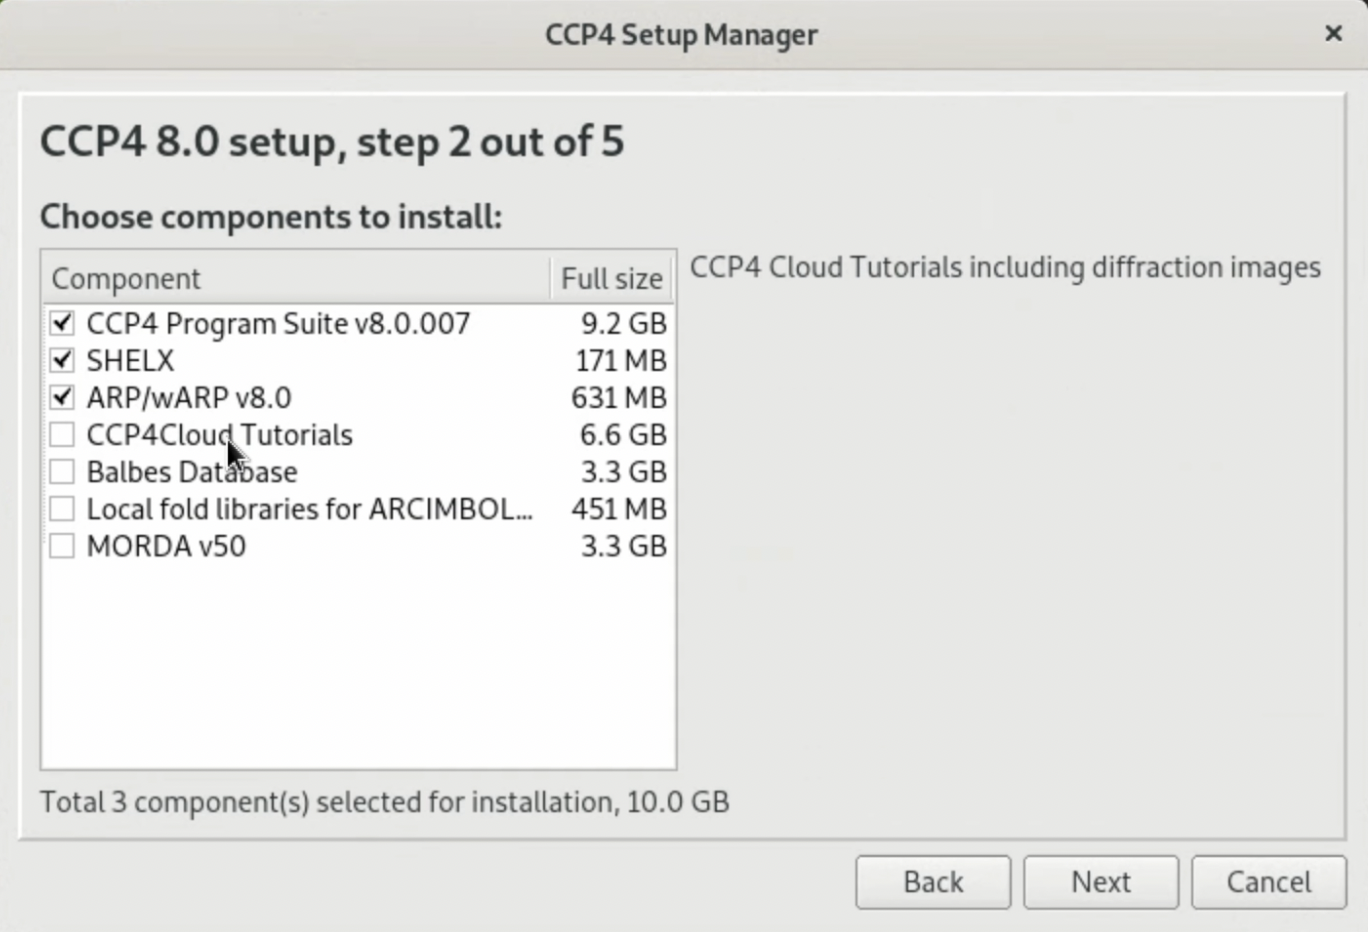
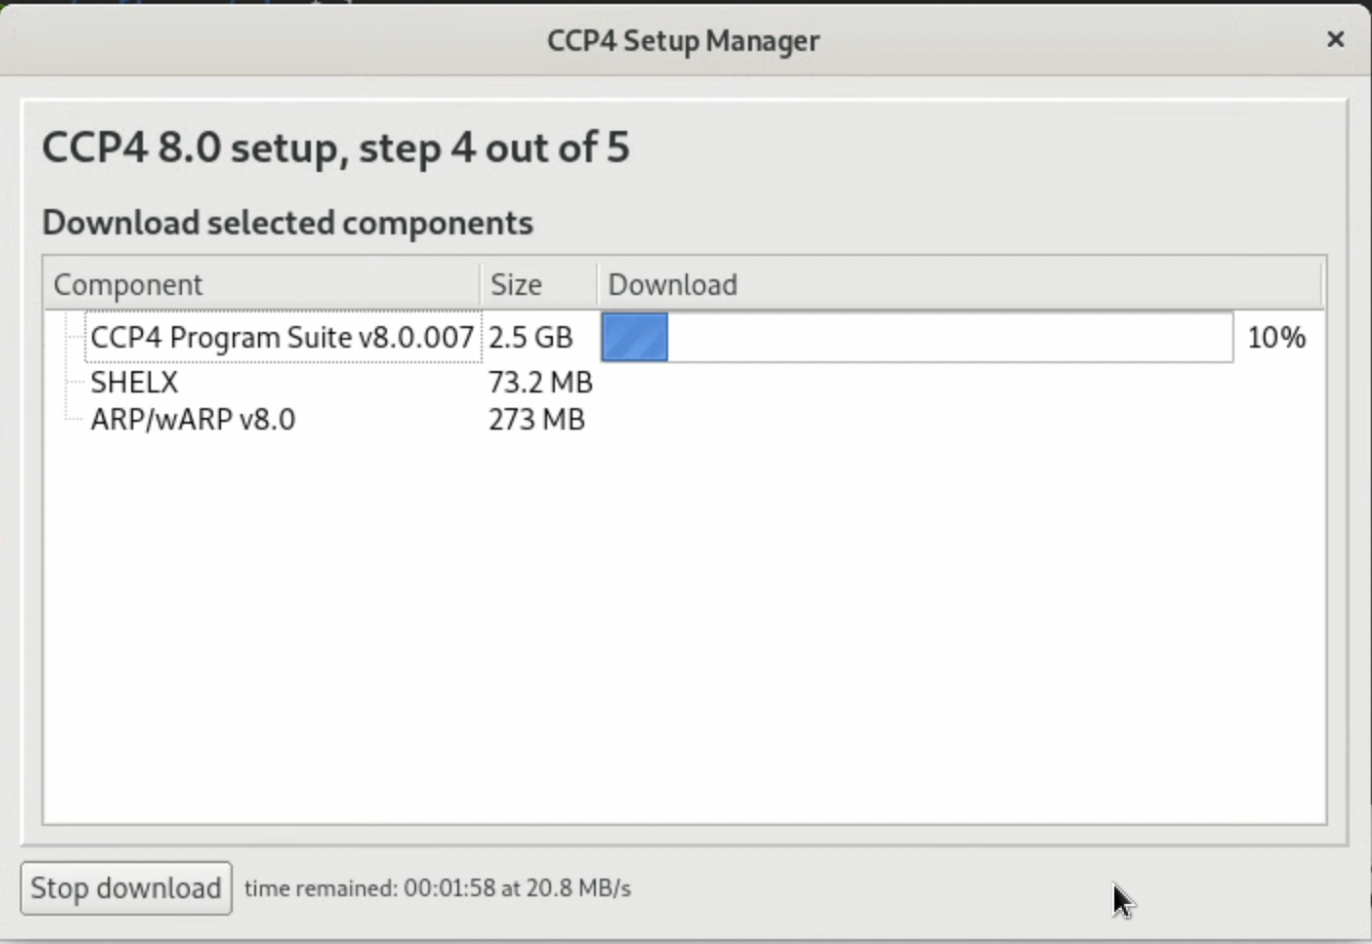
3. Follow the instructions provided by the Package Manager to continue the installation. When the prompt "Choose components to install:" appears, you only need to select "CCP4 Program Suite v???" for this tutorial. However, SHELX is a software frequently used for the determination of initial phases using heavy atoms (MIR, SAD, MAD methods, etc.), and ARP/wARP is one of the software for the automatic construction of protein models. If you are seriously studying protein X-ray crystallography or planning to use X-ray crystallography in your work or research, you might want to install these two as well.
Note: In my environment, an error message saying "tcsh is not installed" appeared. Therefore, I installed "tcsh" using apt and proceeded with the installation.
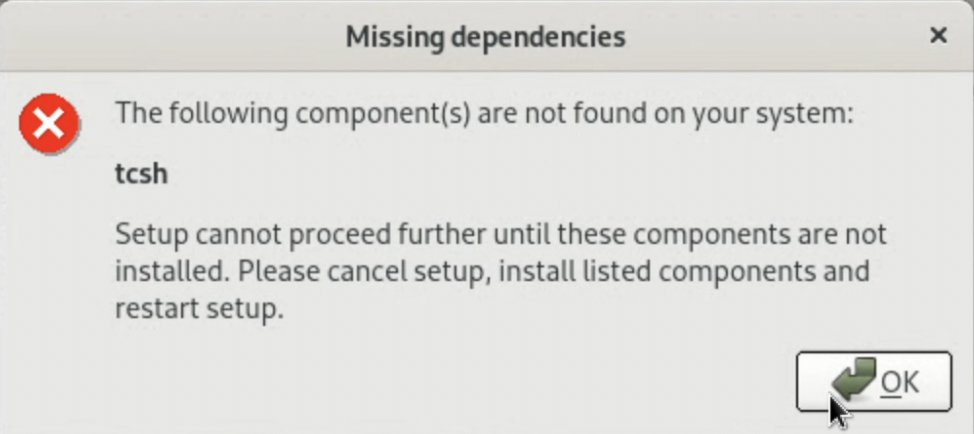
$ sudo apt install tcsh
4. Once you agree to the license terms, the file download will start, followed by the installation. Depending on your environment, this could take 30 to 60 minutes or more, so please be patient.
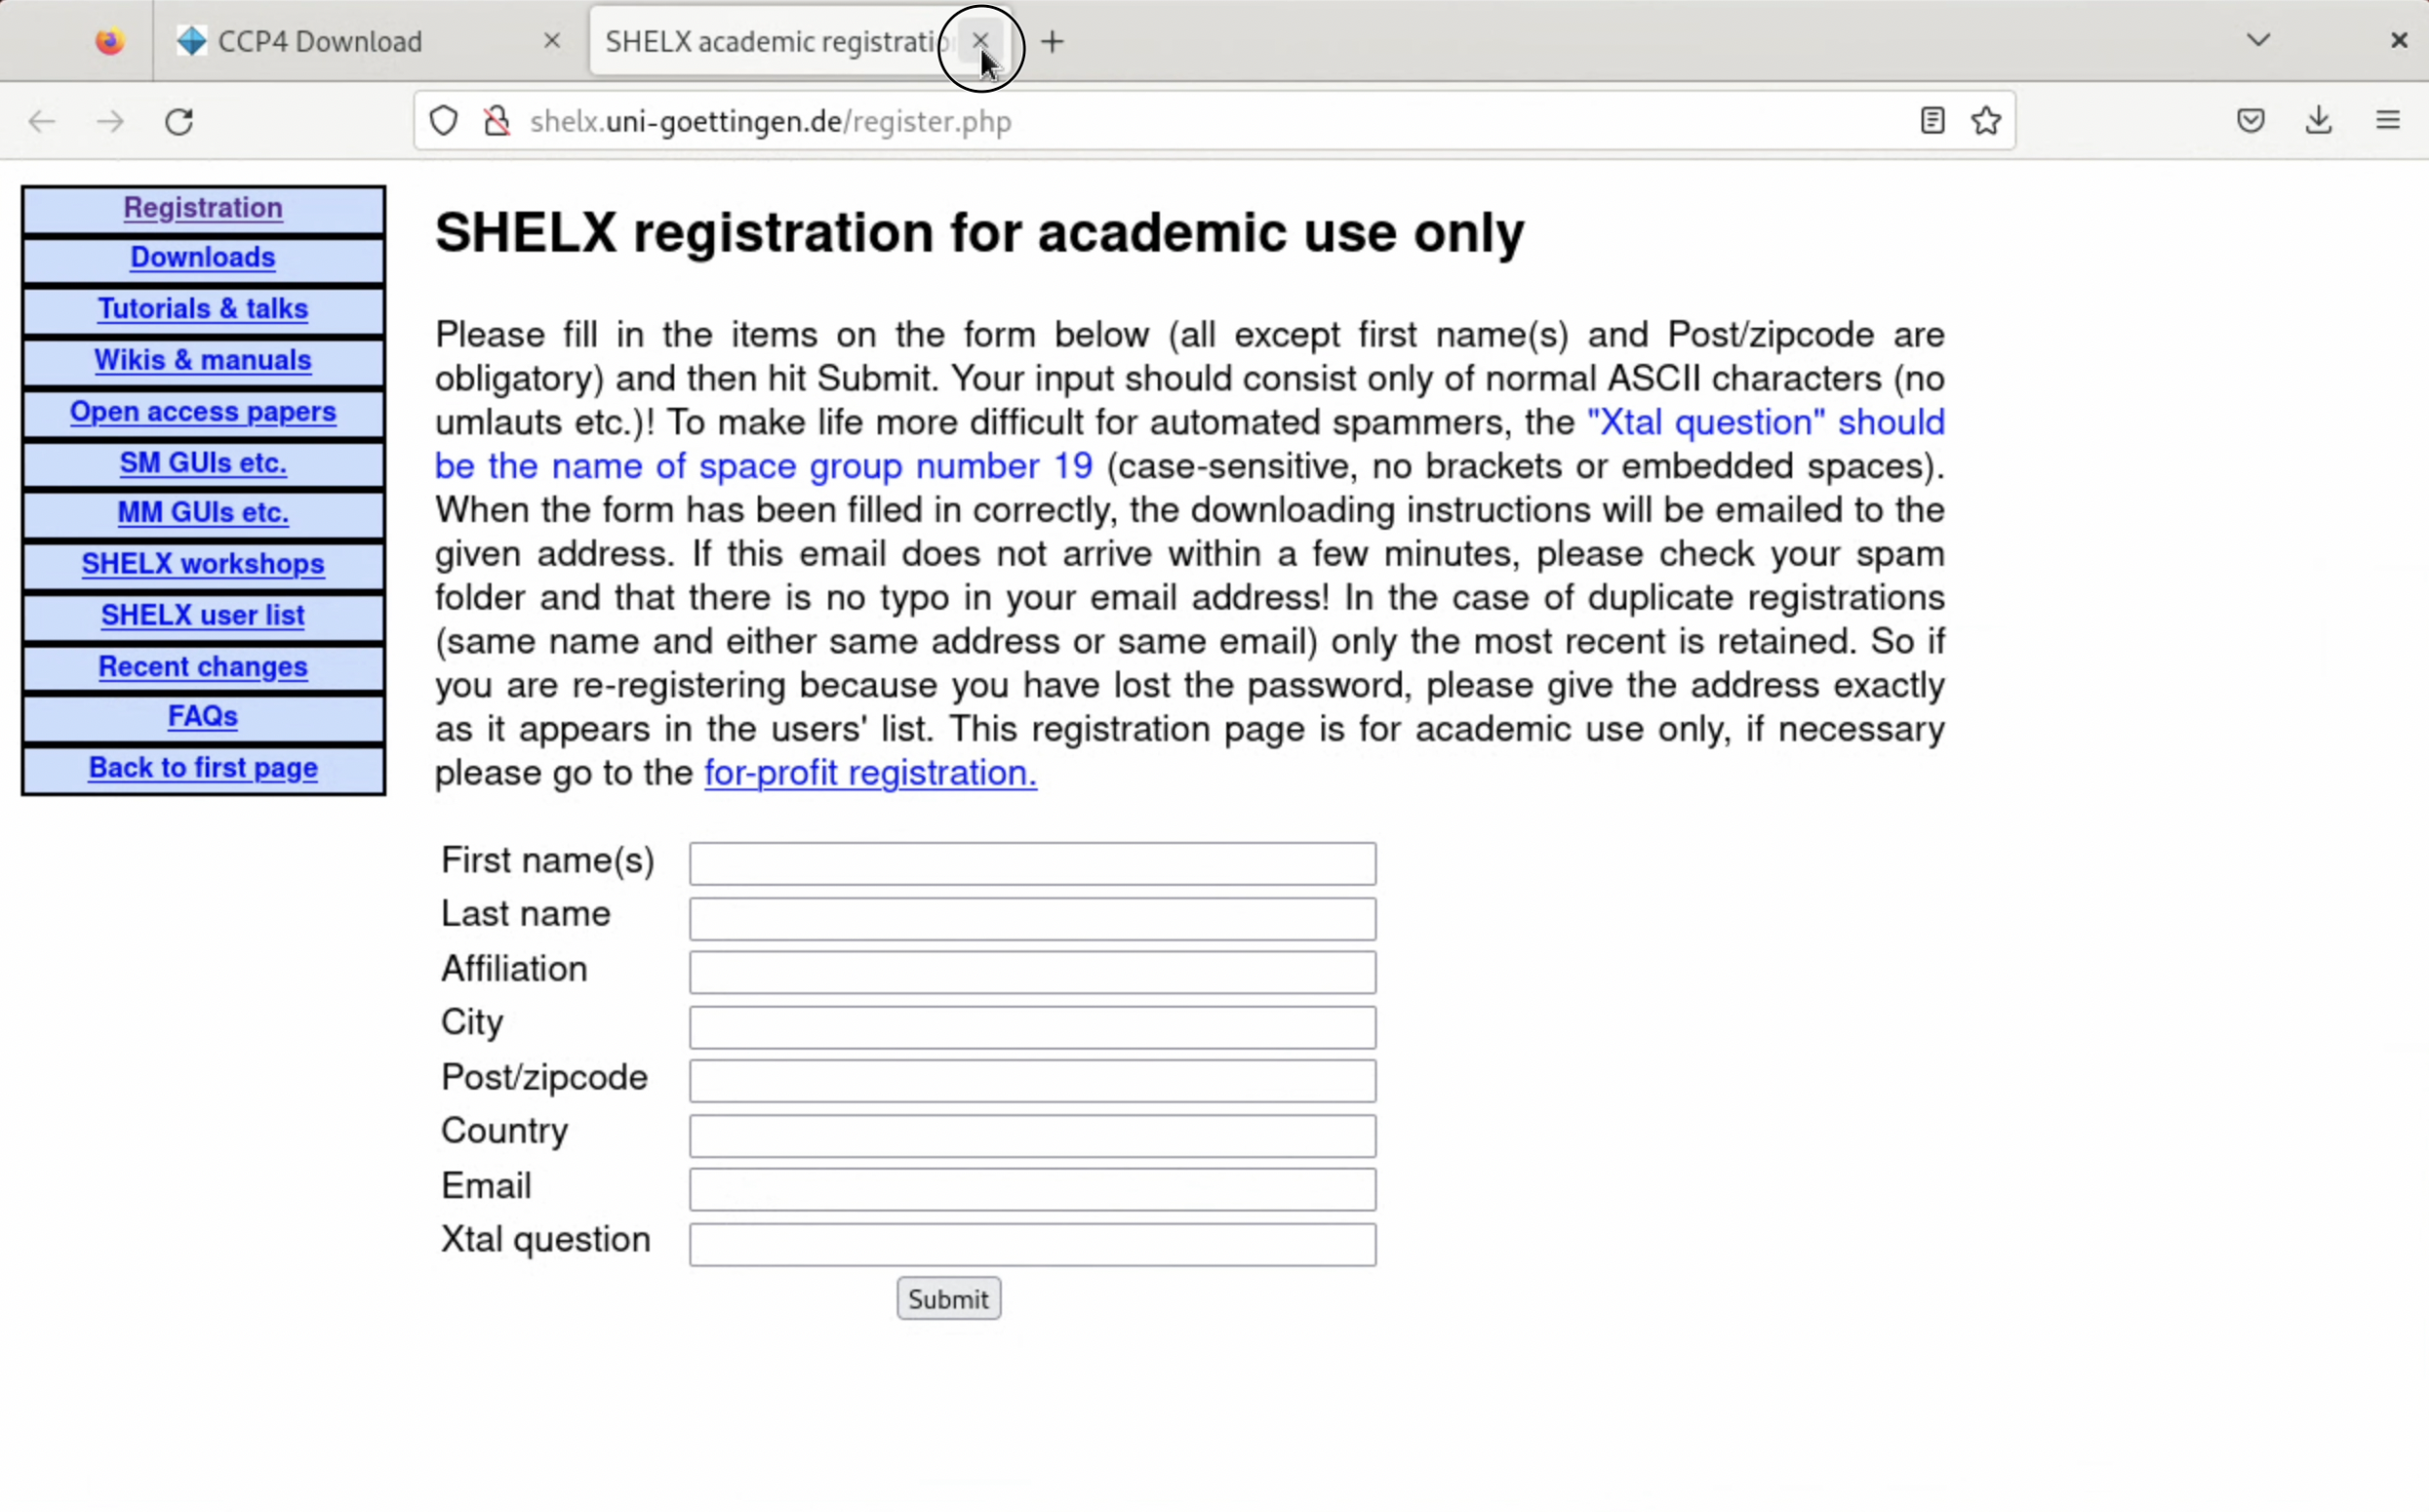
5. If you install SHELX, a page asking for user registration will be displayed. Please register appropriately. The answer to the "Xtal question" can easily be found with a Google search.
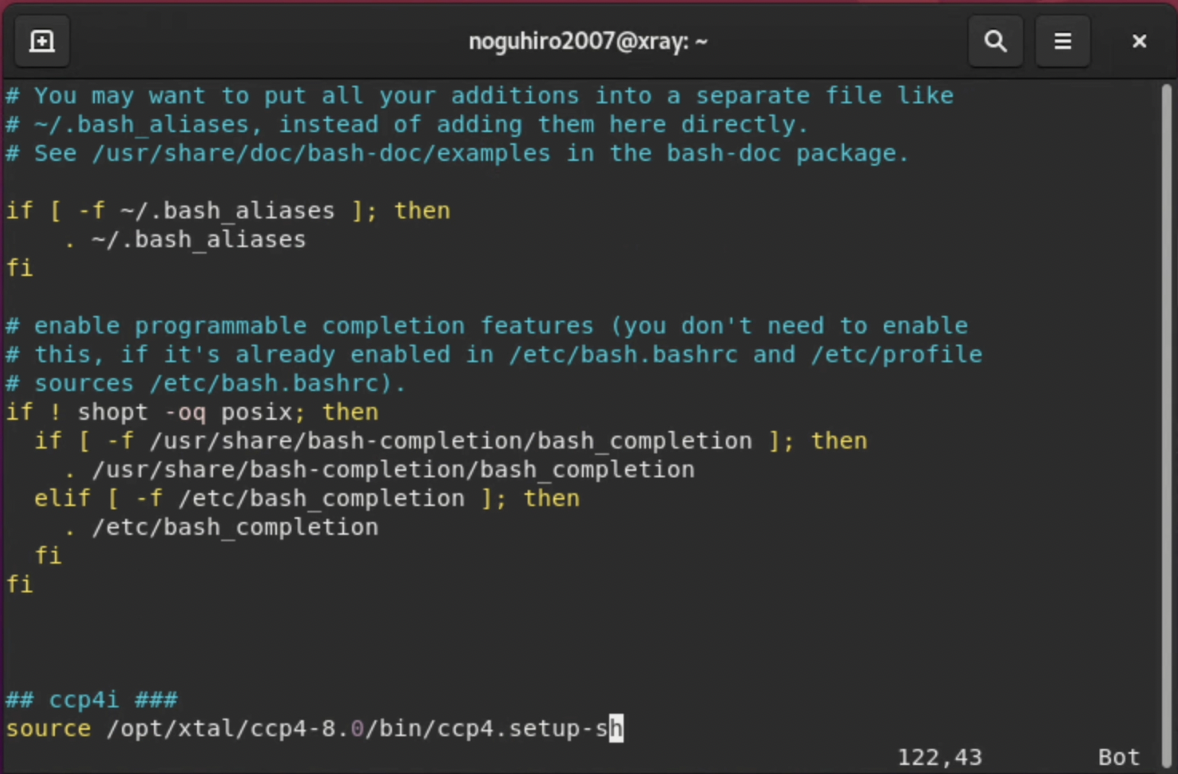
6. After the installation is complete, set up the ccp4 path as a final step. The bash script file prepared by ccp4 is run using the source command. It may be convenient to add this to "~/.bashrc" or another file that is loaded when the terminal is launched.
# By default, ccp4 is installed in /opt/xtal/ccp4-8.0.
# In this case, the setup script to be loaded is /opt/xtal/ccp4-8.0/bin/ccp4.setup-sh.
$ vi ~/.bashrc

# Add "source /opt/xtal/ccp4-8.0/bin/ccp4.setup-sh" to the end of ~/.bashrc as shown in the image below.

# Load the setup script using the source command.
$ source ~/.bashrc
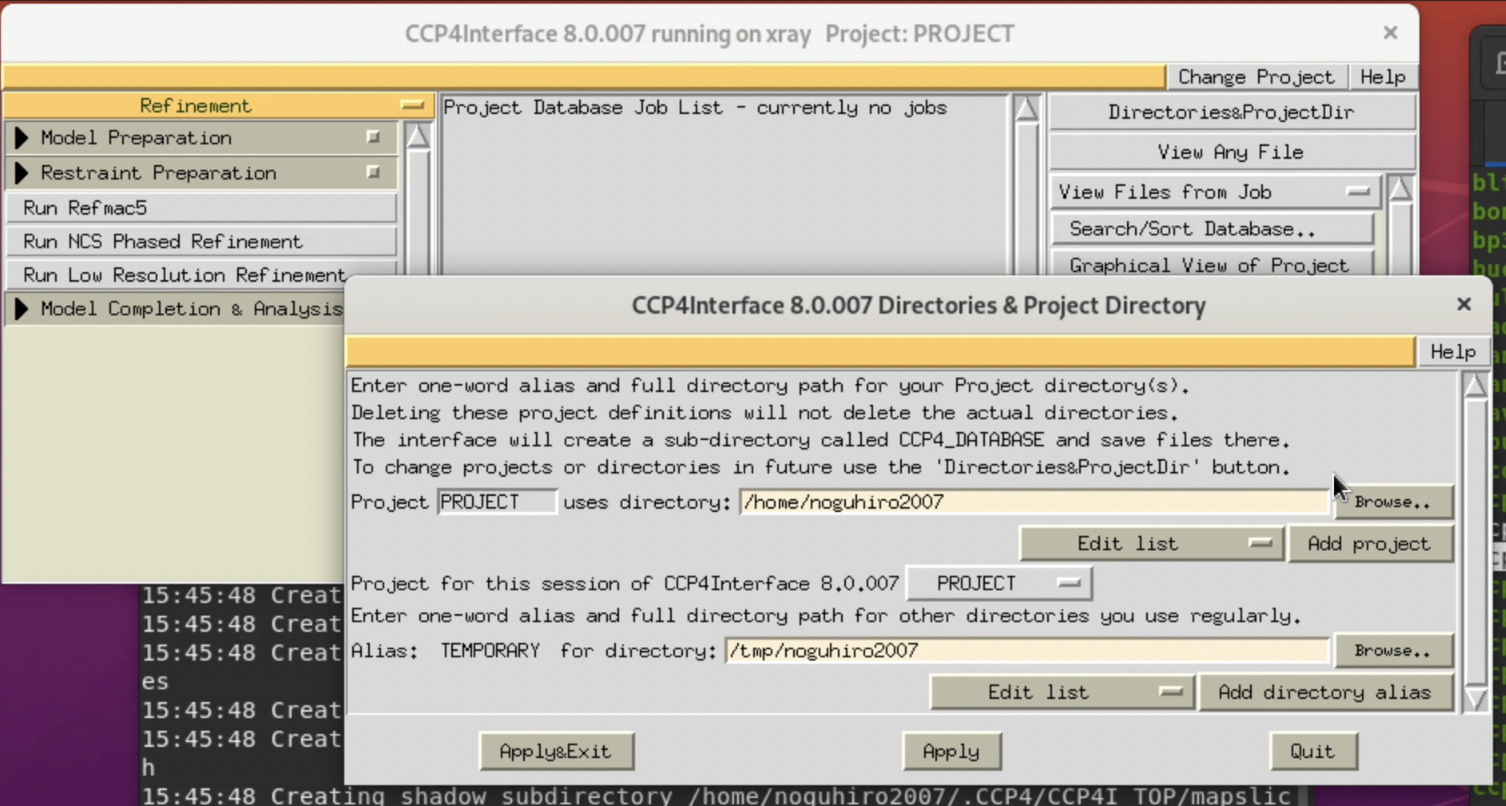
7. If ccp4i starts with the following command, the CCP4 installation has been successful.
$ ccp4i
Step 1-7: Installing Pymol
- Pymol offers a paid version (free for students and faculty as the Education version), but we will install the free open-source version this time.
- Install following the instructions on PyMol Wiki: Linux Install. In this tutorial, we're using Ubuntu 20.04 LTE, so we'll use the following command to install.
$ sudo apt install pymol
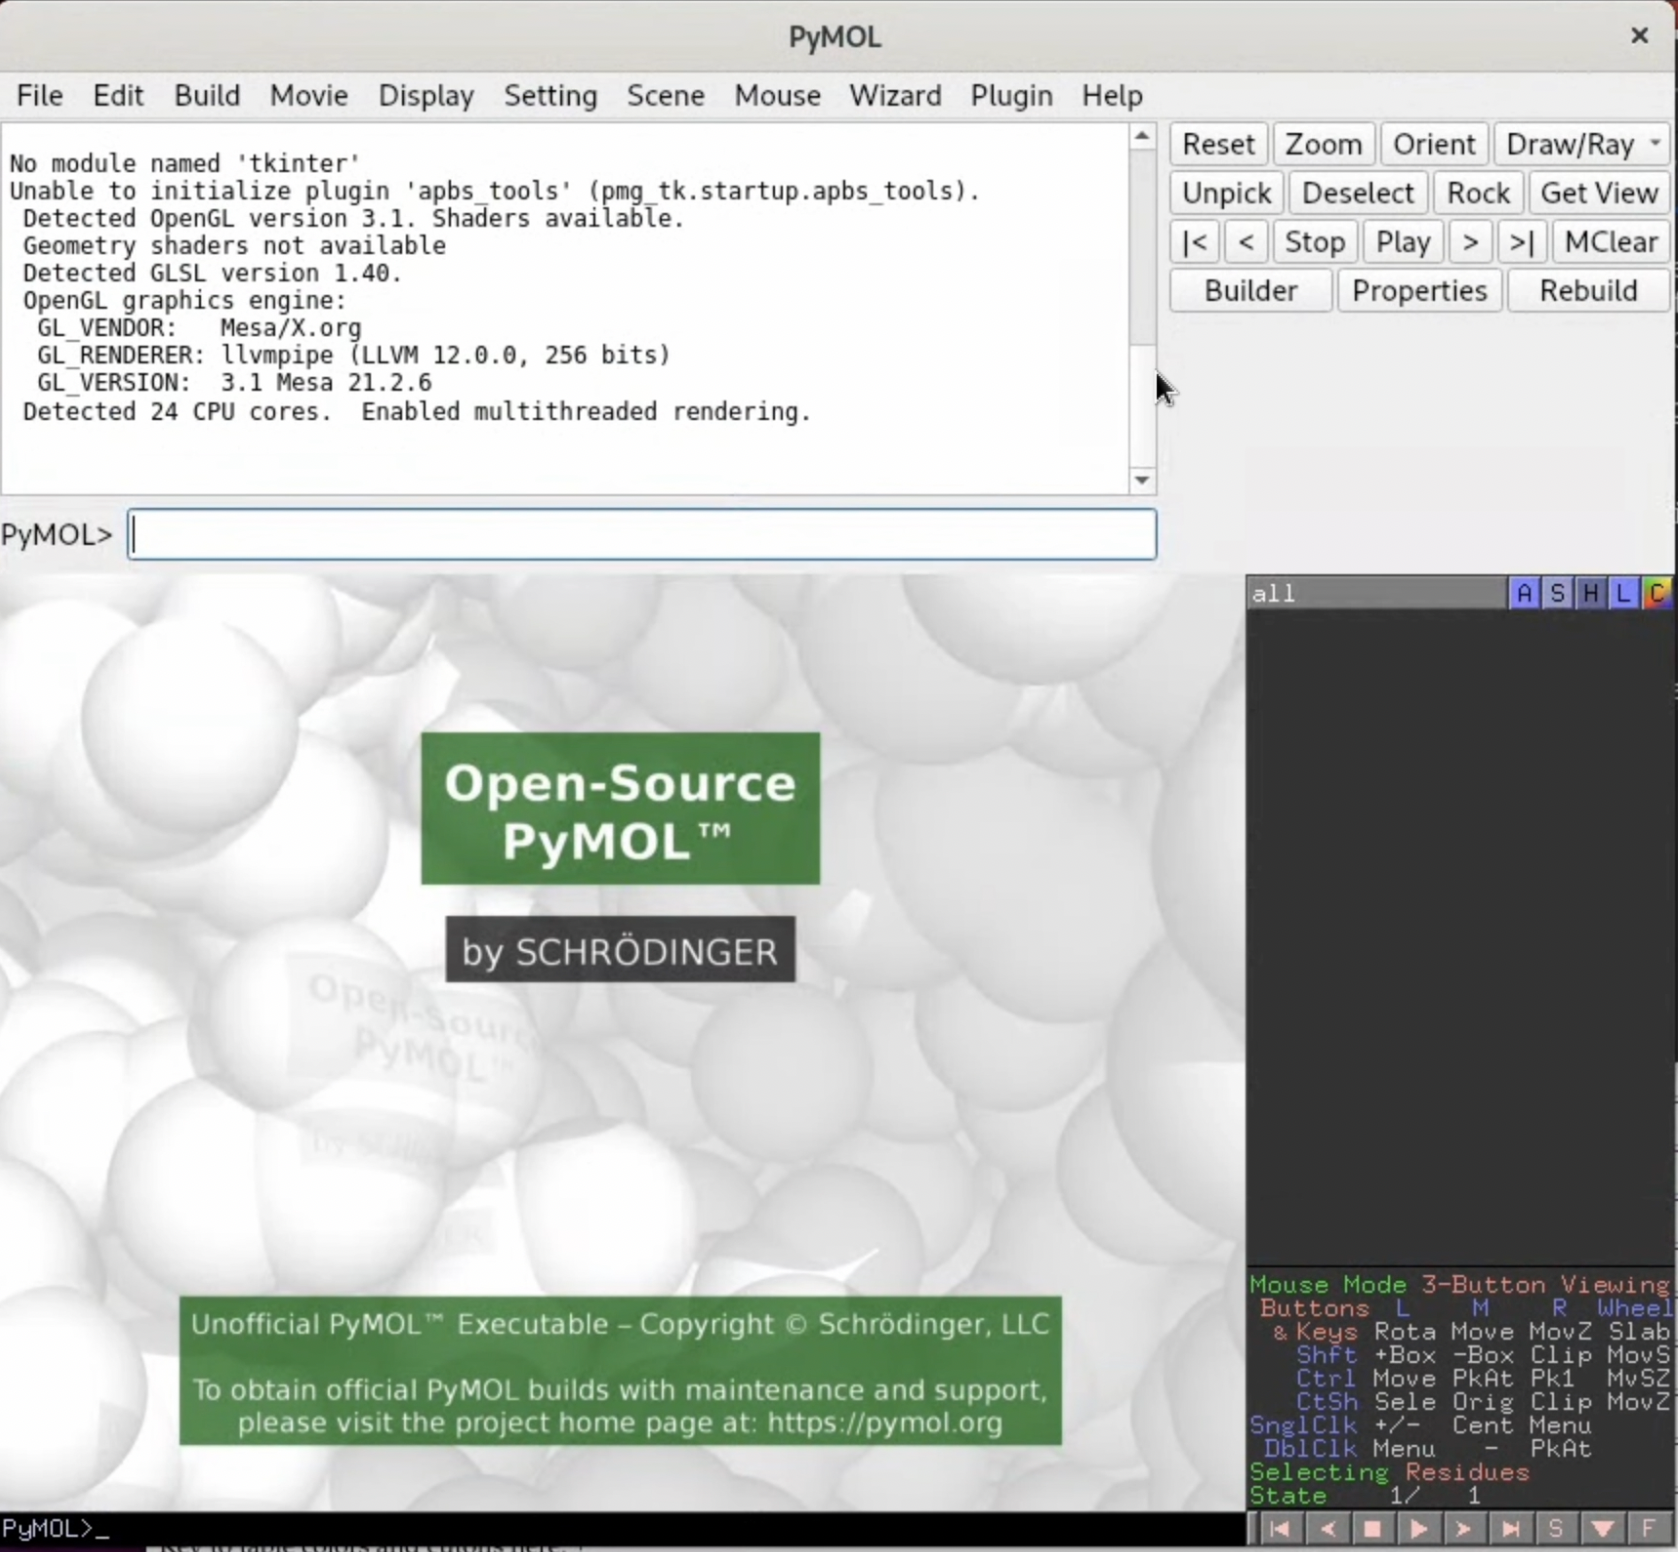
3. Launch Pymol to confirm the installation.
$ pymol
Conclusion
In this tutorial, we've covered the basics of protein X-ray crystallography, the data sets used in structural analysis, and the installation of various software. Next, we'll be calculating structure factors F(hkl) from diffraction data sets..
Table of Contents
- Step.0 The flow of structure determination (this article)
- Step.1 Installing analytical software (this article)
- Step.2 Checking diffraction images and calculating structure factors
- Step.3 Finding initial phases
- Step.4 Structure refinement and validation
-
Even with each step, technological innovation has been made, and compared to the past, Protein X-ray crystallography has become a more accessible experimental method. However, the reality is that expertise is still required for Protein X-ray crystallography, as is evident from the extent of this tutorial. ↩
-
The derivation of the basic equation requires basic knowledge of crystallography, but it's possible to derive it by gradually expanding from the diffraction phenomena of a single atom. As the derivation of the basic equation significantly exceeds the level of this tutorial, those interested are encouraged to refer to published books(JP), open materials from various universities(JP), or CCP4 Workshop Materials. ↩
-
There are many voices of surprise(JP). ↩
-
In recent years, automation has rapidly advanced up to the step of obtaining diffraction images, enabling a limited number of researchers to handle a large number of samples. Particularly, the evolution of two-dimensional detectors for recording diffraction images has greatly facilitated the measurement of a large number of diffraction images in a short time. ↩ ↩2
-
It is a carbohydrate hydrolase derived from chicken egg white, which is often used for E. coli extraction in experiments. It is relatively inexpensive and easy to obtain, and it's easy to produce crystals that give high resolution. Because it has a moderate level of difficulty for analysis, it is frequently used in beginner workshops held at synchrotron radiation facilities, as well as for equipment validation. It is practically a model structure in the Protein X-ray crystallography industry. ↩
-
Those who will use the software in companies or research institutions are urged to read the software licenses thoroughly. We take no responsibility for any damages that may occur in relation to the use of the software. ↩
-
The author has used this software to elucidate more than 60 structures and registered them in the PDB. ↩
-
There is a high probability of issues occurring with software like Coot, and most of the time these problems are due to the GUI library. The author has spent much time troubleshooting these non-essential problems, none of which have occurred in a Linux environment. ↩
-
It's stressful to manipulate 3D structures via remote desktop tools such as Remote Desktop or Chrome Remote Desktop, so a local environment is preferable, if possible. ↩
-
Because there are more free tiers compared to AWS... ↩