作ったプログラムの概要
Heroku上で、Googleフォームを自動で入力して、提出するプログラムを作りました。
あと、提出したことがわかるようにLINE Notifyで通知するようにしました。
何番煎じだよ…って感じのネタですが…w
おおまかな流れとしては
GoogleフォームのURLを改変
↓
seleniumでURLを開く
↓
送信ボタンクリック
↓
LINE Notifyで通知
という感じです。
HerokuでSchedulerアドオンを使い、決まった時間に自動で実行するようにしています。
また、提出時間がある程度ランダムになるようにしました。
デプロイしたフォルダの構造と各ファイルの中身
autoform
├── .fonts
│   └── GenEiMGothic-Regular.ttf(フォントファイル)
├── autoform.py(プログラム本体)
├── requirements.txt(Pythonプログラムで使うモジュールを指定するファイル)
└── runtime.txt(Pythonのバージョンを指定するファイル)
from selenium import webdriver
from selenium.webdriver.chrome.options import Options
import random
import time
import datetime
import requests
import os


def send_line_notify_message(notification_message):
    """
    LINEにメッセージを送る
    """
    # herokuに設定した環境変数"LINE_NOTIFY_TOKEN"からアクセストークンを持ってくる
    LINE_TOKEN = os.environ.get("LINE_NOTIFY_TOKEN")
    line_notify_api = "https://notify-api.line.me/api/notify"
    headers = {"Authorization": f"Bearer {LINE_TOKEN}"}
    data = {"message": f"{notification_message}"}
    requests.post(line_notify_api, headers=headers, data=data)


def send_line_notify_image(notification_message, image):
    """
    LINEにメッセージ&画像を送る
    """
    LINE_TOKEN = os.environ.get("LINE_NOTIFY_TOKEN")
    line_notify_api = "https://notify-api.line.me/api/notify"
    headers = {"Authorization": f"Bearer {LINE_TOKEN}"}
    data = {"message": f"{notification_message}"}
    # rbはバイナリファイルを読み取りモードで開くオプション
    files = {"imageFile": open(image, "rb")}
    requests.post(line_notify_api, headers=headers, data=data, files=files)


def datetime_to_str():
    """
    日時の取得&str型に変換
    """
    datetime_first = datetime.datetime.now()
    datetime_str = datetime_first.strftime("%Y/%m/%d %H:%M:%S")

    return datetime_str


def main():

    # -----URLの置き換え処理-----

    before_url = "https://docs.google.com/forms/d/e/hogehoge/viewform?usp=pp_url(中略)&entry.1110764158=example"
    ransu = random.uniform(10.1, 15.5)
    # 小数点以下を一桁に丸めたあと、float型からstr型に変換
    # ここでは何らかの少数を入力するという前提
    ransu_str = str(round(ransu, 1))
    # URL中の文字列exampleを置き換える
    new_url = before_url.replace("example", ransu_str, 1)

    # -----seleniumの処理-----

    # chromeをheadlessモードで使うためのオプションとかドライバの設定
    options = Options()
    options.add_argument("--headless")
    driver = webdriver.Chrome(options=options)
    # 指定したURLにアクセス
    driver.get(new_url)
    # ページ全体のスクショを撮るためのおまじない
    page_width = driver.execute_script("return document.body.scrollWidth")
    page_height = driver.execute_script("return document.body.scrollHeight")
    driver.set_window_size(page_width, page_height)
    # 一応待つ
    time.sleep(3)
    # 送信ボタンの要素をxpathで取得
    sousin = driver.find_element_by_xpath("//*[@id='mG61Hd']/div[2]/div/div[3]/div[1]/div/div/span/span")
    # 送信ボタンをクリックする前のスクリーンショットを撮影
    driver.save_screenshot("before.png")

    # -----提出時間をランダムにする処理-----

    print("遅延させる前の日時:" + datetime_to_str())
    # 1から540秒の間でランダムにスリープする
    # もし朝7時にschedulerを設定していたら7:00から7:09の間で提出時間が変動する
    random_time = random.randint(1, 540)
    print("クリックするまで" + str(random_time) + "秒遅延させます")
    time.sleep(random_time)
    print("遅延させたあとの日時:" + datetime_to_str())

    # 送信ボタンをクリック
    sousin.click()
    # 一応待つ
    time.sleep(3)
    # 送信ボタンをクリックした後のスクリーンショットを撮影
    driver.save_screenshot("after.png")
    driver.close()

    print("Done " + datetime_to_str())

    # LINE送信
    send_line_notify_image("before", "before.png")
    send_line_notify_image("after", "after.png")
    send_line_notify_message("\n提出しました\n" + datetime_to_str())

    return 0


if __name__ == "__main__":
    main()
Python初心者につきソースコードのクオリティについてはご了承ください。
requests==2.22.0
selenium==3.141.0
python-3.7.4
Herokuでは3.9.1までサポートしているらしいです。
私は3.7.4を指定していますが、ローカル環境のバージョンが3.7.4だったから合わせただけで、特に意味はないです。たぶん3.9.1でも動きます。
ここで現在サポートしているバージョンを確認できます。
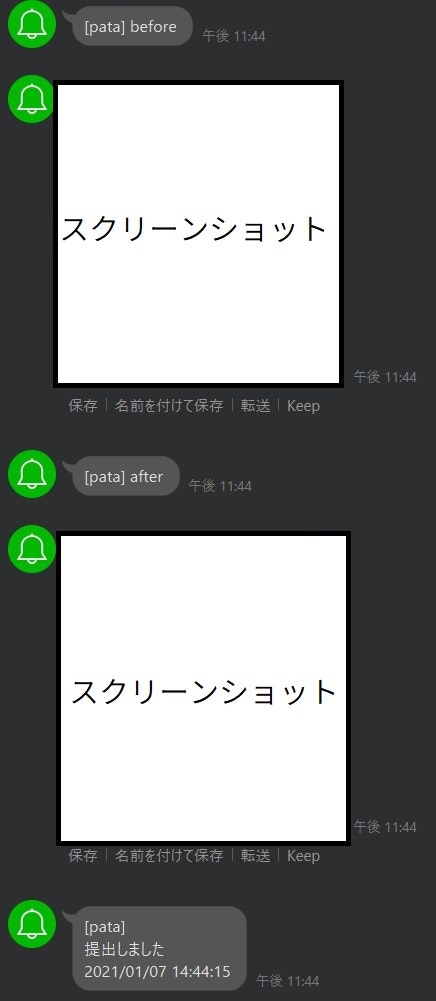
LINE Notifyの実行結果
Pythonの出力結果どうやって確認するねん!
heroku logs -t
このコマンドでターミナルに表示されるはずです。
参考記事🙇♂️
Googleフォーム関連
» (他作の)GoogleFormの自動入力 - Qiita https://qiita.com/mkohei/items/b62700b46bb71bf0a9c3
GoogleフォームのURLの仕様について詳しく書かれています。
Selenium関連
» Python: Selenium + Headless Chrome で Web ページ全体のスクリーンショットを撮る - CUBE SUGAR CONTAINER https://blog.amedama.jp/entry/2018/07/28/003342
ここのソースコードをそのまま使いました。ありがとうございます🙇♂️
» Selenium API(逆引き) https://www.seleniumqref.com/api/webdriver_gyaku.html
逆引き辞典助かる。
» Seleniumで使用するXPathをChromeで取得する - Qiita https://qiita.com/kdm/items/43bbaf076be2bf43b861
Heroku関連
» Herokuを使ってchromeでwebページのスクリーンショットをとる - Qiita https://qiita.com/isamua/items/c6a2f2ae5e2b03ebca6e
Heroku上のフォントの設定方法について詳しく書かれています。
» Herokuでお天気Pythonの定期実行 - Qiita https://qiita.com/seigo-pon/items/ca9951dac0b7fa29cce0
» Herokuで環境変数を設定する方法(全集) – トリリンガルエンジニアブログ https://trilingual-engineer.com/how-to-set-environment-variables-heroku/
LINE Notify関連
» PythonでLINE Notifyへ通知を送る - Qiita https://qiita.com/akeome/items/e1e0fecf2e754436afc8
ここのソースコードもほぼそのまま使いました。ありがとうございます🙇♂️
» PythonでLINEにメッセージを送る - Qiita https://qiita.com/moriita/items/5b199ac6b14ceaa4f7c9
