NFCでやってみた実験一覧
- Felica でつくる簡単な入退室管理 (Rasbpberry Pi に複数台のカードリーダ)
- https://qiita.com/nanbuwks/items/e0988d8fec131baa579d
- RaspberryPi で NFC RFID-RC522
- https://qiita.com/items/c502ba880fbb93f522b3
- element14 の EXPLORE-NFC-WW で NFC 試してみる
- https://qiita.com/items/0c436941a0c5f0a257b1
- Arduino ESP32 と STM32 で NFC RFID-RC522
- https://qiita.com/nanbuwks/items/96c3c2d2af2cf97f3797
- RaspberryPi + ondryaso/pi-rc522 ライブラリで Mifare を操作する
- https://qiita.com/nanbuwks/items/9cbf05609974870e9088
- STM32 で HID キーボード入力する カードリーダーを作る
- https://qiita.com/nanbuwks/items/53839cfee81346ffd6c4
Sony のちょっと旧いカードリーダー、S320。
Felica を使って簡単な入退室管理。
Suica や PASMO を使って、例えば着席したときに机上のカードリーダに読み込ませて・・・という利用シーンがある。この場合は、PCとかにカードリーダを1台つなげていればいい。
けれども入室するときに Suica 使って解錠すると同時に記録を取る、なんてことをする場合は PC じゃなくて IoT デバイス・・・今回は Raspberry Pi に繋げておきたい。
そして部屋の中と外にカードリーダーを設置し、入室専用と退室専用としたいですね。カードリーダーは2台当然必要だけれども、Raspberry Pi は1台にしたいところ。
ということで、Raspberry Pi にカードリーダーを2つつなげる実験。
Ubuntu 16.04 ( AMDx64 ) で S320 を動かす
まずは、PCを使ってテスト。
あらかじめ、
apt-get install libusb-dev
しておく
カードリーダーによって必要になるライブラリは異なる。
http://paralleltree.hatenablog.com/entry/2017/04/01/205708
によると、libpafeが対応しているということなので
http://hito.music.coocan.jp/pasori/libpafe.html
から
libpafe_0.0.8-1_amd64.deb
をダウンロードしてインストールした。
$ pasori_test
PaSoRi (RC-S320)
 firmware version 1.40
Echo test... success
EPROM test... success
RAM test... success
CPU test... success
Polling test... success
しかしながら、
pasori.pyというのを作ってみて、
$ python3 pasori.py
Traceback (most recent call last):
  File "pasori.py", line 11, in <module>
    libpafe = cdll.LoadLibrary("/usr/local/lib/libpafe.so")
  File "/usr/lib/python3.5/ctypes/__init__.py", line 425, in LoadLibrary
    return self._dlltype(name)
  File "/usr/lib/python3.5/ctypes/__init__.py", line 347, in __init__
    self._handle = _dlopen(self._name, mode)
OSError: /usr/local/lib/libpafe.so: cannot open shared object file: No such file or directory
となる。
sudo dpkg -i libpafe_0.0.8-1_amd64.deb
とかしてもダメだった。
あれれ?
結局、
の通り
$ sudo ldconfig
すると
$ python3 pasori.py
08ED125012345678
動いた(数字はダミー)
Raspberry pi ( raspbian )
# uname -a
Linux raspberrypi 4.9.24-v7+ #993 SMP Wed Apr 26 18:01:23 BST 2017 armv7l GNU/Linux
ちょっと前のraspbian
Ubuntuと同様に
sudo apt-get install libusb-dev
しておく
http://hito.music.coocan.jp/pasori/libpafe.html から辿って
wget http://hito.music.coocan.jp/pasori/libpafe-0.0.8.tar.gz
をダウンロード
解凍したディレクトリに入って
./configure
make
sudo make install
としたが、
 $ pasori_test
pasori_test: error while loading shared libraries: libpafe.so.0: cannot open shared object file: No such file or directory
となる。しかしながらUbuntuと同じく
$ sudo ldconfig
でこの問題はクリア。次に、
 $ pasori_test
error
となる。この問題はudevに登録してなかったため。
https://github.com/rfujita/libpafe
のドキュメントを参考に
$ sudo vim /lib/udev/rules.d/60-libpafe.rules
ACTION!="add", GOTO="pasori_rules_end"
SUBSYSTEM=="usb_device", GOTO="pasori_rules_start"
SUBSYSTEM!="usb", GOTO="pasori_rules_end"
LABEL="pasori_rules_start"

ATTRS{idVendor}=="054c", ATTRS{idProduct}=="01bb", MODE="0664", GROUP="plugdev"
ATTRS{idVendor}=="054c", ATTRS{idProduct}=="02e1", MODE="0664", GROUP="plugdev"

LABEL="pasori_rules_end"
$ sudo udevadm control --reload-rules
とすると使えるようになる
GoogleCalendarに記録する
IFTTT
IFTTT使ってGoogleCalendarに登録しようとしたけどうまくいかない。
いい感じにWebHookでトリガーかけたつもりだけれどGoogleCalendar側には何も出ない。
デバッグとかも難しそうだったのでさくっと別方法を。
gcalcli インストールの試行錯誤
ここの項目は、インストールに苦労した記録。単にインストールしたいひとはここは飛ばしてください。
$ sudo pip3 install gcalcli
Downloading/unpacking gcalcli
  Downloading gcalcli-3.4.0.tar.gz (1.7MB): 1.7MB downloaded
  Running setup.py (path:/tmp/pip-build-9snj57_o/gcalcli/setup.py)
・
・
・
さて、試してみるか・・・
$ gcalcli add
  File "/usr/local/bin/gcalcli", line 199
    print "ERROR: Missing module - %s" % e.args[0]
                                     ^
うーん?? Python2 書式でエラーになってますね。
さて、raspbian のレポジトリにも gcalcli 入っているのでこちらを試してみましょう。
$ sudo apt-get install gcalcli
パッケージリストを読み込んでいます... 完了
依存関係ツリーを作成しています
状態情報を読み取っています... 完了
以下の追加パッケージがインストールされます:
  fontconfig fontconfig-config fonts-dejavu-core gxmessage hicolor-icon-theme
  javascript-common libatk1.0-0 libatk1.0-data libavahi-client3 libcairo2
  libcups2 libdatrie1 libfontconfig1 libgdk-pixbuf2.0-0
  libgdk-pixbuf2.0-common libgraphite2-3 libgtk2.0-0 libgtk2.0-bin
  libgtk2.0-common libharfbuzz0b libjasper1 libjs-jquery libpango-1.0-0
  libpango1.0-0 libpangocairo-1.0-0 libpangoft2-1.0-0 libpangox-1.0-0
  libpangoxft-1.0-0 libpixman-1-0 libthai-data libthai0 libxcb-render0
  libxcb-shm0 libxcomposite1 libxcursor1 libxdamage1 libxfixes3 libxft2
  libxinerama1 libxrandr2 libxrender1 python-crypto python-dateutil
  python-gdata python-parsedatetime python-pyicu python-simplejson python-six
  python-vobject
提案パッケージ:
  cups-common librsvg2-common gvfs libjasper-runtime python-crypto-dbg
  python-crypto-doc python-gdata-doc python-twisted-core
以下のパッケージが新たにインストールされます:
  fontconfig fontconfig-config fonts-dejavu-core gcalcli gxmessage
  hicolor-icon-theme javascript-common libatk1.0-0 libatk1.0-data
  libavahi-client3 libcairo2 libcups2 libdatrie1 libfontconfig1
  libgdk-pixbuf2.0-0 libgdk-pixbuf2.0-common libgraphite2-3 libgtk2.0-0
  libgtk2.0-bin libgtk2.0-common libharfbuzz0b libjasper1 libjs-jquery
  libpango-1.0-0 libpango1.0-0 libpangocairo-1.0-0 libpangoft2-1.0-0
  libpangox-1.0-0 libpangoxft-1.0-0 libpixman-1-0 libthai-data libthai0
  libxcb-render0 libxcb-shm0 libxcomposite1 libxcursor1 libxdamage1 libxfixes3
  libxft2 libxinerama1 libxrandr2 libxrender1 python-crypto python-dateutil
  python-gdata python-parsedatetime python-pyicu python-simplejson python-six
  python-vobject
アップグレード: 0 個、新規インストール: 50 個、削除: 0 個、保留: 0 個。
14.6 MB のアーカイブを取得する必要があります。
この操作後に追加で 52.2 MB のディスク容量が消費されます。
続行しますか? [Y/n] y
取得:1 http://mirrordirector.raspbian.org/raspbian/ jessie/main fonts-dejavu-core all 2.34-1 [1,047 kB]
取得:2 http://archive.raspberrypi.org/debian/ jessie/main libpixman-1-0 armhf 0.33.3+git20151011-7de61d8-rpi1 [156 kB]
取得:3 http://mirrordirector.raspbian.org/raspbian/ jessie/main fontconfig-config all 2.11.0-6.3+deb8u1 [274 kB]
・
・
・
$ gcalcli
  File "/usr/local/bin/gcalcli", line 199
    print "ERROR: Missing module - %s" % e.args[0]
                                     ^
SyntaxError: Missing parentheses in call to 'print'
うーん? pathが?
$ sudo pip3 uninstall gcalcli
$ sudo apt-get purge gcalcli
$ sudo pip3 uninstall gcalcli
$ sudo pip install gcalcli
とか繰り返していても同じエラー。はてなー? と思って /usr/local/bin/gcalcliを消してた上で改めて
$ sudo pip install gcalcli
すると動くようになった
(後から考えると $ hash -r するだけで多分OK)
改めて、 gcalcli インストールのまとめ
以下だけでOK(多分)
sudo apt-get install python-pip
sudo pip install gcalcli
gcalcli
まず最初に
$ gcalcli -noauth_local_webserver list
WARNING:root:This function, oauth2client.tools.run(), and the use of the gflags library are deprecated and will be removed in a future version of the library.
Go to the following link in your browser:

    https://accounts.google.com/o/oauth2/auth?scope=https%3A%2F%2Fwww.googleapis.com%2Fauth%2Fcalendar+https%3A%2F%2Fwww.googleapis.com%2Fauth%2Furlshortener&redirect_uri=urn%3Aietf%3Awg%3Aoauth%3A2.0%3Aoob&response_type=code&client_id=232867676714.apps.googleusercontent.com&access_type=offline

Enter verification code:
と出るので、この URL をブラウザにコピペ。
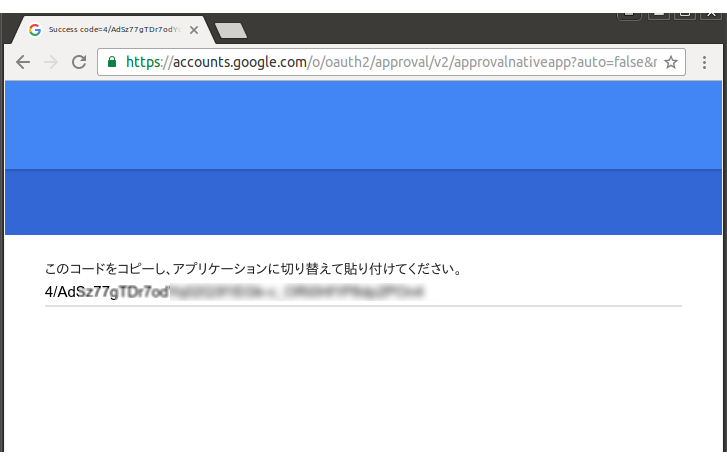
??
出てきたvarification codeをコピペ。
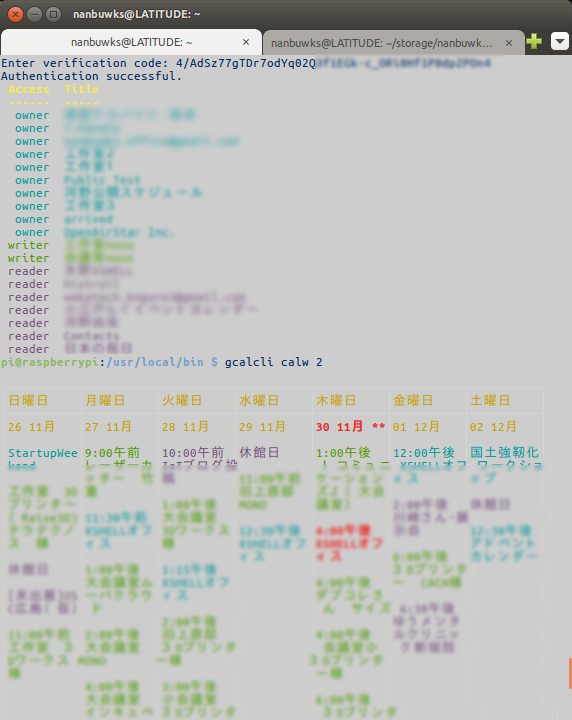
こんな感じで登録できた。
入室を記録
予定を登録するテスト
$ gcalcli --calendar 'arrived' --title 'TEST' --where 'オフィス' --when '11/30/2017 17:00' --duration 60 --description 'ついた' --reminder 30 add
こうすると、2017/11/30 17:00-17:30 の予定として、arrivedカレンダーに「オフィス」に「ついた」として登録できた。
試しに時刻を"now"とすると、
$ gcalcli --calendar 'arrived' --title 'TEST' --where 'オフィス' --when 'now' --duration 60 --description 'ついた' --reminder 30 add
現在時刻で登録できた。
pythonで、特定のカードがかざされるとgcalcliを呼び出すスクリプトを作って、「入室」はできた。
退室
どうしようかな・・・とりあえず安直に、カードリーダを2つ繋げて入室専用と退室専用としてみます。
RaspberryPiのUSBポートはこんな感じです。
$ lsusb -t
/:  Bus 01.Port 1: Dev 1, Class=root_hub, Driver=dwc_otg/1p, 480M
    |__ Port 1: Dev 2, If 0, Class=Hub, Driver=hub/5p, 480M
        |__ Port 1: Dev 3, If 0, Class=Vendor Specific Class, Driver=smsc95xx, 480M
        |__ Port 2: Dev 12, If 0, Class=Vendor Specific Class, Driver=, 1.5M
        |__ Port 5: Dev 14, If 0, Class=Vendor Specific Class, Driver=, 1.5M
4ポートあるUSBコネクタは、内部ではBus01.Dev.2の配下の Port2,Port3,Port4,Port5となっていました。ちなみに、Port1は内部でオンボードのネットワークインターフェースに割り当てられています。
libpafeの標準では、どちらか1つしか認識しません。
ソースを見ていると、はてな? 同じような処理が二重に書かれているのはどうしてかな・・・
調べてみると、libusbというのは2種類あるらしいです。
libusb-dev と libusb-1.0-0の違い
libusb-dev
インストール方法:sudo apt-get install libusb-dev
説明はこちら http://www.electric-spoon.com/doc/libusb-dev/html/index.html
usb.hをインクルードして使用
対応
Chapter 2. Current OS support
Linux (2.2, 2.4 and on)
FreeBSD, NetBSD and OpenBSD
Darwin/MacOS X
libusb-1.0-0
インストール方法:sudo apt-get install libusb-1.0-0-dev
説明はこっち http://libusb.sourceforge.net/
libusb.hをインクルードして使用
対応
What platforms are supported?
Linux, OS X, Windows, Windows CE, Android, OpenBSD/NetBSD, Haiku.
この説明はlibusb-1.0-0の方(多分)
「libusb関係のメモと、バルク転送サンプル」
https://qiita.com/gpsnmeajp/items/b1282b2d3c14470bbae7
libpafe の実装
libpafeは、#ifdef HAVE_LIBUSB_1 でどちらを使うかを分けています。
デフォルトだとlibusb-devを使うようになっていました。
libpafeを書き換えて複数のpasoriに対応する
とりあえず、libusb-devを使う前提で、複数のpasoriに対応するようにしてみました。
pasori_command.hのdiff
6d5
< pasori *pasori_open_n(int number);
pasori_command.cのdiff
10a11
>
714,863d714
< open_usb_n(pasori *pp, int number)
< {
< #ifdef HAVE_LIBUSB_1
<   int i, r, cnt;
<   struct libusb_device_descriptor desc;
<   libusb_device *dev;
<
<   pp->ctx = NULL;
<   pp->devs = NULL;
<   r = libusb_init(&pp->ctx);
<   if (r < 0) {
<     return PASORI_ERR_COM;
<   }
< #ifdef DEBUG_USB
<   libusb_set_debug(pp->ctx, 3);
< #endif
<   cnt = libusb_get_device_list(pp->ctx, &pp->devs); //get the list of devices
<   if(cnt < 0) {
<     return PASORI_ERR_COM;
<   }
<
<   for(i = 0; i < cnt; i++) {
<     r = libusb_get_device_descriptor(pp->devs[i], &desc);
<     if (r < 0) {
<       continue;
<     }
<
< #ifdef DEBUG_USB
<     Log("Check for %04x:%04x\n", desc.idVendor, desc.idProduct);	/* debug */
< #endif
<     if (desc.idVendor == PASORIUSB_VENDOR &&
< 	(desc.idProduct == PASORIUSB_PRODUCT_S310 ||
< 	 desc.idProduct == PASORIUSB_PRODUCT_S320 ||
< 	 desc.idProduct == PASORIUSB_PRODUCT_S330)) {
< #ifdef DEBUG_USB
<       Log("Device is found %04x:%04x\n", desc.idVendor, desc.idProduct);	/* debug */
< #endif
<       dev = pp->devs[i];
<       goto finish;
<     }
<   }
<   Log("pasori not found in USB BUS");
<   return PASORI_ERR_COM;
<
<  finish:
<
<   switch (desc.idProduct) {
<   case PASORIUSB_PRODUCT_S310:
<     pp->type = PASORI_TYPE_S310;
<     break;
<   case PASORIUSB_PRODUCT_S320:
<     pp->type = PASORI_TYPE_S320;
<     break;
<   case PASORIUSB_PRODUCT_S330:
<     pp->type = PASORI_TYPE_S330;
<     break;
<   default:
<     return PASORI_ERR_TYPE;
<   }
<
<   r = libusb_open(dev, &pp->dh);
<   if(r) {
<     return PASORI_ERR_COM;
<   }
<
<   if(libusb_kernel_driver_active(pp->dh, 0) == 1) {
<     r = libusb_detach_kernel_driver(pp->dh, 0);
<     if (r) {
<       return PASORI_ERR_COM;
<     }
<   }
<
<   pp->timeout = TIMEOUT;
<   get_end_points(pp);
<
<   if(libusb_claim_interface(pp->dh, INTERFACE_NUMBER) < 0) {
<     return PASORI_ERR_COM;
<   }
<
<   return 0;
< #else  /* HAVE_LIBUSB_1 */
<   struct usb_bus *bus;
<   struct usb_device *dev;
<
<   usb_init();
< #ifdef DEBUG_USB
<   usb_set_debug(255);
< #else
<   usb_set_debug(0);
< #endif
<   usb_find_busses();
<   usb_find_devices();
<   int counter=0;
<   for (bus = usb_get_busses(); bus; bus = bus->next) {
<     for (dev = bus->devices; dev; dev = dev->next) {
< #ifdef DEBUG_USB
<       Log("check for %04x:%04x\n", dev->descriptor.idVendor, dev->descriptor.idProduct);	/* debug */
< #endif
<       if (dev->descriptor.idVendor == PASORIUSB_VENDOR &&
< 	  (dev->descriptor.idProduct == PASORIUSB_PRODUCT_S310 ||
< 	   dev->descriptor.idProduct == PASORIUSB_PRODUCT_S320 ||
< 	   dev->descriptor.idProduct == PASORIUSB_PRODUCT_S330)) {
< #ifdef DEBUG_USB
< 	Log("Device is found %04x:%04x\n", dev->descriptor.idVendor, dev->descriptor.idProduct);	/* debug */
< #endif
<          if (counter==number){
<            goto finish;
<          }
<  	 counter++;
<       }
<     }
<   }
<   Log("pasori not found in USB BUS");
<   return PASORI_ERR_COM;
<
<  finish:
<   switch (dev->descriptor.idProduct) {
<   case PASORIUSB_PRODUCT_S310:
<     pp->type = PASORI_TYPE_S310;
<     break;
<   case PASORIUSB_PRODUCT_S320:
<     pp->type = PASORI_TYPE_S320;
<     break;
<   case PASORIUSB_PRODUCT_S330:
<     pp->type = PASORI_TYPE_S330;
<     break;
<   default:
<     return PASORI_ERR_TYPE;
<   }
<
<   pp->dh = usb_open(dev);
<   pp->dev = dev;
<   pp->timeout = TIMEOUT;
<   get_end_points(pp);
<
<   if (usb_set_configuration(pp->dh, 1)) {
<     /* error */
<     return PASORI_ERR_COM;
<   }
<
<   if (usb_claim_interface
<       (pp->dh, pp->dev->config->interface->altsetting->bInterfaceNumber)) {
<     /* error */
<     return PASORI_ERR_COM;
<   }
<   return 0;
< #endif	/* HAVE_LIBUSB_1 */
< }
<
< static int
1010,1029d860
< pasori *
< pasori_open_n(int number)
< {
<   pasori *pp;
<
<   pp = (pasori *) malloc(sizeof(pasori));
<
<   if (pp == NULL)
<     return NULL;
<
<   memset(pp, 0, sizeof(pasori));
<   pp->i_ep_in = 0x81;
<
<   if (open_usb_n(pp,number)) {
<     pasori_close(pp);
<     return NULL;
<   }
<
<   return pp;
< }
ということで、今までは
pasori = libpafe.pasori_open_n()
とやればよかったものを
pasori0 = libpafe.pasori_open_n(0)
というようにすれば今までと同じように使える。
pasori1 = libpafe.pasori_open_n(1)
とすると2つ目のpasoriにバインドするようになる。
その後の使い方は同じ。
コード
# -*- coding: utf-8 -*-

from __future__ import print_function
from ctypes import *

import time
import wiringpi as w
import subprocess

FELICA_POLLING_ANY = 0xffff
registered_card = "0123456789012345"


if __name__ == '__main__':

  w.wiringPiSetup()
  w.pinMode(0,1)
  libpafe = cdll.LoadLibrary("/usr/local/lib/libpafe.so")

  libpafe.pasori_open.restype = c_void_p
  libpafe.pasori_open_n.restype = c_void_p
  pasori0 = libpafe.pasori_open_n(0)
  pasori1 = libpafe.pasori_open_n(1)


  while 1:
    mId0 ="0000000000000000"
    mId1 ="0000000000000000"
    while (mId0 == "0000000000000000" and mId1 == "0000000000000000") :
      libpafe.pasori_init(pasori0)
      libpafe.pasori_init(pasori1)

      libpafe.felica_polling.restype = c_void_p
      felica0 = libpafe.felica_polling(pasori0, FELICA_POLLING_ANY, 0, 0)
      felica1 = libpafe.felica_polling(pasori1, FELICA_POLLING_ANY, 0, 0)

      idm0 = c_ulonglong()
      idm1 = c_ulonglong()
      libpafe.felica_get_idm.restype = c_void_p
      libpafe.felica_get_idm(felica0, byref(idm0))
      libpafe.felica_get_idm(felica1, byref(idm1))

      # print('{0:016X}'.format(idm.value ))
      mId0 = '{0:016X}'.format(idm0.value )
      mId1 = '{0:016X}'.format(idm1.value )
#      print (mId0)
#      print (mId1)

      libpafe.free(felica0)
      libpafe.free(felica1)
    if (mId0 == registered_card):
      # registered card
      print("detect arrive:",mId0)
      w.digitalWrite(0,1)
      time.sleep(0.1)
      w.digitalWrite(0,0)
      cmd = " gcalcli --calendar 'arrive' --title 'TEST' --where 'オフィス' --when 'now' --duration 60 --description 'ついた' --reminder 30 add "
      subprocess.call(cmd, shell=True)
    else:
      # non registered card
#      print("detecet not registed:",mId0)
      for i in range(3):
        w.digitalWrite(0,1)
        time.sleep(0.2)
        w.digitalWrite(0,0)
        time.sleep(0.1)
    if (mId1 == registered_card):
      # registered card
      print("detect leave:",mId1)
      w.digitalWrite(0,1)
      time.sleep(0.1)
      w.digitalWrite(0,0)
      cmd = " gcalcli --calendar 'leave' --title 'TEST' --where 'オフィス' --when 'now' --duration 60 --description 'でた' --reminder 30 add "
      subprocess.call(cmd, shell=True)
    else:
      # non registered card
#      print("detecet not registed:",mId1)
      for i in range(3):
        w.digitalWrite(0,1)
        time.sleep(0.2)
        w.digitalWrite(0,0)
        time.sleep(0.1)
    time.sleep(1)


  libpafe.pasori_close(pasori0)
  libpafe.pasori_close(pasori1)
kubohiroya 版の libpafe を使う
さて、上記のlibpafeの書き換えについては、rfujita 版の libpafe を使っていましたが、forkしたレポジトリがあり、そちらは複数のpasoriに対応していました。kubohiroya 版の libpafe がそれです。
今回はこのkubohiroya版のlibpafeは使いませんでしたが、raspberry pi上でコンパイルだけやってみました。以下はその記録。
$ ./configure
$ make

・
・
・
WARNING: `aclocal-1.11' is missing on your system.  You should only need it if
         you modified `acinclude.m4' or `configure.in'.  You might want
         to install the `Automake' and `Perl' packages.  Grab them from
         any GNU archive site.
 cd . && /bin/bash /home/pi/kubohiroya/libpafe/missing --run automake-1.11 --gnu
/home/pi/kubohiroya/libpafe/missing: 行 52: automake-1.11: コマンドが見つかりません
WARNING: `automake-1.11' is missing on your system.  You should only need it if
         you modified `Makefile.am', `acinclude.m4' or `configure.in'.
         You might want to install the `Automake' and `Perl' packages.
         Grab them from any GNU archive site.
CDPATH="${ZSH_VERSION+.}:" && cd . && /bin/bash /home/pi/kubohiroya/libpafe/missing --run autoconf
/home/pi/kubohiroya/libpafe/missing: 行 52: autoconf: コマンドが見つかりません
WARNING: `autoconf' is missing on your system.  You should only need it if
         you modified `configure.in'.  You might want to install the
         `Autoconf' and `GNU m4' packages.  Grab them from any GNU
         archive site.
・
・
・
libtool: link: gcc -I../src -I../ -g -O2 -o .libs/felica_dump felica_dump-felica_dump.o  ../src/.libs/libpafe.dylib
gcc: error: ../src/.libs/libpafe.dylib: No such file or directory
Makefile:282: recipe for target 'felica_dump' failed
make[2]: *** [felica_dump] Error 1
make[2]: Leaving directory '/home/pi/kubohiroya/libpafe/tests'
Makefile:302: recipe for target 'all-recursive' failed
make[1]: *** [all-recursive] Error 1
make[1]: Leaving directory '/home/pi/kubohiroya/libpafe'
Makefile:233: recipe for target 'all' failed
make: *** [all] Error 2
エラー出た
pi@raspberrypi:~/kubohiroya/libpafe $ sudo apt-get install autoconf
として、
$ make clean
$ ./configure
$ make
$ sudo make install
とするとインストールできた。