前回の記事(webサイトの更新の表示をgithubのreleaseで管理)の中で書いたgithubのreleaseに合わせてツイートをするGithub Actionsについて書きます。
概要
githubの任意のリポジトリのreleaseが公開されたタイミングでツイートをするGithub Actionsを作っていきます。
GitHub Marketplace
https://github.com/marketplace/actions/tweet-trigger-publish-release
リポジトリ
https://github.com/mugi111/tweet-trigger-release
作り方
↓↓↓作り方の参考にしたページです↓↓↓
LGTMすると現場猫が「ヨシ!」してくれるGitHub Actionsをつくった + Tips
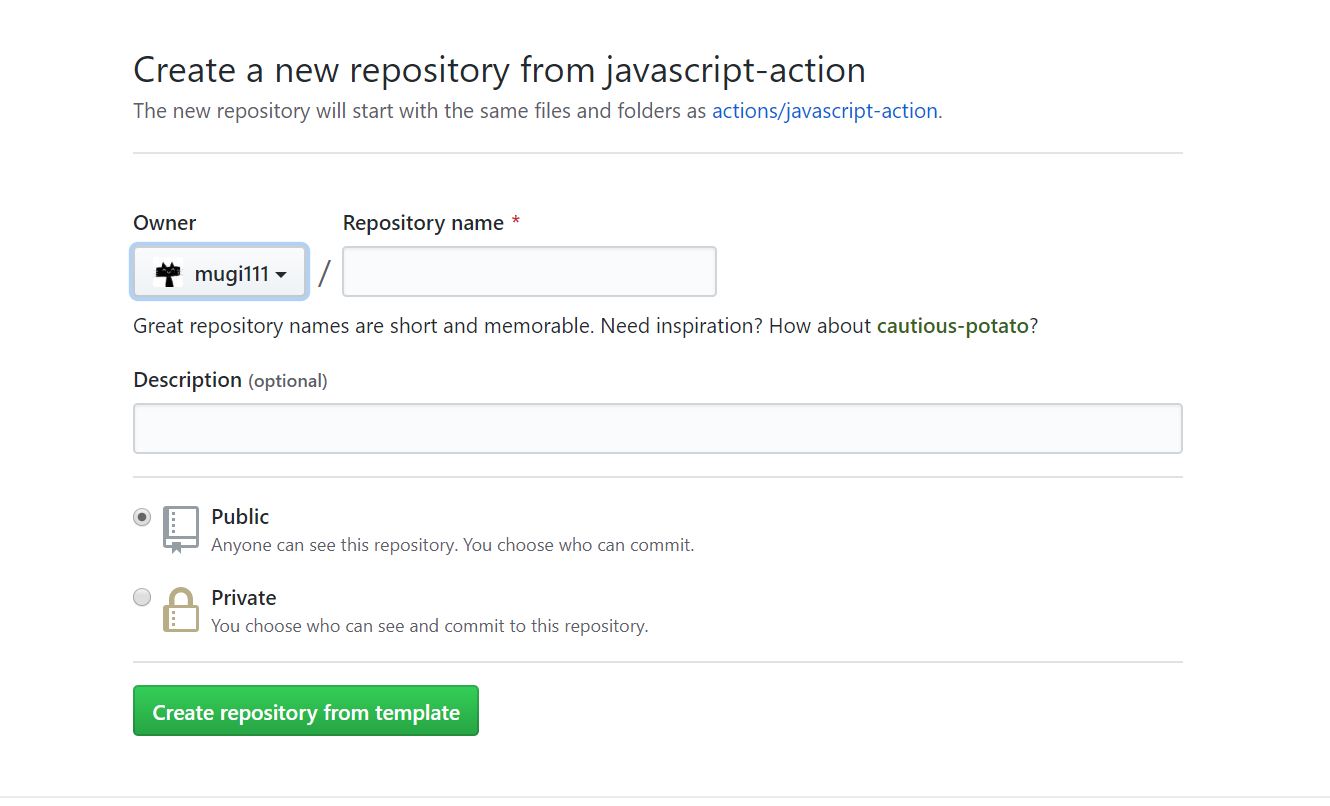
今回はこちらのjavascriptのテンプレートを使用して作っていきました。
githubにログインをしてリポジトリのページに行くと、緑色のUse this templateというボタンが見えるので

いつも通りの見慣れたページに移動するので、ここから自分のリポジトリを作成していきます。

テンプレートに加えて使うものとしてものとして今回はtwitterのパッケージをインストールします
npm i twitter --save
yarn add twitter
作りは単純でtwitterのAPIを使用してツイートをPOSTするだけです。
clientの宣言やツイート本文の指定で使われている
core.getInput(' xxx ')
この記述で後述する.github/workflow直下のyamlファイルから値を取得してきます。
下がコードの全文です。
const core = require('@actions/core');
const Twitter = require('twitter');

// most @actions toolkit packages have async methods
async function run() {
  try {
    const client = new Twitter({
      consumer_key: core.getInput('consumer_key'),
      consumer_secret: core.getInput('consumer_secret'),
      access_token_key: core.getInput('access_token_key'),
      access_token_secret: core.getInput('access_token_secret')
    });

    client.post('statuses/update', {status: core.getInput('tweet_body')}, (error) => {
      if (!error) {
          console.log('Succeeded!');
      } else {
          console.log('Couldnt tweet.');
      }
  });
  }
  catch (error) {
    core.setFailed(error.message);
  }
}

run()
yamlファイルの中身
この部分でreleaseのpublishedをトリガーにすることを定義しています。
on:
  release:
    types: [published]
あとは実行環境や使用するActions、入力する値を設定します。
  build:
    runs-on: ubuntu-latest
    steps:
      - uses: mugi111/tweet-trigger-release@v1.2
        with:
          consumer_key: ${{ secrets.CONSUMER_KEY }}
          consumer_secret: ${{ secrets.CONSUMER_SECRET }}
          access_token_key: ${{ secrets.ACCESS_TOKEN_KEY }}
          access_token_secret: ${{ secrets.ACCESS_TOKEN_SECRET }}
          tweet_body: "更新しました!"
使い方
以下のyamlファイルを.github/workflowの直下においておきます。
name: "tweet-trigger-release"
on:
  release:
    types: [published]

jobs:
  build:
    runs-on: ubuntu-latest
    steps:
      - uses: mugi111/tweet-trigger-release@v1.2
        with:
          consumer_key: ${{ secrets.CONSUMER_KEY }}
          consumer_secret: ${{ secrets.CONSUMER_SECRET }}
          access_token_key: ${{ secrets.ACCESS_TOKEN_KEY }}
          access_token_secret: ${{ secrets.ACCESS_TOKEN_SECRET }}
          tweet_body: "更新しました!"
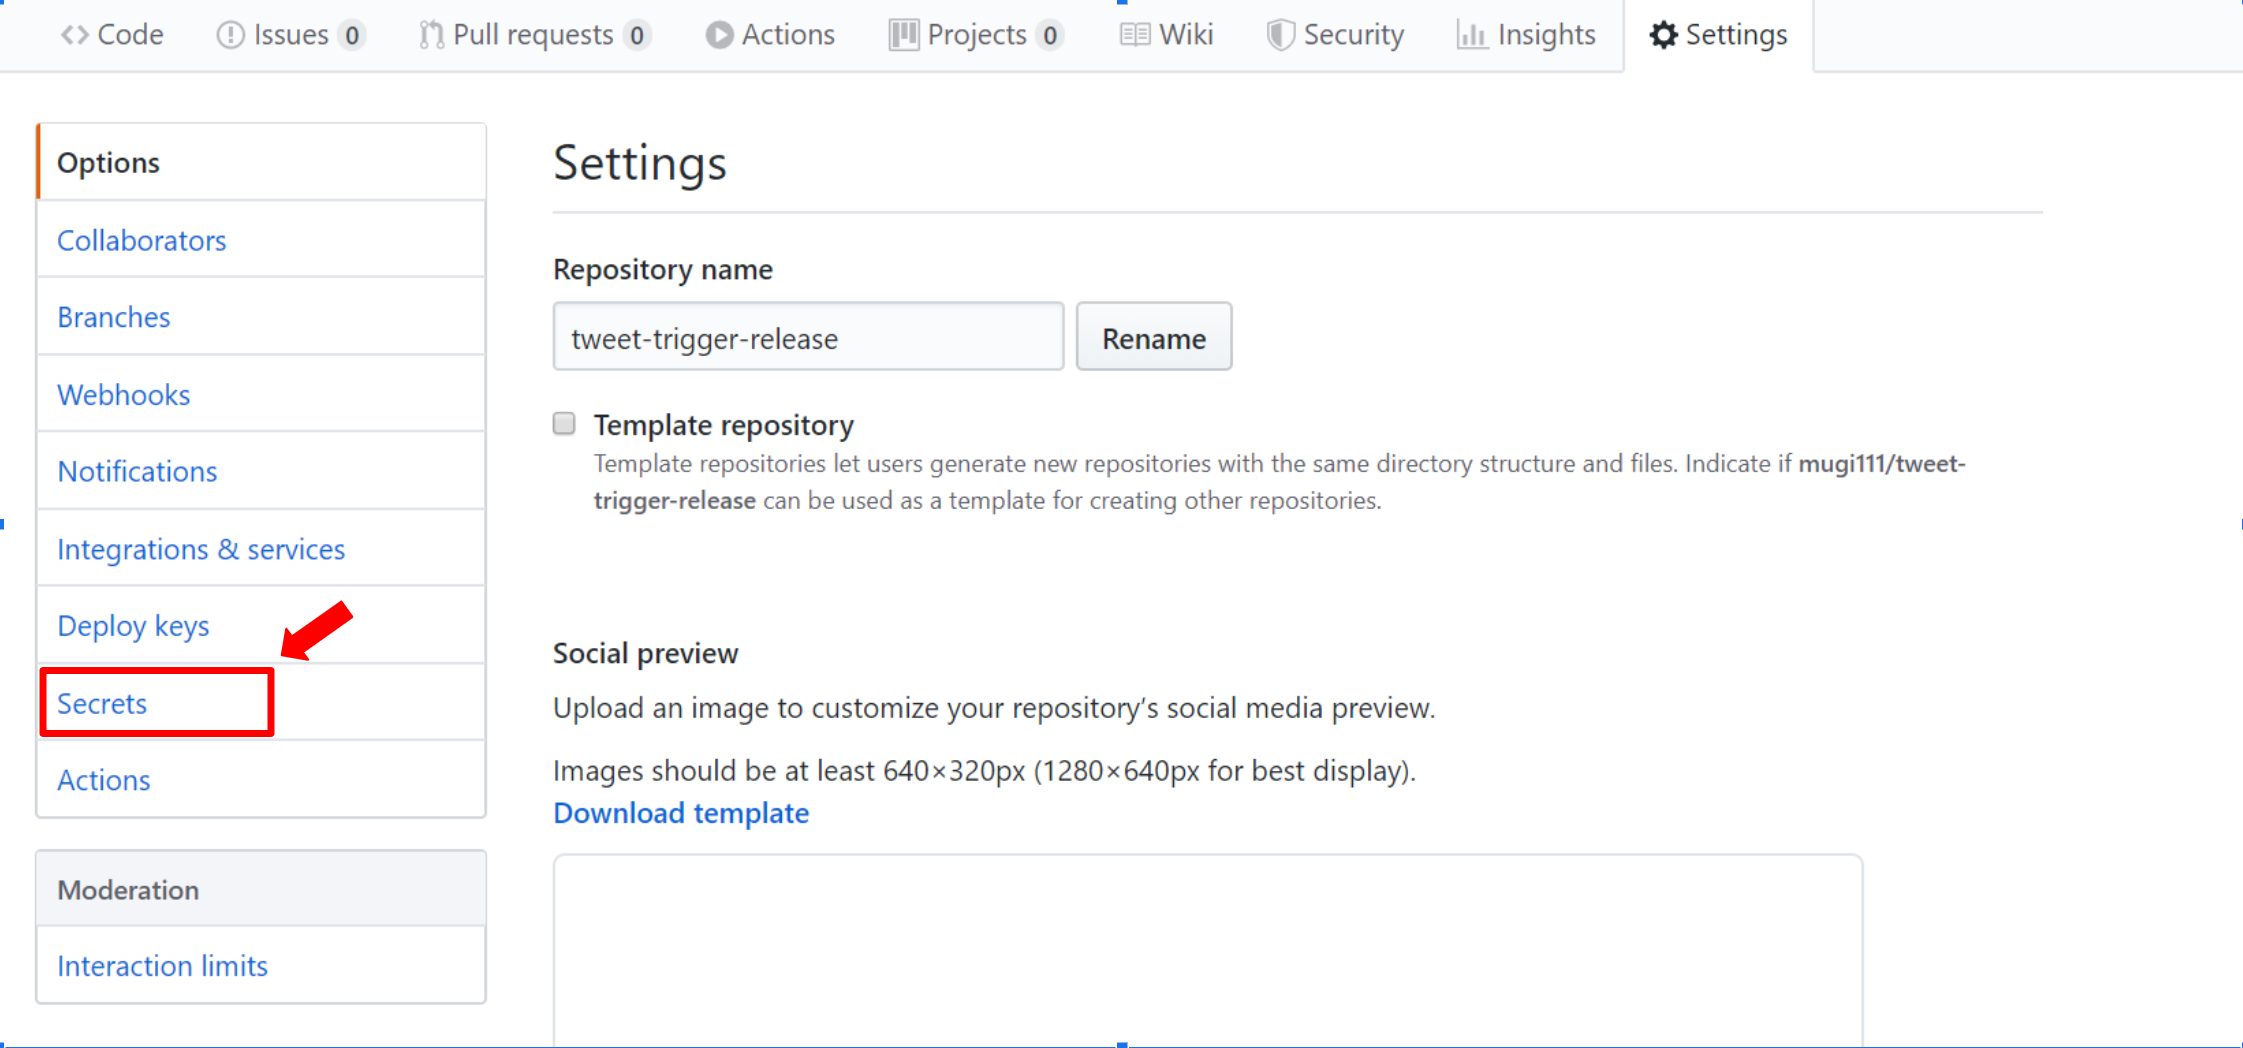
ここのsecrets.XXXを設定するためにSettingsのSecretsタブからtwitterのDeveloperページから取得したtokenやkeyを登録します。

Twitter API 登録 (アカウント申請方法) から承認されるまでの手順まとめ ※2019年8月時点の情報
https://qiita.com/kngsym2018/items/2524d21455aac111cdee
あとは"更新しました!"となっているtweet_bodyを書き換えることでツイートの本文を設定して完了です。
おわり