前提知識
GitHub Actionsは「ソフトウェアワークフローを簡単に自動化するサービス」。
有名どころだとCircleCI的なやつ。CI/CDとかの開発時に必要となる作業を自動化できるサービス。
基本的には.ymlファイルに色々設定とコマンド書けば使えるすごいやつだよ。
長すぎて読めない人
- GitHub Actionsを使って独自のアクションをつくった
- PRとかIssueでコメントに
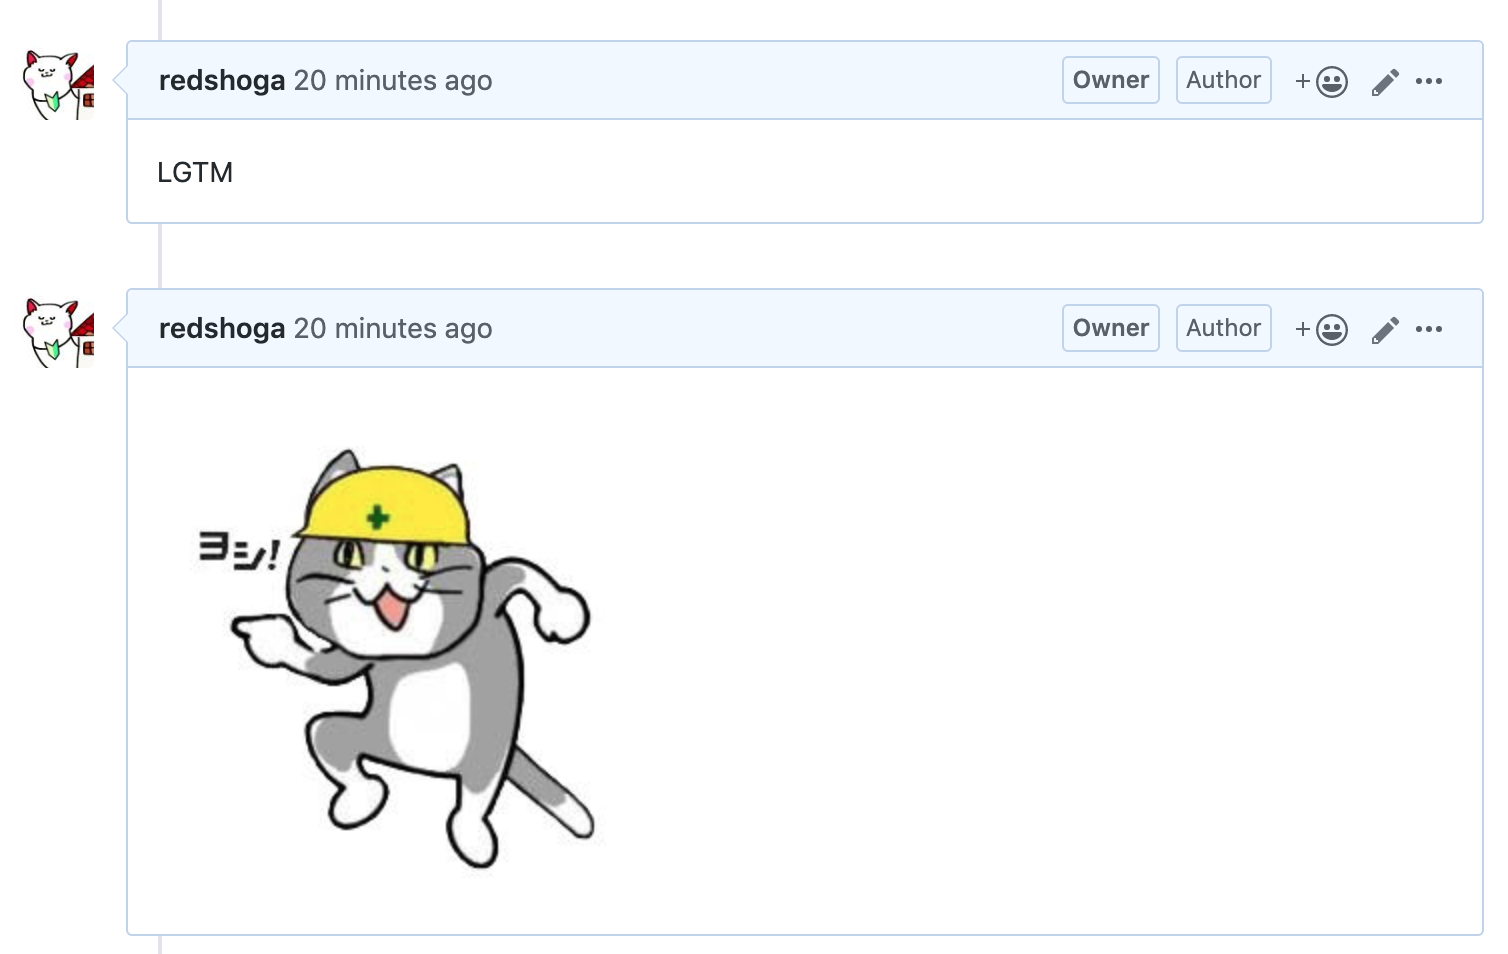
LGTMってあったら現場猫が「ヨシ!」ってしてくれる - 初めて作ったので、Tipsもまとめておく
つくったアクションの概要
リポジトリは以下(スターおねがいします)
設定するとGitHub上でPRやIssue上でLGTMとコメントすると「ヨシ!」って画像が貼られる

😺.。oO(この人がLGTMって言ってたらたぶん大丈夫や...! ヨシ!w)
使い方
任意のリポジトリに以下のファイルを.github/workflowsに保存するだけ。
あとは、SecretsタブでLGTM_TOKENを設定してあげてください。(LGTM_TOKENはscopeにrepoを入れないと権限の都合上動かないです)
- 暗号化されたシークレットの作成と利用: https://help.github.com/ja/actions/automating-your-workflow-with-github-actions/creating-and-using-encrypted-secrets
- GitHub「Personal access tokens」の設定方法: https://qiita.com/kz800/items/497ec70bff3e555dacd0
name: Site Cat LGTM
on:
  issue_comment:
    types: [created]
  pull_request_review:
    types: [submitted]
jobs:
  build:
    runs-on: ubuntu-latest
    steps:
      - uses: redshoga/site-cat-action@1.0
        with:
          token: ${{ secrets.LGTM_TOKEN }}
ソースの中身の簡単な解説
簡単な解説
- アクションのトリガーが走る.
- 任意の環境変数が入って指定した環境で、指定したファイルが実行される(action.yml).
- 以下が実行される
- ヨシ!
const core = require('@actions/core');
const fs = require('fs');
const Octokit = require("@octokit/rest");
const isLgtmString = (target) => {
return target.trim().toLowerCase() === "lgtm"
}
// most @actions toolkit packages have async methods
async function run() {
try {
// action info
const repoOwner = process.env.GITHUB_REPOSITORY.split("/")[0]
const repoName = process.env.GITHUB_REPOSITORY.split("/")[1]
if (!["issue_comment"].includes(process.env.GITHUB_EVENT_NAME)) return;
// github client
const token = core.getInput('token');
const octokit = new Octokit({
auth: `token ${token}`
});
// issue info
const issueInfo = JSON.parse(fs.readFileSync(process.env.GITHUB_EVENT_PATH, 'utf8'));
if (!isLgtmString(issueInfo.comment.body)) return
octokit.issues.createComment({
owner: repoOwner,
repo: repoName,
issue_number: issueInfo.issue.number,
body: ""
})
}
catch (error) {
core.setFailed(error.message);
}
}
run()
大雑把な作り方
GitHub Actionsを容易につくれるようにGitHub Actions Toolkitがある。
今回はその中でも簡単であると考えらえれるJavaScriptのテンプレを使う。
テンプレをcloneして、コードをいじって使う。
実際に動かしたいときには他のアクションなどと同様に以下のようにymlファイルに記述すれば動く。
- uses: your-name/your-action-repo@{{version}}
  with:
    ...
早めにやっておいた楽だったこと
Actionが起きたときの情報が以下の情報から取得できる。
(今回の例でいうと、どのIssueかとかどのリポジトリでアクションが起きたとか)
以下のデータを早めにみておき、どんな感じのデータが使えるのか知っておくとよい。
console.log("process.env");
console.log(process.env);

console.log("GITHUB_EVENT_PATH");
console.log(JSON.parse(fs.readFileSync(process.env.GITHUB_EVENT_PATH, 'utf8')))
あと、アクションの実行テストはやってみないとわからないため、リポジトリ内に自分の開発しているアクションをしてして実際に動かしてみるとよい。以下のような感じ。
your-action-repo
┗.github
 ┗.workflows
  ┗.test-action.yml
name: Action Test
on:
  ...
jobs:
  build:
    runs-on: ubuntu-latest
    steps:
      - uses: your-name/your-action-repo@{{version}}
        with:
          ...
開発の流れ
開発の流れは以下のようになった。
もっと楽な方法あったらおしえてください。
- ソースを修正
- 上記でのtest-action.ymlのversion部分を変更
-
npm run packageでソースを1つのファイルにまとめる(他のテンプレだとたぶん異なる) - コミット&プッシュ
- GitHub上で2で指定したバージョンでタグづけ
- 実際にアクションをトリガーさせて動かせて様子見
- 1に戻る
感想
わりと簡単だった。
GitHub Actionsは非常にGitHubの開発と相性がよく、学習コストも少ないので早めに勉強しておくと人生が豊かになりそう。
ただ、上記で書いたようにテストがめんどくさいので、ここらへんをもうちょっと賢くやっていきたい。