1.はじめに
以前、Python+OpenCVでイラストを描く - Qiitaを行いましたが、OpenCVだと曲線は円弧(楕円含む)しかなく、曲線を書きづらいので、今度はGIMP Python-Fuで行いました。
GIMP Python-Fuでパスを作成して曲線を描画する - Qiitaを利用して、OpenCV版よりも座標指定を減らしています。その代わり制御点を指定しているため複雑になっています。
GIMP Python-Fuでパスを使用して直線・曲線を描く時に、最後を閉じないと線の欠けが発生する - Qiitaのように閉じないストロークの最初と最後が尖ったりするのを目立たないようにするため線を細くしたり、円を描く方法が分からず曲線で書いたりして目が小さくなったりして、雰囲気が若干変わっています。
GIMP 2.10で動作確認をしています。
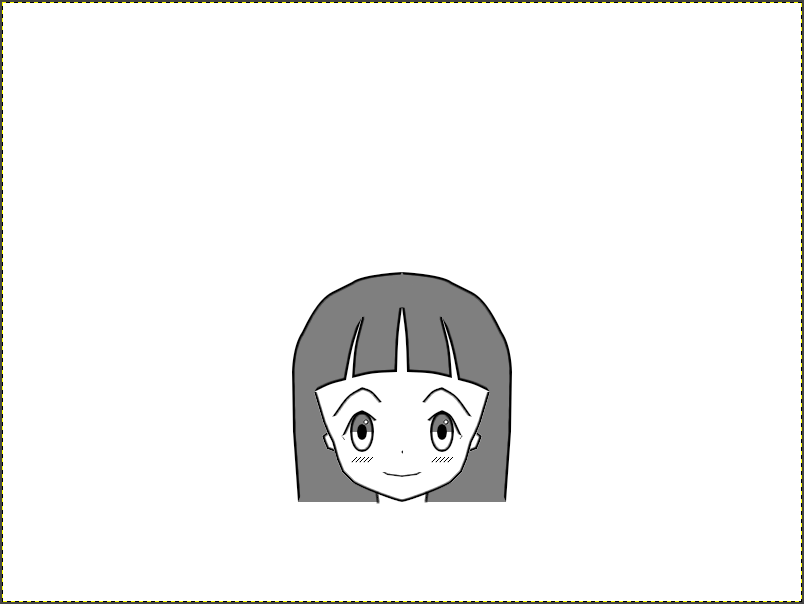
2.実行結果
スクリプトは後に載せています。
追記:「ブラシで描画」を選択していてブラシは「1. Pixel」の場合の実行結果です。「鉛筆で描画」や他のブラシの場合には若干結果が変わります。
3.スクリプト全体
main()以外はGIMP Python-Fuでパスを使用して直線・曲線を描く時に、最後を閉じないと線の欠けが発生する - Qiitaと同じです。但し、make_path_relative2()とget_absolute_point2()は今回ありません。
全てmake_path_relative()で描画しています。
今回も下記関数は、5 分で始める GIMP Python-Fu - Qiitaのものを使用させて頂いています。
create_image()
add_layer()
set_color()
set_line_width()
display_image()
# Python-Fu のサンプル・スクリプト
# GIMP の Python-Fu コンソールにコピペして実行してください

# 画像データの作成
## 指定したサイズで画像データを作成する
### width : 画像データの幅 (px)
### height : 画像データの高さ (px)
def create_image(width, height):
  # 画像データを生成
  return gimp.Image(width, height, RGB)

# レイヤーの追加
## 指定した名前のレイヤーを新規に作成し、画像データに挿入する
### image : レイヤーを追加する画像データ
### name : 新規に作成するレイヤーの名前(文字列)
def add_layer(image, name):
  # レイヤーの作成に必要なパラメータ
  width   = image.width
  height  = image.height
  type    = RGB_IMAGE
  opacity = 100
  mode    = NORMAL_MODE
  #
  # パラメータをもとにレイヤーを作成
  layer = gimp.Layer(image, name, width, height, type, opacity, mode)
  #
  # レイヤーを背景色で塗りつぶす(GIMP のデフォルトの挙動に合わせています)
  layer.fill(1)
  #
  # 画像データの 0 番目の位置にレイヤーを挿入する
  position = 0
  image.add_layer(layer, position)
  #
  return layer

# 描画する色を変更する
## パレットの前景色を変更して描画色を設定する
### r : 赤要素 (0-255)
### g : 緑要素 (0-255)
### b : 青要素 (0-255)
### a : 透明度 (0-1.0)
def set_color(r, g, b, a):
  color = (r, g, b, a)
  pdb.gimp_context_set_foreground(color)

# 描画する線の太さを変える
## ブラシのサイズを変更して線の太さを設定する
### width : 線の太さ
def set_line_width(width):
  pdb.gimp_context_set_brush_size(width)

# アンチエイリアスを設定する
## アンチエイリアスを設定する
### antialias : TRUE:有効、FALSE:無効
def set_antialias(antialias):
  pdb.gimp_context_set_antialias(antialias)

# 画像の表示
## 新しいウィンドウを作成し、画像データを表示する
### image : 表示する画像データ
def display_image(image):
  gimp.Display(image)

# パス作成
## パスを作成
### image : レイヤーを追加する画像データ
### points : パス座標
### mode : 0:描画しない、1:閉じないストローク(初期値)、2:閉じるストローク、3:塗りつぶし
### delete_path : TRUE:パスを削除する(初期値)、FALSE:パスを残す
def make_path(
    image,
    points,
    mode=1,
    delete_path=TRUE,
    ):
    """ パスを作成する。 """
    #
    # フラグ設定
    #
    is_draw   = FALSE
    is_closed = FALSE
    is_fill   = FALSE
    is_stroke = FALSE
    if mode == 1:           # 閉じないストローク
        is_draw   = TRUE
        is_closed = FALSE
        is_fill   = FALSE
        is_stroke = FALSE
    elif mode == 2:         # 閉じるストローク
        is_draw   = TRUE
        is_closed = TRUE
        is_fill   = FALSE
        is_stroke = FALSE
    elif mode == 3:         # 塗りつぶし
        is_draw   = TRUE
        is_closed = TRUE        # TRUE/FALSEどちらでも変わらない
        is_fill   = TRUE
        is_stroke = FALSE
    elif mode == 4:         # 閉じないストローク(アンチエイリアスが効かない)
        is_draw   = TRUE
        is_closed = FALSE       # 効かない
        is_fill   = FALSE
        is_stroke = TRUE
    elif mode == 5:         # 閉じるストローク(アンチエイリアスが効かない)
        is_draw   = TRUE
        is_closed = TRUE
        is_fill   = FALSE
        is_stroke = TRUE
    #
    vectors = pdb.gimp_vectors_new(image, 'path')  # パス新規作成
    pdb.gimp_image_add_vectors(image, vectors, 0)  # パスを画像に追加
    #
    # パスとしてストロークを追加
    #
    stroke_id = pdb.gimp_vectors_stroke_new_from_points(vectors, 0,
            len(points), points, is_closed)
    #
    # パスを表示
    #
    pdb.gimp_vectors_set_visible(vectors, TRUE)
    #
    # 描画するよう指定されてたら、パスから選択範囲を作って描画する。
    #
    if is_draw:
        #
        # 選択範囲解除
        #
        pdb.gimp_selection_none(image)
        #
        # パスから選択範囲作成
        #
        pdb.gimp_vectors_to_selection(
            vectors,
            CHANNEL_OP_REPLACE,
            TRUE,
            FALSE,
            0,
            0,
            )
        #
        # 前景色で描画
        #
        drawable = pdb.gimp_image_active_drawable(image)
        if is_fill:
            pdb.gimp_edit_fill(drawable, FOREGROUND_FILL)
        elif is_stroke:
            pdb.gimp_edit_stroke(drawable)
        else:
            pdb.gimp_drawable_edit_stroke_item(drawable, vectors)
        #
        # 選択範囲解除
        #
        pdb.gimp_selection_none(image)
    #
    # パス削除が指定されていたらパスを削除する。
    #
    if delete_path:
        # パス削除
        #
        pdb.gimp_image_remove_vectors(image, vectors)
    #
    return

def get_absolute_point(list):
    """ """
    rlist = []
    for pos in list:
        if len(pos) == 6:
            (x, y, rx1, ry1, rx2, ry2) = pos
            x1 = x + rx1
            y1 = y + ry1
            x2 = x + rx2
            y2 = y + ry2
        else:
            (x, y) = pos
            x1 = x
            y1 = y
            x2 = x
            y2 = y
        rlist.extend([
            x1,
            y1,
            x,
            y,
            x2,
            y2,
            ])
    return rlist

# パス作成(相対座標指定)
## パスを作成
### image : レイヤーを追加する画像データ
### points : パス座標
### mode : 0:描画しない、1:最後を閉じないストローク(初期値)、2:最後を閉じるストローク、3:塗りつぶし
### delete_path : TRUE:パスを削除する(初期値)、FALSE:パスを残す
def make_path_relative(
    image,
    points,
    mode=1,
    delete_path=TRUE,
    ):
    """ パスを作成する。 """
    new_points = get_absolute_point(points)
    make_path(image, new_points, mode, delete_path)

# メイン
def main():
    image = create_image(800, 600)
    layer = add_layer(image, "背景")
    set_color(0, 0, 0, 1.0)
    set_line_width(6)
    set_antialias(TRUE)
    # 値は(アンカーX, Y[, 制御開始点増分X, Y, 制御終了点増分X, Y])
    #
    set_color(127, 127, 127, 1.0)
    points1_1 = [
        # 髪(右外側)
        (400, 270,    0,   0,   0,   0),
        (450, 280,  -10,  -8,   0,   0),
        (470, 290,    0,   0, +15,  +8),
        (500, 330,   -5, -10, +10, +15),
        (510, 370,    0,   0,   0,   0),
        (509, 430,    0,   0,   0,   0),
        (504, 500,    0,   0,   0,   0),

        # 首(右)
	(424, 500),
	(425, 491),

        # 輪郭右(耳除く)
	(430, 489),
	(440, 485),
	(450, 480),
	(460, 470),
	(465, 458),

	(467, 450),
	(475, 447),
	(478, 440),
	(480, 434),
	(475, 430),

	(479, 420),
	(482, 410),
	(485, 400),
	(488, 390),

        # 髪(右内側)2
        (488, 390,   0,   0, -16,  -8),
        (456, 378, +16,  +4,  -6, -33),
        (440, 315, +10, +30,   0,   0),

        (440, 315),  # 隙間ができるので大きめにする
        (438, 315),  #
        (399, 270),  #
        ]
    make_path_relative(image, points1_1, 3, TRUE)
    #
    points1_2 = [
        # 頭頂
	(400, 270),

        # 髪(右内側)1
        (400, 305,   0,   0,  +4, +30),
        (405, 370,  -1, -35, +25,  +1),
        (450, 376, -20,  -5,  -2, -31),
        (440, 315,  +8, +30,   0,   0),

        (440, 315),
        ]
    make_path_relative(image, points1_2, 3, TRUE)
    #
    points1_3 = [
        # 髪(左外側)
        (400, 270,   0,   0,   0,   0),
        (350, 280, +10,  -8,   0,   0),
        (330, 290,   0,   0, -15,  +8),
        (300, 330,  +5, -10, -10, +15),
        (290, 370,   0,   0,   0,   0),
        (291, 430,   0,   0,   0,   0),
        (296, 500,   0,   0,   0,   0),

        # 首(左)
	(376, 500),
	(375, 491),

        # 輪郭左(耳除く)
	(370, 489),
	(360, 485),
	(350, 480),
	(340, 470),
	(335, 458),

	(333, 450),
	(325, 447),
	(322, 440),
	(320, 434),
	(325, 430),

	(321, 420),
	(318, 410),
	(315, 400),
	(312, 390),

        # 髪(左内側)2
        (312, 390,   0,   0, +16,  -8),
        (344, 378, -16,  +4,  +6, -33),
        (360, 315, -10, +30,   0,   0),

        (360, 315),  # 隙間ができるので大きめにする
        (362, 315),  #
        (401, 270),  #
        ]
    make_path_relative(image, points1_3, 3, TRUE)
    #
    points1_4 = [
        # 頭頂
	(400, 270),

        # 髪(右内側)1
        (400, 305,   0,   0,  -4, +30),
        (395, 370,  +1, -35, -25,  +1),
        (350, 376, +20,  -5,  +2, -31),
        (360, 315,  -8, +30,   0,   0),

        (360, 315),
        ]
    make_path_relative(image, points1_4, 3, TRUE)
    #
    set_color(0, 0, 0, 1.0)
    #
    # 輪郭
    points1 = [
        (488, 390,  0, 0,  0, 0),
        (485, 400,  0, 0,  0, 0),
        (482, 410,  0, 0,  0, 0),
        (479, 420,  0, 0,  0, 0),
        (475, 430,  0, 0,  0, 0),
        (470, 440,  0, 0,  0, 0),
        (465, 458,  0, 0,  0, 0),
        (460, 470,  0, 0,  0, 0),
        (450, 480,  +5,  -5,  -5,  +5),
        (400, 500,  +5,   0,  -5,   0),
        (350, 480,  +5,  +5,  -5,  -5),
        (340, 470,  0, 0,  0, 0),
        (335, 458,  0, 0,  0, 0),
        (330, 440,  0, 0,  0, 0),
        (325, 430,  0, 0,  0, 0),
        (321, 420,  0, 0,  0, 0),
        (318, 410,  0, 0,  0, 0),
        (315, 400,  0, 0,  0, 0),
        (312, 390,  0, 0,  0, 0),
        ]
    make_path_relative(image, points1, 1, TRUE)
    #
    # 髪(右外側)
    points12 = [
        (400, 270,    0,   0,   0,   0),
        (450, 280,  -10,  -8,   0,   0),
        (470, 290,    0,   0, +15,  +8),
        (500, 330,   -5, -10, +10, +15),
        (510, 370,    0,   0,   0,   0),
        (509, 430,    0,   0,   0,   0),
        (504, 500,    0,   0,   0,   0),
        ]
    make_path_relative(image, points12, 1, TRUE)
    #
    #
    # 髪(左外側)
    points13 = [
        (400, 270,   0,   0,   0,   0),
        (350, 280, +10,  -8,   0,   0),
        (330, 290,   0,   0, -15,  +8),
        (300, 330,  +5, -10, -10, +15),
        (290, 370,   0,   0,   0,   0),
        (291, 430,   0,   0,   0,   0),
        (296, 500,   0,   0,   0,   0),
        ]
    make_path_relative(image, points13, 1, TRUE)
    #
    # 髪(右内側)1
    points14_1 = [
        (400, 305,   0,   0,  +4, +30),
        (405, 370,  -1, -35, +25,  +1),
        (450, 376, -20,  -5,  -2, -31),
        (440, 315,  +8, +30,   0,   0),
        ]
    make_path_relative(image, points14_1, 1, TRUE)
    #
    # 髪(右内側)2
    points14_2 = [
        (440, 315,   0,   0, +10, +30),
        (456, 378,  -6, -33, +16,  +4),
        (488, 390, -16,  -8,   0,   0),
        ]
    make_path_relative(image, points14_2, 1, TRUE)
    #
    # 髪(左内側)1
    points15_1 = [
        (400, 305,   0,   0,  -4, +30),
        (395, 370,  +1, -35, -25,  +1),
        (350, 376, +20,  -5,  +2, -31),
        (360, 315,  -8, +30,   0,   0),
        ]
    make_path_relative(image, points15_1, 1, TRUE)
    #
    # 髪(左内側)2
    points15_2 = [
        (360, 315,   0,   0, -10, +30),
        (344, 378,  +6, -33, -16,  +4),
        (312, 390, +16,  -8,   0,   0),
        ]
    make_path_relative(image, points15_2, 1, TRUE)
    #
    set_color(127, 127, 127, 1.0)
    # 右目上半分灰色
    points2 = [
        (452, 430,  0, -10,  0,   0),
        (428, 430,  0,   0,  0, -10),
        (440, 410, -8,   0, +8,   0),
        ]
    make_path_relative(image, points2, 3, TRUE)
    set_color(0, 0, 0, 1.0)
    # 右目
    points2 = [
        (452, 430,  0, -10,  0, +10),
        (440, 450, +8 ,  0, -8,   0),
        (428, 430,  0, +10,  0, -10),
        (440, 410, -8,   0, +8,   0),
        ]
    make_path_relative(image, points2, 2, TRUE)
    # 右瞳孔
    points2_2 = [
        (445, 430,  0, -5,  0, +5),
        (440, 438, +3 , 0, -3,  0),
        (435, 430,  0, +5,  0, -5),
        (440, 422, -3,  0, +3,  0),
        ]
    make_path_relative(image, points2_2, 3, TRUE)
    set_color(127, 127, 127, 1.0)
    # 左目上半分灰色
    points2 = [
        (372, 430,  0, -10,  0,   0),
        (348, 430,  0,   0,  0, -10),
        (360, 410, -8,   0, +8,   0),
        ]
    make_path_relative(image, points2, 3, TRUE)
    set_color(0, 0, 0, 1.0)
    # 左目
    points3 = [
        (372, 430,  0, -10,  0, +10),
        (360, 450, +8 ,  0, -8,   0),
        (348, 430,  0, +10,  0, -10),
        (360, 410, -8,   0, +8,   0),
        ]
    make_path_relative(image, points3, 2, TRUE)
    # 左瞳孔
    points3_2 = [
        (365, 430,  0, -5,  0, +5),
        (360, 438, +3 , 0, -3,  0),
        (355, 430,  0, +5,  0, -5),
        (360, 422, -3,  0, +3,  0),
        ]
    make_path_relative(image, points3_2, 3, TRUE)
    set_line_width(6)
    # 右眉毛
    points5 = [
        (420, 400,  0, 0, +10, -12),
        (440, 385, -10, +3, +15, +8),
        (470, 415, -15, -22,  0, 0),
        ]
    make_path_relative(image, points5, 1, TRUE)
    # 左眉毛
    points6 = [
        (380, 400,  0, 0, -10, -12),
        (360, 385, +10, +3, -15, +8),
        (330, 415, +15, -22,  0, 0),
        ]
    make_path_relative(image, points6, 1, TRUE)
    set_line_width(6)
    # 右目上
    points7 = [
        (425, 418,  0, 0,  +8, -7),
        (440, 408,  -7, +3,  +10, +4),
        (460, 434, -10, -22,  0, 0),
        ]
    make_path_relative(image, points7, 1, TRUE)
    # 左目上
    points8 = [
        (375, 418,  0, 0, -8, -7),
        (360, 408, +7, +3, -10, +4),
        (340, 434, +10, -22,  0, 0),
        ]
    make_path_relative(image, points8, 1, TRUE)
    #
    #
    # 右耳
    points16 = [
        (475, 430,  0, 0,  0, 0),
        (480, 434,  0, 0,  0, 0),
        (478, 440,  0, 0,  0, 0),
        (475, 447,  0, 0,  0, 0),
        (467, 450,  0, 0,  0, 0),
        ]
    make_path_relative(image, points16, 1, TRUE)
    #
    # 左耳
    points17 = [
        (325, 430,  0, 0,  0, 0),
        (320, 434,  0, 0,  0, 0),
        (322, 440,  0, 0,  0, 0),
        (325, 447,  0, 0,  0, 0),
        (333, 450,  0, 0,  0, 0),
        ]
    make_path_relative(image, points17, 1, TRUE)
    #
    #
    set_line_width(4)
    #
    # 右目光
    points2_3 = [
        (447, 420,  0, -2,  0, +2),
        (444, 423, +2 , 0, -2,  0),
        (441, 420,  0, +2,  0, -2),
        (444, 417, -2,  0, +2,  0),
        ]
    set_color(255, 255, 255, 1.0)
    make_path_relative(image, points2_3, 3, TRUE)
    set_color(0, 0, 0, 1.0)
    make_path_relative(image, points2_3, 2, TRUE)
    # 左目光
    points2_4 = [
        (367, 420,  0, -2,  0, +2),
        (364, 423, +2 , 0, -2,  0),
        (361, 420,  0, +2,  0, -2),
        (364, 417, -2,  0, +2,  0),
        ]
    set_color(255, 255, 255, 1.0)
    make_path_relative(image, points2_4, 3, TRUE)
    set_color(0, 0, 0, 1.0)
    make_path_relative(image, points2_4, 2, TRUE)
    # 鼻
    points9 = [
        (401, 448,  0, 0,  0, 0),
        (399, 450,  0, 0,  0, 0),
        (401, 452,  0, 0,  0, 0),
        ]
    make_path_relative(image, points9, 1, TRUE)
    # 口
    points4 = [
        (380, 470,  0, 0,  0, 0),
        (385, 473,  0, 0,  0, 0),
        (400, 475,  0, 0,  0, 0),
        (415, 473,  0, 0,  0, 0),
        (420, 470,  0, 0,  0, 0),
        ]
    make_path_relative(image, points4, 1, TRUE)
    #
    # 短い線を引くと太くぼやけるので、線幅を小さくする
    set_line_width(3)
    # 首(右)
    points10 = [
        (425, 491,  0, 0,  0, 0),
        (424, 500,  0, 0,  0, 0),
        ]
    make_path_relative(image, points10, 1, TRUE)
    #
    # 首(左)
    points11 = [
        (375, 491,  0, 0,  0, 0),
        (376, 500,  0, 0,  0, 0),
        ]
    make_path_relative(image, points11, 1, TRUE)
    #
    # 短い線を引くと太くぼやけるので、線幅を小さくする
    set_line_width(1.5)
    #
    # 右目尻
    points7_2 = [
        (460, 434,  0, 0,  0, 0),
        (458, 437,  0, 0,  0, 0),
        ]
    make_path_relative(image, points7_2, 1, TRUE)
    # 左目尻
    points8_2 = [
        (340, 434,  0, 0,  0, 0),
        (342, 437,  0, 0,  0, 0),
        ]
    make_path_relative(image, points8_2, 1, TRUE)
    #
    #
    set_line_width(1.5)
    #
    # 右頬
    make_path_relative(image, [(430, 460), (435, 455)], 1, TRUE)
    make_path_relative(image, [(434, 460), (439, 455)], 1, TRUE)
    make_path_relative(image, [(438, 460), (443, 455)], 1, TRUE)
    make_path_relative(image, [(442, 460), (447, 455)], 1, TRUE)
    make_path_relative(image, [(446, 460), (451, 455)], 1, TRUE)
    #
    # 左頬
    make_path_relative(image, [(350, 460), (355, 455)], 1, TRUE)
    make_path_relative(image, [(354, 460), (359, 455)], 1, TRUE)
    make_path_relative(image, [(358, 460), (363, 455)], 1, TRUE)
    make_path_relative(image, [(362, 460), (367, 455)], 1, TRUE)
    make_path_relative(image, [(366, 460), (371, 455)], 1, TRUE)
    #
    display_image(image)

main()
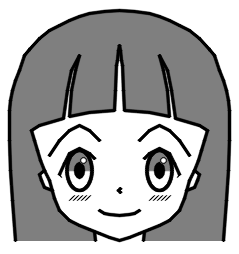
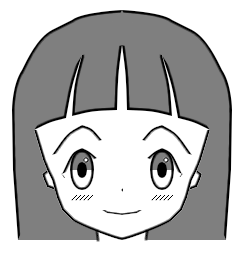
4.OpenCV版との比較
Python+OpenCV版 (Python+OpenCVでイラストを描く - Qiita)
GIMP Python-Fu版(今回)
5.その他
頬の線は直線のつもりなのに、下が出っ張るのが気になります。
現状、髪の塗りつぶしは輪郭を避けた形の多角形の塗りつぶしにしています。(OpenCV版も同様)
ここを、レイヤーを使用して後ろ髪、輪郭、前髪というように描ければ、塗りつぶしの手間が減るのではないかと考えています。
目をグラデーションで塗ろうと思いましたが、gimp_edit_blend()の引数が多くて挫折中です。
→追記:GIMP Python-Fuでグラデーションを描画する - Qiitaでグラデーションを確認しました。
追記:色を塗りました。→GIMP Python-Fuでイラストを描く その2 レイヤー・色塗り編 - Qiita


