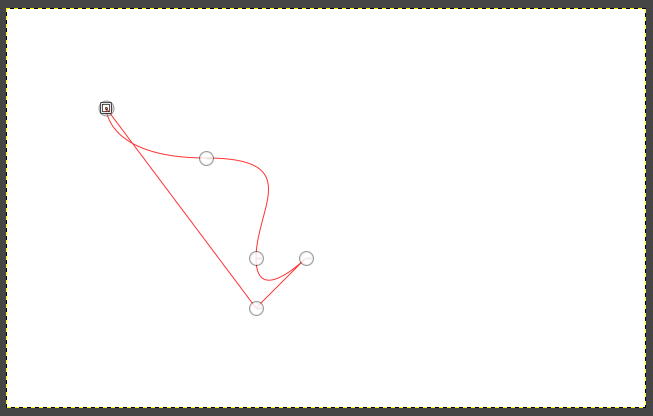
1. はじめに
下記ページを参考にして、Python-Fuコンソールで実行するスクリプトを作成しました。
5 分で始める GIMP Python-Fu - Qiita
パスの作成は下記プラグインを参考にしています。
GIMP 矢印の直線を描く方法・引き方 | Howpon[ハウポン]
タイトルに曲線と記述していますが、曲線と直線の組み合わせです。
最後を閉じないようにしたかったのですが、今はまだ方法が分かっていません。
→追記:gimp_vectors_stroke_new_from_points()の第5引数closedをFALSEにすればOKでした。
→さらに追記:closedをFALSEにした場合、閉じる線を描いて消したような不自然な線の欠けが発生します。
GIMP 2.10で動作確認をしています。
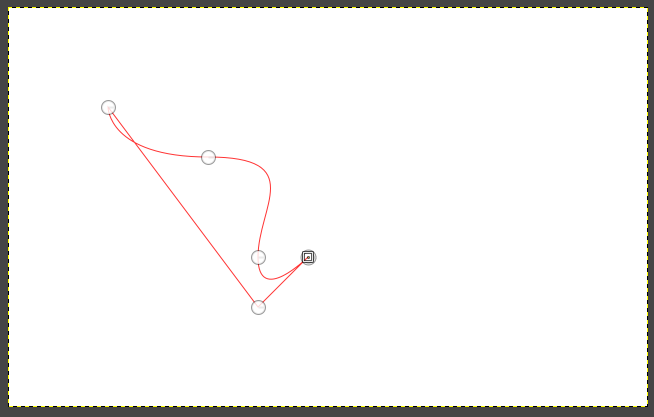
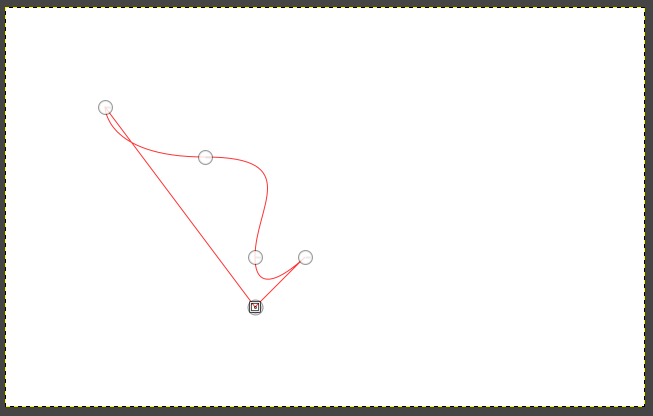
2.実行結果
追記:「鉛筆で描画」を選択していてブラシは「1. Pixel」の場合の実行結果です。「ブラシで描画」や他のブラシの場合には若干結果が変わります。
3.スクリプト全体
下記関数は、5 分で始める GIMP Python-Fu - Qiitaのものを使用させて頂いています。
create_image()
add_layer()
set_color()
set_line_width()
display_image()
# Python-Fu のサンプル・スクリプト
# GIMP の Python-Fu コンソールにコピペして実行してください

# 画像データの作成
## 指定したサイズで画像データを作成する
### width : 画像データの幅 (px)
### height : 画像データの高さ (px)
def create_image(width, height):
  # 画像データを生成
  return gimp.Image(width, height, RGB)

# レイヤーの追加
## 指定した名前のレイヤーを新規に作成し、画像データに挿入する
### image : レイヤーを追加する画像データ
### name : 新規に作成するレイヤーの名前(文字列)
def add_layer(image, name):
  # レイヤーの作成に必要なパラメータ
  width   = image.width
  height  = image.height
  type    = RGB_IMAGE
  opacity = 100
  mode    = NORMAL_MODE
  #
  # パラメータをもとにレイヤーを作成
  layer = gimp.Layer(image, name, width, height, type, opacity, mode)
  #
  # レイヤーを背景色で塗りつぶす(GIMP のデフォルトの挙動に合わせています)
  layer.fill(1)
  #
  # 画像データの 0 番目の位置にレイヤーを挿入する
  position = 0
  image.add_layer(layer, position)
  #
  return layer

# 描画する色を変更する
## パレットの前景色を変更して描画色を設定する
### r : 赤要素 (0-255)
### g : 緑要素 (0-255)
### b : 青要素 (0-255)
### a : 透明度 (0-1.0)
def set_color(r, g, b, a):
  color = (r, g, b, a)
  pdb.gimp_context_set_foreground(color)

# 描画する線の太さを変える
## ブラシのサイズを変更して線の太さを設定する
### width : 線の太さ
def set_line_width(width):
  pdb.gimp_context_set_brush_size(width)

# アンチエイリアスを設定する
## アンチエイリアスを設定する
### antialias : TRUE:有効、FALSE:無効
def set_antialias(antialias):
  pdb.gimp_context_set_antialias(antialias)

# 画像の表示
## 新しいウィンドウを作成し、画像データを表示する
### image : 表示する画像データ
def display_image(image):
  gimp.Display(image)

# パス作成
## パスを作成
### image : レイヤーを追加する画像データ
### points : パス座標
### stroke_enable : TRUE:ストロークを描画する、FALSE:パス作成のみ
def make_path(
    image,
    points,
    stroke_enable,
    ):
    """ パスを作成する。 """
    image.undo_group_start()  # undoできるようにしておく
    #
    vectors = pdb.gimp_vectors_new(image, 'path')  # パス新規作成
    pdb.gimp_image_add_vectors(image, vectors, -1)  # パスを画像に追加
    #
    # パスとしてストロークを追加
    #
    stroke_id = pdb.gimp_vectors_stroke_new_from_points(vectors, 0,
            len(points), points, TRUE)
    #
    # パスを表示
    #
    pdb.gimp_vectors_set_visible(vectors, TRUE)
    #
    # 描画するよう指定されてたら、パスから選択範囲を作って描画するる。
    # (その後、パスは削除してしまう)
    #
    if stroke_enable:
        #
        # 選択範囲解除
        #
        pdb.gimp_selection_none(image)
        #
        # パスから選択範囲作成
        #
        pdb.gimp_vectors_to_selection(
            vectors,
            CHANNEL_OP_REPLACE,
            TRUE,
            FALSE,
            0,
            0,
            )
        #
        # 前景色で描画
        #
        drawable = pdb.gimp_image_active_drawable(image)
        # gimp_edit_stroke(drawable)だとアンチエイリアスが効かないので
        # gimp_drawable_edit_stroke_item(drawable, vectors)を使用している
        pdb.gimp_drawable_edit_stroke_item(drawable, vectors)
        #
        # 選択範囲解除
        #
        pdb.gimp_selection_none(image)
        #
        # パス削除
        #
        pdb.gimp_image_remove_vectors(image, vectors)
    #
    image.undo_group_end()
    return

def main():
  image = create_image(640, 400)
  layer = add_layer(image, "背景")
  set_color(0, 0, 0, 1.0)
  set_line_width(4)
  set_antialias(TRUE)
  #
  # GIMPのパスは、1ヶ所につき、
  # ・制御開始点 x0,y0
  # ・アンカー x1,y1
  # ・制御終了点 x2,y2
  # の3つの座標=6個の値が必要。
  # x0, y0, x1, y1, x2, y2を列挙する。
  # (x0, y0)=(x1, y1)=(x2, y2)とすると、直線になる。
  points = [
      100, 100, 100, 100, 100, 100,
      100, 150, 200, 150, 300, 150,
      250, 200, 250, 250, 250, 300,
      300, 250, 300, 250, 300, 250,
      250, 300, 250, 300, 250, 300,
      ]
  make_path(image, points, TRUE)
  display_image(image)

main()
4. 追加・変更箇所
アンチエイリアス設定関数です。
# アンチエイリアスを設定する
## アンチエイリアスを設定する
### antialias : TRUE:有効、FALSE:無効
def set_antialias(antialias):
  pdb.gimp_context_set_antialias(antialias)
パスを作成し、ストロークを描画します。
座標の指定方法はmain()関数を参照して下さい。
# パス作成
## パスを作成
### image : レイヤーを追加する画像データ
### points : パス座標
### stroke_enable : TRUE:ストロークを描画する、FALSE:パス作成のみ
def make_path(
    image,
    points,
    stroke_enable,
    ):
    """ パスを作成する。 """
    image.undo_group_start()  # undoできるようにしておく
    #
    vectors = pdb.gimp_vectors_new(image, 'path')  # パス新規作成
    pdb.gimp_image_add_vectors(image, vectors, -1)  # パスを画像に追加
    #
    # パスとしてストロークを追加
    #
    stroke_id = pdb.gimp_vectors_stroke_new_from_points(vectors, 0,
            len(points), points, TRUE)
    #
    # パスを表示
    #
    pdb.gimp_vectors_set_visible(vectors, TRUE)
    #
    # 描画するよう指定されてたら、パスから選択範囲を作って描画するる。
    # (その後、パスは削除してしまう)
    #
    if stroke_enable:
        #
        # 選択範囲解除
        #
        pdb.gimp_selection_none(image)
        #
        # パスから選択範囲作成
        #
        pdb.gimp_vectors_to_selection(
            vectors,
            CHANNEL_OP_REPLACE,
            TRUE,
            FALSE,
            0,
            0,
            )
        #
        # 前景色で描画
        #
        drawable = pdb.gimp_image_active_drawable(image)
        # gimp_edit_stroke(drawable)だとアンチエイリアスが効かないので
        # gimp_drawable_edit_stroke_item(drawable, vectors)を使用している
        pdb.gimp_drawable_edit_stroke_item(drawable, vectors)
        #
        # 選択範囲解除
        #
        pdb.gimp_selection_none(image)
        #
        # パス削除
        #
        pdb.gimp_image_remove_vectors(image, vectors)
    #
    image.undo_group_end()
    return
main()関数です。
パスの座標を指定しています。
def main():
  image = create_image(640, 400)
  layer = add_layer(image, "背景")
  set_color(0, 0, 0, 1.0)
  set_line_width(4)
  set_antialias(TRUE)
  #
  # GIMPのパスは、1ヶ所につき、
  # ・制御開始点 x0,y0
  # ・アンカー x1,y1
  # ・制御終了点 x2,y2
  # の3つの座標=6個の値が必要。
  # x0, y0, x1, y1, x2, y2を列挙する。
  # (x0, y0)=(x1, y1)=(x2, y2)とすると、直線になる。
  points = [
      100, 100, 100, 100, 100, 100,
      100, 150, 200, 150, 300, 150,
      250, 200, 250, 250, 250, 300,
      300, 250, 300, 250, 300, 250,
      250, 300, 250, 300, 250, 300,
      ]
  make_path(image, points, TRUE)
  display_image(image)
5.パス
制御開始点 x0,y0、アンカー x1,y1、制御終了点 x2,y2 の順です。
制御点・アンカー1:100, 100, 100, 100, 100, 100,

制御点・アンカー2:100, 150, 200, 150, 300, 150,

制御点・アンカー3:250, 200, 250, 250, 250, 300,

制御点・アンカー4:300, 250, 300, 250, 300, 250,

制御点・アンカー5:250, 300, 250, 300, 250, 300,

6.参考
5 分で始める GIMP Python-Fu - Qiita
GIMP 矢印の直線を描く方法・引き方 | Howpon[ハウポン]
