Azure Percept記事一覧
- Azure Perceptってどんなもの?
- Azure Perceptデバイスのセットアップ
- Azure Perceptデバイスのセットアップ・ツアー
- Azure Percept Visionのサンプルコード+サンプルAIモデルを動かす
- Azure Percept Visionのサンプルコード+カスタムAIモデルを動かす
- Azure Perceptデバイスを初期化
Azure Perceptは、プログラマ目線で言うと、次の3段階に分かれています。
- サンプルコード+サンプルAIモデルを動かす
- サンプルコード+カスタムAIモデルを動かす
- カスタムコード+カスタムAIモデルを動かす
今回は、2.のVision系のサンプルコード+カスタムAIモデル(vision prototype)を動かしてみました。
「サンプルコード+カスタムAIモデル」を動かすには?
大まかには、Custom Vision Projectに画像を投入してタグ付け、トレーニングしてカスタムAIモデルを生成します。そして、カスタムAIモデルをAzure Percept Studioを使ってAzure Perceptデバイスへデプロイします。
(Custom Vision Projectを保持する)Cognitive Servicesの作成や、Custom Vision Projectの作成はいくつかの手段で出来ますが、ここではAzure Percept Studioを使うことにします。
以下の画像の、パトカー、乗用車、消防車を認識するObject Detectionを作りたいと思います。

Custom Vision Projectを作成 @ Azure Percept Studio
Azure Percept Studioを使って、Custom Vision Projectを作成「しようと」します。
先にCognitive Servicesが必要なのですが、Custom Vision Projectを作成する途中でCognitive Servicesの作成ができるので、Custom Vision Projectを作成します。(あぁ、ややこしい)
Azure Percept StudioのOverview -> Demos & tutorialsにある、Create a vision prototypeを実行します。

Resourceと書かれた欄がCustom Visionです。(微妙に分かりにくいw)
Create a new resourceをクリックして、Cognitive Servicesの作成に進みます。

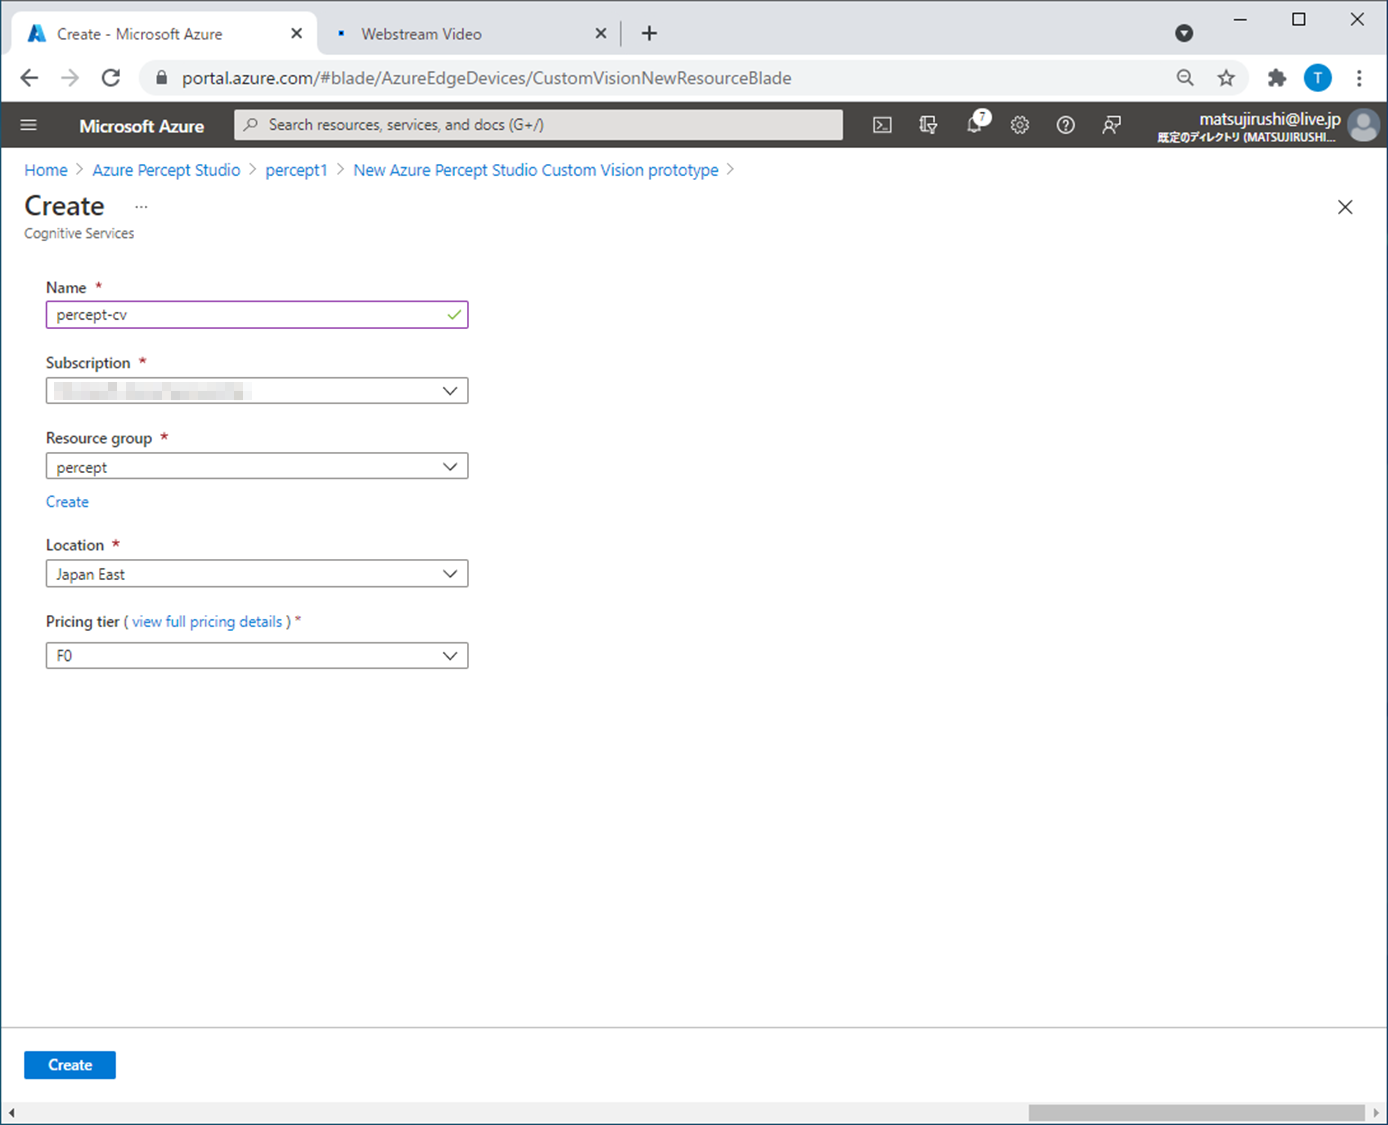
Cognitive Servicesを作成 @ Azure Percept Studio
諸々、入力してCreateをクリックします。
Custom Vision Projectを作成(2度目) @ Azure Percept Studio
諸々、入力してCreateをクリックします。

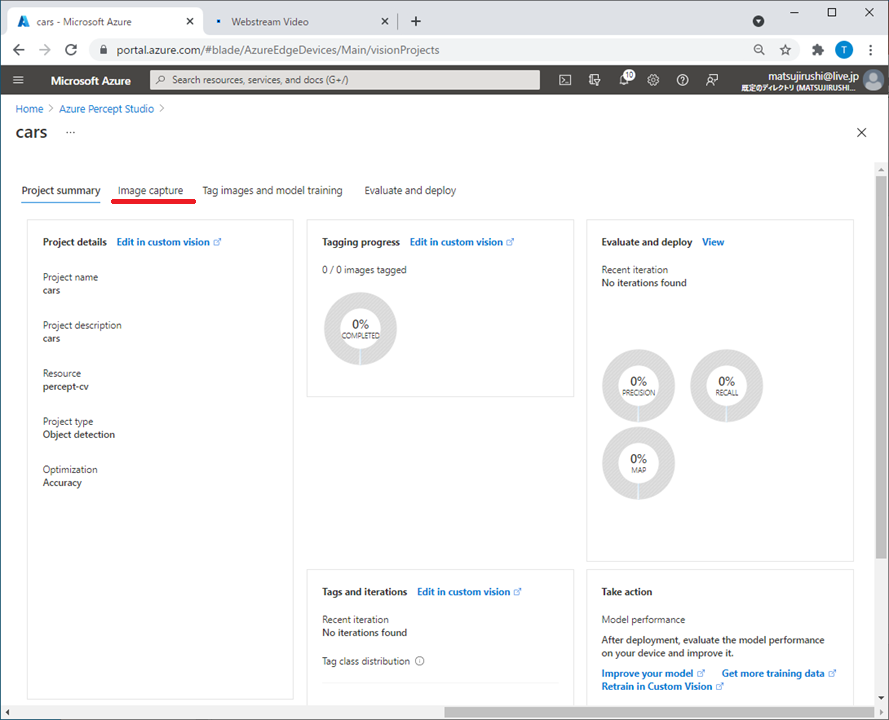
無事、Custom Vision Projectが作成されると、Image captureの画面に切り替わります。
Cognitive Services(のCustom Vision)側から、Custom Vision Projectが作成されているかを確認するために、このウィンドウは置いておいて、別のWebブラウザを起動します。

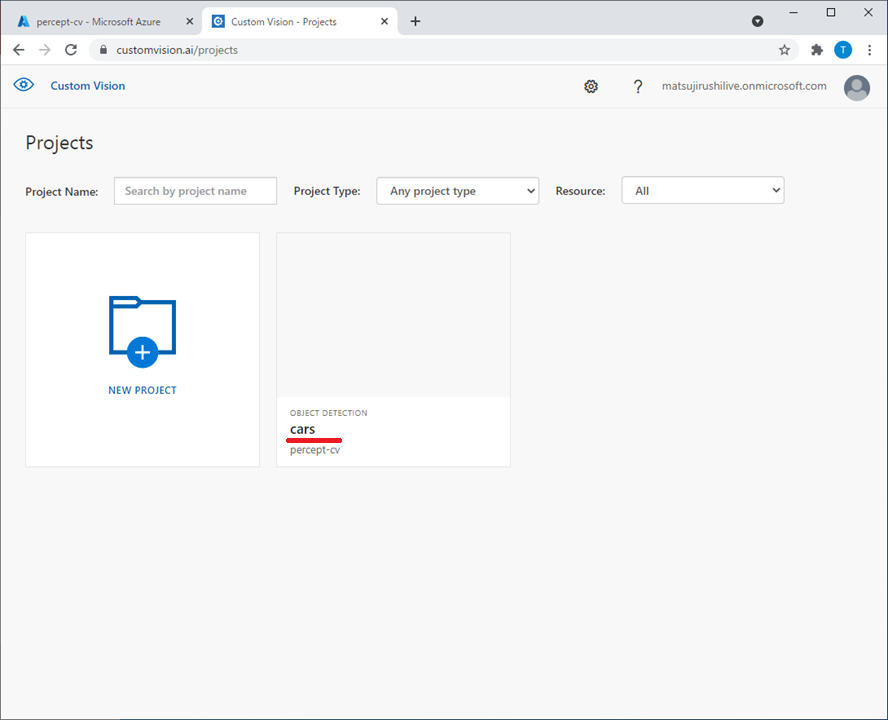
Custom Visionポータルで確認 @ Custom Vision
下記URLを開いて、SIGN INをクリックしてサインインします。

Custom Vision Projectの一覧が表示されます。
さきほど作成した「cars」が作成されているので、これをクリックします。
TaggedやUntaggedをクリックして、学習用の画像が有るか確認します。
まだ画像をキャプチャしていないので表示されません。

画像をキャプチャ @ Azure Percept Studio / Custom Vision
では、学習用の画像をキャプチャしましょう。
Azure Percept StudioのVision -> (Custom Vision Project名)をクリックします。

Image captureをクリックします。
Azure Perceptデバイスを選んでTake photoをクリックすると、Azure Perceptデバイスのカメラから画像を取り込んで、Custom Vision Projectへ転送します。

Custom Vision側は、画像をキャプチャしても即時表示されません。
TaggedやUntaggedをクリックして再表示すると確認できます。

(おもちゃの)クルマを動かしながら、ビシバシと画像をキャプチャします。
が!
やってみると、この部分の操作性が悪すぎてイライライライラMaxになっちゃいました。もー。
カメラ近くにシャッターボタンがあるとか、(自動キャプチャの場合に)キャプチャしたタイミングが分かるようにLEDがついているとかすると良いなーと思いました。
というわけで、デジカメでパパっと撮影して、この画像ファイルをCustom Visionの「+」マークで取り込みました。ふー。

画像のオブジェクトにタグ付け @ Custom Vision
キャプチャした画像のオブジェクト1つ1つに、タグを付けます。

結果、タグ付け完了画像が23枚になりました。

トレーニング @ Custom Vision
タグ付け画像から、AIモデルを生成します。
歯車マークをクリックして、Trainを実行します。

待つこと数分。
出来上がりました。

Azure Perceptデバイスへデプロイ @ Azure Percept Studio
いよいよ、Azure Perceptデバイスへデプロイです。
Azure Percept StudioのCustom Vision Projectにある、Project summaryを開くと、Itarationがあることが確認できます。

Evaluate and deploy画面に切り替えて、Azure PerceptデバイスとItarationを選択、Deploy modelをクリックします。

即、デプロイ完了となりますが、View streamするといつものように「Loading Model」と書かれています。

実行
しばらく待つと、新しいAIモデルで動きだしました!!

乗用車と消防車がうまく区別できていませんね。。。
学習データを作るのに、なにかコツが必要なのかも。
まとめ
Vision系のサンプルコード+カスタムAIモデル(vision prototype)を動かしてみました。
- Custom Vision ProjectをAzure Perceptデバイスへデプロイが簡単
- AIモデルはCustom Visionで作る
- Azure PerceptデバイスのTake photoは辛い、デジカメ->Custom Visionが楽