(目次はこちら)
はじめに
3年ほど前に、Deep FeaturesとFaissというタイトルで画像検索に関して書いたが、2020年3月AWSから、Build k-Nearest Neighbor (k-NN) similarity search engine with Amazon Elasticsearch Serviceが発表されたことを教えてもらい飛びついた。しかもただただサポートされているだけじゃなくて、HNSWで実装されているとのこと。
Built using the lightweight and efficient Non-Metric Space Library (NMSLIB), k-NN enables high scale, low latency nearest neighbor search on billions of documents across thousands of dimensions with the same ease as running any regular Elasticsearch query.
類似ベクトル探索/類似画像検索をElasticsearchで、しかもマネージドサービスで提供できるのは非常にメリットが大きくて、いろいろな用途で使いたい。この記事は、このサービスがすぐにでも実用できるものなのか確認したときの記録です。
(Python: 3.6.8, Tensorflow: 2.1.0で動作確認済み)
前提条件
この条件で、1クエリあたり、10ms〜20msで返ってくるなら、いろいろ用途がありそう
- ベクトル次元: 1,000〜
- ベクトル数: 1,000,000〜
- サーバスペック: AWS ec2 r5.large (2コア, 16GBメモリ) 1台
データ
若干重複はあるもののDeepFashionとDeepFashion2を合わせると約百万件(991,257)
特徴ベクトル抽出
簡単に、MobileNetV2のImageNetのPre-trained modelを使う。ベクトルは1,280次元。
import struct
import glob
import numpy as np
import tensorflow as tf
from tensorflow.keras.applications.mobilenet_v2 import preprocess_input
import tensorflow.keras.layers as layers
from tensorflow.keras.models import Model

def preprocess(img_path, input_shape):
    img = tf.io.read_file(img_path)
    img = tf.image.decode_jpeg(img, channels=input_shape[2])
    img = tf.image.resize(img, input_shape[:2])
    img = preprocess_input(img)
    return img

def main():
    batch_size = 100
    input_shape = (224, 224, 3)
    base = tf.keras.applications.MobileNetV2(input_shape=input_shape,
                                             include_top=False,
                                             weights='imagenet')
    base.trainable = False
    model = Model(inputs=base.input, outputs=layers.GlobalAveragePooling2D()(base.output))

    fnames = glob.glob('deepfashion*/**/*.jpg', recursive=True)
    list_ds = tf.data.Dataset.from_tensor_slices(fnames)
    ds = list_ds.map(lambda x: preprocess(x, input_shape), num_parallel_calls=-1)
    dataset = ds.batch(batch_size).prefetch(-1)

    with open('fvecs.bin', 'wb') as f:
        for batch in dataset:
            fvecs = model.predict(batch)

            fmt = f'{np.prod(fvecs.shape)}f'
            f.write(struct.pack(fmt, *(fvecs.flatten())))

    with open('fnames.txt', 'w') as f:
        f.write('\n'.join(fnames))

if __name__ == '__main__':
    main()
事前検証
Faissにも、HNSWが実装されているので、パラメータ選定の意味も含めて動作検証を行う。
Amazon Elasticsearch Serviceでは、コサイン類似度でスコアが返ってくるので、ここでも、normalize()して、L2をコサイン類似度に変換している。
import os
import time
import math
import random
import numpy as np
import json
from sklearn.preprocessing import normalize
import faiss

def dist2sim(d):
    return 1 - d / 2

def get_index(index_type, dim):
    if index_type == 'hnsw':
        m = 48
        index = faiss.IndexHNSWFlat(dim, m)
        index.hnsw.efConstruction = 128
        return index
    elif index_type == 'l2':
        return faiss.IndexFlatL2(dim)
    raise

def populate(index, fvecs, batch_size=1000):
    nloop = math.ceil(fvecs.shape[0] / batch_size)
    for n in range(nloop):
        s = time.time()
        index.add(normalize(fvecs[n * batch_size : min((n + 1) * batch_size, fvecs.shape[0])]))
        print(n * batch_size, time.time() - s)

    return index

def main():
    dim = 1280
    fvec_file = 'fvecs.bin'
    index_type = 'hnsw'
    #index_type = 'l2'
    index_file = f'{fvec_file}.{index_type}.index'

    fvecs = np.memmap(fvec_file, dtype='float32', mode='r').view('float32').reshape(-1, dim)

    if os.path.exists(index_file):
        index = faiss.read_index(index_file)
        if index_type == 'hnsw':
            index.hnsw.efSearch = 256
    else:
        index = get_index(index_type, dim)
        index = populate(index, fvecs)
        faiss.write_index(index, index_file)
    print(index.ntotal)

    q_idx = [random.randint(0, fvecs.shape[0]) for _ in range(100)]

    k = 10
    s = time.time()
    dists, idxs = index.search(normalize(fvecs[q_idx]), k)
    print((time.time() - s) / len(q_idx))
    print(idxs[0], dist2sim(dists[0]))

    s = time.time()
    for i in q_idx:
        dists, idxs = index.search(normalize(fvecs[i:i+1]), k)
    print((time.time() - s) / len(q_idx))

if __name__ == '__main__':
    main()
検索時間
HNSWすばらしい。これがElasticsearchで実現できるとステキ。
| Batch Search | Single Query Search | |
|---|---|---|
| IndexFlatL2 | 110 ms/image | 530 ms/image |
| IndexHNSWFlat | 0.9 ms/image | 5 ms/image |
類似画像検索結果
最左列がクエリ画像で、右側の列が、類似度が高い順に10画像。
上記、HNSWのパラメータ(m=48, efConstruction=128, efSearch=256)で、今回の検証に耐えうるReallが出てると判断(厳密な検証はしていない)。
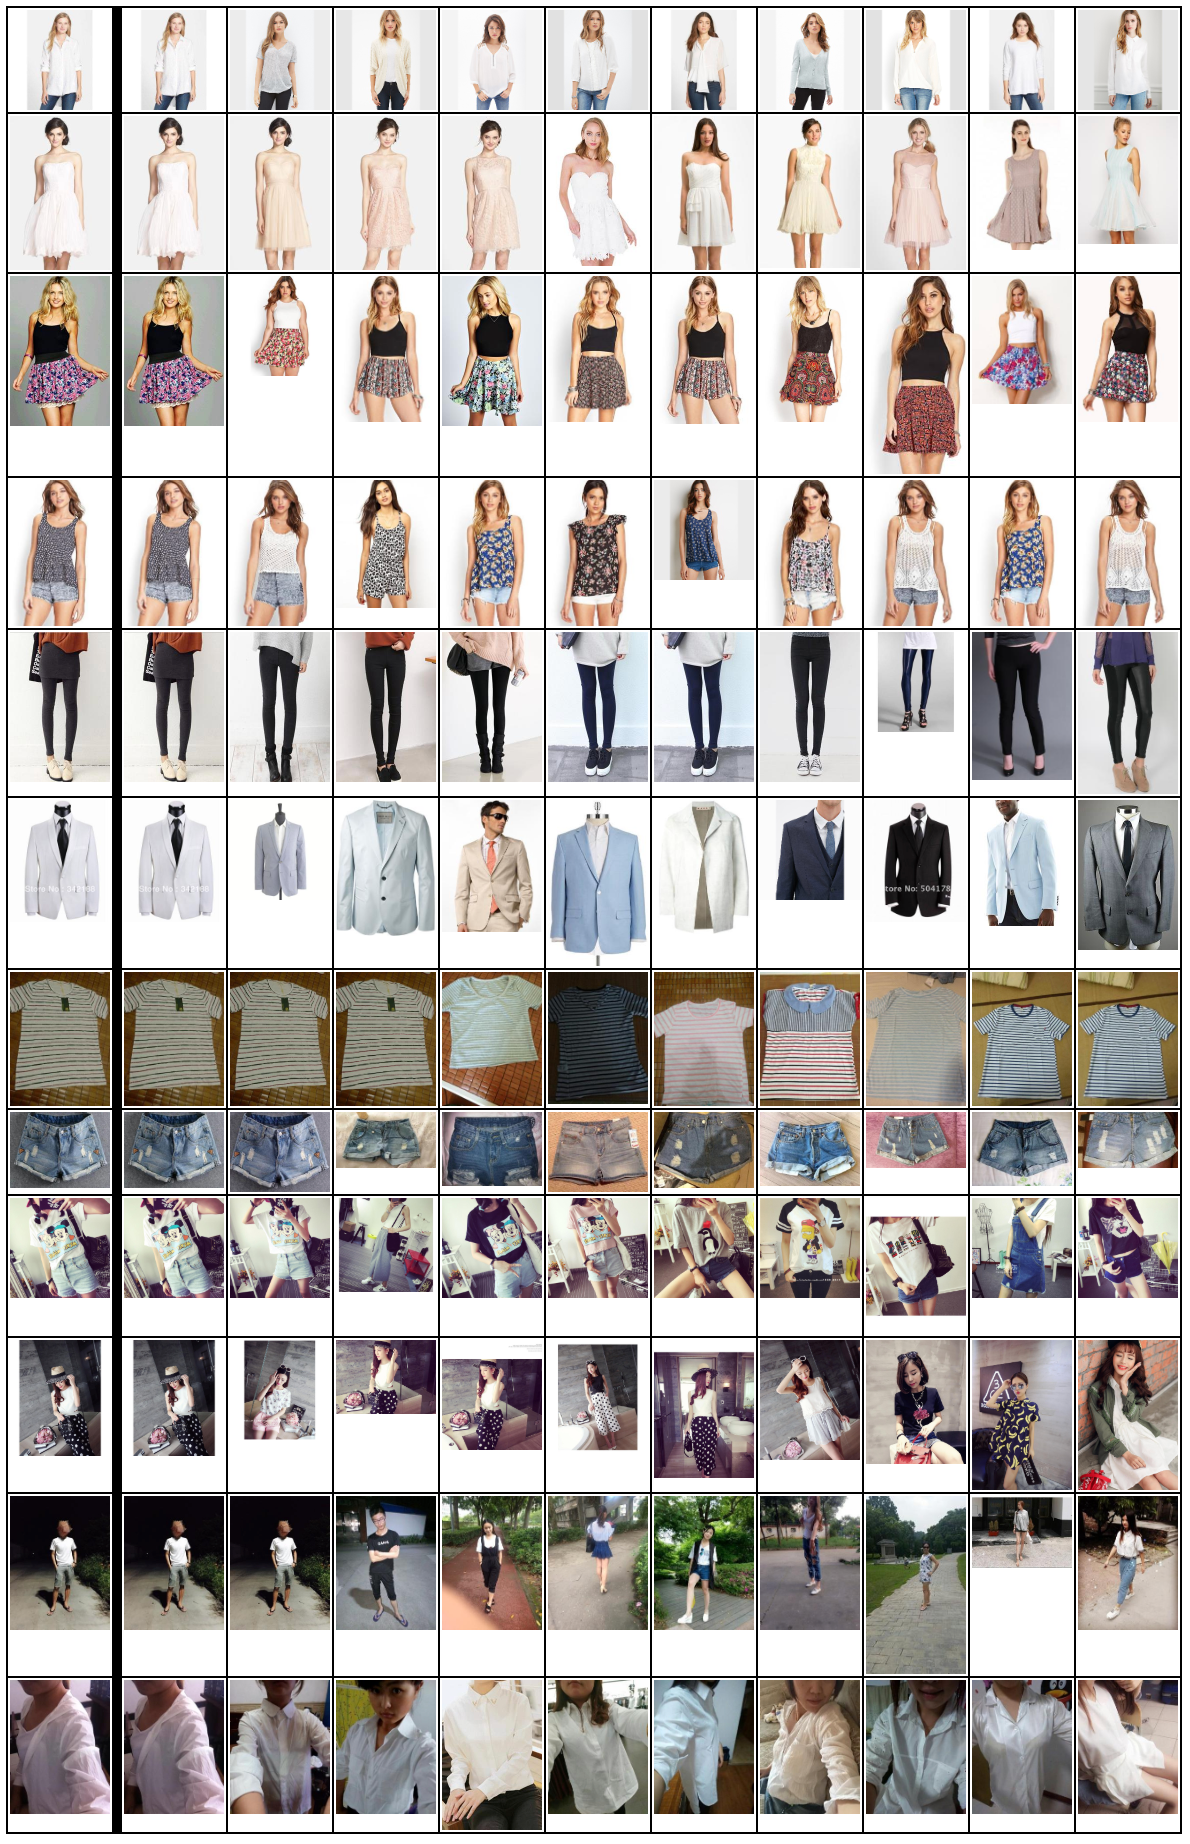
ImageNetのPre-trained modelでここまでいけるんだと感心。
Amazon Elasticsearch Service
AWSのコンソールからポチポチやって、10分くらい待つとインスタンスが立ち上がる。

データ挿入
import time
import math
import numpy as np
import json
import certifi
from elasticsearch import Elasticsearch, helpers
from sklearn.preprocessing import normalize

dim = 1280
fvecs = np.memmap('fvecs.bin', dtype='float32', mode='r').view('float32').reshape(-1, dim)

idx_name = 'imsearch'
es = Elasticsearch(hosts=['https://vpc-xxxxxxxxxxx.us-west-2.es.amazonaws.com'],
                   ca_certs=certifi.where())

mapping = {
    "settings" : {
        "index" : {
            "knn": True,
            "knn.algo_param" : {
                "ef_search" : "256",
                "ef_construction" : "128",
                "m" : "48"
            }
        }
    },
    'mappings': {
        'properties': {
            'fvec': {
                'type': 'knn_vector',
                'dimension': dim
            }
        }
    }
}

res = es.indices.create(index=idx_name, body=mapping, ignore=400)
print(res)

bs = 200
nloop = math.ceil(fvecs.shape[0] / bs)
for k in range(nloop):
    rows = [{'_index': idx_name, '_id': f'{i}',
             '_source': {'fvec': normalize(fvecs[i:i+1])[0].tolist()}}
             for i in range(k * bs, min((k + 1) * bs, fvecs.shape[0]))]
    s = time.time()
    helpers.bulk(es, rows, request_timeout=30)
    print(k, time.time() - s)
1時間くらい待つと、Searchable Documentsがデータ件数と同じに。
res = es.cat.indices(v=True)
print(res)
health status index                   uuid                   pri rep docs.count docs.deleted store.size pri.store.size
yellow open   imsearch                2fvSq3doQ5-4EHhpI_NfhA   5   1     991257            0     24.8gb         24.8gb
検索
k = 10
res = es.search(request_timeout=30, index=idx_name,
                body={'size': k, '_source': False,
                      'query': {'knn': {'fvec': {'vector': normalize(fvecs[0:1])[0].tolist(), 'k': k}}}})
print(json.dumps(res, indent=2))
目を疑う結果に。。。Warmupしても同じ。。。 1クエリあたり15s
サーバ台数を3台にしても現実的なレスポンス時間は得られず。
Faissを使った検証と同じドキュメントが返ってきていることは確認できた。
{
  "took": 15471,
  "timed_out": false,
  "_shards": {
    "total": 5,
    "successful": 5,
    "skipped": 0,
    "failed": 0
  },
  "hits": {
    "total": {
      "value": 1203,
      "relation": "eq"
    },
    "max_score": 1.0,
    "hits": [
      {
        "_index": "imsearch",
        "_type": "_doc",
        "_id": "340460",
        "_score": 1.0
      },
      {
        "_index": "imsearch",
        "_type": "_doc",
        "_id": "355432",
        "_score": 0.6760856
      },
...
あとがき
Amazon Elasticsearch Serviceにデータを入れるところまではよかったが、現実的なレスポンス時間を得ることはできず。何か間違っているんだろうか、、、わからない。。。
Update
Amazon ESチームのかたからアドバイス頂いたので、その内容を後日共有します。