TruffleBoxsがdApps開発で便利そうなので紹介してみる
truffleのTruffleBoxが便利なので紹介してみます。
TruffleBoxって?
TruffleBoxはtruffle(Ethreumのスマートコントラクト開発用フレームワーク)のテンプレート集です。
truffleのチュートリアル(ペットショップ)や、dApps開発用のテンプレート(trffle+react)など、すぐにインストールして実行することができます。
今回はTruffleBoxのreact + truffleが便利だなーと思ったので実際に動かしならが紹介していきます。
前提
- nodejsインストール済み環境
- Chrome利用
事前準備
事前準備として、truffleとganacheを入れます。
インストール
1.truffleのインストール
truffleをインストールします。コマンドを叩くだけです。
$ npm install -g truffle
2.ganacheのダウンロード
ganacheはローカル環境にEthereumのブロックチェーンを構築することのできる開発用ツールです。
GUIでアカウントやトランザクションを見ることができます。
ganacheのサイトよりダウンロードしてください。
※cli版も存在しますが、今回はgui版で実施していきます。
TruffleBoxをダウンロード(react+truffleテンプレート)
まずテスト用のディレクトリを作成し移動します。
$ mkdir truffle
$ cd truffle
次に今回の目玉 TruffleBoxから react+truffleのテンプレートをダウンロードします!
$ truffle unbox react
$ tree -L 2
.
├── LICENSE
├── client
│   ├── README.md
│   ├── node_modules
│   ├── package-lock.json
│   ├── package.json
│   ├── public
│   ├── src
│   └── yarn.lock
├── contracts
│   ├── Migrations.sol
│   └── SimpleStorage.sol
├── migrations
│   ├── 1_initial_migration.js
│   └── 2_deploy_contracts.js
├── test
│   ├── TestSimpleStorage.sol
│   └── simplestorage.js
└── truffle-config.js
ダウンロードが終わりました。ここでディレクトリ構成を簡単に見ていきます。
client:フロント用ソース格納先
contracts:スマートコントラクト格納先
migrations:マイグレーション時の設定ファイル格納先
test:自動テスト用のファイル格納先
「truffle init」コマンドと異なり、フロント用のディレクトリ&サンプルソースが追加されています。
unboxを使えば、サンプルソースでスマートコントラクト〜フロント動作確認まで簡単に動かしてみることができます。
それでは実際にサンプルソースを動かしてみます!
スマートコントラクトのデプロイ
スマートコントラクトのデプロイの前に、ローカル開発環境ツールのganacheを立ち上げます。
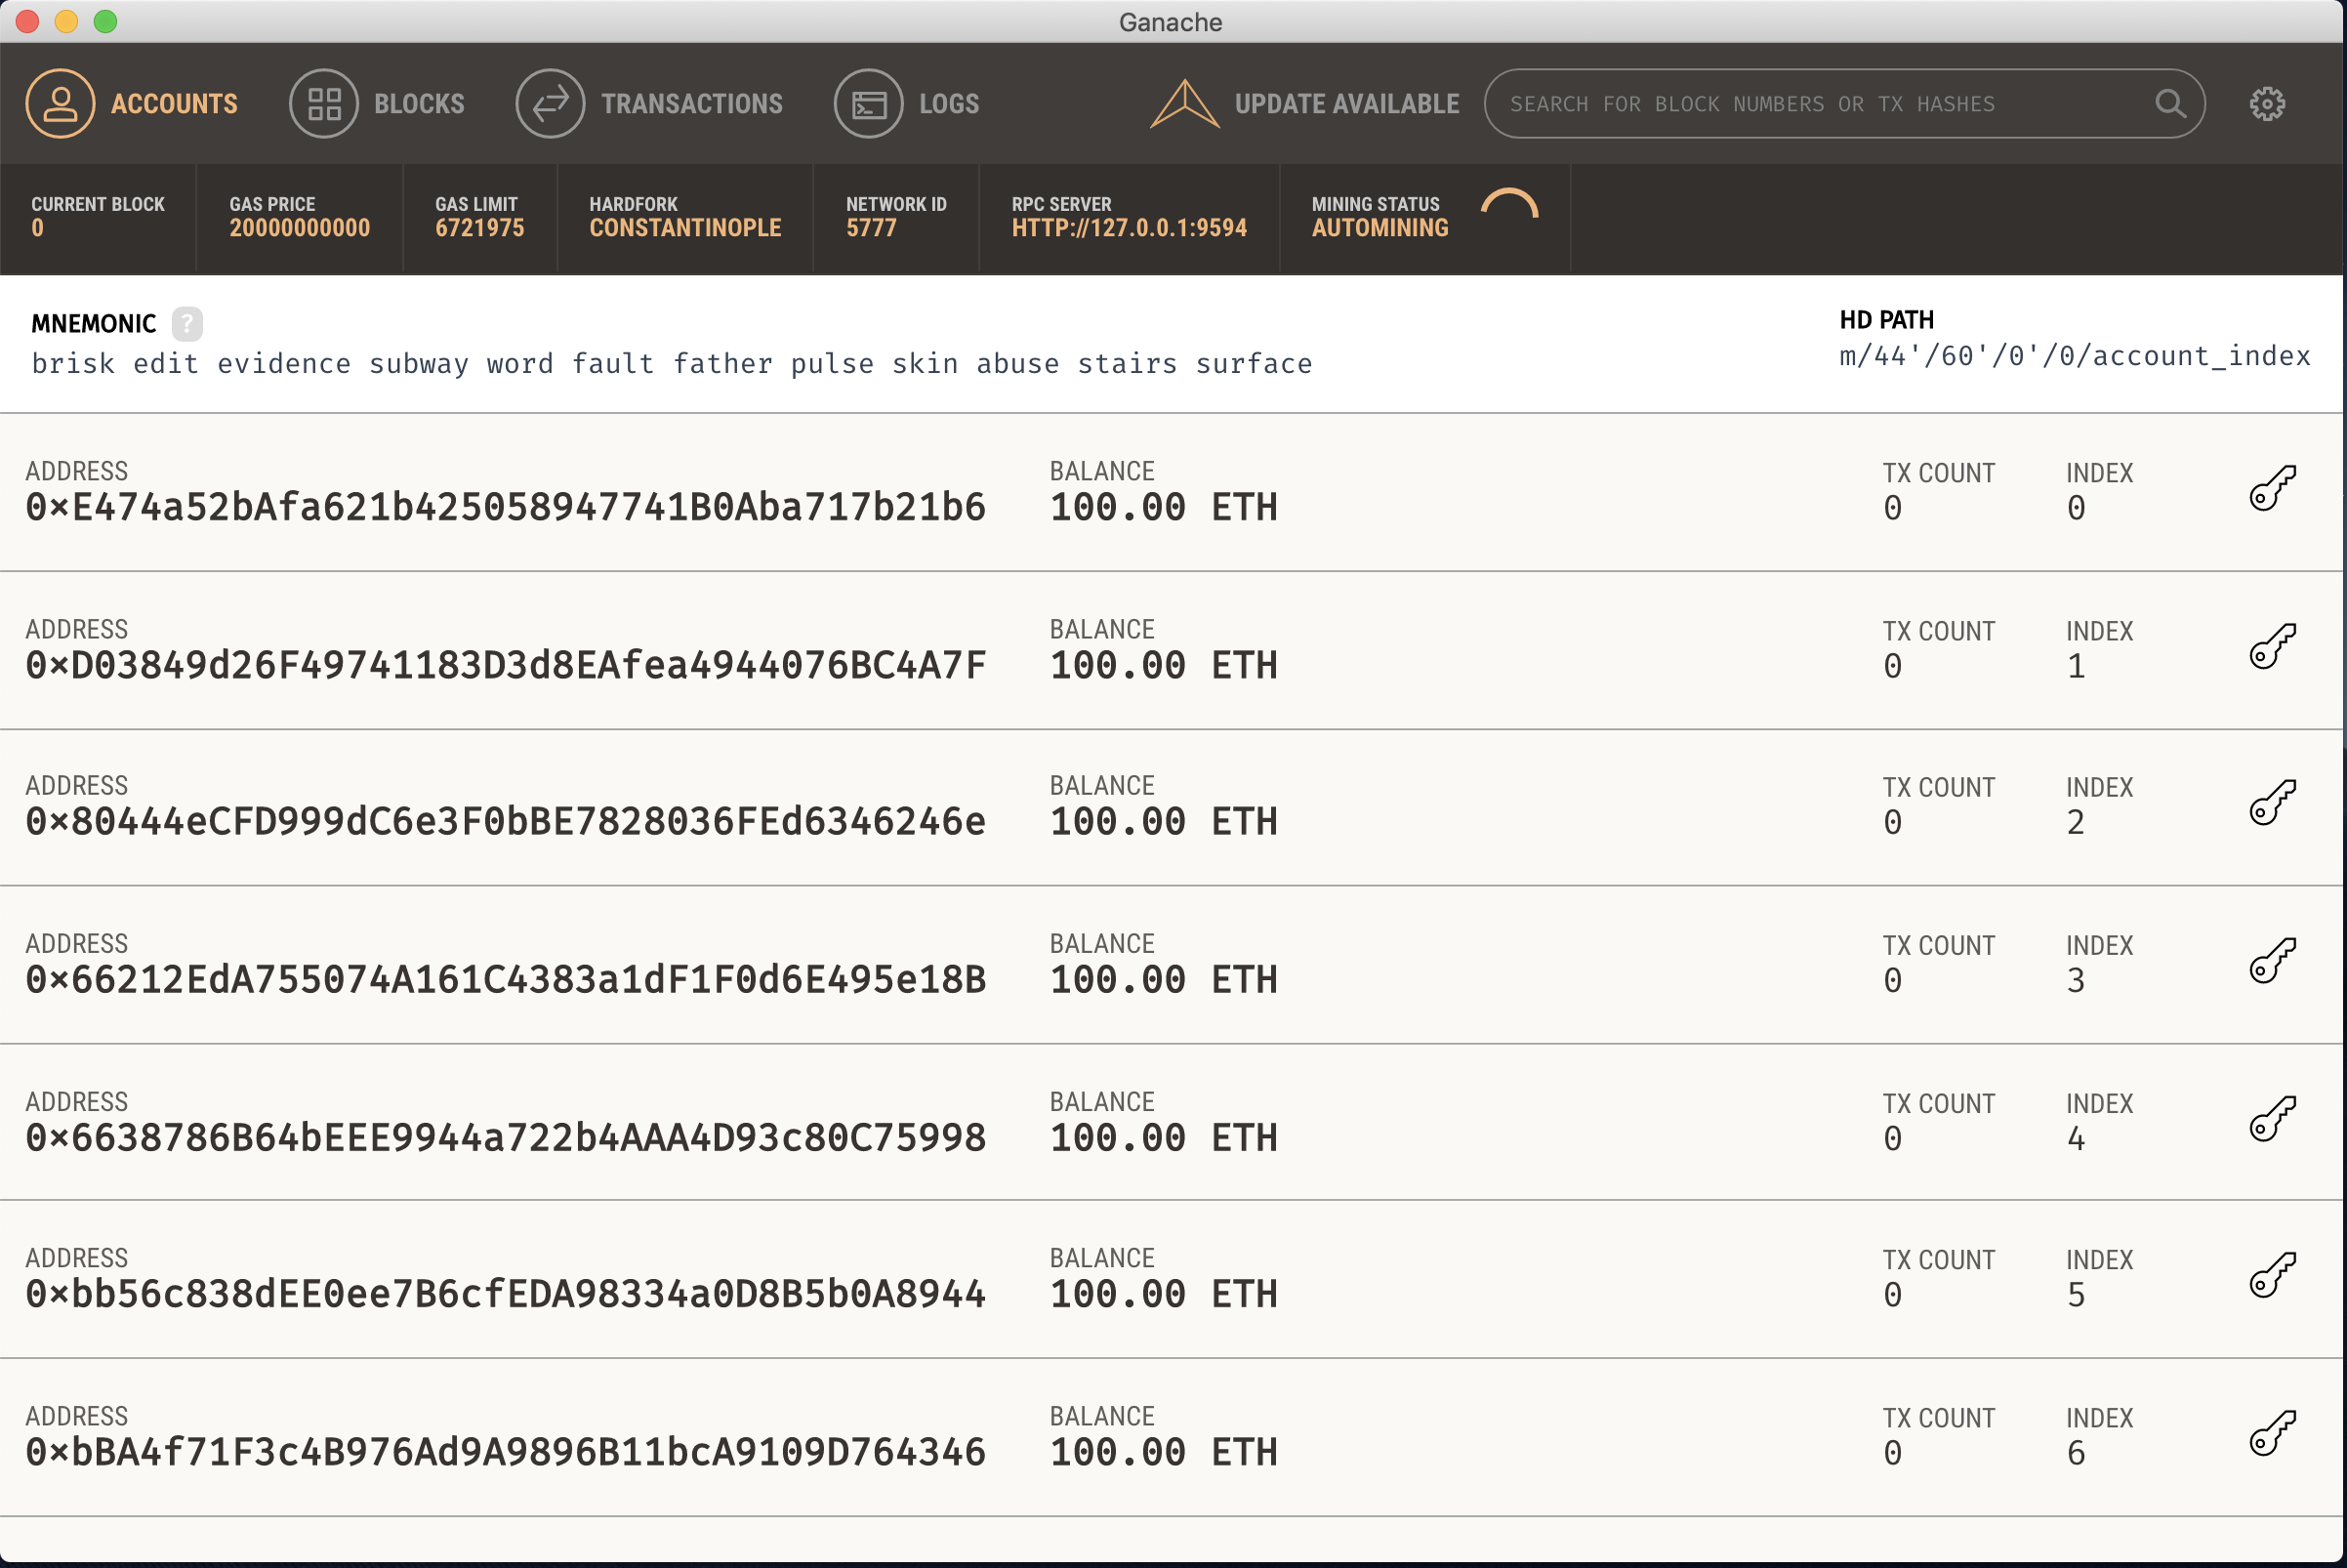
以下がganacheの画面です。
ADDRESS(生成されたアカウント)やBALANCE(所持ETH)、RCP SERVER(ganacheの接続先)など表示されます。
次に、truffleがganacheを参照するようにします。
ganacheの「RCP Server」項目に表示されているIPとPortをtruffle-config.jsに追加します。
今回はnetworksにdevelopment設定を追加します。
(truffleコマンド実行時、ネットワーク指定なしだとdevelopmentが利用されます)
const path = require("path");

module.exports = {
  // See <http://truffleframework.com/docs/advanced/configuration>
  // to customize your Truffle configuration!
  networks: {
    development: {
      host: "127.0.0.1",
      port: 9594,
      network_id: "*" // Match any network id
    }
  },
  contracts_build_directory: path.join(__dirname, "client/src/contracts")
};
ganache連携の準備ができたので、マイグレートしていきます。
マイグレートすることで、スマートコントラクトがローカル環境に登録されます。
マイグレートには、migrationsディレクトリ配下のjsが実行されていきます(番号順)。
このサンプルでは、ETH(gas)を消費し以下の2つが実行されました。
1_initial_migration.js、2_deploy_contracts.js
$ truffle migrate

Compiling your contracts...
===========================
> Compiling ./contracts/Migrations.sol
> Compiling ./contracts/SimpleStorage.sol
> Artifacts written to /Users/h-kane/Work/Program/truffle/client/src/contracts
> Compiled successfully using:
   - solc: 0.5.0+commit.1d4f565a.Emscripten.clang


Starting migrations...
======================
> Network name:    'development'
> Network id:      5777
> Block gas limit: 0x6691b7


1_initial_migration.js
======================

   Deploying 'Migrations'
   ----------------------
   > transaction hash:    0x0cad222460c2ea39ee7655a12d4cd9ff85f54f953ab36ad5460a187c1dbfc84c
   > Blocks: 0            Seconds: 0
   > contract address:    0xAF6E90A88212fE47e2ED501fB11c6911B47262Fe
   > block number:        1
   > block timestamp:     1555434205
   > account:             0xE474a52bAfa621b425058947741B0Aba717b21b6
   > balance:             99.99430184
   > gas used:            284908
   > gas price:           20 gwei
   > value sent:          0 ETH
   > total cost:          0.00569816 ETH


   > Saving migration to chain.
   > Saving artifacts
   -------------------------------------
   > Total cost:          0.00569816 ETH


2_deploy_contracts.js
=====================

   Deploying 'SimpleStorage'
   -------------------------
   > transaction hash:    0x28fc4136ff648fe8d7c46997e225d9b5218f0c6bad90ea472b84b96f735cedbd
   > Blocks: 0            Seconds: 0
   > contract address:    0xAb649B9233F9a52E473a8BDf76221113a00fEd93
   > block number:        3
   > block timestamp:     1555434205
   > account:             0xE474a52bAfa621b425058947741B0Aba717b21b6
   > balance:             99.99114582
   > gas used:            115767
   > gas price:           20 gwei
   > value sent:          0 ETH
   > total cost:          0.00231534 ETH


   > Saving migration to chain.
   > Saving artifacts
   -------------------------------------
   > Total cost:          0.00231534 ETH


Summary
=======
> Total deployments:   2
> Final cost:          0.0080135 ETH
これでスマートコントラクトの登録が終わりました。
フロントの確認を行う前にMetamaskの設定をしていきます。
Metamaskの設定
スマートコントラクトを利用するために、Chromeの拡張機能にMetaMaskを追加します。
MetaMaskはEthreumのウォレットアプリです。
拡張機能に追加することでスマートコントラクトを利用することができます。
Metamaskの使い方にはついては、以下などを参照してください。(そのうち記事を書いたら追記します。)
https://crypto-times.jp/metamask/
上記などで、Metamask導入済み想定で記載します。
次にMetamaskのネットワーク設定にganacheの設定を追加します。
Metamask > 設定 > Advanced > New Network より、
ganacheの「RCP Server」項目の接続先を設定してください。
追加することで、ネットワークからganache用の接続先を設定できるようになったので、
ネットワーク設定を変更してください。
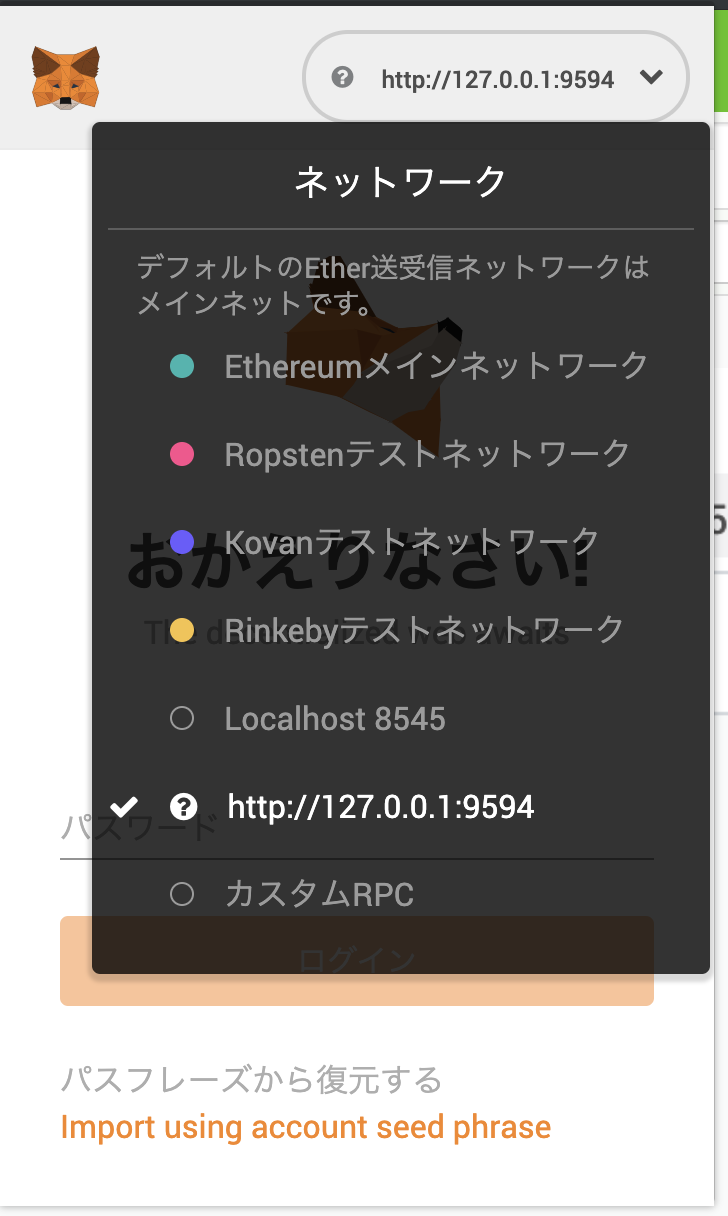
次にganache起動で自動で作成されたアカウントをインポートします。
Metamaskを一度ログアウトして、パスフレーズから復元するを選択してください。
パスフレーズの入力が求められるので、ganacheの「MNEMONIC」項目のニーモニックを入力してください。
入力することで、ganache環境で利用できるウォレットをインポートすることができます。
これで準備完了です。フロントを起動していきます。
フロント実行
フロントを動作させていきます。フロント格納ディレクトリに移動し、起動します。
$ cd client
$ yarn start

Compiled successfully!

You can now view client in the browser.

  Local:            http://localhost:3000/
  On Your Network:  http://192.168.3.2:3000/

Note that the development build is not optimized.
To create a production build, use yarn build.
起動後、http://localhost:3000/ を表示すると、以下の処理が稼働します。
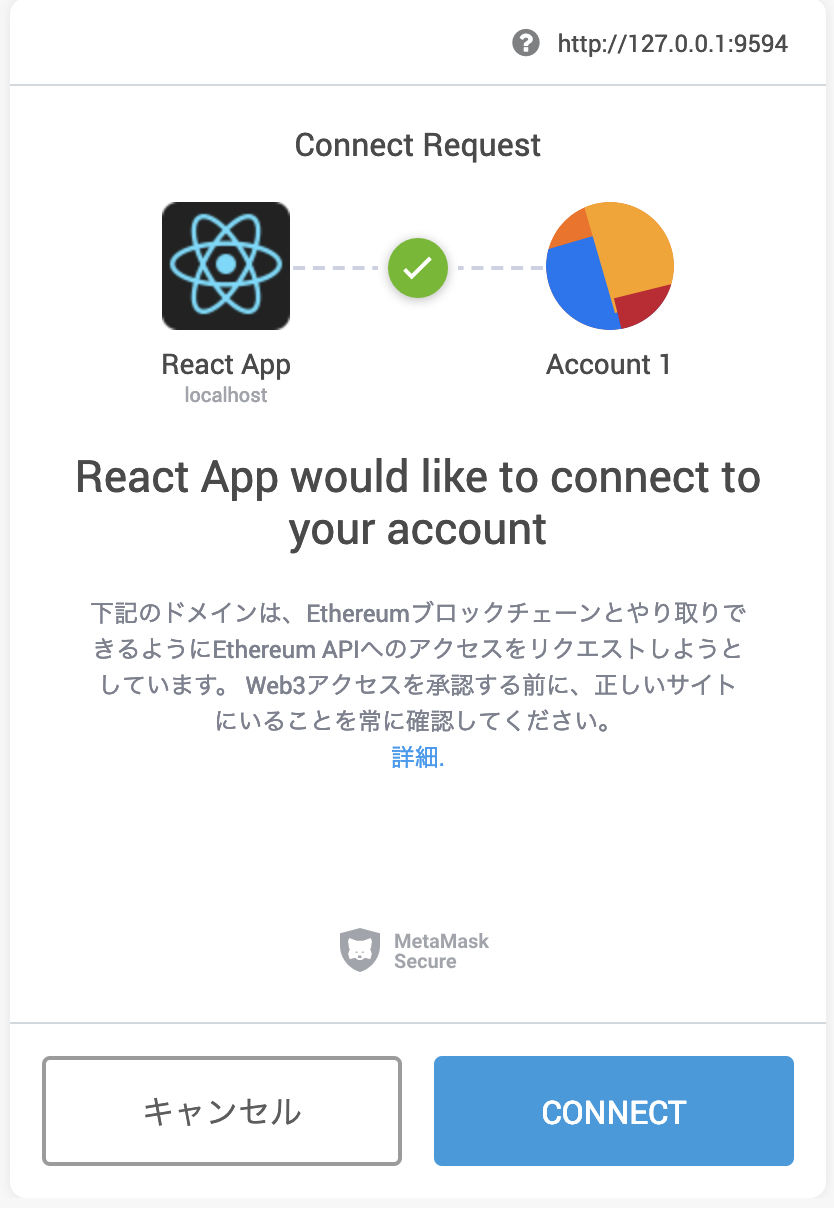
1.Metamaskとの連携
2.スマートコントラクト連携確認
3.スマートコントラクトを実行(send)し、スマートコントラクトにデータを登録(数字の5)
4.スマートコントラクトを参照(call)し、スマートコントラクトのデータを取得し画面に書き出し(テキスト最下部「The stored value is」部分に数字の5)
それでは見ていきましょう。
http://localhost:3000/ を表示。
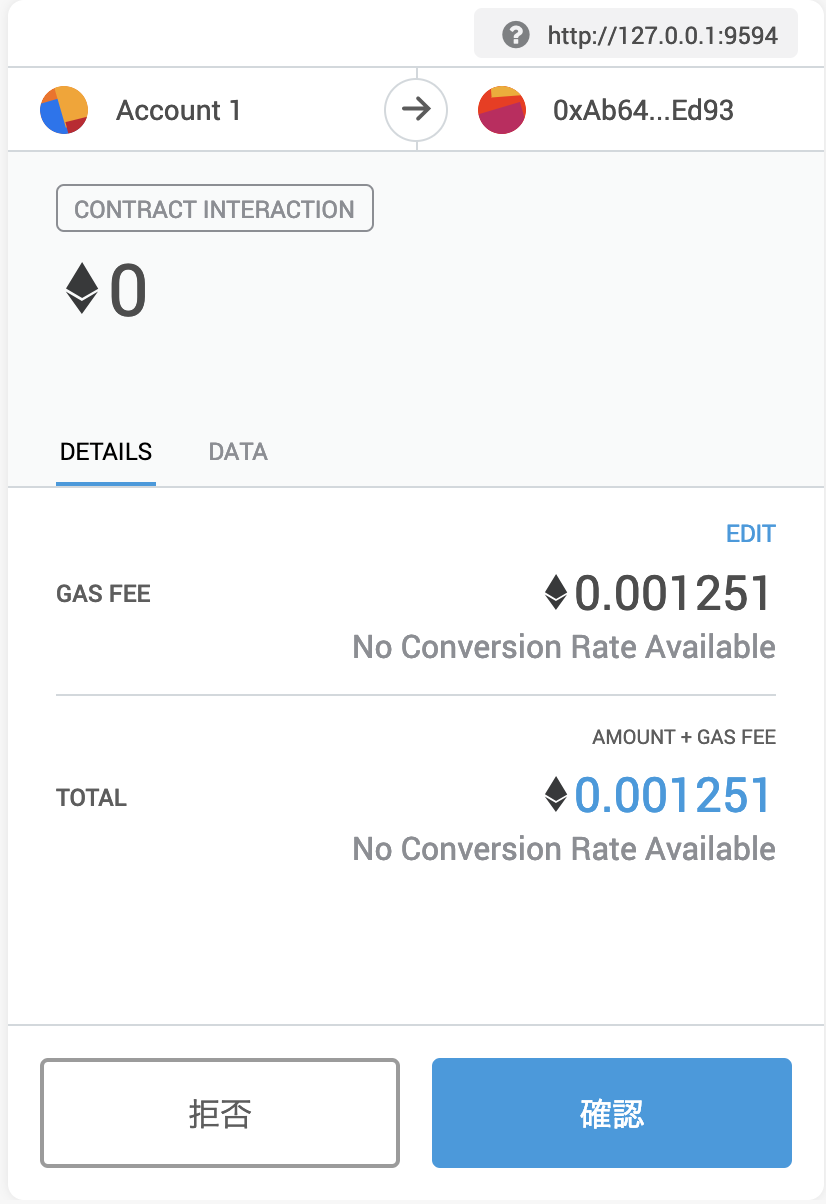
スマートコントラクトの実行(データ登録トランザクション(数値の5を登録))の承認。
画面表示(わかりづらいですが、ブロックチェーンを参照してテキスト最下部「The stored value is」部分に数字の5が設定されています)
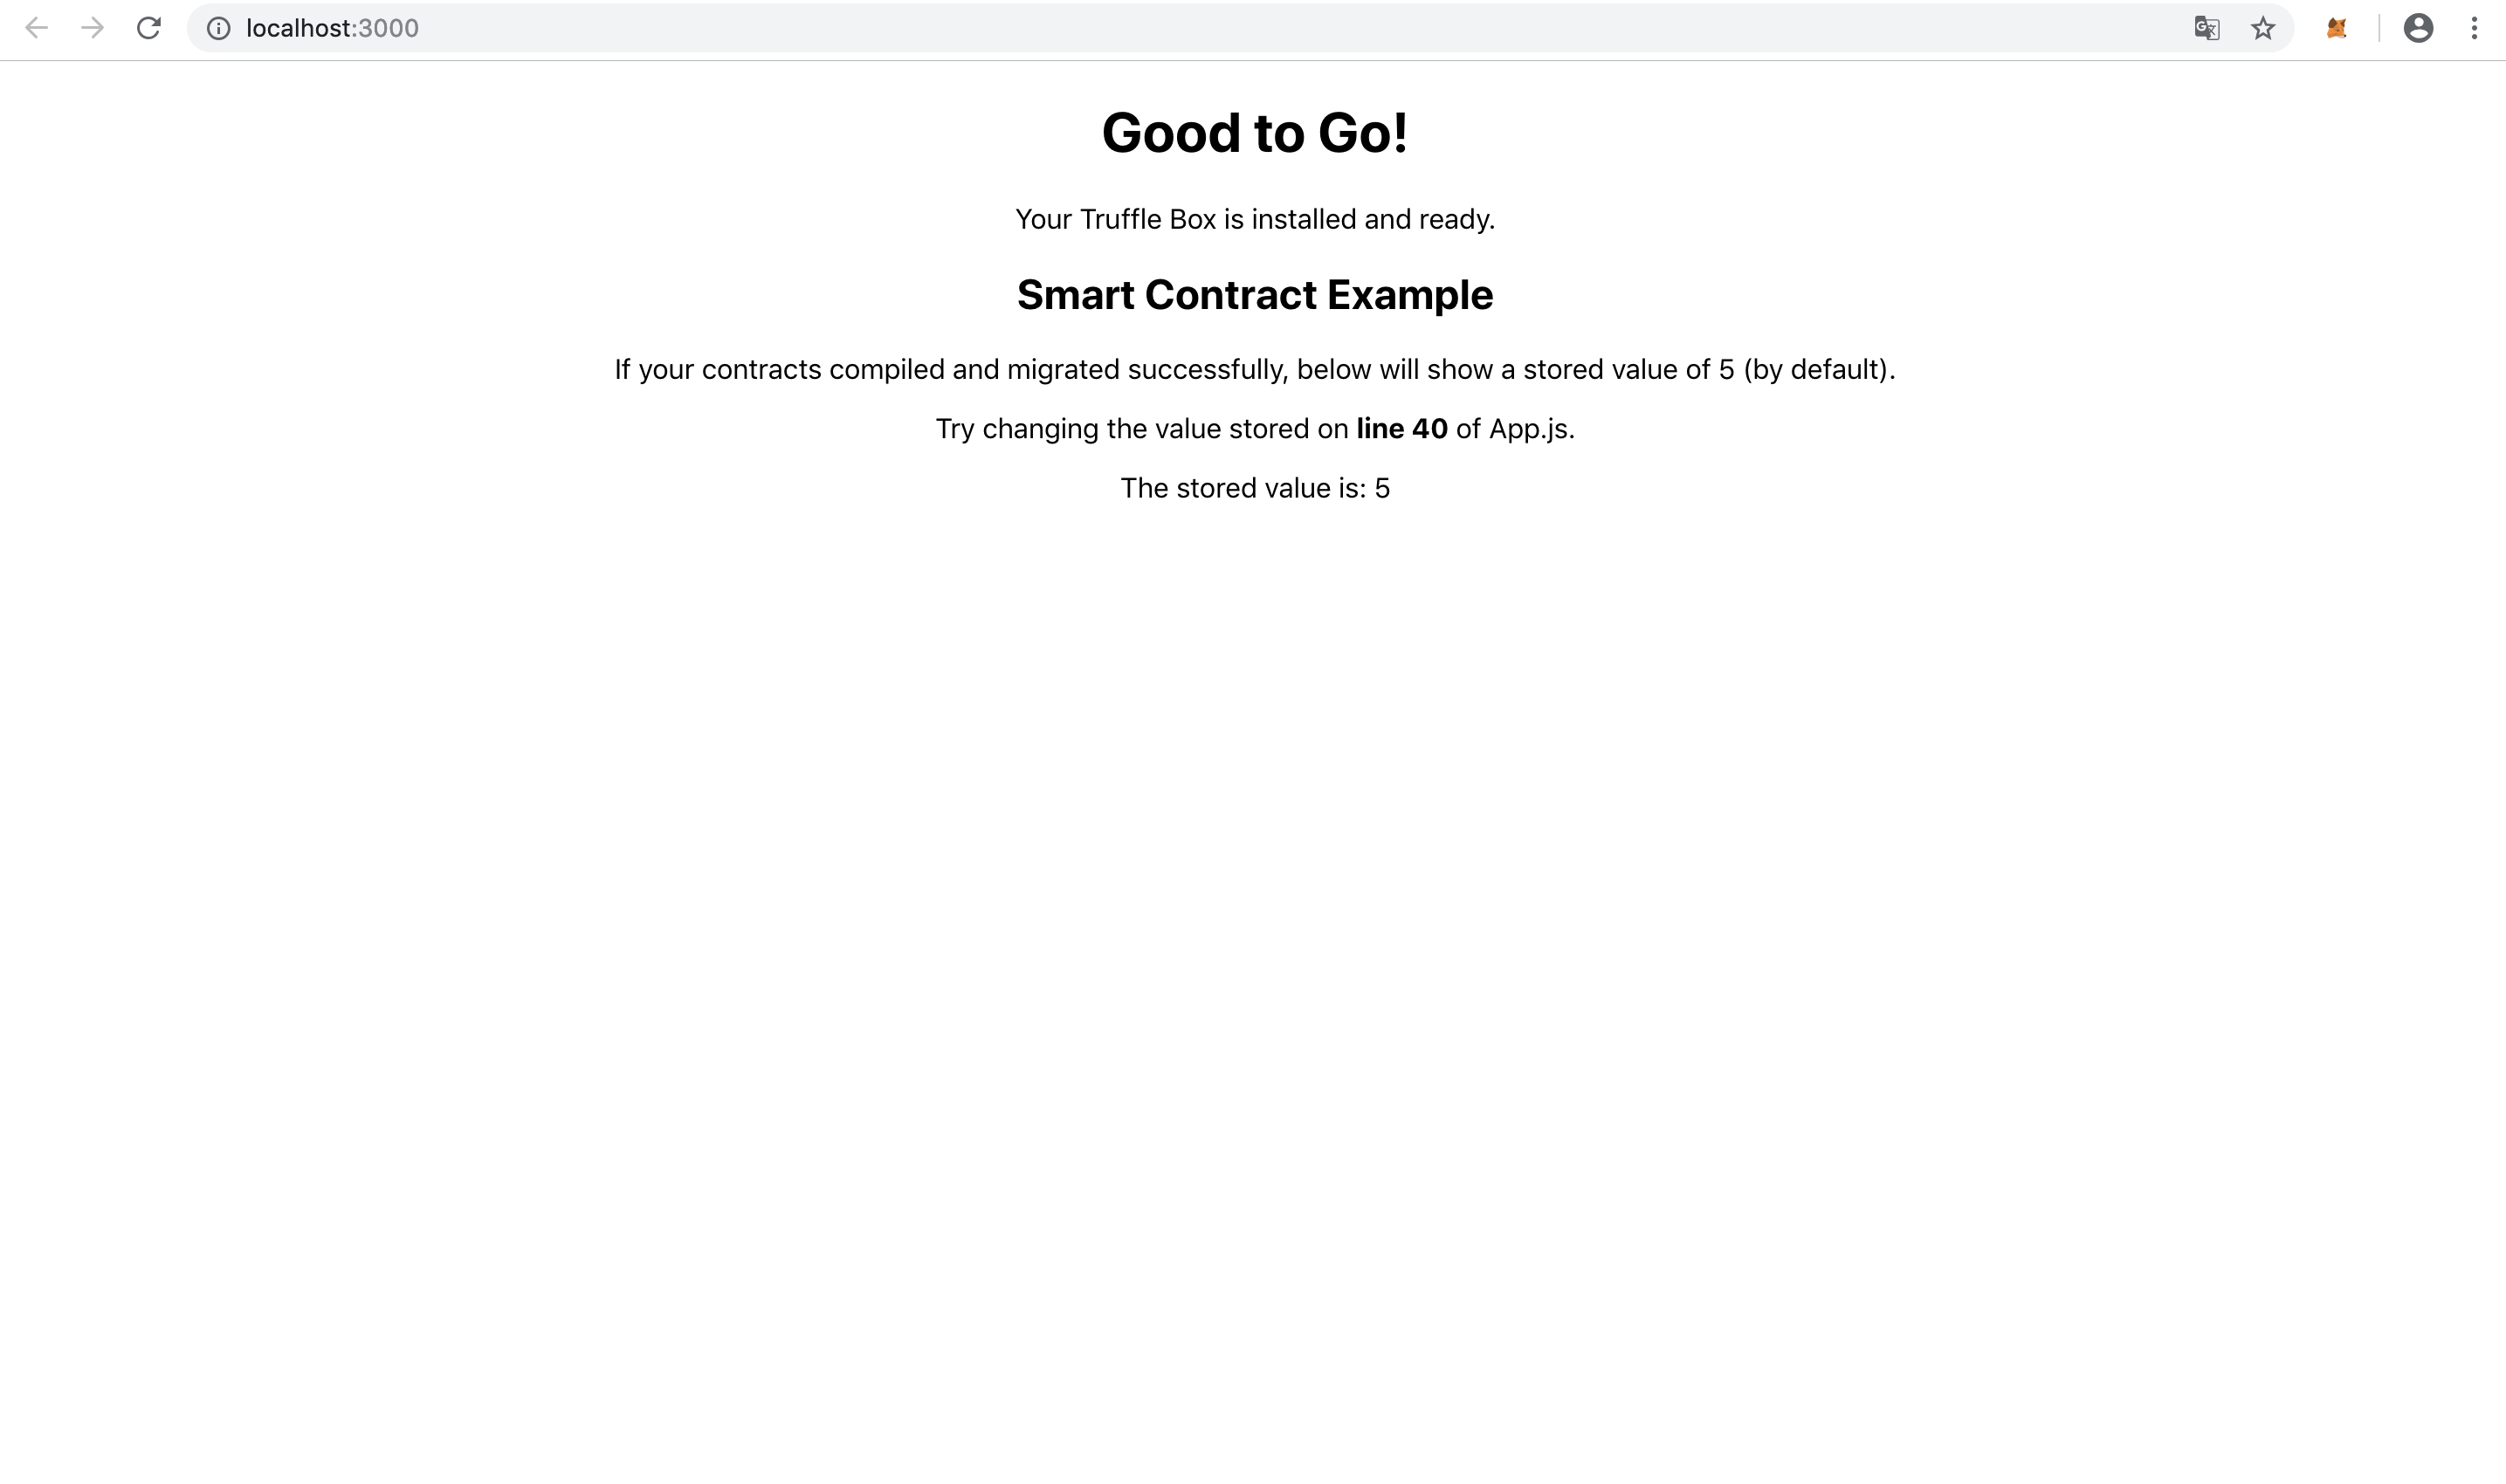
スマートコントラクトと連携されていることが確認できました!
TruffleBoxをインストールして動かすだけで、スマートコントラクトと動かせるフロントが作成できました!
まとめ
TruffleBoxを利用して、react+truffleでスマートコントラクトのデプロイ〜画面確認まで実施してみました。
TruffleBoxはスマートコントラクトやフロントのサンプル、フロント側でのweb3との連携など実装済なので、
あとは自分でスマートコントラクトを作成、フロントもサンプルを参考に少し変えれば簡単にdAppsが作成でき、便利だなーと思い紹介してみました。
今回TruffleBoxのreact+truffle版を紹介しましたが、他にも色々使えそうなテンプレートがあるので、ぜひ触ってみてください。
おまけ
ソース確認
まずはスマートコントラクトのソースから見ていきます。
処理としては、setが呼ばれた際にストレージにパラメータを保存。
get で保存した値を返却するだけのシンプルなソースです。
pragma solidity ^0.5.0;

contract SimpleStorage {
  uint storedData;

  function set(uint x) public {
    storedData = x;
  }

  function get() public view returns (uint) {
    return storedData;
  }
}
フロント側のソースです。
import React, { Component } from "react";
import SimpleStorageContract from "./contracts/SimpleStorage.json";
import getWeb3 from "./utils/getWeb3";

import "./App.css";

class App extends Component {
  state = { storageValue: 0, web3: null, accounts: null, contract: null };

  componentDidMount = async () => {
    try {
      // Get network provider and web3 instance.
      const web3 = await getWeb3();

      // Use web3 to get the user's accounts.
      const accounts = await web3.eth.getAccounts();

      // Get the contract instance.
      const networkId = await web3.eth.net.getId();
      const deployedNetwork = SimpleStorageContract.networks[networkId];
      const instance = new web3.eth.Contract(
        SimpleStorageContract.abi,
        deployedNetwork && deployedNetwork.address,
      );

      // Set web3, accounts, and contract to the state, and then proceed with an
      // example of interacting with the contract's methods.
      this.setState({ web3, accounts, contract: instance }, this.runExample);
    } catch (error) {
      // Catch any errors for any of the above operations.
      alert(
        `Failed to load web3, accounts, or contract. Check console for details.`,
      );
      console.error(error);
    }
  };

  runExample = async () => {
    const { accounts, contract } = this.state;

    // Stores a given value, 5 by default.
    await contract.methods.set(5).send({ from: accounts[0] });

    // Get the value from the contract to prove it worked.
    const response = await contract.methods.get().call();

    // Update state with the result.
    this.setState({ storageValue: response });
  };

  render() {
    if (!this.state.web3) {
      return <div>Loading Web3, accounts, and contract...</div>;
    }
    return (
      <div className="App">
        <h1>Good to Go!</h1>
        <p>Your Truffle Box is installed and ready.</p>
        <h2>Smart Contract Example</h2>
        <p>
          If your contracts compiled and migrated successfully, below will show
          a stored value of 5 (by default).
        </p>
        <p>
          Try changing the value stored on <strong>line 40</strong> of App.js.
        </p>
        <div>The stored value is: {this.state.storageValue}</div>
      </div>
    );
  }
}

export default App;
import Web3 from "web3";

const getWeb3 = () =>
  new Promise((resolve, reject) => {
    // Wait for loading completion to avoid race conditions with web3 injection timing.
    window.addEventListener("load", async () => {
      // Modern dapp browsers...
      if (window.ethereum) {
        const web3 = new Web3(window.ethereum);
        try {
          // Request account access if needed
          await window.ethereum.enable();
          // Acccounts now exposed
          resolve(web3);
        } catch (error) {
          reject(error);
        }
      }
      // Legacy dapp browsers...
      else if (window.web3) {
        // Use Mist/MetaMask's provider.
        const web3 = window.web3;
        console.log("Injected web3 detected.");
        resolve(web3);
      }
      // Fallback to localhost; use dev console port by default...
      else {
        const provider = new Web3.providers.HttpProvider(
          "http://127.0.0.1:9545"
        );
        const web3 = new Web3(provider);
        console.log("No web3 instance injected, using Local web3.");
        resolve(web3);
      }
    });
  });

export default getWeb3;
まず初めにApp.jsのgetWeb3()を呼び出し、
window.addEventListenerでmetamaskなどのウォレットと連携。
const web3 = await getWeb3();
window.addEventListener("load", async () => {
      // Modern dapp browsers...
      if (window.ethereum) {
        const web3 = new Web3(window.ethereum);
        try {
          // Request account access if needed
          await window.ethereum.enable();
          // Acccounts now exposed
          resolve(web3);
        } catch (error) {
          reject(error);
        }
      }
      // Legacy dapp browsers...
      else if (window.web3) {
        // Use Mist/MetaMask's provider.
        const web3 = window.web3;
        console.log("Injected web3 detected.");
        resolve(web3);
      }
      // Fallback to localhost; use dev console port by default...
      else {
        const provider = new Web3.providers.HttpProvider(
          "http://127.0.0.1:9545"
        );
        const web3 = new Web3(provider);
        console.log("No web3 instance injected, using Local web3.");
        resolve(web3);
      }
    });
App.jsのweb3.eth.Contractでスマートコントラクトのインスタンスを作成。
const instance = new web3.eth.Contract(
  SimpleStorageContract.abi,
  deployedNetwork && deployedNetwork.address,
);
作成したインスタンス(スマートコントラクト)からsend(トランザクション発行)とget(ブロックチェーン参照)を呼び出し、スマートコントラクトとやりとりをしていることがわかります。
await contract.methods.set(5).send({ from: accounts[0] });
const response = await contract.methods.get().call();
スマートコントラクトとやりとりするための(Ethereumとやりとりするための)web3.jsについては、web3.js - Ethereum JavaScript APIに記載されておりますので、興味があればぜひ触ってみてください。
