参考
- 以下の記事を参考にさせて頂きました。ありがとうございます。
(デプロイ編①)世界一丁寧なAWS解説。EC2を利用して、RailsアプリをAWSにあげるまで
RailsアプリをAWS、unicorn、nginxで手動デプロイして独自ドメインを紐づけるまで
EC2とRDSでrailsを動かす
AWS EC2 Amazon Linuxインスタンス起動後、最初にやることまとめ(SysVinit編)
目次はこちら
初心者向け:AWS(EC2)にRailsのWebアプリをデプロイする方法 目次
手順
サーバの設定
サーバをアップデートします。
$ sudo yum update
Nginxのインストールします。
$ sudo yum install -y nginx
起動をします。
$ sudo /etc/init.d/nginx start
Starting nginx:                                            [  OK  ]
自動起動を設定します。
$ sudo chkconfig nginx on
ユーザーの作成と設定
作業用ユーザーを作成します。
$ sudo adduser test_user
マスター権限を与えます。
$ sudo usermod -G wheel test_user
パスワードを設定します。
$ sudo passwd test_user
Changing password for user test_user
New password:
Retype new password:
passwd: all authentication tokens updated successfully.
作成したユーザーを追加します。
$ sudo visudo
コメントアウトを外します。
98行目
sshでログインするためのauthorized_keysを[test_user]のフォルダに移動します。
$ sudo rsync -a ~/.ssh/authorized_keys ~test_user/.ssh/
オーナーとグループを変更します。
$ sudo chown -R test_user:test_user ~test_user/.ssh
読み出し、書き込み、実行の許可を取り去ります。
$ sudo chmod -R go-rwx ~test_user/.ssh
アクセスできるか確認ため、一度出ます。
$ exit
ログインするユーザー名を変更し、再度sshでログインします。
$ ssh -i ~/.ssh/鍵名.pem test_user@IP
例
$ ssh -i ~/.ssh/christchurches-map.pem test_user@52.192.101.190
接続できました。
       __|  __|_  )
       _|  (     /   Amazon Linux AMI
      ___|\___|___|

https://aws.amazon.com/amazon-linux-ami/2017.03-release-notes/
$
セキュリティー強化のため、ec2-userからアクセスできないようにします。
$ sudo vi /etc/ssh/sshd_config
ファイルの末尾に追記します。
# ec2-userでのログインを禁止
DenyUsers ec2-user
設定を反映させます。
$ sudo service sshd reload
作業用ディレクトリの作成
railsアプリを配置する作業用のディレクトリを作成します。
$ sudo mkdir /var/www
varに移動します。
$ cd /var/
オーナーを変更し、パスワードを入力します。
$ sudo chown test_user www

We trust you have received the usual lecture from the local System
Administrator. It usually boils down to these three things:

    #1) Respect the privacy of others.
    #2) Think before you type.
    #3) With great power comes great responsibility.

[sudo] password for test_user:
プラグインの導入
以下のコマンドを実行し、インストールします。
$ sudo yum install git make gcc-c++ patch openssl-devel libyaml-devel libffi-devel libicu-devel libxml2 libxslt libxml2-devel libxslt-devel zlib-devel readline-devel ImageMagick ImageMagick-devel epel-release
mysqlは、5.6をインストールするために以下を実行します。
$ sudo yum install http://dev.mysql.com/get/mysql-community-release-el6-5.noarch.rpm
インストールします。
$ sudo yum install mysql mysql-devel mysql-server mysql-utilities
node.jsをインストールします。
$ sudo yum install nodejs npm --enablerepo=epel
rbenvをインストールします。
$ git clone https://github.com/sstephenson/rbenv.git ~/.rbenv
$ echo 'export PATH="$HOME/.rbenv/bin:$PATH"' >> ~/.bash_profile
$ echo 'eval "$(rbenv init -)"' >> ~/.bash_profile
$ source ~/.bash_profile
ruby-buildをインストールします。
$ git clone https://github.com/sstephenson/ruby-build.git ~/.rbenv/plugins/ruby-build
$ rbenv rehash
rubyをインストールします。
ここでは、バージョン2.3.1をインストールします。
$ rbenv install -v 2.3.1
$ rbenv global 2.3.1
$ rbenv rehash
$ ruby -v
ruby 2.3.1p112 (2016-04-26 revision 54768) [x86_64-linux]
Githubと連携
gitの設定ファイルを作成します。
$ vi ~/.gitconfig
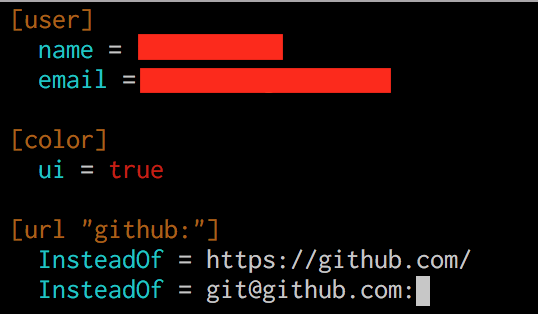
設定ファイルに以下を記載します。
[user]
  name = Githubのユーザー名
  email = Githubに登録しているメールアドレス

[color]
  ui = true

[url "github:"]
  InsteadOf = https://github.com/
  InsteadOf = git@github.com:
例
www配下にRailsを格納するフォルダを作成します。
$ cd /
$ sudo chown test_user var
$ cd /var/www/
$ sudo mkdir projects
$ sudo chown test_user projects
鍵を作成
$ cd
$ chmod 700 .ssh
$ cd .ssh
$ ssh-keygen -t rsa
Generating public/private rsa key pair.
Enter file in which to save the key (/home/test_user/.ssh/id_rsa): aws_git_rsa
# パスワードを入力
Enter passphrase (empty for no passphrase):
Enter same passphrase again:
鍵を確認します。
$ ls
authorized_keys  aws_git_rsa  aws_git_rsa.pub
設定ファイルを作成します。
$ vi config
以下を記載します。
Host github
  Hostname github.com
  User git
  IdentityFile ~/.ssh/aws_git_rsa
暗号を確認します。
$ cat aws_git_rsa.pub
ssh-rsa 鍵の暗号が表示
Githubに鍵を追加
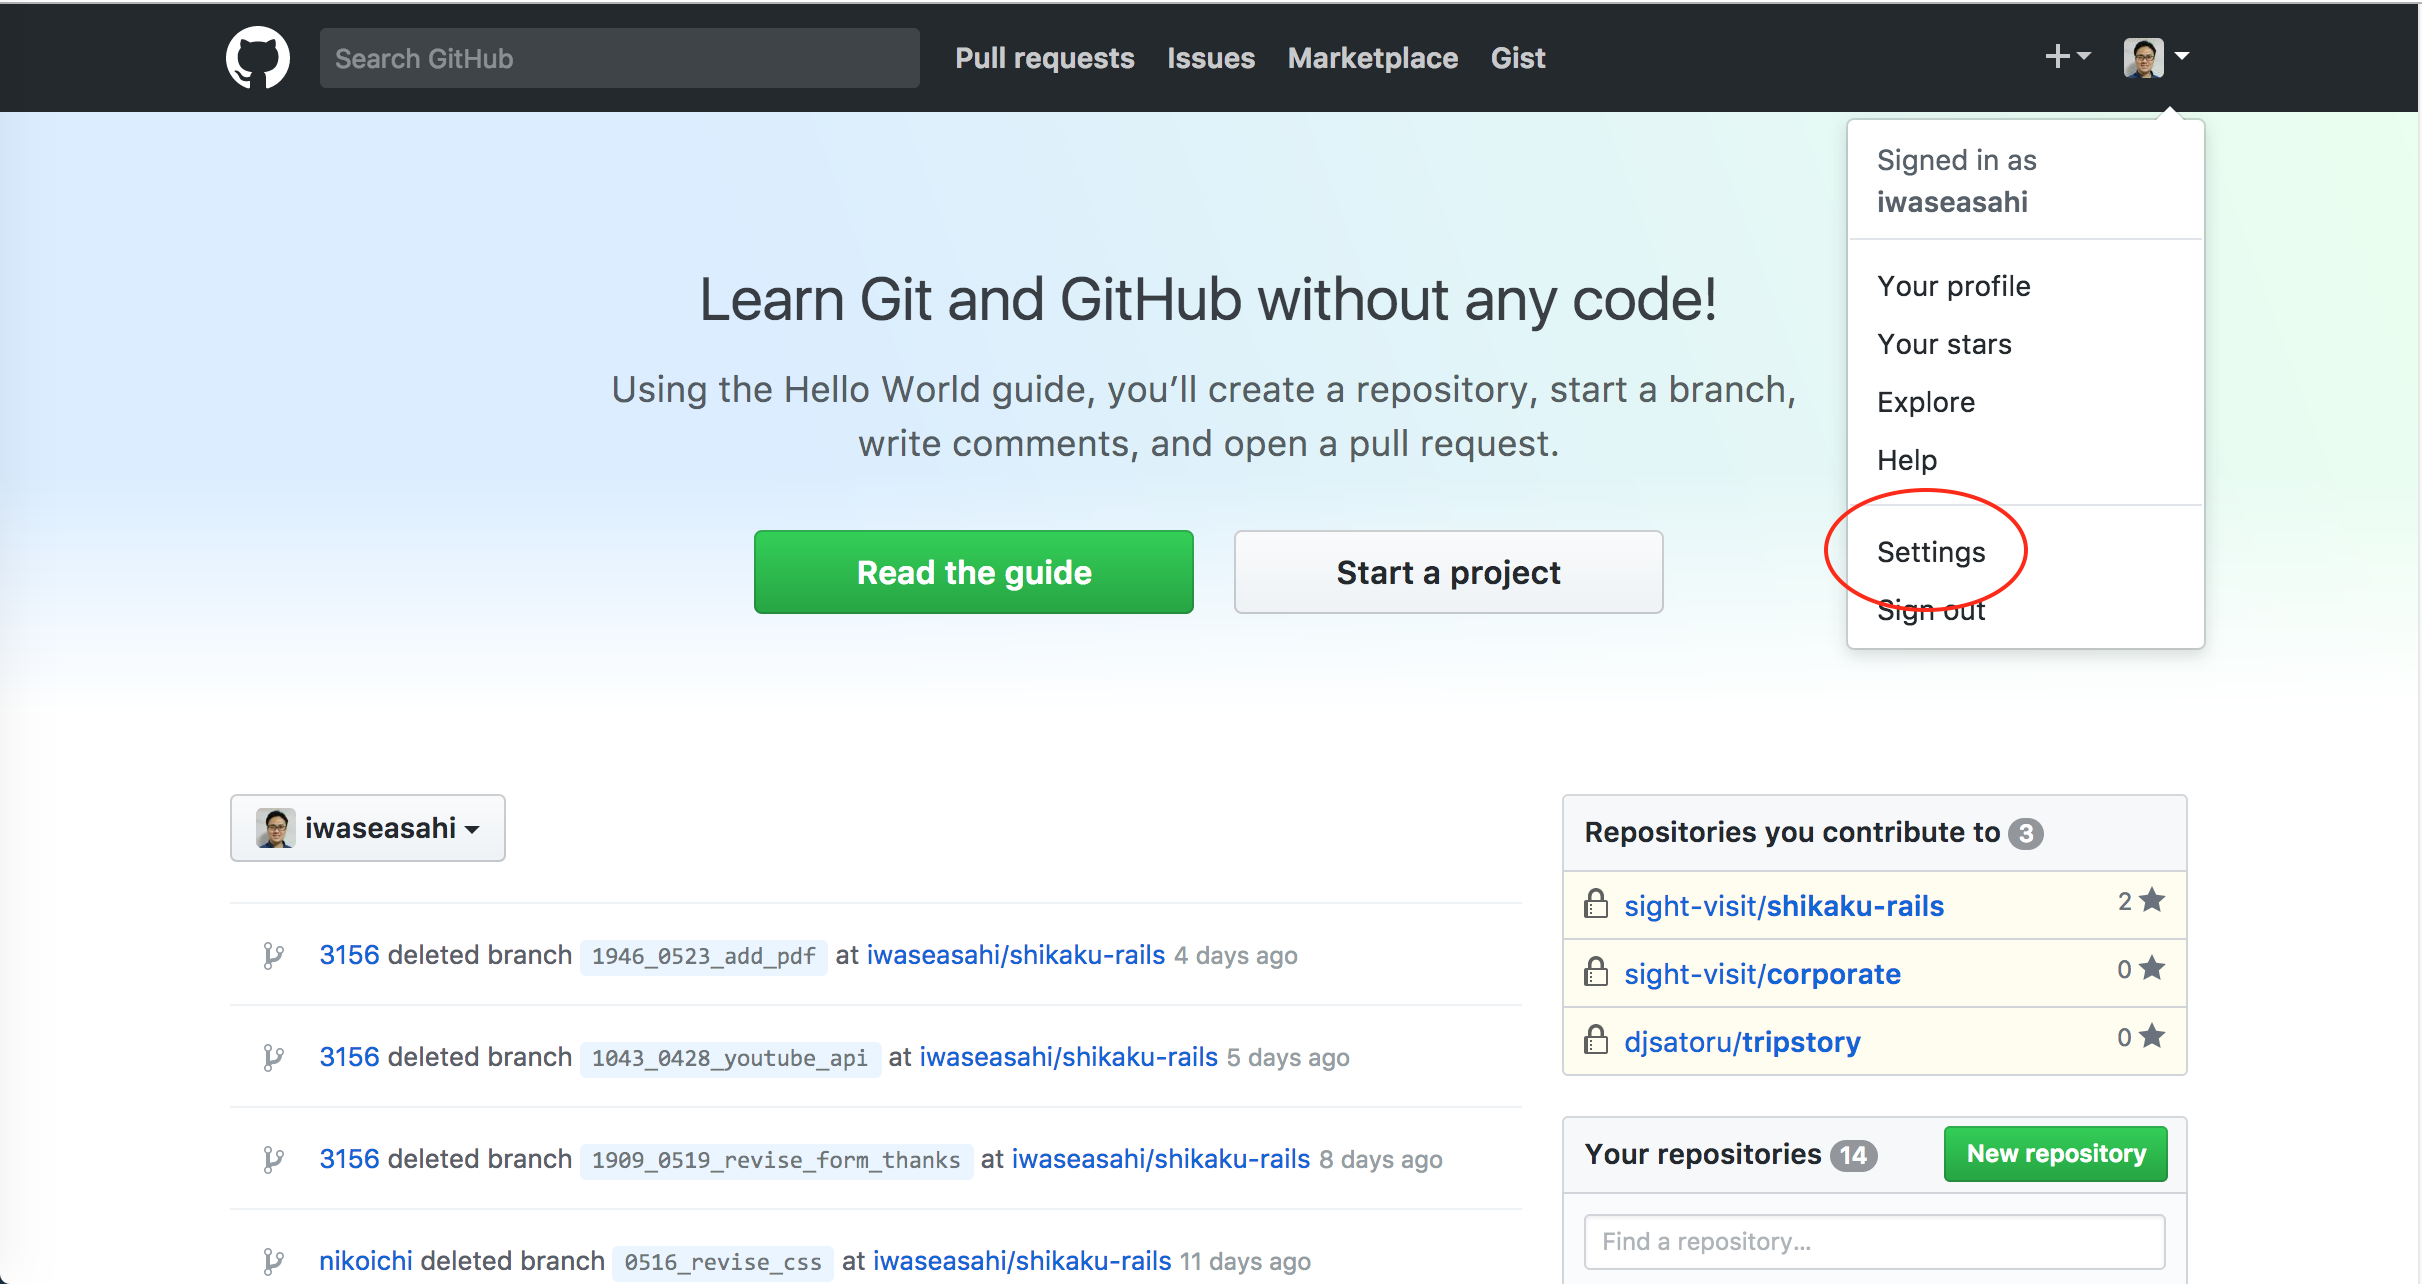
Githubにアクセスします。
Settings をクリックします。
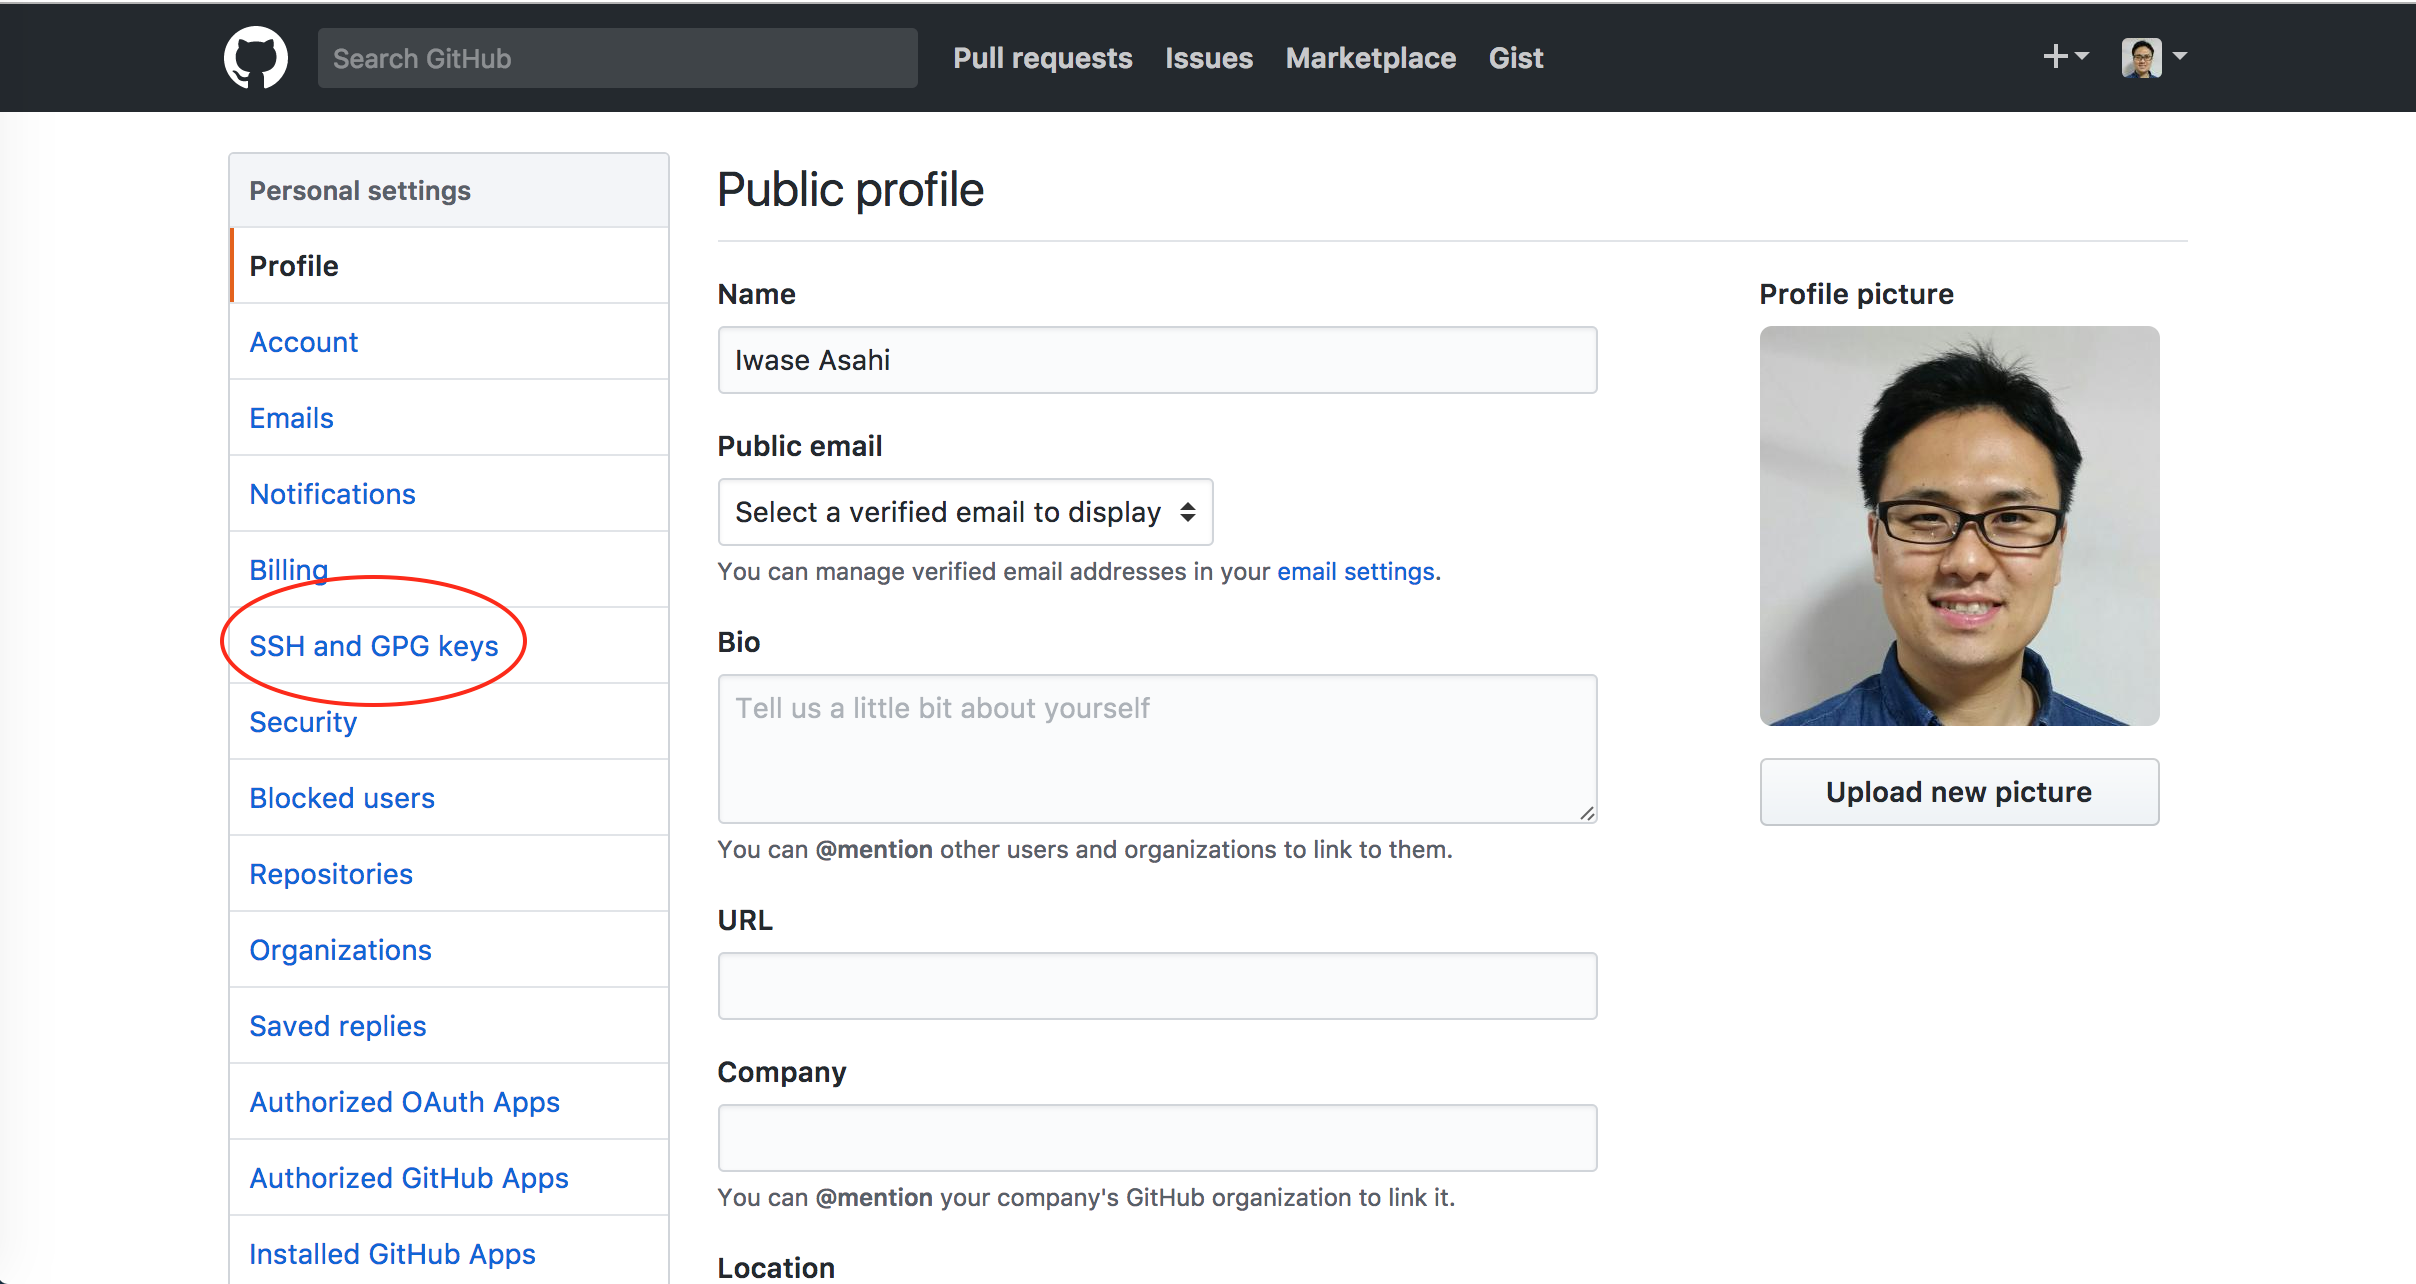
SSH and GPG keys を選択します。
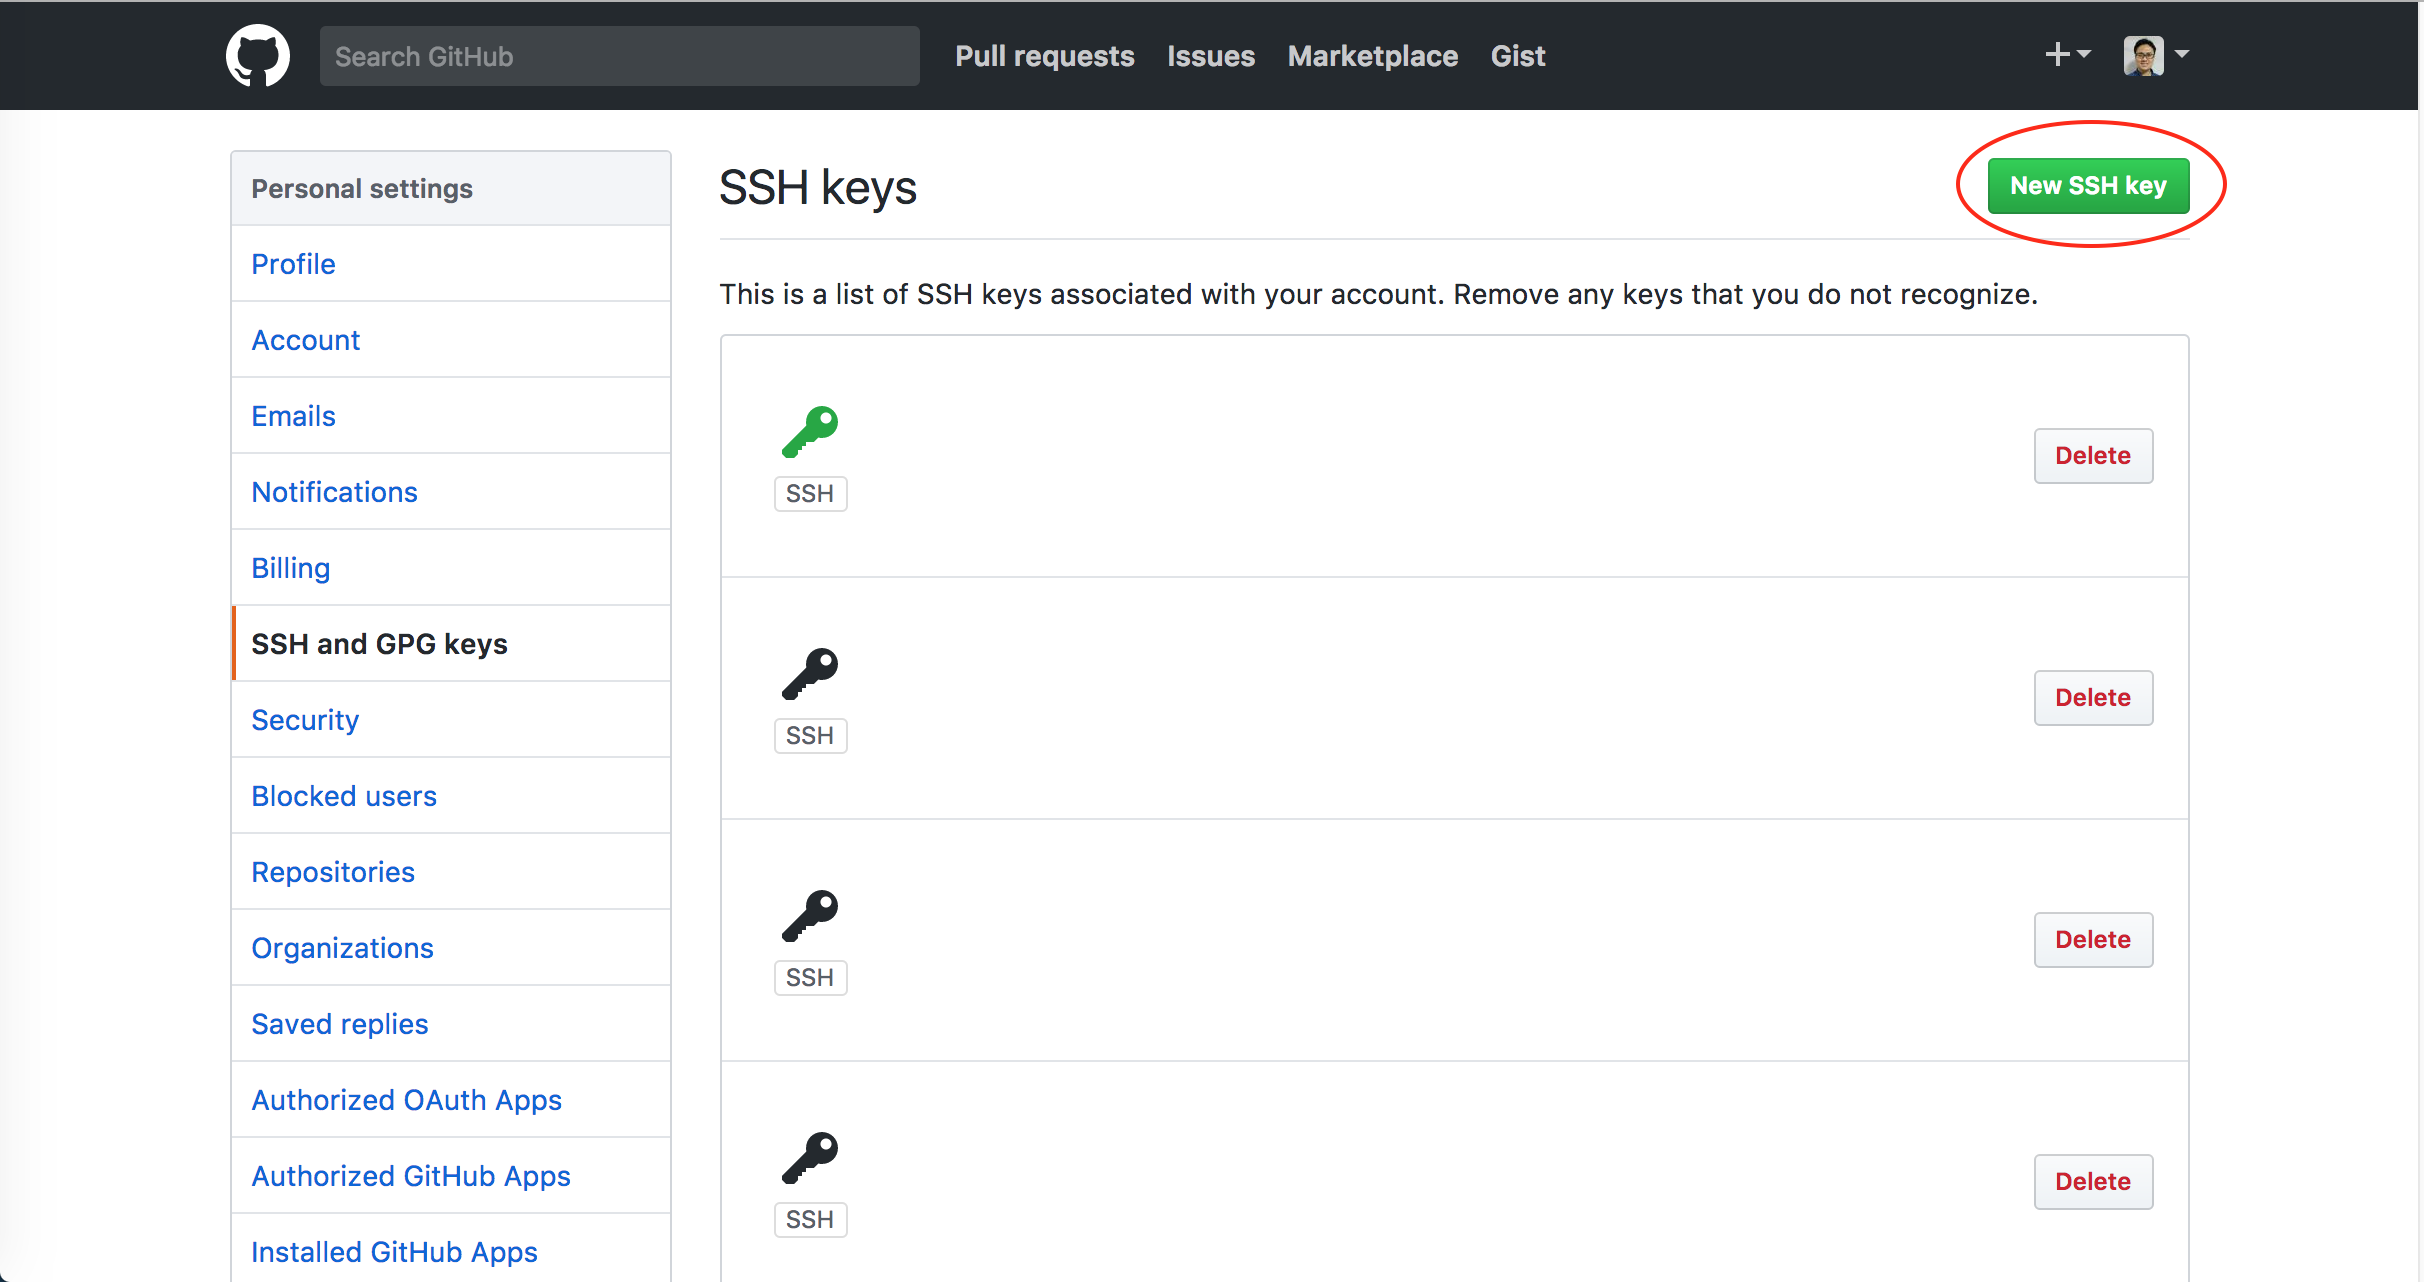
「New SSH key」 をクリックします。
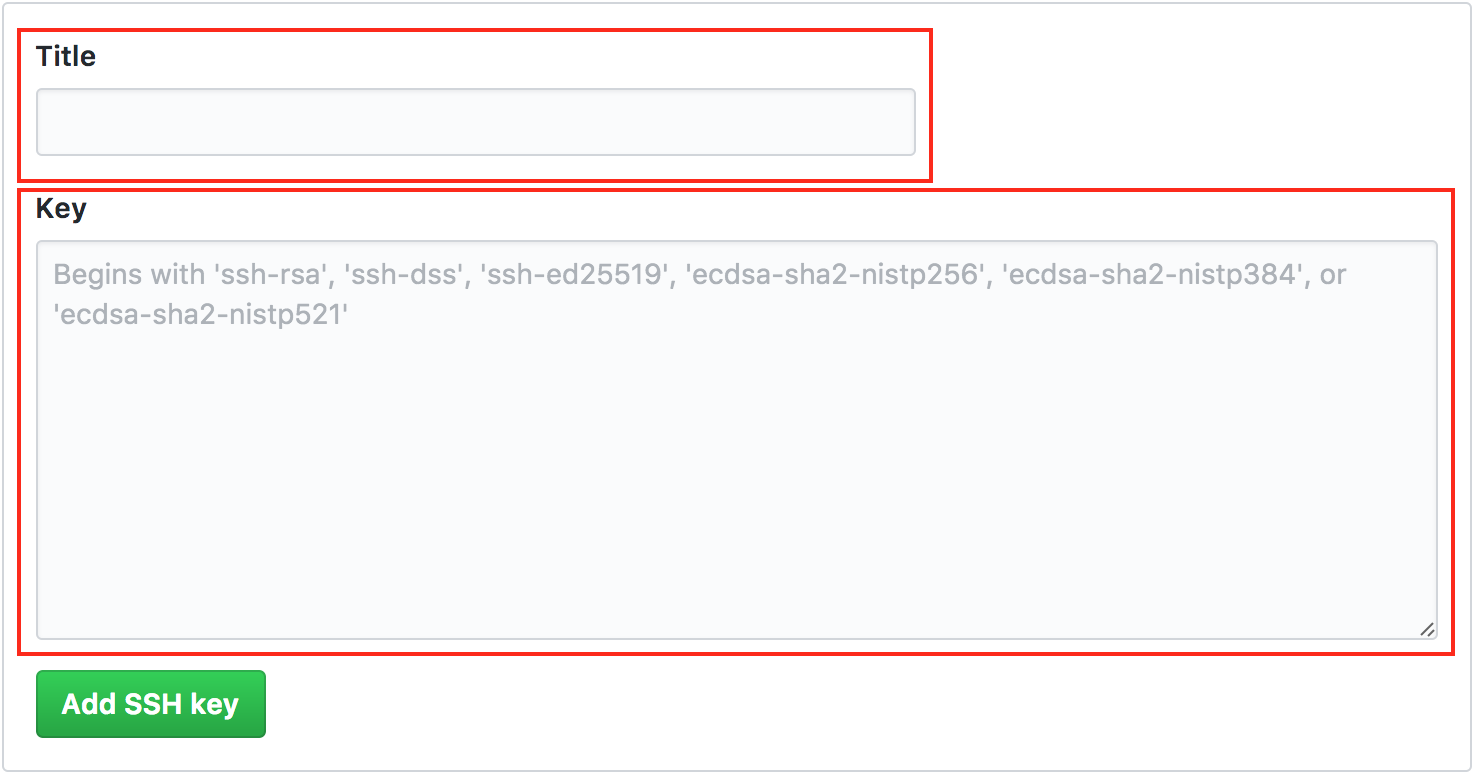
TitleとKeyを入力します。
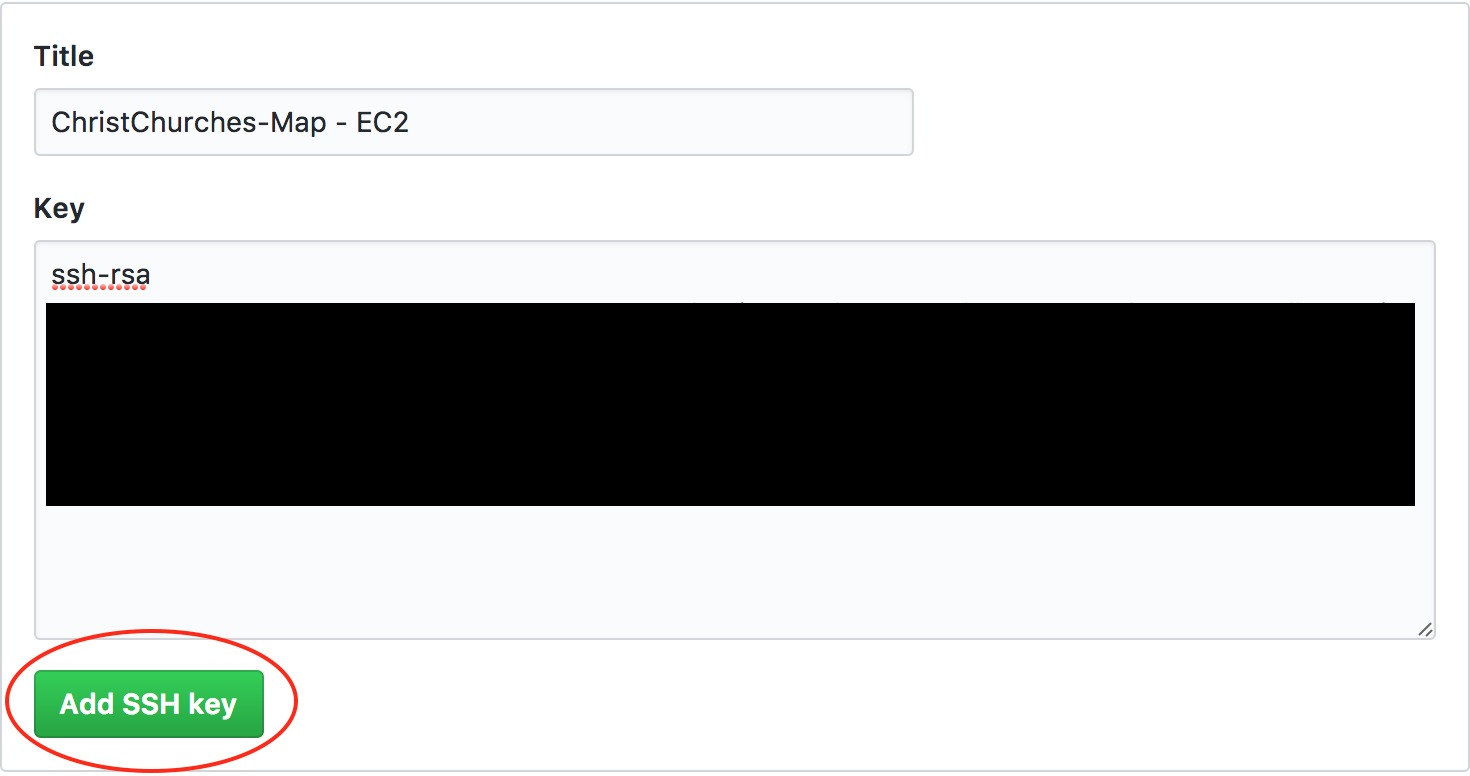
例
Keyの部分は、cat aws_git_rsa.pub で表示された暗号を入力します。
「Add SSH key」をクリックします。
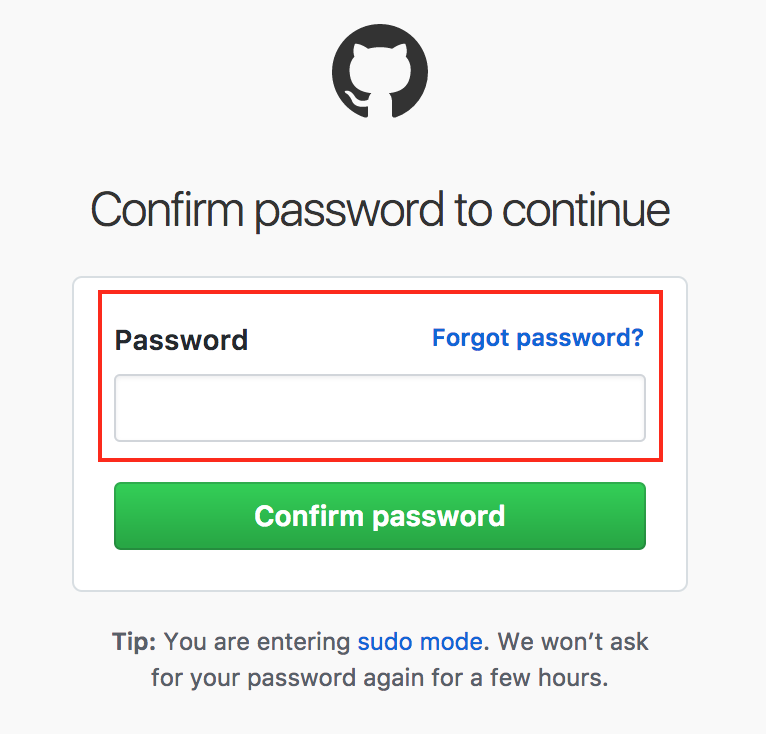
Passwordを入力します。
鍵が登録されました。
設定ファイルの権限を変更します。
$ chmod 600 config
Githubの接続を確認します。
$ ssh -T github
yes と入力します。
The authenticity of host 'github.com (192.30.255.113)' can't be established.
RSA key fingerprint is 16:27:ac:a5:76:28:2d:36:63:1b:56:4d:eb:df:a6:48.
Are you sure you want to continue connecting (yes/no)?
パスワードを入力します。
Warning: Permanently added 'github.com,192.30.255.113' (RSA) to the list of known hosts.
Enter passphrase for key '/home/test_user/.ssh/aws_git_rsa':
接続できました。
Hi user_name! You've successfully authenticated, but GitHub does not provide shell access.
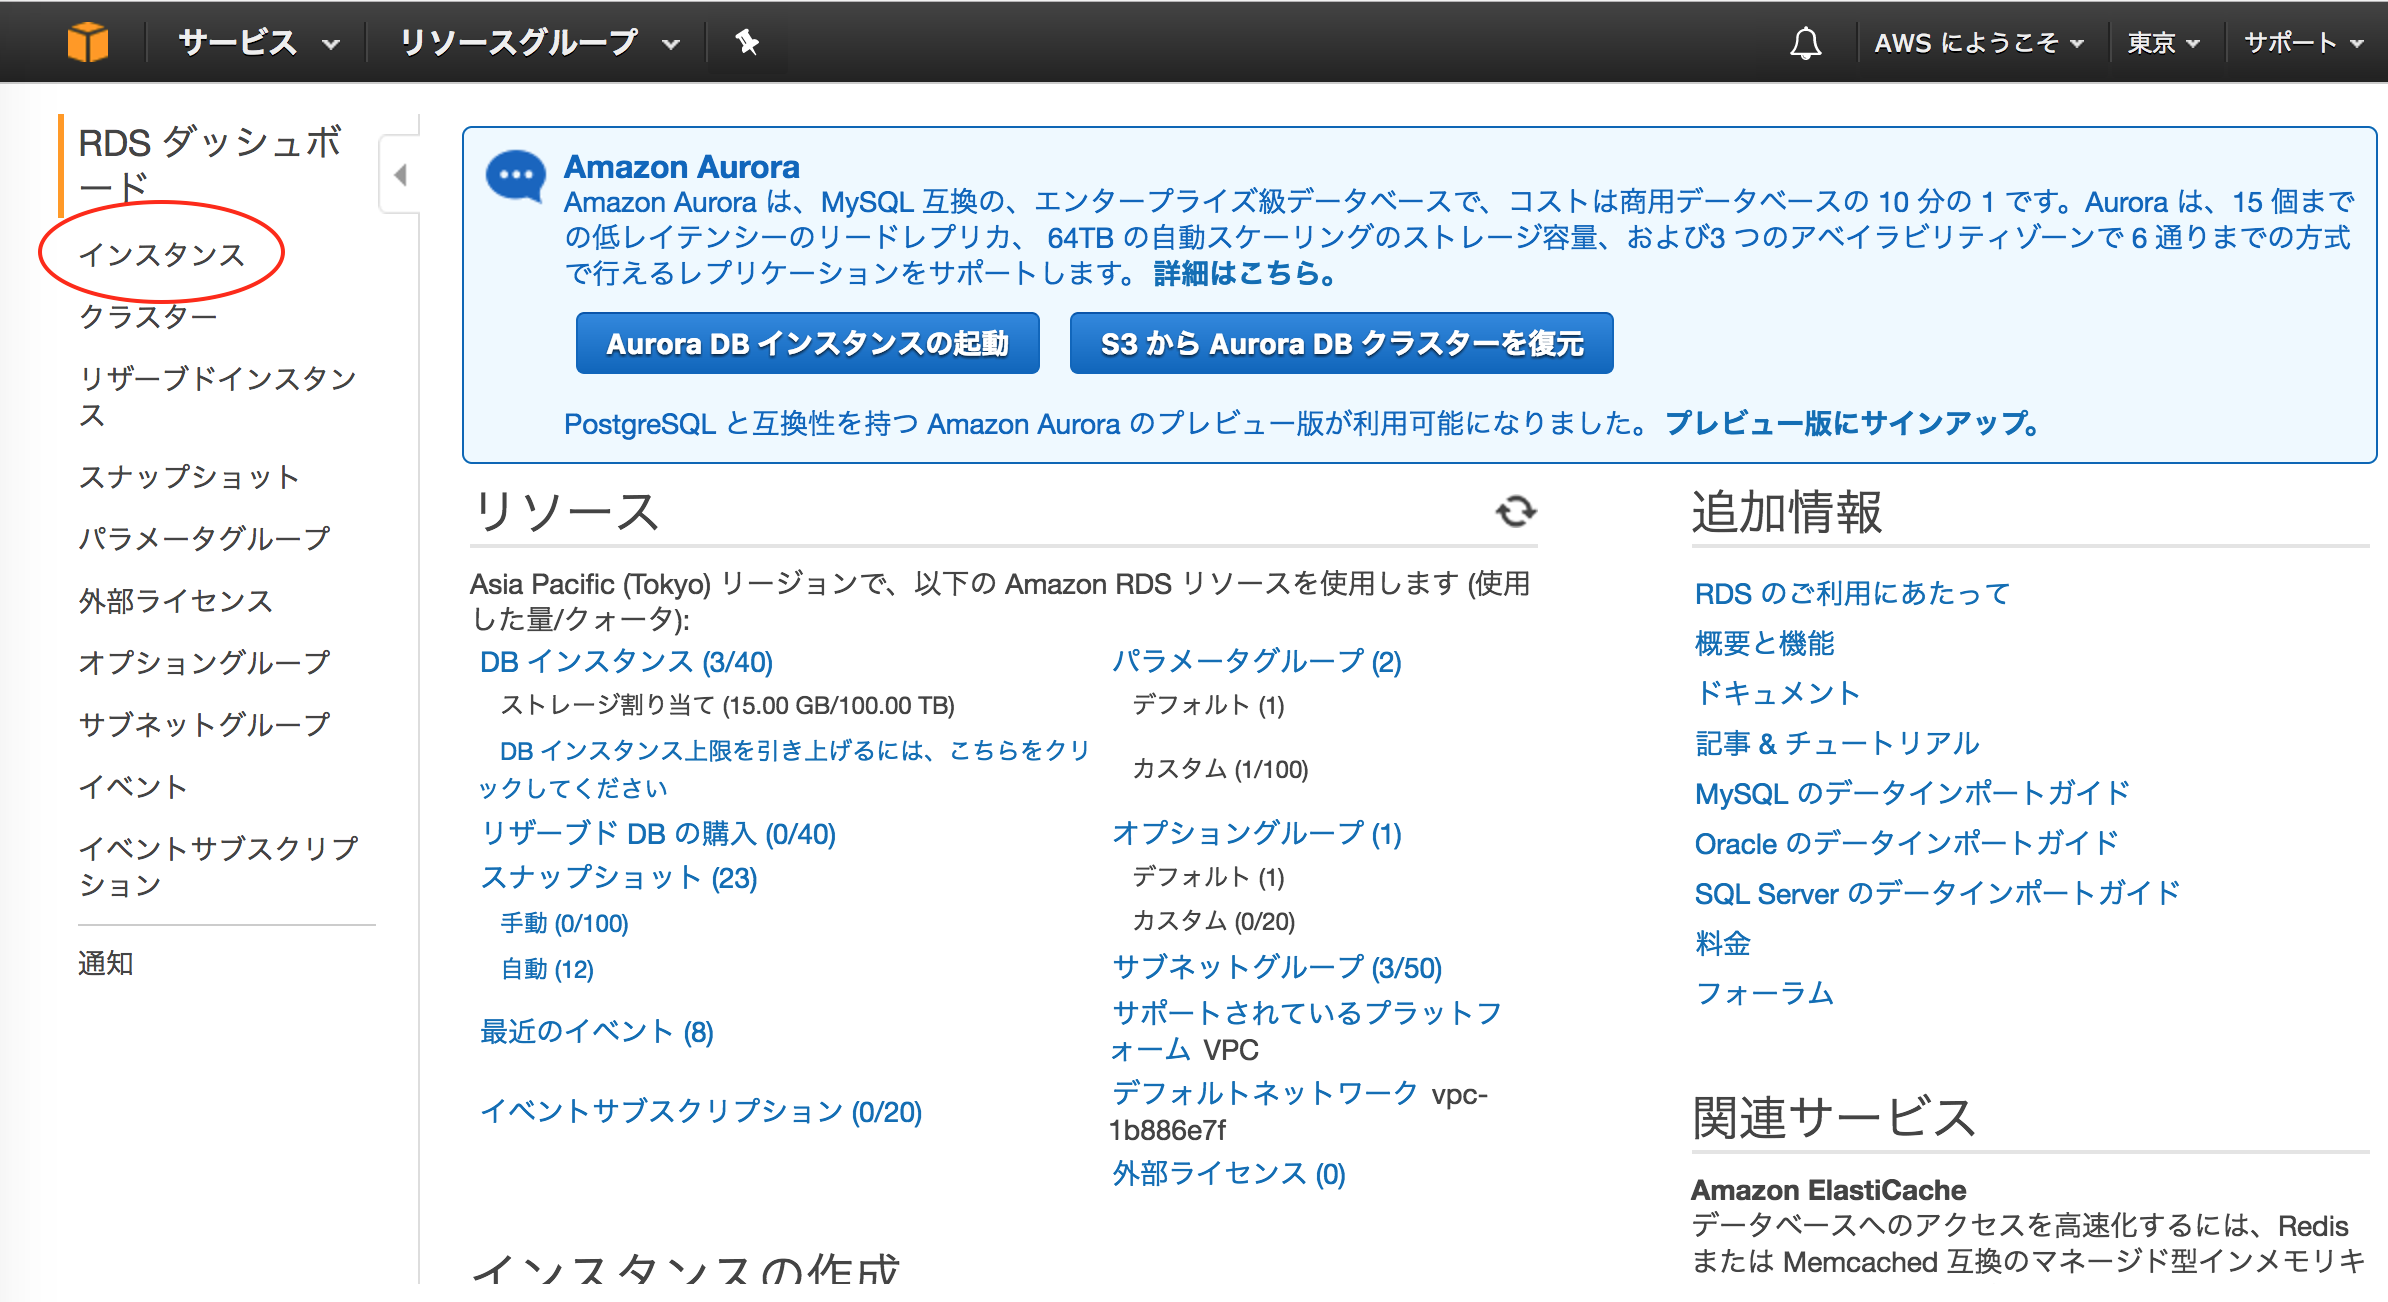
RDSの確認
エンドポイントを確認します。
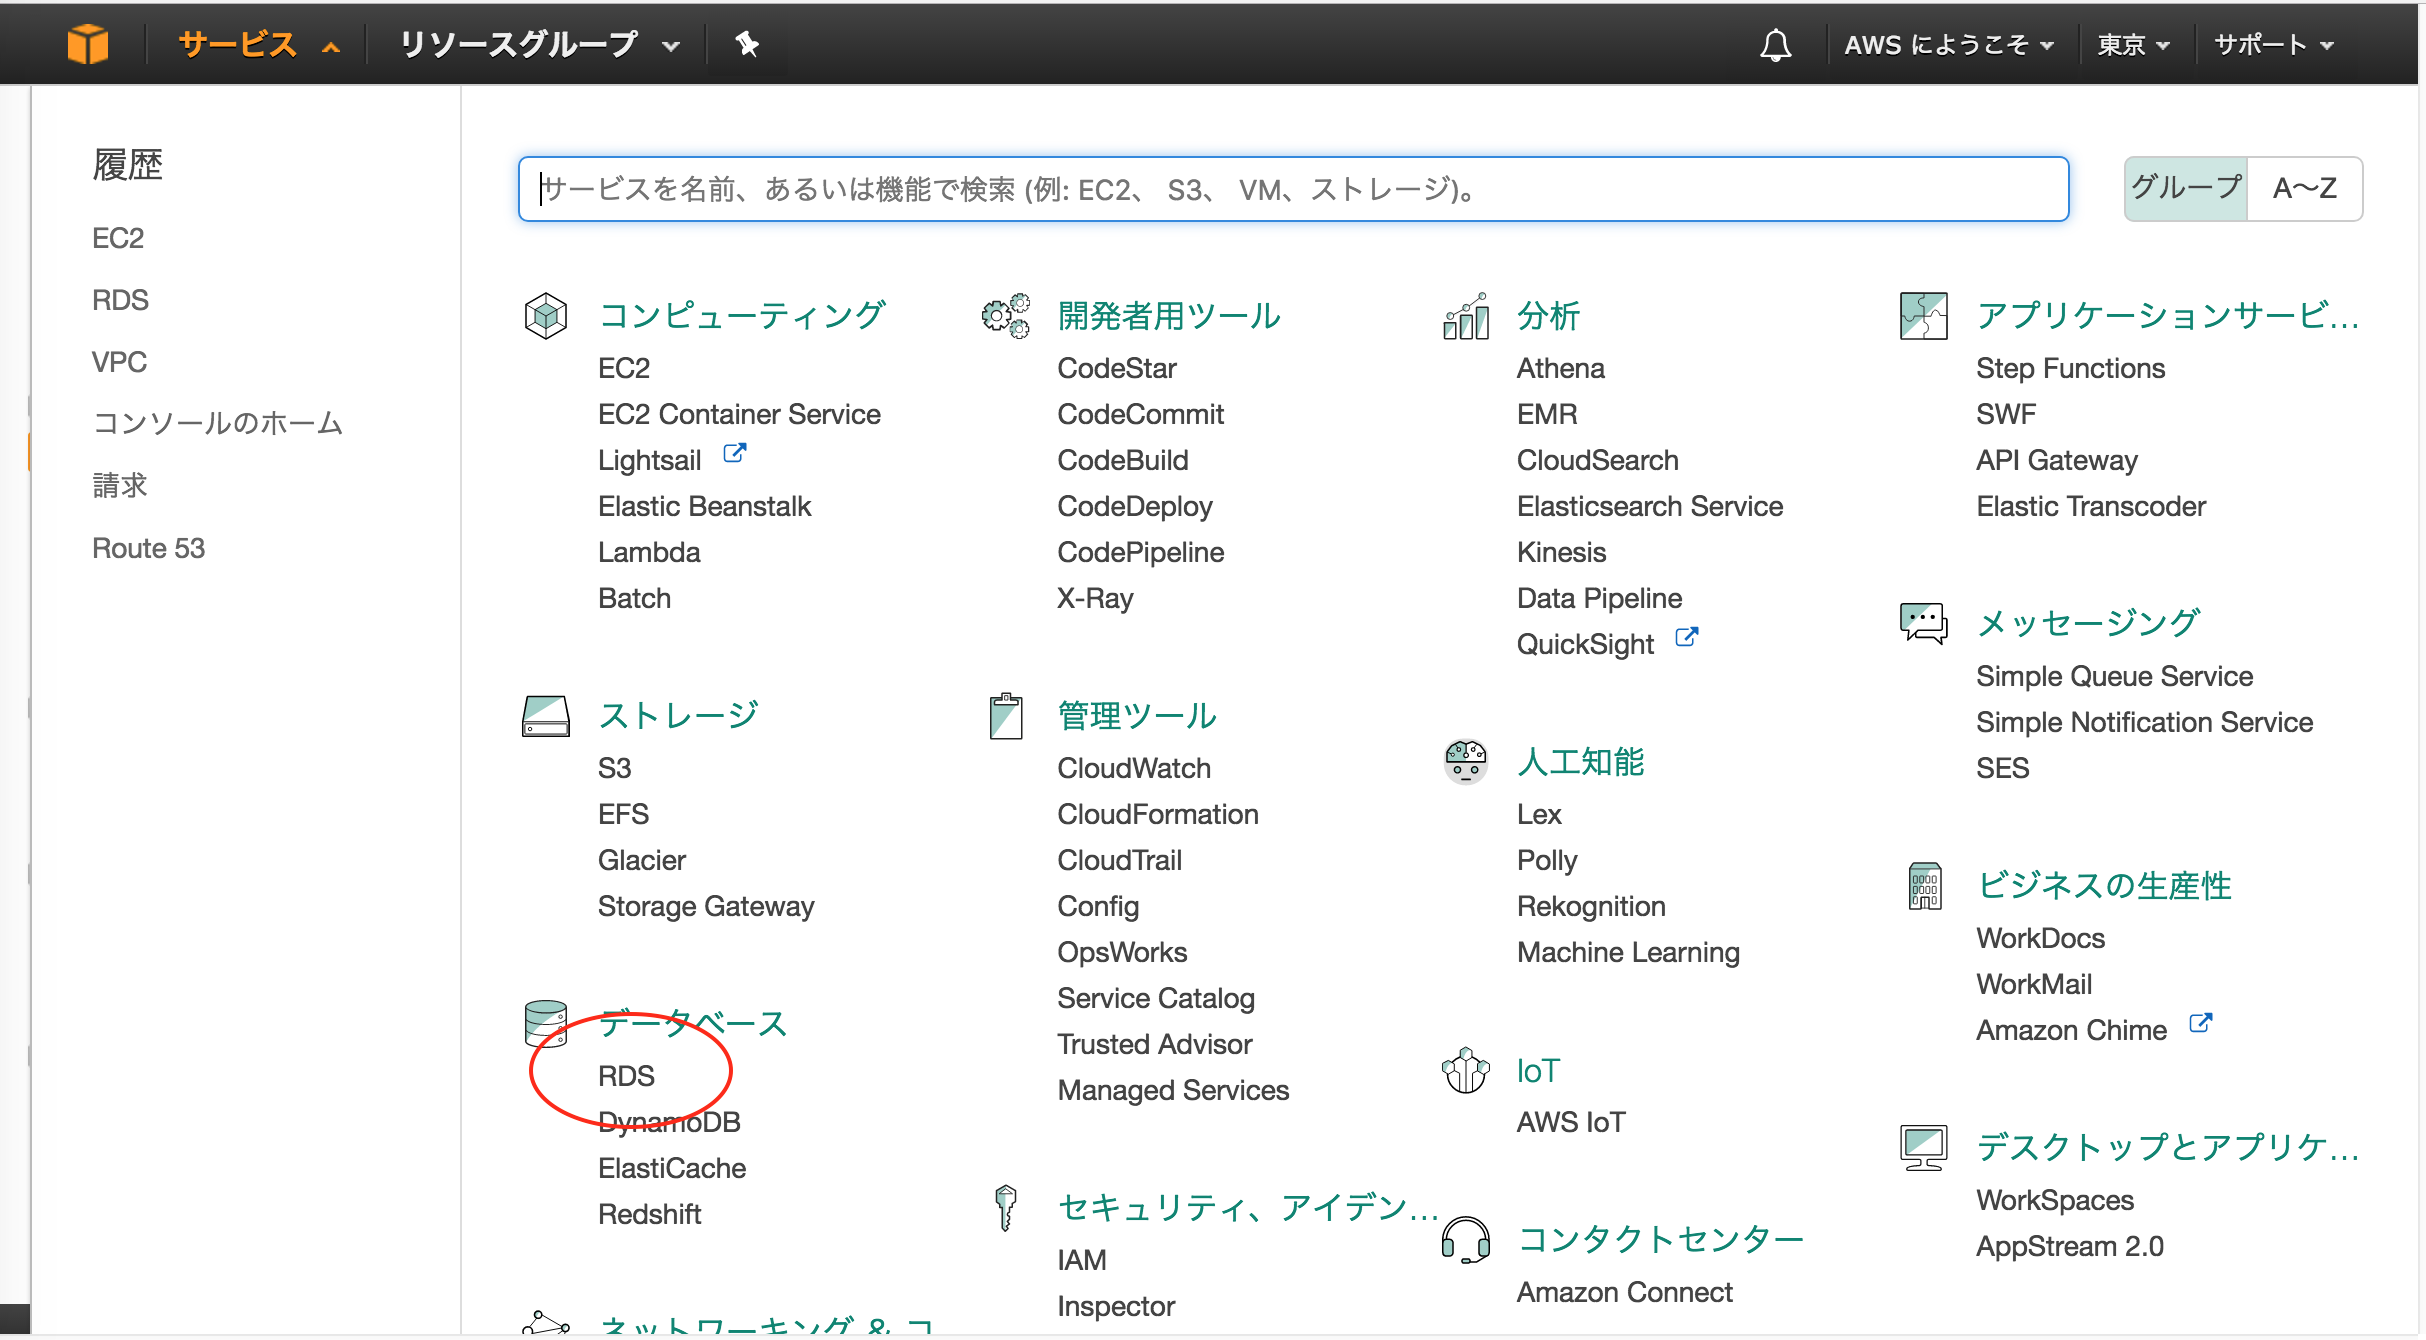
「サービス」をクリックします。
RDSを選択します。
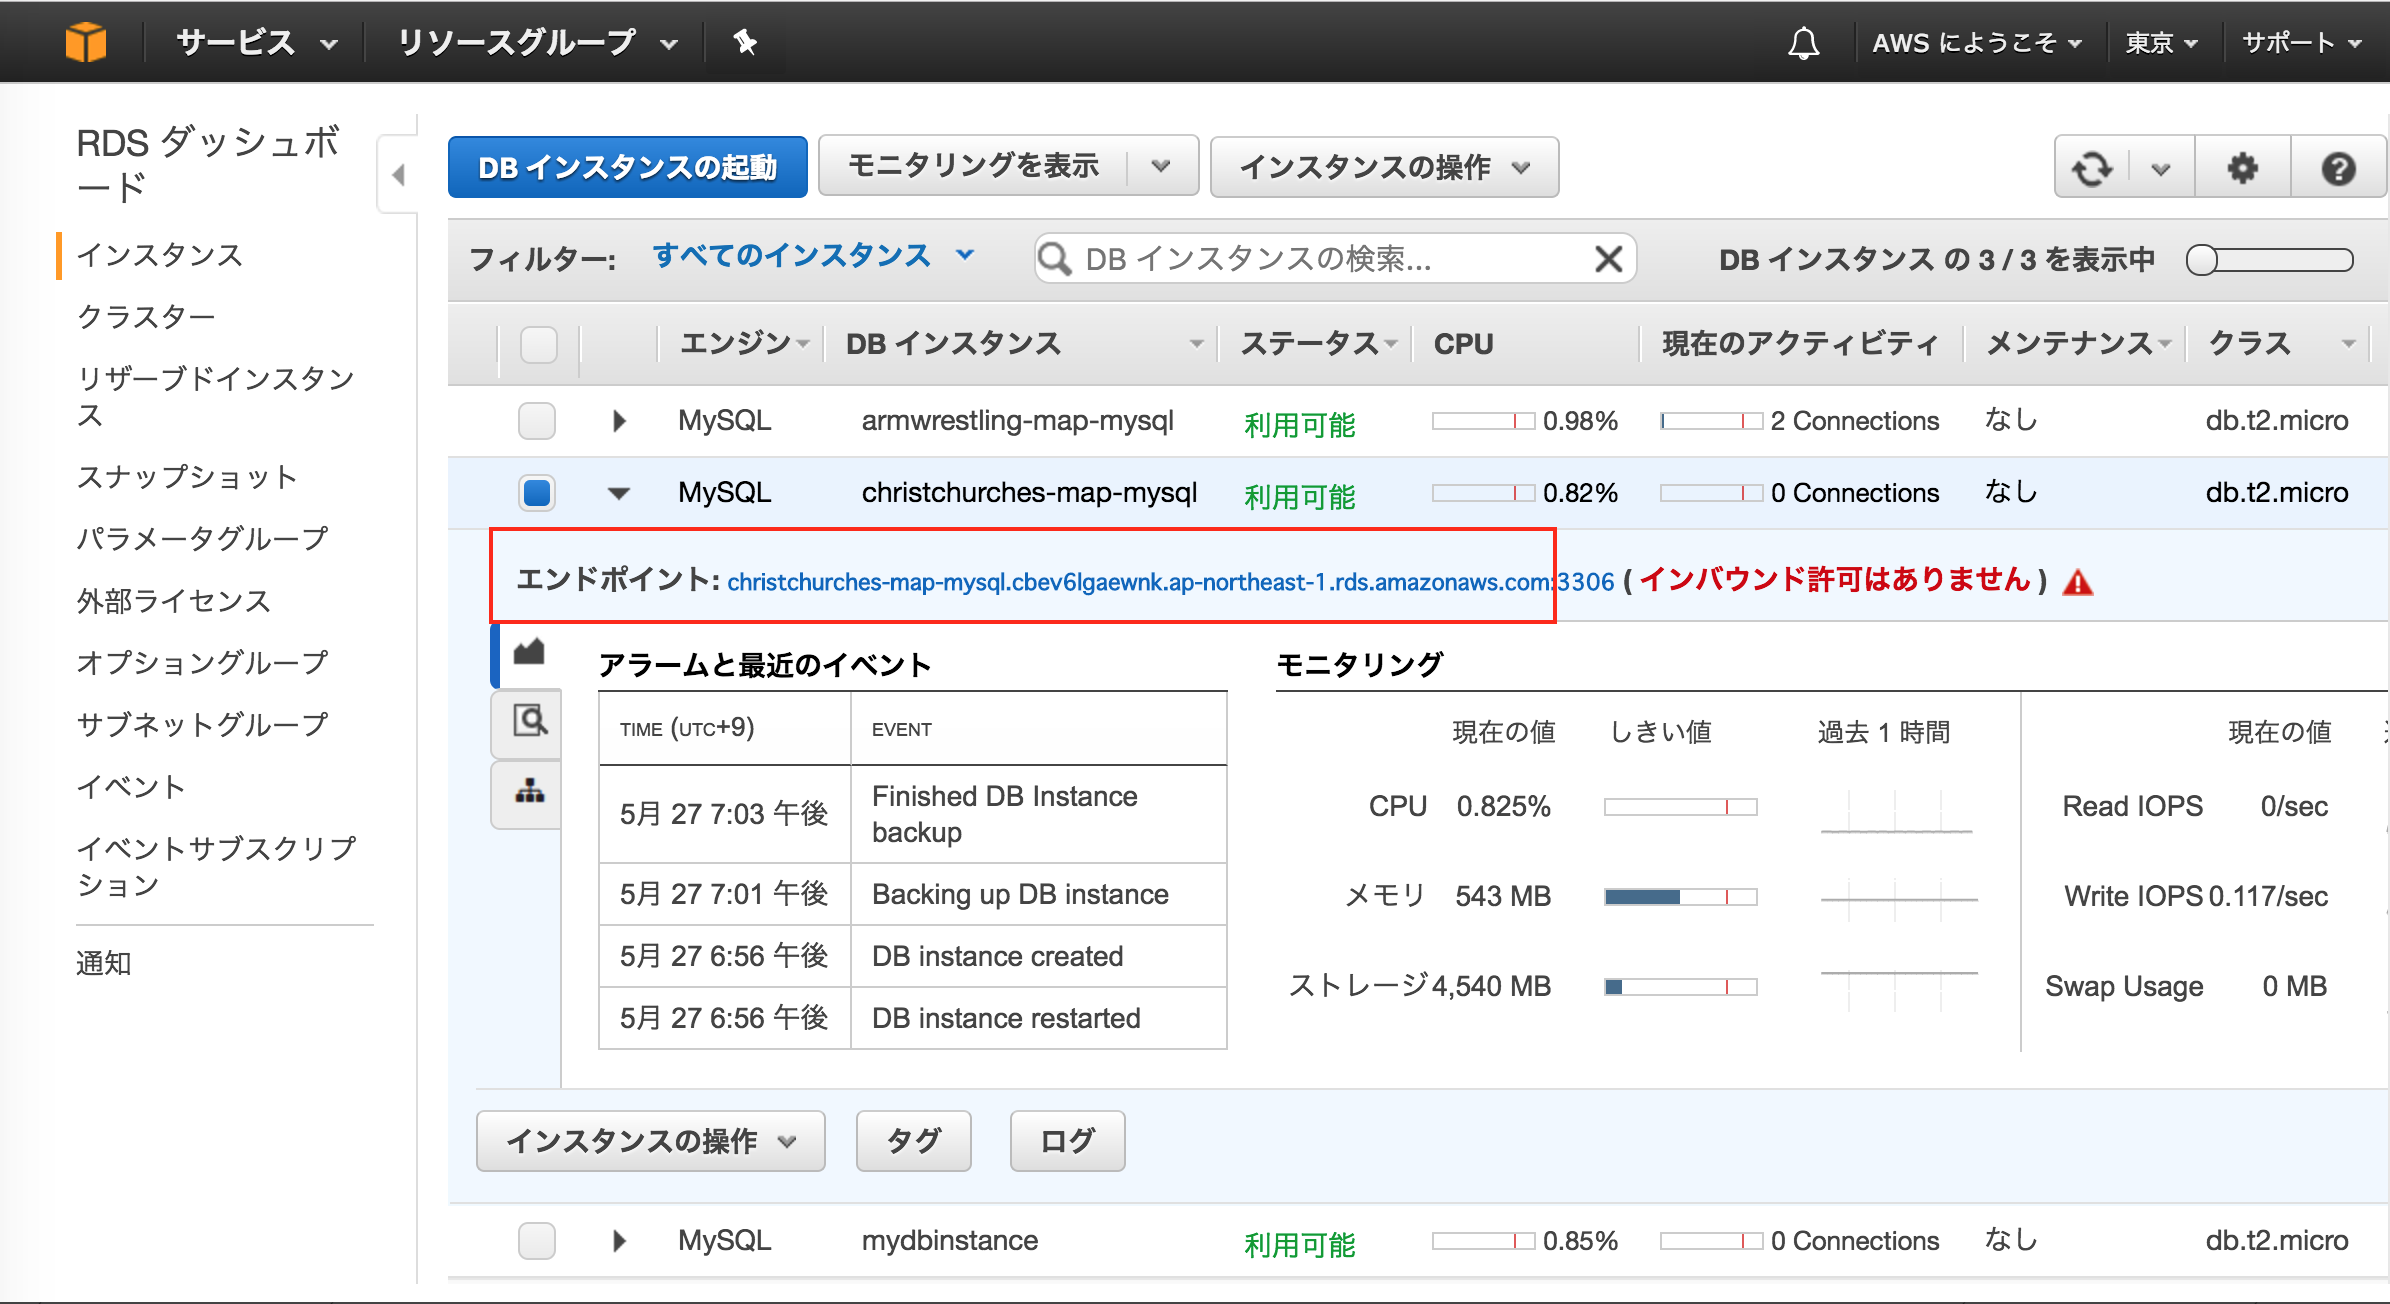
インスタンスを選択します。
作成したRDSを選択し、エンドポイントを確認します。
後で使いますので、コピーしてください。
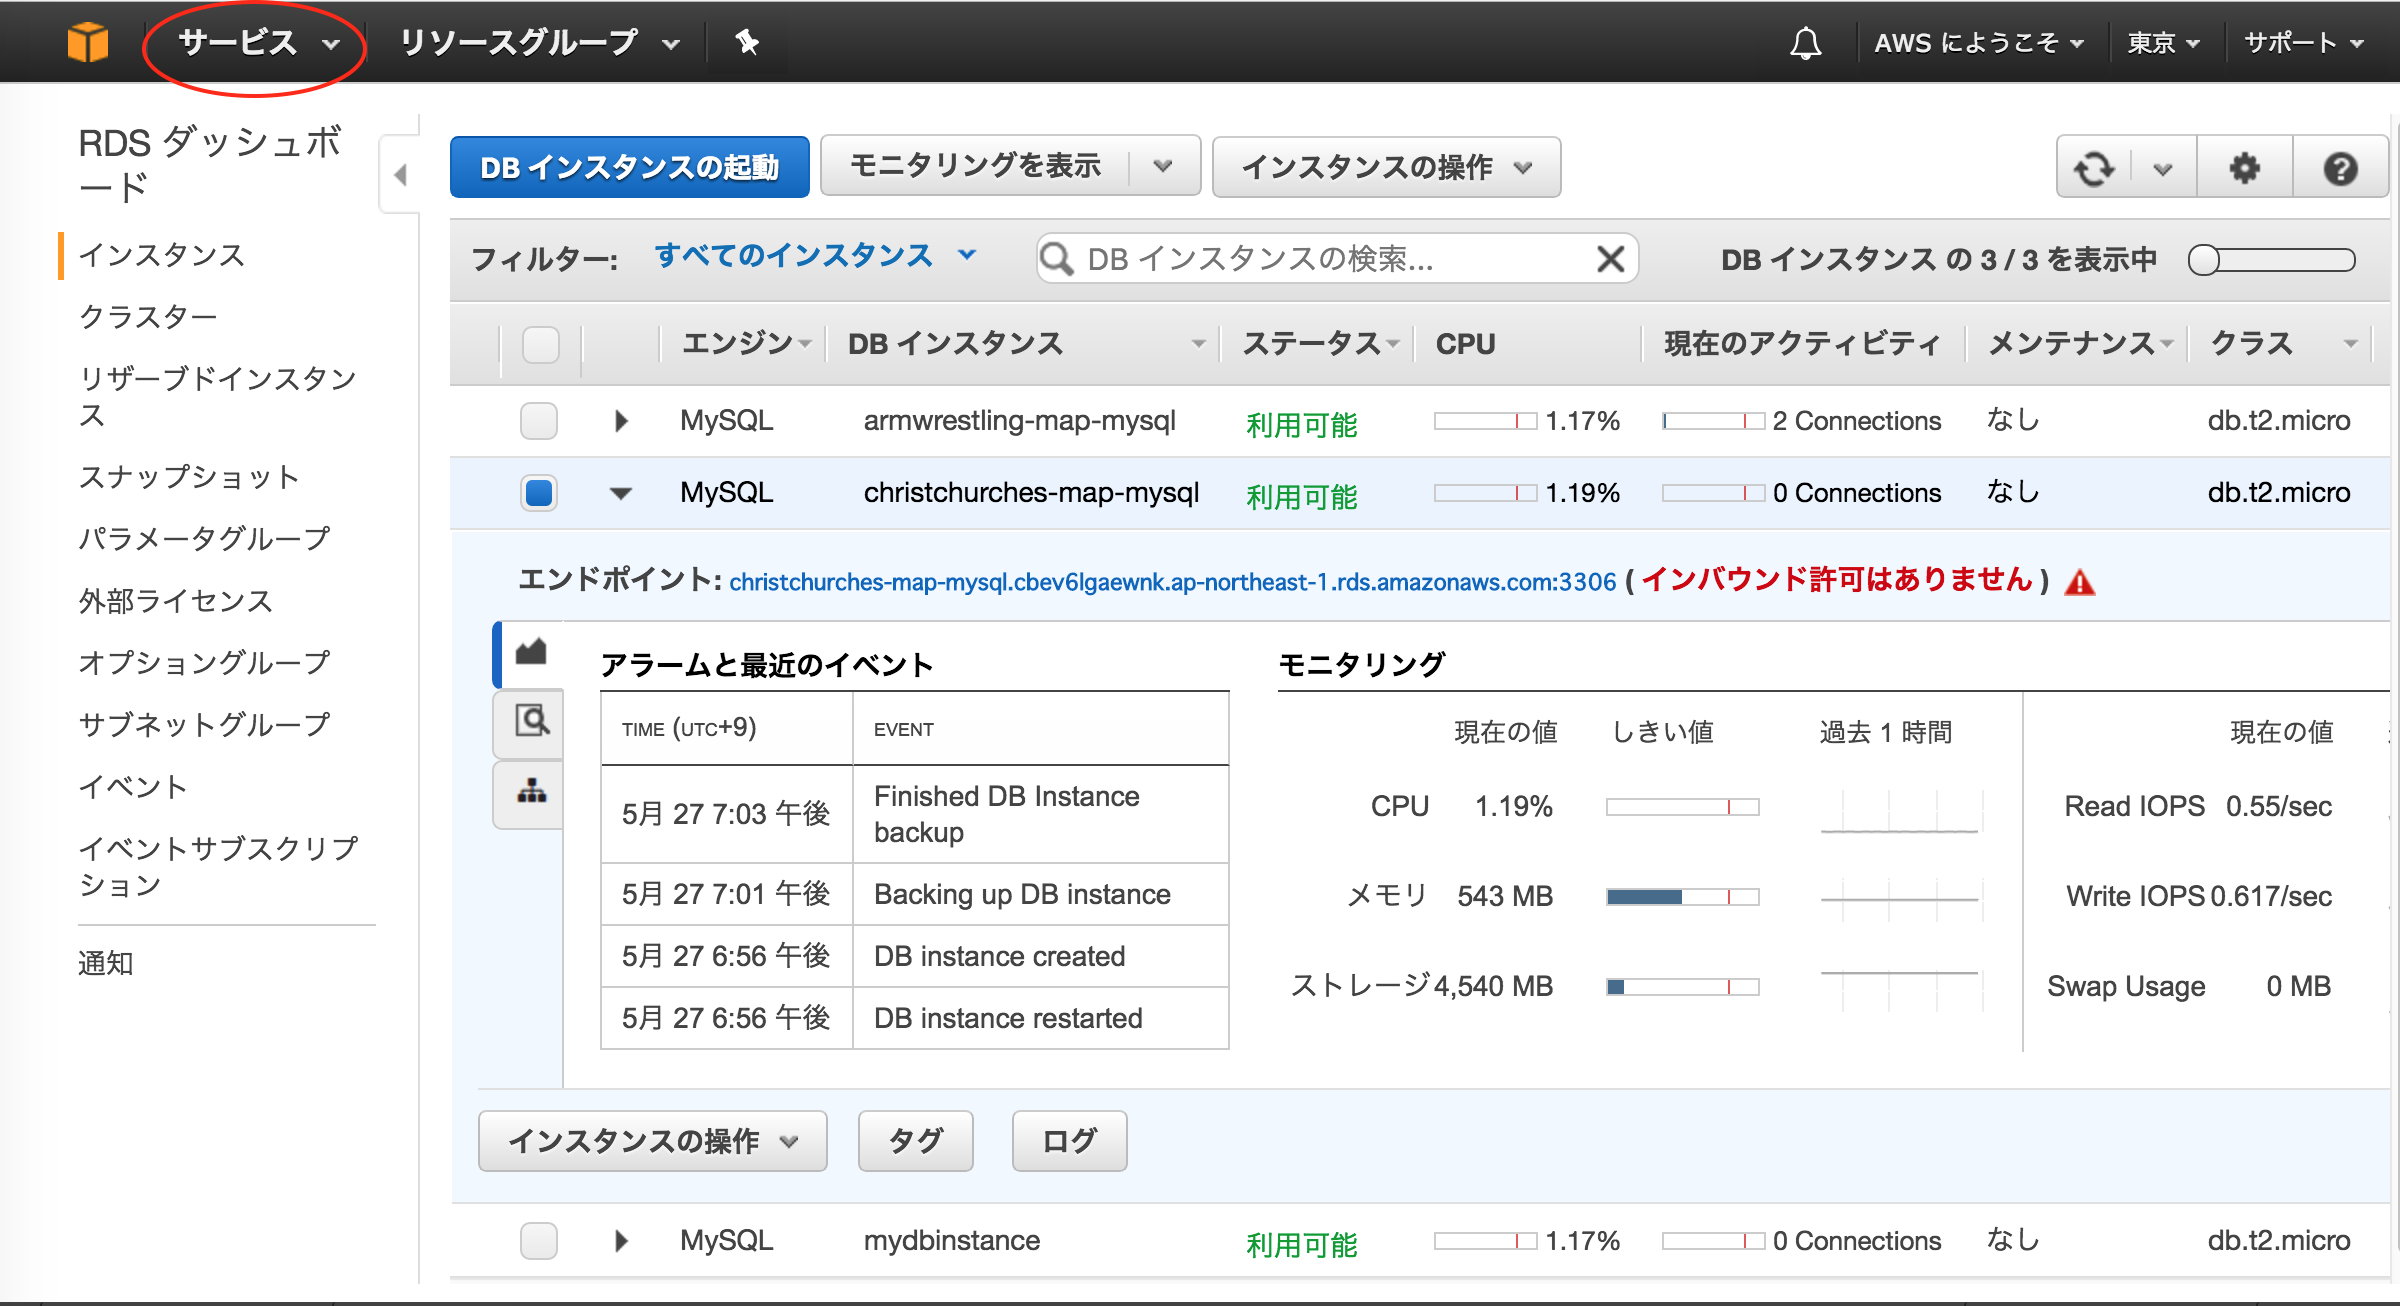
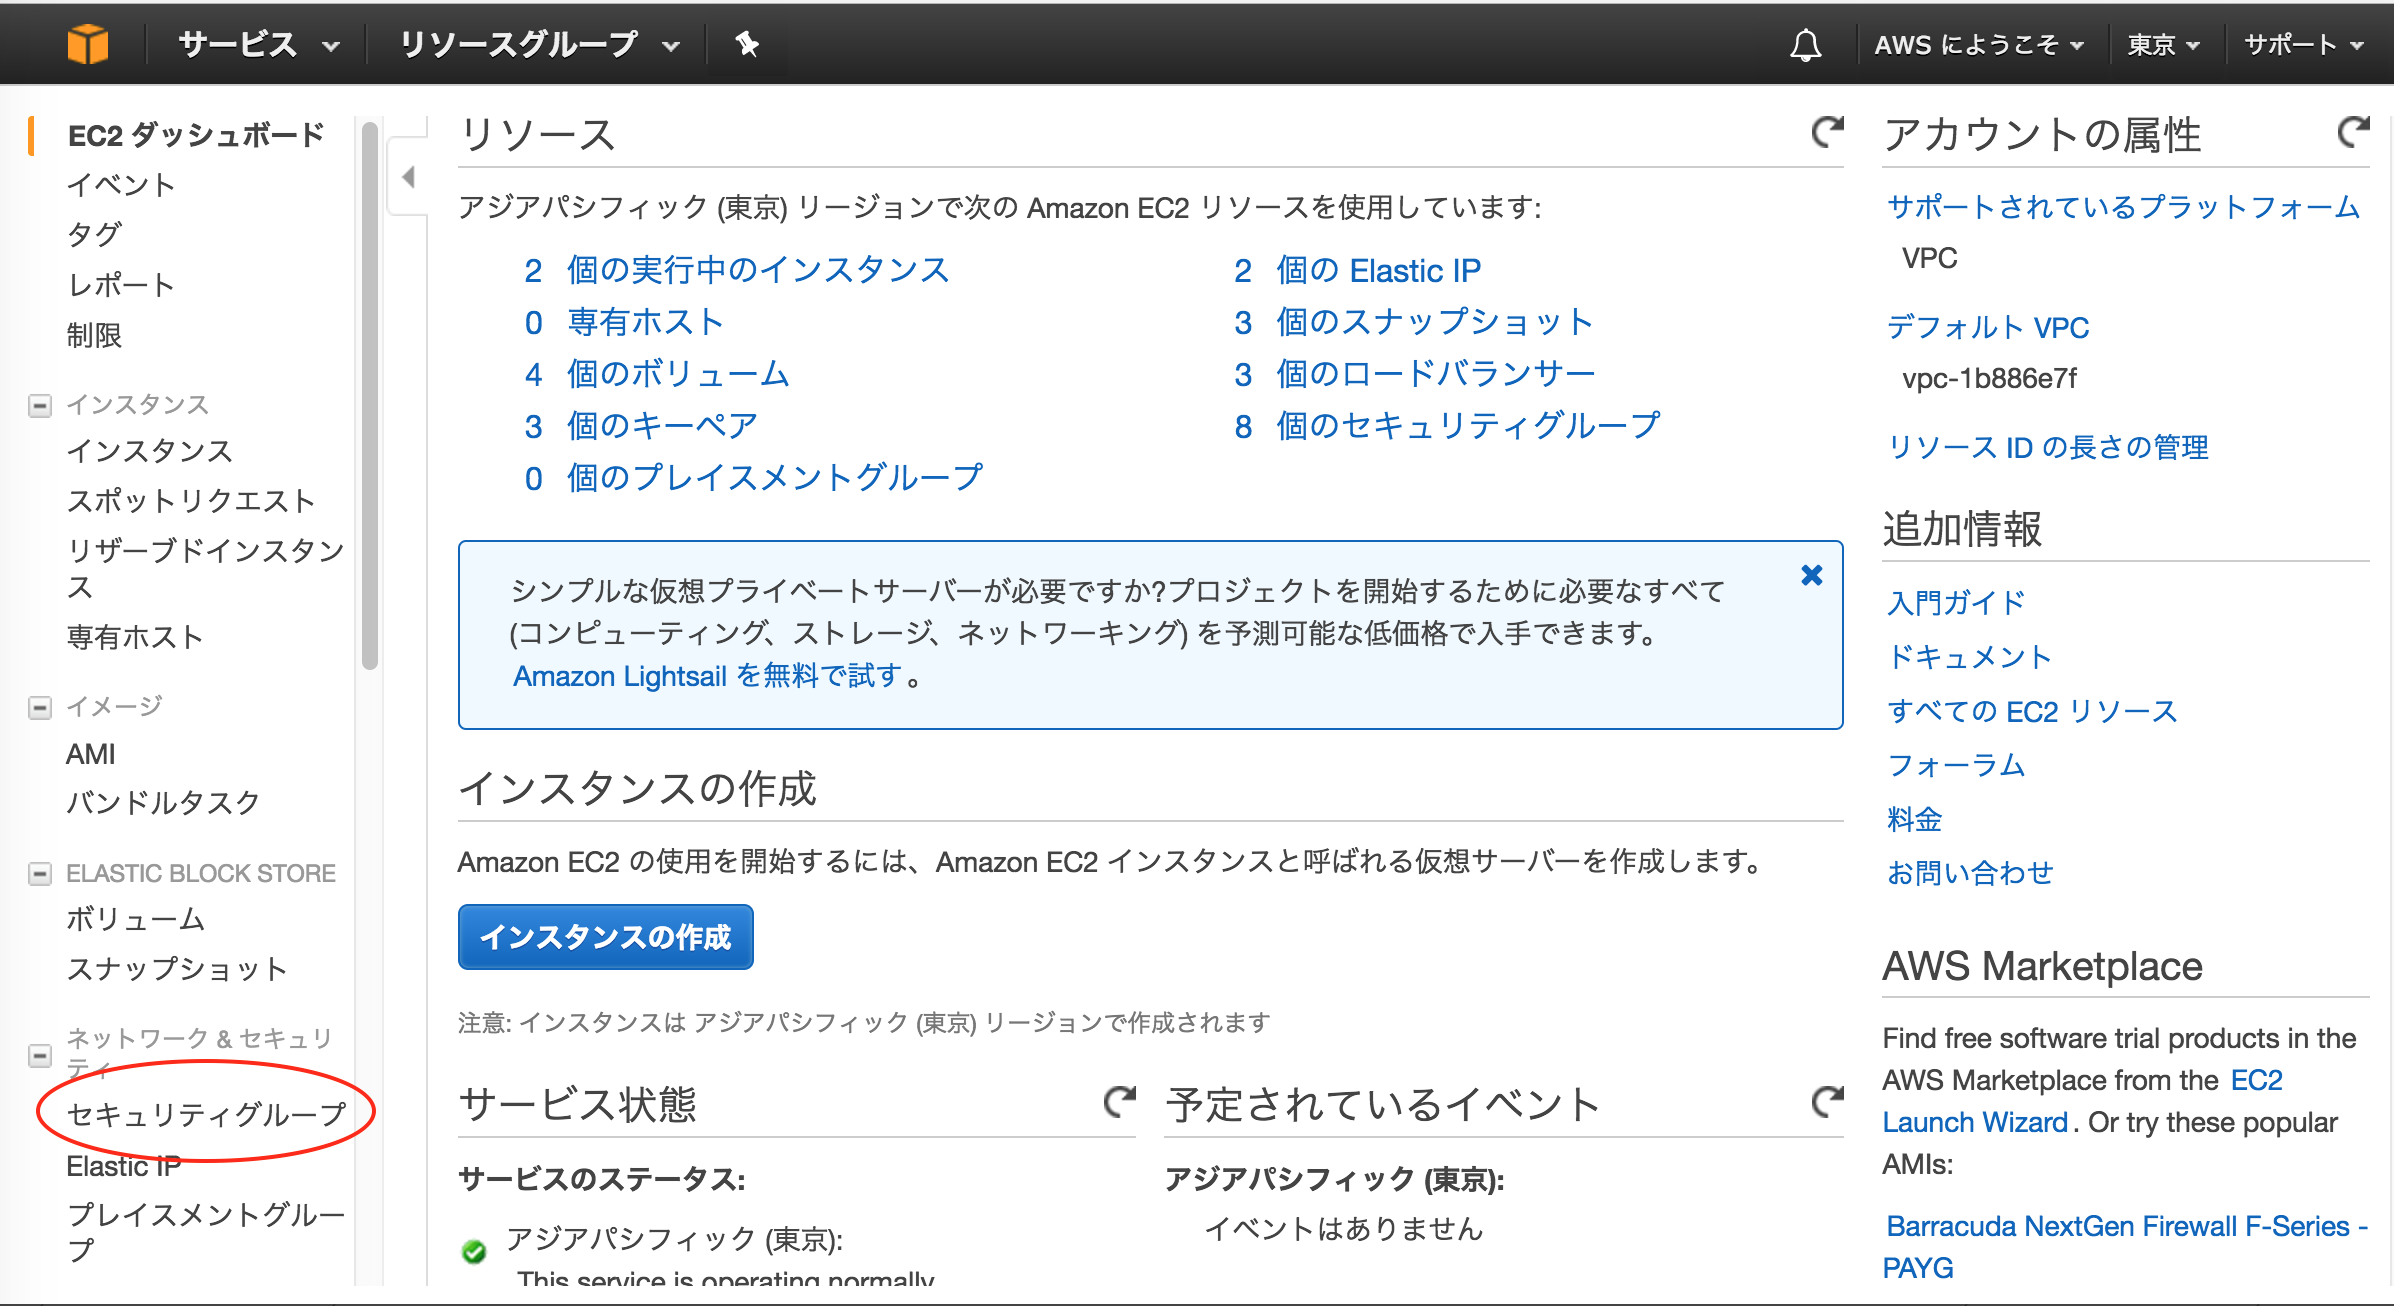
セキュリティグループの設定
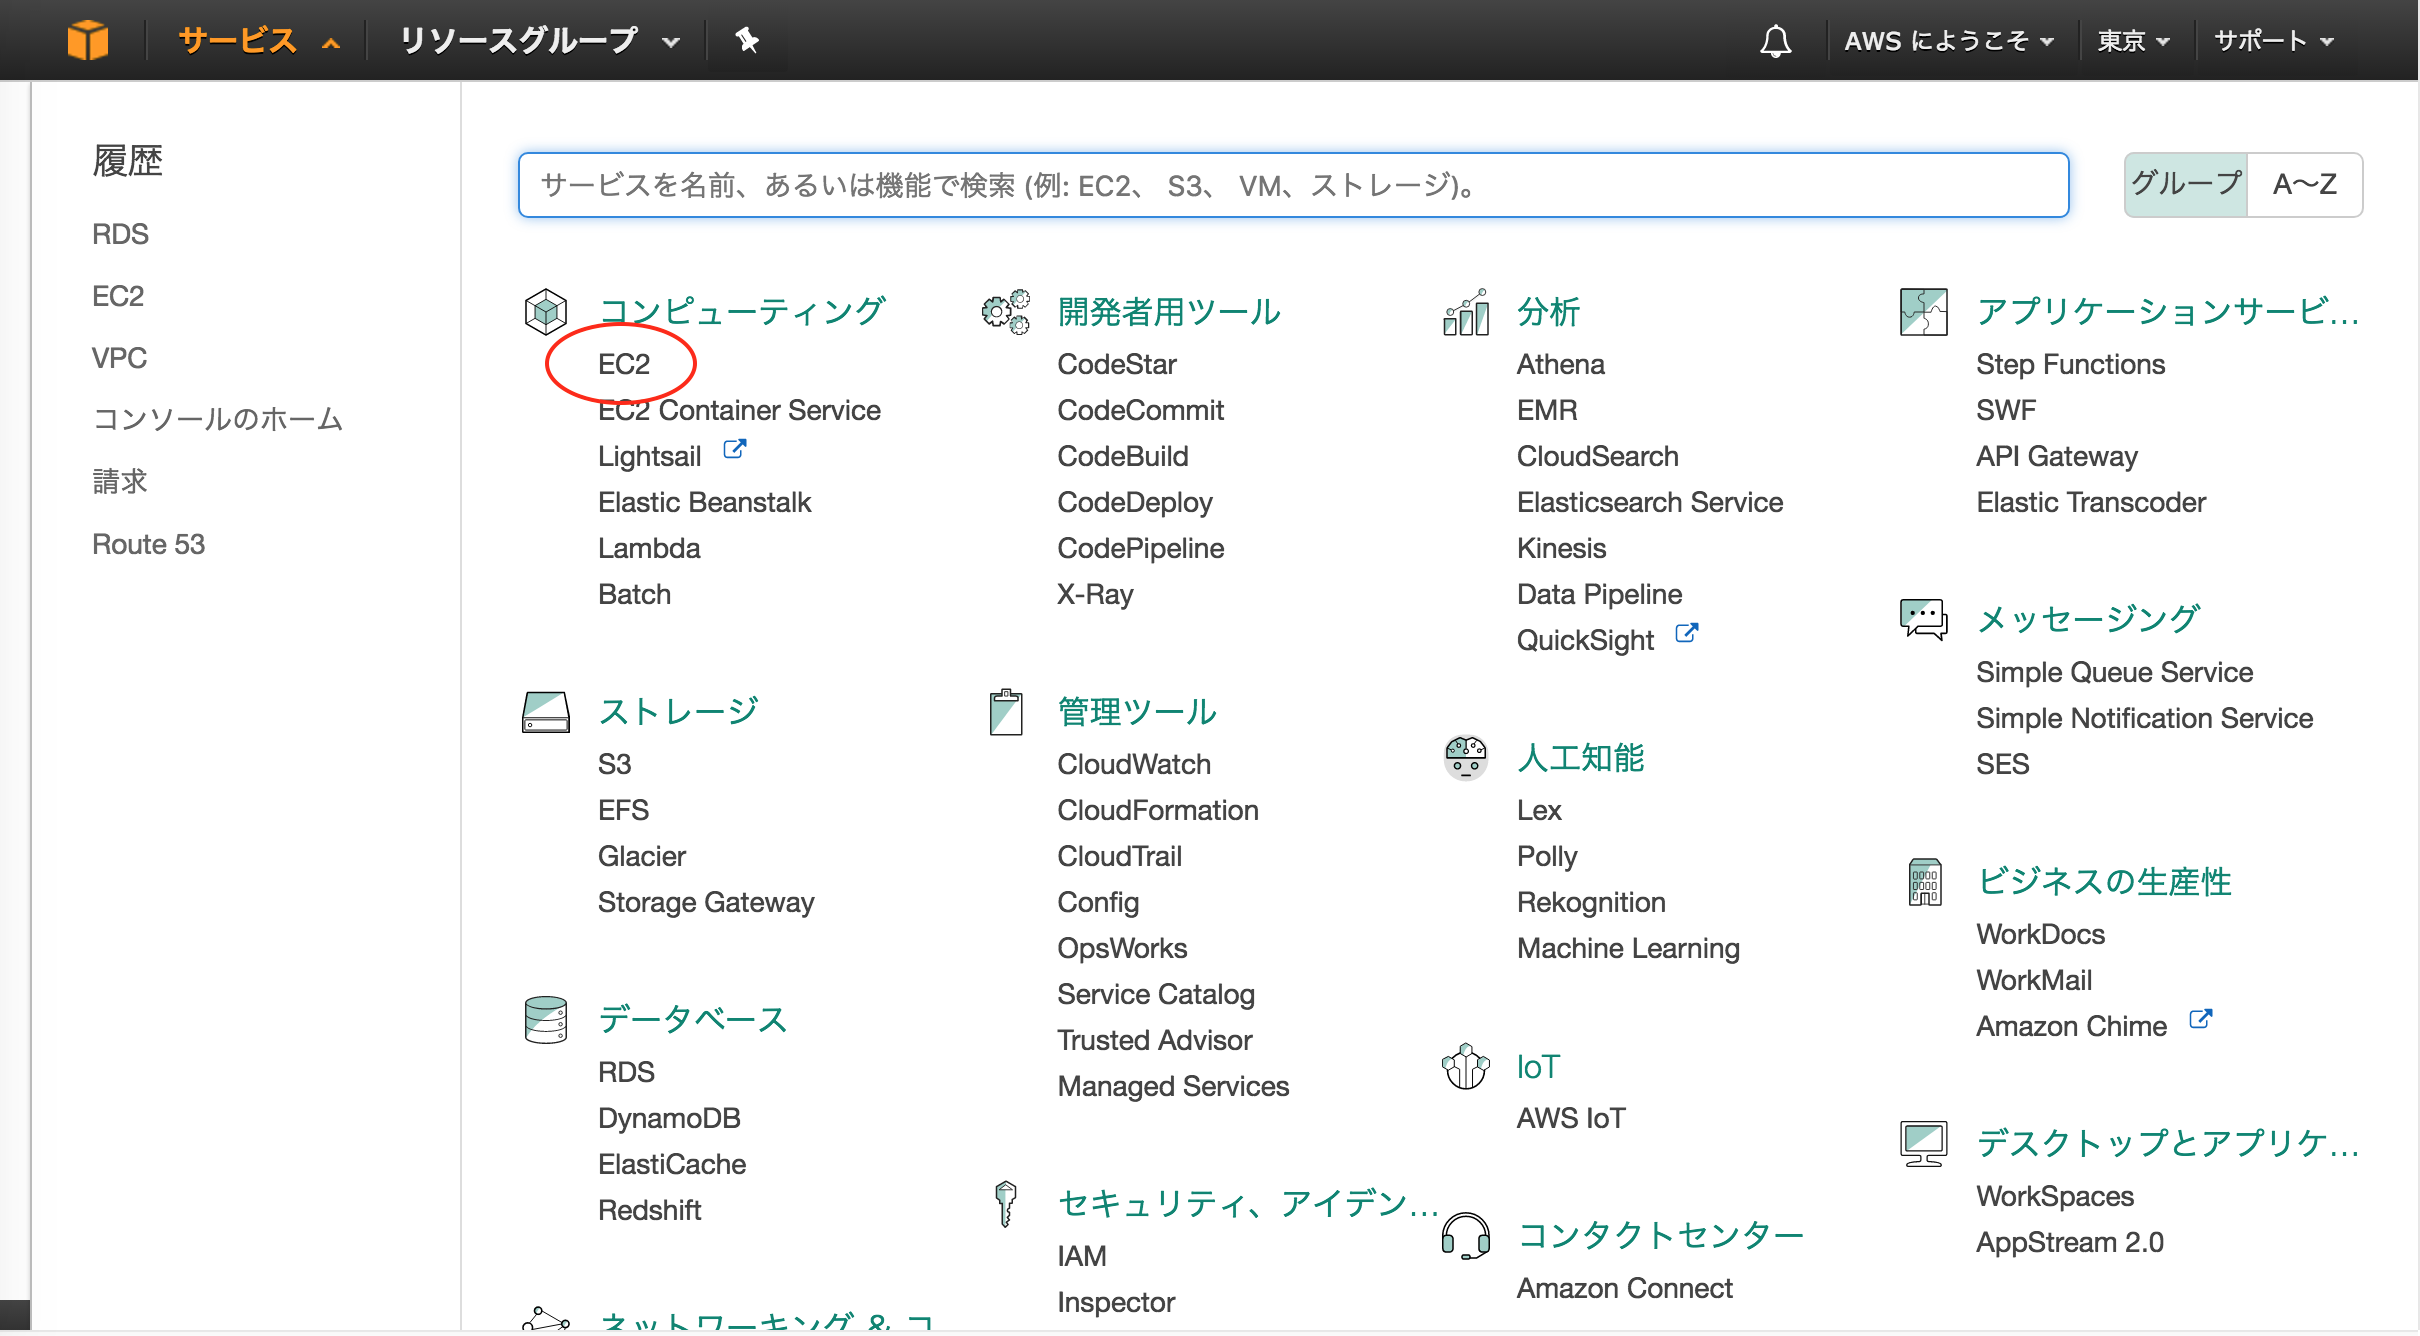
サービスをクリックします。
EC2を選択します。
セキュリティグループを選択します。
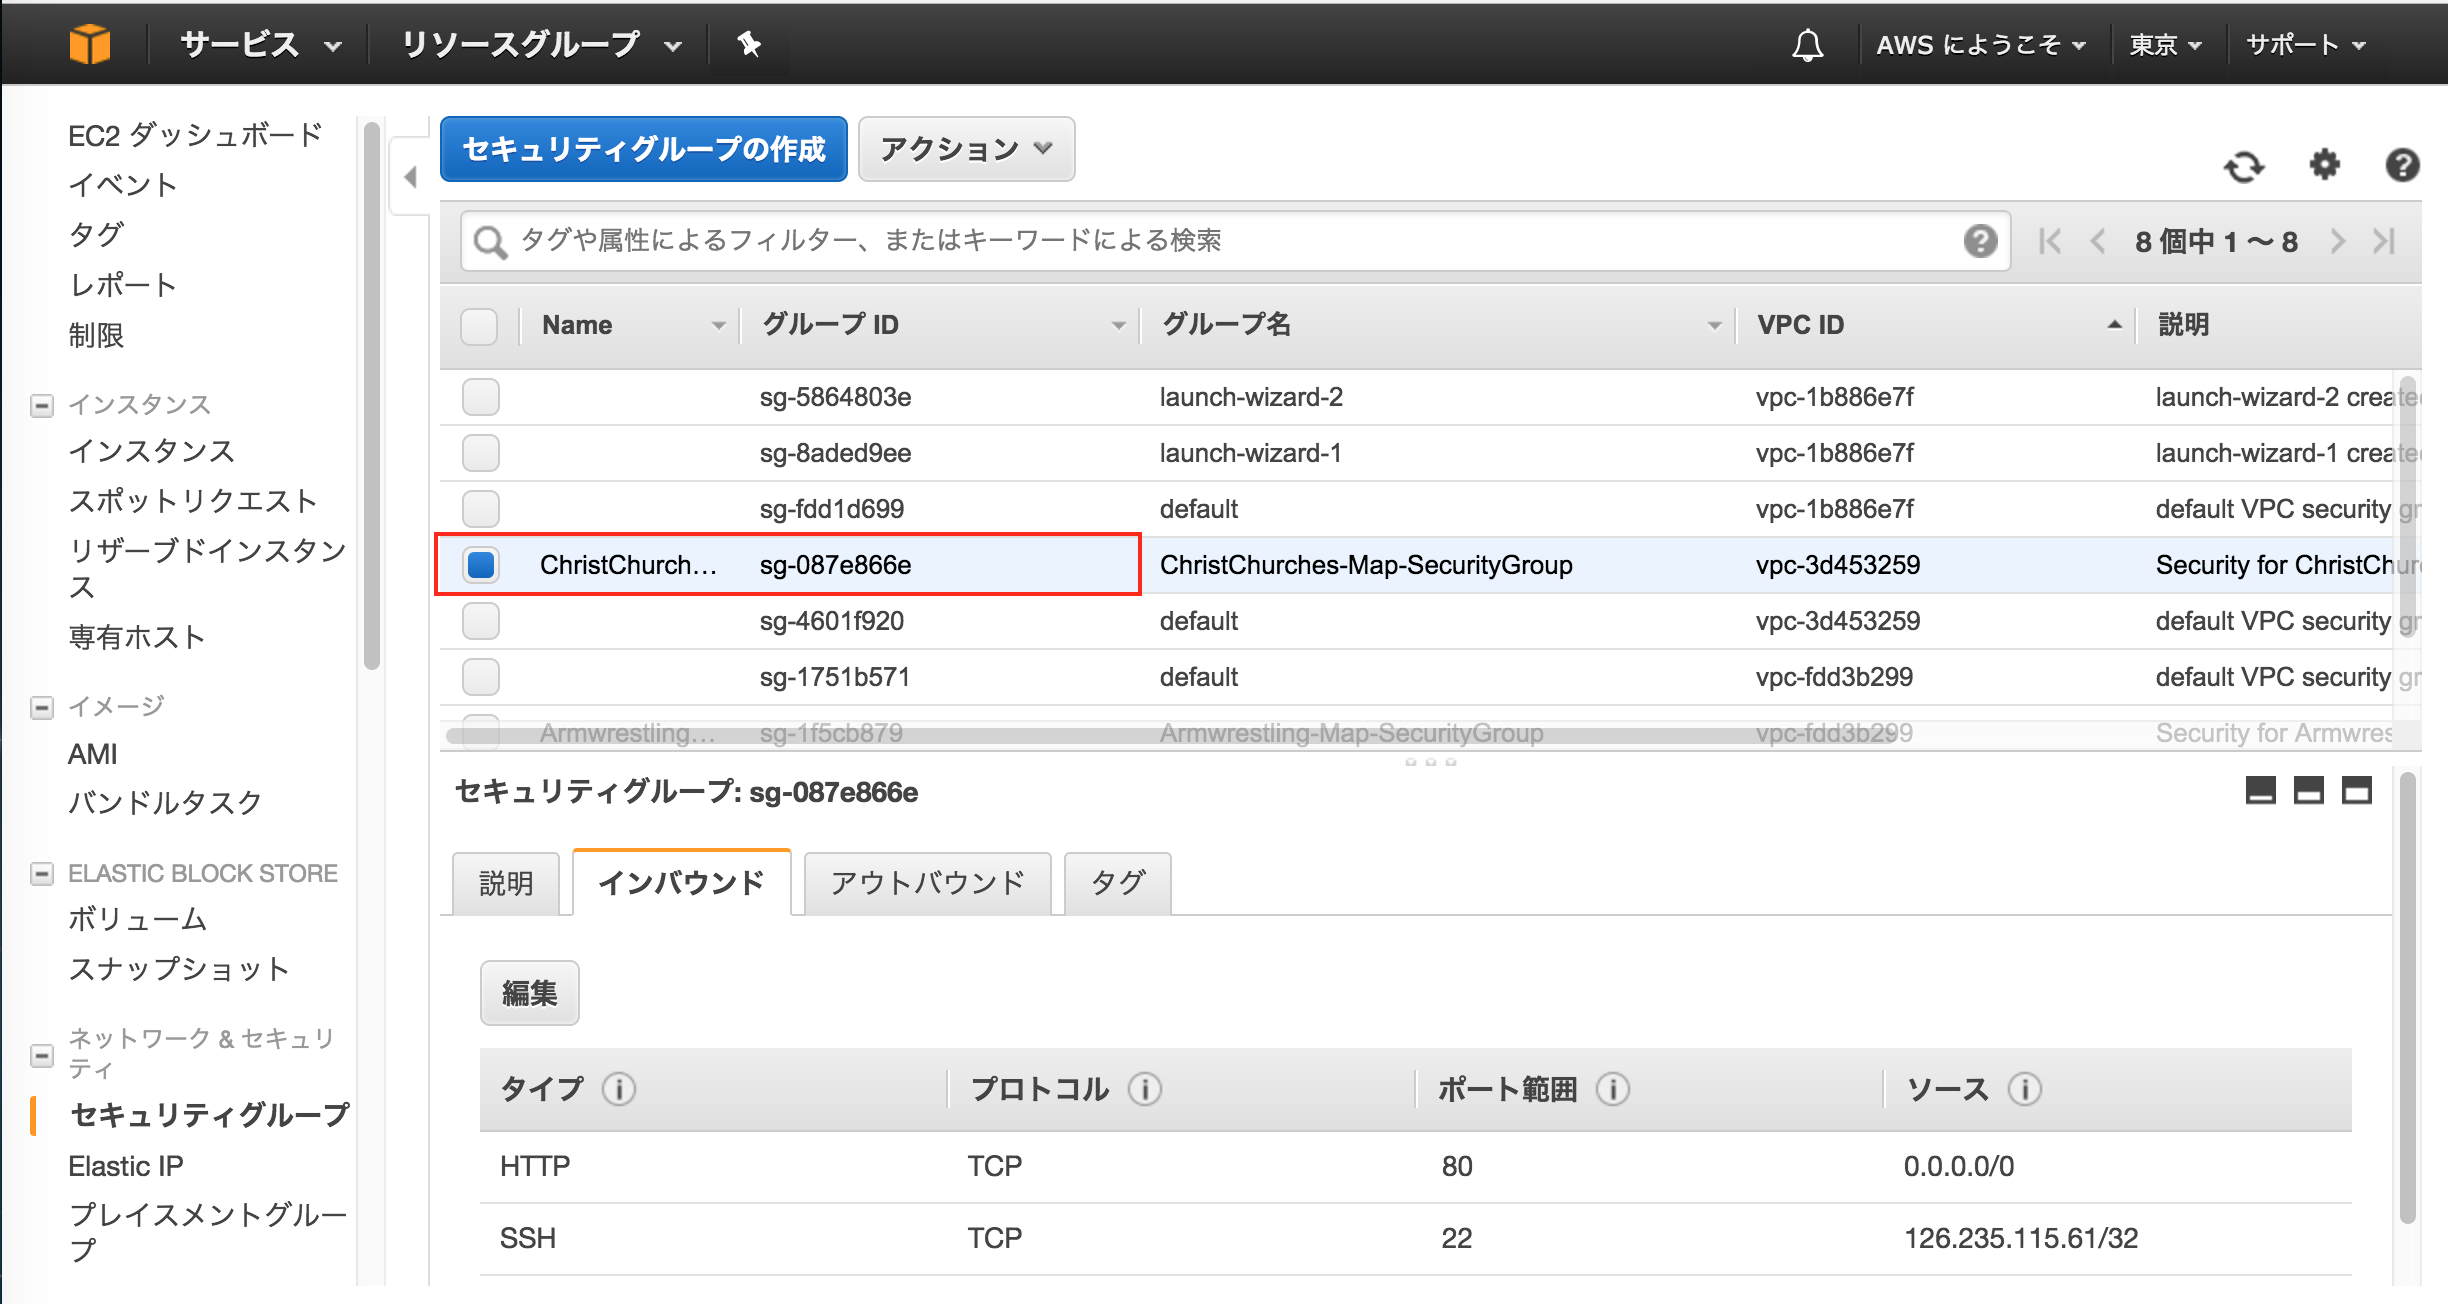
作成したセキュリティグループを選択します。
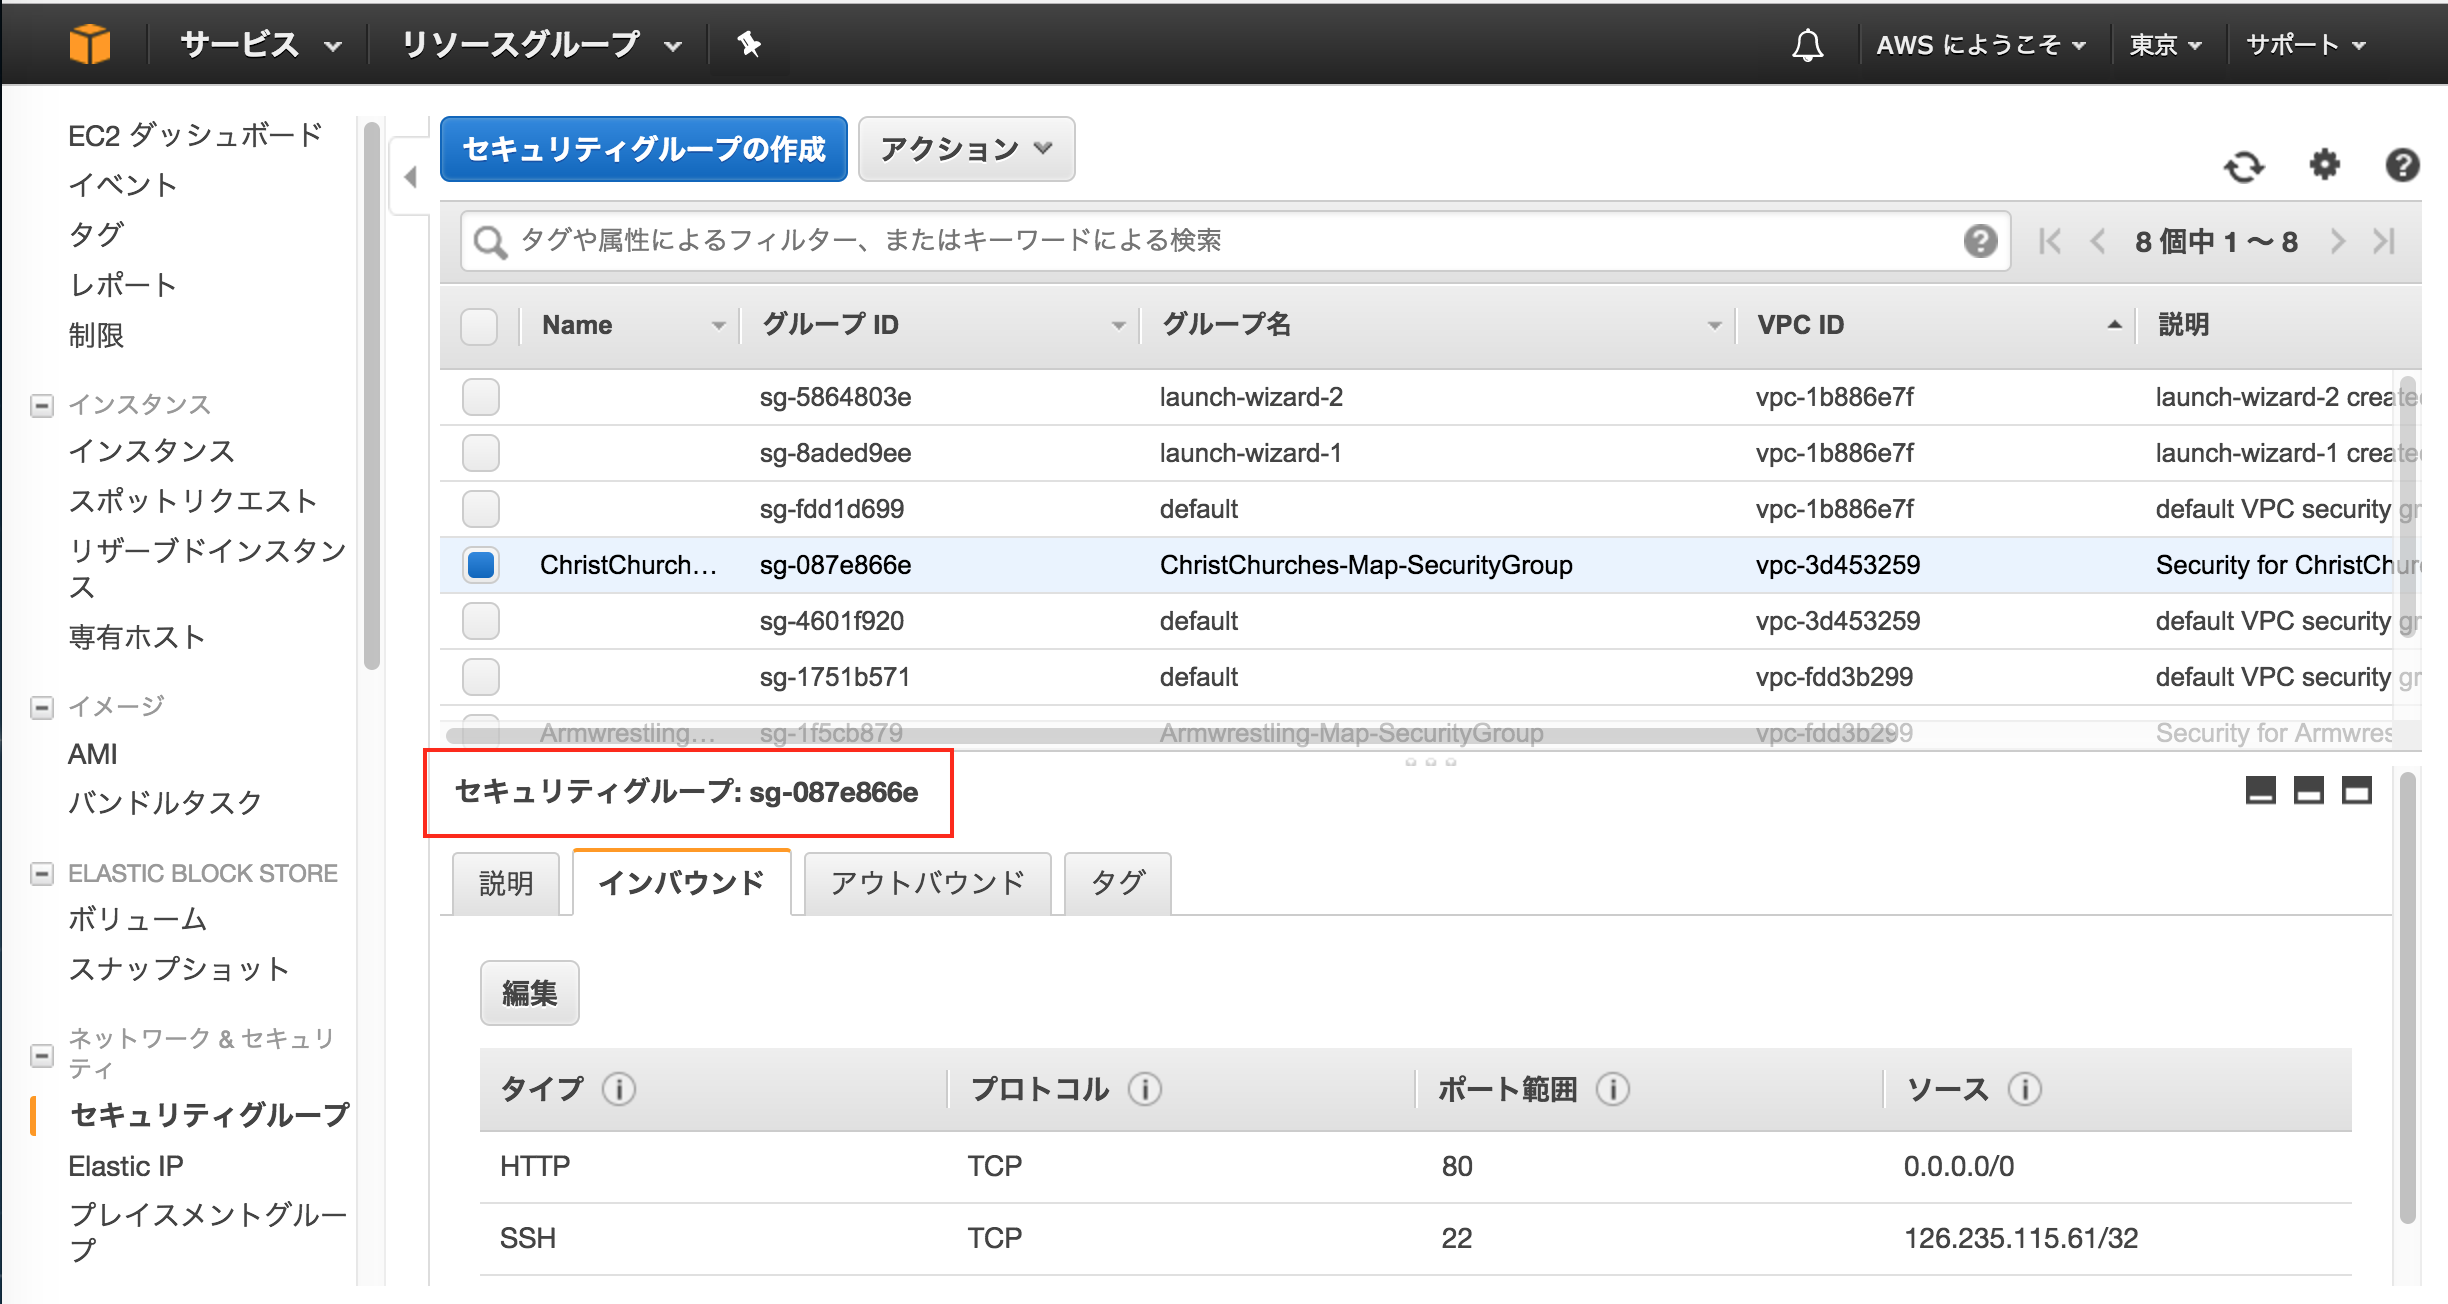
グループIDをコピーします。
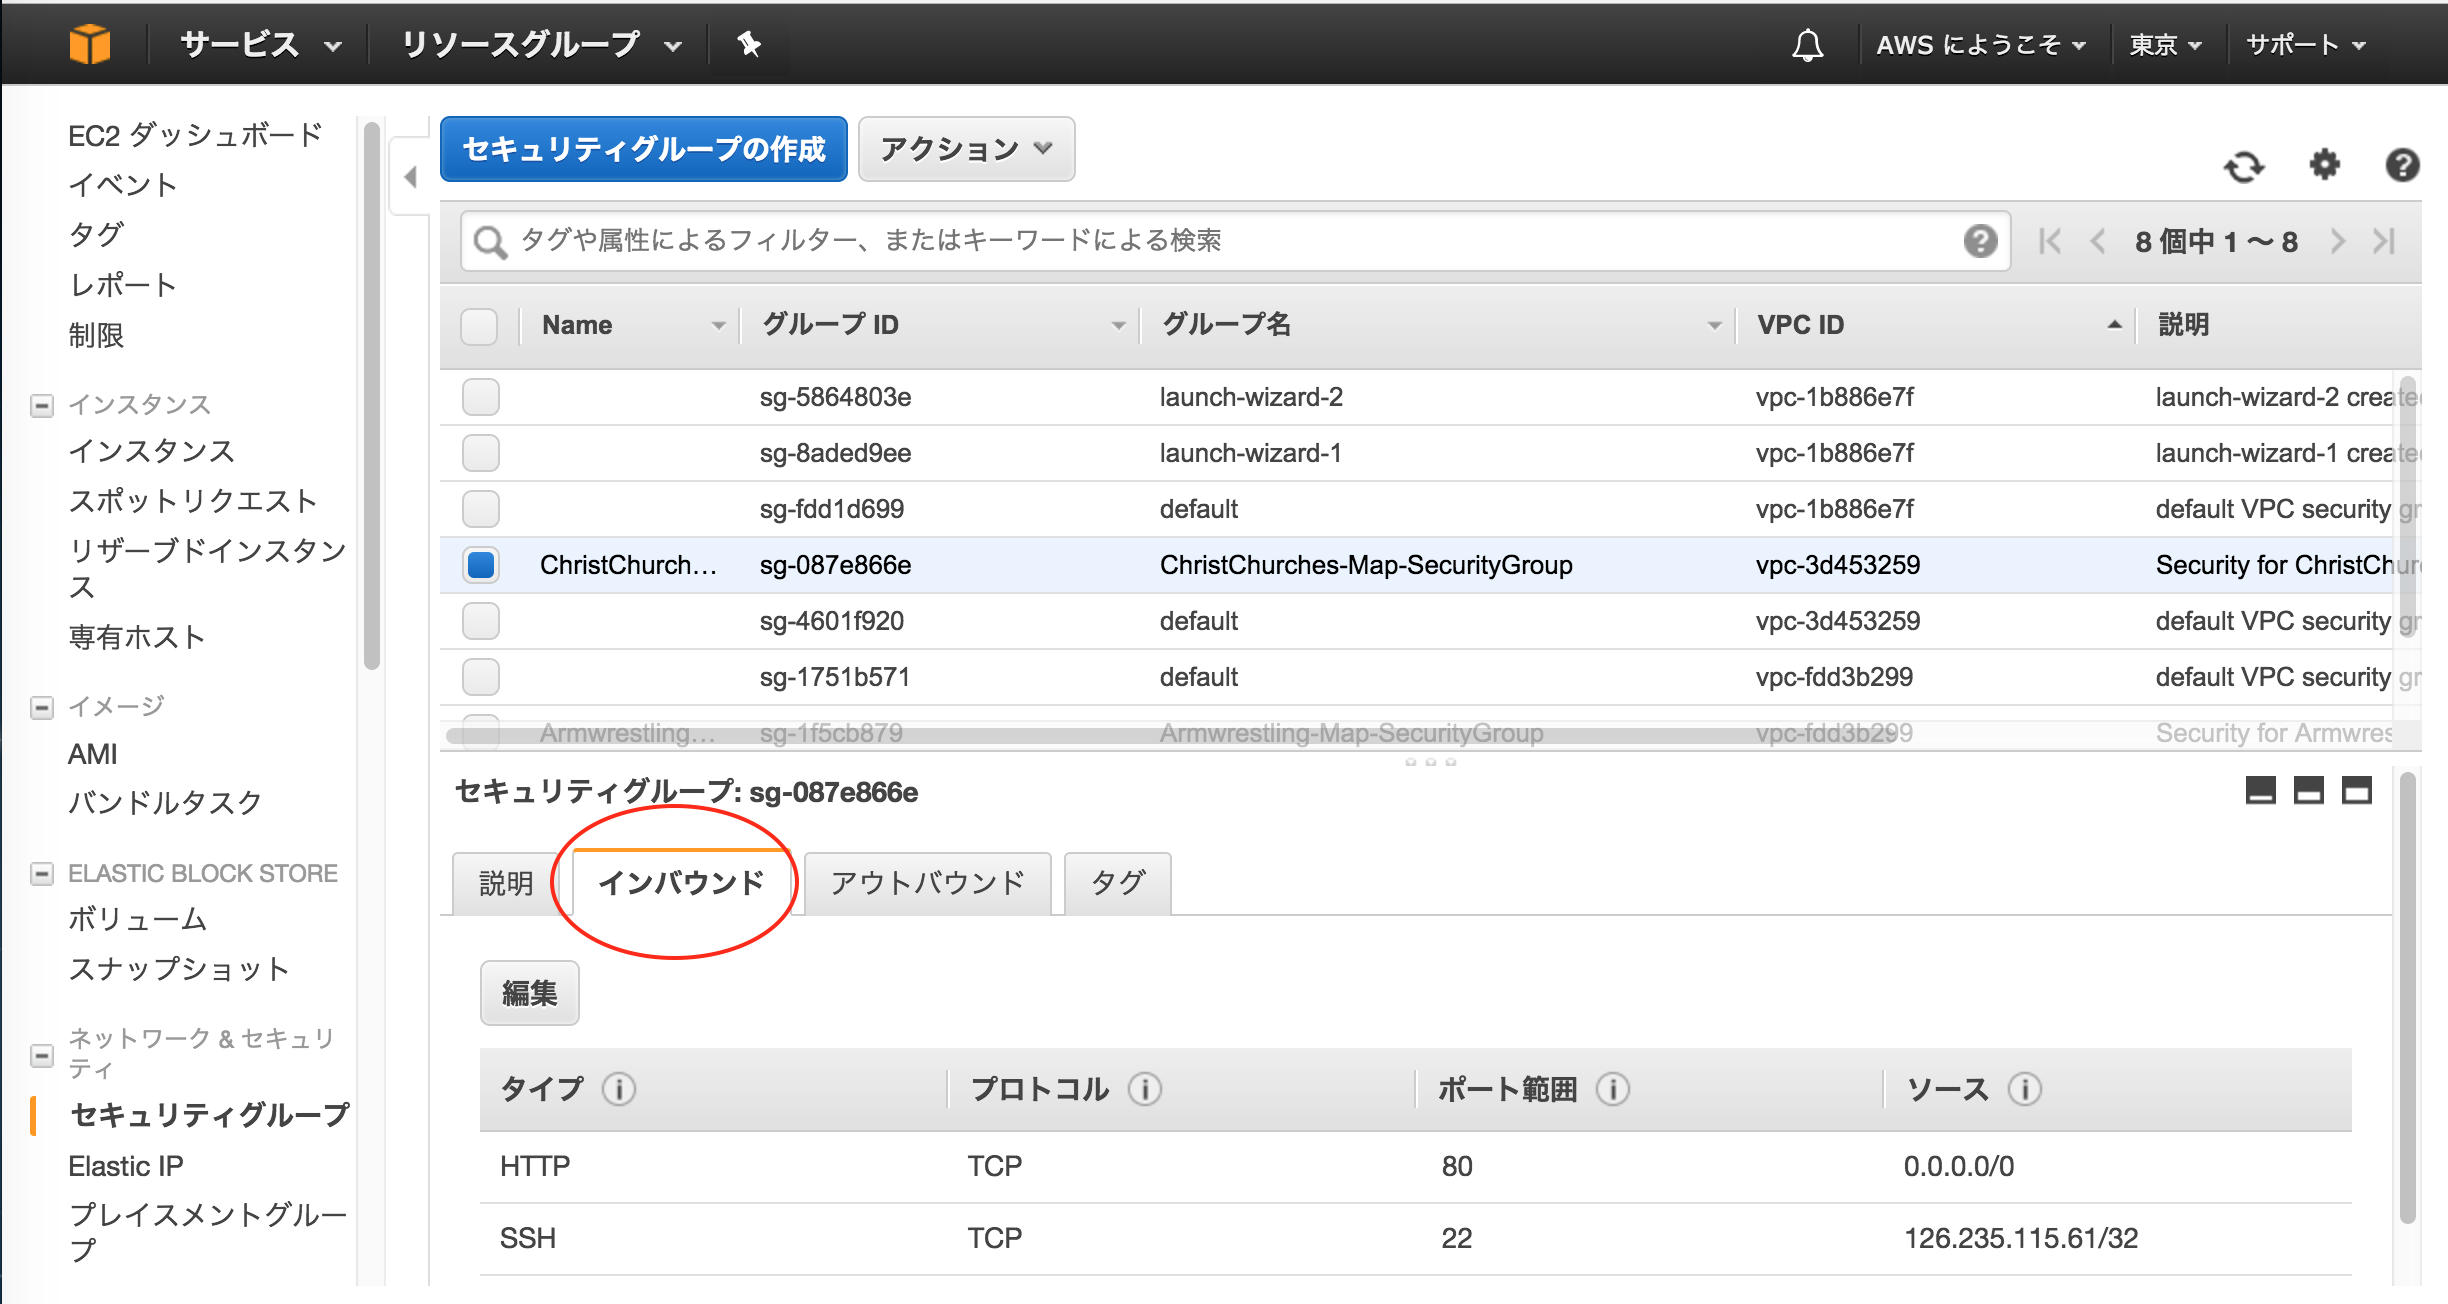
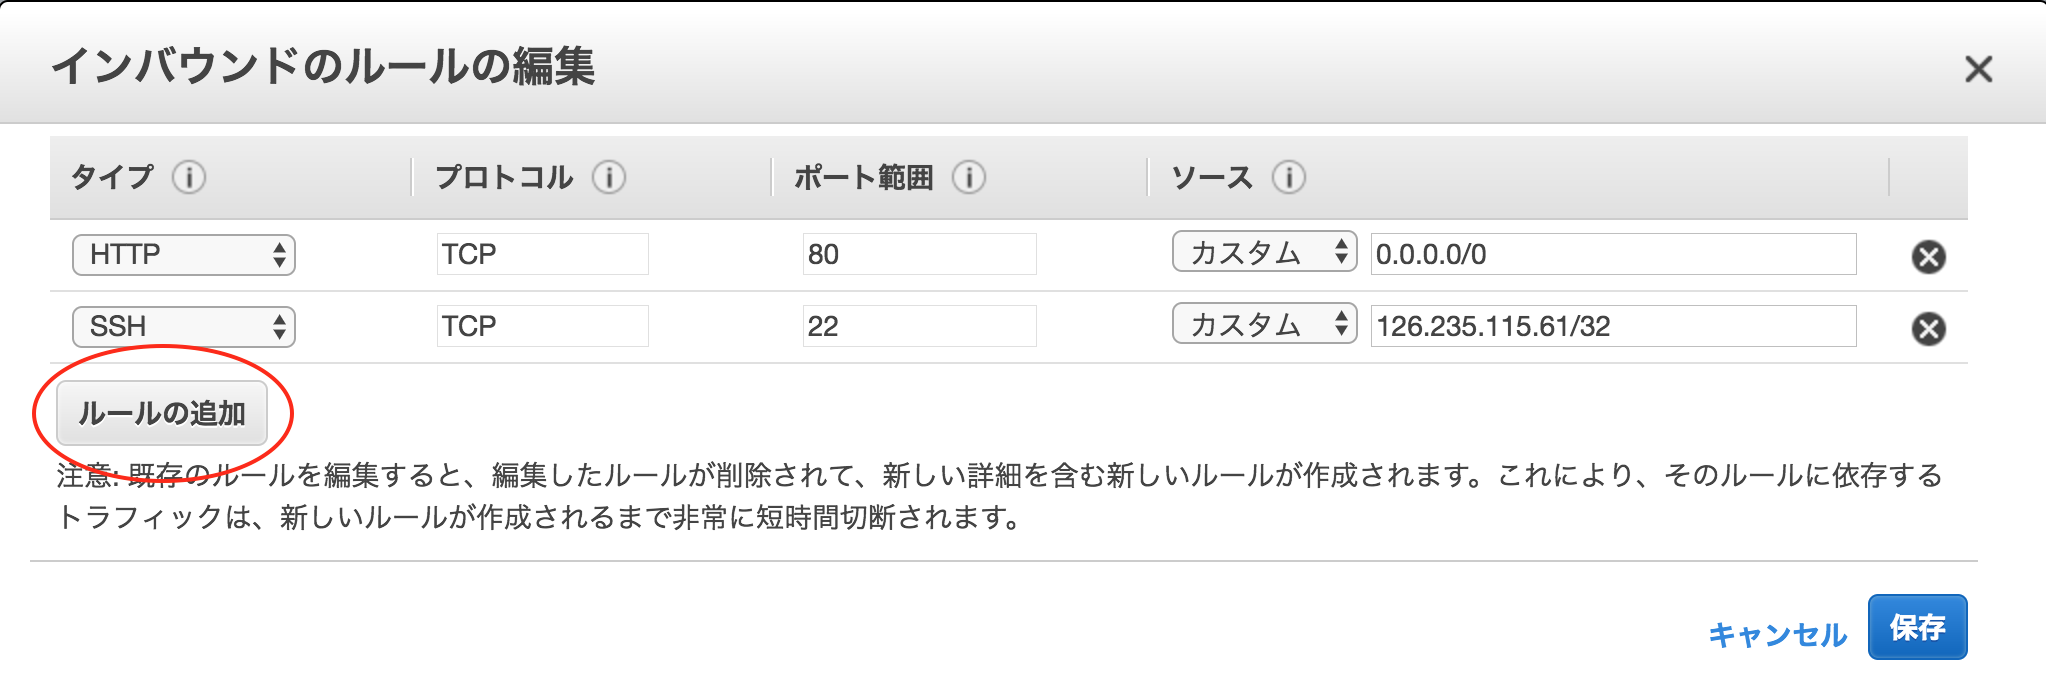
インバウンドをクリックします。
「編集」をクリックします。
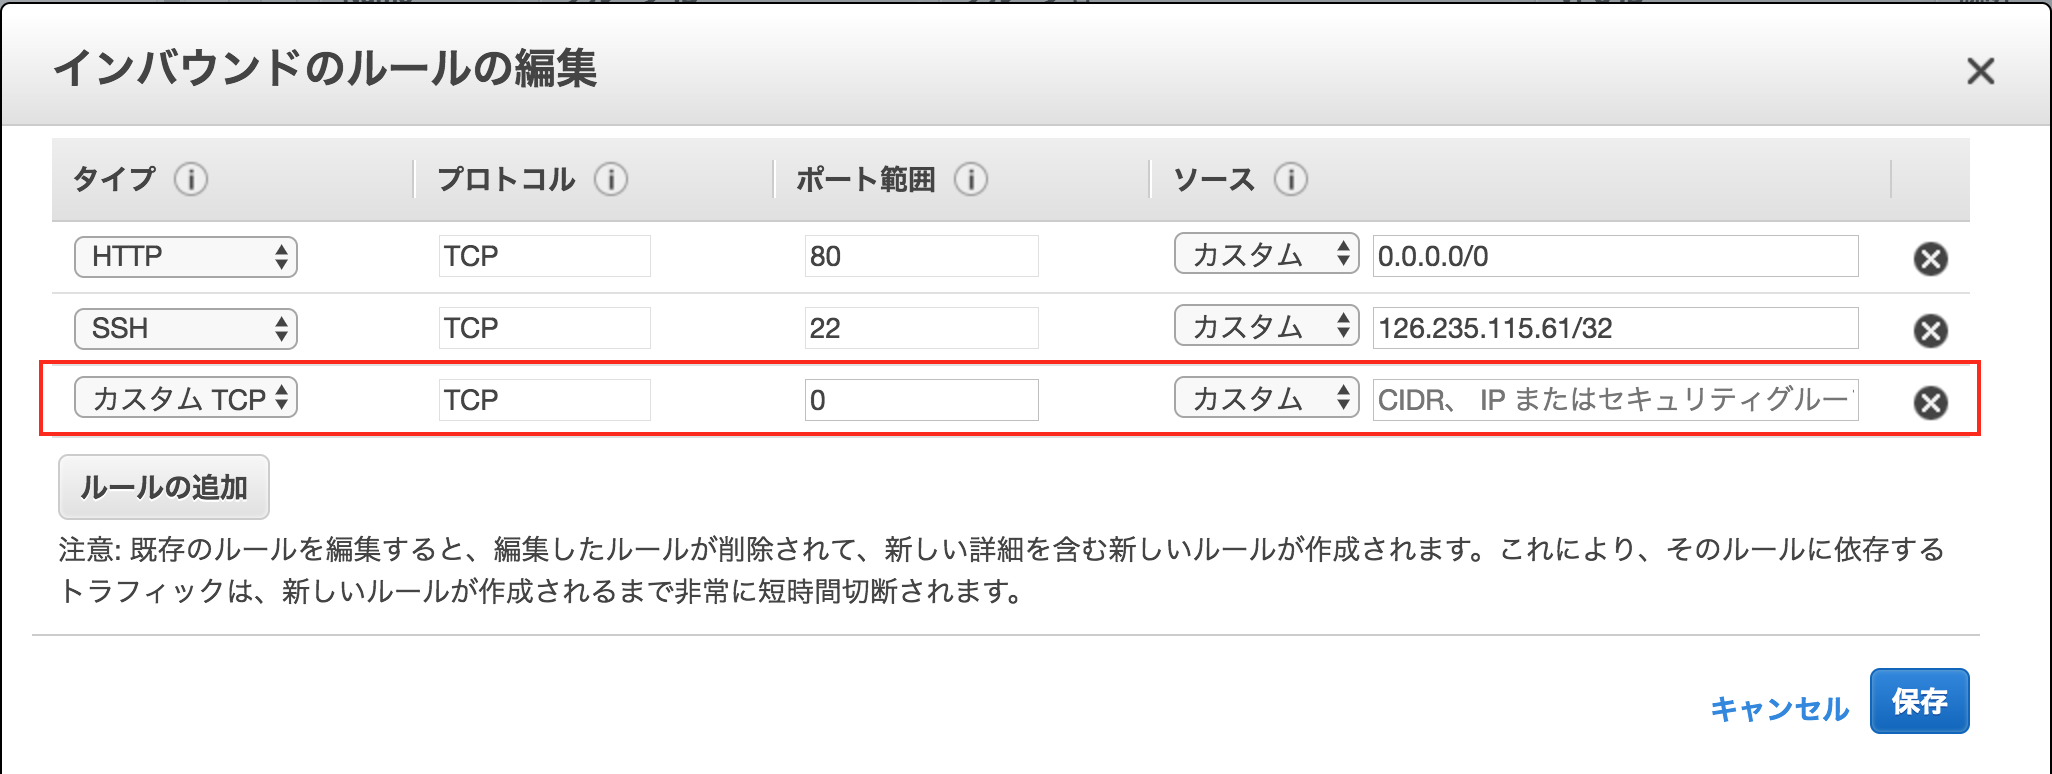
「ルールの追加」をクリックします。
新しい設定を追加します。
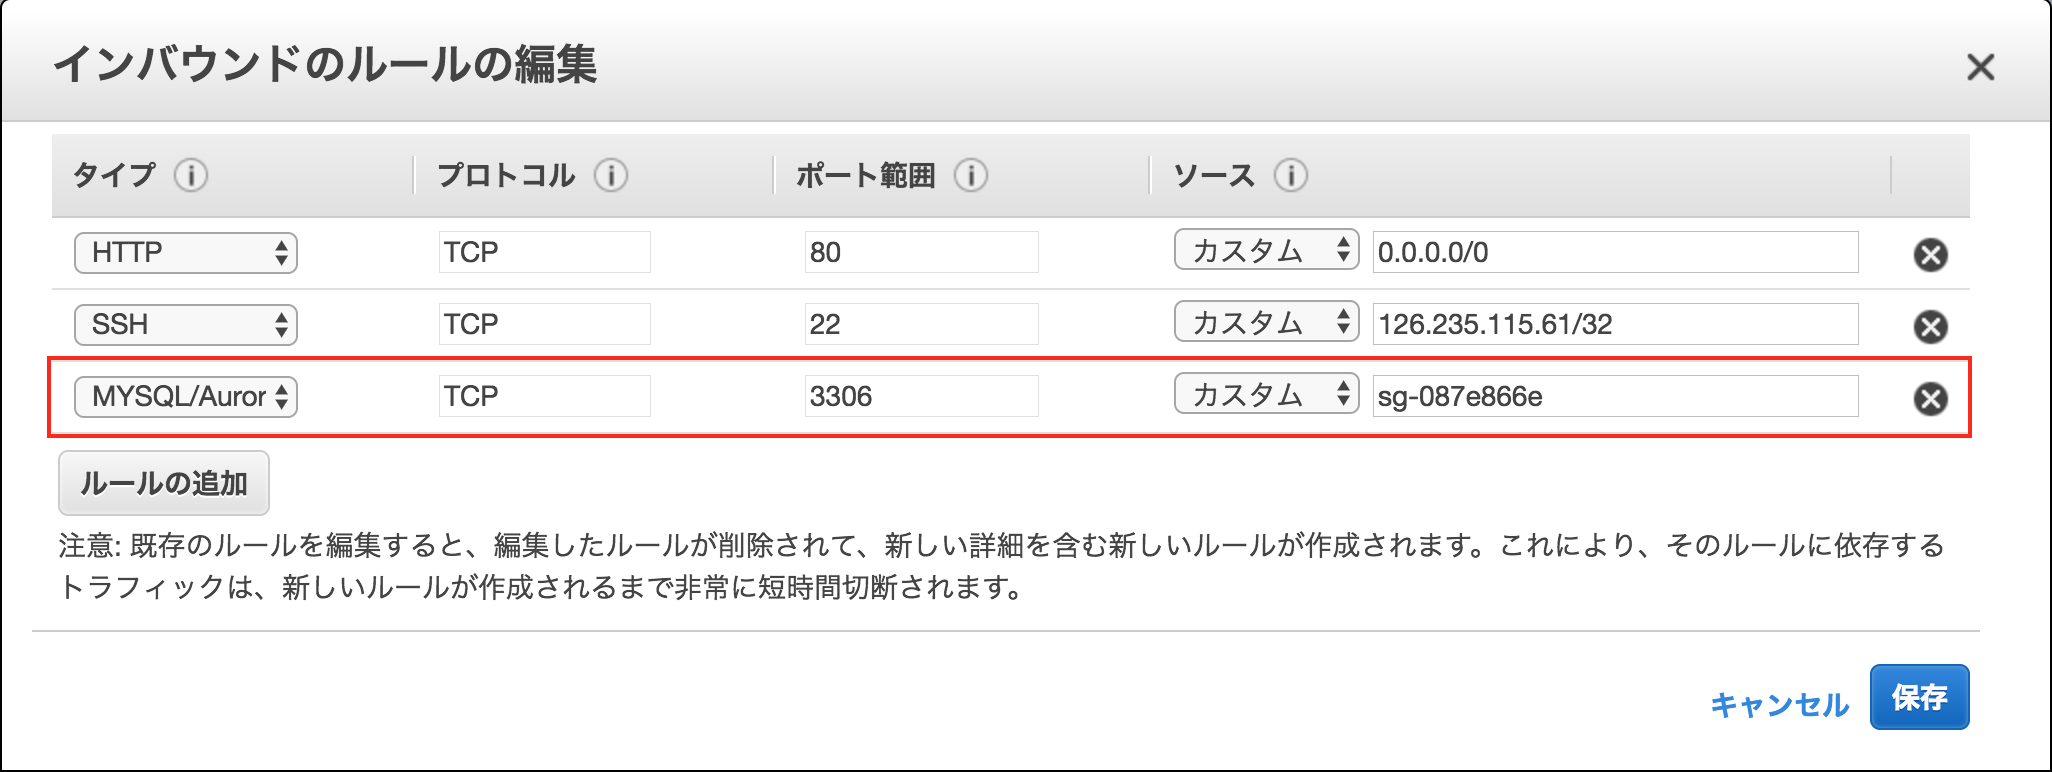
MYSQLを選択します。
コピーしたグループIDを入力します。
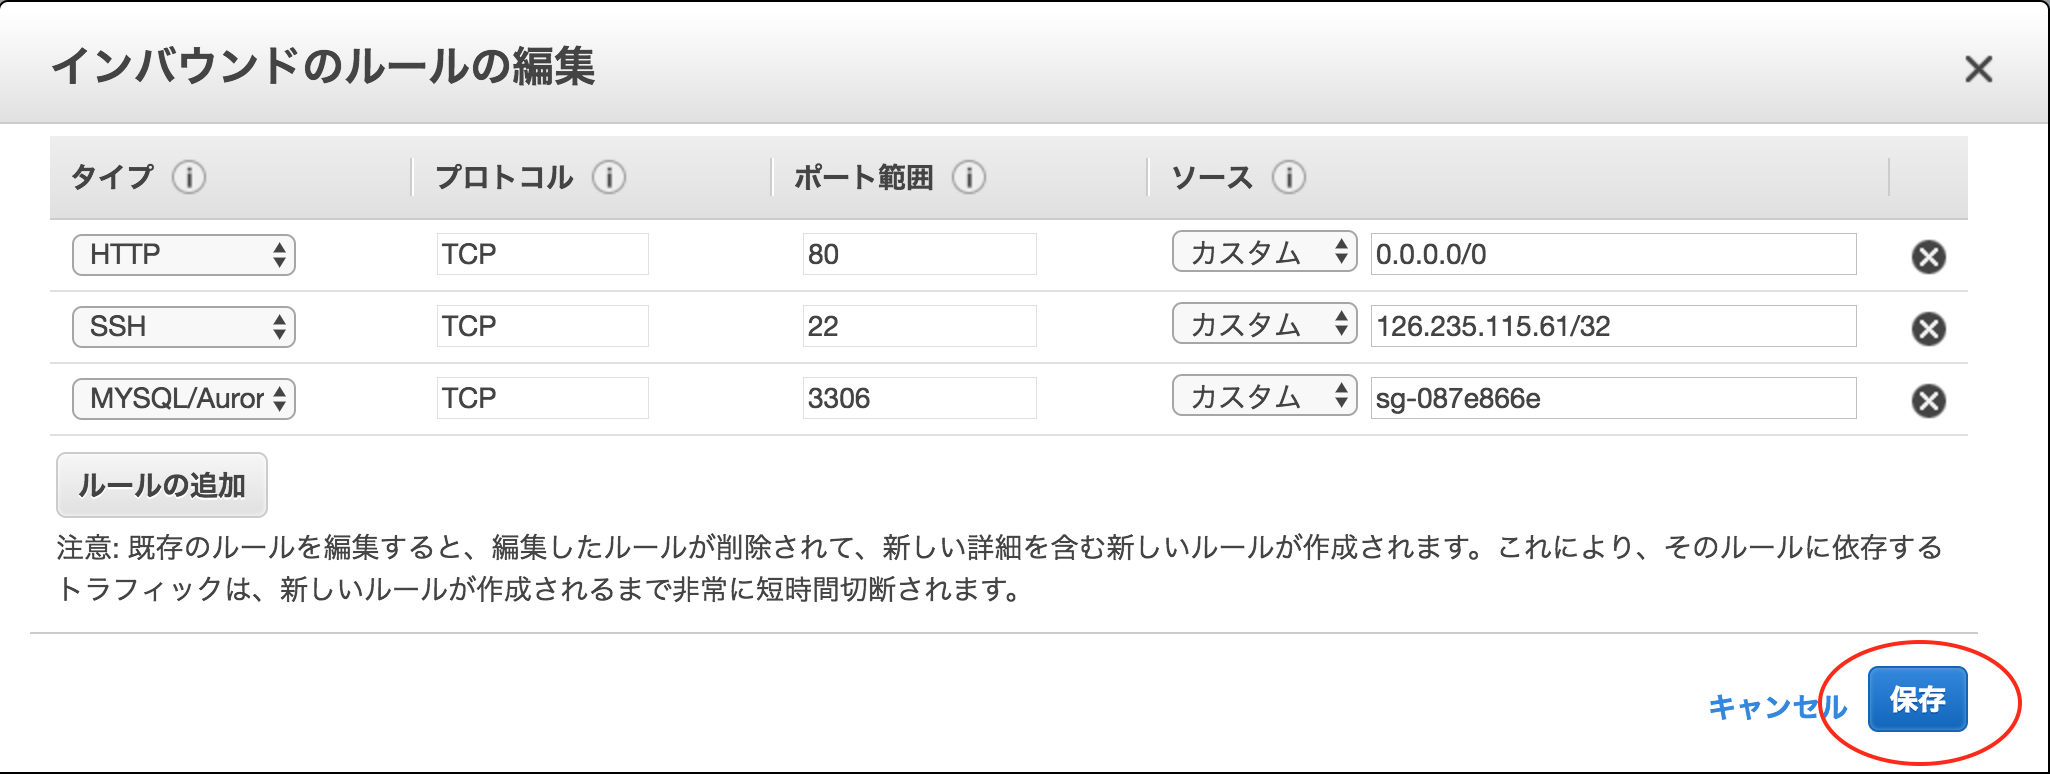
「保存」をクリックします。
サーバにて以下のコマンドを実行します。
ここでエンドポイントを使用します。
$ mysql -h エンドポイント -P 3306 -u root -p
例
$ mysql -h christchurches-map-mysql.cbev6lgaewnk.ap-northeast-1.rds.amazonaws.com -P 3306 -u root -p
パスワードを入力します。
Enter password:
RDSにアクセスできました。
Welcome to the MySQL monitor.  Commands end with ; or \g.
Your MySQL connection id is 75
Server version: 5.6.27-log MySQL Community Server (GPL)

Copyright (c) 2000, 2017, Oracle and/or its affiliates. All rights reserved.

Oracle is a registered trademark of Oracle Corporation and/or its
affiliates. Other names may be trademarks of their respective
owners.

Type 'help;' or '\h' for help. Type '\c' to clear the current input statement.

mysql>
データベースを確認します。
mysql> show databases;
+-------------------------------+
| Database                      |
+-------------------------------+
| information_schema            |
| christchurches_map_production |
| innodb                        |
| mysql                         |
| performance_schema            |
| sys                           |
+-------------------------------+
6 rows in set (0.00 sec)
退出します。
$ exit;
パラメータグループの作成
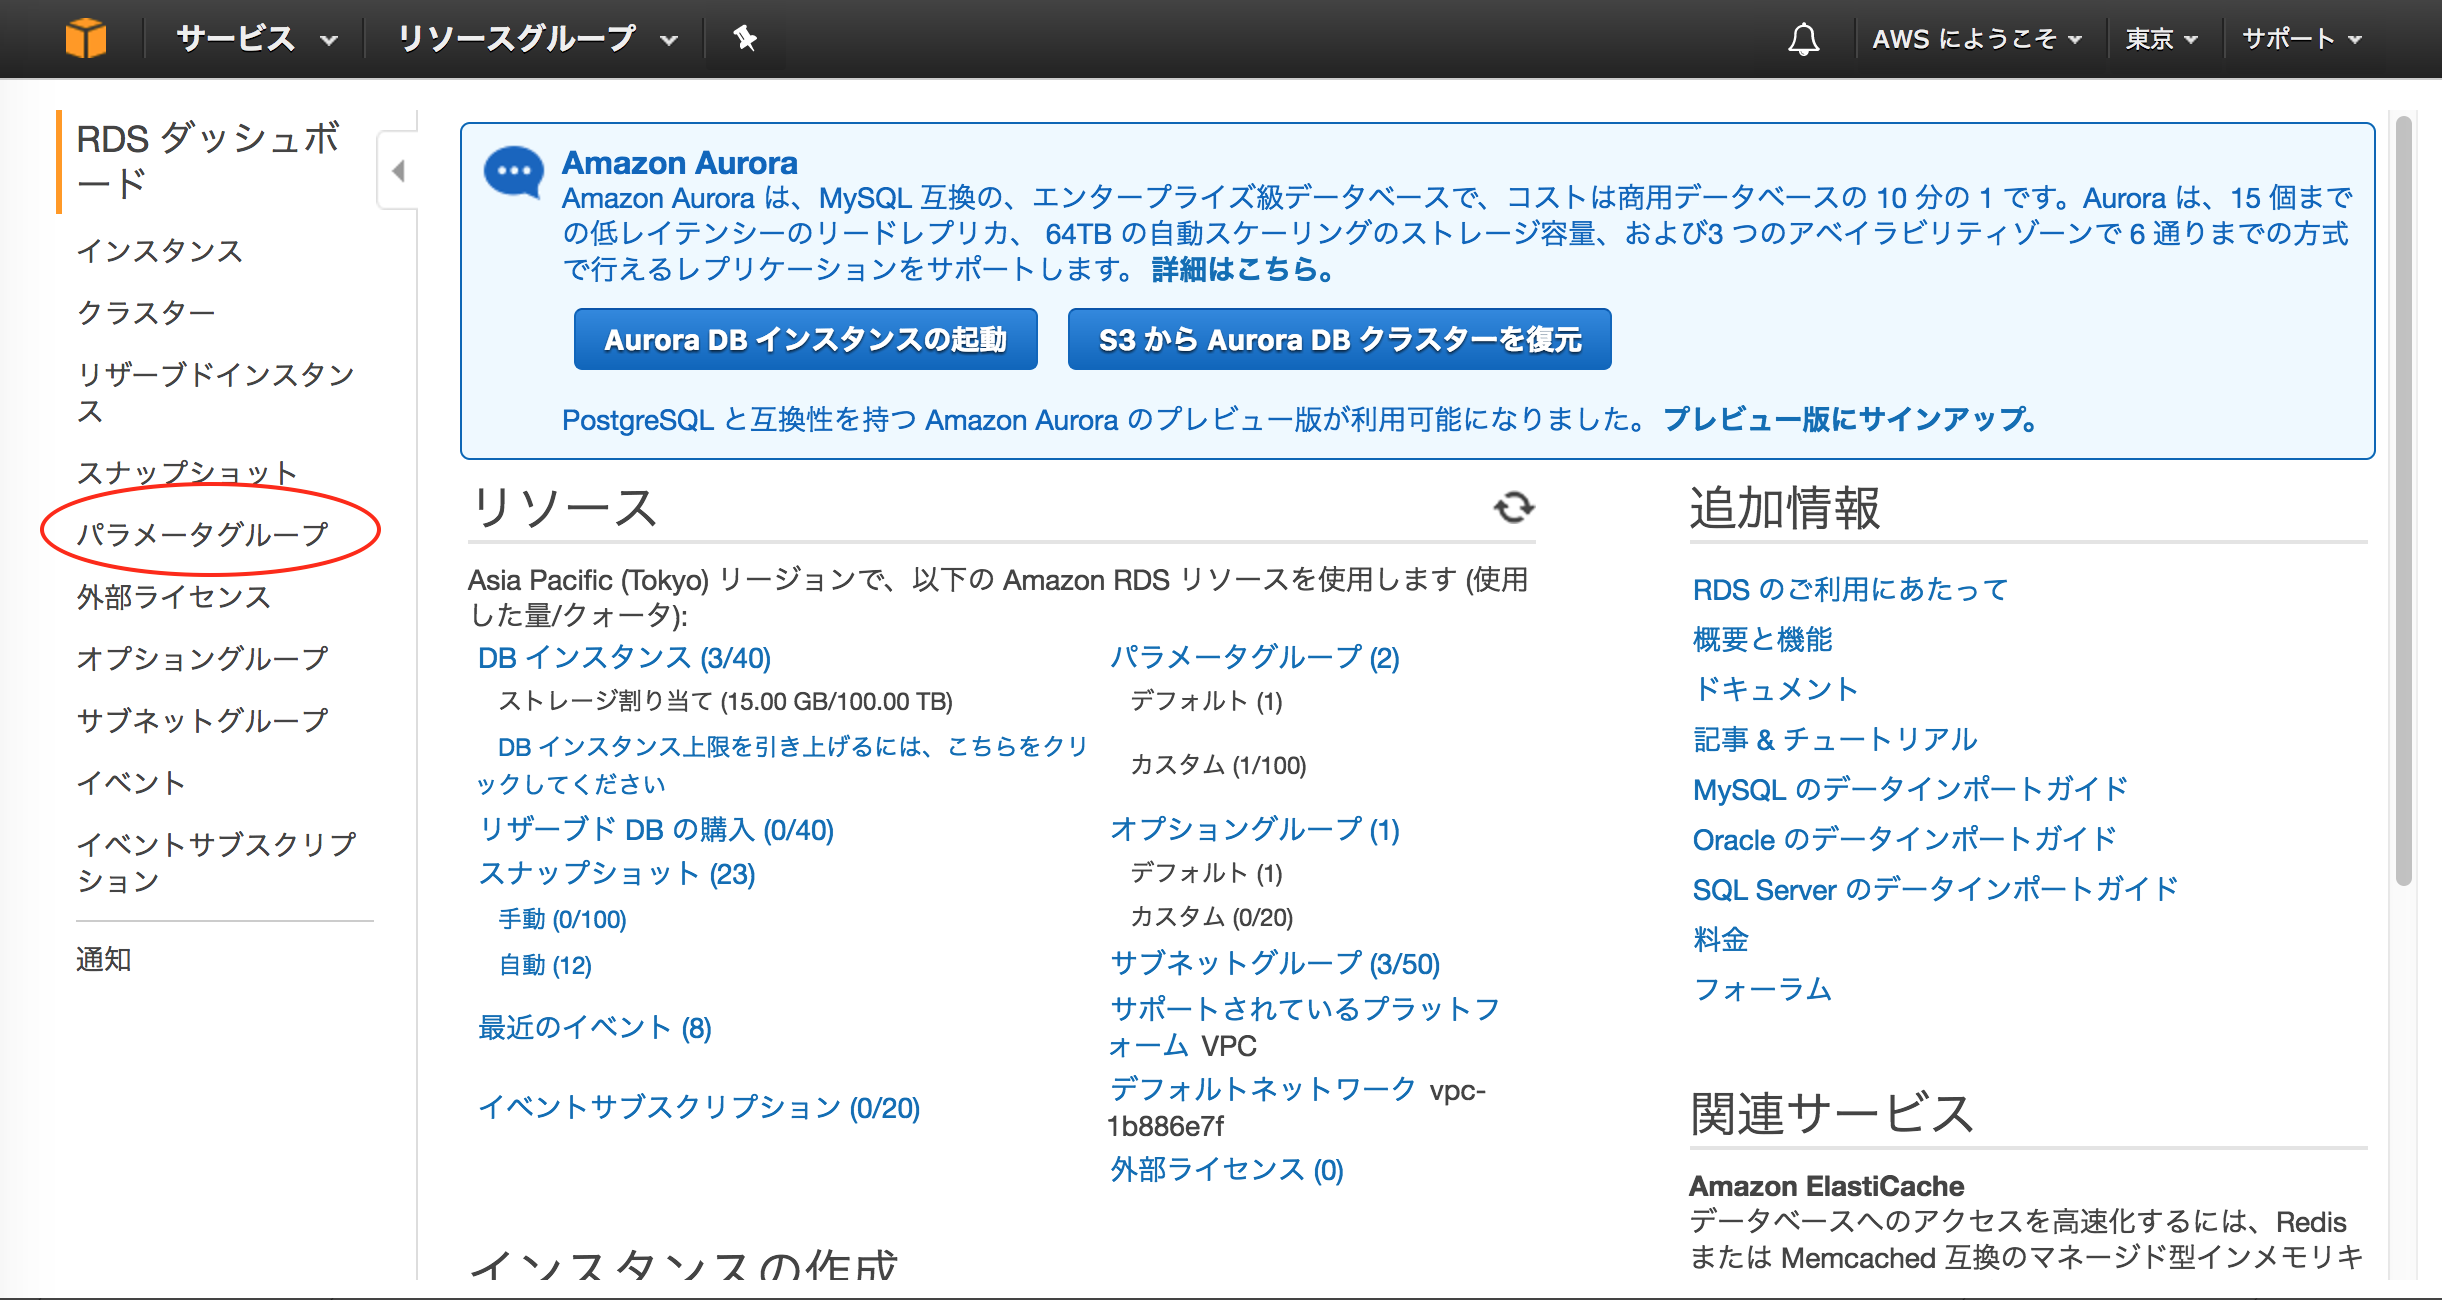
パラメータグループを選択します。
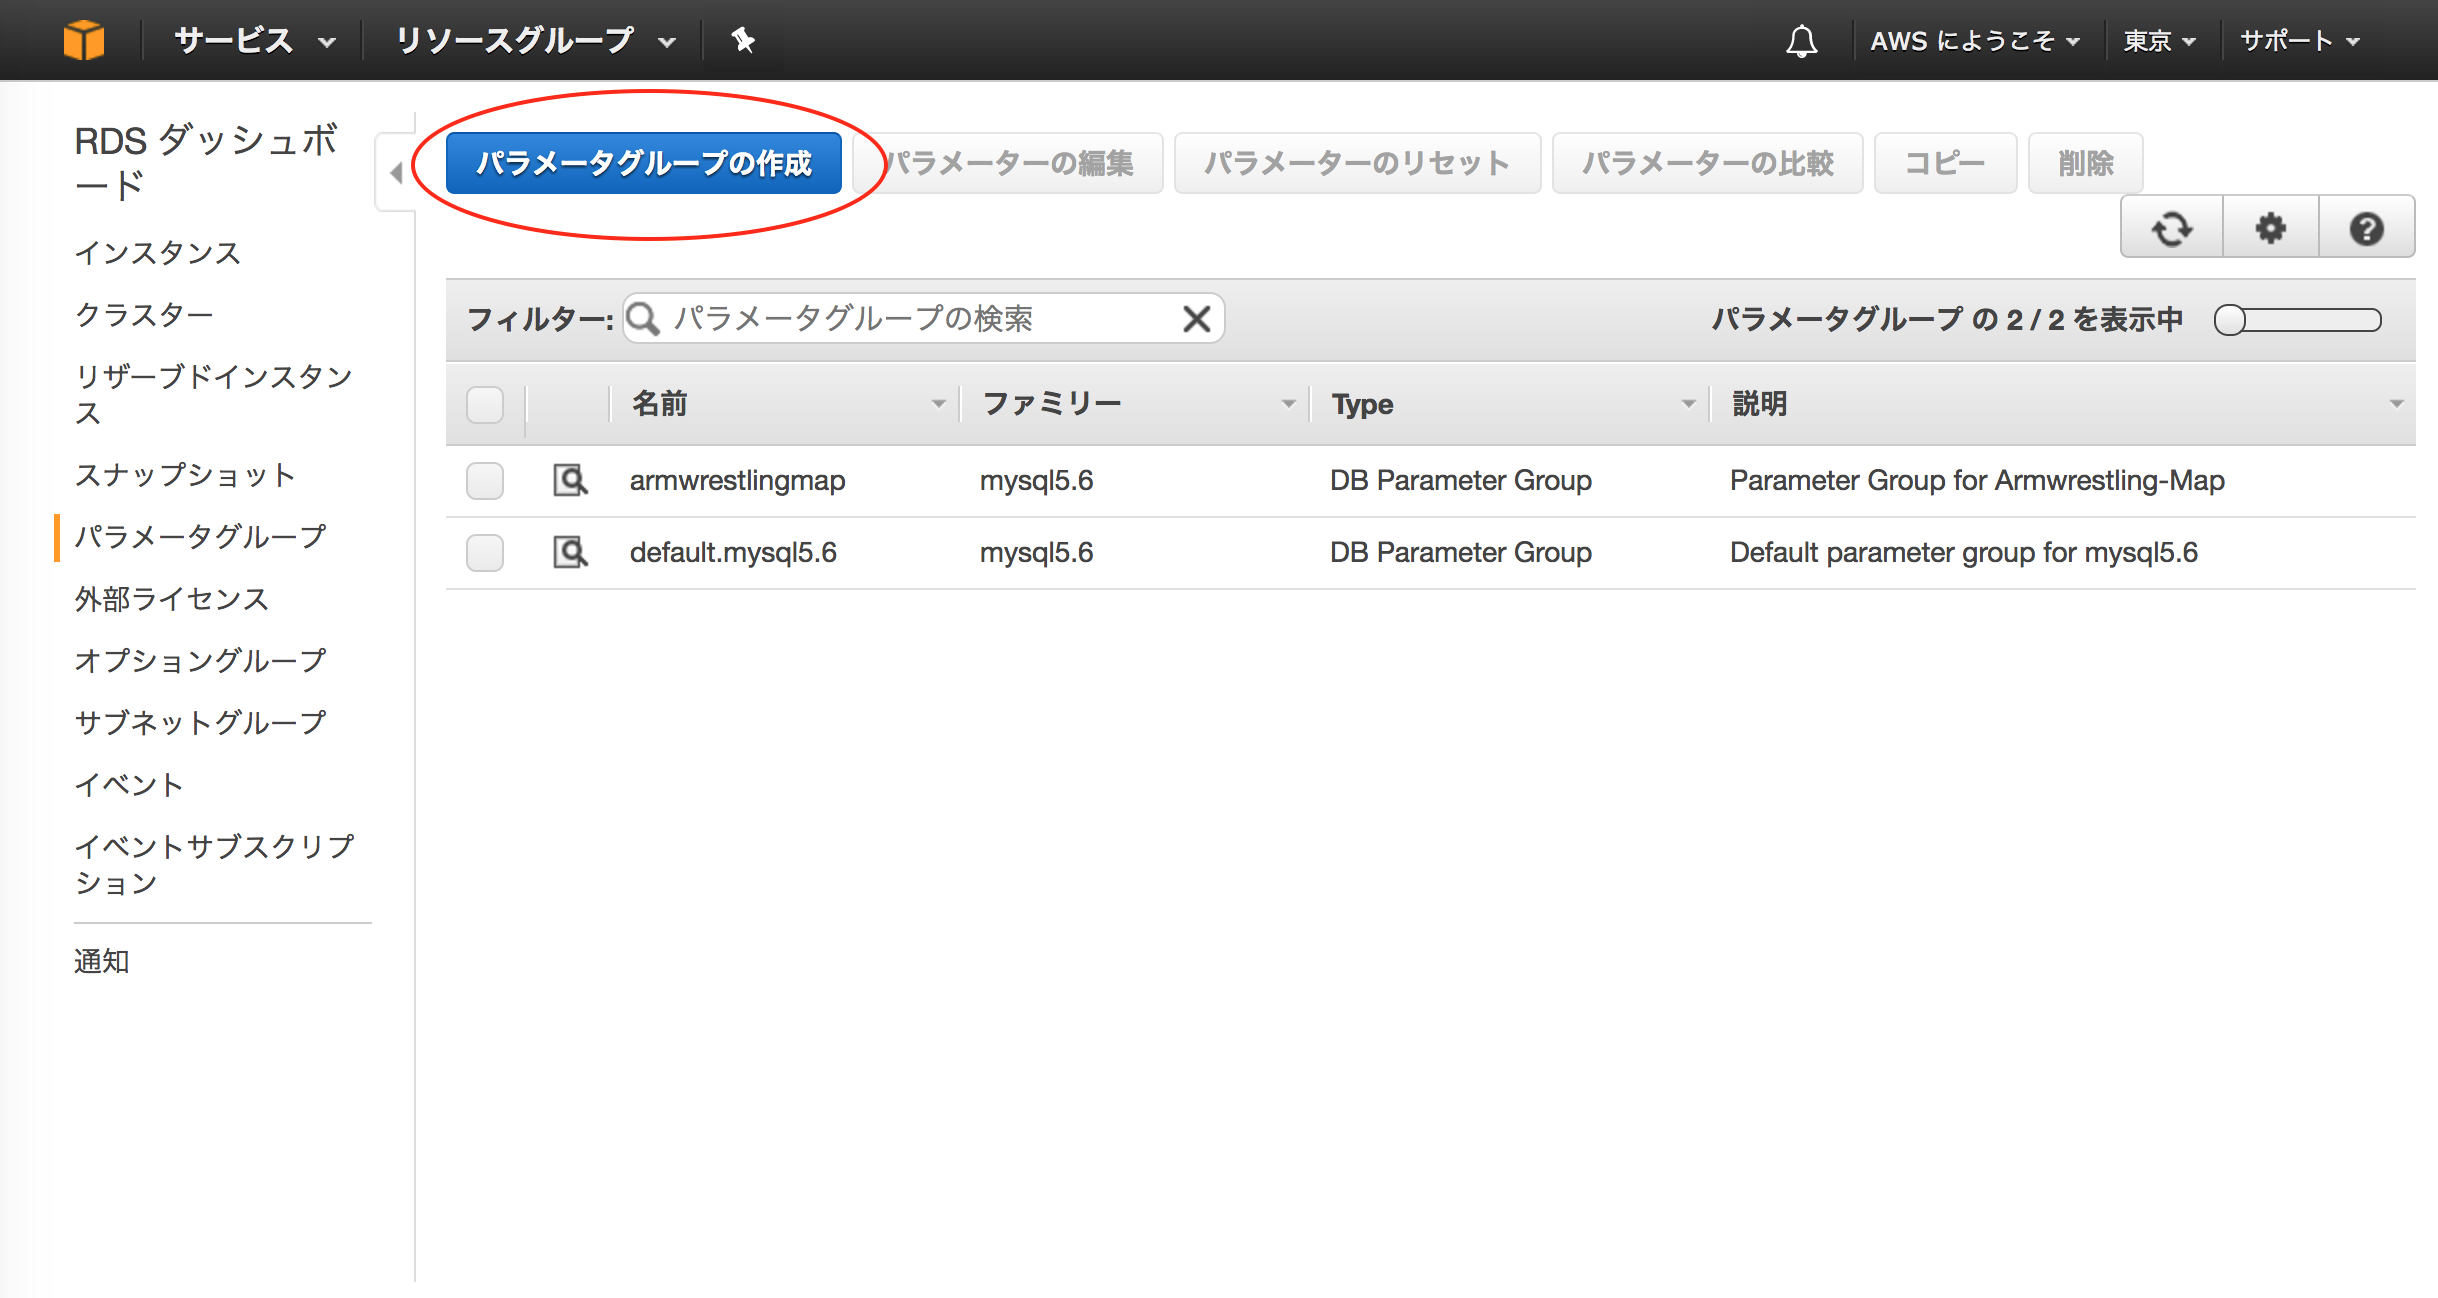
「パラメータグループの作成」をクリックします。
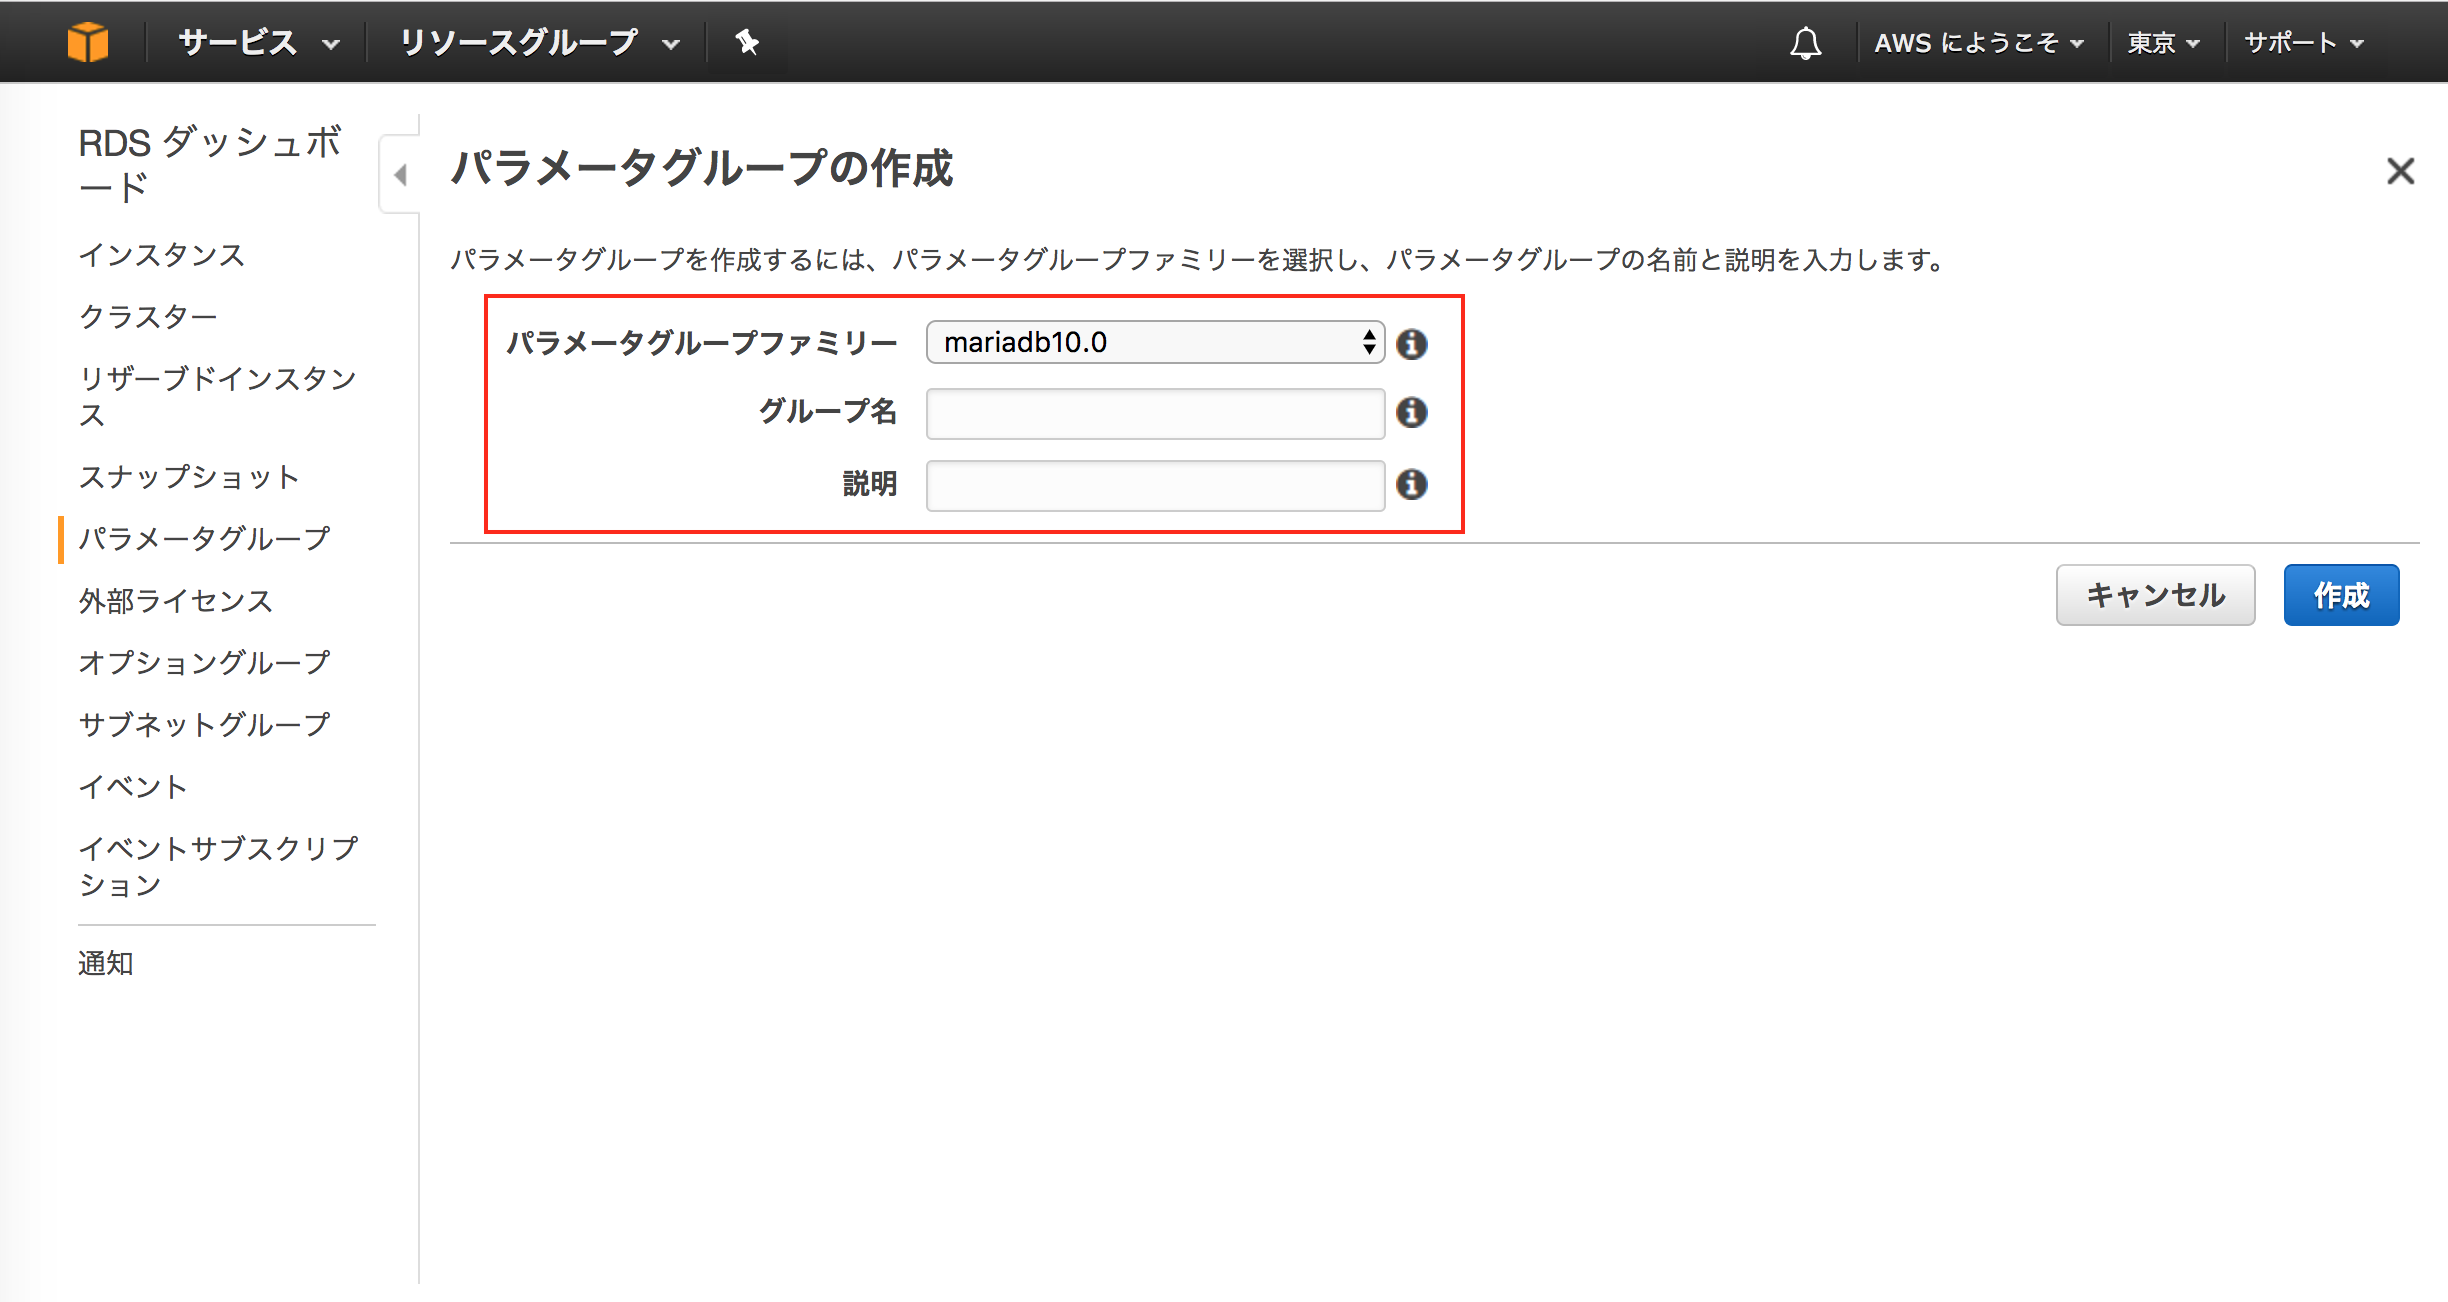
赤囲みの部分を入力します。
例
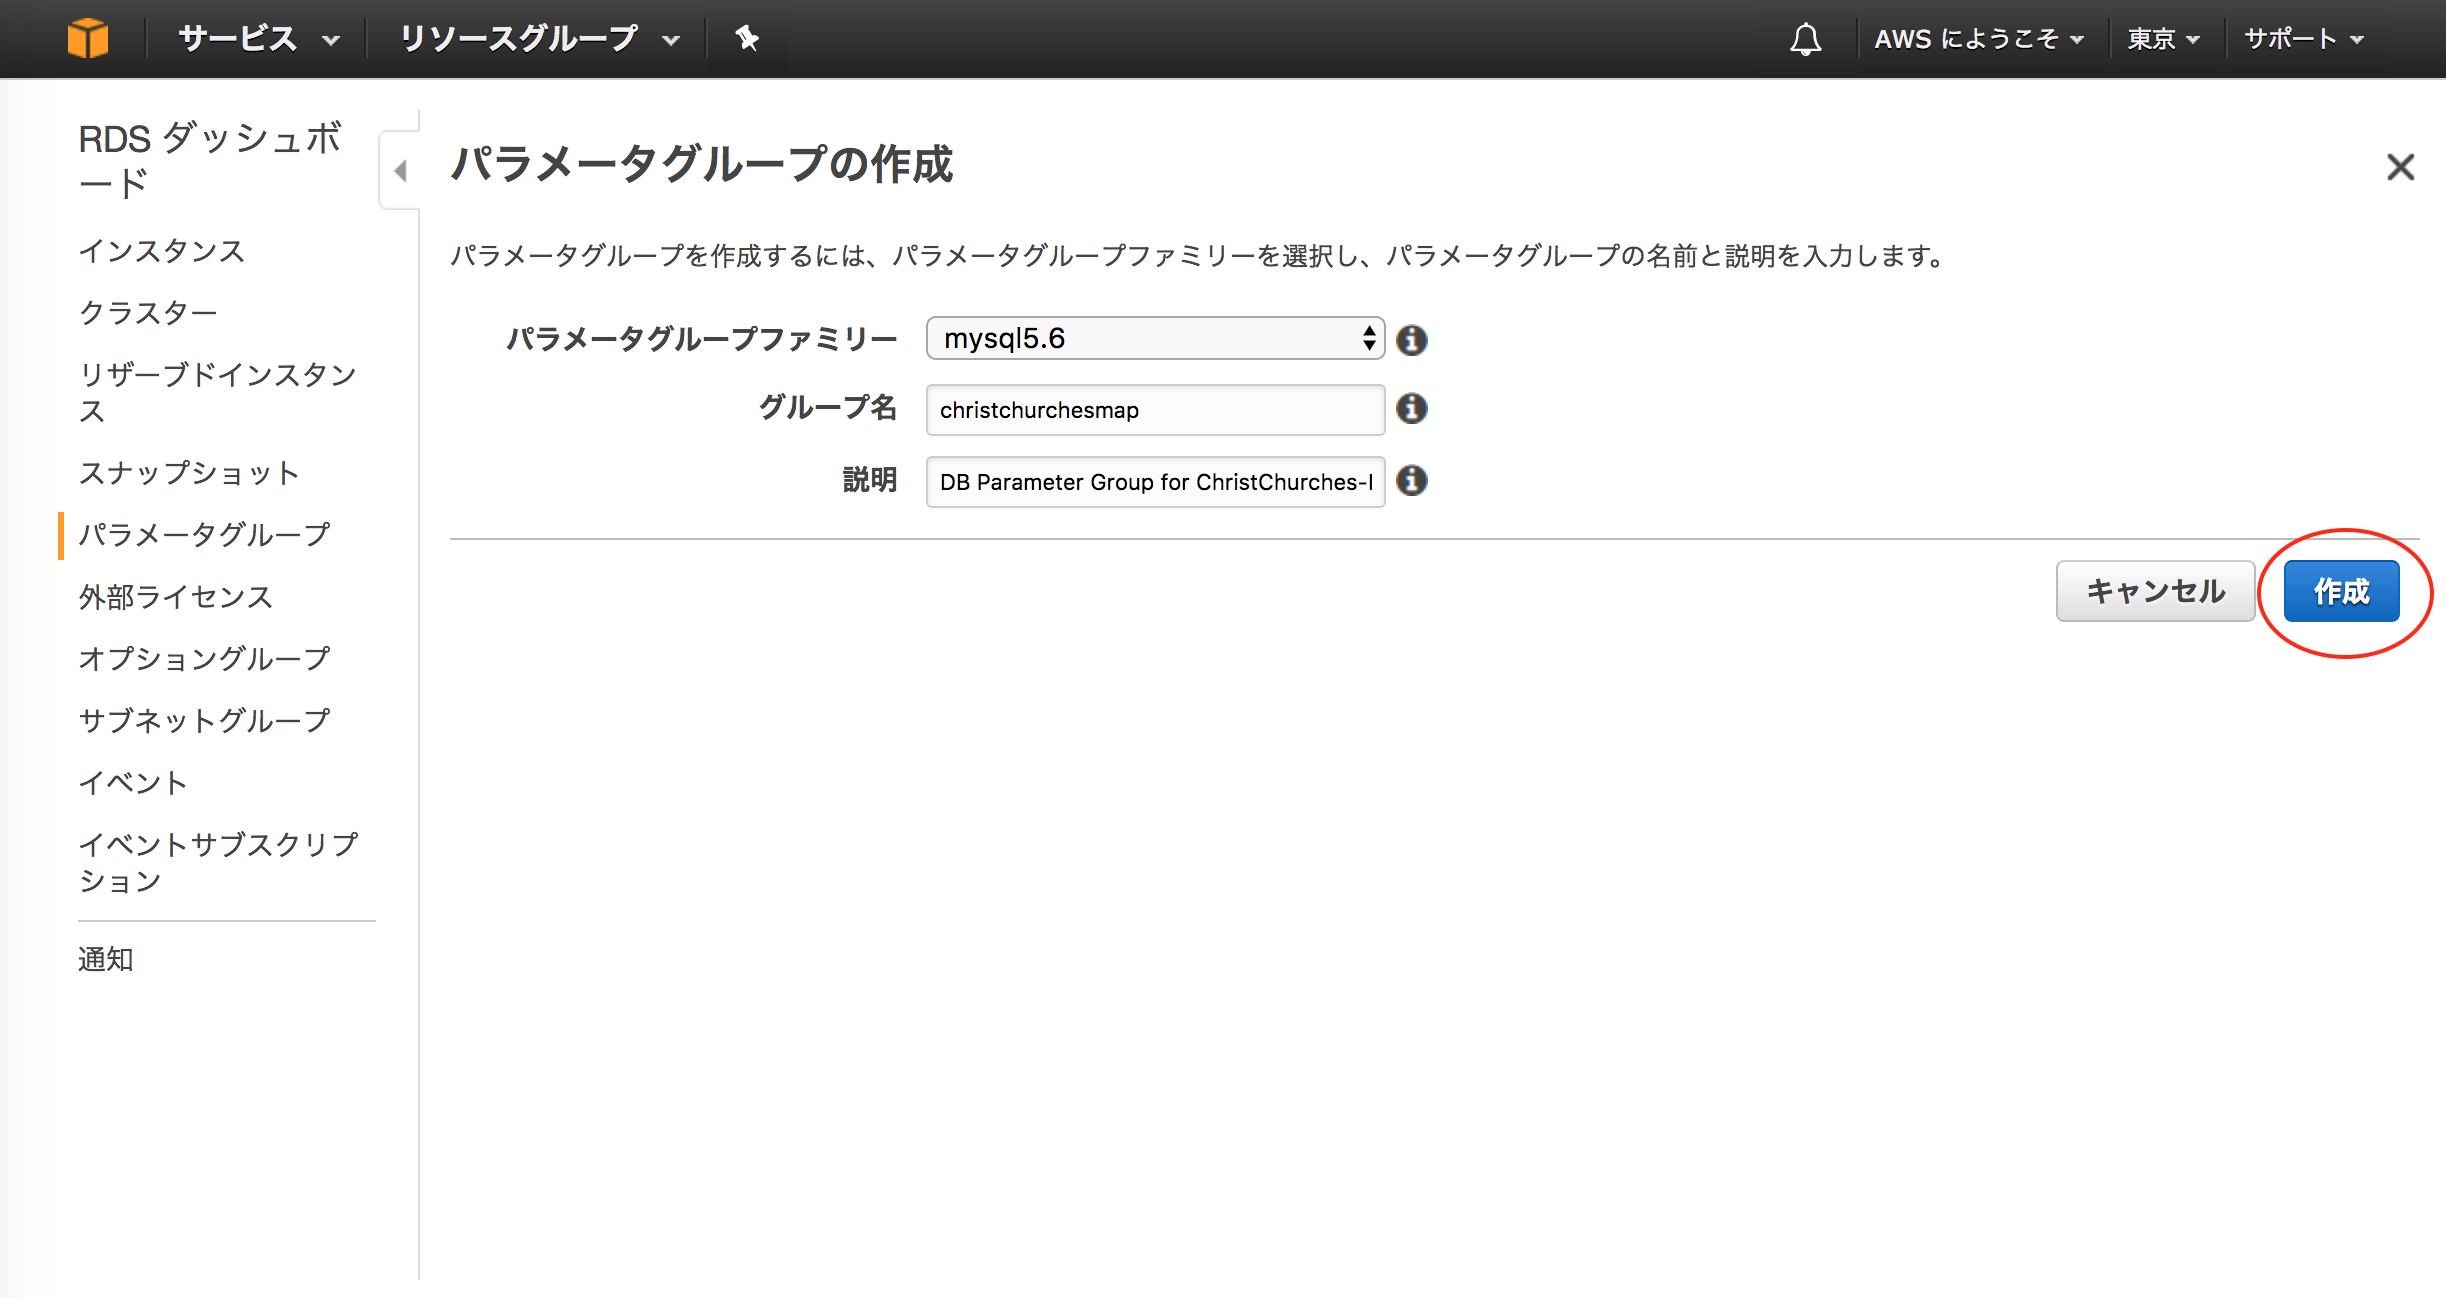
[説明]
DB Parameter Group for ChristChurches-Map
「作成」をクリックします。
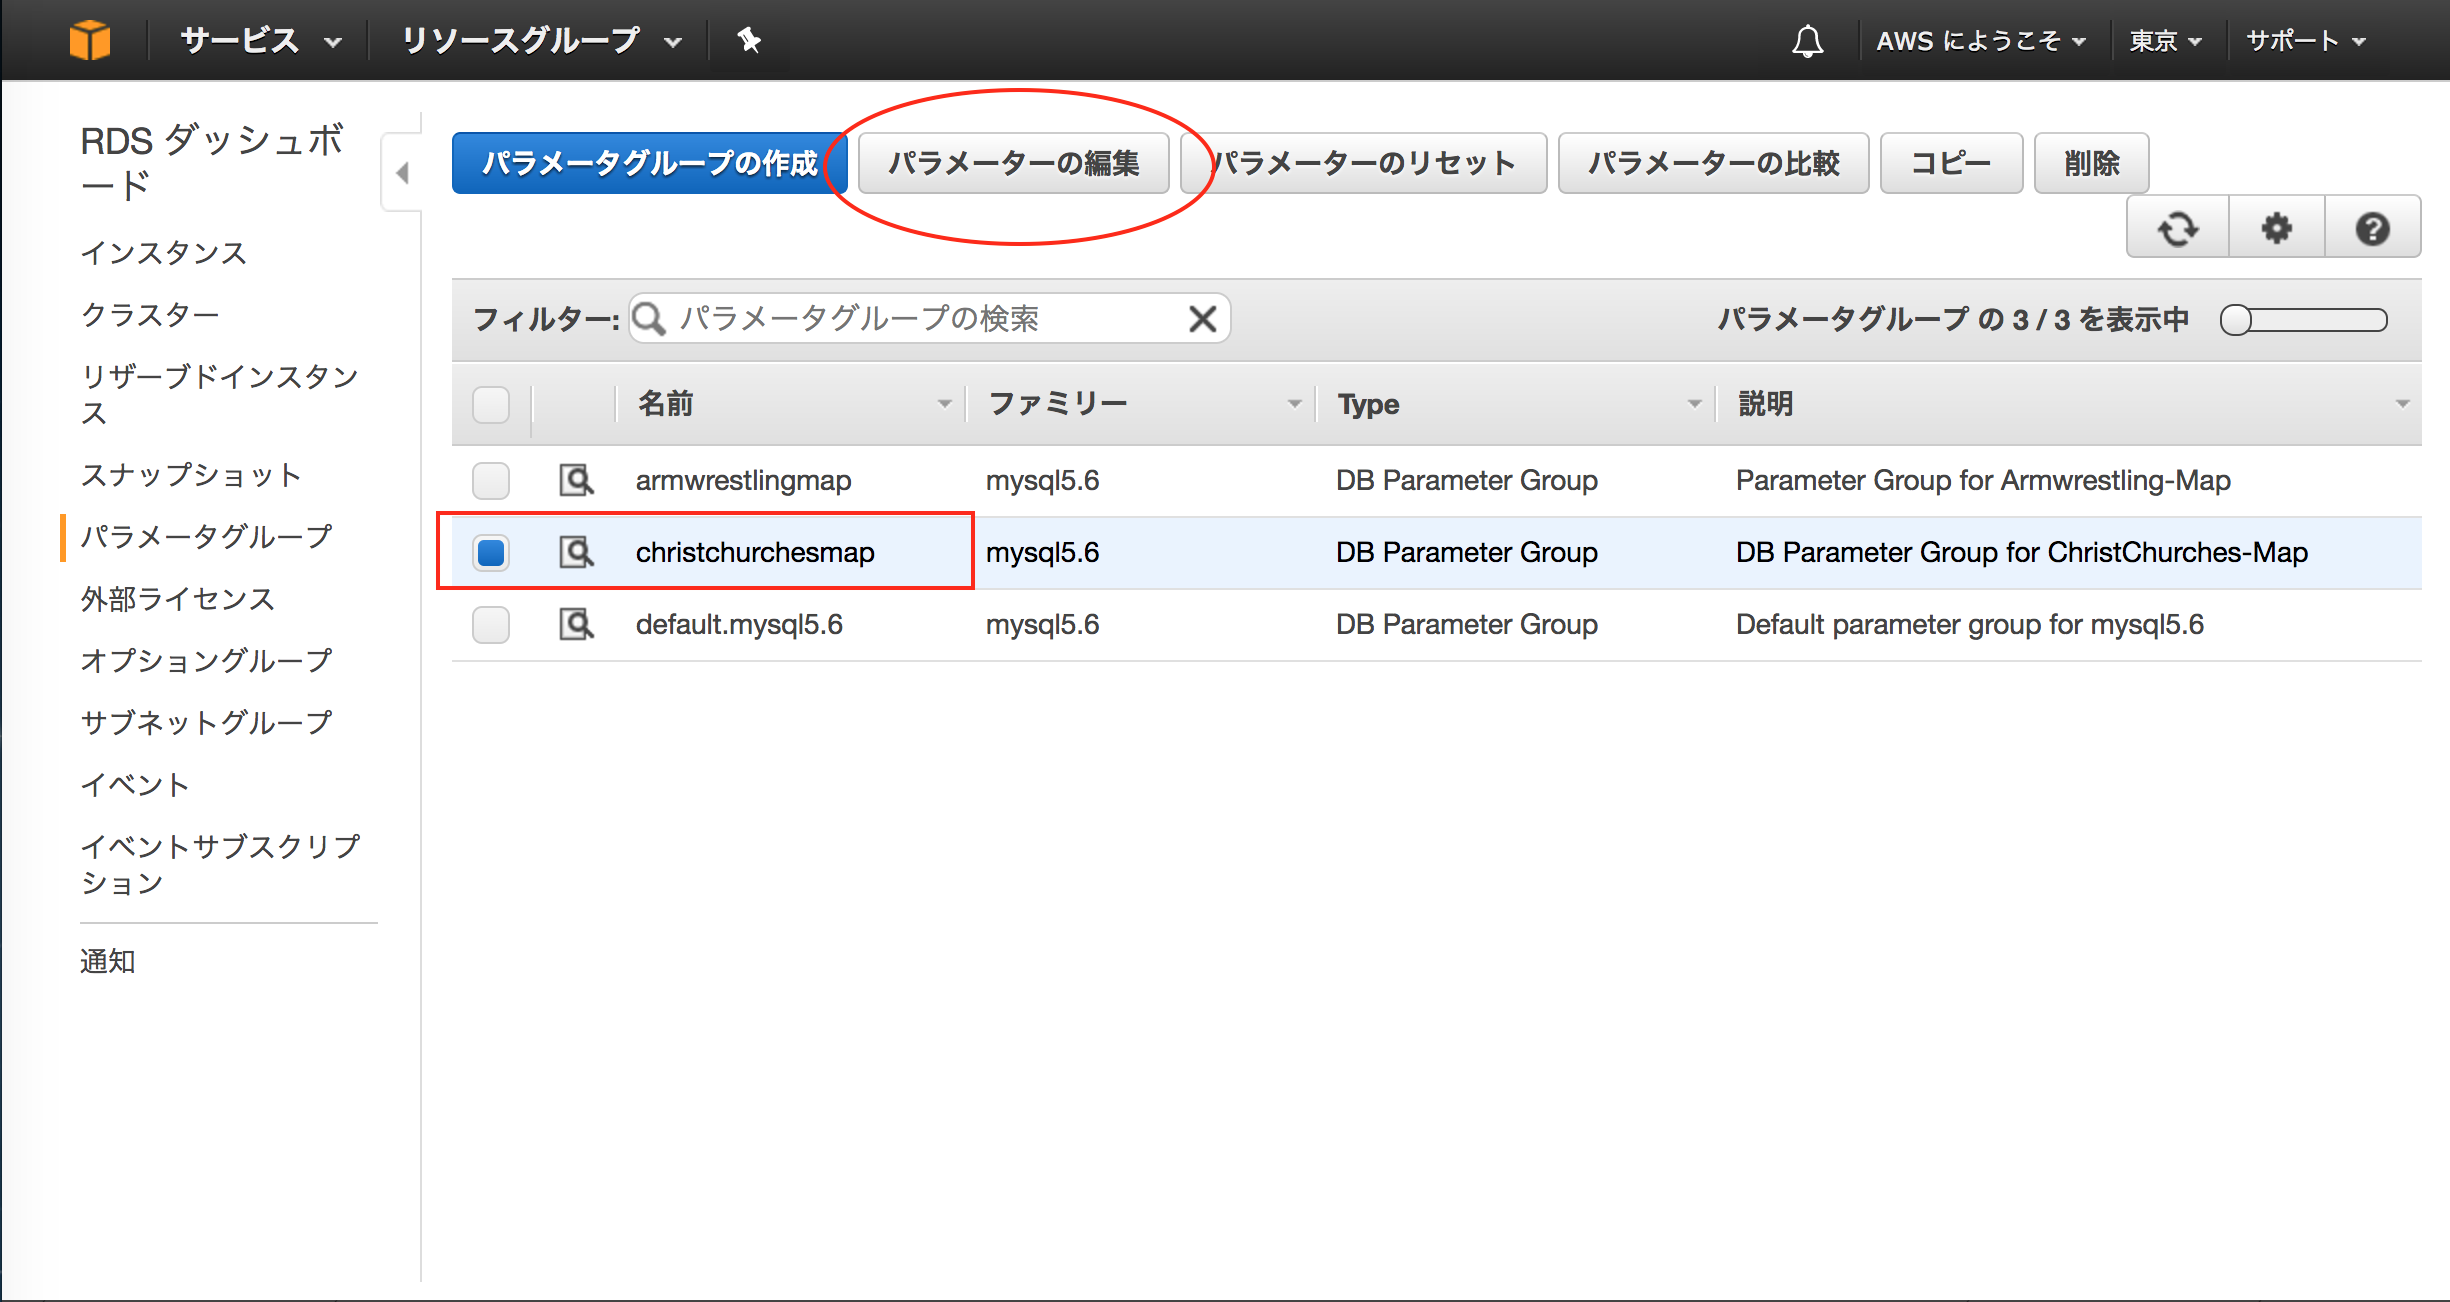
作成したパラメータグループを選択し、「パラメータの編集」をクリックします。
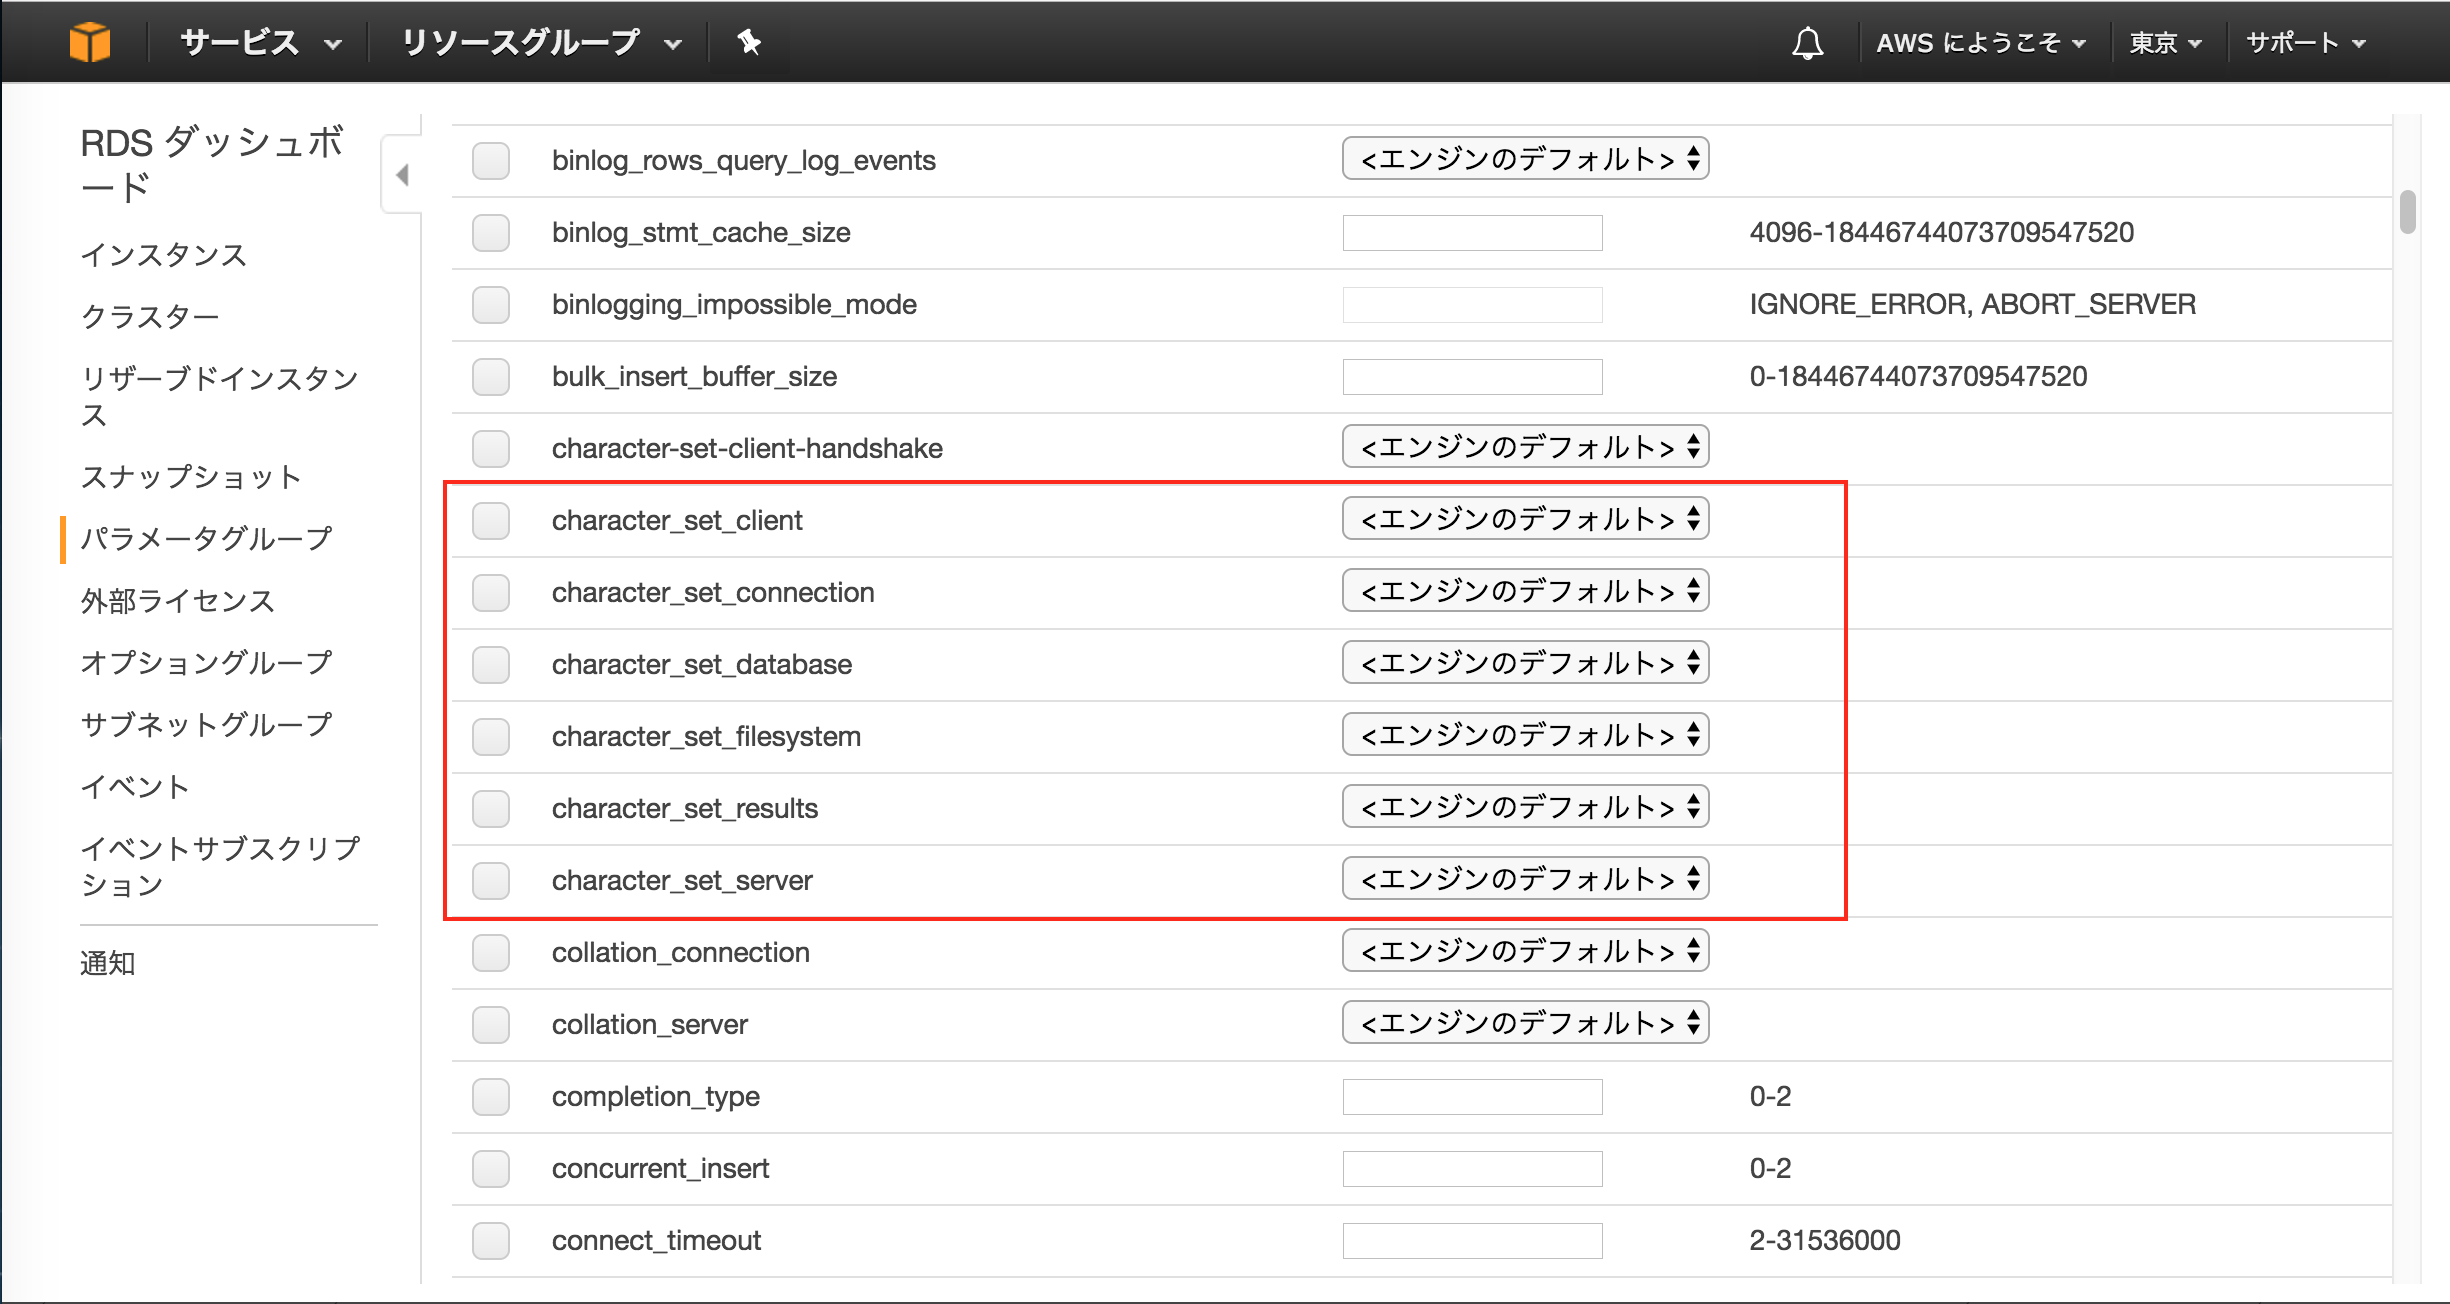
赤囲みの部分を設定します。
例
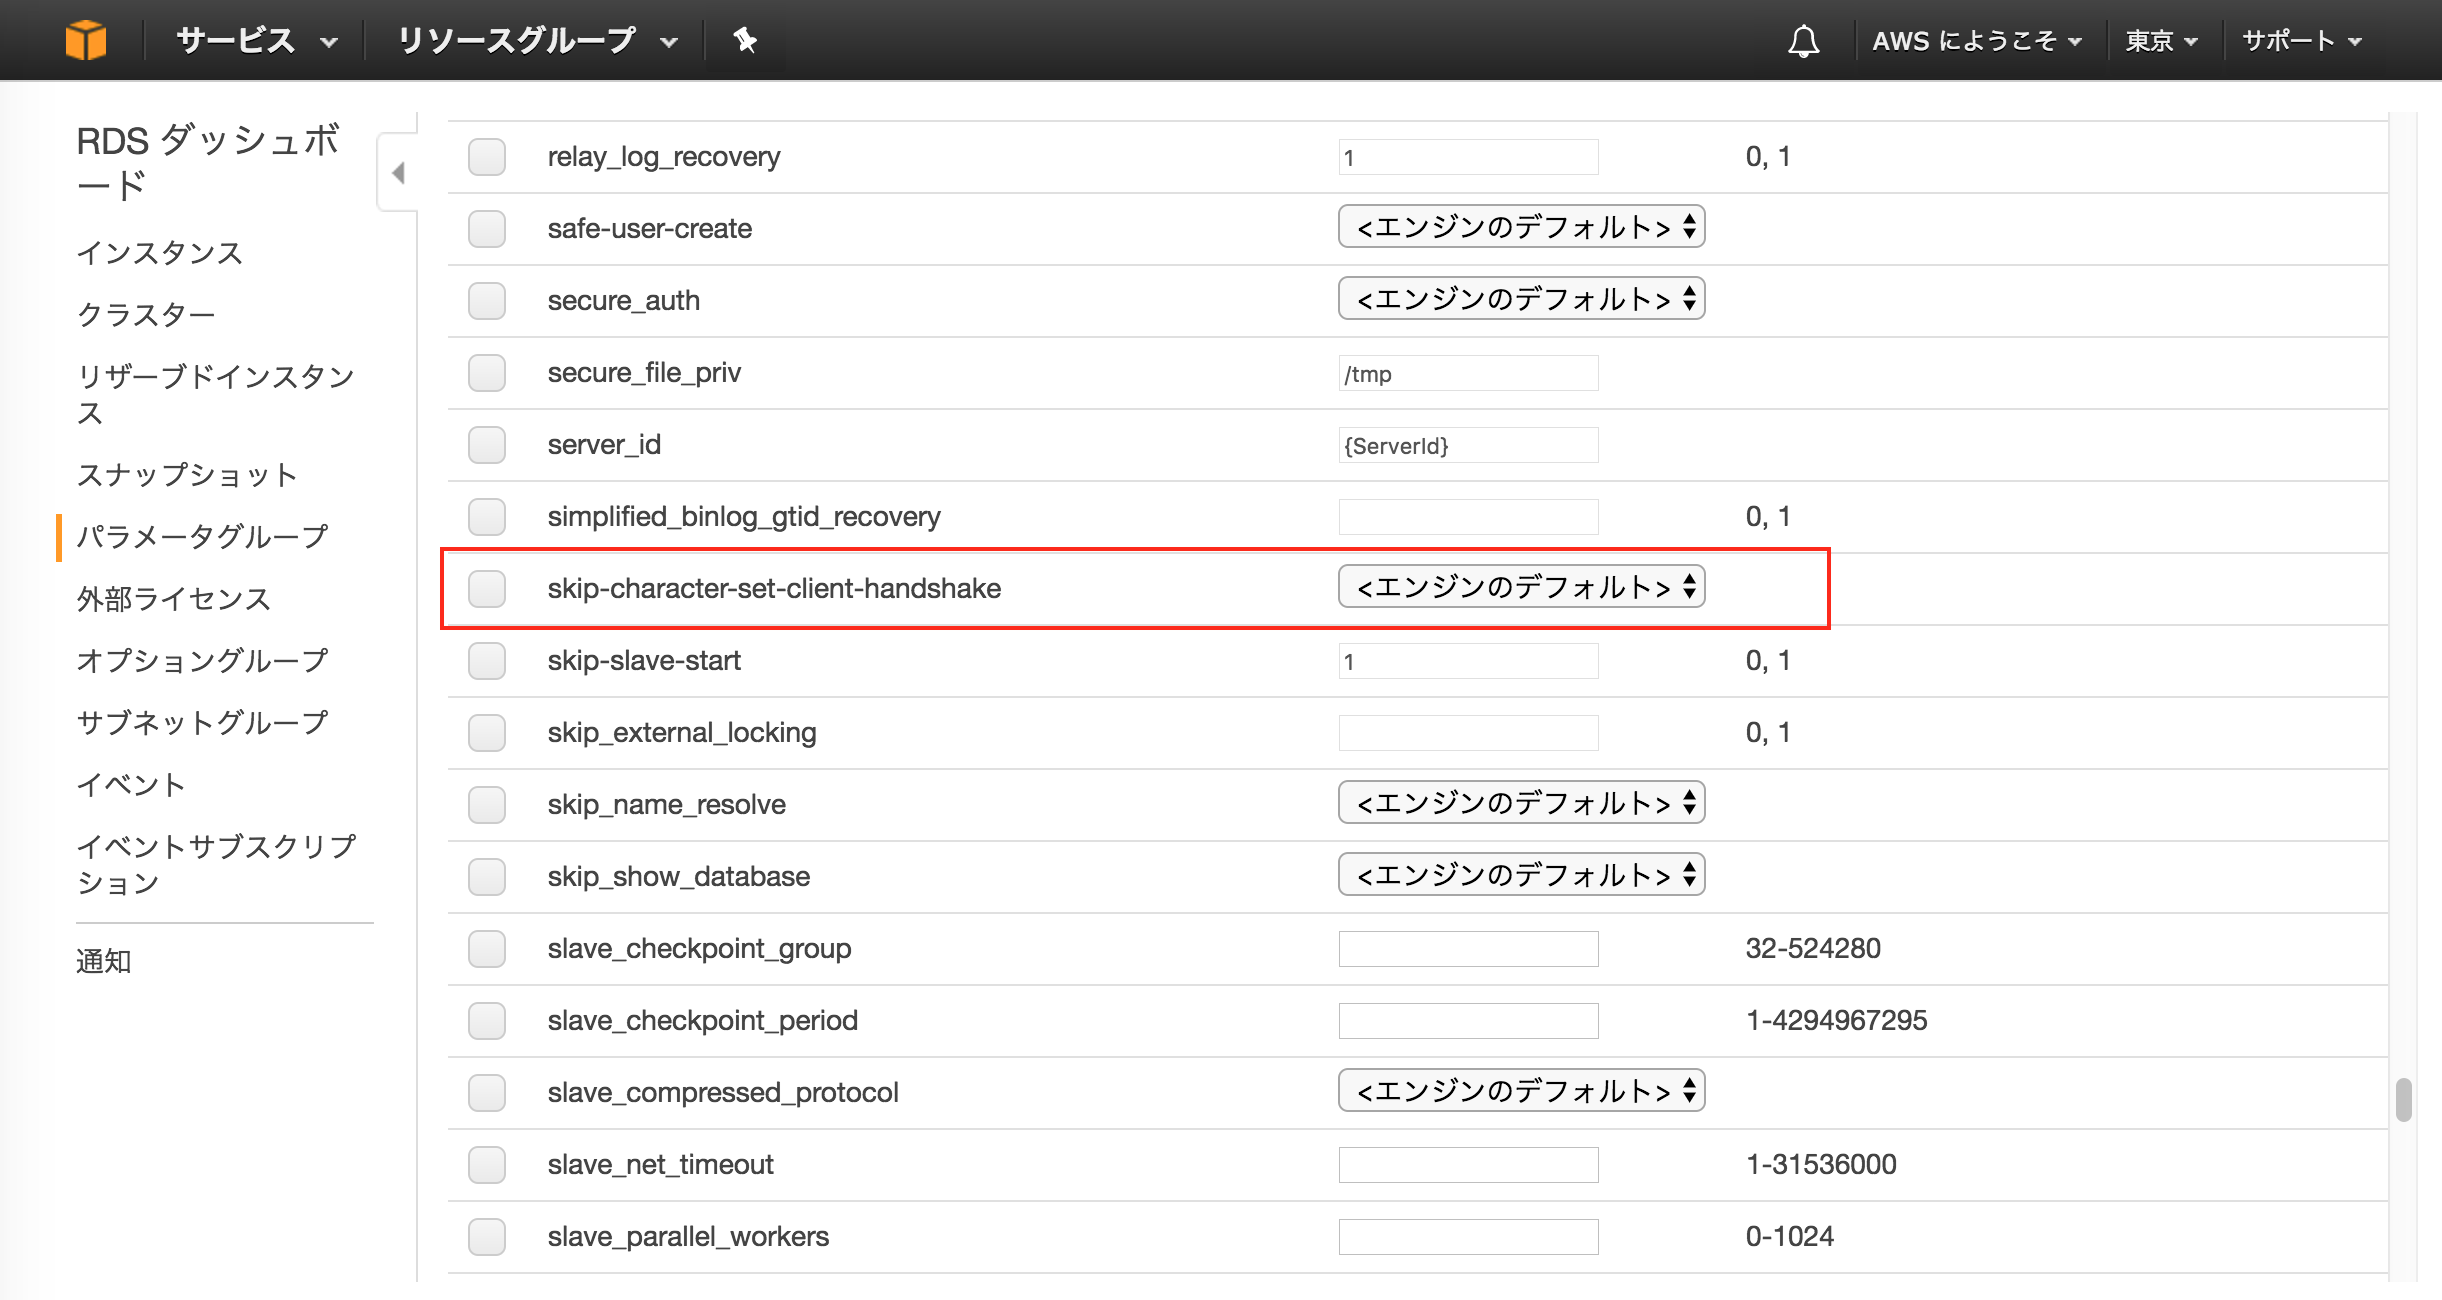
赤囲みの部分を設定します。
例
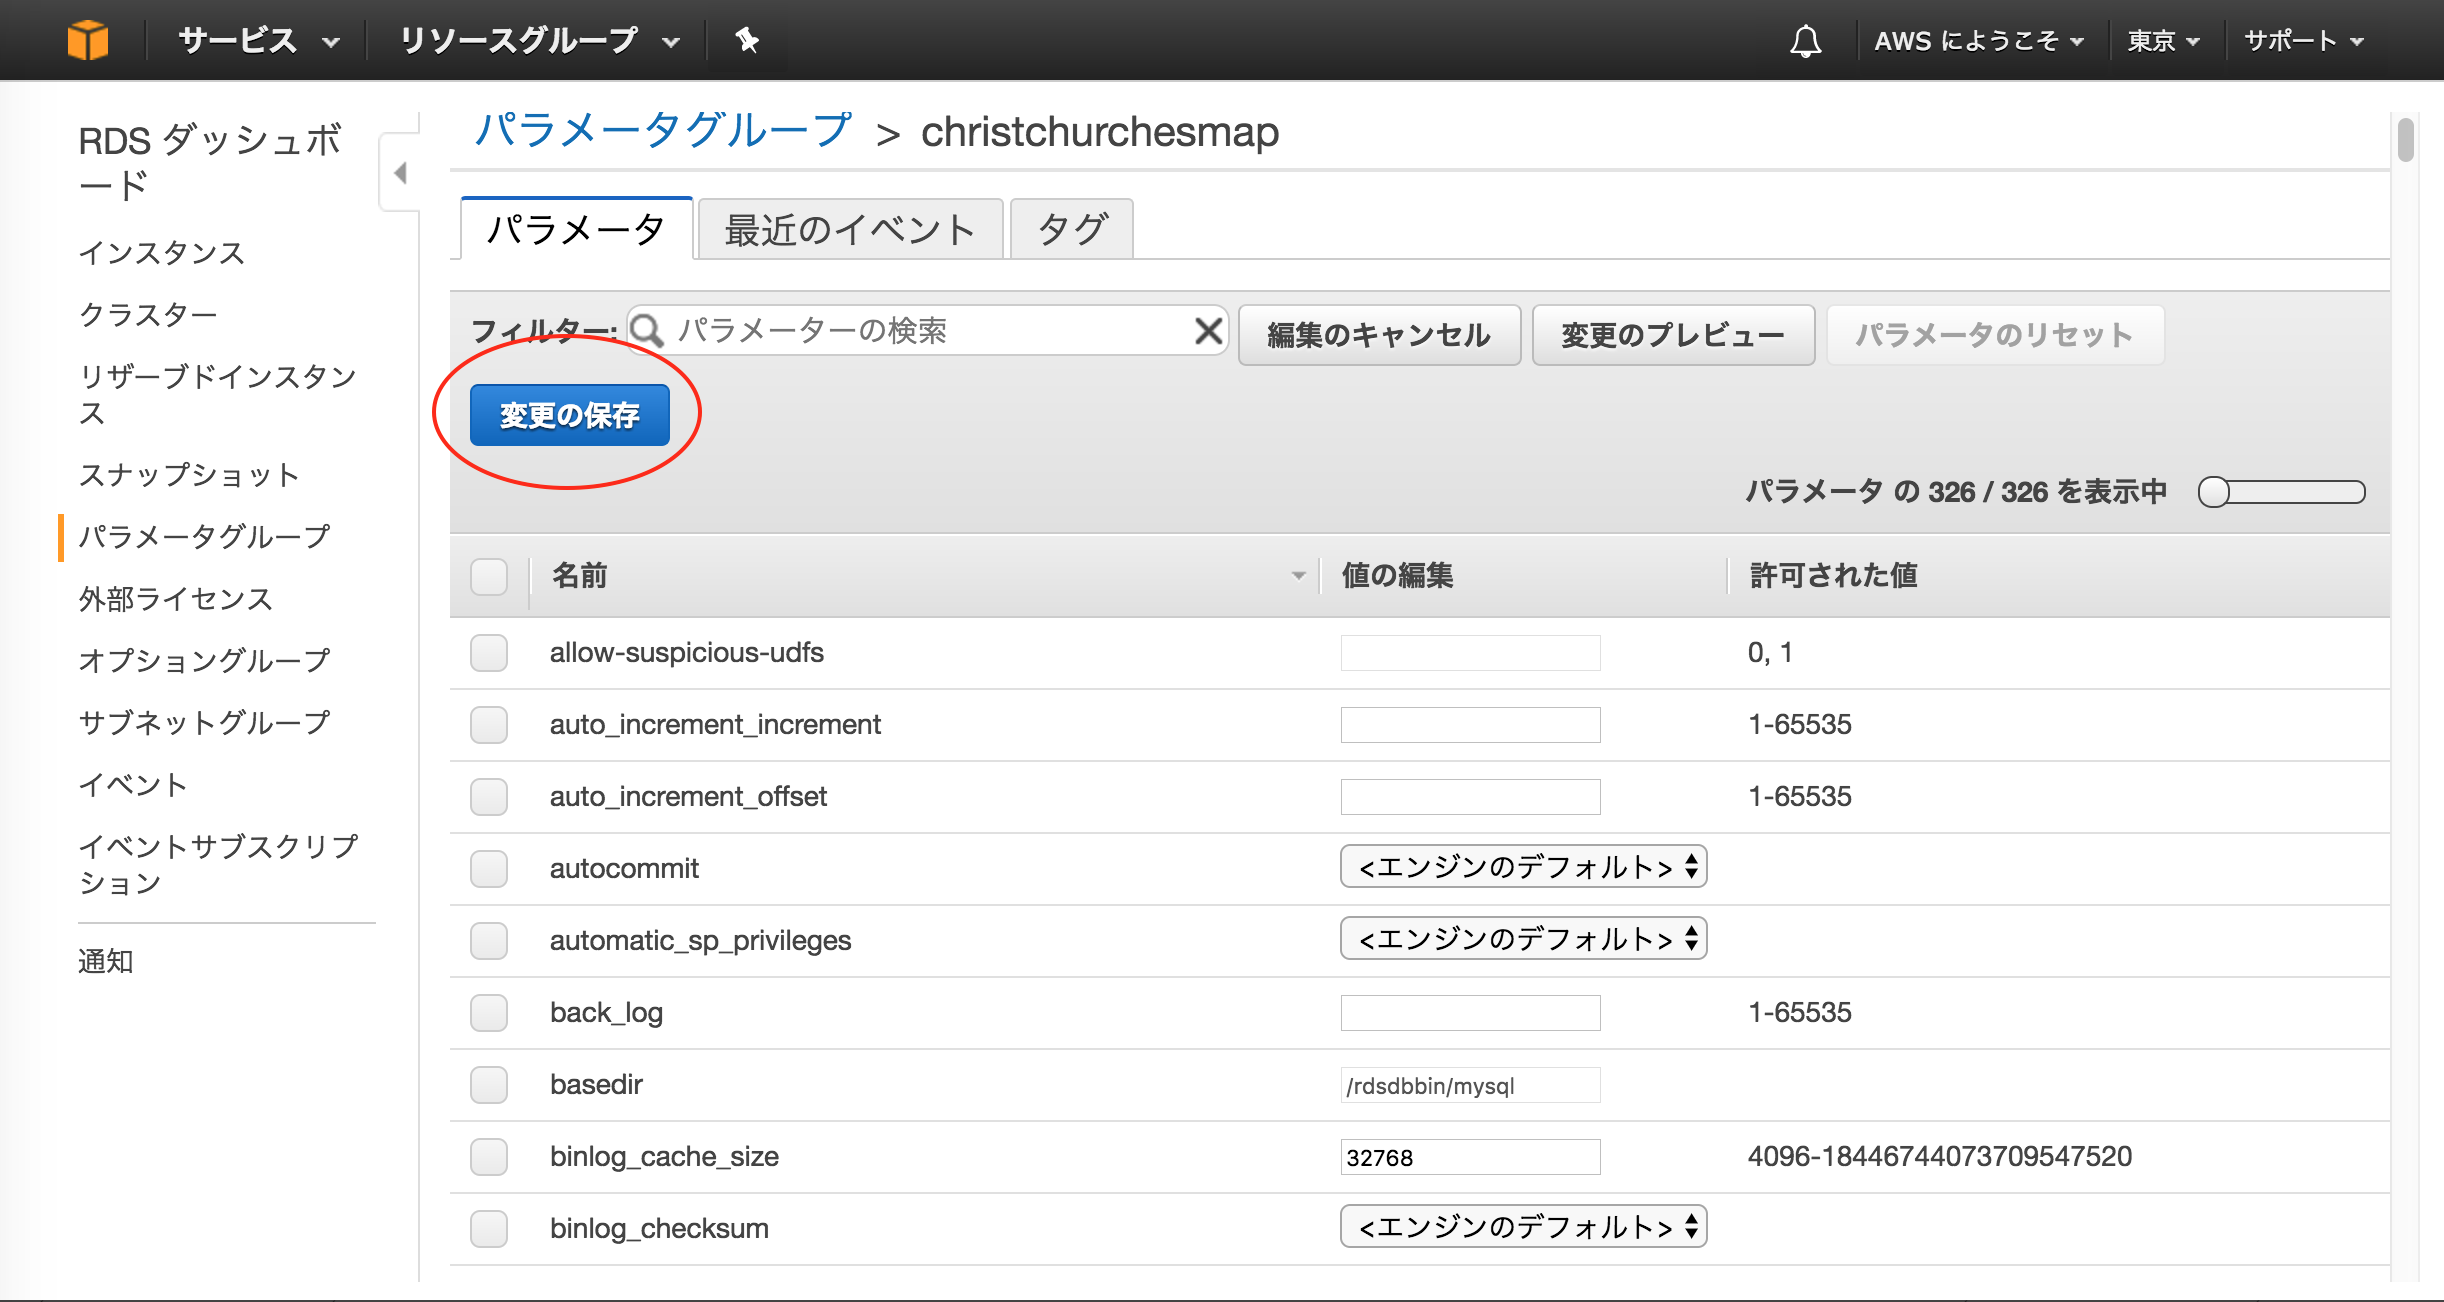
「変更の保存」をクリックします。
Githubからクローン
projectsに移動します。
$ cd /var/www/projects
bundlerをインストールします。
$ gem install bundler
Gemfileを作成します。
$ bundle init
Gemfileを編集します。
$ vim Gemfile
railsのバージョンを記載します。
例
gem "rails", '5.0.1'
vendor/bundle にgemをインストールします。
$ bundle install --path vendor/bundle --jobs=4
railsのバージョンを確認します。
$ bundle exec rails -v
Rails 5.0.1
Githubからクローンします。
$ git clone git@github.com:iwaseasahi/christchurches-map.git
クローンできたか確認します。
$ ls
christchurches-map  Gemfile  Gemfile.lock  vendor
railsアプリに移動します。
$ cd christchurches-map/
vendor/bundle にgemをインストールします。
$ bundle install --path vendor/bundle
シークレットを表示します。
$ bundle exec rake secret
数字が表示
設定ファイルに記載します。
$ vi config/secrets.yml
production:
  secret_key_base: ここにsecretを貼り付ける
nginxの設定
設定ファイルを作成します。
$ sudo vi /etc/nginx/conf.d/アプリ名.conf
例
$ sudo vi /etc/nginx/conf.d/アプリ名.conf
以下を記載します。
upstream unicorn_server {
    server unix:/var/www/projects/christchurches-map/tmp/sockets/.unicorn.sock
    fail_timeout=0;
}

server {
    listen 80;
    client_max_body_size 4G;
    server_name IPアドレス;

    keepalive_timeout 5;

    # Location of our static files
    root /var/www/projects/アプリ名/public;

    location ~ ^/assets/ {
        root /var/www/projects/アプリ名/public;
    }

    location / {
        proxy_set_header X-Forwarded-For $proxy_add_x_forwarded_for;
        proxy_set_header Host $http_host;
        proxy_redirect off;

        if (!-f $request_filename) {
            proxy_pass http://unicorn_server;
            break;
        }
    }

    error_page 500 502 503 504 /500.html;
    location = /500.html {
        root /var/www/projects/christchurches-map/public;
    }
}
例
upstream unicorn_server {
    server unix:/var/www/projects/christchurches-map/tmp/sockets/.unicorn.sock
    fail_timeout=0;
}

server {
    listen 80;
    client_max_body_size 4G;
    server_name 52.192.101.190;

    keepalive_timeout 5;

    # Location of our static files
    root /var/www/projects/christchurches-map/public;

    location ~ ^/assets/ {
        root /var/www/projects/christchurches-map/public;
    }

    location / {
        proxy_set_header X-Forwarded-For $proxy_add_x_forwarded_for;
        proxy_set_header Host $http_host;
        proxy_redirect off;

        if (!-f $request_filename) {
            proxy_pass http://unicorn_server;
            break;
        }
    }

    error_page 500 502 503 504 /500.html;
    location = /500.html {
        root /var/www/projects/christchurches-map/public;
    }
}
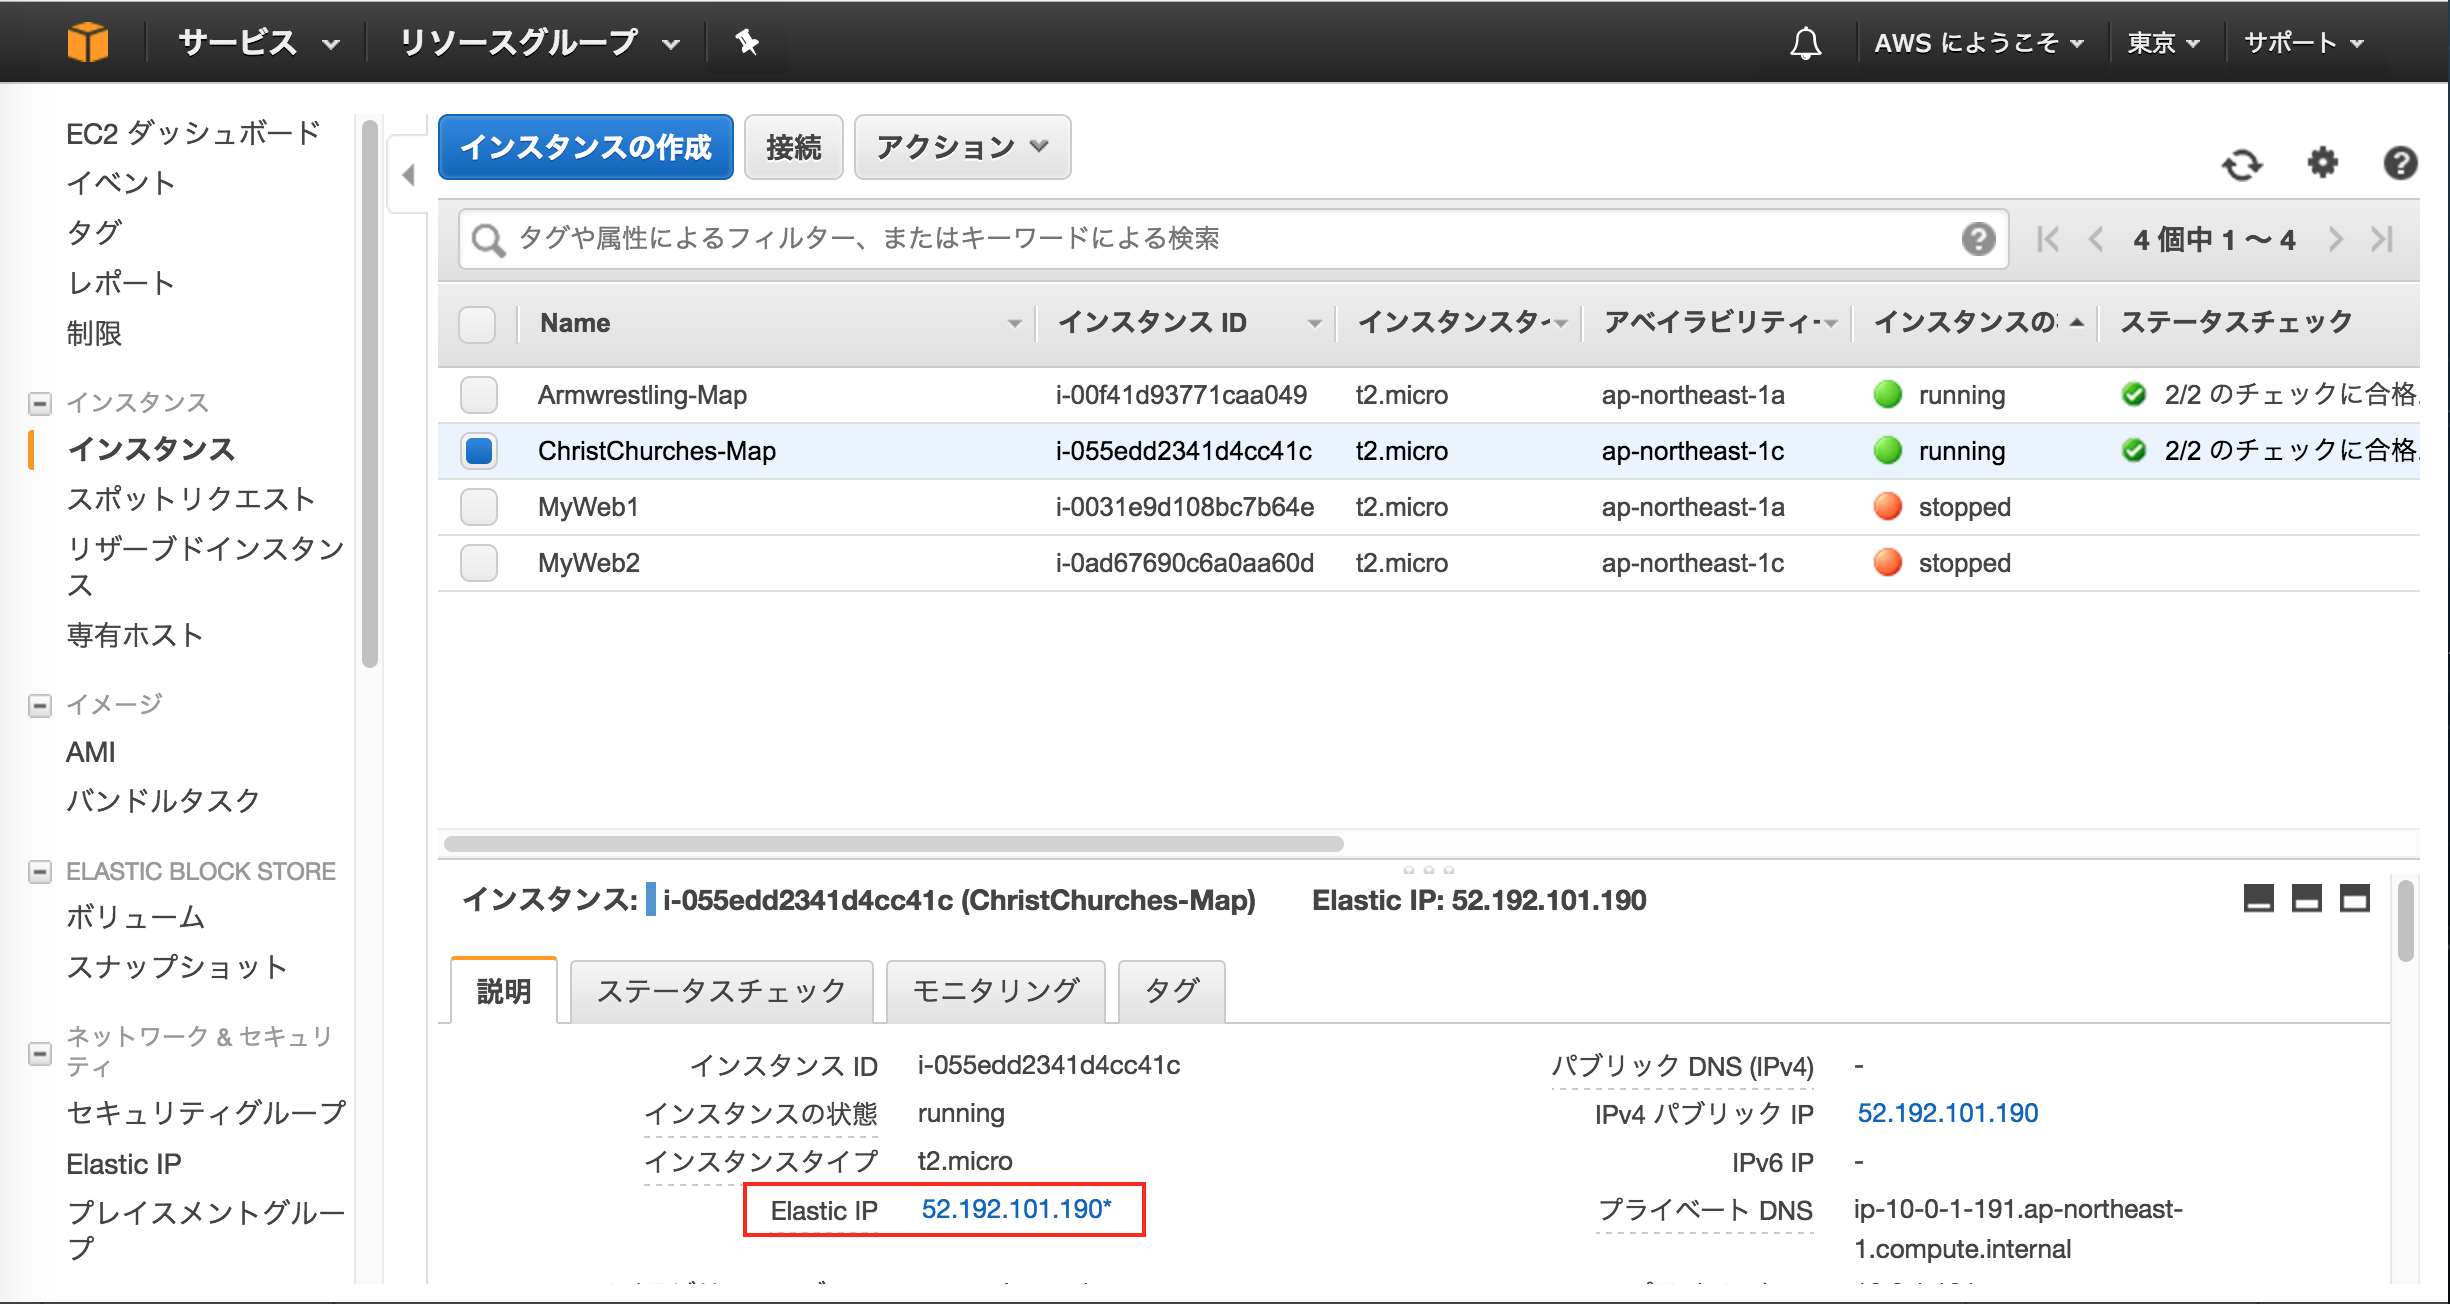
上記の設定において、IPアドレスがわからない場合は、以下で確認できます。
Nginxをリスタートします。
$ sudo service nginx restart
Stopping nginx:                                            [  OK  ]
Starting nginx:                                            [  OK  ]
Unicornの設定
Gemfileを編集します。
$ vim Gemfile
以下をファイルの末尾に追記します。
group :production do
    gem 'unicorn'
end
インストールします。
$ bundle install
unicornの設定ファイルを作成します。
$ vim config/unicorn.conf.rb
以下を記載します。
# set lets
$worker  = 2
$timeout = 30
$app_dir = "/var/www/projects/アプリ名"
$listen  = File.expand_path 'tmp/sockets/.unicorn.sock', $app_dir
$pid     = File.expand_path 'tmp/pids/unicorn.pid', $app_dir
$std_log = File.expand_path 'log/unicorn.log', $app_dir
# set config
worker_processes  $worker
working_directory $app_dir
stderr_path $std_log
stdout_path $std_log
timeout $timeout
listen  $listen
pid $pid
# loading booster
preload_app true
# before starting processes
before_fork do |server, worker|
  defined?(ActiveRecord::Base) and ActiveRecord::Base.connection.disconnect!
  old_pid = "#{server.config[:pid]}.oldbin"
  if old_pid != server.pid
    begin
      Process.kill "QUIT", File.read(old_pid).to_i
    rescue Errno::ENOENT, Errno::ESRCH
    end
  end
end
# after finishing processes
after_fork do |server, worker|
  defined?(ActiveRecord::Base) and ActiveRecord::Base.establish_connection
end
例
# set lets
$worker  = 2
$timeout = 30
$app_dir = "/var/www/projects/christchurches-map"
$listen  = File.expand_path 'tmp/sockets/.unicorn.sock', $app_dir
$pid     = File.expand_path 'tmp/pids/unicorn.pid', $app_dir
$std_log = File.expand_path 'log/unicorn.log', $app_dir
# set config
worker_processes  $worker
working_directory $app_dir
stderr_path $std_log
stdout_path $std_log
timeout $timeout
listen  $listen
pid $pid
# loading booster
preload_app true
# before starting processes
before_fork do |server, worker|
  defined?(ActiveRecord::Base) and ActiveRecord::Base.connection.disconnect!
  old_pid = "#{server.config[:pid]}.oldbin"
  if old_pid != server.pid
    begin
      Process.kill "QUIT", File.read(old_pid).to_i
    rescue Errno::ENOENT, Errno::ESRCH
    end
  end
end
# after finishing processes
after_fork do |server, worker|
  defined?(ActiveRecord::Base) and ActiveRecord::Base.establish_connection
end
権限を変更します。
$ sudo chmod -R 775 /var/lib/nginx/
database.ymlの設定
Ruby アプリケーション環境に Amazon RDS DB インスタンスを追加
念のために database.yml をコピーします。
$ cp config/database.yml config/database.yml.org
編集します。
$ vim config/database.yml
以下を記載します。
$ production:
  <<: *default
  adapter: mysql2
  encoding: utf8
  database: データベース名
  username: root
  password: 設定したパスワード
  host: エンドポイント
  port: 3306
例
$ production:
  <<: *default
  adapter: mysql2
  encoding: utf8
  database: christchurches_map_production
  username: root
  password: 設定したパスワード
  host: christchurches-map-mysql.cbev6lgaewnk.ap-northeast-1.rds.amazonaws.com
  port: 3306
mysqldを起動します。
$ sudo service mysqld start
Starting mysqld:                                           [  OK  ]
念のためにデータベース作成のコマンドを実行します。
$ bundle exec rake db:create RAILS_ENV=production
Database 'christchurches_map_production' already exists
production環境でマイグレーションを実行します。
$ bundle exec rake db:migrate RAILS_ENV=production

