Overview
HW編で、M5StickVに搭載されたSoCのK210の内容は大体わかりましたので、
- 次にSWについてわかっていることのまとめ
- kendryte社提供のSW開発情報
- flash環境
- MaixPyで動作確認
- MaixPyの分析
- MacOSでMaixPy IDEのinstallの仕方
- 実際に動かしてみる
- MaixPy IDEで、microPythonでhello world
- MaixPyをC SDKとして、hello world
- C言語での開発者向けのapplication framework化
という感じで説明していきます。
SWについてわかっていることのまとめ
開発環境の情報について
- M5StickVのSoC Kendryte K210としては、以下が用意されている
- kflash.py 焼き込み用SW
- Standalone SDK (guide) (github)
- FreeRTOS SDK (guide)(github)
- Tool chain for MacOS (for Ubuntu) (github)
- OpenOCD for Ubuntu
- ただ、M5StickVとしては、Sipeedの MaixPy が標準の開発環境のようです。
このMaixPyは、micro pythonベースで開発を行うためのもので、MaixPy自体は、standalone SDKをベースに、K210やMaixボードやM5StickV向けのperipheralを移植したもののようです。
焼き込みtool "kflash.py"
MacOSでは、うまくkflash guiが動かないようですし、Windows以外では安定しないようです。
また、GUIだと、面倒です。
なので、CUIのkflash.pyを利用します。
$ cd ~/work/
$ git clone https://github.com/kendryte/kflash.py.git
$ pip3 install pyserial
$ pip3 install pyelftools
$ ln -s /Users/xxxx/work/kflash.py/kflash.py /Users/xxxx/bin
$ kflash.py --help
usage: kflash.py [-h] [-p PORT] [-f FLASH] [-b BAUDRATE] [-l BOOTLOADER]
                 [-k KEY] [-v] [--verbose] [-t] [-n] [-s]
                 [-B {kd233,dan,bit,bit_mic,goE,goD,maixduino,trainer}]
                 [-S SLOW]
                 firmware

positional arguments:
  firmware              firmware bin path

optional arguments:
  -h, --help            show this help message and exit
  -p PORT, --port PORT  COM Port
  -f FLASH, --flash FLASH
                        SPI Flash type, 0 for SPI3, 1 for SPI0
  -b BAUDRATE, --baudrate BAUDRATE
                        UART baudrate for uploading firmware
  -l BOOTLOADER, --bootloader BOOTLOADER
                        Bootloader bin path
  -k KEY, --key KEY     AES key in hex, if you need encrypt your firmware.
  -v, --version         Print version.
  --verbose             Increase output verbosity
  -t, --terminal        Start a terminal after finish (Python miniterm)
  -n, --noansi          Do not use ANSI colors, recommended in Windows CMD
  -s, --sram            Download firmware to SRAM and boot
  -B {kd233,dan,bit,bit_mic,goE,goD,maixduino,trainer}, --Board {kd233,dan,bit,bit_mic,goE,goD,maixduino,trainer}
                        Select dev board
  -S SLOW, --Slow SLOW  Slow download mode
残念ながらesptool.pyのようなread_flashが無いので(MaskROMには焼き込みしか実装されていないのでしょう)、出荷ROMイメージのbackupはできなそうです。
MaixPyで動作確認
次に、m5stickvで、kflash.pyの使い方を試して見るために、まず、m5stickv向けMaixPyのruntimeの公式の最新版を焼いてみます。
に従い、kflashで、m5stickvのMaixPyのFWを焼き込んでみます。
MaixPy FWのdownload
MaixPyはmicro pythonのruntimeなので、これを実機に焼き込んで、pythonでの開発をできるようにする必要があります。
$ wget https://m5stack.oss-cn-shenzhen.aliyuncs.com/resource/docs/M5StickV_Firmware_1022_beta.kfpkg
quick startのページから最新をdownloadしてください。上は現時点の最新。
USB serialのportの確認
$ ls /dev/cu.*
/dev/cu.usbserial-xxxx
kflash.pyの焼き込み
-Bで指定するものに、M5StickVが無いのですが goE で動きました。
$ kflash.py -b 115200 -B goE -p /dev/cu.usbserial-xxxx
 M5StickV_Firmware_1022_beta.kfpkg
[INFO] COM Port Selected Manually:  /dev/cu.usbserial-xxxx
[INFO] Default baudrate is 115200 , later it may be changed to the value you set.
[INFO] Trying to Enter the ISP Mode...
*
[INFO] Greeting Message Detected, Start Downloading ISP
Downloading ISP: |=====================================================================================| 100.0% 10kiB/s
[INFO] Booting From 0x80000000
[INFO] Wait For 0.1 second for ISP to Boot
[INFO] Boot to Flashmode Successfully
[INFO] Selected Flash:  On-Board
[INFO] Initialization flash Successfully
[INFO] Extracting KFPKG ...
[INFO] Writing maixpy.bin into 0x00000000
Programming BIN: |=====================================================================================| 100.0% 10kiB/s
[INFO] Writing m5stickv_resources.img into 0x00d00000
Programming BIN: |=====================================================================================| 100.0% 10kiB/s
[INFO] Writing facedetect.kmodel into 0x00300000
Programming BIN: |=====================================================================================| 100.0% 10kiB/s
[INFO] Rebooting...
のようになれば焼き込み完了です。
UART consoleで起動画面を見る
$ screen /dev/cu.usbserial-xxxx 115200
[MAIXPY]Pll0:freq:832000000
[MAIXPY]Pll1:freq:398666666
[MAIXPY]Pll2:freq:45066666
[MAIXPY]cpu:freq:416000000
[MAIXPY]kpu
[MAIXPY]Pll0:freq:832000000
[MAIXPY]Pll1:freq:398666666
[MAIXPY]Pll2:freq:45066666
[MAIXPY]cpu:freq:416000000
[MAIXPY]kpu:freq:398666666
[MAIXPY]Flash:0xc8:0x17
open second core...
gc heap=0x80215060-0x80295060
[MaixPy] init end

 __  __              _____  __   __  _____   __     __
|  \/  |     /\     |_   _| \ \ / / |  __ \  \ \   / /
| \  / |    /  \      | |    \ V /  | |__) |  \ \_/ /
| |\/| |   / /\ \     | |     > <   |  ___/    \   /
| |  | |  / ____ \   _| |_   / . \  | |         | |
|_|  |_| /_/    \_\ |_____| /_/ \_\ |_|         |_|

M5StickV by M5Stack : https://m5stack.com/
M5StickV Wiki       : https://docs.m5stack.com
Co-op by Sipeed     : https://www.sipeed.com

[MAIXPY]: result = 0
[MAIXPY]: numchannels = 1
[MAIXPY]: samplerate = 44100
[MAIXPY]: byterate = 88200
[MAIXPY]: blockalign = 2
[MAIXPY]: bitspersample = 16
[MAIXPY]: datasize = 158760
init i2c2
[MAIXPY]: find ov7740
が出れば起動成功です。
ここで、 CTRL+C を押しましょう。
MicroPython v0.4.0-52-g3b8c18b84-dirty on 2019-10-21; M5Stick-V with Kendryte K210
Type "help()" for more information.
>>>
>>>
import lcd

lcd.init()
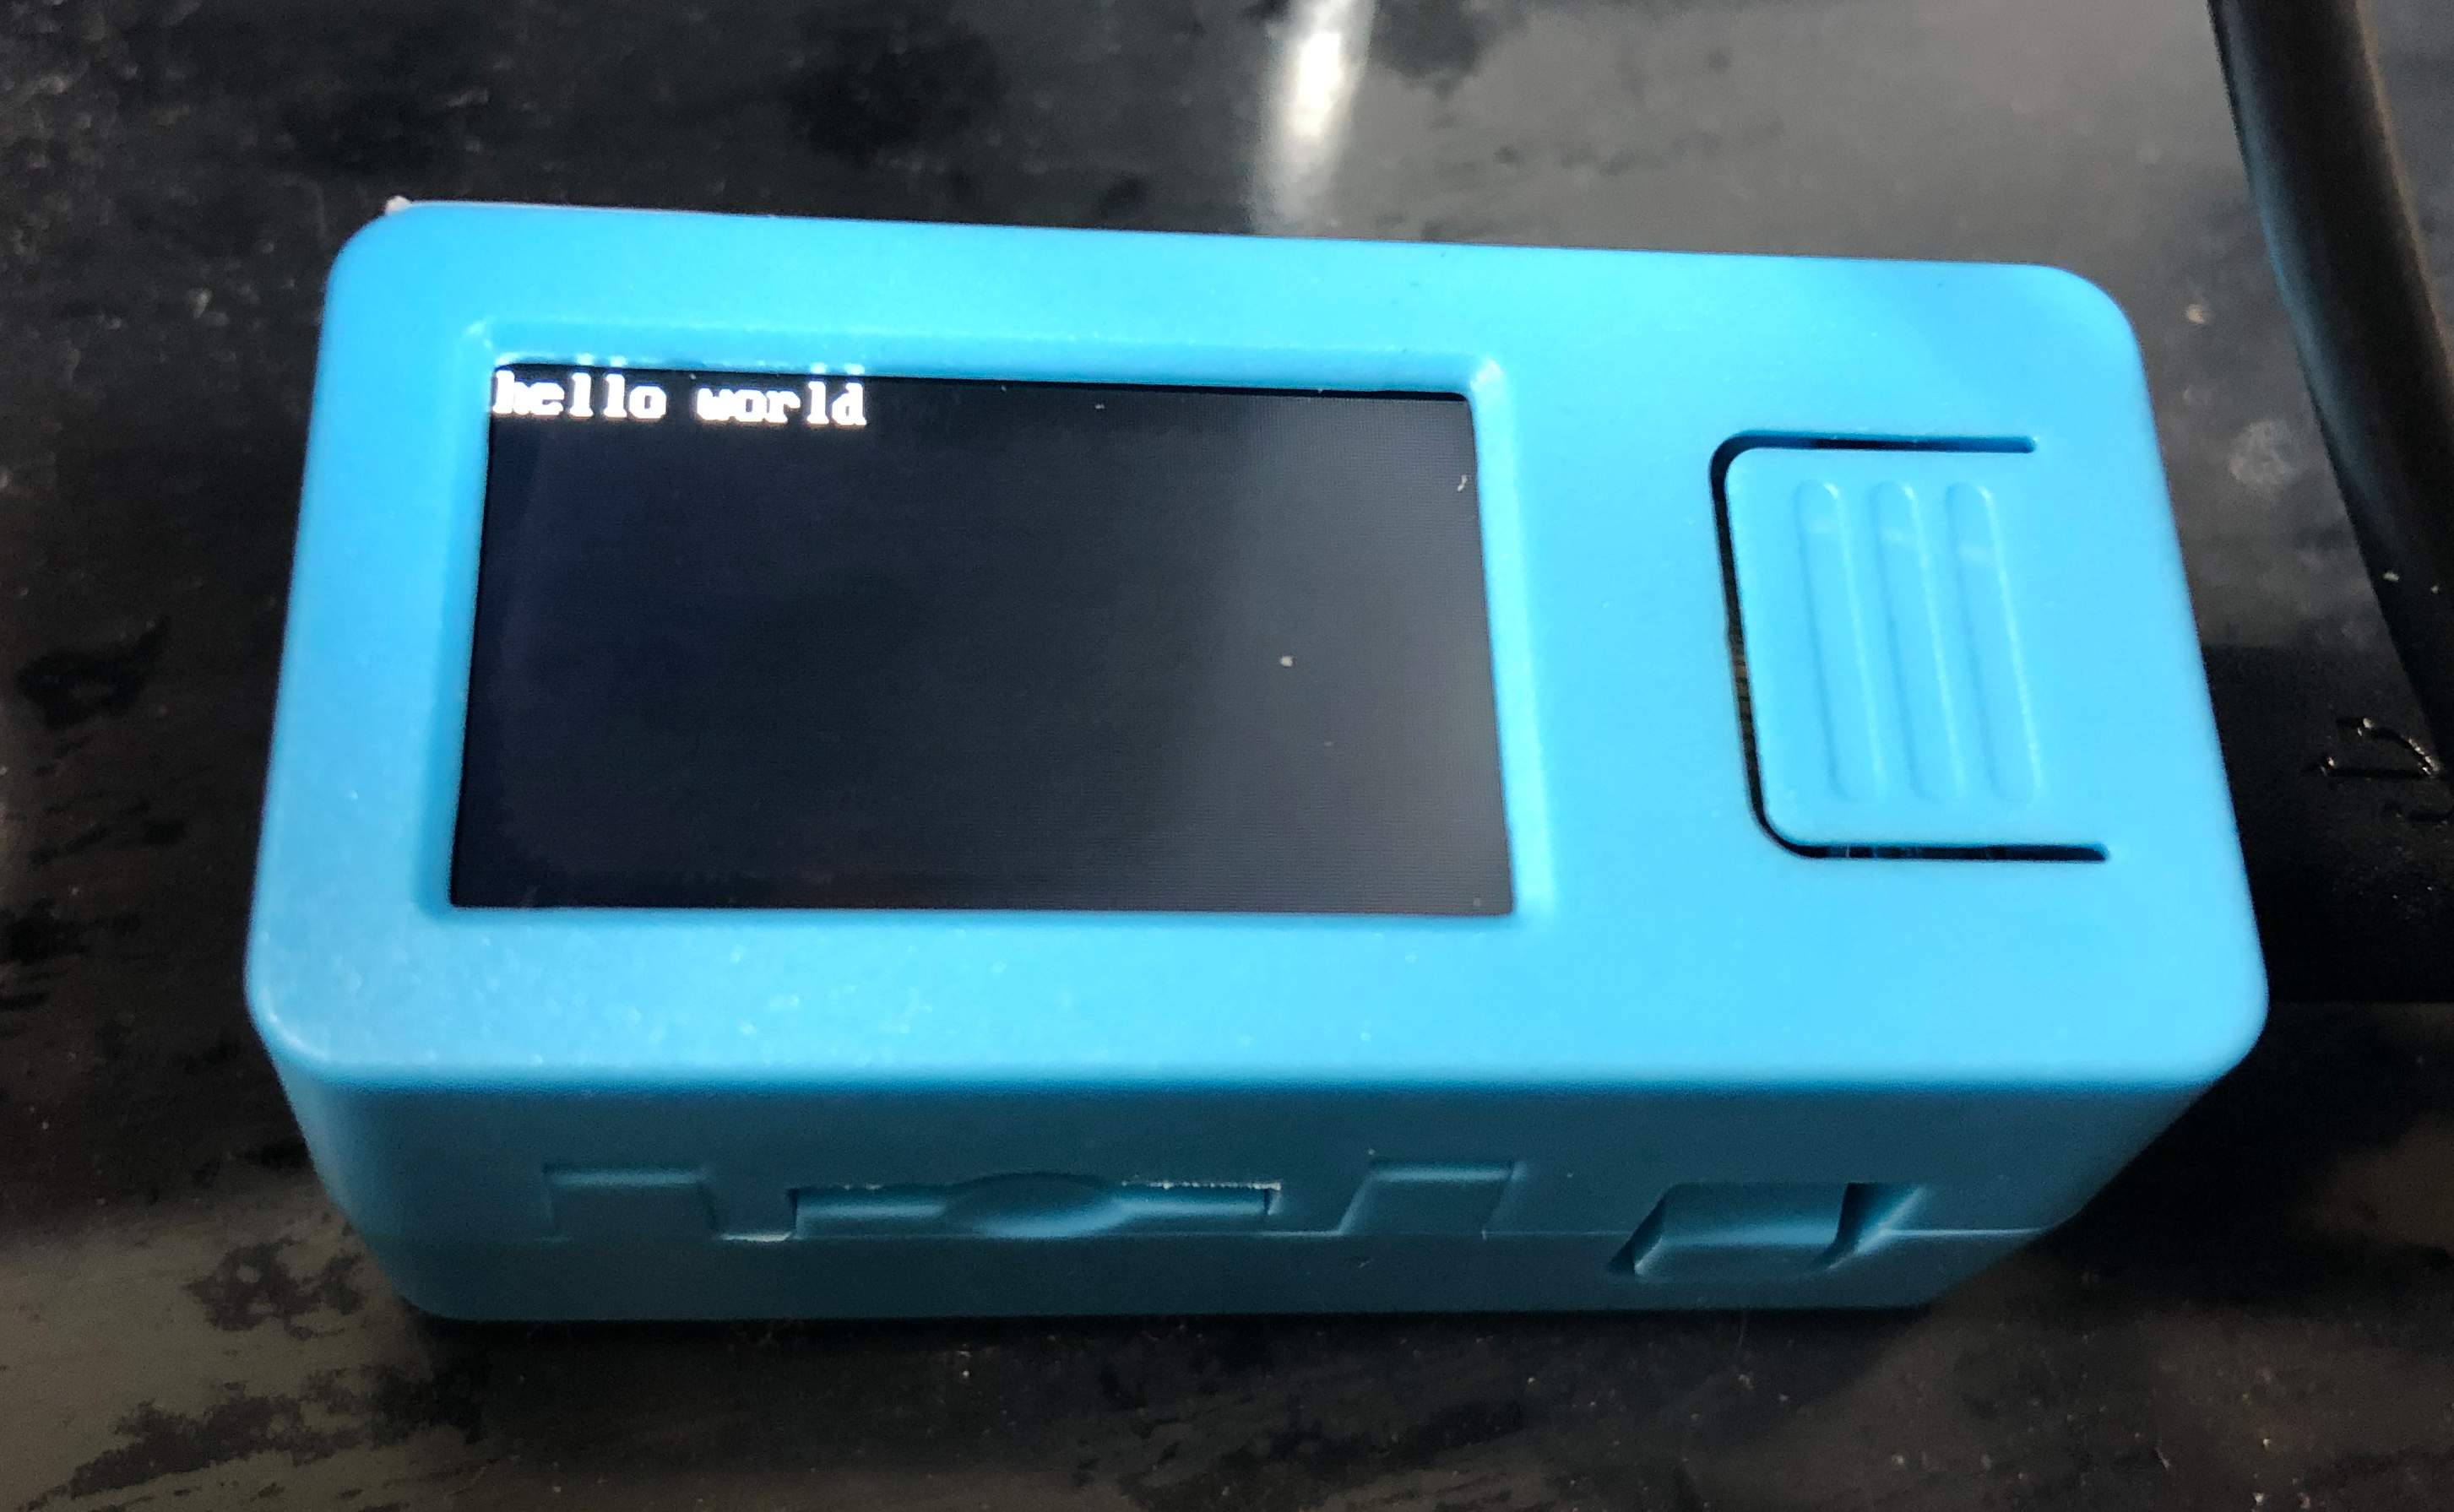
lcd.draw_string(100, 100, "hello world", lcd.RED, lcd.BLACK)
のように、表示されます!
これで、MaixPyの開発環境が整いました。
備考: screenの終了のさせ方
screen の画面で control + a を押して、次に k を押し、Really kill this window [y/n] と表示されるので、 y
GWだし、ESP8266関係の記事をまとめながら、IoT framework作ってみる にも記載したけど、いつも忘れるので再度掲載。
ほか気づいたこと
- homeボタンの近く側のサイドのボタンを、6秒間長押しで、電源OFFです (USBケーブルを抜くのを忘れずに。逆に2秒押すとONのようです。)
MaixPyの分析
MaixPyのライブラリ
いきなり、pythonで書き始める方は、以下のライブラリ情報を見ながら作っていけばよいかと思います。
ですが、githubの中のMaixPyをcloneして、ソースコードを長てみます。
MaixPyの中身を見てみる
$ git clone https://github.com/sipeed/MaixPy.git
$ cd MaixPy
$ git submodule update --recursive --init
MaixPyの構成要素 (folder)
MaixPy $ tree -d -L 3
.
├── assets
│   └── image
├── components
│   ├── boards
│   │   ├── include
│   │   ├── m5stick
│   │   └── src
│   ├── drivers
│   │   ├── flash
│   │   ├── htpa
│   │   ├── joystick
│   │   ├── lcd
│   │   ├── sd_card
│   │   └── ws2812
│   ├── kendryte_sdk
│   │   ├── include
│   │   ├── kendryte-standalone-sdk
│   │   ├── libs
│   │   ├── src
│   │   └── src2
│   ├── micropython
│   │   ├── core
│   │   └── port
│   ├── spiffs
│   │   ├── core
│   │   └── spiffs_port
│   └── utils
│       ├── include
│       └── src
├── projects
│   ├── hello_world
│   │   ├── compile
│   │   └── main
│   ├── maixpy_k210
│   │   ├── compile
│   │   └── main
│   ├── maixpy_k210_minimum
│   │   ├── compile
│   │   └── main
│   ├── maixpy_m5stickv
│   │   ├── builtin_py
│   │   ├── compile
│   │   └── main
│   └── mpy_minimum
│       ├── compile
│       └── main
└── tools
    ├── cmake
    ├── docker
    ├── flash
    │   └── kflash_py
    ├── kconfig
    │   └── Kconfiglib
    ├── release
    └── spiffs
        └── mkspiffs
ふむ。MaixPyの中には、C/C++で、M5StickVを作るときに役立つものがありそうですね。
これらを使ってarduinoあるいはIDFのようなものを作っても良さそうです.(後述)
MaixPyの構成要素 (git submodule)
なお、https://github.com/sipeed/MaixPy/blob/master/build.md に習い、
git submodule update --recursive --init した結果を整理したものが以下です。 (以下のsubmoduleに依存)
- Submodule 'components/micropython/core' (https://github.com/micropython/micropython.git)
- Submodule 'components/micropython/port/src/lvgl/lv_bindings' (https://github.com/littlevgl/lv_binding_micropython.git)
- Submodule 'components/micropython/port/src/ulab/micropython-ulab' (https://github.com/Neutree/micropython-ulab.git)
- Submodule 'components/spiffs/core' (https://github.com/pellepl/spiffs.git)
- Submodule 'tools/flash/kflash_py' (https://github.com/sipeed/kflash.py.git)
- Submodule 'tools/kconfig/Kconfiglib' (https://github.com/ulfalizer/Kconfiglib.git)
- Submodule 'tools/spiffs/mkspiffs' (https://github.com/igrr/mkspiffs.git)
- Submodule 'lib/lwip' (https://git.savannah.gnu.org/r/lwip.git)
- Submodule 'lib/mbedtls' (https://github.com/ARMmbed/mbedtls.git)
- Submodule 'lib/nrfx' (https://github.com/NordicSemiconductor/nrfx.git)
- Submodule 'driver/png/lodepng' (https://github.com/lvandeve/lodepng.git)
- Submodule 'lvgl' (https://github.com/littlevgl/lvgl.git)
- Submodule 'micropython/pycparser' (https://github.com/eliben/pycparser.git)
- Submodule 'spiffs' (https://github.com/pellepl/spiffs.git)
pycparserも入っているので、byte code化されたものも動くみたいですね。
MaixPyでのmicroPythonとしてのboot
MaixPyでのKPU (AI accelerator)の接続について
MaixPy $ du -ak | grep kpu
64	./components/micropython/port/src/Maix/Maix_kpu.c
16	./components/kendryte_sdk/kendryte-standalone-sdk/lib/drivers/include/kpu.h
4	./components/kendryte_sdk/include/sipeed_kpu.h
76	./components/kendryte_sdk/libs/lib_sipeed_kpu.a
のように、microPythonと接続はしていそうです。
https://maixpy.sipeed.com/en/libs/Maix/kpu.html
でも、microPythonとしてのドキュメントの記載も見つけました。
kendryte SDKとして対応しているNN operationについて
typedef enum
{
    KL_INVALID = 0,
    KL_ADD,
    KL_QUANTIZED_ADD,
    KL_GLOBAL_MAX_POOL2D,
    KL_QUANTIZED_GLOBAL_MAX_POOL2D,
    KL_GLOBAL_AVERAGE_POOL2D,
    KL_QUANTIZED_GLOBAL_AVERAGE_POOL2D,
    KL_MAX_POOL2D,
    KL_QUANTIZED_MAX_POOL2D,
    KL_AVERAGE_POOL2D,
    KL_QUANTIZED_AVERAGE_POOL2D,
    KL_QUANTIZE,
    KL_DEQUANTIZE,
    KL_REQUANTIZE,
    KL_L2_NORMALIZATION,
    KL_SOFTMAX,
    KL_CONCAT,
    KL_QUANTIZED_CONCAT,
    KL_FULLY_CONNECTED,
    KL_QUANTIZED_FULLY_CONNECTED,
    KL_TENSORFLOW_FLATTEN,
    KL_QUANTIZED_TENSORFLOW_FLATTEN,
    KL_RESIZE_NEAREST_NEIGHBOR,
    KL_QUANTIZED_RESIZE_NEAREST_NEIGHBOR,
    KL_CHANNELWISE_DEQUANTIZE,
    KL_LOGISTIC,
    KL_K210_CONV = 10240,
    KL_K210_ADD_PADDING,
    KL_K210_REMOVE_PADDING,
    KL_K210_UPLOAD
} kpu_model_layer_type_t;
実際に動かしてみる
M5StickVの動作確認も終わり、MaixPyも多少わかってきたので、これを使ってhello worldしていきます。
MaixPy開発環境 MaixPy IDEでhello world
MacOSでMaixPy IDEをsetup
皆様、MaixPy IDEを使うみたいですが、、、、なんと、、、MacOS版の記載がない。。。
と思ったら、 http://dl.sipeed.com/MAIX/MaixPy/ide/_ の中を探したら、
http://dl.sipeed.com/MAIX/MaixPy/ide/_/v0.2.4/maixpy-ide-mac-0.2.4.dmg がありました。
document未記載だったりするので、自己責任で・・・。
※ maixpy-ide-mac-0.2.4.dmg (29a5750cf34c784f84b31ca68e2eaf7f3e8b99990f19b3a8192b1f6b1ddbc0b3) に対して、virustotalで確認したところ、0/56でundetectedだったので、大丈夫かとは思いますが。
App Storeでのものではなくunsigned?のようなので、一度Launch Padからクリック後に、🍎→システム環境設定→セキュリティとプライバシーで、SipeedのMaixPyIDEが表示されているので、「このまま開く」を押して起動してくださいませ。
MaixPy IDE で helloworld
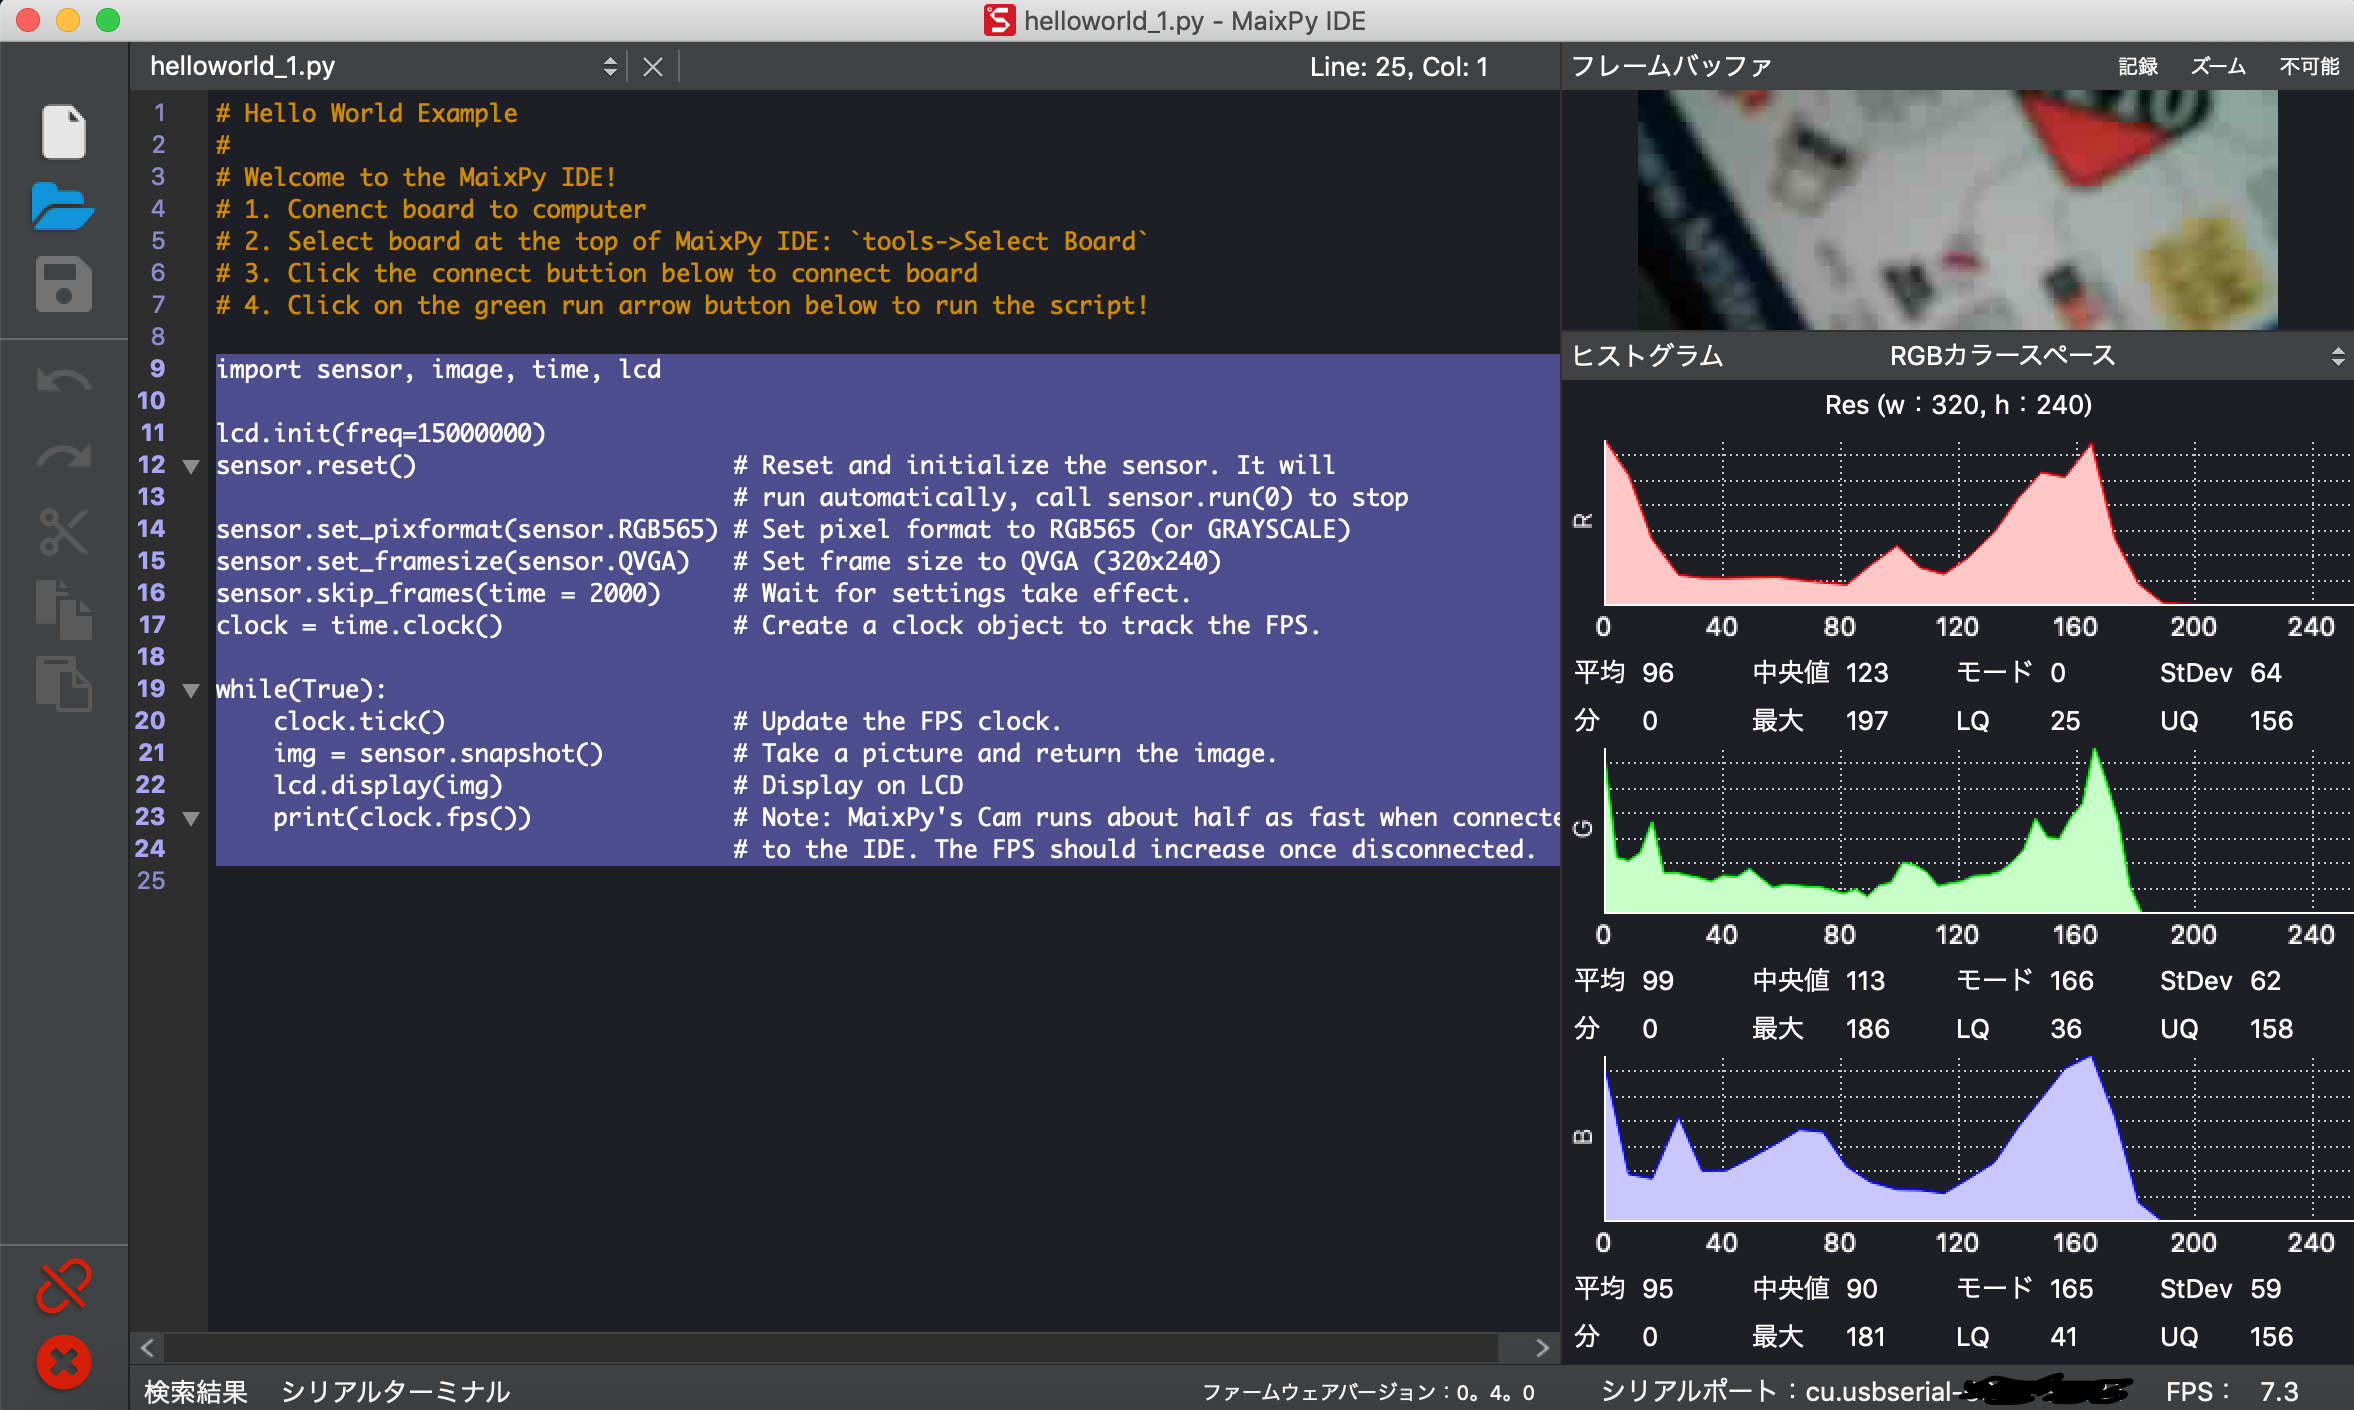
起動すると、helloworld_1.pyが読み込まれた状態で起動します。
- Conenct board to computer
- Select board at the top of MaixPy IDE:
tools->Select Board- Click the connect buttion below to connect board
- Click on the green run arrow button below to run the script!
とのことで、
- M5StickVを接続して、
- ツール→Select Boardから、M5StickVを選択しましょう。
- 次に、左下の接続っぽいアイコンを押して、/dev/cu.usbserialport-xxxxを選択しましょう。
- 左下の接続のアイコンの下にあるグリーンの実行アイコンを押せば、helloworld_1.pyが起動できます

こんな感じでカメラのヒストグラムが動けばOkです.
MaixPyをC SDKとして(not pythonとして)利用して、hello world
https://github.com/sipeed/MaixPy/blob/master/build.md
を参考にします。
toolchainのinstall
※ Kendryteの公式web siteのtoolchainだと動きません. github上のv8.2.0-20190409である必要があります。
https://github.com/kendryte/kendryte-gnu-toolchain/releases
の最新をご確認ください。
$ wget https://github.com/kendryte/kendryte-gnu-toolchain/releases/download/v8.2.0-20190409/kendryte-toolchain-osx-mojave-8.2.0-20190409.tar.bz2
$ sudo tar -Jxvf kendryte-toolchain-osx-mojave-8.2.0-20190409.tar.bz2 -C /opt
$ ls /opt/kendryte-toolchain/bin
riscv64-unknown-elf-addr2line		riscv64-unknown-elf-gcc-ar		riscv64-unknown-elf-ld.bfd
riscv64-unknown-elf-ar			riscv64-unknown-elf-gcc-nm		riscv64-unknown-elf-nm
riscv64-unknown-elf-as			riscv64-unknown-elf-gcc-ranlib		riscv64-unknown-elf-objcopy
riscv64-unknown-elf-c++			riscv64-unknown-elf-gcov		riscv64-unknown-elf-objdump
riscv64-unknown-elf-c++filt		riscv64-unknown-elf-gcov-dump		riscv64-unknown-elf-ranlib
riscv64-unknown-elf-cpp			riscv64-unknown-elf-gcov-tool		riscv64-unknown-elf-readelf
riscv64-unknown-elf-elfedit		riscv64-unknown-elf-gdb			riscv64-unknown-elf-size
riscv64-unknown-elf-g++			riscv64-unknown-elf-gdb-add-index	riscv64-unknown-elf-strings
riscv64-unknown-elf-gcc			riscv64-unknown-elf-gprof		riscv64-unknown-elf-strip
riscv64-unknown-elf-gcc-8.2.0		riscv64-unknown-elf-ld
ほか、
$ pip3 install -r requirements.txt
とか、brewでcmakeとかもし入っていなかったら入れておきましょう。
とりあえずMaixPyとしてbuildしてflashしてみる
いきなりMaixPyで、C SDKとしてhello worldする前に、git cloneしたMaixPyで、micro python runtimeとしてbuildできるかどうかを試してみます.
$ cd MaixPy/projects/maixpy_m5stickv
$ python3 project.py clean_conf
-- SDK_PATH:/Users/xxxx/work/m5v/MaixPy
maixpy
clean now
$ python3 project.py menuconfig
$ python3 project.py build
$ python3 project.py -B goE -p /dev/cu.usbserial-xxxx -b 1500000 flash
で、buildして焼けて、かつ、MaixPyIDEも含め動作しました。
なお、MaixPyのgitのHEADは以下でした.
commit 8eba07df7f60262e02e166038eff0d9fce2e4da6 (HEAD -> master, origin/master, origin/HEAD)
Author: Neucrack <CZD666666@gmail.com>
Date:   Wed Dec 25 18:54:18 2019 +0800

    lvgl png,update lcd color definition(GhRBGl)
お待ちかね Cで、M5StickVで、hello world
pythonもよいけど、やっぱり、全権を握るには、Cだよねということで、Cでhello worldします。
https://github.com/hidenorly/hello_world_m5stickv
に置きました。
- 2つのコアでにそれぞれtaskを作って、hello worldをprint
- lcdを初期化して、hello worldを表示
M5StickVでのCでのapplicationのbase framework
https://github.com/hidenorly/m5stickv_base
に置いていきます。
- gpio
- LED (with Software PWM)
- Debug UART
- LCD
- Sensor support (MPU6886 and SH200Q)
をサポートしています。
(続く)

