新規プロジェクト
まずはプロジェクトの作成をしていきます。
$ composer create-project laravel/laravel sampleproject --prefer-dist "6.0.*"
個人的に上記のコマンドでバージョンを指定してプロジェクトを作成します。
sampleprojectの箇所がプロジェクト名となります。
書き方は他にもいろいろあります。
# バージョン指定なし (最新版をインストール, 初期値でmysqlを利用する)
$ composer create-project --prefer-dist laravel/laravel プロジェクト名

# バージョン指定あり (初期値でmysqlを利用する)
$ composer create-project --prefer-dist "laravel/laravel=5.5.*" sampleproject

# 書き方はいろいろ
$ composer create-project laravel/laravel sampleproject --prefer-dist "6.0.*"
初期設定
続いては初期設定をしていきます。
時間や地域、言語などを日本にしていきましょう。
暗号化
php artisan key:generate
タイムゾーンを日本に変更
タイムゾーンの変更
'timezone' => 'UTC',
# UTCをAsia/Tokyoに変更
'timezone' => 'Asia/Tokyo',
言語を日本に変更
'locale' => 'en',
# enをjaに変更
'locale' => 'ja',
フェイカーもを日本語に設定
# before
'faker_locale' => 'en_US',

# after
'faker_locale' => 'ja_JP',
DBの文字設定
これに関しては変更しなくても大丈夫です。
'charset' => 'utf8mb4',
'collation' => 'utf8mb4_unicode_ci',

# mb4を消す(顔文字を不要)
'charset' => 'utf8',
'collation' => 'utf8_unicode_ci',
デバックバーのインストール
$ composer require barryvdh/laravel-debugbar
画面上に非表示にするために、.envファイルを変更する
APP_DEBUG=true
# falseに変更する
APP_DEBUG=false
これでも画面に残っている場合は、キャッシュを消す
php artisan cache:clear
php artisan config:clear
php artisan route:clear
php artisan view:clear
何かと反映しないときは、上記コマンドでキャッシュを削除して反映させるので、よく使います。
tinkerのインストール
tinkerは処理を確認する際に使います。デバックの一つの方法です。
$ composer require laravel/tinker
$ php artisan tinker
$ php artisan tinker


>>> Task::all();
DBの設定変更
.envファイルの下記のDB設定における、DATABASE名、USERNAM名、PWを設定していく
//アプリ名の変更
APP_NAME=Laravel


//DB情報を変更する
DB_CONNECTION=mysql
DB_HOST=127.0.0.1
DB_PORT=3306
DB_DATABASE=laravel
DB_USERNAME=laravel
DB_PASSWORD=
MAMPでDBの作成
MAMPでUSERを作成
作成した情報を記述する
DB_CONNECTION=mysql
DB_HOST=127.0.0.1
DB_PORT=3306 #MAMP上で設定されたlocalhostになる
DB_DATABASE=laravel_task
DB_USERNAME=laravel_user
DB_PASSWORD=password
接続できるか確認
$php artisan migrate
成功した場合は、無事にDBに接続できている。
MAMPのDBをSeaquel Proで確認する場合
ユーザー名:root
パスワード:root
データベース:
ソケット:/Applications/MAMP/tmp/mysql/mysql.sock
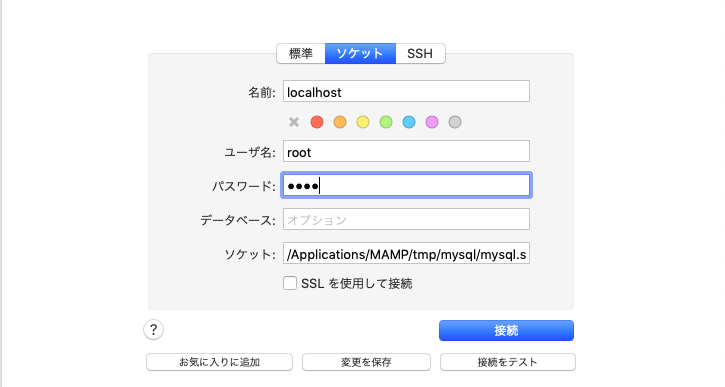
これで接続すれば、確認ができる
Laravel-ui認証
//laravel6の場合
$ composer require laravel/ui:^1.0 --dev
$ composer require laravel/ui "1.*"

//laravel7の場合
$ composer require laravel/ui:^2.4 --dev
$ composer require laravel/ui "2.*"
// 基本的なスカフォールドを生成
php artisan ui bootstrap
php artisan ui vue
php artisan ui react

// ログイン/ユーザー登録スカフォールドを生成
php artisan ui bootstrap --auth
php artisan ui vue --auth
php artisan ui react --auth
$ composer require laravel/ui
$ php artisan ui vue --auth
$ npm install bootstrap-vue bootstrap

import BootstrapVue from 'bootstrap-vue';
Vue.use(BootstrapVue);
$ npm install && npm run dev
$ npm run dev ・・開発用にビルド
$ npm run watch ・・常時ビルド
$ npm run prod ・・本番用にビルド
新規登録後の移行先を変更
# before homeを消す
protected $redirectTo = '/home';

# after
protected $redirectTo = '/';
ログイン後の移行先を変更
laravel6の場合
# before homeを消す
protected $redirectTo = '/home';

# after
protected $redirectTo = '/';
larvel6.8以降の場合
laravel6.8以降は、よりDRYになっている。
<?php
// 略
class RouteServiceProvider extends ServiceProvider
{
    // 略
    public const HOME = '/home';
ここでHOMEを定義することで、複数のAuth系のコントローラーで反映される。
<?php
// 略
class LoginController extends Controller
{
    // 略
    protected $redirectTo = RouteServiceProvider::HOME;
    // 略
}
エラーメッセージを日本語化
コマンドでやる場合
$ php -r "copy('https://readouble.com/laravel/6.0/ja/install-ja-lang-files.php', 'install-ja-lang.php');"
$ php -f install-ja-lang.php
$ php -r "unlink('install-ja-lang.php');"
下記リンクを開く
https://github.com/minoryorg/laravel-resources-lang-ja
ファイルをダウンロード
ダウンロードしたフォルダを開くと、jaというフォルダが存在する
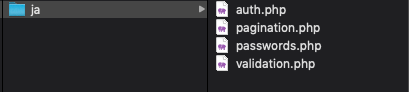
resources/langフォルダに、ダウンロードしたjaフォルダを追加
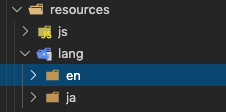
これで日本語されています
passwordなど英語表記のものを日本語にするには、
'attributes' => [],
//最下部のattributesにパスワードの項目を追加する

'attributes' => [
        'password'=>'パスワード'
    ],
ターミナルで開いておきたい
$ npm run development -- --watch
$ php artisan serve
$ 何かターミナルコマンド入力する際に利用する
特定の環境のwebpackでは、ファイル変更時に更新されないことがあります。自分のシステムでこれが起きた場合は、watch-pollコマンドを使用してください。
$ npm run watch-poll
font-awesomeをインストール
$ npm install --save-dev @fortawesome/fontawesome-free
MVCの操作
ここからMVCコントローラーの操作を進めていく
モデル
モデルの作成
# Post関連など全て作成する場合は、下記が一番便利(all)
$ php artisan make:model Models/Post -a
上記コマンドを実施すると、コンとローラー、マイグレーションファイル、seeder、factory、テストが生成される。どちらにせよこれらは利用するので、基本このコマンドを使うと良い。
補足として、他のコマンドを紹介しておきます。
# モデル単体を作成
$php artisan make:model Models/Test

# モデル、マイグレーションファイル、コントローラーを同時に作成
$ php artisan make:model Models/Test -mc

# コントローラーの作成(基本的なアクション含む)
php artisan make:controller PhotoController --resource
Models/Test Modelsフォルダの中で、Test.phpを作成
-mcはマイグレーションファイルとコントローラーを同時に作成するオプション
マイグレーション
マイグレーションファイルの作成
$php artisan make:migration create_tests_table

# 追加で作成
php artisan make:migration add_user_id_to_posts_table --table=posts
マイグレーションの記述
マニュアル
https://readouble.com/laravel/6.x/ja/migrations.html
マニュアルを参考に、カラム型、制限をかけて、カラム修飾子で詳細に設定する
MySQLの外部キー制約RESTRICT,CASCADE,SET NULL,NO ACTIONの違いは?
カラム
Schema::create('tweets', function (Blueprint $table) {
            $table->bigIncrements('id');
            $table->string('title', 200); #200文字制限
            $table->unsignedBigInteger('user_id');
            $table->foreign('user_id')->references('id')->on('users');
            $table->text('text');
            $table->timestamps();
        });
マイグレーションを実行
$ php artisan migrate
$php artisan migrate:status
$php artisan migrate:rollback --step=5
$fillable(ホワイトリスト)
カラム情報をcreateや更新などしてよいか許可する。これをしないとエラーが発生する。
<?php

namespace App\Models;

use Illuminate\Database\Eloquent\Model;

class post extends Model
{
    protected $fillable = [
        'title', 'body', 'user_id'
    ];

}
カラムの変更
「up」の中にはテーブル作成時の記述、「down」の中にはテーブル削除時の記述を書きます。
Schema::createではなく、Schema::tableを記述して変更する
準備
インストール
$ composer require doctrine/dbal
上記コマンドをしない場合は下記のエラーが表示される
[RuntimeException]
  Changing columns for table "books" requires Doctrine DBAL; install "doctrine/dbal".
変更用のマイグレーションファイルを作成
変更用のmigrationファイルを作成する。
$ php artisan make:migration change_books_table --table books
$ php artisan make:migration modify_users_table --table=users
カラム名の変更
renameColumnを利用する
public function up()
{
    Schema::table('users', function (Blueprint $table) {
        $table->renameColumn('from', 'to');
    });
}
カラム属性の変更
DBを削除して、再度マイグレーションするのも一つではあるが、この例ではあくまで既存のDBのカラム名を変更するやり方とする。
作成したファイルに変更内容を記述する。
->change();で変更する
public function up()
{
    Schema::table('books', function (Blueprint $table) {
        $table->datetime('published')->change();
    });
}
Schema::table('users', function (Blueprint $table) {
    $table->string('name', 50)->change();
});
カラムを削除
dropColumnを利用する
Schema::table('users', function (Blueprint $table) {
    $table->dropColumn('votes');
});
再度に更新させる
$ php artisan migrate
すべてのmigrationをリセットする
migrate:resetコマンドはアプリケーション全部のマイグレーションをロールバックします。
$ php artisan migrate:reset
これを実施後に既存のmigrationファイルを書き換えれば良い。
リレーション
1対多
外部キーがデフォルトの<テーブル名_id>の場合
namespace <ファイルのパス>
<?php

namespace App\Model;  //フォルダの階層

use Illuminate\Database\Eloquent\Model;

class Tweet extends Model
{
    public function user() #userとのリレーションを定義。belongs = 単数
    {
        return $this->belongsTo('App\User');
    }
    public function comments() #commentとのリレーションを定義。hasMany = 複数
    {
        return $this->hasMany('App\Model\Comment');
    }
}
上記ではModelを利用するために、namespace App\Model;とuse Illuminate\Database\Eloquent\Model;でモデルクラスを呼び出している。だから、class Tweet extends Modelとextendsで継承できる
<?php

namespace App;

use Illuminate\Contracts\Auth\MustVerifyEmail;
use Illuminate\Foundation\Auth\User as Authenticatable;
use Illuminate\Notifications\Notifiable;

class User extends Authenticatable
{
    public function tweets()
    {
        return $this->hasMany('App\Model\Tweet');
    }
    public function comments()
    {
        return $this->hasMany('App\Model\Comment');
    }

    use Notifiable;

    /**
     * The attributes that are mass assignable.
     *
     * @var array
     */
    protected $fillable = [
        'name', 'email', 'password',
    ];

    /**
     * The attributes that should be hidden for arrays.
     *
     * @var array
     */
    protected $hidden = [
        'password', 'remember_token',
    ];

    /**
     * The attributes that should be cast to native types.
     *
     * @var array
     */
    protected $casts = [
        'email_verified_at' => 'datetime',
    ];


}
外部キーの名前がデフォルトの<テーブル名_id>でない場合
foreign_keyは<テーブル名_id>でない場合(カスタムしている場合)
ポイントは、外部キーのカラム名を指定してあげること。
`hasMany('モデルの場所', '<テーブル名_id>でない場合は、外部キーの指定', '参照先テーブルのカラムがidでない場合、カラムを指定')
デフォルトだと、
-
user_idやtweet_idなどの<テーブル名_id>を外部キーとして参照する。 -
参照先テーブルのidを取得する
だから、デフォルトの外部キーとカラムが違う場合は、それぞれ指定する必要がある。
所得先が"id"の場合は、local_idを省略
return $this->hasMany('App\Comment', 'foreign_key');
公式情報のforeign_keyの箇所に指定の外部キーを記述する。
return $this->hasMany('App\User', 'buyer_id');
return $this->hasMany('App\User', 'seller_id');
上記の例のように、指定の外部キーを記述する。
具体的に見てみましょう
<?php

namespace App\Model;

use Illuminate\Database\Eloquent\Model;

class Product extends Model
{
    public function seller()
    {
        return $this->belongsTo('App\User', 'seller_id'); //seller_idと一致するUserを取得する
    }
}
class User extends Authenticatable
{
    public function sell_products()
    {
        return $this->hasMany('App\Model\Product', 'seller_id'); //productの中でseller_idがこのUserのidと一致するものを取得する
    }
}
所得先が"id"でない場合は、local_idを指定
ようするに、デフォルトの"id"を参照しないので、どのカラムを指定するのかオプションで指定する。
return $this->hasMany('App\Comment', '外部キーのカラム名', 'カラム名');
上記を指定すればよい。
あまり使うことはないと思うが、簡単に例を出す。
return $this->hasMany('App\Product', 'seller_id', 'id');
デフォルトだとidを参照する。しかしidではなく、product_numberを取得するとしたら、
return $this->hasMany('App\Product', 'seller_id', 'product_number');
上記のように記述する。
多対多
belongsToManyを利用して、多対多を定義する。
基本
return $this->belongsToMany('紐付けるモデル', '中間テーブル', '中間テーブルのこのモデル_id', '中間テーブルの紐付け先モデル_id');
第 1 引数では最終的な接続先モデル名を名前空間含めて指定する
第 2 引数では中間テーブル名を指定する
第 3 引数では接続元モデル ID を示す中間テーブル内のカラム名を指定する
第 4 引数では最終的な接続先モデル ID を示す中間テーブル内のカラム名を指定する
第 5 引数では接続元モデル ID のカラム名を指定する
第 6 引数では最終的な接続先モデル ID のカラム名を指定する
<?php

namespace App;

use Illuminate\Database\Eloquent\Model;

class User extends Model
{
    /**
     * userに所属する役目を取得
     */
    public function roles()
    {
        return $this->belongsToMany('App\Role', 'role_user', 'user_id', 'role_id');
    }
}
マイグレーション
他の例*
- productモデル(リレーションの定義:必須)
- product_tagモデル(中間テーブル、リレーションの定義:不要)
- tagモデル(リレーションの定義;必須)
上記のモデルがあるとする。
それぞれのマイグレーションファイルを記述する
多となるProductのマイグレーションファイル
<?php

use Illuminate\Database\Migrations\Migration;
use Illuminate\Database\Schema\Blueprint;
use Illuminate\Support\Facades\Schema;

class CreateProductsTable extends Migration
{
    /**
     * Run the migrations.
     *
     * @return void
     */
    public function up()
    {
        Schema::create('products', function (Blueprint $table) {
            $table->bigIncrements('id');
            $table->string('title');
            $table->text('text');
            $table->unsignedBigInteger('user_id');
            $table->foreign('user_id')->references('id')->on('users');
            $table->timestamps();
        });
    }
もう一方の多となるTag
<?php

use Illuminate\Database\Migrations\Migration;
use Illuminate\Database\Schema\Blueprint;
use Illuminate\Support\Facades\Schema;

class CreateTabsTable extends Migration
{
    /**
     * Run the migrations.
     *
     * @return void
     */
    public function up()
    {
        Schema::create('Tabs', function (Blueprint $table) {
            $table->bigIncrements('id');
            $table->string('name');
            $table->timestamps();
        });
    }
ProductとTagを紐づける、中間テーブルproduct_tag
これに関しては外部キーで紐付けてあげればよい。
<?php

use Illuminate\Database\Migrations\Migration;
use Illuminate\Database\Schema\Blueprint;
use Illuminate\Support\Facades\Schema;

class CreateProductsTable extends Migration
{
    /**
     * Run the migrations.
     *
     * @return void
     */
    public function up()
    {
        Schema::create('products', function (Blueprint $table) {
            $table->bigIncrements('id');
            $table->unsignedBigInteger('product_id');
            $table->foreign('product_id')->references('id')->on('products');
            $table->unsignedBigInteger('tag_id');
            $table->foreign('tag_id')->references('id')->on('tags');
            $table->timestamps();
        });
    }
エラー
####### SQLSTATE[HY000]: General error: 1215 Cannot add foreign key constraint
結論: 外部キーをもつモデルを先に削除しなさい
下記の例は、postの外部キーをもつcommentのmigrationファイルです。
この場合、postより先にcommentモデルを削除する必要がある。
なので、そのように設定する。
<?php

use Illuminate\Database\Migrations\Migration;
use Illuminate\Database\Schema\Blueprint;
use Illuminate\Support\Facades\Schema;

class CreatePostTagsTable extends Migration
{
    /**
     * Run the migrations.
     *
     * @return void
     */
    public function up()
    {
        Schema::create('post_tags', function (Blueprint $table) {
            $table->increments('id');
            $table->unsignedInteger('tag_id');
            $table->unsignedInteger('post_id');
            $table->foreign('tag_id')->references('id')->on('tags')->onDelete('cascade');
            $table->foreign('post_id')->references('id')->on('posts')->onDelete('cascade');
            $table->timestamps();
        });
    }

    /**
     * Reverse the migrations.
     *
     * @return void
     */
    public function down()
    {
        Schema::dropIfExists('post_tags');
        Schema::dropIfExists('posts'); //下に親モデル
        Schema::dropIfExists('tags');  //下に親モデル
    }
}
焦点をあててみると、
    public function down()
    {
        Schema::dropIfExists('post_tags');
        Schema::dropIfExists('posts'); //下に親モデル ここ
        Schema::dropIfExists('tags');  //下に親モデル ここ
    }
外部キーの親モデルを下に書けばよい。
同様に親モデル側のmigrationにも書いていきます。
<?php

use Illuminate\Database\Migrations\Migration;
use Illuminate\Database\Schema\Blueprint;
use Illuminate\Support\Facades\Schema;

class CreatePostsTable extends Migration
{
    /**
     * Run the migrations.
     *
     * @return void
     */
    public function up()
    {
        Schema::create('posts', function (Blueprint $table) {
            $table->increments('id');
            $table->string('title', 50);
            $table->text('body');
            $table->timestamps();
        });
    }

    /**
     * Reverse the migrations.
     *
     * @return void
     */
    public function down()
    {
        Schema::dropIfExists('post_tags');
        Schema::dropIfExists('posts');
    }
}
<?php

use Illuminate\Database\Migrations\Migration;
use Illuminate\Database\Schema\Blueprint;
use Illuminate\Support\Facades\Schema;

class CreateTagsTable extends Migration
{
    /**
     * Run the migrations.
     *
     * @return void
     */
    public function up()
    {
        Schema::create('tags', function (Blueprint $table) {
            $table->increments('id');
            $table->timestamps();
            $table->string('name');
        });
    }

    /**
     * Reverse the migrations.
     *
     * @return void
     */
    public function down()
    {
        Schema::dropIfExists('post_tags');
        Schema::dropIfExists('tags');
    }
}
####### SQLSTATE[42S01]: Base table or view already exists: 1050 Table 'posts' already exists
このエラーが発生した場合は、一度リセットしなおせば良い。
$php artisan migrate:refresh
これで改善します。
あとは、リレーションを記述する。
リレーションの記述
productとtagのリレーションだけ記述すればいいので、難しくない。
<?php

namespace App\Model;

use Illuminate\Database\Eloquent\Model;

class Product extends Model
{
    public function tags()
    {
        return $this->belongsToMany('App\Models\Tag', 'product_tag');
    }
}
<?php

namespace App\Model;

use Illuminate\Database\Eloquent\Model;

class Product extends Model
{
    public function products()
    {
        return $this->belongsToMany('App\Models\Product', 'product_tag');
    }
}
// 得に記述不要
これで多対多の完成です。
save,create
create
saveとsaveManyメソッドに加え、createメソッドも使用できます。属性の配列を引数に受け付け、モデルを作成しデータベースへ挿入します。saveとcreateの違いはsaveが完全なEloquentモデルを受け付けるのに対し、createは普通のPHPの「配列」を受け付ける点です。
$post = App\Post::find(1);

$comment = $post->comments()->create([
    'message' => 'A new comment.',
]);
外部キーを紐付けるとき
$post = Post::create($params);
$tag = Tag::firstOrCreate(['name' => $request->tags]);
$post->tags()->attach($tag);
createMany
$post = App\Post::find(1);

$post->comments()->createMany([
    [
        'message' => 'A new comment.',
    ],
    [
        'message' => 'Another new comment.',
    ],
]);
save
$post = App\Post::find(1);
$post->comments()->save($comment);
saveMany
複数の関連したモデルを保存する必要があるなら、saveManyメソッドを使用できます。
$post = App\Post::find(1);

//書き方1
$post->comments()->saveMany([
    new App\Comment(['message' => 'A new comment.']),
    new App\Comment(['message' => 'Another comment.']),
]);

//書き方2
$post->comments->saveMany([ $item1 , $item2 ]);

//書き方3
$post->comments()->saveMany($comments);
ルーティング
ファイルの場所
- web.php: 基本はここ
- api.php: APIのルーティングはこちら
書き方
GET
Route::get('url', 'コントローラー@アクション')->name('パスの名前');

Route::get('/posts/{post}', 'PostController@show')->name('posts.show');
POST
Route::post('/', 'HomeController@post');
resource
通常
Route::resource('photos', 'PhotoCommentController');
// [GET](/photos)           ->index
// [GET](/photos/{id})      ->show($id)
// [GET](/photos/create)    ->create
// [POST](/photos)          ->store
// [GET](/photos/{id})      ->edit($id)
// [PUT/PATCH](/photos/{id})->update($id)
// [DELETE](/photos/{id})   ->destroy($id)

Route::resource('photos', 'PhotoController');
only
Route::resource('photos', 'PhotoController', [
  'only' => ['index', 'show']
]);
Route::resource('posts', 'PostsController', ['only' => ['create', 'store']]);
except
Route::resource('photos', 'PhotoController', [
  'except' => ['index', 'show']
]);

Route::resource('tweets', 'TweetController', [ 'except' => ['index', 'show']]);
ネスト
Route::resource('photos.comments', 'PhotoCommentController');
//photos/{photoId}/comments/{commentId}
middleware(ミドルウェア)
# ログイン認証
Route::get('profile', function() {
    // 認証済みのユーザーのみが入れる
})->middleware('auth');

Route::get('/settings/security', function () {
    // ユーザーは続けるためにパスワードの入力が必要
})->middleware(['auth', 'password.confirm']);
# ユーザー認証あり
Route::group(['middleware' => 'auth'], function()
{
    Route::resource('tweets', 'TweetController', [ 'except' => ['index', 'show']]);
});
Route::middleware(['first', 'second'])->group(function () {
    Route::get('/', function () {
        // firstとsecondミドルウェアを使用
    });

    Route::get('user/profile', function () {
        // firstとsecondミドルウェアを使用
    });
});
マニュアル:
https://readouble.com/laravel/6.x/ja/controllers.html
Route::get('/', function () {
    //
})->middleware('auth');

// 1つのルートに対して複数のミドルウェアを指定する場合
Route::get('/', function () {
    //
})->middleware('auth', 'auth2');

// 複数のルートに対して1つのミドルウェアを指定する場合
Route::group(['middleware' => 'auth'], function () {
    //
});

// 複数のルートに対して複数のミドルウェアを指定する場合
Route::group(['middleware' => ['auth', 'auth2'], function () {
    //
});
TestController@indexでコントローラーを紐づけている。
ルーティング一覧の確認方法
//ターミナルで確認
$ php artisan route:list

//ファイルで確認
$ php artisan route:list > route.text
コントローラー
コントローラーの作成
$ php artisan make:controller TestController
コントローラーの記述
<?php

namespace App\Http\Controllers;

use Illuminate\Http\Request;
use App\Models\Test; #モデルとコントローラーを紐づける
use Illuminate\Support\Facades\DB; #この記述がないとクエリビルダはエラーになります

class TestController extends Controller
{
    //
    public function index() #railsの場合はdef indexだが、 laravelの場合はpublic function index()
    {
        $values = Test::all(); #モデルを介して、DBから情報を取得
        dd($values); #railsのbinding.pryのように取得した内容を確認できる。
        return view('tests.index', compact('values')); #ここでどのviewなのか指定して紐づける
        #つまり、最後にどのviewにどの値を持っていくか指定する。

        #user認証をコントローラーで作成する場合
        if (Auth::check()) {
            return view('test/menu');
        } else {
            // ログインしていなかったら、Login画面を表示
            return view('auth/login');
        }
    }
}
エラー
Notice: Undefined index
nullの値が混じっているとエラーになるので、対策をとる必要がある。
index
create
store
    public function store(Request $request)
    {

        //newでsaveする方法
        $tweet = new Tweet;
        $tweet->title = $request->input('title');
        $tweet->text = $request->input('text');
        $tweet->user_id = $user->id;
        $tweet->save();

        //::createでいきなり保存する方法
        $task = Task::create($request->all());

        //validateしたあとに保存する方法
        $params = $request->validate([
                'title' => 'required|max:255',
                'body' => 'required|string',
            ]);

        $post = Post::create($params);


    }
エラー
$fillableでホワイトリスト指定する
これをしておかないとエラーが発生する。
Add [name] to fillable property to allow mass assignment on
<?php

namespace App\Models;

use Illuminate\Database\Eloquent\Model;

class Post extends Model
{
    protected $fillable = [
        'title',
        'body',
    ];

    public function comments()
    {
        return $this->hasMany('App\Models\Comment');
    }
}
show
edit
update
    public function update(Request $request, post $post)
    {
    $params = $request->validate([
        'title' => 'required|max:255',
        'body' => 'required|string',
    ]);
    $post->fill($params)->save();

    $task->update($request->all());

    }
App\Flight::where('id', 1)
          ->update(['name' => $request->name]);
$flight = App\Flight::find(1)
$flight->name = $request->name;
$flight->save();
destroy
クエリビルダ
# use Illuminate\Support\Facades\DB;の記述がないとエラーになります

public function index()
    {
        $users = DB::table('users')
                ->where('votes', '>=', 100)
                ->get();

        $users = DB::table('users')
                ->where('votes', '<>', 100)
                ->get();

        $users = DB::table('users')
                ->where('name', 'like', 'T%')
                ->get();
        $users = DB::table('users')->where([
                    ['status', '=', '1'],
                    ['subscribed', '<>', '1'],
                 ])->get();

        return view('user.index', compact('users');

    }
N+1問題
::with(['comments']のようにして、リレーションを引っ張る
//一つの場合
public function index()
{
    $users = User::with('posts')->limit(5)->get();
    return view('user.index')->with('users', $users);
}

//複数の場合は[]でまとめる
public function index()
    {
        $posts = Post::with(['comments'])->orderBy('created_at', 'desc')->paginate(20);

        return view('posts.index', ['posts' => $posts]);
    }
public function index()
{
    $users = User::with('posts.comments')->limit(5)->get();
    return view('user.index')->with('users', $users);
}
select * from users limit 5
select * from posts where posts.user_id in (1, 2, 3, 4, 5)
select * from comments where comments.post_id in (10, 20, 30, 40, 50)
User::with('departmento')->find(Auth::id());
where
    public function index(Request $request)
    {
        //
        $last_comment_id = $request->id;
        $comment = Comment::find($last_comment_id);
        // $comments = Comment::Where([
        //                             ['tweet_id', '=', $comment->tweet->id],
        //                             ['created_at', '>', $comment->created_at],
        //                         ])->orderBy('created_at', 'asc')->get();
        $comments = Comment::With(['user'])->where([
                                                    ['tweet_id', '=', $comment->tweet->id],
                                                    ['created_at', '>', $comment->created_at],
                                                    ])->orderBy('created_at', 'asc')->get()->toJson();
        return $comments;
    }
バリデーション
- 方法①:コントローラー上にリクエストをvalidationする
- 方法②:
FormRequestにvalidationを追加して、それをリクエストして利用する。
方法1:コントローラー上でバリデーションする
$request->validate()を使ってvalidationする。
public function store(Request $request)
{
    $validatedData = $request->validate([
        'title' => 'required|unique:posts|max:255',
        'body' => 'required',
    ]);

    // ブログポストは有効
}
方法2:バリデーションを記述するファイルを作成
# モデル名だけだと、コントローラーでモデルファイルとバリデーションファイルで競合になるので注意
php artisan make:request StoreTweet
public function authorize()
    {
        #before
        return false;

        #after
        return true;
    }

public function rules()
    {
        return [
            // #バリデーションのルールを記述する
            'カラム名' => 'ルール1|ルール2|ルール3',
            'title' => 'required|string|max:45',
            'text' => 'required|string|max:400',
        ];
    }
<?php

namespace App\Http\Requests;

use Illuminate\Foundation\Http\FormRequest;

class StoreTweet extends FormRequest
{
    /**
     * Determine if the user is authorized to make this request.
     *
     * @return bool
     */
    public function authorize()
    {
        return true;
    }

    /**
     * Get the validation rules that apply to the request.
     *
     * @return array
     */
    public function rules()
    {
        return [
            //
            'title' => 'required|string|max:45',
            'text' => 'required|string|max:400',
        ];
    }
}
作成したバリデーションをコントローラーで読み込みさせる
use App\HTTP\Requests\StoreTweet; #バリデーションのファイルを読み込みさせる

class TweetController extends Controller
{
    #before: Request
    public function store(Request $request)

    #before: RequestをStoreTweetに変更 > バリデーションルールが適用
    public function store(StoreTweet $request)
    {
        //
        $user = Auth::user();
        $tweet = new Tweet;
        $tweet->title = $request->input('title');
        $tweet->text = $request->input('text');
        $tweet->user_id = $user->id;
        $tweet->save();
        return redirect(route('tweets.index'));

    }
エラーメッセージをviewに表示
@if ($errors->any())
    <div class="alert alert-danger">
        <ul>
            @foreach ($errors->all() as $error)
                <li>{{ $error }}</li>
            @endforeach
        </ul>
    </div>
@endif
@error('title')
    <div class="alert alert-danger">{{ $message }}</div>
@enderror
エラーメッセージの編集
# 型
'ルール'             => ':カラム名は〜です。',

# before
'required'             => ':attributeは必須です。',

# after
'required'             => ':attributeを入力してください。',
ダミーデータ(seeder)
[マニュアルはこちら](https://readouble.com/laravel/6.x/ja/seeding.html)
$ php artisan make:seeder PhotoTableSeeder
シーダクラスを書き上げたら、Composerのオートローダを再生成するために、dump-autoloadコマンドを実行する必要があります。
流れ
まず、seederのファイルを作成して記述します(後述)。
その後に、次のコマンドを実行します。
$ composer dump-autoload
これで準備ができたので、seederを実行します
$php artisan db:seed
特定のseederのみを実行させたい場合
$ php artisan db:seed --class=UsersTableSeeder
FactoryとSeederの作成
1対多
UserのFactory
<?php

/** @var \Illuminate\Database\Eloquent\Factory $factory */
use App\User;
use Faker\Generator as Faker;
use Illuminate\Support\Str;

/*
|--------------------------------------------------------------------------
| Model Factories
|--------------------------------------------------------------------------
|
| This directory should contain each of the model factory definitions for
| your application. Factories provide a convenient way to generate new
| model instances for testing / seeding your application's database.
|
*/

$factory->define(User::class, function (Faker $faker) {
    return [
        'name' => $faker->name,
        'email' => $faker->unique()->safeEmail,
        'email_verified_at' => now(),
        'password' => '$2y$10$92IXUNpkjO0rOQ5byMi.Ye4oKoEa3Ro9llC/.og/at2.uheWG/igi', // password
        'remember_token' => Str::random(10),
    ];
});
1対多の子要素のFactory
<?php

/** @var \Illuminate\Database\Eloquent\Factory $factory */

use App\Models\Post;
use App\Models\Tag;
use Faker\Generator as Faker;

$factory->define(Post::class, function (Faker $faker) {
    //親要素のUserを取得
    $userIDs  = App\User::pluck('id')->all();
    return [
        'title'     => $faker->realText(30),
        'body'      => $faker->realText(),
        //外部キーに親要素のUserをセット(ランダム)
        'user_id'   => $faker->randomElement($userIDs),
    ];
});
<?php

/** @var \Illuminate\Database\Eloquent\Factory $factory */

use App\Models\like;
use Faker\Generator as Faker;

$factory->define(like::class, function (Faker $faker) {
    $postIDs  = App\Models\Post::pluck('id')->all();
    $userIDs  = App\User::pluck('id')->all();
    return [
        'post_id' => $faker->randomElement($postIDs),
        'user_id' => $faker->randomElement($userIDs),
    ];
});
Seederの記述
<?php

use Illuminate\Database\Seeder;
use App\User;

class UserSeeder extends Seeder
{
    /**
     * Run the database seeds.
     *
     * @return void
     */
    public function run()
    {
        App\User::create([
            'name' => "test",
            'email' => "test@test",
            'email_verified_at' => now(),
            'password' => bcrypt("test1234"),
            'remember_token' => "test12345"
        ]);
        factory(User::class, 100)->create();
    }
}
1つのダミーデータを作成する
php artisan make:seeder UsersTableSeeder
seederのファイルを記述
1つのデータのみ作成する場合
<?php

use Illuminate\Database\Seeder;
use Illuminate\Support\Facades\DB;
use Illuminate\Support\Facades\Hash;
use Illuminate\Support\Str;

class DatabaseSeeder extends Seeder
{
    /**
     * データベース初期値設定の実行
     *
     * @return void
     */
    public function run()
    {
        DB::table('users')->insert([
            'name' => Str::random(10),
            'email' => Str::random(10).'@gmail.com',
            'password' => Hash::make('password'),
        ]);
    }
}
<?php

use Illuminate\Database\Seeder;

class TaskSeeder extends Seeder
{
    /**
     * Run the database seeds.
     *
     * @return void
     */
    public function run()
    {
        for ($i = 1; $i <= 10; $i++) {
            Task::create([
                'title' => 'title' . $i,
                'content' => 'content' . $i,
                'person_in_charge' => 'person_in_charge' . $i,
            ]);
        }
    }
}
seeder実行時に作成されるモデルを追加
<?php

use Illuminate\Database\Seeder;

class DatabaseSeeder extends Seeder
{
    /**
     * Seed the application's database.
     *
     * @return void
     */
    public function run()
    {
        $this->call(UsersTableSeeder::class);
        $this->call(TweetSeeder::class); #追加
    }
}
composer dump-autoload
# すべてのseedを実行する場合
php artisan db:seed

# 特定のファイルのみ実行する場合
php artisan db:seed --class=UsersTableSeeder

# 一度DBをリセットする場合
php artisan migrate:fresh --seed
ファクトリーで多数のダミーデータを作成する
参考になる資料:
[PHP] Fakerでランダムなフェイクデータを作成する
ファクトリの生成
# モデル指定(モデル作成時にオプション-aを利用している場合、すでに作成されます)
php artisan make:factory TweetFactory --model=Tweet


# モデル指定なし
php artisan make:factory TweetFactory
フェイカーもを日本語に設定
# before
'faker_locale' => 'en_US',

# after
'faker_locale' => 'ja_US',
作成したファクトリーを記述
use Faker\Generator as Faker;
use Illuminate\Support\Str;

$factory->define(App\User::class, function (Faker $faker) {
    #外部キーが必要な場合、user->idをpluckで取得する
    $userIDs  = App\User::pluck('id')->all();

    return [
        'name' => $faker->name,
        'email' => $faker->unique()->safeEmail,
        'email_verified_at' => now(),
        'password' => '$2y$10$92IXUNpkjO0rOQ5byMi.Ye4oKoEa3Ro9llC/.og/at2.uheWG/igi', // password
        'remember_token' => Str::random(10),
        'title' => $faker->realText(30),
        #日本語の文章はrealText
        'text' => $faker->realText(200),
        #外部キーを挿入
        'user_id' => $faker->randomElement($userIDs),
    ];
});
Fakerの例
| country | 国名 |
|---|---|
| prefecture | 都道府県 |
| city | 市 |
| ward | 区 |
| streetAddress | 町以下 |
| postcode | 郵便番号 |
| secondaryAddress | マンション名 |
| company | 会社名 |
| userName | ユーザ名 |
| domainName | ドメイン名 |
| メールアドレス | |
| name | 名前(姓 + 名) |
| lastName | 姓 |
| firstName | 名 |
| firstNameMale | 名(男性) |
| firstNameFeMale | 名(女性) |
| kanaName | 名前カナ |
| lastKanaName | 姓カナ |
| firstKanaName | 名カナ |
| firstKanaNameMale | 名カナ(男性) |
| firstKanaNameFemale | 名カナ(女性) |
| phoneNumber | 電話番号 |
| realText | 日本語文章 |
ファクトリーの記述をseedファイルに使用する
<?php

use Illuminate\Database\Seeder;
use Illuminate\Support\Str;
use Illuminate\Support\Facades\DB;
use App\Model\Tweet;

class TweetSeeder extends Seeder
{
    /**
     * Run the database seeds.
     *
     * @return void
     */

# before
    public function run()
    {
        //

        DB::table('tweets')->insert([
            'title' => Str::random(10),
            'text' => Str::random(20),
            'user_id' => 1
        ]);
    }
# after
    public function run()
    {
        //
        #ファクトリーでTweetモデルを200個作成する
        factory(Tweet::class, 200)->create();

    }
}
seeder実行時に作成されるモデルを追加
<?php

use Illuminate\Database\Seeder;

class DatabaseSeeder extends Seeder
{
    /**
     * Seed the application's database.
     *
     * @return void
     */
    public function run()
    {
        $this->call(UsersTableSeeder::class);
        $this->call(TweetSeeder::class); #追加することでseederが実行される
    }
}
実行する
composer dump-autoload
# すべてのseedを実行する場合
php artisan db:seed

# 特定のファイルのみ実行する場合
php artisan db:seed --class=UsersTableSeeder

# 一度DBをリセットする場合
php artisan migrate:fresh --seed
View
基本的な考え方
- app.blade.phpなどの土台となるhtmlを用意する。
- その中に、コンテンツを入れたい場所に@yieldを記述する。
- 他のbladeファイルは、@extendsで土台となるapp.blade.phpを呼び出す。
- 呼び出したら、
@yieldの部分を@sectionで記述する - 部分テンプレートが必要な場合は、
@includeで呼び出す。
基本的な考え方2
viewファイルの指定は、
layouts.appのように.で指定する。
.で指定するのは、viewであったり、web.phpのnameなどです。
基本的な考え方3(変数)
コントローラーで変数を定義
$test_1 = 1;
$test_2 = 2;

return view('posts.index', compact('test','test_2');
コントローラーから渡された変数は{{}}で使用する。
<div>
  {{ $test_1 }}
</div>
@yield
指定した@sectionの内容を表示する。
つまり、@sectionの内容を埋め込みたい場所
@yield('content')
@section('content','これが表示されます')
@section('content')
 こんな書き方もあります
@endsection()
@sectionの使い方
基本
-
@yieldの場所に@section~@endsectionで記述を追加する -
@yieldをなしでも、@section〜@showで表示可能。また,@sectionで上書きをしたり、@section~@parent~@endsectionで@showの内容を残しつつ、さらに記述を追加できる。
//1 @endsection使わない場合
@section('title', 'アプリ名')

//1で変数を渡す場合
@section('title', $post->title)

//2 @endsectionを使う場合
@section('content')
<a></a>
@endsection
つまり、
yieldを指定して、endsectionを使って書くか、そうでないかのやり方が基本となる。
@includeは部分テンプレート
//呼び出すだけ
@include('layouts.header')

//変数を渡して呼び出す
@include('layouts.header', ['テンプレート内の変数' => 渡す値])
headerを別ファイルにまとめて、土台となるapp.blade.phpに読み込ませる
    <body>
        <div class="flex-center position-ref full-height">
          @include('layouts.header') # views/layouts.header.blade.phpを読み込む
        </div>
    </body>
変数を渡す場合
<body>
  <h1>All the items:</h1>
  @foreach ($items as $foo)
    @include('partials.item-display', ['item' => $foo])
  @endforeach
</body>
<div>
    Name: {{ $item->name }}<br>
    Description: {{{ $item->description }}}
</div>
extendsしたテンプレートへ挿入したいsectionはどこに書いても良い
extends宣言の前でも後でも良い
includeしたテンプレートへ挿入したいsectionは、includeするよりも先にsectionを書かないといけない
sectionの記述後にincludeしないといけない
エラーが起こるケース
@include('my-partial-name', [
    'value1' => 'abc',
    'value2' => $some_var,
    'value3' => date('Y-m-d'),
])
<html>
    <head>
        <title>アプリ名 - @yield('title')</title>
    </head>
    <body>
        @section('sidebar')
            ここがメインのサイドバー
        @show

        <div class="container">
            @yield('content')
        </div>
    </body>
</html>
layoutsを土台にして、index.blade.phpを作成する
<!-- resources/views/child.blade.phpとして保存 -->

@extends('layouts.app') # layoutsフォルダの中にある、app.blade.phpを読み込む

@section('title', 'Page Title') # @yield('title')の中身をPage Titleにする

@section('sidebar')
    @parent

    <p>ここはメインのサイドバーに追加される</p>
@endsection

@section('content')
    <p>ここが本文のコンテンツ</p>
@endsection
実際に表示されるのは下記になる
ここがメインのサイドバー
ここはメインのサイドバーに追加される
ここが本文のコンテンツ
土台となるapp.blade.phpを作成
[マニュアルはこちら]
(https://readouble.com/laravel/6.x/ja/blade.html)
viewsの中にlayoutsフォルダを作成し、その中にapp.blade.phpを作成する
{{}}XSS攻撃を防ぐ
メソッド
ループ処理
@foreachは全部に適応 => エラーが出たりする
@forelseは空欄の時も設定できる => エラーが出ないようにカスタムしやすい
@for ($i = 0; $i < 10; $i++)
    現在の値は: {{ $i }}
@endfor

@foreach ($users as $user)
    <p>これは {{ $user->id }} ユーザーです。</p>
@endforeach

@forelse ($users as $user)
    <li>{{ $user->name }}</li>
@empty
    <p>ユーザーなし</p>
@endforelse

@while (true)
    <p>無限ループ中</p>
@endwhile
brake処理
@continueで続行、@breakで終了
@foreach ($users as $user)
    @if ($user->type == 1)
        @continue
    @endif

    <li>{{ $user->name }}</li>

    @if ($user->number == 5)
        @break
    @endif
@endforeach
くは、ディレクティブに条件を記述して、一行で済ますこともできます。
@foreach ($users as $user)
    @continue($user->type == 1)

    <li>{{ $user->name }}</li>

    @break($user->number == 5)
@endforeach
ログイン判定
マニュアル
https://readouble.com/laravel/6.x/ja/blade.html
@auth
    // ユーザーは認証済み
@else
    //
@endauth

@guest
    // ユーザーは認証されていない
@endguest
aタグにrouteのリンクを埋め込む
routeのnameを記述することで、リンク先のURLを簡単に指定できる
<a href={{ route('contacts.index') }}
フラッシュメッセージ
補足情報
ページネーション
->paginate(表示件数)をつけるだけ
public function index()
    {
        #before
        $users = DB::table('users')->get();

        #after(getをpaginateに変更)
        $users = DB::table('users')->paginate(15);

        return view('user.index', ['users' => $users]);
    }
viewにページネーションを表示
{{ $users->links() }}
-> と =>の違い
->…オブジェクトのプロパティやメソッドを参照する場合に使う
=>…連想配列のキーと値を区切る場合に使う
=> ダブルアロー演算子
定義する際に利用する
配列のキーととバリューを定義する際に利用する。
キー => バリュー
# シンボル型
[name: '田中', age: 19]

# ロケットハッシュ
[name => '田中', age => 19]

# laravelはシンボル型がない。
-> アロー演算子
表示する際に利用する
モデルのカラムを取り出したりする際に利用する。
左から右に取り出す
$user->name #名前を表示
$user->age #年齢を表示
テスト
わかりやすいサイト
参考にしようと思う記事
ログインのテスト
noteで参考になる記事
Laravelでテストコードを書くためのチュートリアル
テストファイルの作成
Featureテスト
実際の通信を伴う機能テスト
php artisan make:test [テストケースクラス名]

php artisan make:test PostTest
Unitテスト
PHPクラス単位の単体テスト
php artisan make:test [テストケースクラス名] --unit

php artisan make:test PostTest --unit
テストファイルの編集
注意: public function test~のようにtestが先頭にないと実行されない。
<?php

namespace Tests\Feature;

use Illuminate\Foundation\Testing\RefreshDatabase;
use Tests\TestCase;

class ExampleTest extends TestCase
{
    /**
     * @return void
     */
    public function testBasicTest()
    {
        $response = $this->get('/');
        $response->assertStatus(200);
    }
}
実例
<?php

namespace Tests\Unit;

// use PHPUnit\Framework\TestCase;
use Tests\TestCase;
use App\Models\Task;

class TaskTest extends TestCase
{
    /**
     * A basic unit test example.
     *
     * @return void
     * @test
     */
    public function testExample()
    {
        // $this->assertTrue(true);
        $response = $this->get('/tasks');
        $response->assertStatus(200);
    }

    public function testHttpIndex()
    {
        $response = $this->get('/tasks');
        $response->assertStatus(200);
    }

    public function testHttpCreate()
    {
        $response = $this->get('/tasks/create');
        $response->assertStatus(200);
    }

    public function testHttpShow()
    {
        $response = $this->get('/tasks/1');
        $response->assertStatus(200);
    }

    public function testHttpEdit()
    {
        $response = $this->get('/tasks/1/edit');
        $response->assertStatus(200);
    }

    public function testInsert_success()
    {
        $tasks = factory(Task::class, 3)->create();
        $count = count($tasks);
        $this->assertEquals(3, $count);
    }
}
実行すると
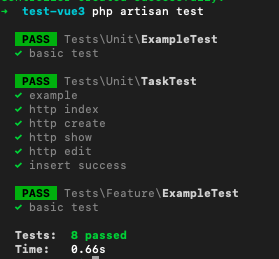
実行方法
$ php artisan test
または
$ vendor/bin/phpunit
デバック
eval(\Psy\sh());
dd()
js
jsを使えるようにする
jsファイルを作成
# ここに記述をする
jsファイルを読み込みさせる
require('./bootstrap');
require('./flashmessage');
require('./sample'); //requireで読み込みさせる
const mix = require('laravel-mix');


mix.js([
        'resources/js/app.js',
        'resources/js/scroll.js',
        'resources/js/sample.js',
        'resources/js/comments.js',
    ], 'public/js')
    .sass('resources/sass/app.scss', 'public/css');
npm run dev
個別に読み込ませるなど
<link href="{{ mix('css/app.css') }}" rel="stylesheet" type="text/css">
app.cssはscssなどをコンパイルしたもので、scssも問題なく利用できます。
@section('js')
<script src="{{ mix('js/app.js') }}"></script>
@show
非同期通信(AJAX)
参考$.ajaxSetup({
headers: {
'X-CSRF-TOKEN': $('meta[name="csrf-token"]').attr('content')
}
});
public function getData()
{
    $comments = Comment::orderBy('created_at', 'desc')->get();
    $json = ["comments" => $comments];
    return response()->json($json);
}
return response()->json($json);
ajaxを使って、jsonを取得する
ajaxを使えるようにするために、app.blade.phpのheadの部分でスクリプトを読み込む。
<script src="{{ asset('js/app.js') }}" defer></script>
<script src="https://ajax.googleapis.com/ajax/libs/jquery/3.2.1/jquery.min.js"></script>
$.ajax({
    url: "result/ajax/",
    dataType: "json",
    success: data => {
      // 成功時の処理
    },
    error: () => {
      // エラー時の処理
    }
})
AJAXリクエストとバリデーション
この例ではアプリケーションにデータを送るために伝統的なフォームを使いました。しかし、多くのアプリケーションでAJAXリクエストが使用されています。AJAXリクエストにvalidateメソッドを使う場合、Laravelはリダイレクトレスポンスを生成しません。代わりにバリデーションエラーを全部含んだJSONレスポンスを生成します。このJSONレスポンスは422 HTTPステータスコードで送られます。
さらに追加でPOSTパラメーターとしてCSRFトークンを確認したい場合は、LaravelのVerifyCsrfTokenミドルウェアがX-CSRF-TOKENリクエストヘッダもチェックします。たとえば、HTML中のmetaタグにトークンを保存します。
<meta name="csrf-token" content="{{ csrf_token() }}">
metaタグを作成したら、jQueryのようなライブラリーで、全リクエストヘッダにトークンを追加できます。この手法によりAJAXベースのアプリケーションにシンプルで便利なCSRF保護を提供できます。
$.ajaxSetup({
    headers: {
        'X-CSRF-TOKEN': $('meta[name="csrf-token"]').attr('content')
    }
});
jsonにリレーションのモデルを付与する
パッケージ(ライブラリ)を入れる
追加方法
パッケージを後追いで追加する場合、
composer require {パッケージ名} で行います。
パッケージ名が hoge/huga の場合
$ ~/composer/composer.phar require hoge/huge
この場合は当該パッケージのみを入れ込み、またcomposer.jsonにも追記してくれます。
なお、hoge/hugeにあたるパッケージ名の一覧は
Packagistから探す。
バージョン指定してパッケージを後追いで追加したい
古いバージョンのモジュールを使う必要がある、というような場合にはバージョン指定で入れる。
composer require {パッケージ名}:{バージョン番号} で行います。
下記はhoge/hugaの2.6.30のバージョンを入れたい場合の例。
$ ~/composer/composer.phar require hoge/huge:2.6.30
バージョン番号もPackageistにあるのでそこを参考に。
# パッケージを追加
$ composer require [vendor/package]
# 実例
$ composer require goodby/csv
# バージョン指定してパッケージを追加
$ composer require goodby/csv:1.2.0

# 削除
$ composer remove [vendor/package]

# 「開発」で必要なものを追加
$ composer require --dev [vendor/package]

# 「開発」で必要なものを削除
$ composr remove --dev [vendor/package]