はじめに
やりたいなって思うことがあって単純な顔検出ができるモデルを作ろうと思ったけれども、keras-ssdの事前学習モデルはPascal VOCデータで学習させたもので、分類できる21クラスの中にpersonは入っているけどfaceは入っていない。なのでFDDBデータセットを使って顔検出ができるモデルを転移学習させてつくった。普段はWebサービスのアクセスログなどをメインに分析したりしている人間なので、畑違いの画像系のモデルを作るのに苦労した…。CNNについてふわっとした理解はしているけど、SSDやYOLOなど物体検出についてはほとんど知らない。ディープラーニングなんもわからん。
SSD
詳細は元論文とか他の方のわかりやすい記事を見てほしい。私は知らない。。。
参考:
物体検出についての歴史まとめ
【物体検出】SSD(Single Shot MultiBox Detector)とは
上記記事らによると
入力画像上で畳み込みネットワークを1回だけ実行し、特徴マップを計算します。特徴マップ上に小さな3×3サイズの畳み込みカーネルを実行して、bounding box と分類確率を予測します。
とか
その後登場したYOLO(You Only Look Once)とSSD(Single Shot Multibox Detector)では、「画像をグリッドで分割して、それぞれのグリッドに対して固定されたいくつかのバウンディングボックスの当てはまり具合を見てみよう」という方針を採っている。
とか書いてる。
よくわからんけどCNNモデル(keras-ssdはVGG16っぽい)で特徴マップ作って、特徴マップ上を四角(bounding box)でいっぱい分割して四角ごとに分類確率を出して確率高い四角が答えだ!っていう理解でいいのだろうか。まあ理論知る前に"とりあえず試そう"精神でいこう。
環境
Google Colaboratory
GPU持っていないので。。。
Google Driveをマウントして、drive上のディレクトリのファイルとか使う。
Keras/TensorFlowで実装されたSSD
ここからとってくる↓
https://github.com/rykov8/ssd_keras
Google Colaboratoryで以下のコマンドを実行。
!git clone https://github.com/rykov8/ssd_keras.git
すると、drive上にssd_kerasフォルダが保存される。
ここにkerasのssd実装のコードとか学習済み重みのファイルが入ってたりする。(weights_SSD300.hdf5)
この学習済みの重みは以下のようなデータで学習していて21クラス分類ができる。
学習データセット:Pascal VOC
検出クラス:21クラス
"background", "aeroplane", "bicycle", "bird", "boat", "bottle", "bus", "car", "cat", "chair", "cow", "diningtable", "dog", "horse", "motorbike", "person", "pottedplant", "sheep", "sofa", "train", "tvmonitor"
人を検出するpersonは入っているけど、顔を検出するものは入っていない!
なので転移学習させて顔を検出するようなモデルを作ることにする。
データセット
データセットはFDDBを使う。
http://vis-www.cs.umass.edu/fddb/
5171人に自然な動きを捉えたデータだそうな。
アノテーションもある。

この2つのリンクからダウンロード。
画像が入ったoriginalPicsとアノテーションファイルが入ったFDDB-foldsをゲットできる。
アノテーションのファイル名はFDDB-fold-xx-ellipseList.txt。
フォーマットは以下。
format:
...
<image name i>#画像ファイル名
<number of faces in this image =im>#顔の数
<face i1>#顔の中心座標、長径・短径、傾き角度
<face i2>#顔の中心座標、長径・短径、傾き角度
...
<face im>
...
これらデータをdrive上のssd_kerasフォルダに移してデータの準備は完了。
パッケージ
ssd_kerasはtensorflow 1.xじゃないとエラー出ちゃうとか見たので、バージョンを指定してインストールし直す。tensorflow 1.xでGPUを使うにはtensorflow-gpuを使用する必要があるそう。
!pip install scipy==1.1.0
!pip uninstall tensorflow
!pip uninstall tensorflow-gpu
!pip install tensorflow-gpu==1.14
!pip install keras==1.2.2
!pip install opencv-python==3.1.0.5
# 必要パッケージのimport
import cv2
import keras
from keras.applications.imagenet_utils import preprocess_input
from keras.backend.tensorflow_backend import set_session
from keras.models import Model
from keras.preprocessing import image
import matplotlib.pyplot as plt
import numpy as np
import pickle
from random import shuffle
from scipy.misc import imread
from scipy.misc import imresize
import tensorflow as tf
from ssd import SSD300
from ssd_training import MultiboxLoss
from ssd_utils import BBoxUtility
from PIL import Image
from lxml import etree
from xml.etree import ElementTree
import math
import os
import glob
from google.colab.patches import cv2_imshow
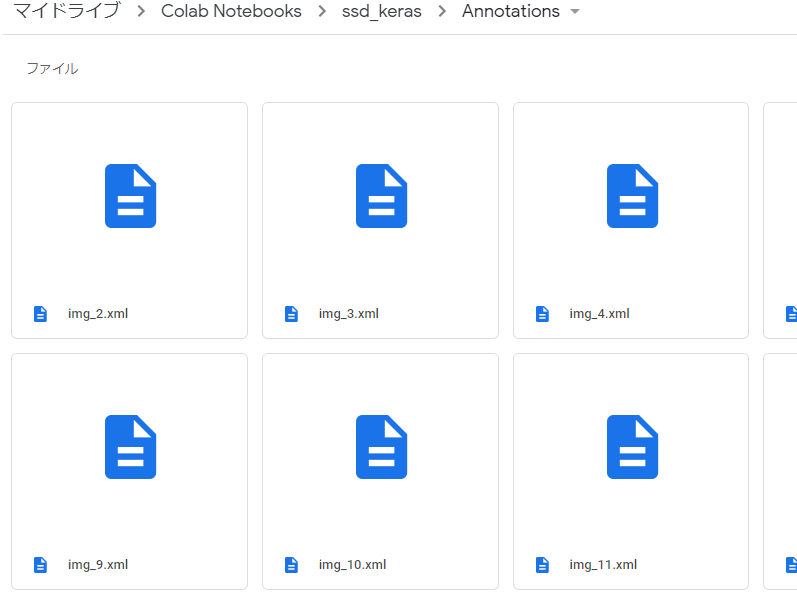
アノテーションファイルをxmlに変換
ssd_kerasで転移学習しやすいように、アノテーションファイルをxmlファイルに変換する。
このコードをほとんど丸パクる↓
https://github.com/kuangliu/FDDB/blob/master/FDDBtoXML.py
os.makedirs('Annotations', exist_ok=True)#xmlを保存するフォルダを作っておく
save_dir='/content/drive/My Drive/Colab Notebooks/ssd_keras/Annotations'
def writeXML(imName, faces, H, W, C):

    annotation = etree.Element('annotation')

    folder = etree.SubElement(annotation, 'folder').text='VOC2007'
    filename = etree.SubElement(annotation, 'filename').text=imName+'.jpg'
    source = etree.SubElement(annotation, 'source')

    database = etree.SubElement(source, 'database').text='The FDDB Database'
    annno = etree.SubElement(source, 'annotation').text='FDDB'
    image = etree.SubElement(source, 'image').text='Dummy'
    flickrid = etree.SubElement(source, 'flickrid').text='Dummy'

    owner = etree.SubElement(annotation, 'owner')
    flickrid2 = etree.SubElement(owner, 'flickrid').text='Dummy'
    name = etree.SubElement(owner, 'name').text='Dummy'

    size = etree.SubElement(annotation, 'size')
    width = etree.SubElement(size, 'width').text=str(W)
    height = etree.SubElement(size, 'height').text=str(H)
    depth = etree.SubElement(size, 'depth').text=str(C)

    segmented = etree.SubElement(annotation, 'segmented').text='0'

    for face in faces:
        obj = etree.SubElement(annotation, 'object')
        name2 = etree.SubElement(obj, 'name').text='face'
        pose = etree.SubElement(obj, 'pose').text='Unspecified'
        truncated = etree.SubElement(obj, 'truncated').text='0'
        difficult = etree.SubElement(obj, 'difficult').text='0'

        bndbox = etree.SubElement(obj, 'bndbox')

        xmin = etree.SubElement(bndbox, 'xmin').text=str(face[0])
        ymin = etree.SubElement(bndbox, 'ymin').text=str(face[1])
        xmax = etree.SubElement(bndbox, 'xmax').text=str(face[2])
        ymax = etree.SubElement(bndbox, 'ymax').text=str(face[3])

    tree = etree.ElementTree(annotation)
    tree.write(save_dir+'/'+imName.split('/')[-1]+".xml",pretty_print=True)
アノテーションファイル(.txt)をすべて読み込んで、この関数を適用させて/Annotationsフォルダにxmlファイルを保存していく。
anno_dir='/content/drive/My Drive/Colab Notebooks/ssd_keras/FDDB-folds'
pic_dir='/content/drive/My Drive/Colab Notebooks/ssd_keras/originalPics'

# アノテーションtxtファイルファイルリストの取得
file_list=[os.path.split(f)[1] for f in glob.glob(anno_dir+'/*ellipseList.txt')]
print(file_list)
print('file Cnt: ', len(file_list))

for file in file_list:
  print(file)
  f = open(anno_dir+'/'+file)
  '''
  #txtファイルの中身
  2002/08/31/big/img_18008 ファイル名
  4 顔の数
  53.968100 38.000000 -1.494904 31.598276 55.596600  1 座標とか角度1
  56.000000 37.000000 -1.460399 202.152999 122.034200  1 座標とか角度2
  54.558400 39.000000 1.396263 293.611040 133.853600  1 座標とか角度3
  44.000000 34.000000 -1.442216 391.131100 168.266900  1 座標とか角度4 ここで1ファイル分
  2002/08/22/big/img_249 ファイル名
  1 顔の数
  92.731568 55.547794 1.319755 133.877336 101.823201  1 座標とか角度1
  '''
  while True:
    line = f.readline()#実行するたびに1行ずつ読み取っていく。最初はファイル名
    if not line:
        break

    line = line.strip()
    imName = pic_dir+'/'+line

    # idx = line.rfind('/')
    # imName = line[idx+1:]

    print('processing ' + imName)

    # '2002/08/11/big/img_591'
    im = cv2.imread(imName+'.jpg')

    H, W, C = im.shape
    faceNum = int(f.readline().strip())#実行するたびに1行ずつ読み取っていく。これは1ファイルの情報行数
    faces = []

    for faceIdx in range(faceNum):
        #実行するたびに1行ずつ読み取っていく。faceNum行分実行。これは座標とか角度
        line = f.readline().strip()
        splited = line.split()
        r1 = float(splited[0])
        r2 = float(splited[1])
        angle = float(splited[2])
        cx = float(splited[3])
        cy = float(splited[4])


        rectH = 2*r1*(math.cos(math.radians(abs(angle))))
        rectW = 2*r2*(math.cos(math.radians(abs(angle))))

        lx = int(max(0, cx - rectW/2))
        ly = int(max(0, cy - rectH/2))
        rx = int(min(W-1, cx + rectW/2))
        ry = int(min(H-1, cy + rectH/2))

        faceIdx = 0

        faces.append((lx,ly,rx,ry))

    writeXML(imName, faces, H, W, C)

  f.close()
これでxmlファイルの作成完了。
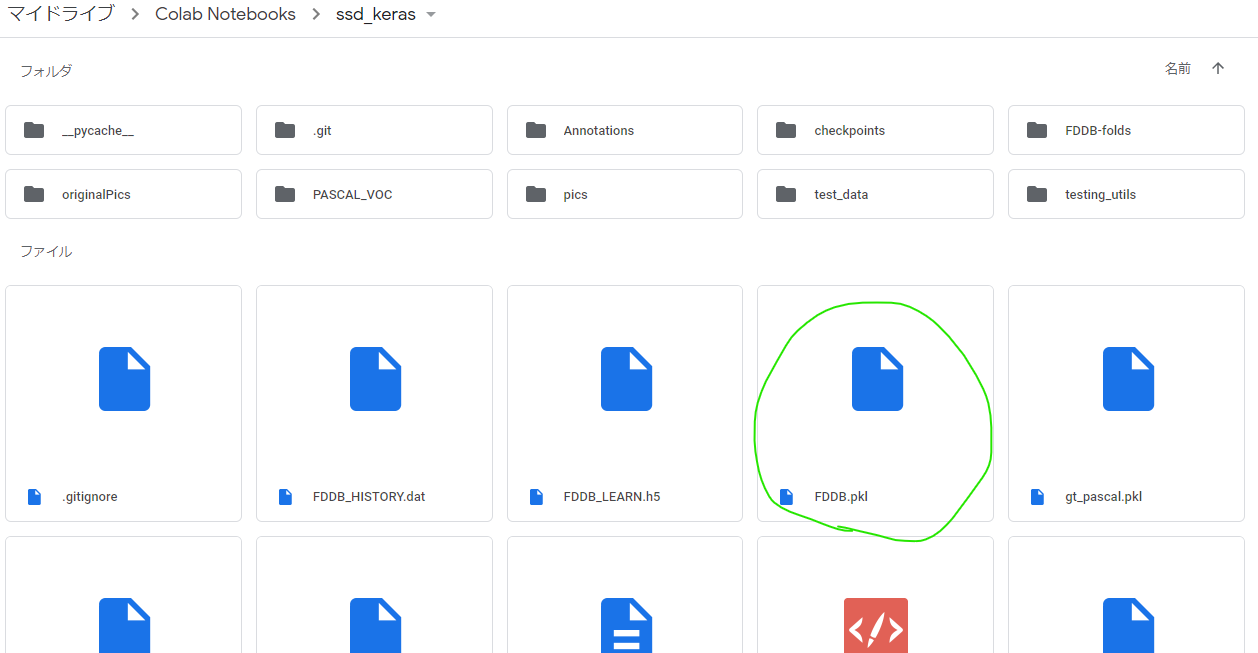
xmlファイルをひとまとめ
次にxmlファイルを1つのpklファイルにまとめる作業を行う。
この作業のためのコードは最初にgit cloneして作成されたssd_kerasフォルダ内に入っている。(ssd_keras/PASCAL_VOC/get_data_from_XML.py)
コードと合わせて以下の記事を参考に実施。
記事:物体検出アルゴリズム(SSD : Single Shot MultiBox Detector)を学習させてみる
もともとのコードは21クラス分類のために作られているが、今回は顔かそうでないかの2クラス分類なので19クラス分は消しちゃった。
class XML_preprocessor(object):

    def __init__(self, data_path):
        self.path_prefix = data_path
        self.num_classes = 1
        self.data = dict()
        self._preprocess_XML()

    def _preprocess_XML(self):
        filenames = os.listdir(self.path_prefix+'/')
        for filename in filenames:
            print(filename)
            tree = ElementTree.parse(self.path_prefix +'/' + filename)
            root = tree.getroot()
            bounding_boxes = []
            one_hot_classes = []
            size_tree = root.find('size')
            width = float(size_tree.find('width').text)
            height = float(size_tree.find('height').text)
            for object_tree in root.findall('object'):
                for bounding_box in object_tree.iter('bndbox'):
                    xmin = float(bounding_box.find('xmin').text)/width
                    ymin = float(bounding_box.find('ymin').text)/height
                    xmax = float(bounding_box.find('xmax').text)/width
                    ymax = float(bounding_box.find('ymax').text)/height
                bounding_box = [xmin,ymin,xmax,ymax]
                bounding_boxes.append(bounding_box)
                class_name = object_tree.find('name').text
                one_hot_class = self._to_one_hot(class_name)
                one_hot_classes.append(one_hot_class)
            image_name = root.find('filename').text
            bounding_boxes = np.asarray(bounding_boxes)
            one_hot_classes = np.asarray(one_hot_classes)
            image_data = np.hstack((bounding_boxes, one_hot_classes))
            self.data[image_name] = image_data

    def _to_one_hot(self,name):
        one_hot_vector = [0] * self.num_classes
        # faceかそうでないかだけ分類
        if name == 'face':
            one_hot_vector[0] = 1
        else:
            print('unknown label: %s' %name)

        return one_hot_vector
xml_dir='/content/drive/My Drive/Colab Notebooks/ssd_keras/Annotations'
data = XML_preprocessor(xml_dir).data
pkl_dir='/content/drive/My Drive/Colab Notebooks/ssd_keras'
pickle.dump(data,open(pkl_dir+'/'+'FDDB.pkl','wb'))
完成。
いざ学習
ssd_kerasフォルダ内にSSD_training.pyがあるので、学習はそのコードをもとに実施。
ちょこちょこFDDB学習用に修正している。
ここでも物体検出アルゴリズム(SSD : Single Shot MultiBox Detector)を学習させてみるを参考にさせていただいた。
%%time
os.makedirs('checkpoints', exist_ok=True)#学習途中の重みも保存するためのフォルダ作成
checkpoints_dir='/content/drive/My Drive/Colab Notebooks/ssd_keras/checkpoints'

np.set_printoptions(suppress=True)

NUM_CLASSES = 2
input_shape = (300, 300, 3)

# 計算済みのデフォルトボックスの位置を保存したprior_boxes_ssd300を読み込む
# SSDは画像上に大きさや形の異なるデフォルトボックスを乗せ、その枠ごとに予測値を計算
# VGGやResNetのような画像分類で大きな成果をあげたネットワーク構造を用いて画像から特徴マップを抽出
# そして特徴マップの位置毎に候補を用意(SSD論文ではdefault boxと呼ばれている)
priors = pickle.load(open('prior_boxes_ssd300.pkl', 'rb'))
# バウンティボックス
bbox_util = BBoxUtility(NUM_CLASSES, priors)

# FDDBデータの情報まとめたファイル
gt = pickle.load(open('FDDB.pkl', 'rb'))
keys = sorted(gt.keys())
num_train = int(round(0.8 * len(keys)))
train_keys = keys[:num_train]
val_keys = keys[num_train:]
num_val = len(val_keys)

class Generator(object):# pkl上にpathも含めているのでpath_prefixは消した
    def __init__(self, gt, bbox_util,
                 batch_size,
                 train_keys, val_keys, image_size,
                 saturation_var=0.5,
                 brightness_var=0.5,
                 contrast_var=0.5,
                 lighting_std=0.5,
                 hflip_prob=0.5,
                 vflip_prob=0.5,
                 do_crop=True,
                 crop_area_range=[0.75, 1.0],
                 aspect_ratio_range=[3./4., 4./3.]):
        self.gt = gt
        self.bbox_util = bbox_util
        self.batch_size = batch_size
        self.train_keys = train_keys
        self.val_keys = val_keys
        self.train_batches = len(train_keys)
        self.val_batches = len(val_keys)
        self.image_size = image_size
        self.color_jitter = []
        if saturation_var:
            self.saturation_var = saturation_var
            self.color_jitter.append(self.saturation)
        if brightness_var:
            self.brightness_var = brightness_var
            self.color_jitter.append(self.brightness)
        if contrast_var:
            self.contrast_var = contrast_var
            self.color_jitter.append(self.contrast)
        self.lighting_std = lighting_std
        self.hflip_prob = hflip_prob
        self.vflip_prob = vflip_prob
        self.do_crop = do_crop
        self.crop_area_range = crop_area_range
        self.aspect_ratio_range = aspect_ratio_range

    # 画像のチャンネル数変えたり明度変えたりして学習用の画像を増やしているのかな??関数群
    def grayscale(self, rgb):
        return rgb.dot([0.299, 0.587, 0.114])

    def saturation(self, rgb):
        gs = self.grayscale(rgb)
        alpha = 2 * np.random.random() * self.saturation_var
        alpha += 1 - self.saturation_var
        rgb = rgb * alpha + (1 - alpha) * gs[:, :, None]
        return np.clip(rgb, 0, 255)

    def brightness(self, rgb):
        alpha = 2 * np.random.random() * self.brightness_var
        alpha += 1 - self.saturation_var
        rgb = rgb * alpha
        return np.clip(rgb, 0, 255)

    def contrast(self, rgb):
        gs = self.grayscale(rgb).mean() * np.ones_like(rgb)
        alpha = 2 * np.random.random() * self.contrast_var
        alpha += 1 - self.contrast_var
        rgb = rgb * alpha + (1 - alpha) * gs
        return np.clip(rgb, 0, 255)

    def lighting(self, img):
        cov = np.cov(img.reshape(-1, 3) / 255.0, rowvar=False)
        eigval, eigvec = np.linalg.eigh(cov)
        noise = np.random.randn(3) * self.lighting_std
        noise = eigvec.dot(eigval * noise) * 255
        img += noise
        return np.clip(img, 0, 255)

    def horizontal_flip(self, img, y):
        if np.random.random() < self.hflip_prob:
            img = img[:, ::-1]
            y[:, [0, 2]] = 1 - y[:, [2, 0]]
        return img, y

    def vertical_flip(self, img, y):
        if np.random.random() < self.vflip_prob:
            img = img[::-1]
            y[:, [1, 3]] = 1 - y[:, [3, 1]]
        return img, y

    # 画像のアスペクト比変えたりして、それに合うようにBBOXも変えている感じ??
    def random_sized_crop(self, img, targets):
        img_w = img.shape[1]
        img_h = img.shape[0]
        img_area = img_w * img_h
        random_scale = np.random.random()
        random_scale *= (self.crop_area_range[1] -
                         self.crop_area_range[0])
        random_scale += self.crop_area_range[0]
        target_area = random_scale * img_area
        random_ratio = np.random.random()
        random_ratio *= (self.aspect_ratio_range[1] -
                         self.aspect_ratio_range[0])
        random_ratio += self.aspect_ratio_range[0]
        w = np.round(np.sqrt(target_area * random_ratio))
        h = np.round(np.sqrt(target_area / random_ratio))
        if np.random.random() < 0.5:
            w, h = h, w
        w = min(w, img_w)
        w_rel = w / img_w
        w = int(w)
        h = min(h, img_h)
        h_rel = h / img_h
        h = int(h)
        x = np.random.random() * (img_w - w)
        x_rel = x / img_w
        x = int(x)
        y = np.random.random() * (img_h - h)
        y_rel = y / img_h
        y = int(y)
        img = img[y:y+h, x:x+w]
        new_targets = []
        for box in targets:
            cx = 0.5 * (box[0] + box[2])
            cy = 0.5 * (box[1] + box[3])
            if (x_rel < cx < x_rel + w_rel and
                y_rel < cy < y_rel + h_rel):
                xmin = (box[0] - x_rel) / w_rel
                ymin = (box[1] - y_rel) / h_rel
                xmax = (box[2] - x_rel) / w_rel
                ymax = (box[3] - y_rel) / h_rel
                xmin = max(0, xmin)
                ymin = max(0, ymin)
                xmax = min(1, xmax)
                ymax = min(1, ymax)
                box[:4] = [xmin, ymin, xmax, ymax]
                new_targets.append(box)
        new_targets = np.asarray(new_targets).reshape(-1, targets.shape[1])
        return img, new_targets

    # 上の関数群使って学習させる画像を生成する関数かな??前処理とかも実施している
    def generate(self, train=True):
        print(tf.test.gpu_device_name())
        while True:
            # 1epochごとに画像の順番をシャッフル
            if train:# 学習の時は学習用ファイルを使う
                shuffle(self.train_keys)
                keys = self.train_keys
            else:
                shuffle(self.val_keys)
                keys = self.val_keys
            inputs = []
            targets = []
            for key in keys:
                img_path = key
                #print(img_path)
                img = imread(img_path).astype('float32')
                y = self.gt[key].copy()
                if train and self.do_crop:
                    img, y = self.random_sized_crop(img, y)
                img = imresize(img, self.image_size).astype('float32')
                # boxの位置は正規化されているから画像をリサイズしても
                # 教師信号としては問題ない らしいです
                if train:
                    shuffle(self.color_jitter)
                    for jitter in self.color_jitter:
                        if len(img.shape) == 2:#グレイスケール画像の場合エラーが出るので3チャンネルの画像に変換する
                          img=cv2.cvtColor(img, cv2.COLOR_GRAY2RGB)
                        img = jitter(img)
                    if self.lighting_std:
                        img = self.lighting(img)
                    if self.hflip_prob > 0:
                        img, y = self.horizontal_flip(img, y)
                    if self.vflip_prob > 0:
                        img, y = self.vertical_flip(img, y)
                # 訓練データ生成時にbbox_utilを使っているのはここだけらしい
                y = self.bbox_util.assign_boxes(y)
                inputs.append(img)
                targets.append(y)
                # 1 iter 分終わったら返す
                if len(targets) == self.batch_size:
                    tmp_inp = np.array(inputs)
                    tmp_targets = np.array(targets)
                    inputs = []
                    targets = []
                    # 前処理。preprocess_input()の中ではモデルによって画像の正規化、ImageNetデータセットのRGB各チャンネルごとの平均値を引く、などの処理が行われているようです。
                    # VGG16では画像をRGBからBGRに変換し、スケーリングせずにImageNetデータセットに対して各カラーチャネルをゼロ中心にします。
                    yield preprocess_input(tmp_inp), tmp_targets

gen = Generator(gt, bbox_util, 16,
                train_keys, val_keys,
                (input_shape[0], input_shape[1]), do_crop=False)

# 学習済みモデル読み込み
model = SSD300(input_shape, num_classes=NUM_CLASSES)
model.load_weights('weights_SSD300.hdf5', by_name=True)

# 再学習しないレイヤー
freeze = ['input_1', 'conv1_1', 'conv1_2', 'pool1',
          'conv2_1', 'conv2_2', 'pool2',
          'conv3_1', 'conv3_2', 'conv3_3', 'pool3']#,
#           'conv4_1', 'conv4_2', 'conv4_3', 'pool4']

# 再学習しないように設定
for L in model.layers:
    if L.name in freeze:
        L.trainable = False

def schedule(epoch, decay=0.9):
    return base_lr * decay**(epoch)

# driveの容量が危ないので5 epochずつ保存することにする
callbacks = [keras.callbacks.ModelCheckpoint(checkpoints_dir + '/weights.{epoch:02d}-{val_loss:.2f}.hdf5',
                                             verbose=1,monitor='val_loss',save_best_only=True,mode='min',
                                             save_weights_only=True,period=5),
             keras.callbacks.LearningRateScheduler(schedule)]

base_lr = 3e-4
optim = keras.optimizers.Adam(lr=base_lr)
# neg_pos_ratio:ハードネガティブマイニング負例と正例の最大の比
model.compile(optimizer=optim,
              loss=MultiboxLoss(NUM_CLASSES, neg_pos_ratio=2.0).compute_loss)

nb_epoch = 100

# 学習
# ミニバッチごとに入力の前処理を行うのでfit_generatorを使う
history = model.fit_generator(gen.generate(True), gen.train_batches,
                              nb_epoch, verbose=1,
                              callbacks=callbacks,
                              validation_data=gen.generate(False),
                              nb_val_samples=gen.val_batches,
                              nb_worker=1)
model.save('FDDB_LEARN.h5')
with open('FDDB_HISTORY.dat', 'wb') as file_pi:
  pickle.dump(history.history, file_pi)
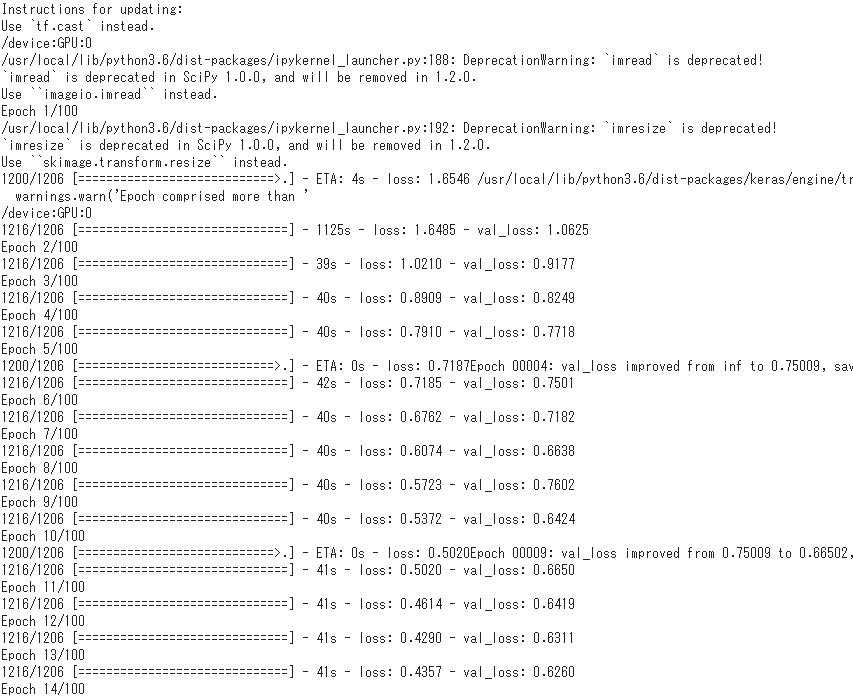
scipyは古いバージョンを使っているので、「scipyのimreadとかimsizeは重複した名前だし、将来的に消えるから代わりに別のツールを使うことを推奨するぞ」とか警告がいっぱい出るけどフルシカト。
学習が進むぞ。1h 24min 56sで学習終わった。
epochとlossの関係をplotしてみる。
plt.clf()
plt.xlabel('epochs')
plt.plot(np.arange(1, len(history.history['loss'])+1),
         history.history['loss'], label='loss')
plt.plot(np.arange(1, len(history.history['loss'])+1),
         history.history['val_loss'], label='val_loss')
plt.legend()
plt.show()
print(min(history.history['val_loss']))
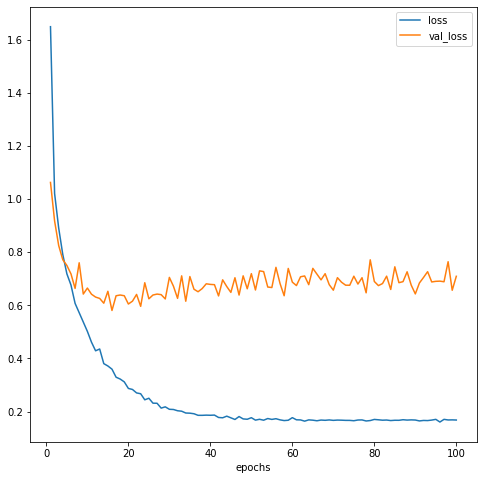
20 epochあたりの時にval_lossが最も低そうなので、/checkpointsフォルダにある19 epochの重みを使用することにする。
作成したモデルで顔検出をやってみる
画像は写真ACさんから1枚使用させていただきました。
# 学習済みモデル読み込み
model = SSD300(input_shape, num_classes=NUM_CLASSES)#NUM_CLASSES=2
model.load_weights(checkpoints_dir+'/'+'weights.19-0.60.hdf5', by_name=True)#19epochの重み

# 画像とBBOXを可視化する関数
def plot_img_bbox(img_path):
  inputs = []
  images = []
  img = image.load_img(img_path, target_size=(300, 300))
  img = image.img_to_array(img)
  images.append(imread(img_path))
  inputs.append(img.copy())
  # 前処理
  inputs = preprocess_input(np.array(inputs))

  preds = model.predict(inputs, batch_size=1, verbose=1)
  results = bbox_util.detection_out(preds)

  for i, img2 in enumerate(images):
    img = img2.copy()
    if len(img.shape) == 2:
      img = cv2.cvtColor(img, cv2.COLOR_GRAY2RGB)
    # Parse the outputs.
    det_label = results[i][:, 0]
    det_conf = results[i][:, 1]
    det_xmin = results[i][:, 2]
    det_ymin = results[i][:, 3]
    det_xmax = results[i][:, 4]
    det_ymax = results[i][:, 5]

    # Get detections with confidence higher than 0.6.
    top_indices = [i for i, conf in enumerate(det_conf) if conf >= 0.6]

    top_conf = det_conf[top_indices]
    top_label_indices = det_label[top_indices].tolist()
    top_xmin = det_xmin[top_indices]
    top_ymin = det_ymin[top_indices]
    top_xmax = det_xmax[top_indices]
    top_ymax = det_ymax[top_indices]

    colors = plt.cm.hsv(np.linspace(0, 1, NUM_CLASSES)).tolist()

    plt.imshow(img / 255.)
    currentAxis = plt.gca()

    for i in range(top_conf.shape[0]):
        xmin = int(round(top_xmin[i] * img.shape[1]))
        ymin = int(round(top_ymin[i] * img.shape[0]))
        xmax = int(round(top_xmax[i] * img.shape[1]))
        ymax = int(round(top_ymax[i] * img.shape[0]))
        score = top_conf[i]
        label = int(top_label_indices[i])
        # label_name = voc_classes[label - 1]
        display_txt = '{:0.2f}, {}'.format(score, label)
        coords = (xmin, ymin), xmax-xmin+1, ymax-ymin+1
        color = colors[label]
        currentAxis.add_patch(plt.Rectangle(*coords, fill=False, edgecolor=color, linewidth=2))
        currentAxis.text(xmin, ymin, display_txt, bbox={'facecolor':color, 'alpha':0.5})

    plt.show()

img_path = '/content/drive/My Drive/Colab Notebooks/ssd_keras/pics/315222_s.jpg'
plot_img_bbox(img_path)
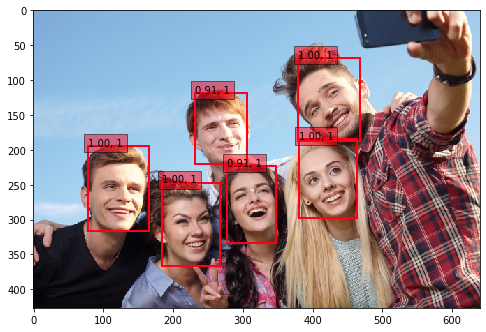
顔を検出しているぞ。やったぜ!
おわりに
いやーこのへんは門外漢だから転移学習をするだけでけっこう苦労したぜ…。
特にPascal VOCデータセット以外を転移学習させている記事があんまり見つけられなくて、FDDB用にコードを修正するのにけっこう試行錯誤した…。
でも良い勉強になったからよし!
これでやりたいことの1歩目を踏み出せた。
以上!