DeepLearningを用いた物体検出アルゴリズムはいくつかあり、試してみた系の記事はたくさんあります。
画像の”どこ”に”何”があるかを識別してくれる物体検出アルゴリズムであるSSDも以下のような記事があるので、訓練済みのモデルを用いて試して見る分には簡単にできそうです。
SSD: Single Shot MultiBox Detector 高速リアルタイム物体検出デモをKerasで試す
今回は、SSDのKeras版(ssd_keras)のモデルについて、学習をどうやって行うかを試してみましたのでそれについて説明します。
データセットの取得
とりあえずVOC2007とかVOC2012とかのデータセットをダウンロードしてきます。
上記のサイトから"Details of each of the challenges can be found on the corresponding challenge page:"の項目に行きまして、その中から適当なVOC20XX Challengeを選び、そこへ飛びます。そこからDevelopment Kitの"Download the training/validation data"からデータセットをダウンロードします。
もしくは、以下のコマンドを打ってもダウンロードできます。
wget http://host.robots.ox.ac.uk/pascal/VOC/voc2012/VOCtrainval_11-May-2012.tar
wget http://host.robots.ox.ac.uk/pascal/VOC/voc2007/VOCtrainval_06-Nov-2007.tar
wget http://host.robots.ox.ac.uk/pascal/VOC/voc2007/VOCtest_06-Nov-2007.tar
次にtarファイルを解凍します。VOCdevkitという名のフォルダが現れ、その中に画像データ(VOCdevkit/VOC20XX/JPEGImages)とアノテーションデータ(画像に写っている物体やその位置に関する情報が記載されているもの)(VOCdevkit/VOC20XX/Annotations)があることを確認してください。
教師信号をまとめたファイルの生成
次に教師信号を1つのpklファイルにまとめる作業をします。これもVOC20XXのデータセットであれば自動で行ってくれるコードがssd_kerasにありますので、それを利用させていただきます。
PASCAL_VOC/get_data_from_XML.pyがそのコードです。
コードの一番最後に以下のようなコードを追加します。
            :
            :
            :
            one_hot_vector[18] = 1
        elif name == 'tvmonitor':
            one_hot_vector[19] = 1
        else:
            print('unknown label: %s' %name)

        return one_hot_vector

## ここから下のコードを追加する
import pickle
data = XML_preprocessor('VOCdevkit/VOC2007/Annotations/').data
pickle.dump(data,open('VOC2007.pkl','wb'))
ファイルがある場所を間違えないようお気をつけ下さい。
教師信号としては、画像の名前(00XXXX.jpg)と物体の位置とクラス名が必要になるので、pklファイルにはそれがまとめられています。
pklファイルの中身は辞書型の構造になっていて、画像名を指定すると、Nx24の2次元配列(行列)が得られます。
Nは画像の中にある物体の数で、画像によって異なります。
24というのは、位置とクラス名のデータを合わせたデータを表すベクトルになっていて、(xmin, ymin, xmax, ymax)の4次元の情報で物体を囲む矩形の位置を表し、残りの20次元でクラス名を表します。クラス名が20次元あるということは20種類の物体を見分けたい、ということになります。なお、深層学習で20種類の物体を識別する場合、20種類のどれにも該当しないというクラスも必要になるので、出力層の出力は21次元だけ必要になります。
import pickle
f = open('VOC20XX.pkl', 'rb')
data = pickle.load(f)
print(data.keys())
#############################################
# dict_keys(['000005.jpg', ..., '006739.jpg', ...]) ...
# みたいな感じで画像名のリストが表示されます。
#############################################

print(data['007571.jpg'])
#######################################################
# array([[ 0.272     ,  0.26666667,  0.504     ,  0.73866667,  0.        ,
#          0.        ,  0.        ,  0.        ,  0.        ,  0.        ,
#          0.        ,  0.        ,  0.        ,  0.        ,  0.        ,
#          0.        ,  0.        ,  0.        ,  1.        ,  0.        ,
#          0.        ,  0.        ,  0.        ,  0.        ],
#        [ 0.51      ,  0.22133333,  0.73      ,  0.70133333,  0.        ,
#          0.        ,  0.        ,  0.        ,  0.        ,  0.        ,
#          0.        ,  0.        ,  0.        ,  0.        ,  0.        ,
#          0.        ,  0.        ,  0.        ,  1.        ,  0.        ,
#          0.        ,  0.        ,  0.        ,  0.        ],
#        [ 0.264     ,  0.50133333,  0.536     ,  0.85066667,  0.        ,
#          1.        ,  0.        ,  0.        ,  0.        ,  0.        ,
#          0.        ,  0.        ,  0.        ,  0.        ,  0.        ,
#          0.        ,  0.        ,  0.        ,  0.        ,  0.        ,
#          0.        ,  0.        ,  0.        ,  0.        ],
#        [ 0.532     ,  0.48266667,  0.71      ,  0.82133333,  0.        ,
#          1.        ,  0.        ,  0.        ,  0.        ,  0.        ,
#          0.        ,  0.        ,  0.        ,  0.        ,  0.        ,
#          0.        ,  0.        ,  0.        ,  0.        ,  0.        ,
#          0.        ,  0.        ,  0.        ,  0.        ]])
# みたいな感じで2次元配列(行列)が表示されます。
#######################################################
すなわち、ssd_kerasで学習をさせるためには教師信号をこのような形で表す必要があるということですね。
学習
ここでは、上記の処理により、VOC2007.pklファイルができていると仮定して話を進めます。
学習コードは以下になります。画像のあるディレクトリおよびVOC2007.pklのある場所を正しく指定してから実行してください。
また、実行する際には、実行時にいるディレクトリにてcheckpointsという名のディレクトリを作成しておいてください。そのディレクトリの中に学習済みのモデルパラメータが保存されます。
import cv2
import keras
from keras.applications.imagenet_utils import preprocess_input
from keras.backend.tensorflow_backend import set_session
from keras.models import Model
from keras.preprocessing import image
import matplotlib.pyplot as plt
import numpy as np
import pickle
from random import shuffle
from scipy.misc import imread
from scipy.misc import imresize
import tensorflow as tf

from ssd import SSD300
from ssd_training import MultiboxLoss
from ssd_utils import BBoxUtility

plt.rcParams['figure.figsize'] = (8, 8)
plt.rcParams['image.interpolation'] = 'nearest'

np.set_printoptions(suppress=True)

# 21
NUM_CLASSES = 21 #4
input_shape = (300, 300, 3)

priors = pickle.load(open('prior_boxes_ssd300.pkl', 'rb'))
bbox_util = BBoxUtility(NUM_CLASSES, priors)

# gt = pickle.load(open('gt_pascal.pkl', 'rb'))
gt = pickle.load(open('VOC2007.pkl', 'rb'))
keys = sorted(gt.keys())
num_train = int(round(0.8 * len(keys)))
train_keys = keys[:num_train]
val_keys = keys[num_train:]
num_val = len(val_keys)

class Generator(object):
    def __init__(self, gt, bbox_util,
                 batch_size, path_prefix,
                 train_keys, val_keys, image_size,
                 saturation_var=0.5,
                 brightness_var=0.5,
                 contrast_var=0.5,
                 lighting_std=0.5,
                 hflip_prob=0.5,
                 vflip_prob=0.5,
                 do_crop=True,
                 crop_area_range=[0.75, 1.0],
                 aspect_ratio_range=[3./4., 4./3.]):
        self.gt = gt
        self.bbox_util = bbox_util
        self.batch_size = batch_size
        self.path_prefix = path_prefix
        self.train_keys = train_keys
        self.val_keys = val_keys
        self.train_batches = len(train_keys)
        self.val_batches = len(val_keys)
        self.image_size = image_size
        self.color_jitter = []
        if saturation_var:
            self.saturation_var = saturation_var
            self.color_jitter.append(self.saturation)
        if brightness_var:
            self.brightness_var = brightness_var
            self.color_jitter.append(self.brightness)
        if contrast_var:
            self.contrast_var = contrast_var
            self.color_jitter.append(self.contrast)
        self.lighting_std = lighting_std
        self.hflip_prob = hflip_prob
        self.vflip_prob = vflip_prob
        self.do_crop = do_crop
        self.crop_area_range = crop_area_range
        self.aspect_ratio_range = aspect_ratio_range

    def grayscale(self, rgb):
        return rgb.dot([0.299, 0.587, 0.114])

    def saturation(self, rgb):
        gs = self.grayscale(rgb)
        alpha = 2 * np.random.random() * self.saturation_var
        alpha += 1 - self.saturation_var
        rgb = rgb * alpha + (1 - alpha) * gs[:, :, None]
        return np.clip(rgb, 0, 255)

    def brightness(self, rgb):
        alpha = 2 * np.random.random() * self.brightness_var
        alpha += 1 - self.saturation_var
        rgb = rgb * alpha
        return np.clip(rgb, 0, 255)

    def contrast(self, rgb):
        gs = self.grayscale(rgb).mean() * np.ones_like(rgb)
        alpha = 2 * np.random.random() * self.contrast_var
        alpha += 1 - self.contrast_var
        rgb = rgb * alpha + (1 - alpha) * gs
        return np.clip(rgb, 0, 255)

    def lighting(self, img):
        cov = np.cov(img.reshape(-1, 3) / 255.0, rowvar=False)
        eigval, eigvec = np.linalg.eigh(cov)
        noise = np.random.randn(3) * self.lighting_std
        noise = eigvec.dot(eigval * noise) * 255
        img += noise
        return np.clip(img, 0, 255)

    def horizontal_flip(self, img, y):
        if np.random.random() < self.hflip_prob:
            img = img[:, ::-1]
            y[:, [0, 2]] = 1 - y[:, [2, 0]]
        return img, y

    def vertical_flip(self, img, y):
        if np.random.random() < self.vflip_prob:
            img = img[::-1]
            y[:, [1, 3]] = 1 - y[:, [3, 1]]
        return img, y

    def random_sized_crop(self, img, targets):
        img_w = img.shape[1]
        img_h = img.shape[0]
        img_area = img_w * img_h
        random_scale = np.random.random()
        random_scale *= (self.crop_area_range[1] -
                         self.crop_area_range[0])
        random_scale += self.crop_area_range[0]
        target_area = random_scale * img_area
        random_ratio = np.random.random()
        random_ratio *= (self.aspect_ratio_range[1] -
                         self.aspect_ratio_range[0])
        random_ratio += self.aspect_ratio_range[0]
        w = np.round(np.sqrt(target_area * random_ratio))
        h = np.round(np.sqrt(target_area / random_ratio))
        if np.random.random() < 0.5:
            w, h = h, w
        w = min(w, img_w)
        w_rel = w / img_w
        w = int(w)
        h = min(h, img_h)
        h_rel = h / img_h
        h = int(h)
        x = np.random.random() * (img_w - w)
        x_rel = x / img_w
        x = int(x)
        y = np.random.random() * (img_h - h)
        y_rel = y / img_h
        y = int(y)
        img = img[y:y+h, x:x+w]
        new_targets = []
        for box in targets:
            cx = 0.5 * (box[0] + box[2])
            cy = 0.5 * (box[1] + box[3])
            if (x_rel < cx < x_rel + w_rel and
                y_rel < cy < y_rel + h_rel):
                xmin = (box[0] - x_rel) / w_rel
                ymin = (box[1] - y_rel) / h_rel
                xmax = (box[2] - x_rel) / w_rel
                ymax = (box[3] - y_rel) / h_rel
                xmin = max(0, xmin)
                ymin = max(0, ymin)
                xmax = min(1, xmax)
                ymax = min(1, ymax)
                box[:4] = [xmin, ymin, xmax, ymax]
                new_targets.append(box)
        new_targets = np.asarray(new_targets).reshape(-1, targets.shape[1])
        return img, new_targets

    def generate(self, train=True):
        while True:
            if train:
                shuffle(self.train_keys)
                keys = self.train_keys
            else:
                shuffle(self.val_keys)
                keys = self.val_keys
            inputs = []
            targets = []
            for key in keys:
                img_path = self.path_prefix + key
                img = imread(img_path).astype('float32')
                y = self.gt[key].copy()
                if train and self.do_crop:
                    img, y = self.random_sized_crop(img, y)
                img = imresize(img, self.image_size).astype('float32')
                # boxの位置は正規化されているから画像をリサイズしても
                # 教師信号としては問題ない
                if train:
                    shuffle(self.color_jitter)
                    for jitter in self.color_jitter:
                        img = jitter(img)
                    if self.lighting_std:
                        img = self.lighting(img)
                    if self.hflip_prob > 0:
                        img, y = self.horizontal_flip(img, y)
                    if self.vflip_prob > 0:
                        img, y = self.vertical_flip(img, y)
                # 訓練データ生成時にbbox_utilを使っているのはここだけらしい
                #print(y)
                y = self.bbox_util.assign_boxes(y)
                #print(y)
                inputs.append(img)
                targets.append(y)
                if len(targets) == self.batch_size:
                    tmp_inp = np.array(inputs)
                    tmp_targets = np.array(targets)
                    inputs = []
                    targets = []
                    yield preprocess_input(tmp_inp), tmp_targets

path_prefix = './VOCdevkit/VOC2007/JPEGImages/'
gen = Generator(gt, bbox_util, 4, path_prefix,
                train_keys, val_keys,
                (input_shape[0], input_shape[1]), do_crop=False)

model = SSD300(input_shape, num_classes=NUM_CLASSES)
model.load_weights('weights_SSD300.hdf5', by_name=True)

freeze = ['input_1', 'conv1_1', 'conv1_2', 'pool1',
          'conv2_1', 'conv2_2', 'pool2',
          'conv3_1', 'conv3_2', 'conv3_3', 'pool3']#,
#           'conv4_1', 'conv4_2', 'conv4_3', 'pool4']

for L in model.layers:
    if L.name in freeze:
        L.trainable = False

def schedule(epoch, decay=0.9):
    return base_lr * decay**(epoch)

callbacks = [keras.callbacks.ModelCheckpoint('./checkpoints/weights.{epoch:02d}-{val_loss:.2f}.hdf5',
                                             verbose=1,
                                             save_weights_only=True),
             keras.callbacks.LearningRateScheduler(schedule)]

base_lr = 3e-4
optim = keras.optimizers.Adam(lr=base_lr)
model.compile(optimizer=optim,
              loss=MultiboxLoss(NUM_CLASSES, neg_pos_ratio=2.0).compute_loss)

nb_epoch = 100
history = model.fit_generator(gen.generate(True), gen.train_batches,
                              nb_epoch, verbose=1,
                              callbacks=callbacks,
                              validation_data=gen.generate(False),
                              nb_val_samples=gen.val_batches,
                              nb_worker=1)

inputs = []
images = []
img_path = path_prefix + sorted(val_keys)[0]
img = image.load_img(img_path, target_size=(300, 300))
img = image.img_to_array(img)
images.append(imread(img_path))
inputs.append(img.copy())
inputs = preprocess_input(np.array(inputs))

preds = model.predict(inputs, batch_size=1, verbose=1)
results = bbox_util.detection_out(preds)

for i, img in enumerate(images):
    # Parse the outputs.
    det_label = results[i][:, 0]
    det_conf = results[i][:, 1]
    det_xmin = results[i][:, 2]
    det_ymin = results[i][:, 3]
    det_xmax = results[i][:, 4]
    det_ymax = results[i][:, 5]

    # Get detections with confidence higher than 0.6.
    top_indices = [i for i, conf in enumerate(det_conf) if conf >= 0.6]

    top_conf = det_conf[top_indices]
    top_label_indices = det_label[top_indices].tolist()
    top_xmin = det_xmin[top_indices]
    top_ymin = det_ymin[top_indices]
    top_xmax = det_xmax[top_indices]
    top_ymax = det_ymax[top_indices]

    colors = plt.cm.hsv(np.linspace(0, 1, NUM_CLASSES)).tolist()

    plt.imshow(img / 255.)
    currentAxis = plt.gca()

    for i in range(top_conf.shape[0]):
        xmin = int(round(top_xmin[i] * img.shape[1]))
        ymin = int(round(top_ymin[i] * img.shape[0]))
        xmax = int(round(top_xmax[i] * img.shape[1]))
        ymax = int(round(top_ymax[i] * img.shape[0]))
        score = top_conf[i]
        label = int(top_label_indices[i])
        # label_name = voc_classes[label - 1]
        display_txt = '{:0.2f}, {}'.format(score, label)
        coords = (xmin, ymin), xmax-xmin+1, ymax-ymin+1
        color = colors[label]
        currentAxis.add_patch(plt.Rectangle(*coords, fill=False, edgecolor=color, linewidth=2))
        currentAxis.text(xmin, ymin, display_txt, bbox={'facecolor':color, 'alpha':0.5})

    plt.show()
基本的にはgithubに上がっているSSD_training.ipynbをベースに作っています。学習済みモデルも手に入るのでfinetuneをするように実装してあります。
比較
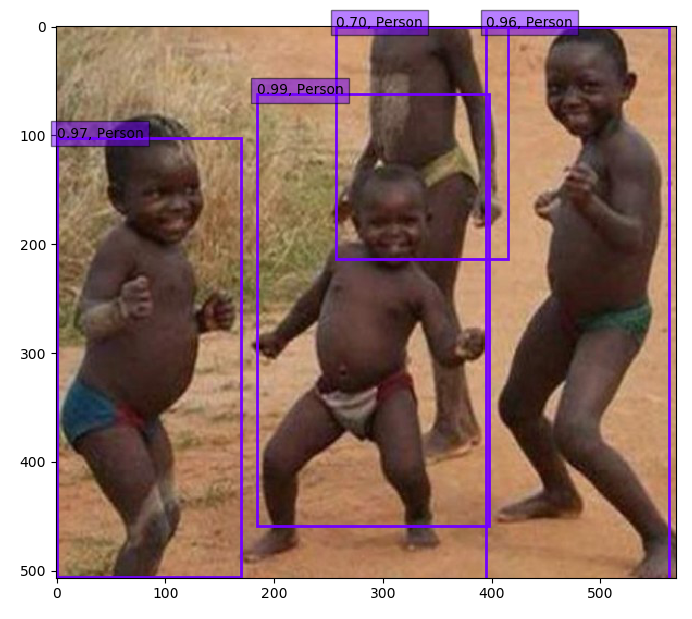
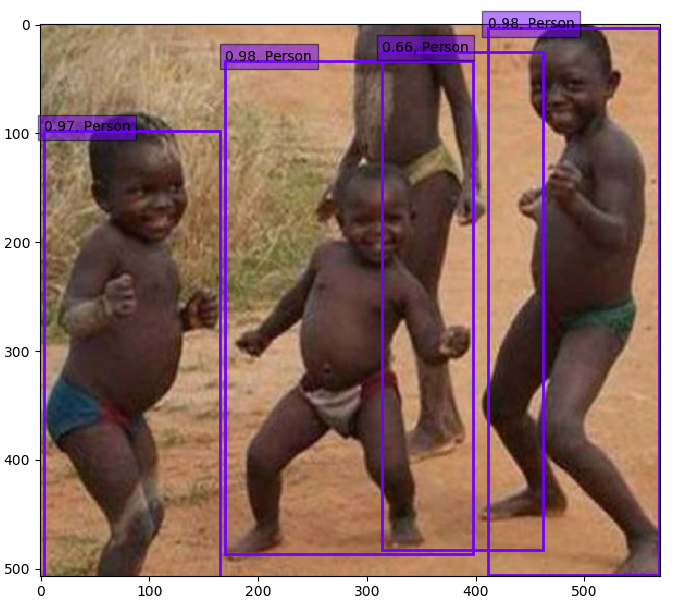
学習により得られたモデルで画像から物体検出をしてみると、少し結果が異なって出てきます。
お前らのいいね待ってるぜ!
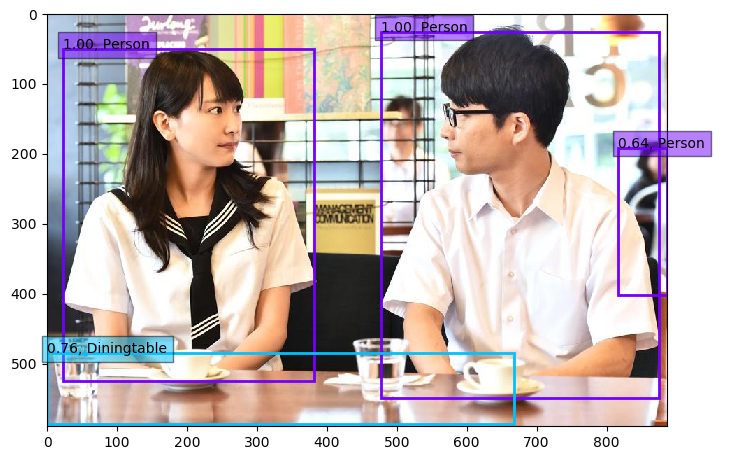
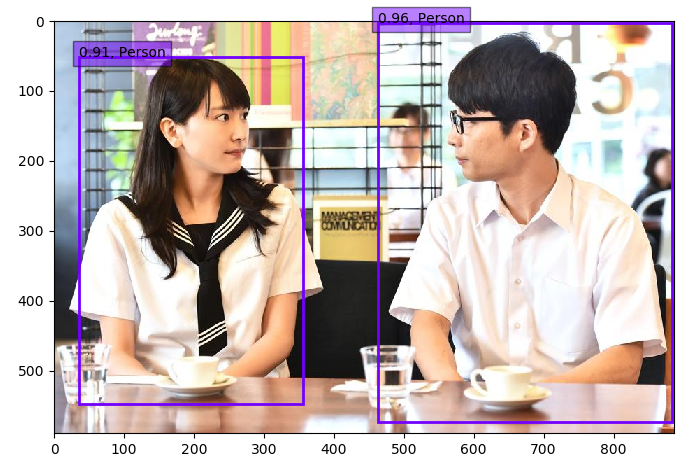
せっかくなのでもう1枚試してみましょう。日本で一番かわいいと言われているお方の登場です。
VOC2007のデータセットを使ったので、ラベルも全く同じになります。なので、あまり違いを実感することができないのですが、例えば自分なりに作ったデータセットを投げてみると、出力結果に大きな違いが現れそうですね。
メモ書き程度のTips
- image_dim_orderingは'tf'です。
- Python2系でも動きます。
- VOC2007のデータセットで学習100epoch回すのに6時間半くらいかかりました(GPUはGeForce GTX 1060です)。


