はじめに
CentOS8を入れてみたかった。それはCentOS7のシステム側のpythonが2で、プレーンなpython環境にしようとすると、ケンカするんだよね。CentOS側のpythonが3になってAnaconda縛りから解放されるってだけでやって見る価値あるでしょ。
参考URL
サーバーワールド
https://www.server-world.info/query?os=CentOS_8&p=install
いままではここの内容ですら難しかったけど今なら大丈夫でしょ
CentOS8
インストール
CentOS8が標準OS入りしました(2020/5/11に気づいた)
あっ!なんかそのままの画面でパケットフィルタ設定できるじゃん!地味にUX改善されてる(2020/5/11に気づいた)
パケットフィルタは、teratermをつかうのにSSH、Webは必須、あと僕はローカルのファイルを移したいのでFTPにチェックした。


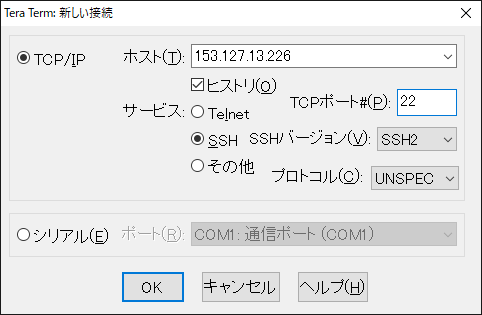
Teraterm
※Linuxの記号の意味
Linux初心者は、コンソール上の「$」とか「#」がよくわかんなかったりする
| 記号 | 意味 |
|---|---|
| $ | 一般ユーザ権限で操作中 |
| # | root権限権限で操作中 |
ログインチェック
まだ portは22

OK!

最初の設定
# useradd op
# passwd op
# reboot
Teratermを起動し直して、opユーザでログインしてください
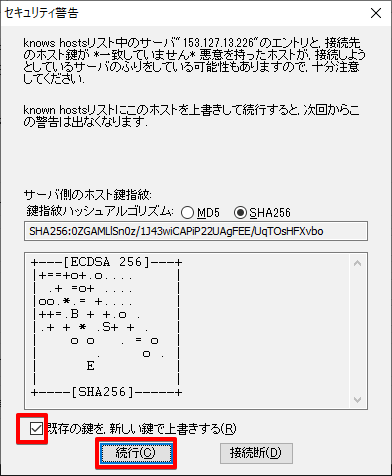
公開鍵認証によるSSH接続
作った公開鍵を置く(cdしてドラッグアンドドロップでOK)
$ pwd
  /home/op
$ ls
  id_rsa.pub

許可する鍵としてさっきの公開鍵を登録する(先頭にドットがつくのは隠しフォルダ)
$ mkdir .ssh
$ chmod 700 .ssh
$ cat id_rsa.pub > .ssh/authorized_keys
$ chmod 600 .ssh/authorized_keys
$ rm -f id_rsa.pub

sshd_configの編集(ポート番号など)
$ su -
# vi /etc/ssh/sshd_config
  Port 61203
  PermitRootLogin no
  PasswordAuthentication no

wheel グループに対する sudo 設定の有効化(ホイールって識者って意味らしいぞ)
# usermod -G wheel op

ファイアウォールのポート番号を61203と合わせて
# vi /usr/lib/firewalld/services/ssh.xml
  port="61203"

selinuxが無効になっていることを確認
# getenforce
  Disabled
# vi /etc/selinux/config
  SELINUX=disabled(編集注:さくらのVPSはdisabledが標準になった!?)

設定の有効化とステータス確認
# systemctl restart sshd
# systemctl status sshd
# reboot

TeraTermを開きなおして、opの61203の秘密鍵でログインできるか確認(rootでログインできないことも確認)
$

次の作業のために root になっておく(ファイアウォールの効きも確認)
$ su -
# systemctl start firewalld.service
# firewall-cmd --reload
  success
国や地域の設定
# localectl set-locale LANG=ja_JP.UTF-8
# source /etc/locale.conf
# localectl
# date
文字化け
・TeraTermで日本語が化ける件あれこれ(locale変えて曜日が化けたらこれ。原因はTeraTermのConsolasフォント)
Apache(Webサーバ)
インストール
# dnf -y install httpd httpd-devel gcc
:set number
httpd.conf
# vi /etc/httpd/conf/httpd.conf

# 89行目:管理者アドレス指定
ServerAdmin yoshitakachan@gmail.com
# 98行目:コメント解除しサーバー名指定
ServerName 153.126.200.229:80
# 147行目:変更 (Indexes を削除)
Options FollowSymLinks
# 154行目:変更
AllowOverride All
# 167行目:必要に応じて追記 (ディレクトリ名のみでアクセスできるファイル名 index.php など)
DirectoryIndex index.html
# 319行目:確認(UTF-8になってると思うけどなってなかったら変更)
AddDefaultCharset UTF-8

# 最終行に追記
# サーバーの応答ヘッダ
ServerTokens Prod
# キープアライブオン
KeepAlive On
# systemctl enable --now httpd
  Created symlink /etc/systemd/system/multi-user.target.wants/httpd.service → /usr/lib/systemd/system/httpd.service.
# firewall-cmd --add-service=http --permanent
  success
# firewall-cmd --reload
  success
テストhtmlを作ってみる
デフォルトの「ドキュメントルート」が /var/www/html/ なんだってさ。
httpd.conf を探すとあるよ。
# vi /var/www/html/index.html
<html>
  hello from 153.127.13.226
</html>
アドレスアクセステスト

Tree
インストール
ツリー表示ができるようになる。スーパー便利。使い方は「cd」と同じ
# dnf install tree
バーチャルホスト
・バーチャルホストの設定
さくらとの契約で手に入れた「153.126.200.229」を、http://www.henojiya.net と、http://app.henojiya.net で2通りの使い方にしたいときに使う(この時点では両方にアクセスしても apache のテストページが出てくるはずだけど)。難しくてもいちばん概念を理解しないといけない場所だよ。エイリアスっていう言い方で納得感が出る人もいる。
検証用でIP直打ち(ドメイン取るまでもない)するような場合ここは必要なくて、/var/www/html/index.htmlに作れば良い
# chown -R op:op /var/www/html
# vi /etc/httpd/conf/httpd.conf
httpd.conf
+ <VirtualHost *:80>
+   ServerName www.henojiya.net
+   DocumentRoot "/var/www/html"
+ </VirtualHost>
	・
	・
	こんな感じで欲しいサブドメインの分だけ <VirtualHost>ディレクティブを追記
# vi /etc/httpd/conf/httpd.conf
サーバを実行するためのユーザーとグループを指定します。ここで指定するユーザーとグループに、nobodyを設定する方も多いと思いますが、特定の新しいユーザとグループを作成して、設定する事が推奨されています。
- User apache
- Group apache
+ User op
+ Group op
# systemctl restart httpd
アドレスアクセステスト
ネームサーバーを設定
バーチャルホストと対にして覚えないといけない概念、ネームサーバー。これで大ハマりしてたよ。
考え方自体は ここ の設定の概要がわかりやすい。要は、お名前.comと、さくらVPSコントロールパネル両方での設定が必要だということ(以下に勘所は書くけどあくまで作業手順はリンク先を見てね)。
・お名前.comでドメインを取得する(省略)
・お名前.com のコントロールパネルに入る。

・さくらのVPSのネームサーバー情報は
「ns1.dns.ne.jp」
「ns2.dns.ne.jp」
となっており、この情報を、お名前.com のネームサーバー情報に設定する。
これはドメインネーム(=会社名)とIP(=電話帳)の台帳のようなモンで、お名前.comの台帳をつかってもいいし、さくらのVPSの台帳を使ってもいい。どっちで設定しても同じ効果。逆に言うと片方に書くようにしないとあとあと混乱を招く。

・取得したドメインを登録する(wwwとかはつけんくてよろしい)

・台帳たる、さくらの「ゾーン情報」のAレコードには、henojiya.netのIPアドレスが記帳されている。
Aレコードの設定とは?:ドメイン名がこのIPアドレスだよと指定すること。そしてここの「エントリの追加と変更」のとこに、欲しいサブドメインを登録するわけだ。
(※注意 画像では「app01」だけど「app」に修正済み)

・「app」が増えてるでしょ?いやー、このへんがドハマりしてげんなりしてた。相当勉強になった。

アドレスアクセステスト
それぞれ違うページが出てくるはず
http://www.henojiya.net
http://app.henojiya.net
https
httpsポート開放
# firewall-cmd --add-service=https --zone=public --permanent
  success
# systemctl restart firewalld
# systemctl restart httpd
確認
# firewall-cmd --list-all
  public (active)
    target: default
    icmp-block-inversion: no
    interfaces: eth0
    sources:
    services: cockpit dhcpv6-client http https mysql ssh
    ports:
    protocols:
    masquerade: no
    forward-ports:
    source-ports:
    icmp-blocks:
    rich rules:
Let’s Encrypt
いつか有料のhttpsにできるといいね
なお、バーチャルホストの設定が前提になります
インストール
# dnf install wget
# wget https://dl.eff.org/certbot-auto
# mv certbot-auto /usr/local/bin/certbot-auto
# chown root /usr/local/bin/certbot-auto
# chmod 0755 /usr/local/bin/certbot-auto
# systemctl enable httpd.service
# systemctl is-enabled httpd.service
  enabled

(※このコマンドでいろんなインストールが走ったあとに The apache plugin is not working が出るが、apache再起動すると通る)
# /usr/local/bin/certbot-auto --apache
# systemctl restart httpd
# /usr/local/bin/certbot-auto --apache
  E-mail?: yoshitakachan@gmail.com
  (A)gree/(C)ancel?: A
  E-mail sharing ok?: Y
  redirect to https?: 1
確認

定例更新化
cd /root
vi certbot.sh
# /bin/sh
/usr/local/bin/certbot-auto renew
today=$(date "+%Y/%m/%d %H:%M:%S")
echo ${today} certbot-auto >> result.log
chmod 755 certbot.sh
crontab -e
0 0 * * * /root/certbot.sh
crontab -l
確認
# ls /etc/letsencrypt/live
  www.henojiya.net
# openssl x509 -in /etc/letsencrypt/live/www.henojiya.net/fullchain.pem -noout -dates
  notBefore=May 13 11:09:02 2020 GMT
  notAfter =Aug 11 11:09:02 2020 GMT
MySQL8
mariadbの削除
※CentOS8 で Failed to set locale, defaulting to C.UTF-8 と言われる時
CentOS8 で Failed to set locale, defaulting to C.UTF-8 と言われる時
# yum install -y langpacks-ja
# dnf list installed | grep mariadb
  # (注: 多分入ってない)

# dnf remove MariaDB-server MariaDB-client MariaDB-common MariaDB-compat galera-4 MariaDB-devel
インストール
(rootじゃないと入れられないみたい)
# dnf module -y install mysql:8.0
# vi /etc/my.cnf.d/mysql-server.cnf
character-set-server=utf8
[client]
default-character-set=utf8
[mysql]
default-character-set=utf8
[mysqldump]
default-character-set=utf8
# systemctl enable --now mysqld
# firewall-cmd --add-service=mysql --permanent
  success
# firewall-cmd --reload
  success
# mysql_secure_installation

# パスワード品質チェックを有効にするか否か
Press y|Y for Yes, any other key for No: y

# パスワード品質チェックを有効にした場合は強度を選択
Please enter 0 = LOW, 1 = MEDIUM and 2 = STRONG: 0

# MySQL root パスワードを設定
New password:
Re-enter new password:

# 入力したパスワードで良いかの確認
Do you wish to continue with the password provided?(Press y|Y for Yes, any other key for No) : y

# 匿名ユーザーを削除するか否か
Remove anonymous users? (Press y|Y for Yes, any other key for No) : y

# root ユーザーのリモートログインを無効とするか否か
Disallow root login remotely? (Press y|Y for Yes, any other key for No) : y

# テストデータベースを削除するか否か
Remove test database and access to it? (Press y|Y for Yes, any other key for No) : y

# 特権情報をリロードするか否か
Reload privilege tables now? (Press y|Y for Yes, any other key for No) : y

All done!
起動確認
# mysql -u root -p
mysql> status
--------------
mysql  Ver 8.0.17 for Linux on x86_64 (Source distribution)

Connection id:          10
Current database:
Current user:           root@localhost
SSL:                    Not in use
Current pager:          stdout
Using outfile:          ''
Using delimiter:        ;
Server version:         8.0.17 Source distribution
Protocol version:       10
Connection:             Localhost via UNIX socket
Server characterset:    utf8
Db     characterset:    utf8
Client characterset:    utf8
Conn.  characterset:    utf8
UNIX socket:            /var/lib/mysql/mysql.sock
Uptime:                 9 min 36 sec

Threads: 2  Questions: 18  Slow queries: 0  Opens: 131  Flush tables: 3  Open tables: 48  Queries per second avg: 0.031
--------------
※UNIXドメインソケット
経緯はここを見て MySQL8になったら無いとは思うんだけど、さっきMySQLで status を打ったときに UNIX socket が「/var/lib/mysql/mysql.sock」となっていた。それと、cnfの mysqldセクションの socket は一致してないといけないわけ。
# vi /etc/my.cnf.d/mysql-server.cnf
+ [mysqld]
+ socket=/var/lib/mysql/mysql.sock
データベースを作成
# mysql -u root -p
mysql> CREATE DATABASE pythondb DEFAULT CHARACTER SET utf8;
   Query OK, 1 row affected (0.01 sec)
mysql> show databases;

ユーザ作成
「pythondb」に対してFULL権限をもつ「python」ユーザを作成。
最初はSELECT権限だけ、とかにしてたんだけど、DjangoがMigrationするときにCREATEなどの権限をよこせと言ってくる。あえてひとつひとつエラーになっていくのも勉強になる。
ユーザ名とパスワード同じにしたかったけどパスワードポリシーが面倒だな...
| 項目 | 入力 |
|---|---|
| user | python |
| password | python123 |
# mysql -u root -p
mysql> CREATE USER 'python'@'localhost' IDENTIFIED BY 'python123';
grant CREATE, DROP, SELECT, UPDATE, INSERT, DELETE, ALTER, REFERENCES, INDEX on pythondb.* to python@localhost;
mysql> exit
MySQLWorkbench
GUI環境で接続することで取り回しがよくなる。
さくらVPS Ubuntu MySQLWorkbench でMysqlサーバーにssh 接続
接続の新規追加


| 入力箇所 | 入力値 |
|---|---|
| SSH Hostname | 153.127.13.226:61203 |
| SSH Username | op |
| SSH Password | (op ユーザーのパスワード) |
| SSH Key File | (VPSでのログイン時に指定する rsa 秘密鍵) |
| MySQL Hostname | localhost |
| MySQL Server Port | 3306 |
| Username | root |
| Password | (MySQLのrootユーザーのパスワード) |
mysql> select user, host from mysql.user;
+---------------+-----------+
| user          | host      |
+---------------+-----------+
| mysql.session | localhost |
| mysql.sys     | localhost |
| root          | localhost |
+---------------+-----------+
Python3.6
インストール
(rootじゃないと入れられないみたい)
# dnf module -y install python38
起動確認
# python3 -V
  Python 3.6.8
# alternatives --config python
  ('python'って打たれたらどこを見に行くの?と聞かれるので 2 を入力)
# python -V
  Python 3.6.8
# update-alternatives --install /usr/bin/pip pip /usr/bin/pip3 1
# pip --version
virtualenv
インストール
(rootじゃないと入れられないみたい)
# dnf -y install python3-virtualenv
activate
# cd /var/www/html
# virtualenv venv (※ここにpython3.6がinstallされる)
# source /var/www/html/venv/bin/activate
deactivate
# deactivate
mod_wsgi
インストール
(venv)# pip install mod_wsgi
※トラブルシューティング
PythonのDjangoを動かすために「mod-wsgi」をインストールしたいのですができません...
httpd-devel, gcc のインストールが足りない
gcc: エラー: /usr/lib/rpm/redhat/redhat-hardened-cc1: そのようなファイルやディレクトリはありません
dnf -y install rpm-build
Django3
インストール
# source /var/www/html/venv/bin/activate
# pip install django==3.0
# django-admin --version
  3.0
pip list
# pip list
  Package    Version
  ---------- -------
  asgiref    3.2.7
  Django     3.0
  mod-wsgi   4.7.1
  pip        20.0.2
  pytz       2019.3
  setuptools 46.1.3
  sqlparse   0.3.1
  wheel      0.34.2
わかりやすいプロジェクト構成
新規作成時のみ
- ベースディレクトリ名と設定ディレクトリ名が同じでややこしい
- テンプレートと静的ファイルがアプリケーションごとにバラバラに配置されてしまう
これらを解決する。ベースディレクトリを作成したあとにベースディレクトリの下に移動し、設定ディレクトリ名と.を指定する
$ mkdir mysite
$ cd mysite
$ django-admin startproject config .
$ python manage.py startapp hoge
PROJECT_NAME = os.path.basename(BASE_DIR)
STACIC_URL = '/static/'
STATICFILES_DIRS = [os.path.join(BASE_DIR, 'static')]
STATIC_ROOT = '/var/www/{}/static'.format(PROJECT_NAME)
Cloneする
Cloneできないときはこれをチェック
-
ls ~/.sshに github 登録したカギがあるか(ユーザが合っているか) - 権限が github に登録したユーザについてるか
chown -R op:op /home/op
# cd /var/www/html
# git clone git@github.com:duri0214/Portfolio.git
# systemctl restart httpd
.
├── Portfolio
│   ├── docs
│   │   └── linebot
│   └── mysite
│       ├── gmarker
│       │   ├── __pycache__
│       │   ├── api_setting
│       │   ├── static
│       │   │   └── gmarker
│       │   │       ├── css
│       │   │       ├── img
│       │   │       └── js
│       │   └── templates
│       │       └── gmarker
│       ├── linebot
│       │   ├── __pycache__
│       │   ├── api_setting
│       │   └── static
│       │       └── linebot
│       │           └── img
│       ├── mysite
│       │   └── __pycache__
│       ├── register
│       │   ├── __pycache__
│       │   ├── api_setting
│       │   ├── static
│       │   │   └── register
│       │   │       └── css
│       │   └── templates
│       │       └── register
│       │           └── mail_template
│       ├── shopping
│       │   ├── __pycache__
│       │   ├── api_setting
│       │   ├── static
│       │   │   └── shopping
│       │   │       ├── css
│       │   │       ├── img
│       │   │       └── js
│       │   └── templates
│       │       └── shopping
│       ├── static
│       │   ├── admin
│       │   │   ├── css
│       │   │   │   └── vendor
│       │   │   │       └── select2
│       │   │   ├── fonts
│       │   │   ├── img
│       │   │   │   └── gis
│       │   │   └── js
│       │   │       ├── admin
│       │   │       └── vendor
│       │   │           ├── jquery
│       │   │           ├── select2
│       │   │           │   └── i18n
│       │   │           └── xregexp
│       │   ├── gmarker
│       │   │   ├── css
│       │   │   ├── img
│       │   │   └── js
│       │   ├── linebot
│       │   │   └── img
│       │   ├── register
│       │   │   └── css
│       │   ├── shopping
│       │   │   ├── css
│       │   │   ├── img
│       │   │   └── js
│       │   └── vietnam_research
│       │       ├── css
│       │       └── js
│       └── vietnam_research
│           ├── __pycache__
│           ├── static
│           │   └── vietnam_research
│           │       ├── chart
│           │       ├── chart_uptrend
│           │       ├── css
│           │       └── js
│           └── templates
│               └── vietnam_research
│                   └── articles
└── venv
.gitignore
お好みで。だけどgit使うなら作っといたほうがいいな。
場所は git init した場所かな
【Django】git ignoreの簡単な使い方
mod_wsgi
LoadModule
# find -name 'mod_*.so'
  /var/www/html/venv/lib/python3.6/site-packages/mod_wsgi/server/mod_wsgi-py36.cpython-36m-x86_64-linux-gnu.so
python-home
# find -name '*venv*'
  /var/www/html/venv
settings.py
ALLOWED_HOSTS(許可するドメイン)を編集する
# vi /var/www/html/portfolio/mysite/mysite/settings.py
- ALLOWED_HOSTS = []
+ ALLOWED_HOSTS = ['.henojiya.net']
httpd.conf(wsgi.conf)
# vi /etc/httpd/conf.d/wsgi.conf
LoadModule wsgi_module /var/www/html/venv/lib/python3.6/site-packages/mod_wsgi/server/mod_wsgi-py36.cpython-36m-x86_64-linux-gnu.so
WSGIScriptAlias / /var/www/html/portfolio/mysite/mysite/wsgi.py
WSGIDaemonProcess wsgi_app python-home=/var/www/html/venv python-path=/var/www/html/portfolio/mysite
WSGIProcessGroup wsgi_app
WSGISocketPrefix /var/run/wsgi

# css, javascript etc
Alias /static/ /var/www/html/portfolio/mysite/static/
<Directory /var/www/html/portfolio/mysite/static>
  Require all granted
</Directory>
LoadModule: mod_wsgiの本体ファイルの位置。Apacheがwsgiを認識するために必要
WSGIScriptAlias: 1つめの引数のURLでアクセスされたら、2つめの引数のwsgiスクリプトに移動する
WSGIDaemonProcess: Linuxではデーモン(=サービス)として動かすのが推奨されている
WSGIProcessGroup: 「サービス」に名前をつける
WSGISocketPrefix: 「※Socketの問題」を参照
パーミッションチェック
# ls -l /var/www/html
# chown -R op:op /var/www/html
アドレスアクセステスト
# systemctl restart httpd.service

※トラブルシューティング
(たぶんVagrantでやってるときは出るかも)
DjangoはRuntimeErrorの処理を停止します:populate()はリエントラントではありません
前提:apacheのサンプルページは出ていること
手順:wsgi.pyを以下の全文で書き換えて、ブラウザの500ページをリロード。その後、wsgi.pyで ctrl + z でもとに戻す。キャッシュを書き換えるような効果があるようだ
def application(environ, start_response):
    if environ['mod_wsgi.process_group'] != '':
        import signal
        os.kill(os.getpid(), signal.SIGINT)
    return ["killed"]
これで治らなかったらmysqlclientを入れる手順を踏んでみて
おもに関連するファイルのディレクトリ構造
/
├─ var
│  └─ www
│     └─ html  #apacheのドキュメントルート
│        ├─ index.html #練習で作ったから消していい
│        ├─ mysite #Djangoのprojectディレクトリ
│        │    │ manage.py
│        │    ├─ static
│        │    ├─ mysite
│        │    │  ├─ settings.py
│        │    │  └─ wsgi.py
│        │    └─app
│        └─ venv #pythonはここにある
├─ etc
│  └─ httpd
│     ├─ conf
│   │  └─ httpd.conf  #apacheの設定ファイル
│     └─ conf.d
│        └─ wsgi.conf #Djangoを動かすための追加設定ファイル
Tips: CentOSエラーログと再起動
# tail -f /var/log/httpd/error_log
# systemctl restart httpd.service
※Socketの問題
このようなエラーが出た場合、WSGISocketPrefixディレクティブを追記する必要があるようだ。またテメェェェェか!Socket!
(13)Permission denied: [client 160.237.103.72:55510] mod_wsgi (pid=5665): Unable to connect to WSGI daemon process 'wsgi_app' on '/etc/httpd/run/wsgi.5662.0.1.sock' as user with uid=1000.
ソケットをシステムの一時作業ディレクトリに配置しないでください。他のユーザーはディレクトリを読み取ることができません。
ちゃんとこのへん面倒見といてよ...
# vi /etc/httpd/conf.d/wsgi.conf
WSGISocketPrefix /var/run/wsgi
Tips: 500 Internal Server Error
※まずはCentOS側をDEBUG=TRUEにしろ話はそれからだ
OpenSSL(Let'sEncrypt)の問題かと思って1週間悩んでたけど結局SQLの問題だったからね
当時のStackOverFlowの投稿
当時のlet'sEncryptの投稿
※apacheの再起動でなおるかもよ
# service httpd restart
> 不正なリクエストがあったってことなんやろうか?
> 気になる中華ip 219.157.152.196 をWHOISで調べてみると、 country: CN →(中国)
> 処理が不完全でした(閲覧者のブラウザ処理が遅くてキャンセルしたような時にこれが出るらしいから、これが必ずしも原因とは限らないが500は出るらしい)
[Sat Apr 24 12:15:00.083869 2021] [wsgi:error] [pid 17664:tid 139984015140608] [client 219.157.152.196:34977] mod_wsgi (pid=17664): Request data read error when proxying data to daemon process: Partial results are valid but proces
sing is incomplete.
よく使うライブラリ
# pip install pandas sqlalchemy bs4 matplotlib pillow lxml stripe
Cron(タスクスケジューラ)
CronはWindowsでいうタスクスケジューラだ。決まった時間に決まったコマンドを実行してくれる
Cron(crontab)の設定
定期実行するプログラムの作成
# pwd
  /var/www/html
# vi hello-cron.py
import codecs
from datetime import datetime

txt = datetime.now().strftime("%Y/%m/%d %H:%M:%S") + ' hello-cron.py'
with codecs.open('hello-cron.log', 'a', 'utf-8') as f:
    f.writelines('\n' + txt)
# python hello-cron.py
# vi hello-cron.log
2020/03/28 02:18:26 hello-cron.py
Cronの設定
10分ごとに Hello-cron.py を実行するスケジュールを作成します。
気をつける点は、pythonプログラムが書き込む場所の権限とpythonプログラム自体へのパス(フルパスなんよね)。あとは相対パスでプログラムを書いている場合の「カレントディレクトリ」に注意。windowsとlinuxのディレクトリ構造は違うことが多いし。
# crontab -e
*/10 * * * * /var/www/html/venv/bin/python /var/www/html/hello-cron.py
0 * * * * /var/www/html/venv/bin/python /var/www/html/hello-cron.py
* * * * * /var/www/html/venv/bin/python /var/www/html/hello-cron.py
0 0 * * * /root/certbot.sh
0 18 * * * /var/www/html/venv/bin/python /var/www/html/portfolio/daily_industry.py
5 18 * * * /var/www/html/venv/bin/python /var/www/html/portfolio/daily_sbi.py
6 18 * * * /var/www/html/venv/bin/python /var/www/html/portfolio/daily_vnindex.py
15 18 * * * /var/www/html/venv/bin/python /var/www/html/portfolio/daily_chart.py
0 19 * * * /root/collectstatic.sh
# crontab -l
  */10 * * * * /var/www/html/venv/bin/python /var/www/html/hello-cron.py

# vi hello-cron.log
2020/03/28 02:18:26 hello-cron.py
2020/03/28 02:28:26 hello-cron.py
# chmod 774 /var/www/html/portfolio/daily_industry.py
# chmod 774 /var/www/html/portfolio/daily_sbi.py
# chmod 774 /var/www/html/portfolio/daily_vnindex.py
# chmod 774 /var/www/html/portfolio/daily_chart.py
# chmod 664 /var/www/html/portfolio/result.log

# ls -l /var/www/html/portfolio
  合計 56
  -rwxrwxr--. 1 op op 6577  3月 28 02:32 daily_chart.py
  -rw-rw-r--. 1 op op 4908  3月 28 02:32 daily_chart_cp.py
  -rwxrwxr--. 1 op op 4990  3月 28 02:32 daily_industry.py
  -rwxrwxr--. 1 op op 1426  3月 28 02:32 daily_sbi.py
  -rwxrwxr--. 1 op op 1421  3月 28 02:32 daily_vnindex.py
  drwxrwxr-x. 3 op op   17  3月 28 02:33 import
  -rw-rw-r--. 1 op op 1146  3月 28 02:32 import_mst.py
  -rw-rw-r--. 1 op op 3458  3月 28 02:32 import_statistics.py
  -rw-rw-r--. 1 op op 1219  3月 28 02:32 import_vnindex.py
  -rw-rw-r--. 1 op op    2  3月 28 02:34 result.log
# chown -R op:op /var/www/html
mysqlclient
MySQLクライアントを入れてsettings.pyのDATABASESを書き換えることと
インストール
# dnf install python3-devel
# dnf install mysql-devel
# pip install mysqlclient
DATABASES = {
    'default': {
        'HOST': '127.0.0.1',
        'ENGINE': 'django.db.backends.mysql',
        'NAME': 'pythondb',
        'USER': 'python',
        'PASSWORD': 'python123',
    }
}
Djangoログイン機能
ここはタイミング的にはここに書いておくけどアプリケーション作るのに慣れてからやること。ログイン機能は、ログイン機能としてのアプリケーションを別個につくるのがベスト・プラクティスだ。
Reset(※必要に応じて)
- まず各appディレクトリのmigrationsディレクトリを消してまわります
- dbを消します(=pythondb)
- dbを作ります
startapp
# cd /var/www/html/portfolio/mysite
# python manage.py startapp register
from django.db import models
from django.core.mail import send_mail
from django.contrib.auth.models import PermissionsMixin, UserManager
from django.contrib.auth.base_user import AbstractBaseUser
from django.utils.translation import ugettext_lazy as _
from django.utils import timezone


class CustomUserManager(UserManager):
    """ユーザーマネージャー"""
    use_in_migrations = True

    def _create_user(self, email, password, **extra_fields):
        if not email:
            raise ValueError('The given email must be set')
        email = self.normalize_email(email)
        user = self.model(email=email, **extra_fields)
        user.set_password(password)
        user.save(using=self._db)
        return user

    def create_user(self, email, password=None, **extra_fields):
        extra_fields.setdefault('is_staff', False)
        extra_fields.setdefault('is_superuser', False)
        return self._create_user(email, password, **extra_fields)

    def create_superuser(self, email, password, **extra_fields):
        extra_fields.setdefault('is_staff', True)
        extra_fields.setdefault('is_superuser', True)
        if extra_fields.get('is_staff') is not True:
            raise ValueError('Superuser must have is_staff=True.')
        if extra_fields.get('is_superuser') is not True:
            raise ValueError('Superuser must have is_superuser=True.')
        return self._create_user(email, password, **extra_fields)


class User(AbstractBaseUser, PermissionsMixin):
    """カスタムユーザーモデル."""

    email = models.EmailField(_('email address'), unique=True)
    first_name = models.CharField(_('first name'), max_length=30, blank=True)
    last_name = models.CharField(_('last name'), max_length=150, blank=True)

    is_staff = models.BooleanField(
        _('staff status'),
        default=False,
        help_text=_(
            'Designates whether the user can log into this admin site.'),
    )
    is_active = models.BooleanField(
        _('active'),
        default=True,
        help_text=_(
            'Designates whether this user should be treated as active. '
            'Unselect this instead of deleting accounts.'
        ),
    )
    date_joined = models.DateTimeField(_('date joined'), default=timezone.now)

    objects = CustomUserManager()

    EMAIL_FIELD = 'email'
    USERNAME_FIELD = 'email'
    REQUIRED_FIELDS = []

    class Meta:
        verbose_name = _('user')
        verbose_name_plural = _('users')

    def get_full_name(self):
        """Return the first_name plus the last_name, with a space in
        between."""
        full_name = '%s %s' % (self.first_name, self.last_name)
        return full_name.strip()

    def get_short_name(self):
        """Return the short name for the user."""
        return self.first_name

    def email_user(self, subject, message, from_email=None, **kwargs):
        """Send an email to this user."""
        send_mail(subject, message, from_email, [self.email], **kwargs)

    @property
    def username(self):
        """username属性のゲッター

        他アプリケーションが、username属性にアクセスした場合に備えて定義
        メールアドレスを返す
        """
        return self.email
INSTALLED_APPS = [
    'django.contrib.admin',
    'django.contrib.auth',
    'django.contrib.contenttypes',
    'django.contrib.sessions',
    'django.contrib.messages',
    'django.contrib.staticfiles',
+    'register.apps.RegisterConfig', # 追記
]
+ # login
+ LOGIN_URL = 'register:login'
+ LOGIN_REDIRECT_URL = 'vnm:index'  #ログイン後にリダイレクトしたい先
+ LOGOUT_REDIRECT_URL = "vnm:index" #ログアウト後にリダイレクトしたい先
+ AUTH_USER_MODEL = 'register.User'
# mkdir -p templates/register
# vi templates/register/base.html
{% load static %}
<!DOCTYPE html>
<html lang="ja">
<head>
    <!-- Global site tag (gtag.js) - Google Analytics -->
    <script async src="https://www.googletagmanager.com/gtag/js?id=UA-43097095-9"></script>
    <script>
        window.dataLayer = window.dataLayer || [];
        function gtag(){dataLayer.push(arguments);}
        gtag('js', new Date());
        gtag('config', 'UA-43097095-9');
    </script>

    <meta charset="UTF-8">
    <meta name="viewport" content="width=device-width, initial-scale=1.0">
    <meta http-equiv="X-UA-Compatible" content="ie=edge">
    <title>VNMビューア</title>

    <!-- css -->
    <link rel="stylesheet" href="{% static 'register/css/reset.css' %}">
    <link rel="stylesheet" href="{% static 'register/css/index.css' %}">

    <!-- font -->
    <link href="https://fonts.googleapis.com/css?family=Sawarabi+Gothic" rel="stylesheet">
    <!-- fontawesome -->
    <link href="https://use.fontawesome.com/releases/v5.6.1/css/all.css" rel="stylesheet">

    <!-- favicon -->
    <link rel="shortcut icon" href="{% static 'register/images/c_r.ico' %}">

</head>
<body>
    <!-- nav -->
    <h1></h1>

    <div id="main">
        {% block content %}{% endblock %}
    </div>

    <footer>
        <p>© 2019 henojiya. / <a href="https://github.com/duri0214" target="_blank">github portfolio</a></p>
    </footer>

</body>
</html>
"""views.py"""
from django.conf import settings
from django.contrib.auth import get_user_model
from django.contrib.auth.views import LoginView, LogoutView
from django.contrib.sites.shortcuts import get_current_site
from django.core.signing import BadSignature, SignatureExpired, loads, dumps
from django.http import HttpResponseBadRequest
from django.shortcuts import redirect
from django.template.loader import render_to_string
from django.views import generic
from .forms import UserCreateForm

# signup
class UserCreate(generic.CreateView):
    """ユーザー仮登録"""
    template_name = 'register/user_create.html'
    form_class = UserCreateForm

    def form_valid(self, form):
        """仮登録と本登録用メールの発行."""
        # 仮登録と本登録の切り替えは、is_active属性を使うと簡単です。
        # 退会処理も、is_activeをFalseにするだけにしておくと捗ります。
        user = form.save(commit=False)
        user.is_active = False
        user.save()

        # アクティベーションURLの送付
        current_site = get_current_site(self.request)
        domain = current_site.domain
        context = {
            'protocol': self.request.scheme,
            'domain': domain,
            'token': dumps(user.pk),
            'user': user,
        }
        folder = settings.BASE_DIR + '/register/templates/register/mail_template/'
        subject = render_to_string(folder + 'subject.txt', context)
        message = render_to_string(folder + 'message.txt', context)

        user.email_user(subject, message)
        return redirect('register:user_create_done')


class UserCreateDone(generic.TemplateView):
    """ユーザー仮登録したよ"""
    template_name = 'register/user_create_done.html'


class UserCreateComplete(generic.TemplateView):
    """メール内URLアクセス後のユーザー本登録"""
    template_name = 'register/user_create_complete.html'
    timeout_seconds = getattr(settings, 'ACTIVATION_TIMEOUT_SECONDS', 60*60*24)  # デフォルトでは1日以内

    def get(self, request, *args, **kwargs):
        """tokenが正しければ本登録."""
        token = kwargs.get('token')
        try:
            user_pk = loads(token, max_age=self.timeout_seconds)

        # 期限切れ
        except SignatureExpired:
            return HttpResponseBadRequest()

        # tokenが間違っている
        except BadSignature:
            return HttpResponseBadRequest()

        # tokenは問題なし
        else:
            try:
                user = get_user_model().objects.get(pk=user_pk)
            except get_user_model().DoesNotExist:
                return HttpResponseBadRequest()
            else:
                if not user.is_active:
                    # 問題なければ本登録とする
                    user.is_active = True
                    user.save()
                    return super().get(request, **kwargs)

        return HttpResponseBadRequest()


class Login(LoginView):
    """ログインページ"""
    template_name = 'register/login.html'
"""forms.py"""
from django.contrib.auth.forms import UserCreationForm
from django.contrib.auth import get_user_model

class UserCreateForm(UserCreationForm):
    """ユーザー登録用フォーム"""

    class Meta:
        model = get_user_model()
        fields = ('email',)

    def clean_email(self):
        """clean_email"""
        email = self.cleaned_data['email']
        get_user_model().objects.filter(email=email, is_active=False).delete()
        return email
{% extends "register/base.html" %}
{% block content %}
<div class="card col-md-6">
    <div class="card-body">
        <form action="{% url 'register:login' %}" method="POST">
            {{ form.non_field_errors }}
            {% for field in form %}
                {{ field }}
                {{ field.errors }}
                <hr>
            {% endfor %}
            <button type="submit" class="btn btn-success btn-lg btn-block" >ログイン</button>
            <input type="hidden" name="next" value="{{ next }}" />
            {% csrf_token %}
        </form>
    </div>
</div>
<div class="">
    <div class="card-body">
        <a href="{% url 'register:user_create' %}" class="" >会員登録</a>
    </div>
</div>
{% endblock %}
"""urls.py"""
from django.urls import path
from . import views
from django.contrib.auth.views import LoginView, LogoutView

app_name = 'register'

urlpatterns = [
    path('login/', LoginView.as_view(template_name='register/login.html'), name='login'),
    path('logout/', LogoutView.as_view(), name='logout'),
    path('user_create/', views.UserCreate.as_view(), name='user_create'),
    path('user_create/done', views.UserCreateDone.as_view(), name='user_create_done'),
    path('user_create/complete/<str:token>/', views.UserCreateComplete.as_view(), name='user_create_complete'),
]
migrationとcreatesuperuser
最初に register を指定しながらの makemigrations をしないとだめ
# python manage.py makemigrations register
  Migrations for 'register':
    register\migrations\0001_initial.py
      - Create model User
# python manage.py migrate
  Operations to perform:
    Apply all migrations: admin, auth, contenttypes, register, sessions
  Running migrations:
    Applying contenttypes.0001_initial... OK
    Applying contenttypes.0002_remove_content_type_name... OK
    Applying auth.0001_initial... OK
    Applying auth.0002_alter_permission_name_max_length... OK
    Applying auth.0003_alter_user_email_max_length... OK
    Applying auth.0004_alter_user_username_opts... OK
    Applying auth.0005_alter_user_last_login_null... OK
    Applying auth.0006_require_contenttypes_0002... OK
    Applying auth.0007_alter_validators_add_error_messages... OK
    Applying auth.0008_alter_user_username_max_length... OK
    Applying auth.0009_alter_user_last_name_max_length... OK
    Applying auth.0010_alter_group_name_max_length... OK
    Applying auth.0011_update_proxy_permissions... OK
    Applying register.0001_initial... OK
    Applying admin.0001_initial... OK
    Applying admin.0002_logentry_remove_auto_add... OK
    Applying admin.0003_logentry_add_action_flag_choices... OK
    Applying sessions.0001_initial... OK
# python manage.py makemigrations vietnam_research
# python manage.py makemigrations gmarker
# python manage.py makemigrations shopping
# python manage.py makemigrations linebot
# python manage.py makemigrations warehouse
# python manage.py migrate
# python manage.py createsuperuser
  Email address:
  Password:
  Password (again):
  Superuser created successfully.
確認
djangoがシステム的に作ったテーブルと、アプリケーションを作っていればアプリケーション名が先頭についたテーブルが作成される(赤枠)

MySQLデータのインポート
Djangoアプリケーション
# cd /var/www/html/portfolio/mysite
# python manage.py startapp vietnam_research
# vi vietnam_research/views.py
from django.http import HttpResponse

def index(request):
    return HttpResponse("Hello, world.")
settings.py
# vi mysite/settings.py
INSTALLED_APPS = [
    ...,
    'vietnam_research.apps.VietnamResearchConfig'
]
httpd.conf(wsgi.conf)
staticディレクトリ配下は開放。
※あくまで DEBUG = True のときの設定です。慣れてきて DEBUG = False にするときは こっち を参照
# vi /etc/httpd/conf.d/wsgi.conf
+ # css, javascript etc
+ Alias /static/ /var/www/html/portfolio/mysite/static/
+ <Directory /var/www/html/portfolio/mysite/static>
+   Require all granted
+ </Directory>
# systemctl restart httpd.service
vietnam_research/urls.py を編集
URLの紐づけをロケットアニメのHelloWorldから変えるために、urls.py を新規作成する(作る場所は「vietnam_research」フォルダ)。便宜上「子供のurls.py」と呼ぶことがある。「urls.py」には「s」をつけろよデコ助野郎。

from django.urls import path

# 現在のフォルダの「views.py」を import する!さっき "Hello, world." したやつ!
from . import views

# views.py には「index」という関数を作りましたね!それを呼んでます
urlpatterns = [
    path('', views.index, name='index'),
]
mysite/urls.py(共通Configのほう)
NTTの配電盤みたいなイメージね。便宜上「親のurls.py」と呼ぶことがある。
(※この英語部分もよく読むと実はさっき子供のurls.pyに書いたようなことをやれって書いてあったりする)
"""mysite URL Configuration

The `urlpatterns` list routes URLs to views. For more information please see:
    https://docs.djangoproject.com/en/2.2/topics/http/urls/
Examples:
Function views
    1. Add an import:  from my_app import views
    2. Add a URL to urlpatterns:  path('', views.home, name='home')
Class-based views
    1. Add an import:  from other_app.views import Home
    2. Add a URL to urlpatterns:  path('', Home.as_view(), name='home')
Including another URLconf
    1. Import the include() function: from django.urls import include, path
    2. Add a URL to urlpatterns:  path('blog/', include('blog.urls'))
"""
from django.contrib import admin
from django.urls import include, path

urlpatterns = [
    path('vietnam_research/', include('vietnam_research.urls')),
    path('admin/', admin.site.urls),
]
HelloWorld!
# systemctl restart httpd.service


model.py
ここはデータベースとテーブルの話だからね。好きにやってちょうだい
"""このファイル内に、必要なテーブルがすべて定義されます"""
from django.db import models

class Industry(models.Model):
    """
    viet-kabuで取得できる業種つき個社情報
    closing_price: 終値(千ドン)
    volume: 出来高(株)
    trade_price_of_a_day: 売買代金(千ドン)
    marketcap: 時価総額(億円)
    """
    market_code = models.CharField(max_length=4)
    symbol = models.CharField(max_length=10)
    company_name = models.CharField(max_length=50)
    industry1 = models.CharField(max_length=10)
    industry2 = models.CharField(max_length=20)
    open_price = models.DecimalField(max_digits=10, decimal_places=2, default=0.00)
    high_price = models.DecimalField(max_digits=10, decimal_places=2, default=0.00)
    low_price = models.DecimalField(max_digits=10, decimal_places=2, default=0.00)
    closing_price = models.DecimalField(max_digits=10, decimal_places=2, default=0.00)
    volume = models.DecimalField(max_digits=10, decimal_places=2, default=0.00)
    trade_price_of_a_day = models.DecimalField(max_digits=20, decimal_places=2, default=0.00)
    marketcap = models.DecimalField(max_digits=10, decimal_places=2, default=0.00)
    per = models.DecimalField(max_digits=10, decimal_places=2, default=0.00)
    pub_date = models.DateField()
migrations
python manage.py makemigrations vietnam_research
migrate
# python manage.py migrate
  Operations to perform:
    Apply all migrations: admin, auth, contenttypes, sessions
  Running migrations:
    Applying contenttypes.0001_initial... OK
    Applying auth.0001_initial... OK
    Applying admin.0001_initial... OK
    Applying admin.0002_logentry_remove_auto_add... OK
    Applying admin.0003_logentry_add_action_flag_choices... OK
    Applying contenttypes.0002_remove_content_type_name... OK
    Applying auth.0002_alter_permission_name_max_length... OK
    Applying auth.0003_alter_user_email_max_length... OK
    Applying auth.0004_alter_user_username_opts... OK
    Applying auth.0005_alter_user_last_login_null... OK
    Applying auth.0006_require_contenttypes_0002... OK
    Applying auth.0007_alter_validators_add_error_messages... OK
    Applying auth.0008_alter_user_username_max_length... OK
    Applying auth.0009_alter_user_last_name_max_length... OK
    Applying auth.0010_alter_group_name_max_length... OK
    Applying auth.0011_update_proxy_permissions... OK
    Applying sessions.0001_initial... OK
アプリケーションとして認識させる
(このステップ忘れるべからず)
このsettingでアプリケーションとして認識させることで、index.htmlを開きにいったときの「templates/{アプリケーション名}/index.html」を自動的に識別して読みにいってくれる。
DjangoでTemplateDoesNotExistと言われたら
「各アプリケーションの配下にあるtemplatesディレクトリ」を探索するということは、アプリケーションと認識されていなければ探索されないということだ。
今回はそもそもここに原因があった。settings.pyのINSTALLED_APPSにmyappを登録するのを忘れていた。
INSTALLED_APPS に設定を追加するんだが、、え?VietnamResearchConfigに覚えがないって?
そうなんだよ、アプリケーションフォルダ(test_chartjs)配下にある、「apps.py」を開いてみると書いてあるんだよね。わかりにくいなぁこれ。
INSTALLED_APPS = [
    'django.contrib.admin',
    'django.contrib.auth',
    'django.contrib.contenttypes',
    'django.contrib.sessions',
    'django.contrib.messages',
    'django.contrib.staticfiles',
    'test_chartjs.apps.VietnamResearchConfig',  # 追加!
]
templates ディレクトリを作成
最初に、アプリケーションフォルダの中に「templates」フォルダを作成。さらにその中に、(Djangoのテンプレート読み込みルールに則り)アプリケーションフォルダと同じ名前のフォルダを作成してから index.html というファイルを作成する。

つまり、テンプレートは「vietnam_research/templates/vietnam_research/index.html」に書く必要がある。「テンプレートフォルダのなかにアプリケーション名がある」というの自体はほかのWeb言語にもあったような気がする?![]()
これは文化的なもので「名前空間」という意味合いに過ぎない。
「templates」には「s」をつけろよデコ助野郎。
テンプレートを編集
vscodeのhtmlファイル上で「!」って入力するとこのテンプレートが出てくる![]()
<!DOCTYPE html>
<html lang="ja">
<head>
    <meta charset="UTF-8">
    <meta name="viewport" content="width=device-width, initial-scale=1.0">
    <title>vietnam_research</title>
</head>
<body>
    <h1>vietnam_research</h1>
</body>
</html>
static ディレクトリを作成
・static(黄色の四角)
・static/vietnam_research(オレンジ)
・static/vietnam_research/js
などのフォルダやファイルは、手で作る必要があります。
(templateと同じ階層にstaticをつくります)

・htmlの最初に {% load static %} を忘れるな!
・javascript を読み込むときのパスは {% static 'vietnam_research/js/script.js' %} だ
・このフォルダの「指定方法」と「そしてどうなる」を脳筋になるまで繰り返して感覚をつかめ!
google analytics
headタグの一番最初に取り付ける
<!-- Global site tag (gtag.js) - Google Analytics -->
<script async src="https://www.googletagmanager.com/gtag/js?id=UA-43097095-9"></script>
<script>
    window.dataLayer = window.dataLayer || [];
    function gtag(){dataLayer.push(arguments);}
    gtag('js', new Date());
    gtag('config', 'UA-43097095-9');
</script>
index.html
{% load static %}
<!DOCTYPE html>
<html lang="ja">
    <head>
        <!-- Global site tag (gtag.js) - Google Analytics -->
        <script async src="https://www.googletagmanager.com/gtag/js?id=UA-43097095-9"></script>
        <script>
            window.dataLayer = window.dataLayer || [];
            function gtag(){dataLayer.push(arguments);}
            gtag('js', new Date());
            gtag('config', 'UA-43097095-9');
        </script>

        <meta charset="UTF-8">
        <meta name="viewport" content="width=device-width, initial-scale=1.0">
        <title>shopping</title>

        <!-- css -->
        <link rel="stylesheet" href="{% static 'vietnam_research/css/reset.css' %}">
        <link rel="stylesheet" href="{% static 'vietnam_research/css/index.css' %}">
        <!-- favicon -->
        <link rel="icon" href="{% static 'vietnam_research/c_v.ico' %}">

        <!-- javascript -->
        <script src="{% static 'vietnam_research/js/script.js' %}"></script>

        <!-- font -->
        <link href="https://fonts.googleapis.com/css?family=Sawarabi+Gothic" rel="stylesheet">
        <!-- fontawesome -->
        <link href="https://use.fontawesome.com/releases/v5.6.1/css/all.css" rel="stylesheet">

        <!-- for ajax -->
        <script>let myurl = {"base": "{% url 'vnm:index' %}"}</script>

    </head>

    <body>
        <h1>vietnam_research</h1>
    </body>
</html>
views.pyがテンプレートへ向けて置換をかけて返却する流れを作る
"""views.py"""
from django.shortcuts import render

def index(request):
    """いわばhtmlのページ単位の構成物です"""
    # htmlとして返却します
    return render(request, 'vietnam_research/index.html')
ローカル環境でのテスト

フォームでのファイルアップロードを実装する
いやー stackoverflowで質問しても 回答つかなくて困った困った。settings.pyの MEDIA の役割がわかってなかったんだよね。
# これの追記で permissionerror 回避を確認ok
MEDIA_ROOT = os.path.join(BASE_DIR, 'media')
MEDIA_URL = '/media/'
上記の settings.py の追記に加えて、下記のように models.py で upload_to='shopping/ にすると、[example.com]/media/shopping/xxx.jpg と保存されるようになる
class Products(models.Model):
    """商品"""
    code = models.CharField('商品コード', max_length=200)
    name = models.CharField('商品名', max_length=200)
    price = models.IntegerField('金額', default=0)
    description = models.TextField('説明')
    picture = models.ImageField('商品写真', upload_to='shopping/')
class UploadSingleView(FormView):
    """UploadSingleView"""
    form_class = SingleRegistrationForm
    success_url = reverse_lazy('shp:index')

    def form_valid(self, form):
        # prepare
        code = form.cleaned_data.get('code')
        Products.objects.filter(code=code).delete()
        # save
        form.save()
        # delete if file is exists as same.
        orgname, ext = os.path.splitext(form.cleaned_data["picture"].name)
        mvfilepath = settings.BASE_DIR + '/shopping/static/shopping/img/' + code + ext.lower()
        if os.path.exists(mvfilepath):
            os.remove(mvfilepath)
        # move file as rename
        uploadfilepath = settings.BASE_DIR + '/media/shopping/' + orgname + ext.lower()
        os.rename(uploadfilepath, mvfilepath)
        return super().form_valid(form)
DEBUGをFalseにしてみて?
公式:本番環境における静的ファイルの配信
DEBUGをTrueにしているあいだは気にすることはないが、本番環境にしようとしてDEBUGをFalseにすると /static/ (settings.pyのSTATIC_URL)は各アプリケーション内のstaticディレクトリを読みにいきません。
(非効率であったり、セキュリティ上の理由らしい)
DEBUG = False
# /var/www/html/portfolio/mysite/static/
STATIC_ROOT = os.path.join(BASE_DIR, "static")
# python manage.py collectstatic
# chown -R op:op /var/www/html
# systemctl restart httpd.service
collectstaticの定例更新化
# cd /root
# vi collectstatic.sh
+ # /bin/sh
+ cd /root
+ source /var/www/html/venv/bin/activate
+ python /var/www/html/portfolio/mysite/manage.py collectstatic --noinput
# chmod 755 collectstatic.sh
# crontab -e
0 19 * * * /root/collectstatic.sh
crontab -l
権限 chown -R op:op /home/op
さんざん root のままディレクトリとか作りまくってると access denied というか permission error になってることがあるので注意
権限をまとめて op 扱いに
# chown -R op:op /home/op
Git
インストール
# cd /home/op/
# git --version
  git version 1.8.3.1
# dnf remove git
# git --version
  -bash: /usr/bin/git: そのようなファイルやディレクトリはありません
# dnf -y install git
# git --version
  git version 2.18.4
鍵の作成と設定
アプリとかHPの設置場所が基本的に /Home/op 配下なので、GitHubとの接続は op でのプロンプト(=$)じゃないとダメみたい。ヘンにrootで操作してここでもハマった。
gitHubでssh接続する手順~公開鍵・秘密鍵の生成から~
# exit
$ git config --global user.name "yoshi"
$ git config --global user.email "yoshi@gmail.com"
$ cd ~/.ssh

なにか聞かれたらEnter3回でカレントディレクトリに鍵が作られる
$ ssh-keygen -t ed25519 -C "my-email@gmail.com"
公開鍵をgitHubにアップ

$ ssh -T git@github.com
Hi duri0214! You've successfully authenticated, but GitHub does not provide shell access.
実行すべきgitコマンドは書かれている

$ cd /home/op/html/mysite
$ git init
  Initialized empty Git repository in /home/op/html/.git/
$ git add .
$ git commit -m "first commit"
$ git remote add origin git@github.com:duri0214/CentOS-Python.git
$ git push -u origin master
Commit
git add -A 新規作成/変更/削除されたファイル全てを追加(AllのA)
最後にまた git diff をして差分がでなくなったことを確認している。
コミットがローカルへのセーブ、プッシュがサーバーへのセーブ
$ git add -A
$ git commit -m "コミットコメントをここに書く"
  15 files changed, 10 insertions(+), 16 deletions(-)
$ git push -u origin master
  Counting objects: 25, done.
  Compressing objects: 100% (23/23), done.
  Writing objects: 100% (25/25), 4.10 KiB | 0 bytes/s, done.
  Total 25 (delta 11), reused 0 (delta 0)
  remote: Resolving deltas: 100% (11/11), completed with 11 local objects.
  To github.com:duri0214/CentOS-Python.git
   b137e37..7af5695  master -> master
  Branch master set up to track remote branch master from origin.
Fetch
Masterの同期を取る
$ git fetch
$ git merge origin/master
FTP
インストール
昔は NextFTP とかそういうのでやってたんだけどいまは FileZilla ってのがよく出てくるのでこれにした。
鍵の登録
- メニューバーから 編集 -> 設定 -> SFTP で "鍵ファイルの追加(A)" ボタンをクリック。
- 秘密鍵を選択する
- filezilla用に作り替えてもいいか聞いてくるので OK として、リネームする(id_rsa -> id_rsa_filezilla.ppk)

接続

つながったつながった!これでバックアップもできるね!![]()
