前回の記事の続きです。
今回は前回の学習済みモデルとslackbotを用いて雑談チャットボットを実装してみました。
slackbotの基本的な使い方やbotの設定については、こちら(Pythonを使ったSlackBotの作成方法)を参考にさせていただきました。ありがとうございます!!
今回も近日中にGithubにソースコードを公開できればと思っています。
Githubに公開しました。(こちら)
今回やったこと
- pythonのライブラリ
slackbotを用いた雑談チャットボットの実装
実装環境
- python:3.6
(前回の記事では2.7で開発していましたがslackbotの関係で3.6に移行しました) - TensorFlow==0.12.0
- mecab-python3==0.7
- slackbot==0.5.3
Slack上でのBotアカウントの設定
Slack上で受け答えしてくれるBotの設定を行います。
ここからBotアカウントを作成しましょう。
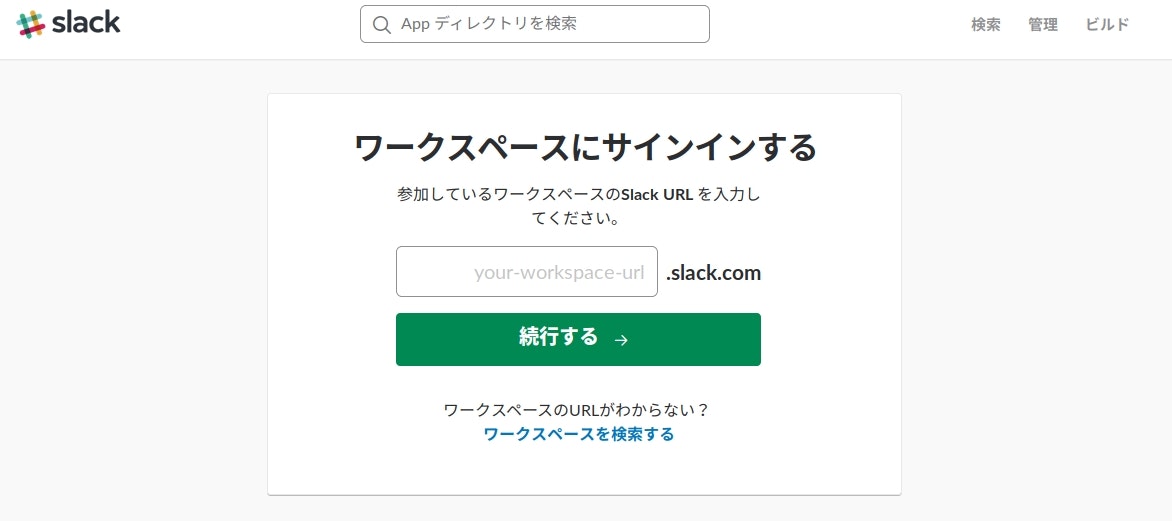
ワークスペースにサインインして、
適当な名前を付けてボットインテグレーションを追加しましょう。
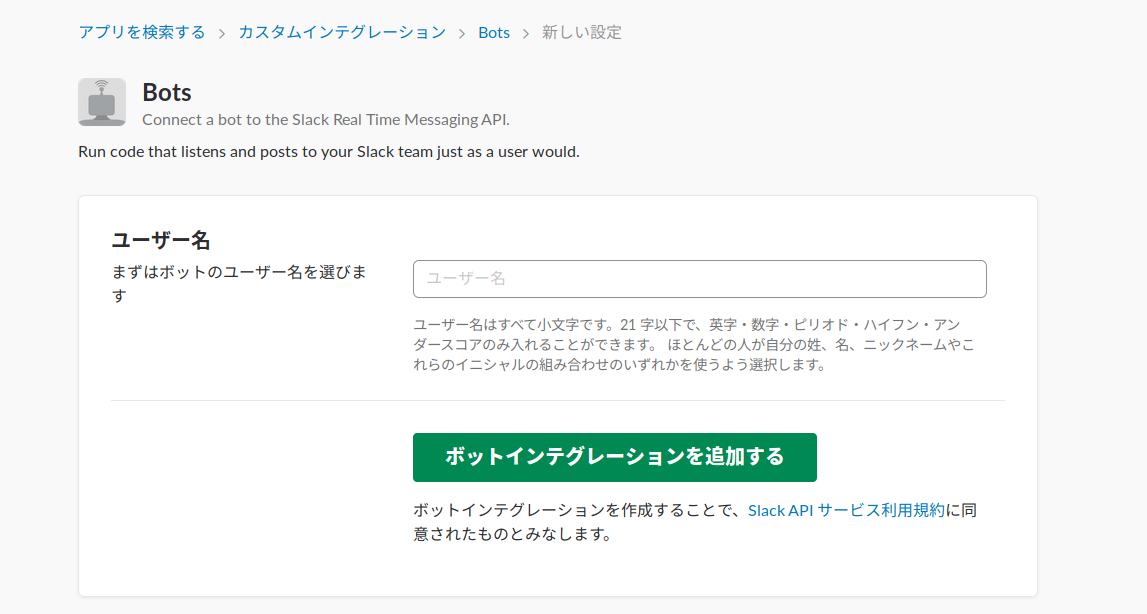
前回にちなんで「カーミ」という名前にしました。
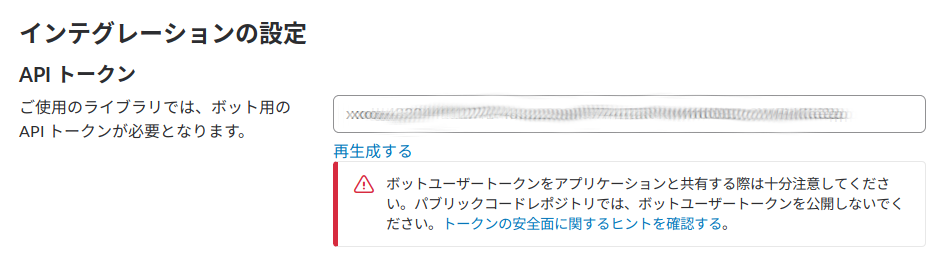
発行されたAPIトークンはこのあとスクリプトで使用します。
slackbotによる実装
まずはpipコマンドを用いてライブラリをインストールします。
pip install slackbot
ディレクトリ構造
今回作成したリポジトリは以下のような構造になっています。
slackbot
    ├ data_utils.py
    ├ data
    ├ seq2seq_model.py
    |
    ├ run.py                 #botを起動するためのメインスクリプト
    ├ slackbot_settings.py   #bot設定用スクリプト
    └ plugins
        ├ __init__.py
        └ my_mention.py      #seq2seqによるデコードを応答に用いる
                              ためのスクリプト
data_utils.py, seq2seq_model.pyは前回の記事で使用したスクリプトとまったく同じです。
dataディレクトリには前回のファイルの他に、訓練モードで保存される学習済みのモデルtranslate.ckpt-xxxx.data-00000-of-00001,translate.ckpt-xxxx.indexが必要になります。(ディレクトリをそのままコピーすればそれで大丈夫です。)
Botの基本設定
run.pyとslackbot_setting.pyで基本的なbotの設定を行なっています。
どちらもテンプレートとして利用できます。
# -*- coding: utf-8 -*-
from slackbot.bot import Bot

def main():
    bot = Bot()
    bot.run()

if __name__ == "__main__":
    print('start slackbot')
    main()
run.pyはSlack上でbotを起動するためのスクリプトです。
# -*- coding: utf-8 -*-

# botアカウントのトークンを指定
API_TOKEN = "xxxx-xxxxxxxxxxxx-xxxxxxxxxxxxxxxxxxxxxxxx"

# このbot宛のメッセージで、どの応答にも当てはまらない場合の応答文字列
DEFAULT_REPLY = "What r u saying?"

# プラグインスクリプトを置いてあるサブディレクトリ名のリスト
PLUGINS = ['plugins']
API_TOKENはBotアカウントの設定のときに発行されたものに書き換えてください。
また、今回はこのあとで説明するmy_mention.pyで入力された発話全てに対して返答するようにしているため、DEFAULT_REPLYは使用されません。
メンションの作成
Botに学習済みのモデルからの応答を返すようにさせます。
# coding: utf-8
from __future__ import absolute_import
from __future__ import division
from __future__ import print_function

import MeCab

import math
import os
import random
import sys
import time

import tensorflow.python.platform

import numpy as np
from six.moves import xrange
import tensorflow as tf

import data_utils
from tensorflow.models.rnn.translate import seq2seq_model
from tensorflow.python.platform import gfile


tf.app.flags.DEFINE_float("learning_rate", 0.5, "Learning rate.")
tf.app.flags.DEFINE_float("learning_rate_decay_factor", 0.99,
                          "Learning rate decays by this much.")
tf.app.flags.DEFINE_float("max_gradient_norm", 5.0,
                          "Clip gradients to this norm.")
tf.app.flags.DEFINE_integer("batch_size", 4,
                            "Batch size to use during training.")
tf.app.flags.DEFINE_integer("size", 256, "Size of each model layer.")
tf.app.flags.DEFINE_integer("num_layers", 2, "Number of layers in the model.")
tf.app.flags.DEFINE_integer("in_vocab_size", 12500, "input vocabulary size.")
tf.app.flags.DEFINE_integer("out_vocab_size", 12500, "output vocabulary size.")
tf.app.flags.DEFINE_string("data_dir", "./datas", "Data directory")
tf.app.flags.DEFINE_string("train_dir", "./datas", "Training directory.")
tf.app.flags.DEFINE_integer("max_train_data_size", 0,
                            "Limit on the size of training data (0: no limit).")
tf.app.flags.DEFINE_integer("steps_per_checkpoint", 100,
                            "How many training steps to do per checkpoint.")
tf.app.flags.DEFINE_boolean("decode", False,
                            "Set to True for interactive decoding.")
tf.app.flags.DEFINE_boolean("self_test", False,
                            "Run a self-test if this is set to True.")

FLAGS = tf.app.flags.FLAGS

_buckets = [(5, 10), (10, 15), (20, 25), (40, 50)]


def read_data(source_path, target_path, max_size=None):
  data_set = [[] for _ in _buckets]
  source_file = open(source_path,"r")
  target_file = open(target_path,"r")

  source, target = source_file.readline(), target_file.readline()
  counter = 0
  while source and target and (not max_size or counter < max_size):
    counter += 1
    if counter % 50 == 0:
      print("  reading data line %d" % counter)
      sys.stdout.flush()

    source_ids = [int(x) for x in source.split()]
    target_ids = [int(x) for x in target.split()]
    target_ids.append(data_utils.EOS_ID)
    for bucket_id, (source_size, target_size) in enumerate(_buckets):
      if len(source_ids) < source_size and len(target_ids) < target_size:
        data_set[bucket_id].append([source_ids, target_ids])
        break
    source, target = source_file.readline(), target_file.readline()
  return data_set

def create_model(session, forward_only):
  model = seq2seq_model.Seq2SeqModel(
      FLAGS.in_vocab_size, FLAGS.out_vocab_size, _buckets,
      FLAGS.size, FLAGS.num_layers, FLAGS.max_gradient_norm, FLAGS.batch_size,
      FLAGS.learning_rate, FLAGS.learning_rate_decay_factor,
      forward_only=forward_only)

  ckpt = tf.train.get_checkpoint_state(FLAGS.train_dir)
  #if ckpt and gfile.Exists(ckpt.model_checkpoint_path):
    #add
  if not os.path.isabs(ckpt.model_checkpoint_path):
    ckpt.model_checkpoint_path= os.path.abspath(os.path.join(os.getcwd(), ckpt.model_checkpoint_path))
    #so far
    print("Reading model parameters from %s" % ckpt.model_checkpoint_path)
    model.saver.restore(session, ckpt.model_checkpoint_path)
  else:
    print("Created model with fresh parameters.")
    session.run(tf.initialize_all_variables())
  return model


# 学習済みモデル、語彙ファイルを読み込み
sess = tf.Session()
model = create_model(sess, True)
model.batch_size = 1

in_vocab_path = os.path.join(FLAGS.data_dir,
                             "vocab_in.txt")
out_vocab_path = os.path.join(FLAGS.data_dir,
                             "vocab_out.txt" )

in_vocab, _ = data_utils.initialize_vocabulary(in_vocab_path)
_, rev_out_vocab = data_utils.initialize_vocabulary(out_vocab_path)


# 発話から応答を生成する
def decode(sent):
  '''seq2seqモデルによる応答生成
  引数 sent(str):発話
  返値 out(str):応答
  '''
  sentence = sent
  sentence = wakati(sentence)

  token_ids = data_utils.sentence_to_token_ids(sentence, in_vocab)

  bucket_id = min([b for b in xrange(len(_buckets))
                     if _buckets[b][0] > len(token_ids)])

  encoder_inputs, decoder_inputs, target_weights = model.get_batch(
      {bucket_id: [(token_ids, [])]}, bucket_id)

  _, _, output_logits = model.step(sess, encoder_inputs, decoder_inputs,
                                     target_weights, bucket_id, True)

  outputs = [int(np.argmax(logit, axis=1)) for logit in output_logits]

  if data_utils.EOS_ID in outputs:
    outputs = outputs[:outputs.index(data_utils.EOS_ID)]

  out = "".join([rev_out_vocab[output] for output in outputs])

  return out


def wakati(input_str):
        '''分かち書き用関数
        引数 input_str : 入力テキスト
        返値 m.parse(wakatext) : 分かち済みテキスト'''
        m = MeCab.Tagger('-Owakati')
        wakatext = input_str
        #print(m.parse(wakatext))
        return m.parse(wakatext)


# ~~slackbot~~
# 生成された応答をBotに発言させる
from slackbot.bot import respond_to     # @botname: で反応するデコーダ
from slackbot.bot import listen_to      # チャネル内発言で反応するデコーダ
from slackbot.bot import default_reply  # 該当する応答がない場合に反応するデコーダ


@respond_to('')                         #入力した全ての発言が対象
def mention_func(message):
    in_message = message.body["text"]   #Slack上でのユーザ発話の生テキストを取得
    out = decode(in_message)            #モデルに入力し応答を生成する
    message.reply(out)                  # Botに発言させる
my_mention.pyではSlack上で何かボットに話しかけた際の応答ルールを設定しています。
@respond_to('発話内容') の部分で発話内容ごとの応答ルールが決められます。
今回は前述の通り、全ての発話に対してモデルが生成した応答を返すようにしています。
TensorFlow seq2seqモデルチュートリアルを基に、ボット上での実装用にdecode(sent)関数を設けました。(ハイパーパラメータ等は前回と同じです。)
事前に学習済みモデルを読み込んでおくことで応答生成の高速化を図っています。
実際に話してみる
端末上でrun.pyを実行することでボットが起動します。(モデルの読み込みに少し時間がかかります。)
python run.py
SlackでボットのアカウントがオンラインになればOKです。
実際に会話してみました。
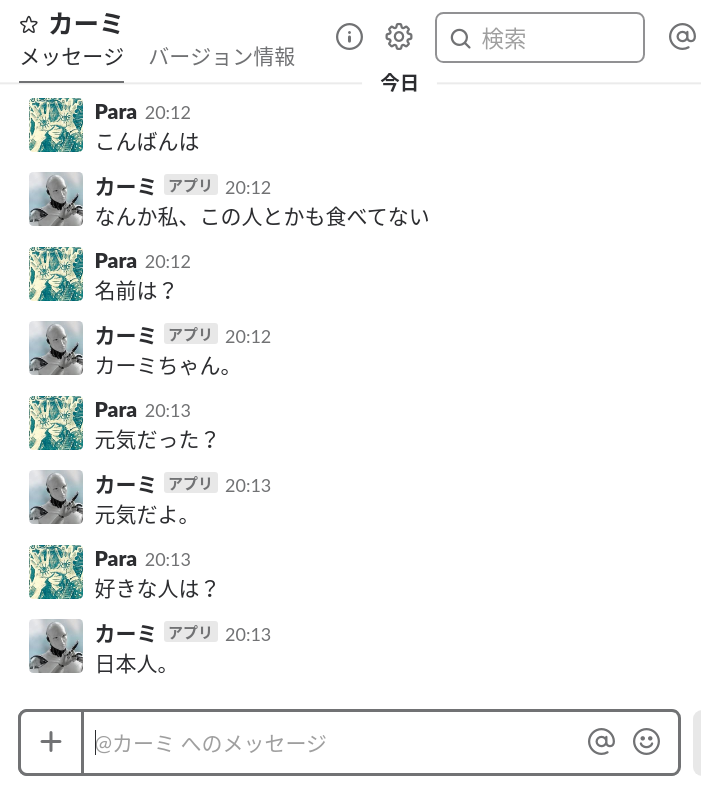
前回から学習は進めていないので会話は相変わらずですが、無事にSlack上にボットとして実装することができました!
まとめ
今回はslackbotというライブラリを使用することでSlack上にチャットボットを実装しました。
思ったより簡単にボットの実装ができてよかったです。
前回も今回も、比較的うまく会話が成立してそうなものを選んで紹介していますが、やはり会話として成り立たないものが多いです。
今後はデータの規模を増やしたり、モデルをもっと複雑にする必要があると感じました。