◆ はじめに
前回、ハンドトラッキングの実装しました。
なので、今回は物を掴む方法について書きます。
手の動き、指の取得は
こちらの記事を参考にしてください。
必要あれば前の記事を参考してください。
Oculus Quest向けのAPPをビルドして、動作確認する
物を掴む為には(物体の制作)
ハンドトラッキングの実装
今回の記事ですが、
完全に自己流の方法でやっているので、無理矢理感がある為、要注意です。
◆ 開発環境
macOS Mojave バージョン 10.14.6
Unity 2018.4.12f1
Android SDK
ハンドトラッキング機能を使用する為、
Oculusのバージョンは(Ver12)以上、にアップデートする必要があります。
◆ 手順
- 準備した物の説明
- 掴む実装方法説明
- 指動作の判断
- 論理およびコード説明]
- 動作確認
準備した物の説明
 まず、必要なObjectを準備しました。
ハンドトラッキングを実装して、物体(Cube)とテーブルを用意します。
Cubeのサイズは自由に設置しても構いません。
プログラムがちゃんと動いてるかどうか、
結果を見やすくする為に、Canvasを作りました。必須ではないですが、あった方が便利です。
また、テーブルも必須ではないです。
掴む実装方法説明
以前の物を掴む為にはでは、
無事に手を表示後普通に物体を掴む事ができますが、ハンドトラッキングではできないらしいです。

なので、
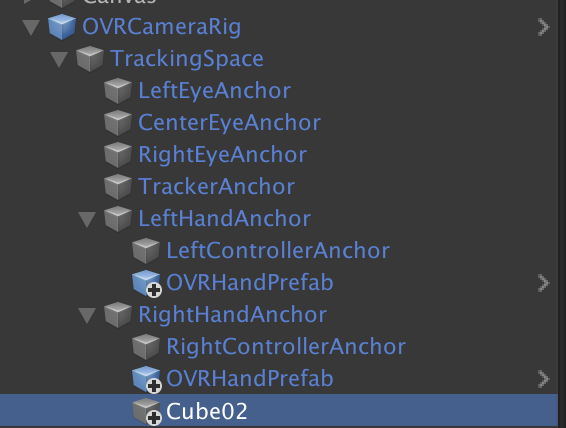
今回やるべき事は手が物体を当たった状態で、掴むという動作をした時、物体を手の階層に入れる。
要するに、物体を手の子要素にするという事です。
勿論、
子要素にするのではなく、掴む判定の時、物体のポジションを手と同じにするというのも方法の一つです。
指動作の判断
using System.Collections;
using System.Collections.Generic;
using UnityEngine;

public class ovrHand : MonoBehaviour
{
    private OVRHand _ovrHand;
    // 掴む状態
    public bool _catching;

    // Start is called before the first frame update
    void Start()
    {
        _catching = false;
        _ovrHand = this.gameObject.GetComponent<OVRHand>();
    }
    // Update is called once per frame
    void Update()
    {
        if (_ovrHand.GetFingerIsPinching(OVRHand.HandFinger.Index))
        {
            _catching = true;
        }
        else
        {
            _catching = false;
        }
    }
}
上記のコードは「OVRHandPrefab」に追加します。
手を取得し、変数「_ catching」を作ります。「_ catching」の説明は後で
GetFingerIsPinchingは、指先と指先が触れているかどうかを取得する事ができます。
OVRHand.HandFingerは、親指とどの指が触れているかを判定できます。今回は人差し指にします。
今回は、指先と指先が触れてたら「_catching」は真にします。
状態はCanvas上に表示します。
(Canvas作ってないなら書く必要はないです、この後にCanvas関する説明も全部省略します)
論理およびコード説明
    private ovrHand _ovrHand;
    private bool _touchIN;      //当たり
    private bool _catch;        //掴む
    private bool _hold;         //取れる

    // Start is called before the first frame update
    void Start()
    {
        _ovrHand = FindObjectOfType<ovrHand>();
    }
void Update()
    {
        // 手は選択状態なのかを常に取得する
        _catch = _ovrHand._catching;
        touchCube();
        CatchCube();
    }
void touchCube()
    {
        if (_touchIN == true && _catch == false)
        {
            _hold = true;
        }
    }

    void CatchCube()
    {
        if (_hold == true && _catch == true)
        {
            _touchIN = false;
        }
        else if (_touchIN = false && _touchIN == false)
        {
            _hold = false;
        }
    }
まず、掴むという動作について考えます。
手は握った状態で物体に当たったら、物体をつかめる。
物体に当たった後、手を握ると、物体をつかめる。
このことを、上記のコードで表しています。
void OnCollisionStay(Collision other)
    {
        // 物体をタッチした時 タッチ変数は 真になる
        if (other.gameObject.name == "Hand_Index3_CapsuleRigidBody" ||
            other.gameObject.name == "Hand_Index2_CapsuleRigidBody" ||
            other.gameObject.name == "Hand_Thumb3_CapsuleRigidBody" ||
            other.gameObject.name == "Hand_Thumb2_CapsuleRigidBody"
            )
        {
            _touchIN = true;
            // 位置固定し物理削除する
            gameObject.GetComponent<Rigidbody>().constraints = RigidbodyConstraints.FreezeAll;
            gameObject.GetComponent<Rigidbody>().isKinematic = true;
        }
    }
上の説明に合わせ、
まず、物体をタッチしないと始まらないので、当たり判定書きます。
それぞれの指の名前は一番上の参考リンクを参照してください。
タッチしたら、「 _touchIN」は真になります。
void CatchCube()
    {
        if (_hold == true && _catch == true)
        {
            Debug.Log("_catch = " + _catch + " 物を掴みました!");
            // 右手の子供になる
            gameObject.transform.SetParent(_rightHandAnchor.gameObject.transform);
            // 重力抜き 当たり判定しない
            gameObject.GetComponent<Rigidbody>().useGravity = false;
            gameObject.GetComponent<BoxCollider>().isTrigger = true;
            _touchIN = false;
        }
        else if (_touchIN = false && _touchIN == false)
        {
            // 親関係解除
            gameObject.transform.parent = null;
            // 重力 当たり判定 復帰
            gameObject.GetComponent<Rigidbody>().useGravity = true;
            gameObject.GetComponent<BoxCollider>().isTrigger = false;
            // 位置移動可 物理復帰
            gameObject.GetComponent<Rigidbody>().constraints = RigidbodyConstraints.None;
            gameObject.GetComponent<Rigidbody>().isKinematic = false;
            _hold = false;
        }
    }
今回のCubeは物理演算を入れているので、掴む時は物理演算を抜く必要があります。
「CatchCube()」の中に必要な処理を追加します。
コードの意味は 、コメントアウトで書いているので参考にしてください。
最後に、「cubeTouch.cs」をCubeの中に入れば完成です。
動作確認
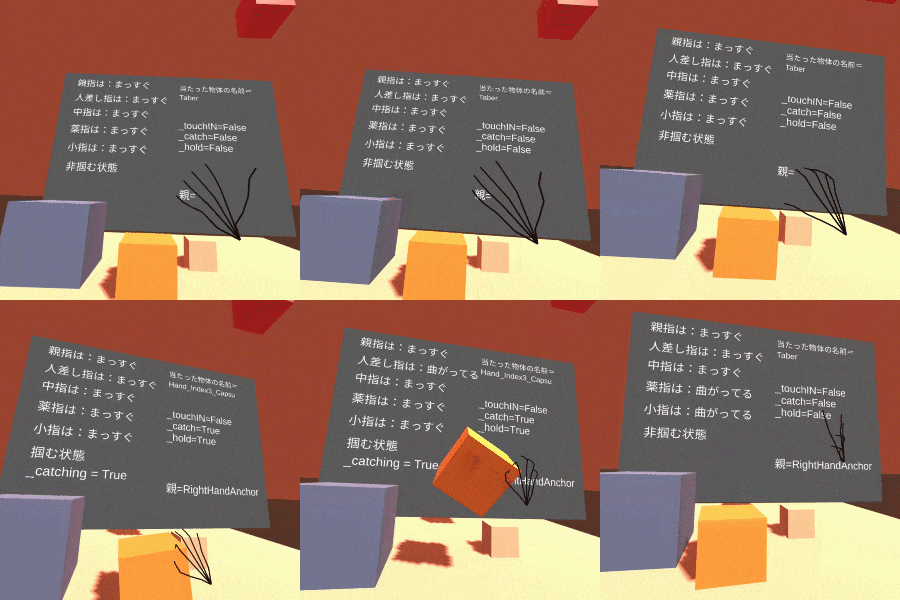
ビルドして、動作確認するとこうなります。
