目次
1. BlenderでVroidのモデルを編集しよう
2. Oculus Quest 2の準備をしよう
3. UnityにVRMモデルを入れてみよう
4. VeryAnimationで遊んでみよう
5. DynamicBoneでいろいろ遊んでみよう
6. UnityのAnimationでいちゃいちゃしよう
デモとパッケージ
##3.UnityにVRMモデルを入れてみよう
###VRMモデルのImport手順
まず、UnityにAssets > Import Package > Custom Packageから、UniVRMをimportします。
つぎに、AssetsのなかにVRM用のFolderを作成してVRMモデルをDrag&Dropします。
VRMモデルのImportが完了したら、モデルのPrefab AssetをHierachyにDrag&Dropします。
VRMモデルの設定
まず、Projectのところで右クリックして、適当にAnimationControllerの作成
VRMモデルのInspectorにあるAnimatorにとりあえず、先ほど作成したAnimationControllerを入れます。
次に VRM Look At Headの編集をします。
TargetにCenterEyeAnchor, HeadにJ_Bip_C_Headを入れます。
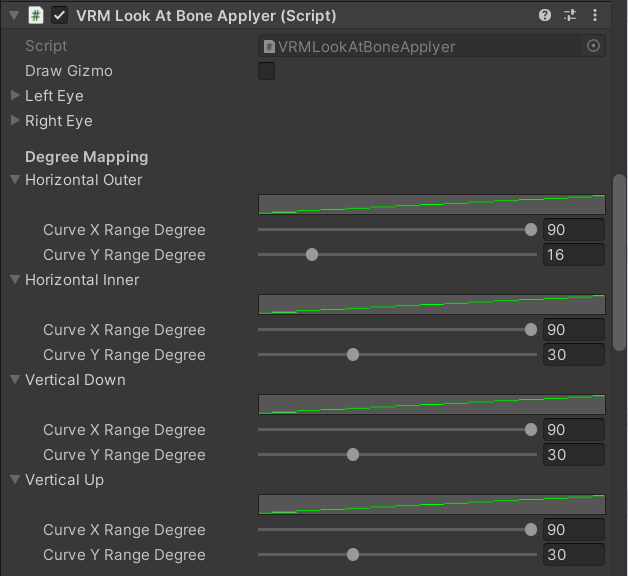
そして、VRM Look At Bone Applyerの編集に移ります。
画像のようにパラメータを設定してください。
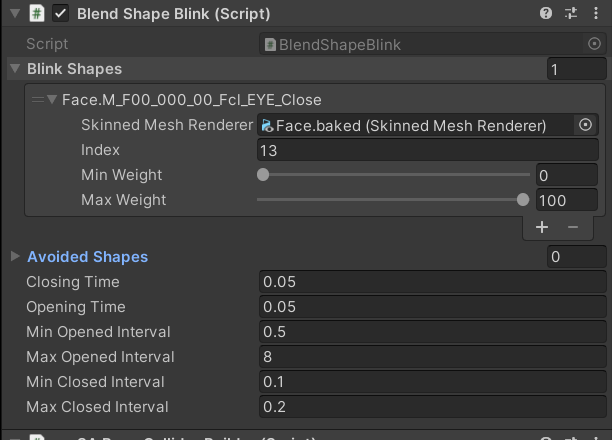
次にこちらのBlend Shape Blinkをお借りして、瞬きするように設定します。
モデルのInspectorからBlende Shape BlinkをAdd Componentします。基本はデフォルトのままで大丈夫です。
Blink Shapesについて以下の写真のように設定してください。
最後にOculus Quest 2の準備をしようのOVRCameraRigにアタッチされているCameraPositionのTarget Objectについて、写真のようにモデルのオブジェクトを設定してください。


