スケジュール
- 1日目 要件定義編
- 2日目 環境構築編
- 3日目 ドーナッツグラフ編
- 4日目 棒グラフ編
- 5日目 GraphQL編
- 6日目 GraphQL編2
- 7日目 GraphQL編3←今ここ
- 8日目 GraphQL編4
- 9日目 デプロイ編
前提条件
- node.js v8.3以上
- yarn or npmが入っている(Document見るとyarnの方が推奨とのこと)
- Gridsomeのプロジェクトを作成している
新たにjsonファイルをデータソースとして指定
src/data/assettransition.json
[
  {
    "date": "202004",
    "asset_usd": "18723.52",
    "asset_yen": "2000000",
    "usd/jpy": "107.26"
  },
  {
    "date": "202005",
    "asset_usd": "19659.70",
    "asset_yen": "2100000",
    "usd/jpy": "108.36"
  },
  {
    "date": "202006",
    "asset_usd": "20595.88",
    "asset_yen": "2200000",
    "usd/jpy": "109.64"
  },
  {
    "date": "202007",
    "asset_usd": "21532.05",
    "asset_yen": "2300000",
    "usd/jpy": "106.58"
  }
]
今回は新たなデータソースとしてjson形式のファイルからインポートしてみようと思います。
csv-parseが要らない分jsonの方がシンプルでやりやすいですね。
gridsome.server.js
// Server API makes it possible to hook into various parts of Gridsome
// on server-side and add custom data to the GraphQL data layer.
// Learn more: https://gridsome.org/docs/server-api/

// Changes here require a server restart.
// To restart press CTRL + C in terminal and run `gridsome develop`

const {readFileSync} = require('fs');
const parse = require('csv-parse/lib/sync');
module.exports = function (api) {
  api.loadSource(async (actions) => {
    // CSVから資産データを取得
    const input = readFileSync('./src/data/assetbalance_202008.csv', 'utf8');
    const Assets = parse(input, {
      from_line: 2,
      skip_empty_lines: true,
    });
    const collection = actions.addCollection({
      typeName: 'Assets',
    });
    for (const asset of Assets) {
      collection.addNode(asset);
    }

    // jsonから資産推移データを取得
    const Transitions = require('./src/data/assettransition.json');
    const collection2 = actions.addCollection({
      typeName: 'Transitions',
    });
    for (const transition of Transitions) {
      collection2.addNode(transition);
    }
  })

  api.createPages(({ createPage }) => {
    // Use the Pages API here: https://gridsome.org/docs/pages-api/
  })
}
collection2 という新たなコレクションを作って、そこに同じようにaddNode することで追加していけます。
データソースを複数にしてもGraphQLが上手く吸収してくれるので、競合することなく使えて便利でいいですね。
あとは他と同じくフロントエンド側のページでクエリから取得する
src/pages/asset-transition/index.vue
<template>
  <Layout>
    <h1>Asset transition</h1>
    <bar :labels="formatLabels($page.allTransitions.edges)" :chartData="formatChartData($page.allTransitions.edges)"></bar>
  </Layout>
</template>
<page-query>
query {
  allTransitions(order:ASC) {
    edges {
      node {
        date
        asset_usd
      }
    }
  }
}
</page-query>
<script>
import Bar from "../../components/chart/Bar";
export default {
  components: {
    Bar
  },
  methods: {
    formatLabels: function (labels) {
      return labels.map(item => item['node']['date']);
    },
    formatChartData: function (chartData) {
      return chartData.map(item => item['node']['asset_usd']);
    }
  },
  metaInfo: {
    title: 'Hello, world!'
  }
}
</script>

<style>
.home-links a {
  margin-right: 1rem;
}
</style>
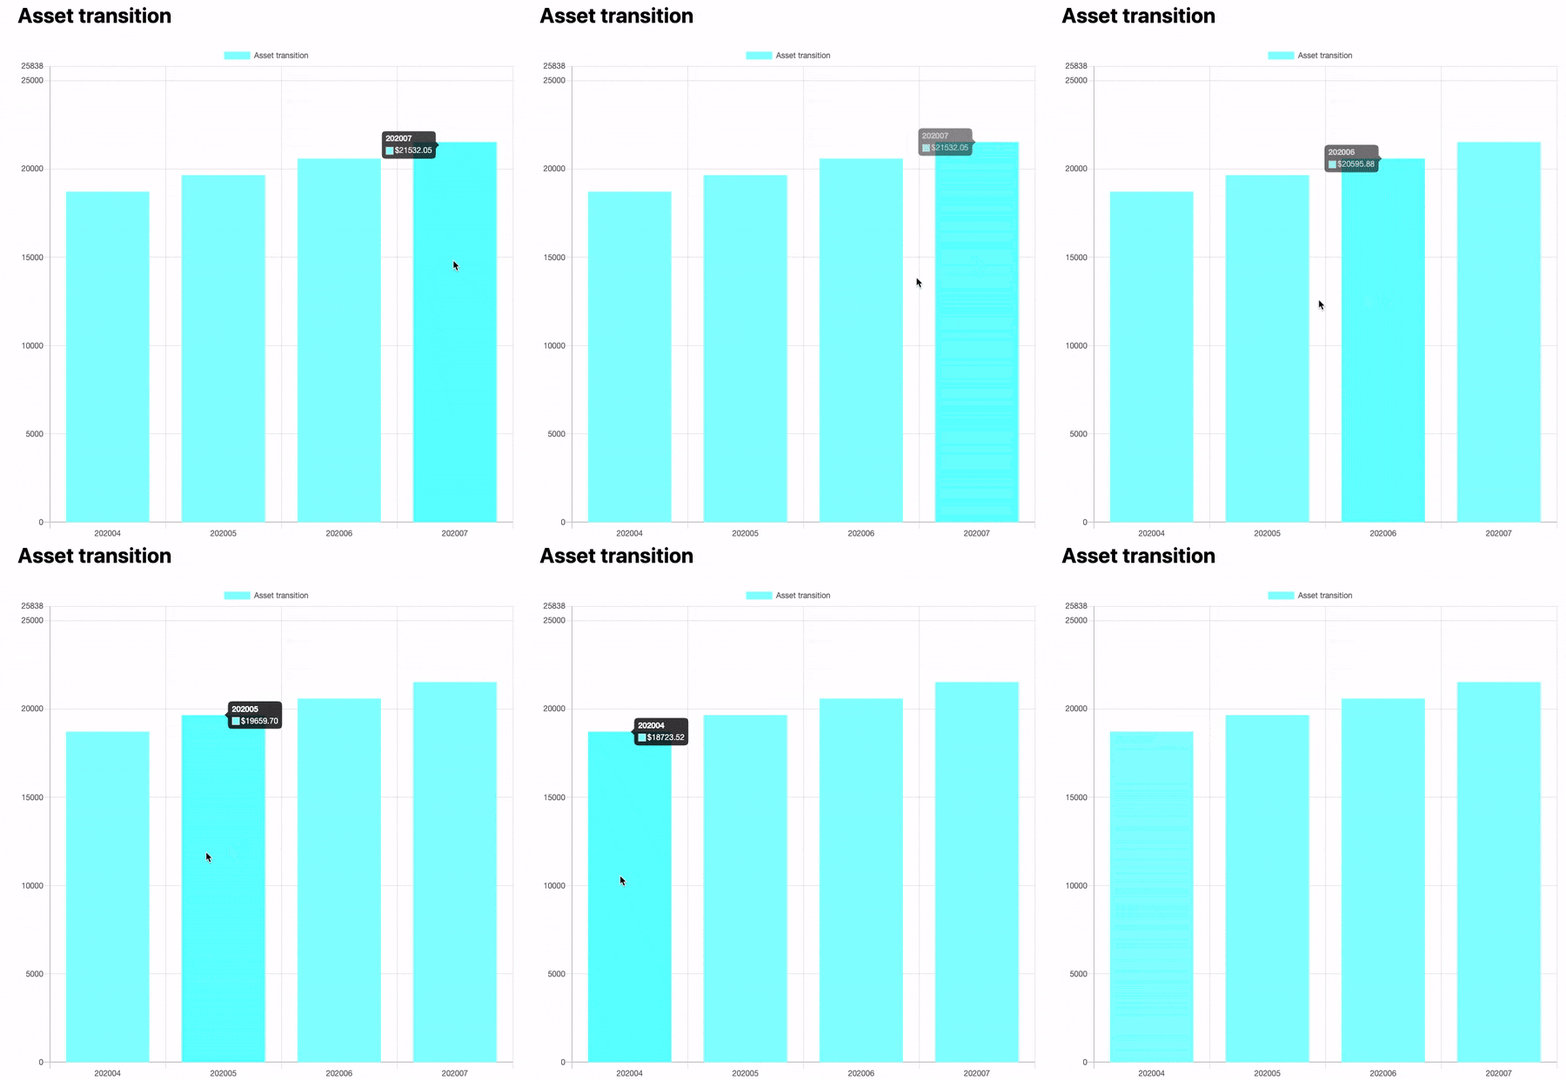
実際のグラフはこちら

jsonファイルからインポートしたデータで表示されています。
あとがき
だんだんと出来上がってきました。と思ったらお盆休みも残りわずか。。
あとは色々調整して、最終日にAWS S3にデプロイして終わりかなー。