FastAPIを利用してWebAPIを作っていくシリーズの第4弾となります。
今回は、JWTを利用してAccessTokenの発行機能を追加していきます。
FastAPIに関するこれまでの記事は、以下にリンクを記載します。
| タイトル | リンク |
|---|---|
| Fast APIでWebAPIを作ってみる① | プロジェクトの作成 |
| Fast APIでWebAPIを作ってみる② | Docker上にpostgresを構築する方法 |
| Fast APIでWebAPIを作ってみる③ | Docker上にpostgres環境にFastAPIでアクセスする |
開発環境
| バージョン | |
|---|---|
| Python | 3.10.4 |
| FastAPI | 0.78.0 |
| Uvicorn | 0.18.1 |
| Docker | 20.10.16 |
| Postgres | 14.4 |
| SQLAlchemy | 1.4.39 |
| python-jose 追加 | 3.3.0 |
| bcrypt 追加 | 1.7.4 |
| python-multipart 追加 | 0.0.5 |
今回のお題
①新しいパッケージの設定
②認証サービスの追加
③JWTの実装
④動作検証
あたりまで実装していきます。
実装!
①新しいパッケージの設定
requirement.txtファイル内に新たに認証に必要なパッケージを追加します。
# WebAPI
fastapi==0.78.0
uvicorn==0.18.1

# DB接続用
databases[postgresql]==0.6.0
SQLAlchemy==1.4.39
psycopg2==2.9.3

# 認証
python-jose[cryptography]==3.3.0                   # 追加
passlib[bcrypt]==1.7.4                             # 追加
python-multipart==0.0.5                            # 追加
| 追加パッケージ | 内容 |
|---|---|
| python-jose | PythonでJWTのAccessTokenやRefreshTokenを生成したり、検証を行う |
| passlib[bcrypt] | パスワードのハッシュ化やデコードを行う |
| python-multipart | ユーザコードやパスワードをサーバサイドへ送るために必要となる |
②認証サービスの追加
serviceフォルダ内に、authentication.pyファイルを作成します。
その中に以下の内容を追記します。
from app.models.DTO.ma_user_model import AUTHENTICATE
from passlib.context import CryptContext
from app.core import config

# ここがよくわからん
pwd_context = CryptContext(schemes=["bcrypt"],deprecated="auto")

class AuthenticationService:

    # パスワードをハッシュ化する
    def hash_password(password: str):
        hashed_password = pwd_context.hash(password)

        return hashed_password

    # 入力されたPWとハッシュ化されたPWを比較する。入力されたPWがハッシュ化された内容と同様であれば、Trueを返す。
    def verify_password(password:str,hashed_password: str):
        password = pwd_context.verify(password,hashed_password)

        return password
hash_password:パスワードのハッシュ化を行う
verify_password:入力されたパスワードと、登録されているハッシュ化されているパスワードの比較を行う
③JWTの実装
services\authentication.pyを作成し、認証機能に必要な情報を記載していきます。
class JWTService:
    # Access Tokenの生成()
    def create_access_token(usercd:str):

        jwt_meta = JWTMeta(
            iss = config.JWT_ISS,
            audience = config.JWT_AUDIENCE,
            iat = datetime.timestamp(datetime.utcnow()),
            exp=datetime.timestamp(datetime.utcnow() + timedelta(minutes=config.ACCESS_TOKEN_EXPIRE_MINIUTES))
        )

        jwtcreds = JWTCreds(
            usercd = usercd,
            token_type = config.ACCESS_TOKEN
            )

        payload = JWTPayload(
            **jwt_meta.__dict__,
            **jwtcreds.__dict__,)

        #  AccessTokenを生成する。
        encoded_jwt = jwt.encode(payload.__dict__,config.JWT_SECRET_KEY,algorithm=config.JWT_ALGORITHM)

        return encoded_jwt
次に、ユーザ情報のチェック、ハッシュ化されたPWのチェック機能を追加します。
from typing import List
from app.db.dbaccess import DBAccess
from sqlalchemy.sql import text


class AuthenticationRepositry():

    # ユーザ情報登録チェック
    def checkusercd(usercd:str):

        check_user = False
        con = DBAccess.connect_database()

        query = text("SELECT count(ID) FROM MA_USER WHERE usercd = :usercd")

        try:
            countuser = con.execute(query,**{"usercd": usercd}).scalar()

            if countuser != None and countuser != 0:
                check_user = True

        except Exception as err:
            print(err)

        finally:
            con.close()

        return check_user

    #PWの取得
    def get_hashpw(usercd:str):

        con = DBAccess.connect_database()

        query = text("SELECT password FROM MA_USER WHERE usercd = :usercd")

        try:
            hash_pw = con.execute(query,**{"usercd": usercd}).scalar()

        except Exception as err:
            print(err)

        finally:
            con.close()

        return hash_pw
最後にControllerを追加します。
routes/authentication/authenticationController.pyを追加し、AccessTokenの発行処理を行うエンドポイントを追加します。
from telnetlib import STATUS
from app.models.DAO.authentication.AuthenticationRepository import AuthenticationRepositry
from app.services.authentication import AuthenticationService,JWTService
from fastapi import APIRouter

from fastapi import Depends, FastAPI, HTTPException, status, Response
from fastapi.security import OAuth2PasswordBearer, OAuth2PasswordRequestForm

router = APIRouter()

# ログイン処理
@router.post("/token")
async def auth_login(response: Response,form_data:OAuth2PasswordRequestForm = Depends()):

    #入力されたユーザCDがDB上に存在しているかチェックを行う。
    user = AuthenticationRepositry.checkusercd(form_data.username)

    if user == False:
        raise HTTPException(
            status_code=status.HTTP_401_UNAUTHORIZED,
            detail= 'Could not validate credentials',
            headers= {"WWW-Authenticate":"Bearer"},
        )

    # 入力されたusercdからPWを取得する。
    hash_pw = AuthenticationRepositry.get_hashpw(form_data.username)

    # 入力されたPWとDBに登録されているハッシュ化されたPWを比較する。
    checkpw = AuthenticationService.verify_password(form_data.password,hash_pw)
    # 入力されたPWとハッシュ化されたPWが同じかチェックを行う。
    if checkpw == False:
        raise HTTPException(
            status_code=status.HTTP_401_UNAUTHORIZED,
            detail= 'Could not validate credentials',
            headers= {"WWW-Authenticate":"Bearer"},
        )

    # 存在すれば、Access Tokenを発行する。
    access_token = JWTService.create_access_token(form_data.username)

    # 作成したAccessTokenをcookieに設定する。
    response.set_cookie(key="access_token", value=access_token)

    return {"access_token": access_token, "token_type": "bearer"}
④動作検証
実装した認証機能について、対象のWebAPIがJWTによって、保護されていることを確認します。
以下のURLを叩いて、Swaggerを起動します。
http://localhost:8000/docs
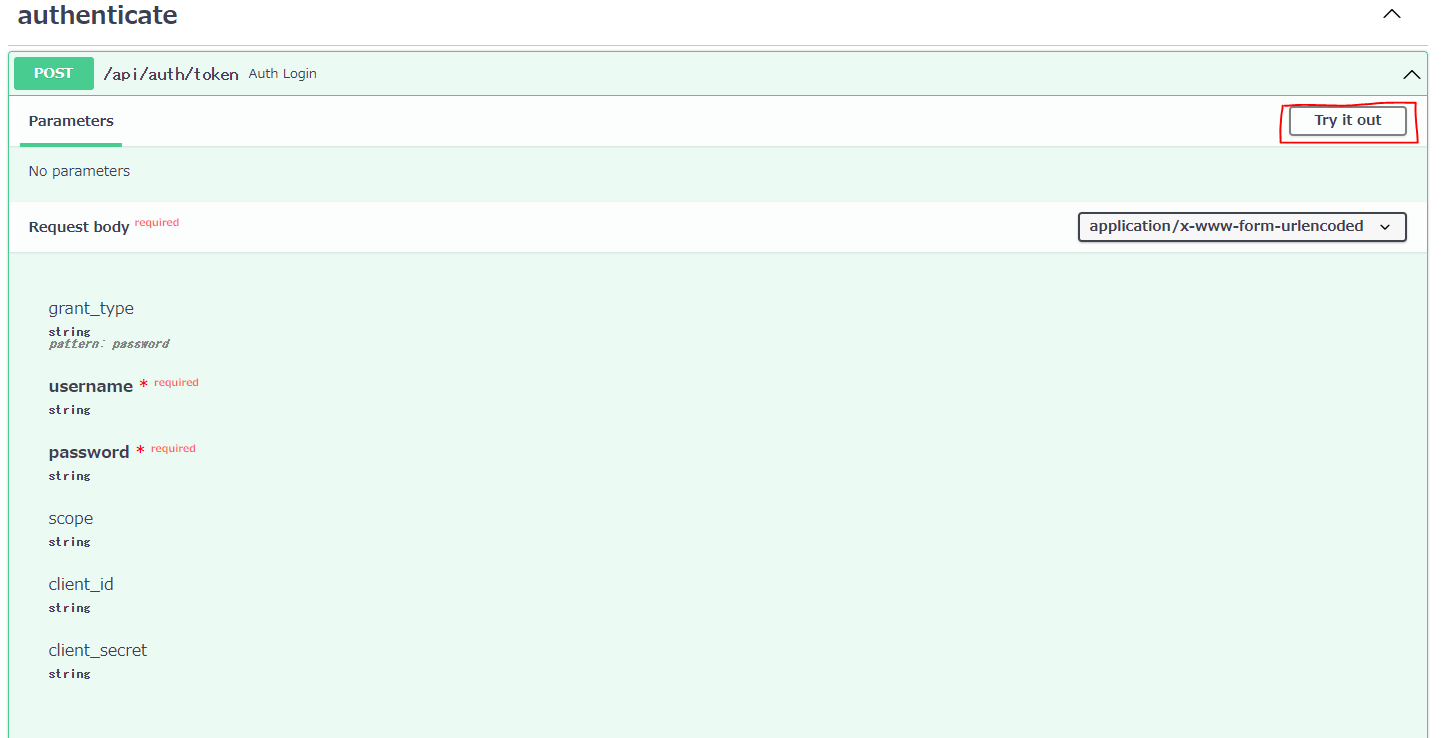
以下のURLが追加されていることを確認します。

開くと、以下のようになっているので、「Try it out」をクリックしてください。
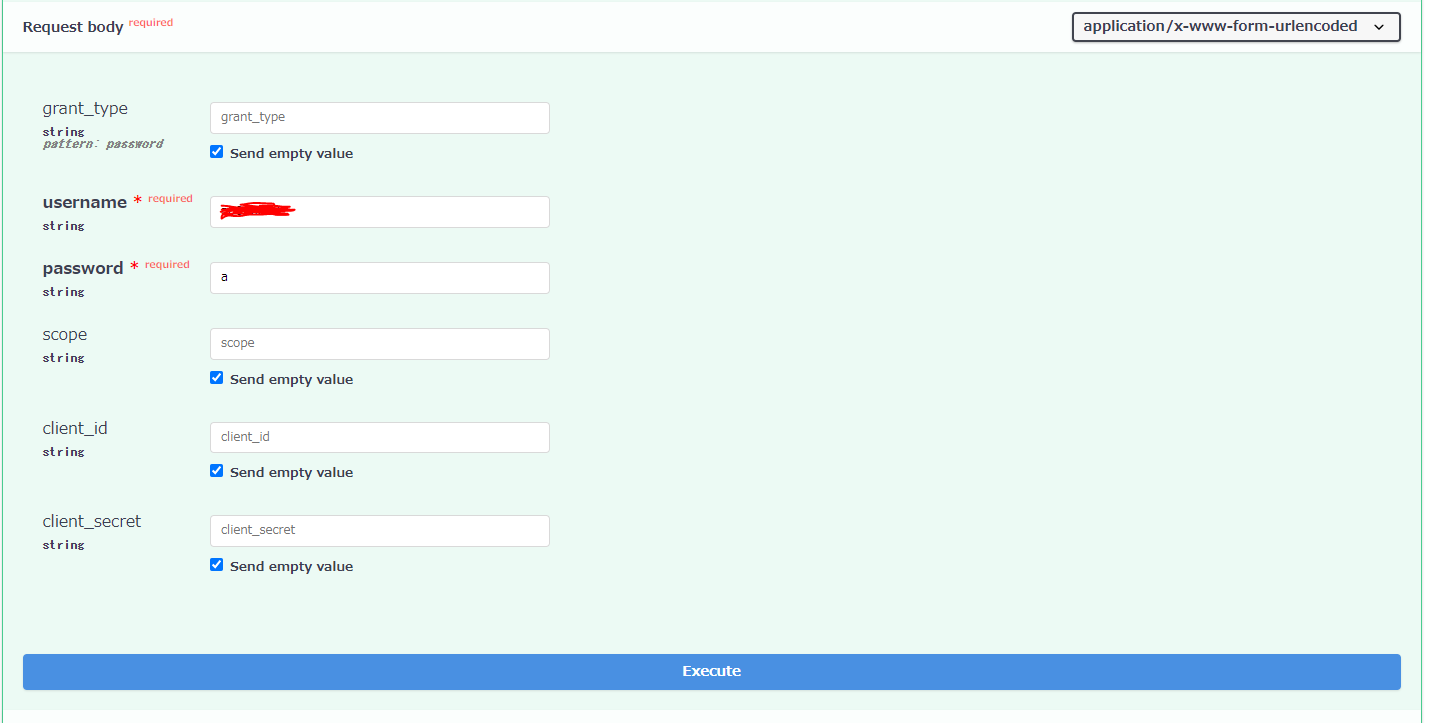
usernameとpasswordを入力し、「Execute」ボタンをクリックしてください。
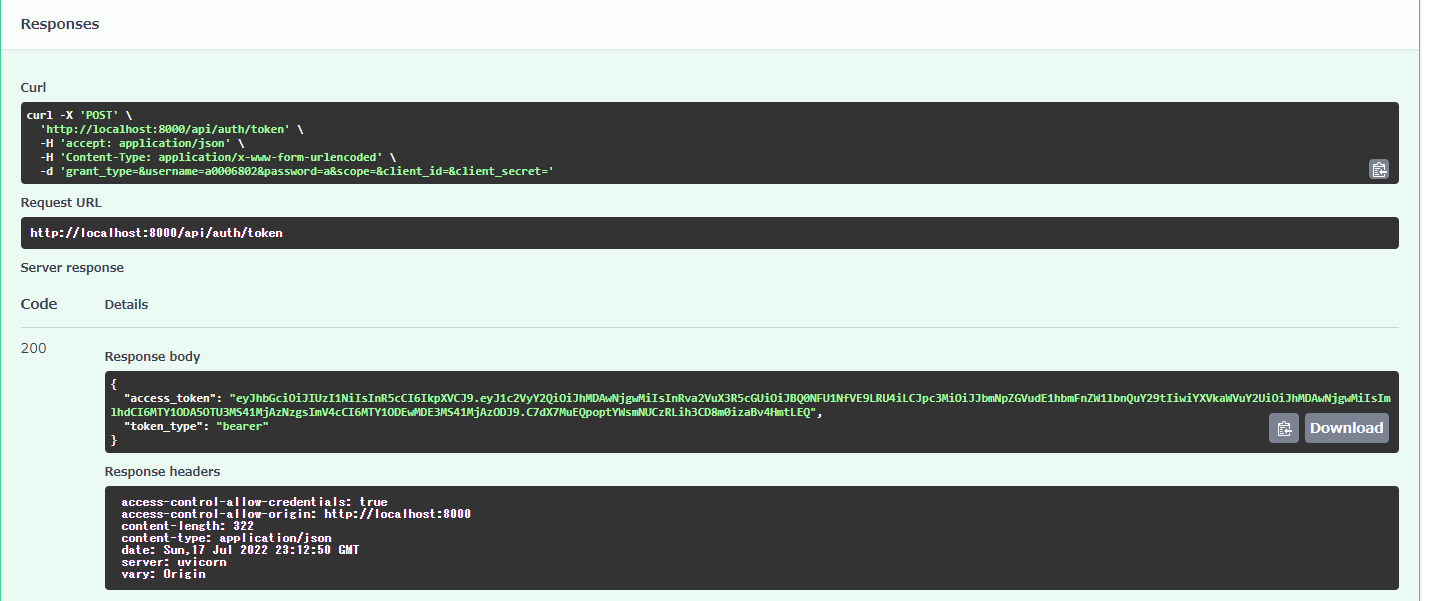
以下の様に、Codeに200が表示され、その横に、AccessTokenが表示されていれば、正常にAccessTokenが表示されたこととなります。
今回作成したコードはGithubにアップしておきました。
次回は、今回は発行されたAccessTokenを使って、他のWebAPIを保護していく処理を追加していきます。