1. はじめに
Db2のデータウェアハウス版であるDb2 WarehouseはエンジンがDb2と共通ですが、大量データの分析・集計処理などに向くように設定されています。また一部のテーブルをトランザクション処理向けに設定して、用途に応じたテーブルを混在させることができます。
Db2 Warehouseのエンジンはコンテナとして提供されており、クラウド環境(OpenShift等)やパソコン(Docker)にデプロイすることができます。フルマネージド・サービスのDb2 Warehouse on Cloudが無料トライアル対象(2023年10月時点)となっていて、1000米ドル分使うことができます。一方、パソコンに導入して無料トライアル(90日間)を行うこともできます。
本記事ではパソコン(x86-64)への導入方法を紹介します。そこに導入するDockerとUbuntuもそれぞれのライセンス条項の範囲内で無料で使うことができます。この環境にDb2 Warehouseのノード1台構成、つまりSMP構成 (symmetric multiprocessing) を導入します。私は導入時のエラー解消に若干の手間を要したので本記事にまとめました。
目次は次の通りです。
- はじめに
- 手順実行の前提
- 手順概要
- 手順
- エラー例
- 参考資料
- 類似テーマを扱ったQiita記事
2. 手順実行の前提
- パソコン(x86-64)
UbuntuとDb2 Warehouseが必要とするリソースは次のようになっています。本記事で使うDokcer Engineについては私が探した範囲でリソース情報が見当たりませんでした。下のUbuntuとDb2 Warehouseの値を合計すると全体でCPU 3コア、メモリー 12GB、ストレージ 50GBとなります。-
Ubuntu Desktopの最小リソース
- CPU:2コア 2GHz
- メモリー:4GB
- ストレージ:25GB
-
Db2 Warehouse SMP構成の最小リソース
- CPU:1コア 2GHz
- メモリー:8GB
- ストレージ:25GB
-
Ubuntu Desktopの最小リソース
なお、本記事で使ったパソコンは24仮想コア(12物理コア) 3.1GHz、32GBメモリで、利用可能なストレージは100GBです。
-
上記最小リソース以上のパソコンに導入されたUbuntu
本記事の検証で使ったUbuntuは22.04.3 LTSです。下の手順を行うためにこれからUbuntuを導入する場合は、ファイルシステムをxfsにしてください。これによって非推奨のストレージ・ドライバー(devicemapper)を使う必要がなくなります。 -
IBMidとIBM CloudのAPIキー
これから入手する方は次のQiita記事を参考にしてください。
3. 手順概要
次の順序で進めます。
- sshログインを有効化
- Docker Engineを導入
- Db2 Warehouseを導入
- Db2 Warehouseの動作確認(Web管理画面)
- Db2 Warehouseの動作確認(コマンドライン・プロセッサ(CLP))
- Db2 Warehouseの動作確認(コマンドライン・プロセッサ(CLP)、リモート接続)
- Db2 Warehouseの停止と起動
本記事で用いたDockerとDb2 Warehouseのバージョンは次の通りです。
root@kuma:~# docker --version
Docker version 24.0.6, build ed223bc

[db2inst1@kuma - Db2wh ~]$ db2level
Informational tokens are "DB2 v11.5.8.0", "special_29494",
"DYN2304181003AMD64_29494", and Fix Pack "0".
各手順においてUbuntuユーザー名がyama、Ubuntuサーバー名がkuma、そのIPアドレスがxxx.xxx.xxx.xxxとなっていますが、ご自身の環境に合わせて読み替えてください。
4. 手順1) sshログインを有効化
Ubuntuを便利に使うためにsshログインできるようにします。デスクトップから端末を起動し、管理ユーザーrootのパスワードを設定し、rootでsshサーバーを導入し、ファイアウォールのsshポートを開放します。
yama@kuma:~$ sudo passwd root
yama@kuma:~$ su -
root@kuma:~# apt update
root@kuma:~# apt upgrade
root@kuma:~# apt install openssh-server
root@kuma:~# systemctl status ssh
● ssh.service - OpenBSD Secure Shell server
     Loaded: loaded (/lib/systemd/system/ssh.service; enabled; vendor preset: enabled)
     Active: active (running) since Fri 2023-10-13 14:47:59 JST; 9s ago

root@kuma:~# ufw enable
root@kuma:~# ufw allow ssh
root@kuma:~# ufw status
Status: active
To                         Action      From
--                         ------      ----
22/tcp                     ALLOW       Anywhere
22/tcp (v6)                ALLOW       Anywhere (v6)
4. 手順2) Docker Engineを導入
本記事ではDocker DesktopのGUIを使わないため、Docker Engineを導入します。まずAptリポジトリにDockerを追加します。
$ ssh yama@xxx.xxx.xxx.xxx
yama@kuma:~$ su -
root@kuma:~# apt update
root@kuma:~# apt install ca-certificates curl gnupg
ca-certificates is already the newest version (20230311ubuntu0.22.04.1).
gnupg is already the newest version (2.2.27-3ubuntu2.1).
Setting up curl (7.81.0-1ubuntu1.14) ...
...
root@kuma:~# install -m 0755 -d /etc/apt/keyrings
root@kuma:~# curl -fsSL https://download.docker.com/linux/ubuntu/gpg | sudo gpg --dearmor -o /etc/apt/keyrings/docker.gpg
root@kuma:~# chmod a+r /etc/apt/keyrings/docker.gpg
root@kuma:~# echo \
  "deb [arch="$(dpkg --print-architecture)" signed-by=/etc/apt/keyrings/docker.gpg] https://download.docker.com/linux/ubuntu \
  "$(. /etc/os-release && echo "$VERSION_CODENAME")" stable" | \
  sudo tee /etc/apt/sources.list.d/docker.list > /dev/null

root@kuma:~# tail /etc/apt/sources.list.d/docker.list
deb [arch=amd64 signed-by=/etc/apt/keyrings/docker.gpg] https://download.docker.com/linux/ubuntu   jammy stable

root@kuma:~# sudo apt update
Docker Engineを導入します。
root@kuma:~# apt install docker-ce docker-ce-cli containerd.io docker-buildx-plugin docker-compose-plugin
...
Setting up liberror-perl (0.17029-1) ...
Setting up docker-buildx-plugin (0.11.2-1~ubuntu.22.04~jammy) ...
Setting up containerd.io (1.6.24-1) ...
Created symlink /etc/systemd/system/multi-user.target.wants/containerd.service → /lib/systemd/system/containerd.service.
Setting up docker-compose-plugin (2.21.0-1~ubuntu.22.04~jammy) ...
Setting up docker-ce-cli (5:24.0.6-1~ubuntu.22.04~jammy) ...
Setting up libslirp0:amd64 (4.6.1-1build1) ...
Setting up pigz (2.6-1) ...
Setting up git-man (1:2.34.1-1ubuntu1.10) ...
Setting up docker-ce-rootless-extras (5:24.0.6-1~ubuntu.22.04~jammy) ...
Setting up slirp4netns (1.0.1-2) ...
Setting up docker-ce (5:24.0.6-1~ubuntu.22.04~jammy) ...
Created symlink /etc/systemd/system/multi-user.target.wants/docker.service → /lib/systemd/system/docker.service.
Created symlink /etc/systemd/system/sockets.target.wants/docker.socket → /lib/systemd/system/docker.socket.
Setting up git (1:2.34.1-1ubuntu1.10) ...
Docker Engineの動作確認を行います。
root@kuma:~# docker run hello-world
...
Hello from Docker!
This message shows that your installation appears to be working correctly.
4. 手順3) Db2 Warehouseを導入
Ubuntuパソコンのホスト名とIPアドレスを/etc/hostsに登録します。
xxx.xxx.xxx.xxx kuma.myhome.com kuma
別の端末からDb2 Warehouseにアクセスするためにポートを開放します。ポートはマニュアルに載っていますが、本記事では説明に関係するポートのみ開放します。
root@kuma:~# ufw allow 8443/tcp
root@kuma:~# ufw allow 50000/tcp
root@kuma:~# ufw allow 50001/tcp
root@kuma:~# ufw status
Status: active
To                         Action      From
--                         ------      ----
22/tcp                     ALLOW       Anywhere
8443/tcp                   ALLOW       Anywhere
50000/tcp                  ALLOW       Anywhere
50001/tcp                  ALLOW       Anywhere
22/tcp (v6)                ALLOW       Anywhere (v6)
8443/tcp (v6)              ALLOW       Anywhere (v6)
50000/tcp (v6)             ALLOW       Anywhere (v6)
50001/tcp (v6)             ALLOW       Anywhere (v6)
IPv4転送を有効にするため、/etc/sysctl.confに次の行を登録します。
net.ipv4.ip_forward=1
ネットワークを再起動します。
root@kuma:~# systemctl restart NetworkManager
root@kuma:~# systemctl status NetworkManager
● NetworkManager.service - Network Manager
     Loaded: loaded (/lib/systemd/system/NetworkManager.service; enabled; vendor preset: enabled)
     Active: active (running) since Thu 2023-10-12 21:22:27 JST; 8s ago
次にストレージ・ドライバーを設定します。まずDockerを停止します。
root@kuma:~# systemctl stop docker
Warning: Stopping docker.service, but it can still be activated by:
  docker.socket
- Ubuntuのファイルシステムがxfs以外の場合
ストレージ・ドライバーをdevicemapperに設定し、それが生成するオブジェクト(base device)をDb2 Warehouseが必要とする大きさに設定します。/etc/docker/daemon.jsonに次の行を登録します。
{
"storage-driver": "devicemapper",
"storage-opts": [ "dm.basesize=20G" ]
}
- Ubuntuのファイルシステムがxfsの場合
推奨ドライバーであるoverlay2を設定します。/etc/docker/daemon.jsonに次の行を登録します。
{
  "storage-driver": "overlay2"
}
- 以下、Ubuntuのファイルシステムによらず共通の手順
Dockerを起動してストレージ・ドライバーを確認します。
root@kuma:~# systemctl start docker
root@kuma:~# systemctl status docker
root@kuma:~# docker info
IBM Cloudのリポジトリにログインします。パスワードとして2節(手順実行の前提)で準備したAPIキーの値を入力します。
root@kuma:/etc# docker login -u iamapikey icr.io
Password:
Login Succeeded
Db2 Warehouseコンテナイメージをデプロイします。ここではコンテナ名をDb2whとしますが、これに限らず他の名前を使うこともできます。
root@kuma:~# docker run -d -it --privileged=true --net=host --name=Db2wh -v /mnt/clusterfs:/mnt/bludata0 -v /mnt/clusterfs:/mnt/blumeta0 icr.io/obs/hdm/db2wh_ee:v11.5.8.0-db2wh-linux
...
Status: Downloaded newer image for icr.io/obs/hdm/db2wh_ee:v11.5.8.0-db2wh-linux
b0ac4893d38e2ab7168c67d1f34d118a7175bd2895bc5e9dc39df89919861a93
デプロイの状態を次のコマンドで確認します。デプロイが終わったらデータベース管理者bluadminのパスワードが表示されますので、後で使えるようテキストファイル等に保存します。
root@kuma:~# docker logs --follow Db2wh
...
[  829.599734] start_dashDB_local.sh[211]: #######################################################################
[  829.604587] start_dashDB_local.sh[211]: ##      --- IBM Db2 Warehouse stack service status summary ---       ##
[  829.610671] start_dashDB_local.sh[211]: #######################################################################
[  830.955451] start_dashDB_local.sh[211]: Redirecting to /bin/systemctl status slapd.service
[  832.074257] start_dashDB_local.sh[211]: SUMMARY
[  832.074650] start_dashDB_local.sh[211]: Db2TablesOnline               : RUNNING
[  832.075015] start_dashDB_local.sh[211]: Db2connectivity               : RUNNING
[  832.075386] start_dashDB_local.sh[211]: Db2running                    : RUNNING
[  832.075706] start_dashDB_local.sh[211]: LDAPrunning                   : RUNNING
[  832.076049] start_dashDB_local.sh[211]: WebConsole                    : RUNNING
[  832.384989] start_dashDB_local.sh[211]: Backing-up the system configuration ...
[  832.393244] start_dashDB_local.sh[211]: System configuration backed-up to /mnt/blumeta0/SystemConfig/kuma on the named volume successfully
[  834.615707] start_dashDB_local.sh[211]: ********************************************************************************
[  834.621550] start_dashDB_local.sh[211]: ******                          Congratulations!                          ******
[  834.627791] start_dashDB_local.sh[211]: ******     You have successfully deployed IBM Db2 Warehouse      ******
[  834.633020] start_dashDB_local.sh[211]: ********************************************************************************
[  834.637192] start_dashDB_local.sh[211]: *
[  834.641803] start_dashDB_local.sh[211]: * Next steps:
[  834.645724] start_dashDB_local.sh[211]: *
[  834.649979] start_dashDB_local.sh[211]: * 1. If you were monitoring the container startup progress using docker logs
[  834.654091] start_dashDB_local.sh[211]: command, use Ctrl+c key-sequence to detach from the Docker logs console.
[  834.659182] start_dashDB_local.sh[211]: * 3. Log in to the web console using the following information:
[  834.663695] start_dashDB_local.sh[211]: *        URL: https://xxx.xxx.xxx.xxx:8443
[  834.667772] start_dashDB_local.sh[211]: *        Default user ID    : bluadmin
*        Default password   : xxxxxxxxxxxxxxxxxxxxxxxxxxxxx
ここで次のエラーメッセージが表示されてデプロイが失敗するときは、5節(エラー例2)を参考にしてください。
Failed to mount cgroup at /sys/fs/cgroup/systemd: Operation not permitted
4. 手順4) Db2 Warehouseの動作確認(Web管理画面)
Ubuntuパソコンのポート8443 (https://xxx.xxx.xxx.xxx:8443/) にアクセスして、管理ユーザーbluadminとしてログインします。前節のDockerログに表示されたパスワードをここで入力します。
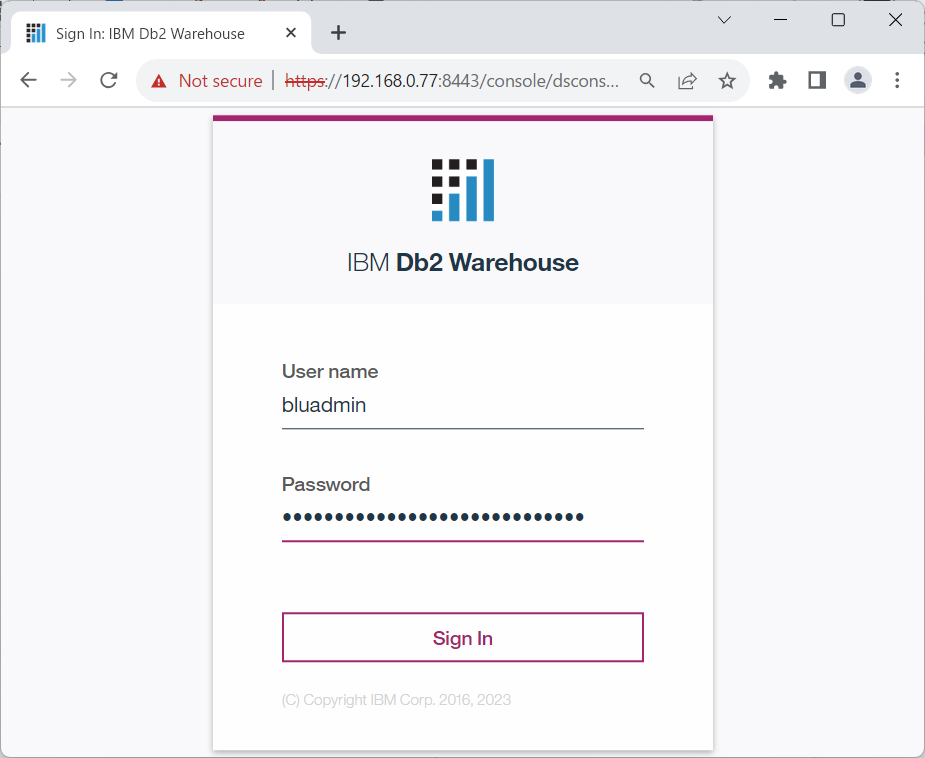
ライセンス条項をAcceptすると、次の画面が表示されて動作確認ができました。

4. 手順5) Db2 Warehouseの動作確認(コマンドライン・プロセッサ(CLP))
コンテナDb2whの中でシェルを起動します。
root@kuma:~# docker exec -it Db2wh bash
ユーザーをdb2inst1に変更してCLPを起動します。
[root@kuma - Db2wh /]# su - db2inst1
[db2inst1@kuma - Db2wh ~]$ db2
(c) Copyright IBM Corporation 1993,2007
Command Line Processor for DB2 Client 11.5.8.0
db2 =>
Db2 Warehouseへの接続に必要な情報を設定します。ここではノード名とデータベース別名をそれぞれnd_kuma, db_kumaとしていますが、これに限らず別の名前を使うことができます。
db2 => catalog tcpip node nd_kuma remote xxx.xxx.xxx.xxx server 50001 security SSL
DB20000I  The CATALOG TCPIP NODE command completed successfully.
DB21056W  Directory changes may not be effective until the directory cache is refreshed.

db2 => catalog db bludb as db_kuma at node nd_kuma
DB20000I  The CATALOG DATABASE command completed successfully.
DB21056W  Directory changes may not be effective until the directory cache is refreshed.
Db2 Warehouseに管理ユーザーbluadminとして接続します。手順3(Db2 Warehouseを導入)のDockerログに表示されたパスワードをここで入力します。
db2 => connect to db_kuma user bluadmin
Enter current password for bluadmin:
   Database Connection Information
 Database server        = DB2/LINUXX8664 11.5.8.0
 SQL authorization ID   = BLUADMIN
 Local database alias   = DB_KUMA
表を作成してみます。
db2 => create table サンプル表1012b (番号 int, 名前 nvarchar(10))
DB20000I  The SQL command completed successfully.

db2 => list tables
Table/View                      Schema          Type  Creation time
------------------------------- --------------- ----- --------------------------
サンプル表1012B                 BLUADMIN        T     2023-10-12-14.12.40.239167

db2 => insert into サンプル表1012b values (1,'山'),(2,'かず')
DB20000I  The SQL command completed successfully.

db2 => select * from サンプル表1012b
番号        名前
----------- --------------------
          1 山
          2 かず
これでCLPの動作確認ができました。
4. 手順6) Db2 Warehouseの動作確認(コマンドライン・プロセッサ(CLP)、リモート接続)
Db2 Warehouseを導入したパソコンとは別の端末にデータベースを導入せず、クライアント・ツールだけを導入することができます。手順を次の記事に載せました。
4. 手順7) Db2 Warehouseの停止と起動
Ubuntuをシャットダウンする前にコンテナを停止します。
root@kuma:~# docker stop Db2wh
Db2wh
Ubuntuを起動した後はコンテナを起動します。少し時間を要するので、その間はDockerログで状況を確認します。
root@kuma:~# docker start Db2wh
Db2wh
root@kuma:~# docker logs --follow Db2wh
Welcome to Db2 Warehouse!
...
5. エラー例1) Failed to mount cgroup at /sys/fs/cgroup/systemd
私の環境でDockerを起動するとき次のエラーが表示されました。
root@kuma:~# systemctl start docker
Job for docker.service failed because the control process exited with error code.
See "systemctl status docker.service" and "journalctl -xeu docker.service" for details.

root@kuma:~# systemctl status docker
× docker.service - Docker Application Container Engine
     Loaded: loaded (/lib/systemd/system/docker.service; enabled; vendor preset: enabled)
     Active: failed (Result: exit-code) since Fri 2023-10-13 08:05:29 JST; 3min 0s ago
このとき/etc/docker/daemon.jsonに次のように登録していましたが、これは誤りです。dm.basesize はDevice Mapperドライバーが生成するオブジェクトの大きさであり、overlay2ドライバーに関係しません。
{
"storage-driver": "overlay2",
"storage-opts": [ "dm.basesize=20G" ]
}
エラーの解消方法はdm.basesizeの設定を削除することです。これでDockerが起動するようになりました。
{
"storage-driver": "overlay2"
}
5. エラー例2) Failed to mount cgroup at /sys/fs/cgroup/systemd
私の環境ではDb2 WarehouseコンテナをデプロイするとDockerログに次のメッセージが表示されました。
root@kuma:~# docker logs --follow Db2wh
Failed to mount cgroup at /sys/fs/cgroup/systemd: Operation not permitted
systemd 219 running in system mode. (+PAM +AUDIT +SELINUX +IMA -APPARMOR +SMACK +SYSVINIT +UTMP +LIBCRYPTSETUP +GCRYPT +GNUTLS +ACL +XZ +LZ4 -SECCOMP +BLKID +ELFUTILS +KMOD +IDN)
Detected virtualization docker.
Detected architecture x86-64.

Welcome to Db2 Warehouse!

Set hostname to <kuma>.
Initializing machine ID from random generator.
Cannot determine cgroup we are running in: No such file or directory
Failed to allocate manager object: No such file or directory
[!!!!!!] Failed to allocate manager object, freezing.
記事(Ubuntu22.04でCentOS7をLXCコンテナで動かす)によるとcgroup v2のみが動いていて、cgroup v1が動いていないときこのエラーが生じます。(注:cgourpはプロセスの集まりでCPUやメモリなどリソースの管理に用いられる)
LXC (Linux Containers) の管理ツールを導入してcgroupを確認します。
root@kuma:~# docker stop Db2wh
root@kuma:~# systemctl stop docker
Warning: Stopping docker.service, but it can still be activated by:
  docker.socket
root@kuma:~# apt install lxc
root@kuma:~# lxc-checkconfig
...
--- Control groups ---
Cgroups: enabled
Cgroup namespace: enabled

Cgroup v1 mount points:


Cgroup v2 mount points:
/sys/fs/cgroup

Cgroup v1 systemd controller: missing
Cgroup v1 freezer controller: missing
ブートローダーの設定を変更してcgroup v1が動作するようにします。/etc/default/grubにsystemd.unified_cgroup_hierarchy=falseを追加します。
旧)GRUB_CMDLINE_LINUX_DEFAULT="quiet splash"
新)GRUB_CMDLINE_LINUX_DEFAULT="quiet splash systemd.unified_cgroup_hierarchy=false"
変更をブートローダーに反映します。
root@kuma:~# update-grub
...
Adding boot menu entry for UEFI Firmware Settings ...
done
Ubuntuを再起動してcgourp v1が動作していることを確認します。
root@kuma:~# shutdown -r now

root@kuma:~# lxc-checkconfig
...
--- Control groups ---
Cgroups: enabled
Cgroup namespace: enabled

Cgroup v1 mount points:
/sys/fs/cgroup/systemd
/sys/fs/cgroup/net_cls,net_prio
/sys/fs/cgroup/cpu,cpuacct
/sys/fs/cgroup/rdma
/sys/fs/cgroup/pids
/sys/fs/cgroup/hugetlb
/sys/fs/cgroup/misc
/sys/fs/cgroup/perf_event
/sys/fs/cgroup/memory
/sys/fs/cgroup/cpuset
/sys/fs/cgroup/blkio
/sys/fs/cgroup/devices
/sys/fs/cgroup/freezer

Cgroup v2 mount points:
/sys/fs/cgroup/unified

Cgroup v1 clone_children flag: enabled
...
Db2 Warehouseコンテナを起動します。
root@kuma:~# docker start Db2wh
Db2wh
6. 参考資料
- IBMidとAPIキーの取得(Qiita記事)
- IBMidを作成してみる。
https://qiita.com/Shumpei_Kubo/items/564126081dea547dd742 - IBM Cloud APIKEYの作成(取得)方法
https://qiita.com/nishikyon/items/fa8b951267efbe911fe7
- IBMidを作成してみる。
- Ubuntuが必要とするハードウェア・スペック
- Download Ubuntu Desktop
https://ubuntu.com/download/desktop
- Download Ubuntu Desktop
- Dockerマニュアル
- Install Docker Engine on Ubuntu
https://docs.docker.com/engine/install/ubuntu/ - Use the OverlayFS storage driver
https://docs.docker.com/storage/storagedriver/overlayfs-driver/ - Devicemapper workflow
https://docs.docker.com/storage/storagedriver/device-mapper-driver/#devicemapper-workflow
- Install Docker Engine on Ubuntu
- Db2 Warehouseマニュアル
- IBM Db2 Warehouse prerequisites for Linux and x86 hardware
https://www.ibm.com/docs/en/db2-warehouse?topic=prerequisites-linux-x86-hardware#local_prereqs-Linux__title__6 - Installing the Docker engine
https://www.ibm.com/docs/en/db2-warehouse?topic=warehouse-installing-docker-engine - Deploying IBM Db2 Warehouse SMP on Linux and x86 hardware
https://www.ibm.com/docs/en/db2-warehouse?topic=hardware-deploying-smp-linux-x86
- IBM Db2 Warehouse prerequisites for Linux and x86 hardware
- Db2コマンドライン・プロセッサ(CLP)の導入(Qiita記事)
- Db2 WarehouseにSSL接続(Windows/Docker上のDb2コマンド環境)
https://qiita.com/yamasakk/items/3b8d5eb3f60707870a5d - 初めて導入するDb2コマンド実行環境(Windows用)
https://qiita.com/yamasakk/items/b59e39310a15c21f7576 - Db2コマンド実行環境の導入(Linux用)
https://qiita.com/yamasakk/items/dba85f0aabc7b5b008c4
- Db2 WarehouseにSSL接続(Windows/Docker上のDb2コマンド環境)
- その他エラー対応
- Ubuntu22.04でCentOS7をLXCコンテナで動かす
https://sakakinox.net/posts/p37/
- Ubuntu22.04でCentOS7をLXCコンテナで動かす
7. 類似テーマを扱ったQiita記事
- 社外接続できない素のRHEL7サーバーにDb2 WarehouseコンテナをSMP構成でデプロイする
https://qiita.com/HDM_Tech_Team/items/14ebf6101964201ea1e2 - Db2 Warehouse (SMP構成)をデプロイする
https://qiita.com/Asuka_Saito/items/cd0895986a22a6aa3800 - Db2 Warehouse SMP構成(シングルノード) x86版 を導入してみた
https://qiita.com/m1914uk/items/9e7573dd7f20e31735b5