概要
Raspbeery Piのカメラの映像をAndroidのアプリに組み込んで表示したい場合があると思います。そのような時に、カメラ映像の配信にmjpeg-streamerを利用し、ipcam-viewで表示すれば簡単に実現することができます。
- Raspberry Piのカメラ映像の配信 ... jacksonliam/mjpg-streamer
- Androidでの映像の表示(View) ... niqdev/ipcam-view
mjpeg-streamerのインストール&起動
こちらのドキュメントを参考にインストールします。
Setup Guide: Raspberry Pi | MJPEG Streamer Install & Setup & FFMpeg Recording
# Update & Install Tools
sudo apt-get update
sudo apt-get upgrade -y
sudo apt-get install build-essential libjpeg8-dev imagemagick libv4l-dev cmake -y

# Clone Repo in /tmp
cd /tmp
git clone https://github.com/jacksonliam/mjpg-streamer.git
cd mjpg-streamer/mjpg-streamer-experimental

# Make
make
sudo make install

# Webサーバーの起動(インプットをRaspberry Pi用に修正)
/usr/local/bin/mjpg_streamer -i "input_raspicam.so -x 640 -y 480 -fps 15 -q 80" -o "output_http.so -p 8080 -w /usr/local/share/mjpg-streamer/www"
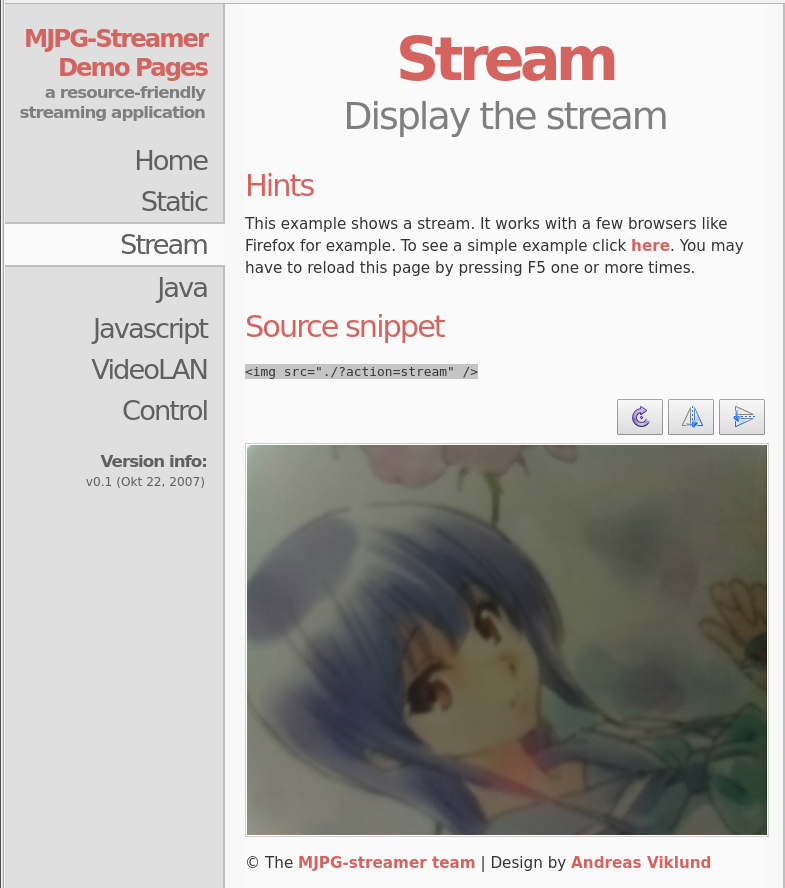
最後のコマンドではWebサーバーを起動しています。 http://RaspberryPiのIPアドレス:8080/stream.html へアクセスするとストリーミングされた映像を見ることができます。
映像部分はimgタグになっており、映像の取得には./?action=streamへアクセスすればよいことがわかります。
<img src="./?action=stream" />
ipcam-viewを使ったアプリの開発
niqdev/ipcam-viewのUsageに書いてある通りに変更を加えていきます。
exampleのアプリはAndroidストアで公開されています。
build.gradle
一行追加するだけです。
dependencies {
    ...
    implementation 'com.github.niqdev:mjpeg-view:1.3.2' // 追加
    ...
}
AndroidManifest.xml
インターネットの接続が必要になります。
<uses-permission android:name="android.permission.INTERNET" />
activity_main.xml
<RelativeLayout
  xmlns:android="http://schemas.android.com/apk/res/android"
  // ↓追加
  xmlns:stream="http://schemas.android.com/apk/res-auto"
  ...>

    <!-- ↓MjpegSurfaceViewの追加 -->
    <com.github.niqdev.mjpeg.MjpegSurfaceView
      android:id="@+id/mjpeg_view"
      android:layout_width="match_parent"
      android:layout_height="match_parent"
      stream:type="stream_default" />
</RelativeLayout>
MainActivity.kt
ここではkotlinで書いてます。Androidの場合そのままではAvahi-daemonが使えないため、raspberrypi.localのような形でアクセスすることができないことに注意(IPアドレスを直接入れる必要がある)
class MainActivity : AppCompatActivity() {

    val mjpegView by lazy {
        findViewById(R.id.mjpeg_view) as MjpegView
    }
    val STREAM_URL = "http://192.168.1.XXX:8080/?action=stream"
    val TIMEOUT = 5

    override fun onCreate(savedInstanceState: Bundle?) {
        super.onCreate(savedInstanceState)
        setContentView(R.layout.activity_main)
    }

    fun loadIpCam() {
        Mjpeg.newInstance()
                .open(STREAM_URL, TIMEOUT)
                .subscribe( {
                    mjpegView.setSource(it)
                    mjpegView.setDisplayMode(DisplayMode.BEST_FIT)
                    mjpegView.showFps(true)
                },
                {
                    Log.e("loadIpCam", it.toString());
                    Toast.makeText(this, "Error: " + it.toString(), Toast.LENGTH_LONG).show();
                })
    }

    override fun onResume() {
        super.onResume()
        loadIpCam()
    }
}
アプリの起動
無事ストリーミングされました。

