概要
PowerApps のカメラで撮影した画像を API Management 経由で FaceAPI に転送し、その画像の分析結果「感情、性別、年齢」を PoweApps に表示するアプリの実装手順を数回に分け記載しています。また、並行して、その分析結果を CosmosDB に保存しておき、PowerApps からの累積情報取得リクエストにより累積クエリ結果「感情分布、性別分布」を PowerApps に返し、円グラフ表示する機能の実装手順も複数回に分け記載します。なお、PowerApp の画面作成については省略し、APIコール部分とその戻り値の部分に焦点をあてて記載しています。
本アプリの全体構成は下図となります。
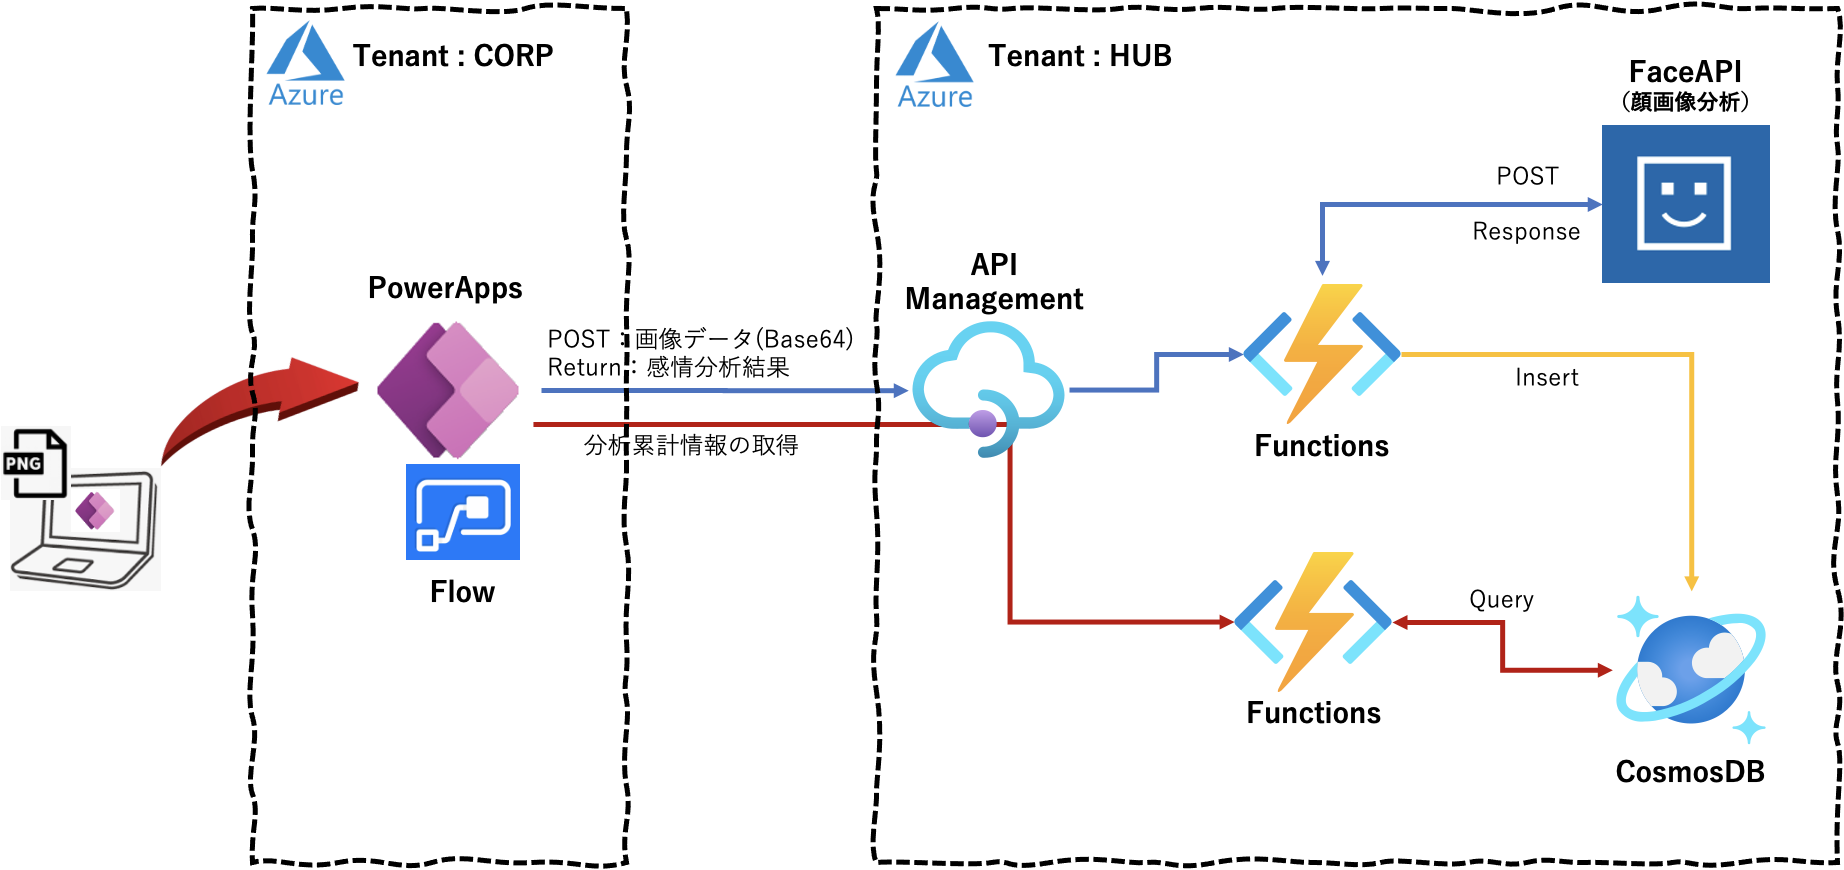
第4回目は、第3回 で作成した API Management(以下、APIM) を PowerAppsカスタムコネクタ からコールし、同様の結果が得られることを確認してみます。
実行環境
macOS Big Sur 11.3
Python 3.8.3
APIM から OpenAPI のエクスポート
PowerApps と APIM が属する Azureのテナント が異なるため、PowerApps から OpenAPI を通じて、APIM にアクセスさせます。そのため、前回作成した APIM の「iturufuncface」 から 「OpenAPI v2 (JSON)」をエクスポートします。

ローカルに「iturufuncface.swagger.json」というファイル名で OpenAPI がエクスポートされました。
PowerApps での OpenAPI のインポート
PowerApps のサイトに接続し、「データ」-「カスタムコネクタ」から上記でエクスポートされたJSONファイルをインポートします。
画面の手順に従い、コネクタ名には「apim-ituru-face-connect」を定義し、最後に続行ボタンを押します。
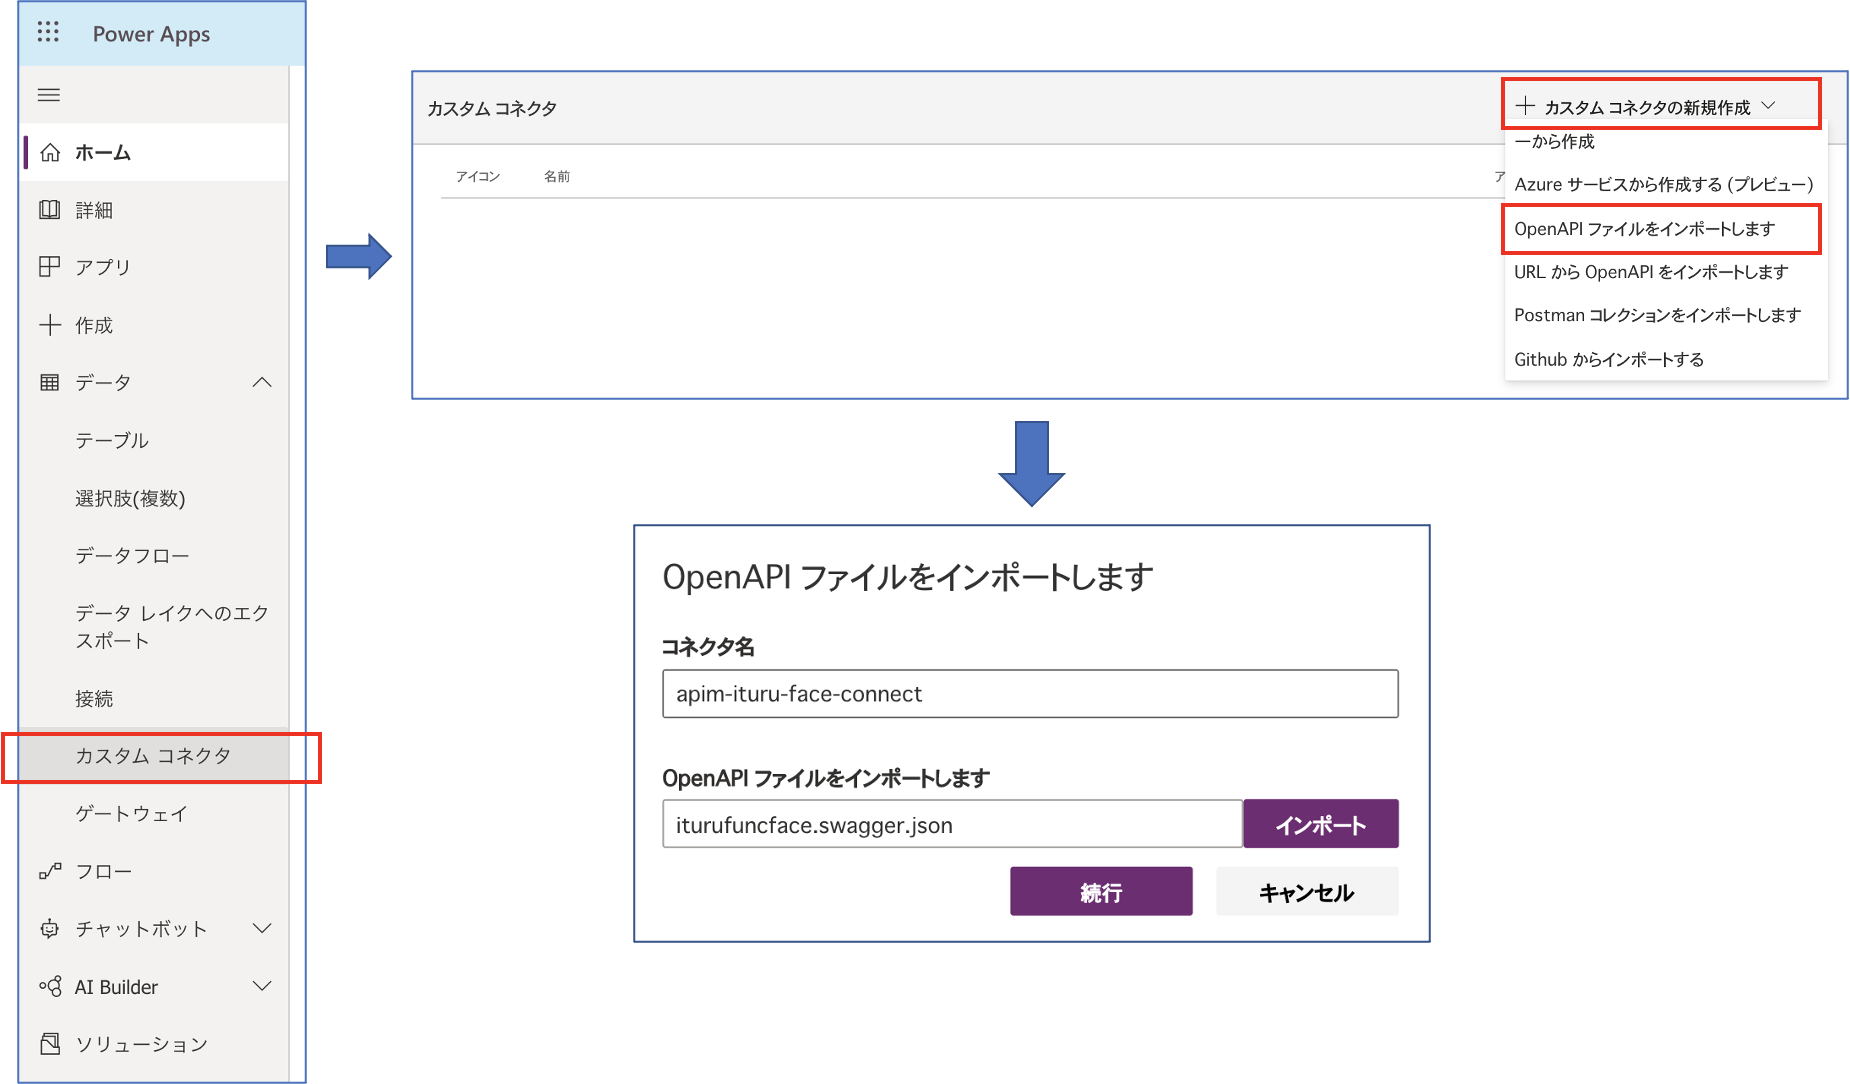
PowerApps のカスタムコネクタの定義
上記手順完了後、各タムコネクタの編集画面に切り替わります。任意でコネクタアイコンをアップロードします。必要であれば説明欄を記載します。

Swagger定義
画面上部の「Swaggerエディター」をONにし編集します。編集完了後、「コネクタの更新」を押します
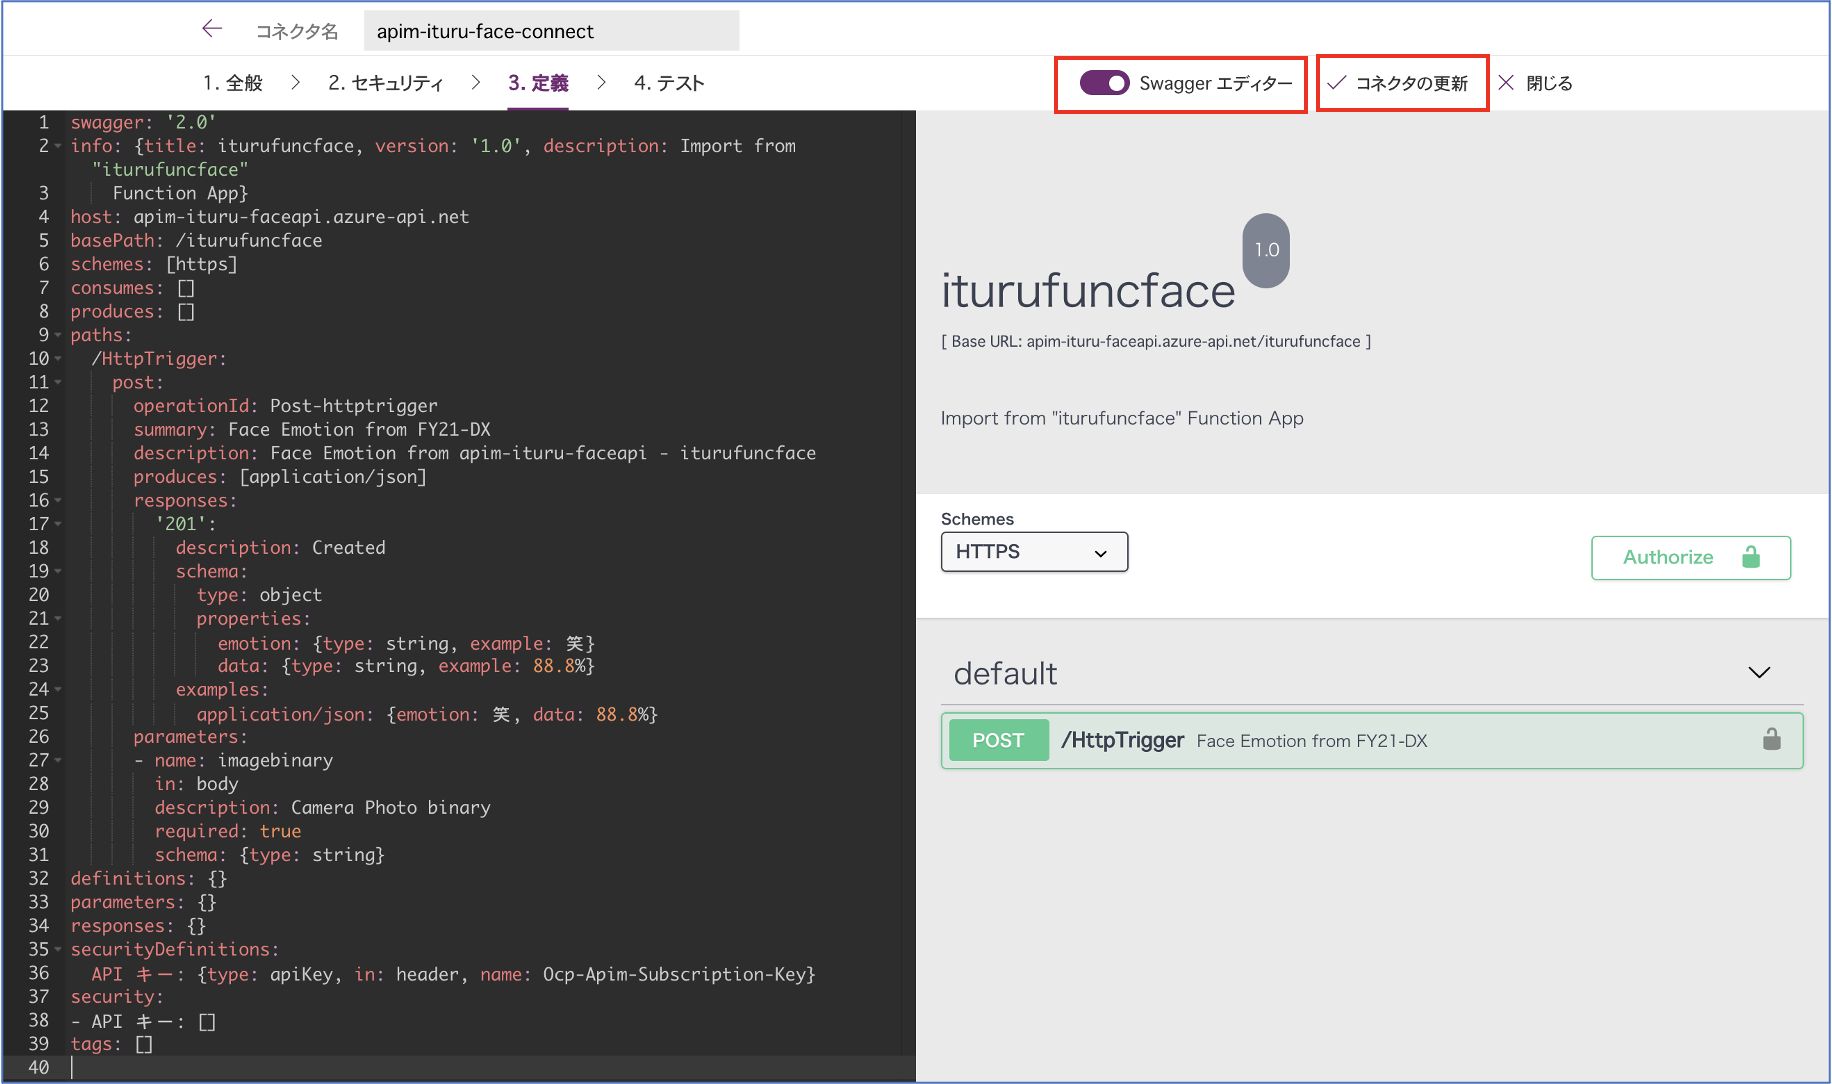
Swaggerは下記のように編集しました。
swagger: '2.0'
info: {title: iturufuncface, version: '1.0', description: Import from "iturufuncface"
    Function App}
host: apim-ituru-faceapi.azure-api.net
basePath: /iturufuncface
schemes: [https]
consumes: []
produces: []
paths:
  /HttpTrigger:
    post:
      operationId: Post-httptrigger
      summary: Face Emotion from FY21-DX
      description: Face Emotion from apim-ituru-faceapi - iturufuncface
      produces: [application/json]
      responses:
        '201':
          description: Created
          schema:
            type: object
            properties:
              emotion: {type: string, example: 笑}
              data: {type: string, example: 88.8%}
          examples:
            application/json: {emotion: 笑, data: 88.8%}
      parameters:
      - name: imagebinary
        in: body
        description: Camera Photo binary
        required: true
        schema: {type: string}
definitions: {}
parameters: {}
responses: {}
securityDefinitions:
  API キー: {type: apiKey, in: header, name: Ocp-Apim-Subscription-Key}
security:
- API キー: []
tags: []
PowerAppsからのテスト
カスタムコネクタ「apim-ituru-face-connect」の画面から「テスト」タブを選択します。

任意の画像のBase64テキストを Base64エンコーダー で生成し、上記の「ImageBinary」欄に貼り付けます。
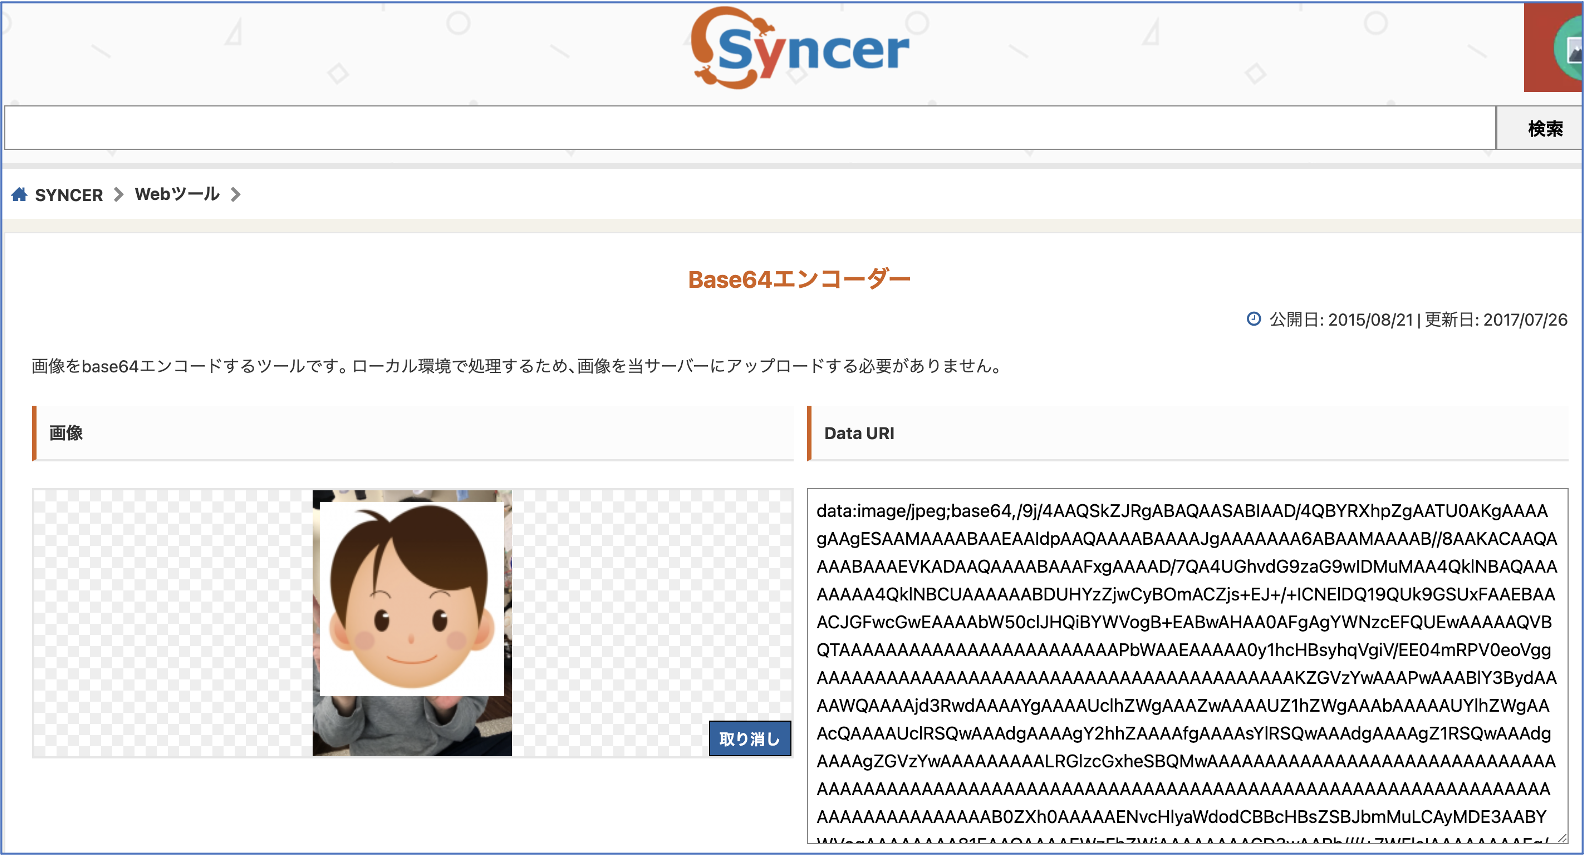

上記画面の「テスト操作」ボタンを押します。実行結果は以下となりました。
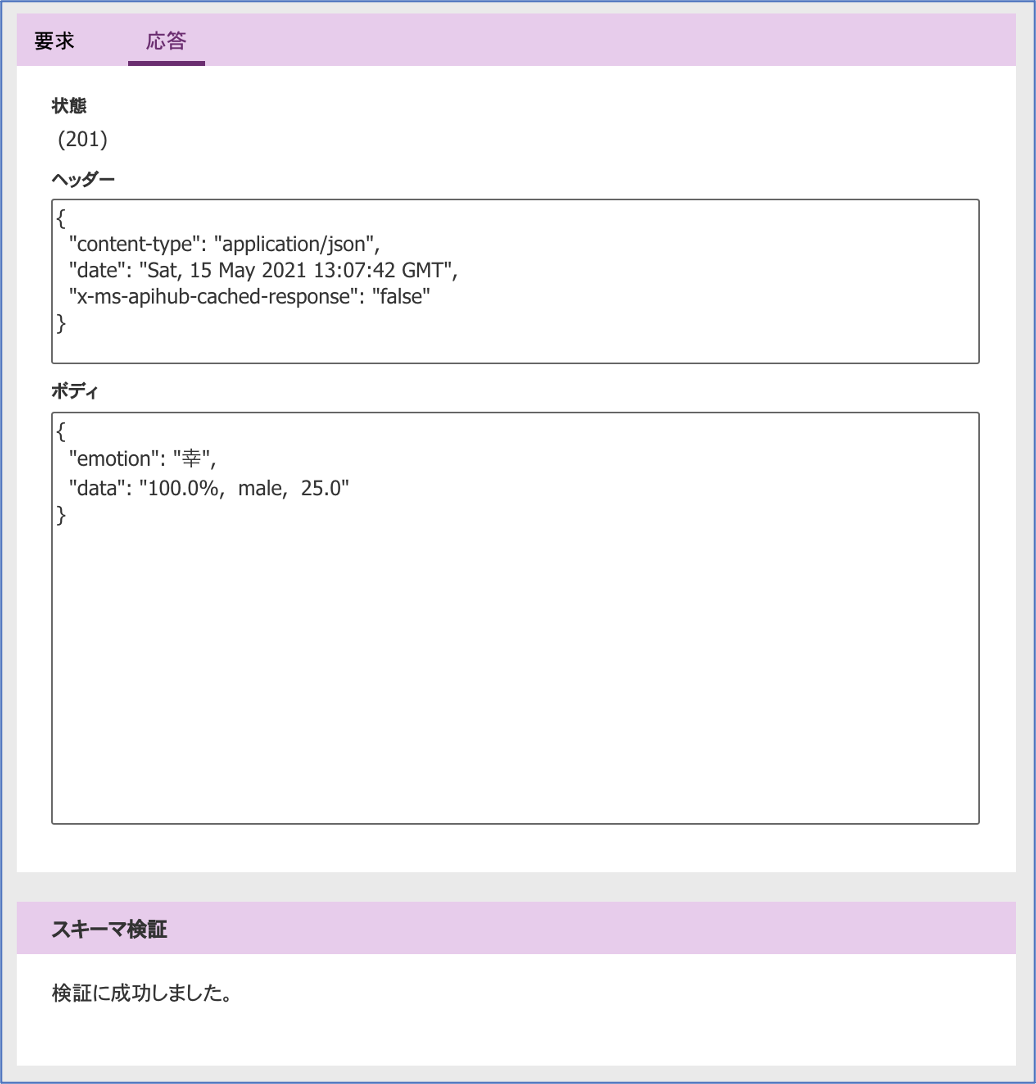
問題なく分析結果を取得できました。これで PowerAppsカスタムコネクタ から APIM -> Functions -> FaceAPI にて、想定する戻り値をJSON形式で取得できていることを確認できました。
次回について
次回(第5回)は Flow から今回作成したカスタムコネクタ経由し、API Management -> Functions -> FaceAPI で同様の結果が得られることを確認してみます。
参考情報
以下の情報を参考にさせていただきました。感謝申し上げます。
PowerApps / PowerAutomate カスタムコネクタを OpenAPI(Swagger)Specから作成する
Swaggerの記法まとめ

