概要
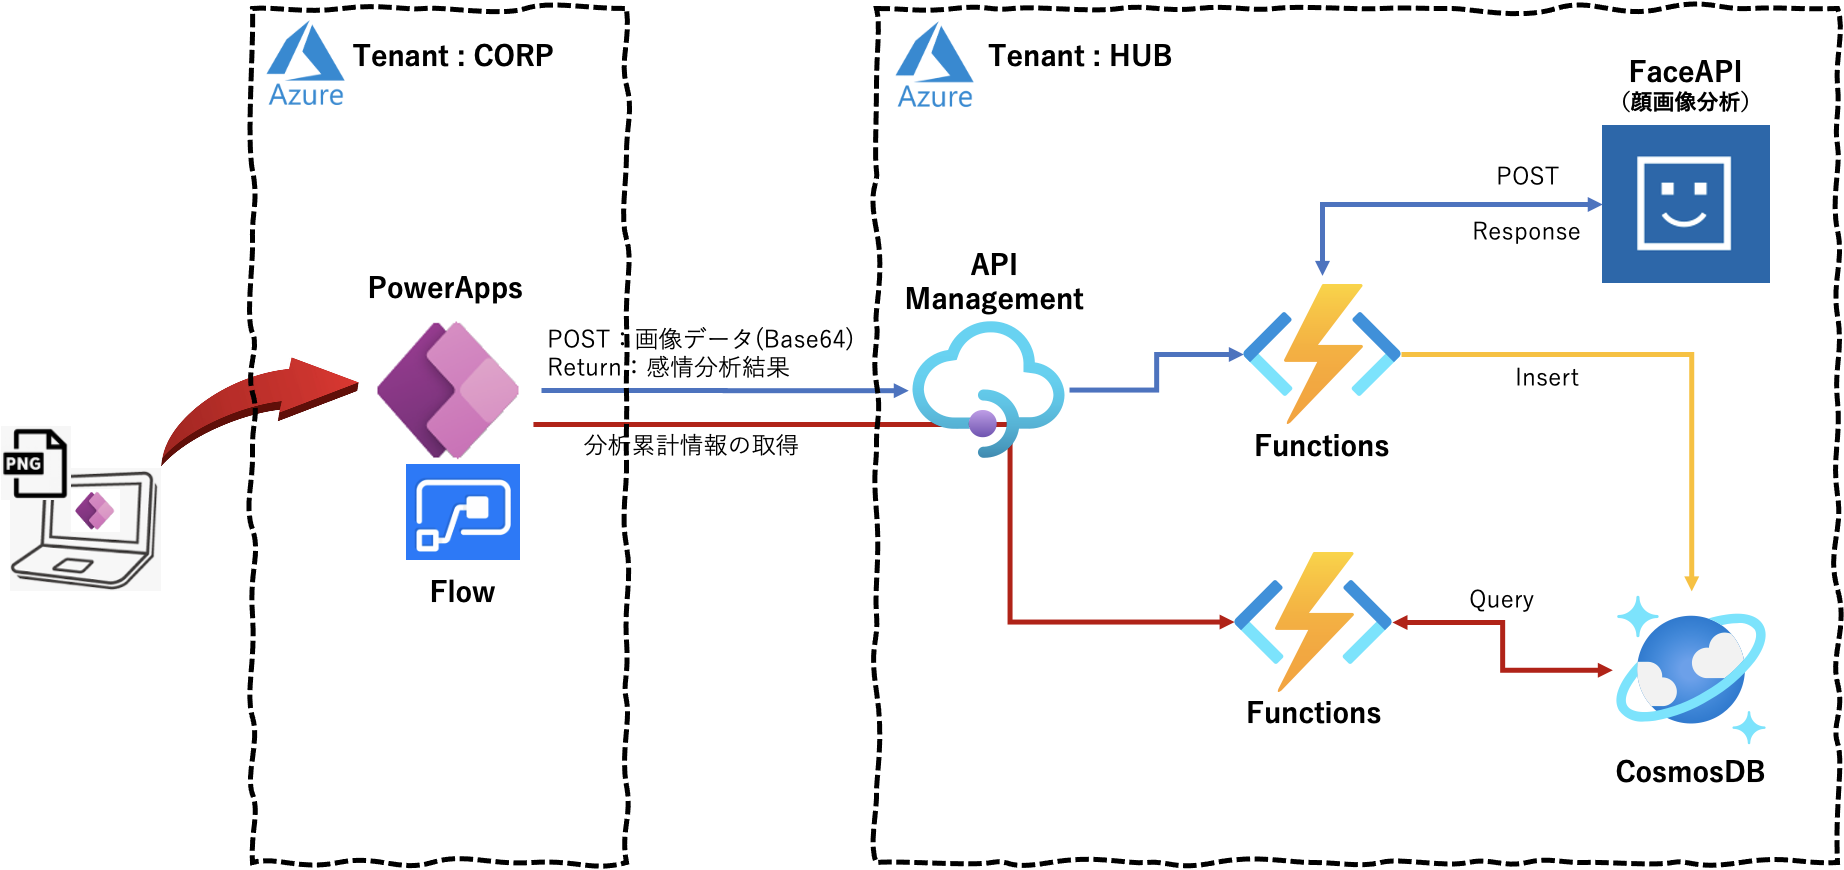
PowerApps のカメラで撮影した画像を API Management 経由で FaceAPI に転送し、その画像の分析結果「感情、性別、年齢」を PoweApps に表示するアプリの実装手順を数回に分け記載しています。また、並行して、その分析結果を CosmosDB に保存しておき、PowerApps からの累積情報取得リクエストにより累積クエリ結果「感情分布、性別分布」を PowerApps に返し、円グラフ表示する機能の実装手順も複数回に分け記載します。なお、PowerApp の画面作成については省略し、APIコール部分とその戻り値の部分に焦点をあてて記載しています。
本アプリの全体構成は下図となります。
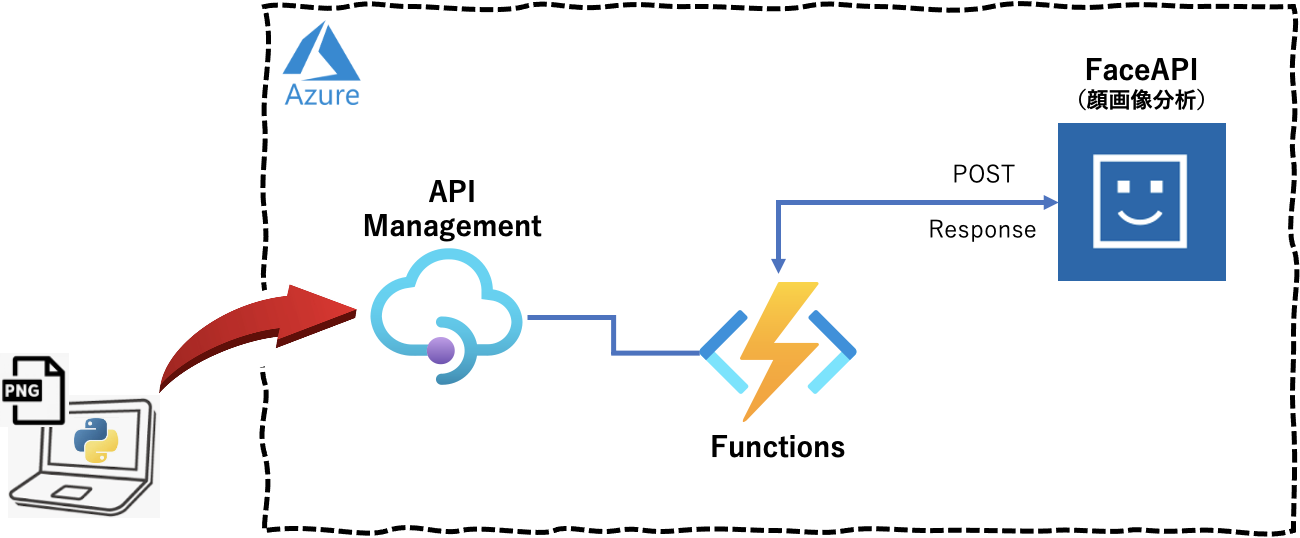
第3回目は、第2回 で作成した Functions を API Management(以下、APIM) からコールし、同様の結果が得られることを確認してみます。結果確認のための APIM へのアクセスプログラムを別途作成しています。
実行環境
macOS Big Sur 11.3
Python 3.8.3
Azure Portal上での API Management の作成
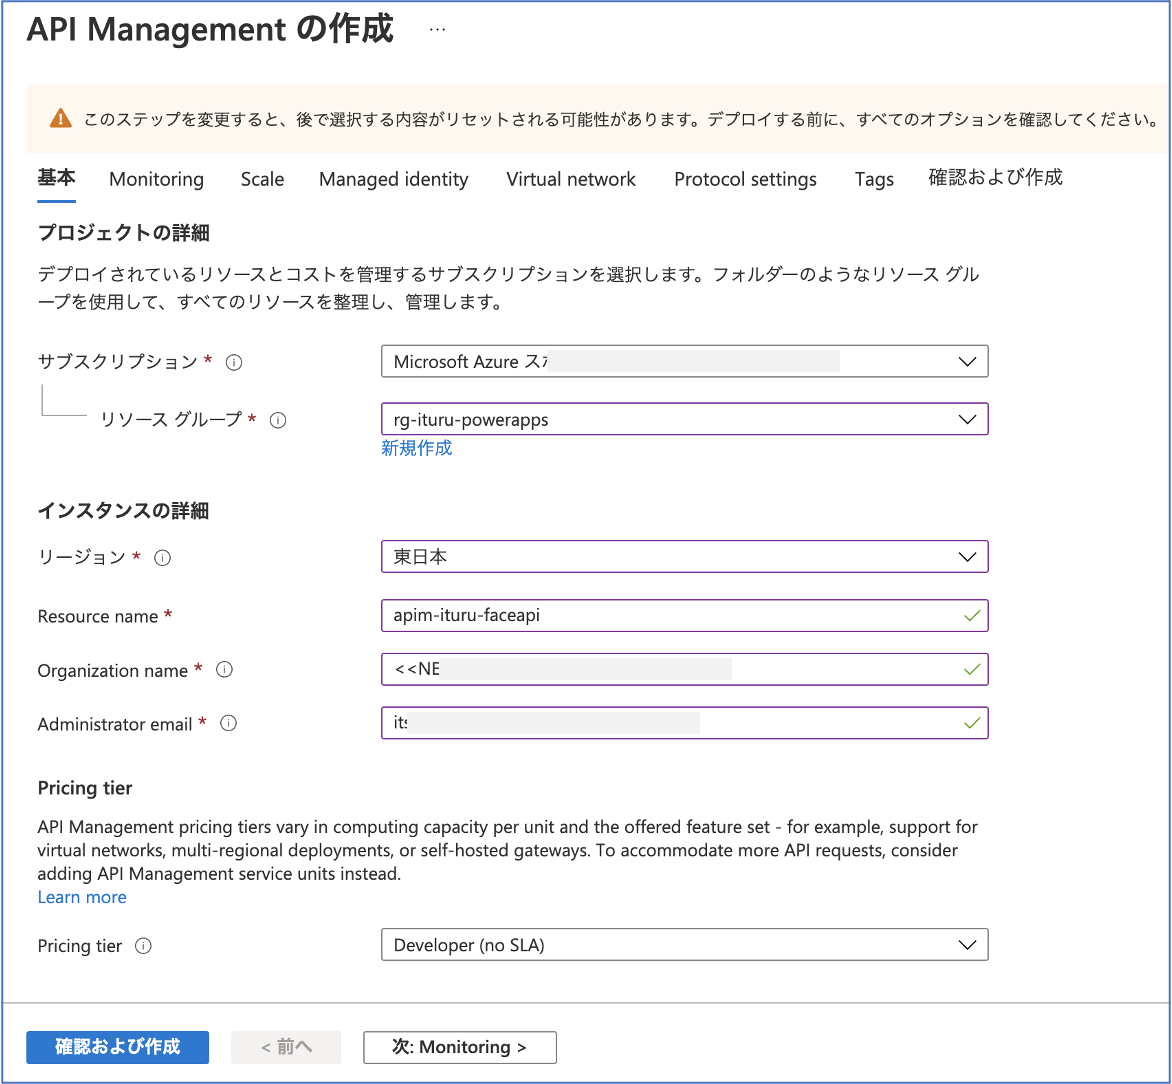
Resource name : apim-ituru-faceapi として API Management を作成します。作成には1時間弱?かかりました、、、、
Azure Portal上での API Management のサブスクリプションキーの取得
先程作成した「apim-ituru-faceapi」のサブスクリプションキーを確認しておきます。

Azure Portal上での API Management と Functions の紐付け
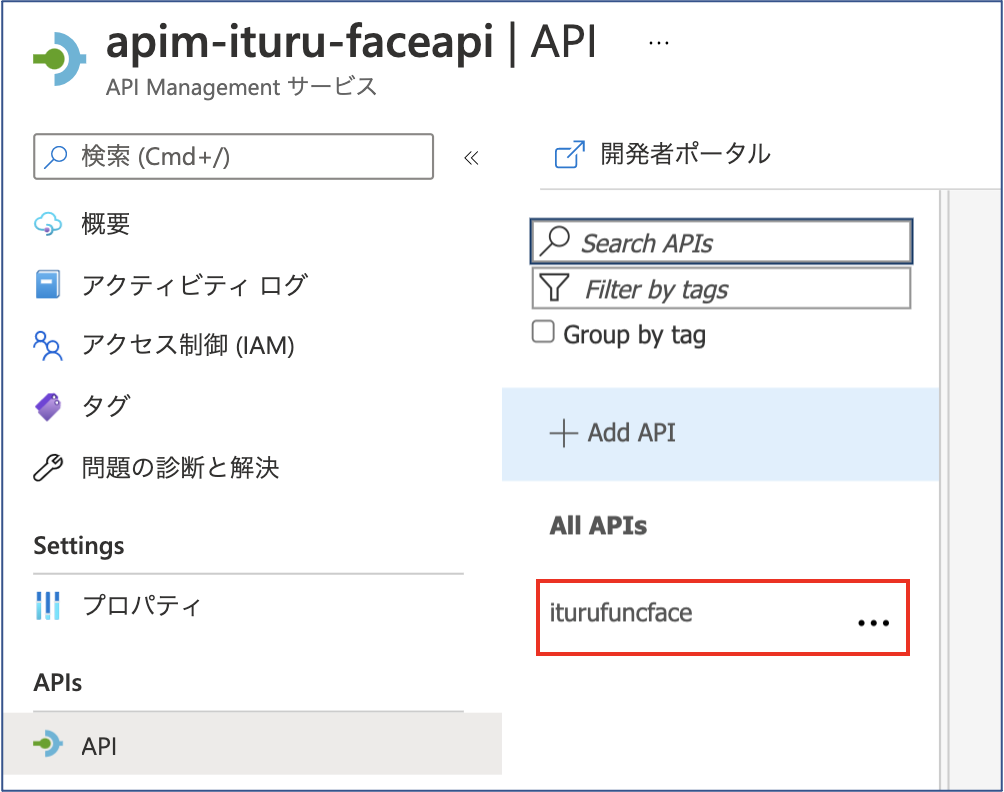
API Management の「apim-ituru-faceapi」と Functions の「iturufuncface」を以下の手順で紐付けます
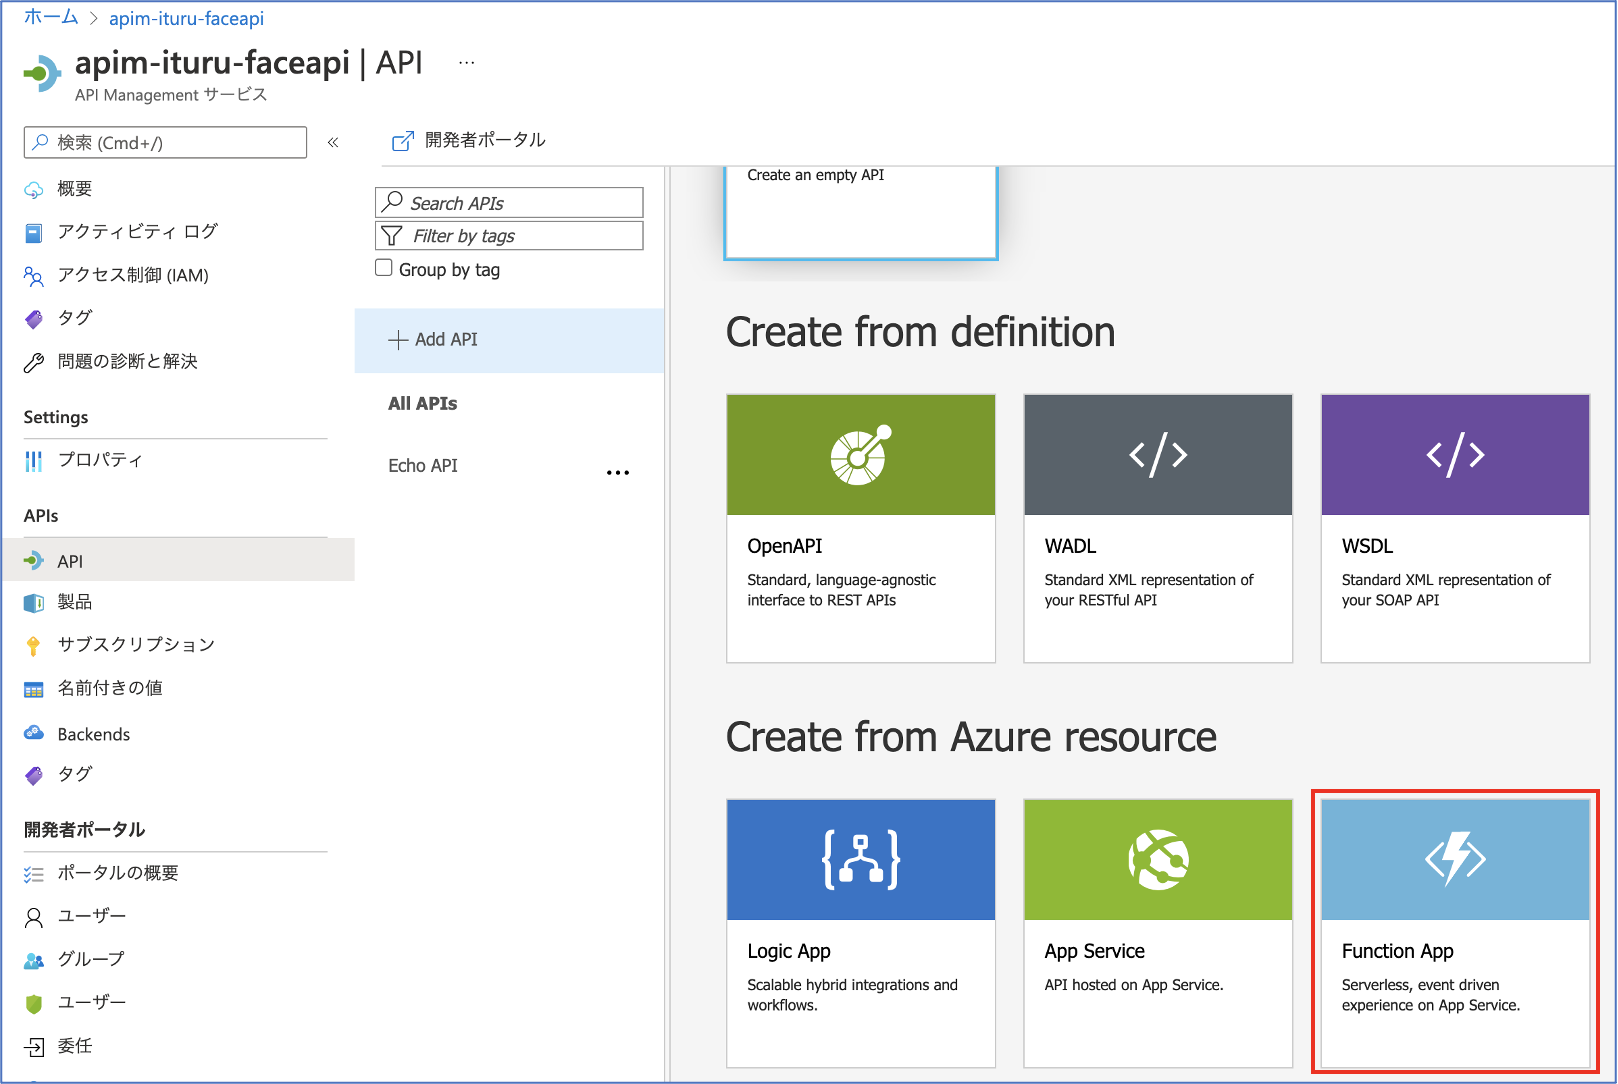
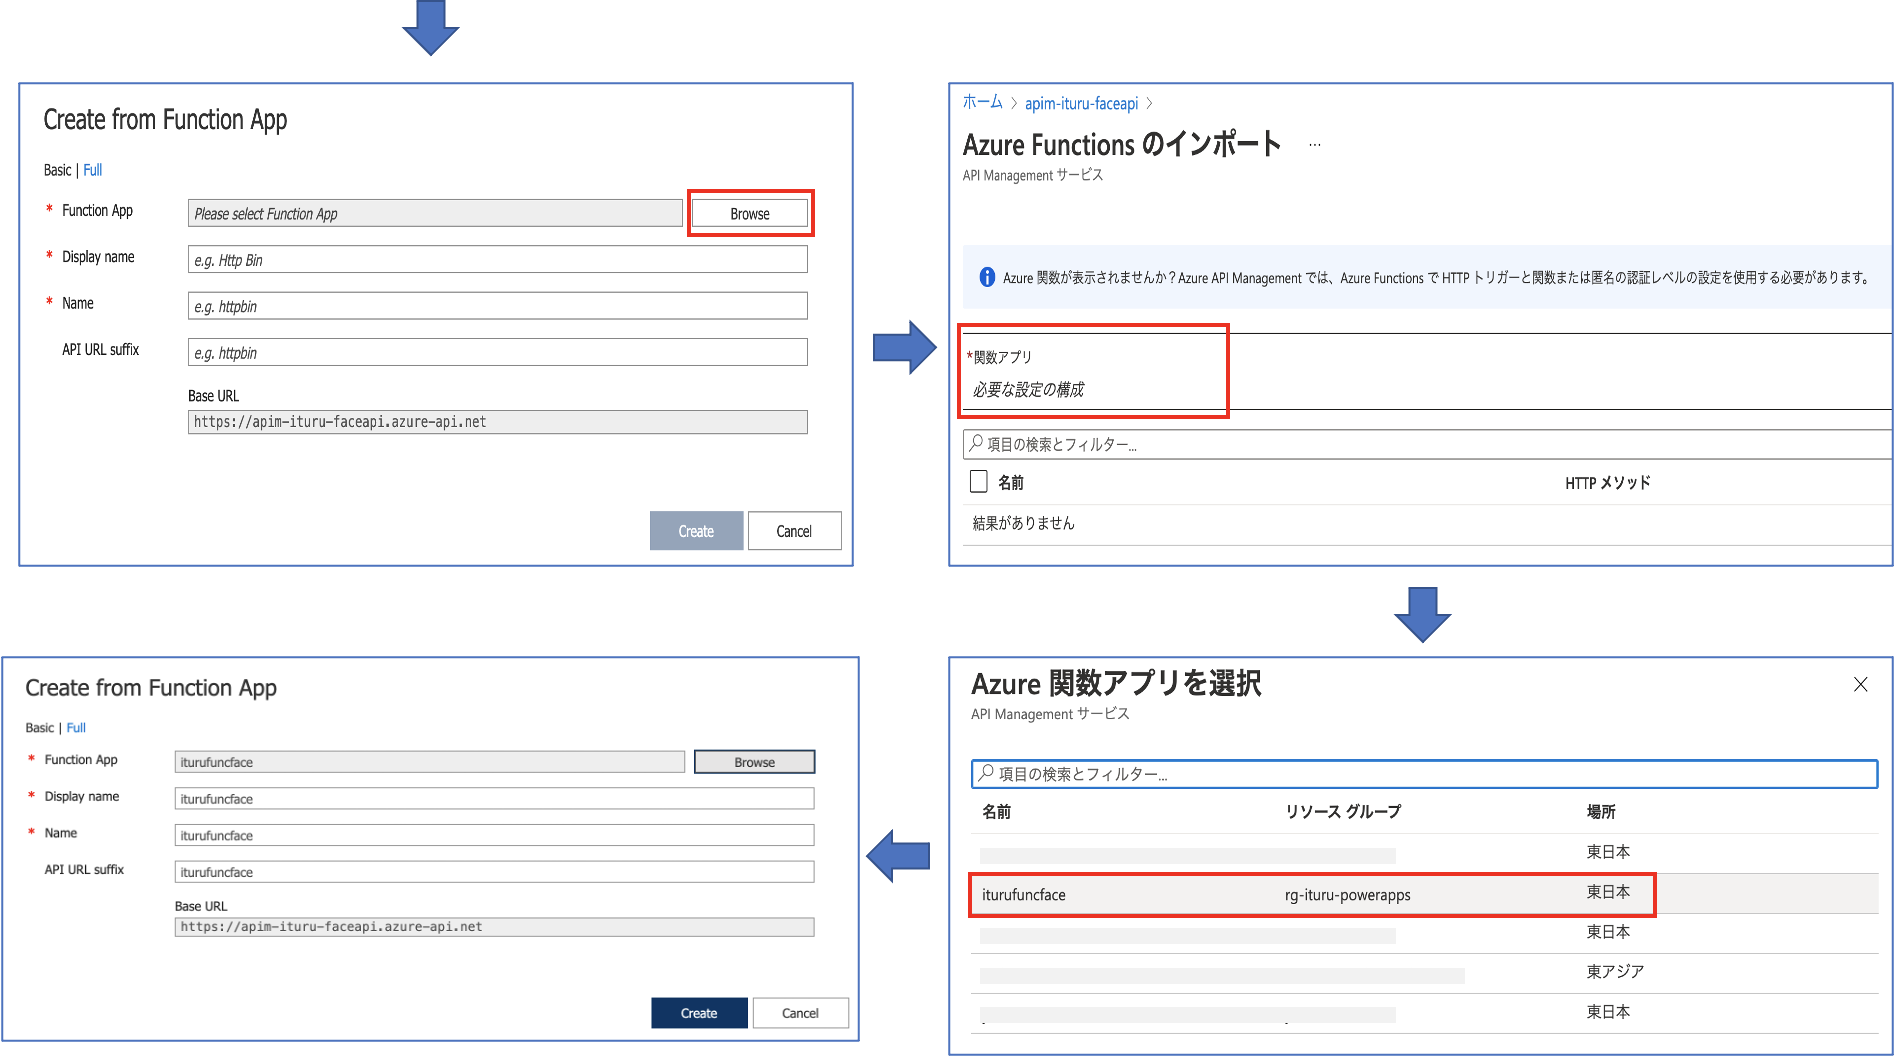
API の実装
次に、以下の順で 「iturufuncface」の API を実装していきます。
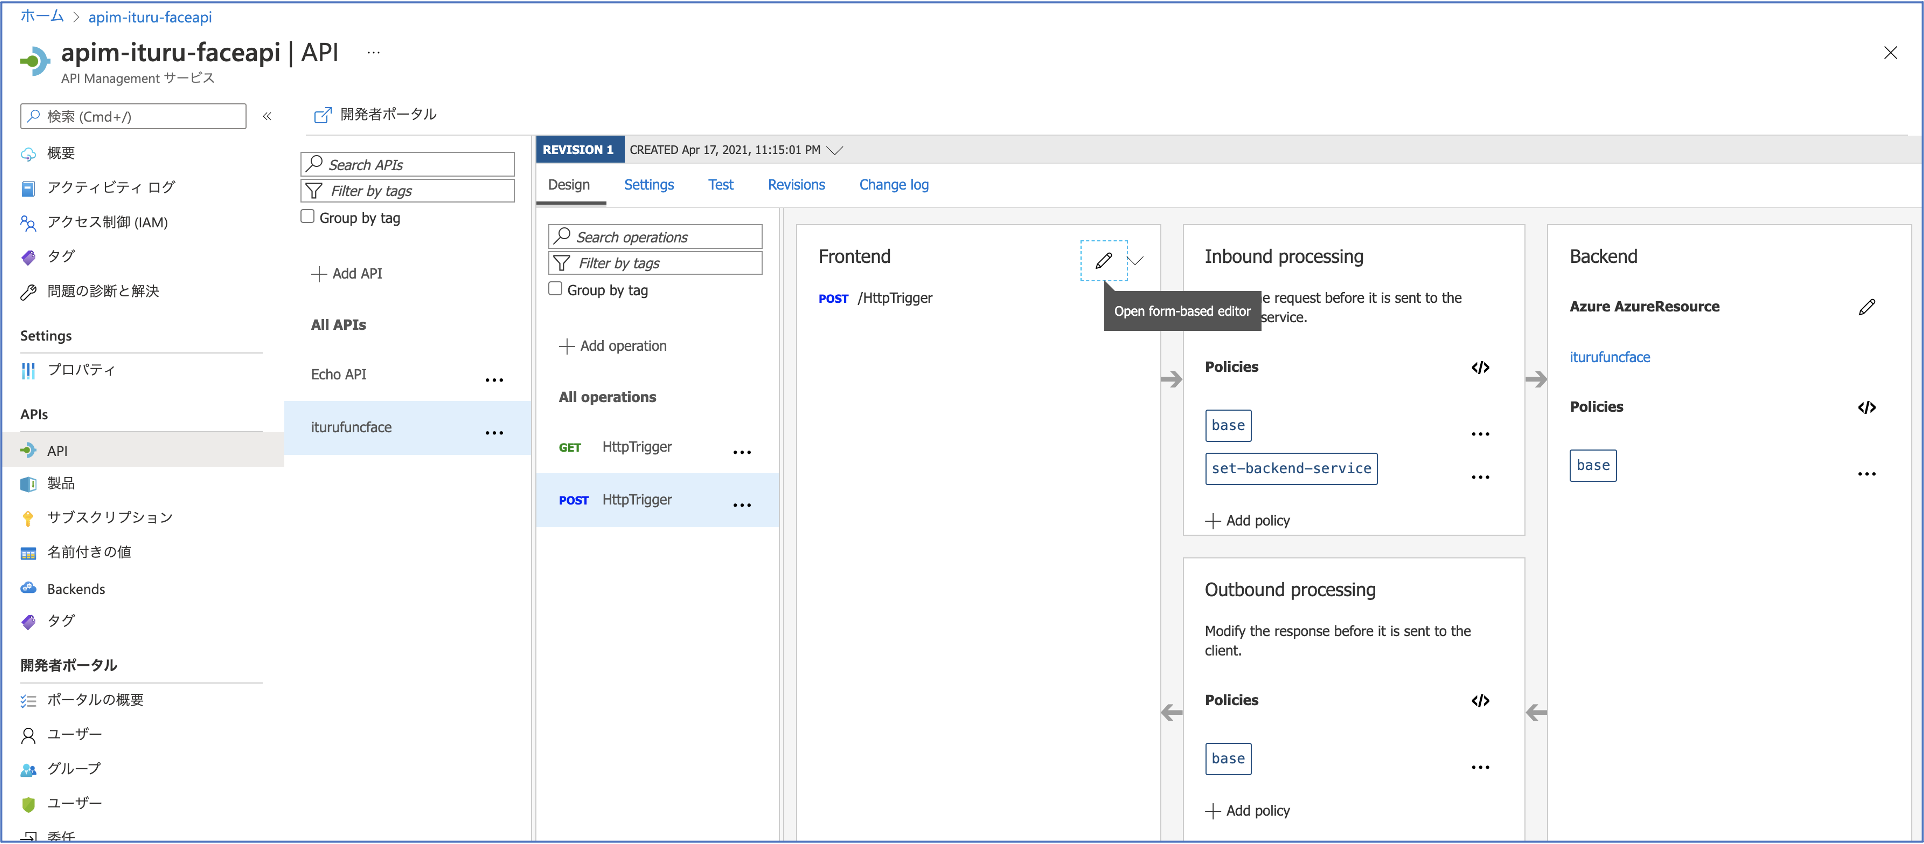
1.「Design」タグで「POST HTTP Trigger」を選択し、「Frontend」ー「Oepn from-based editor」をクリックします。
2.画面中央タブ「Responses」を選択し、「Add Response」から「201 Created」を選択します。
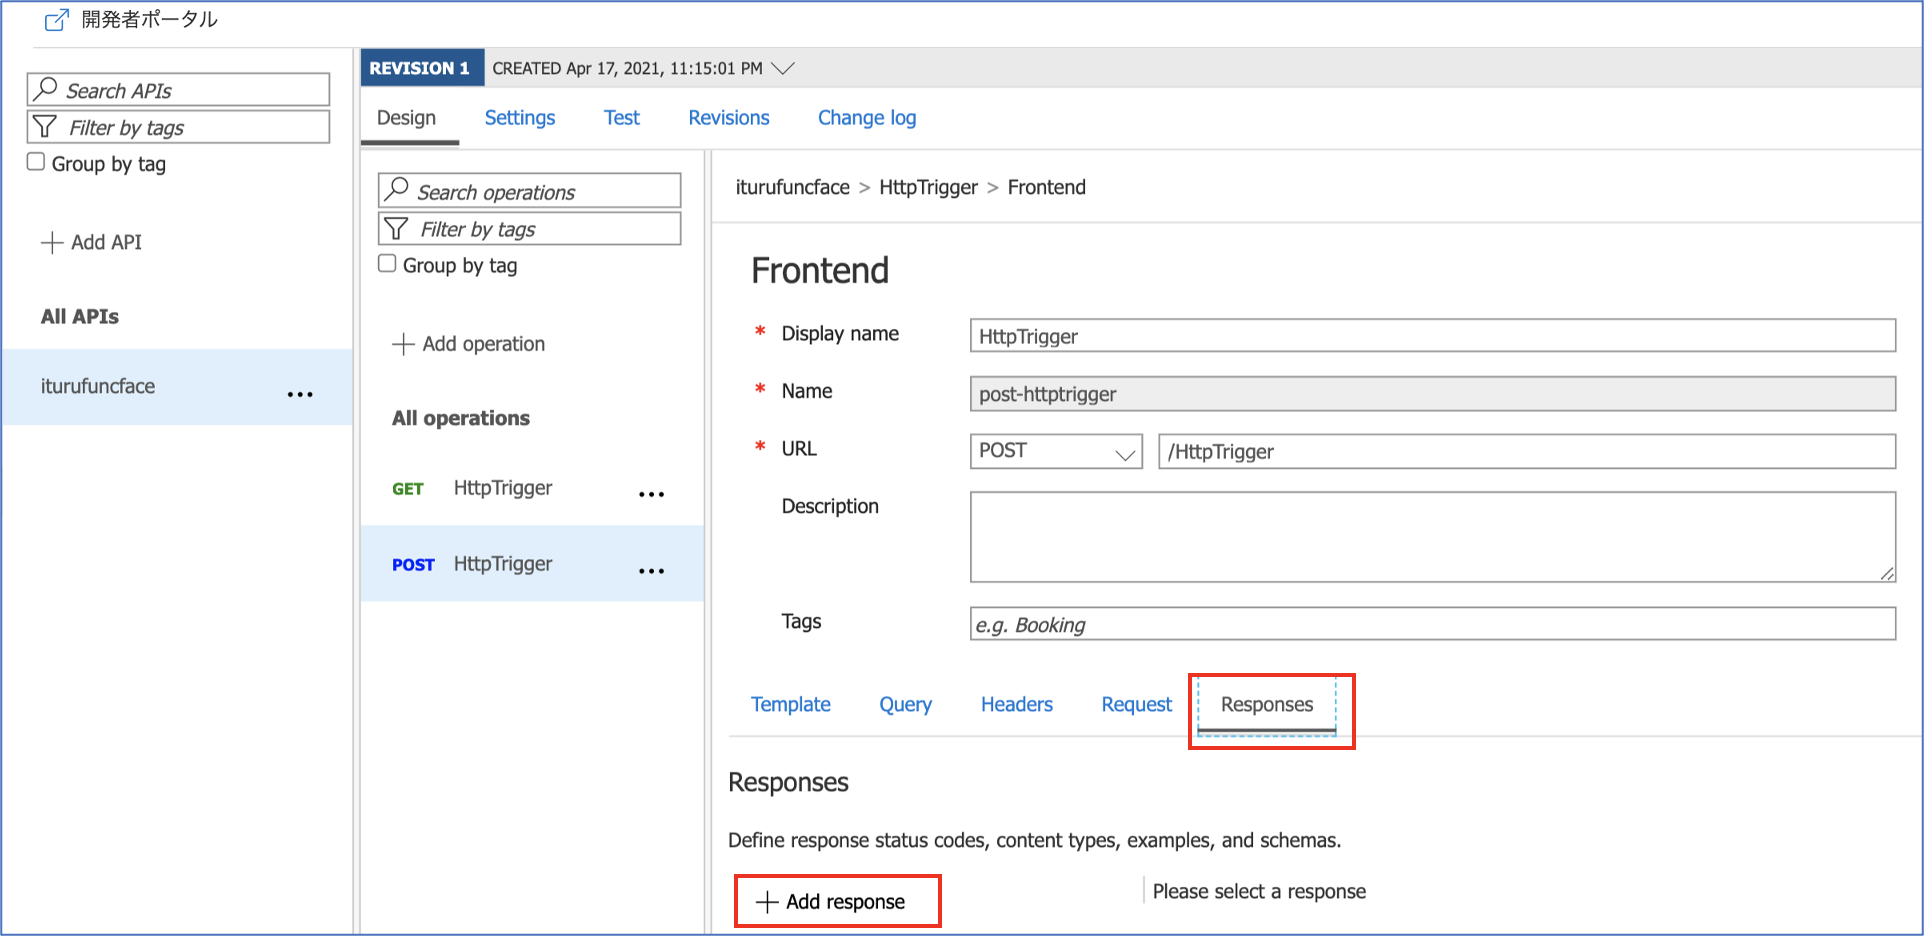
「201 Created」で以下の設定を行い、「Save」します。
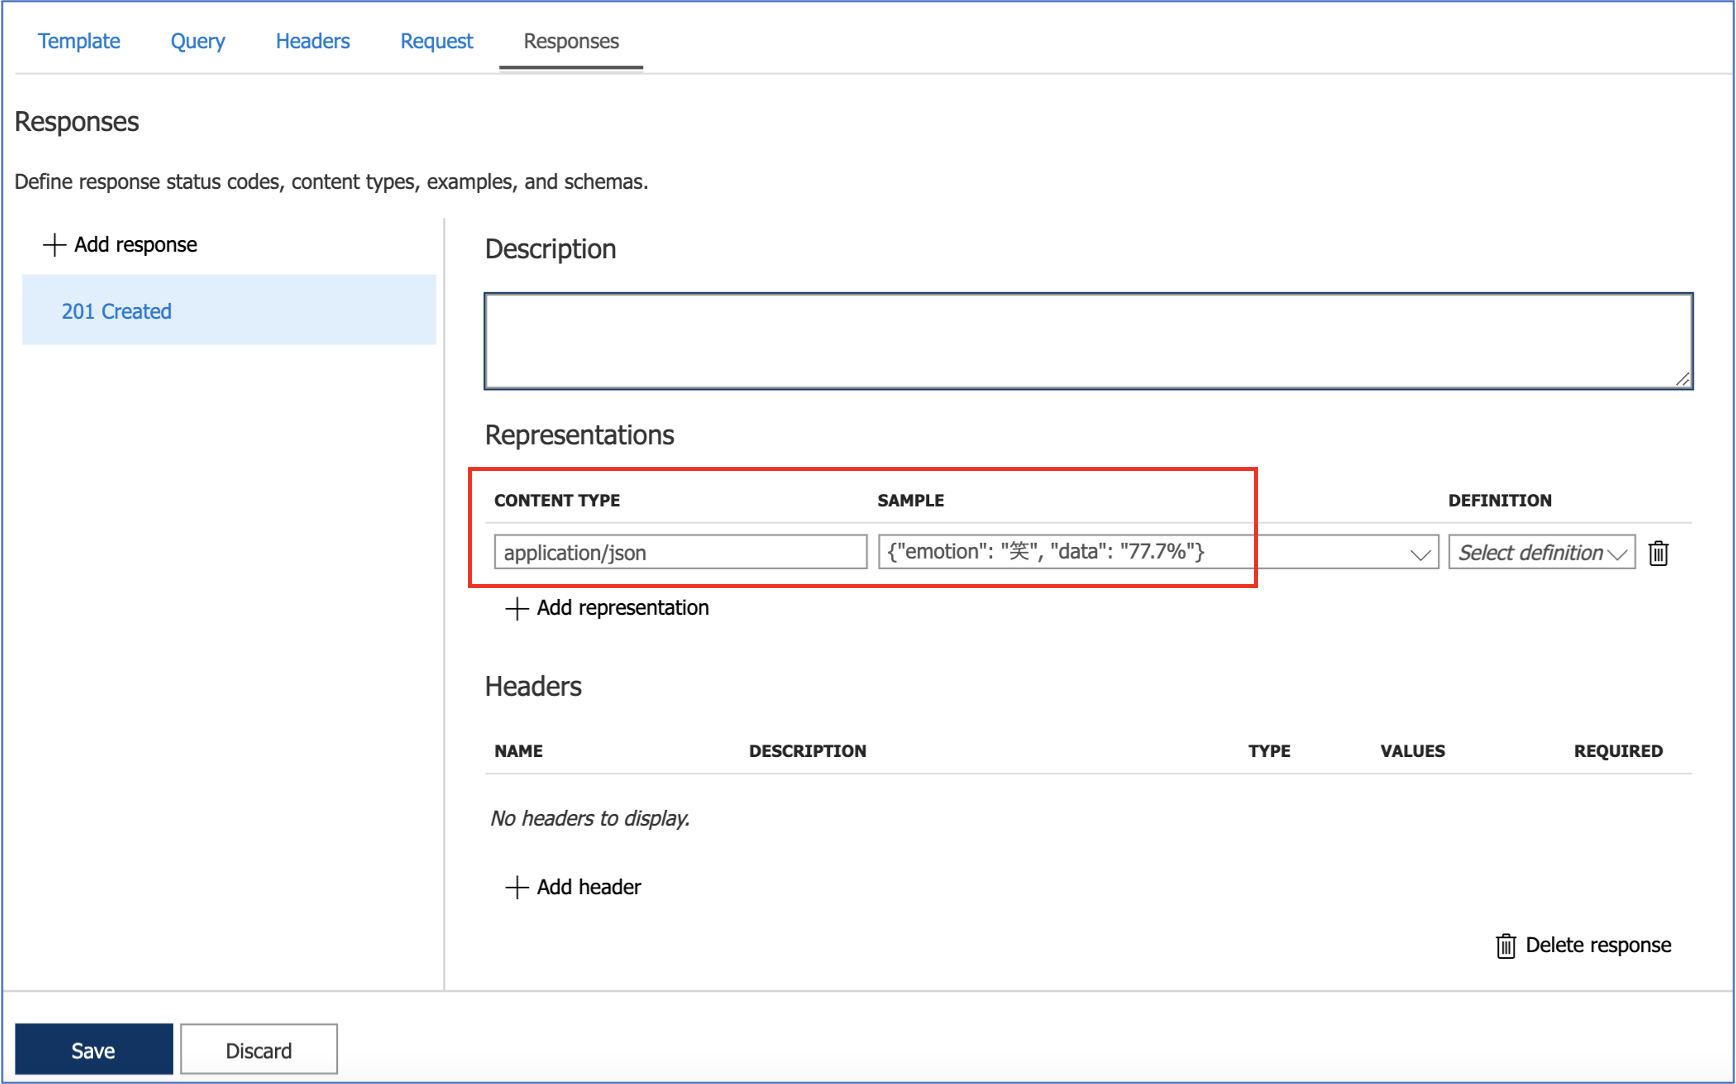
3.再度、「Design」タグの「Frontend」から「OpenAPI editor(JSON)」をクリックします。
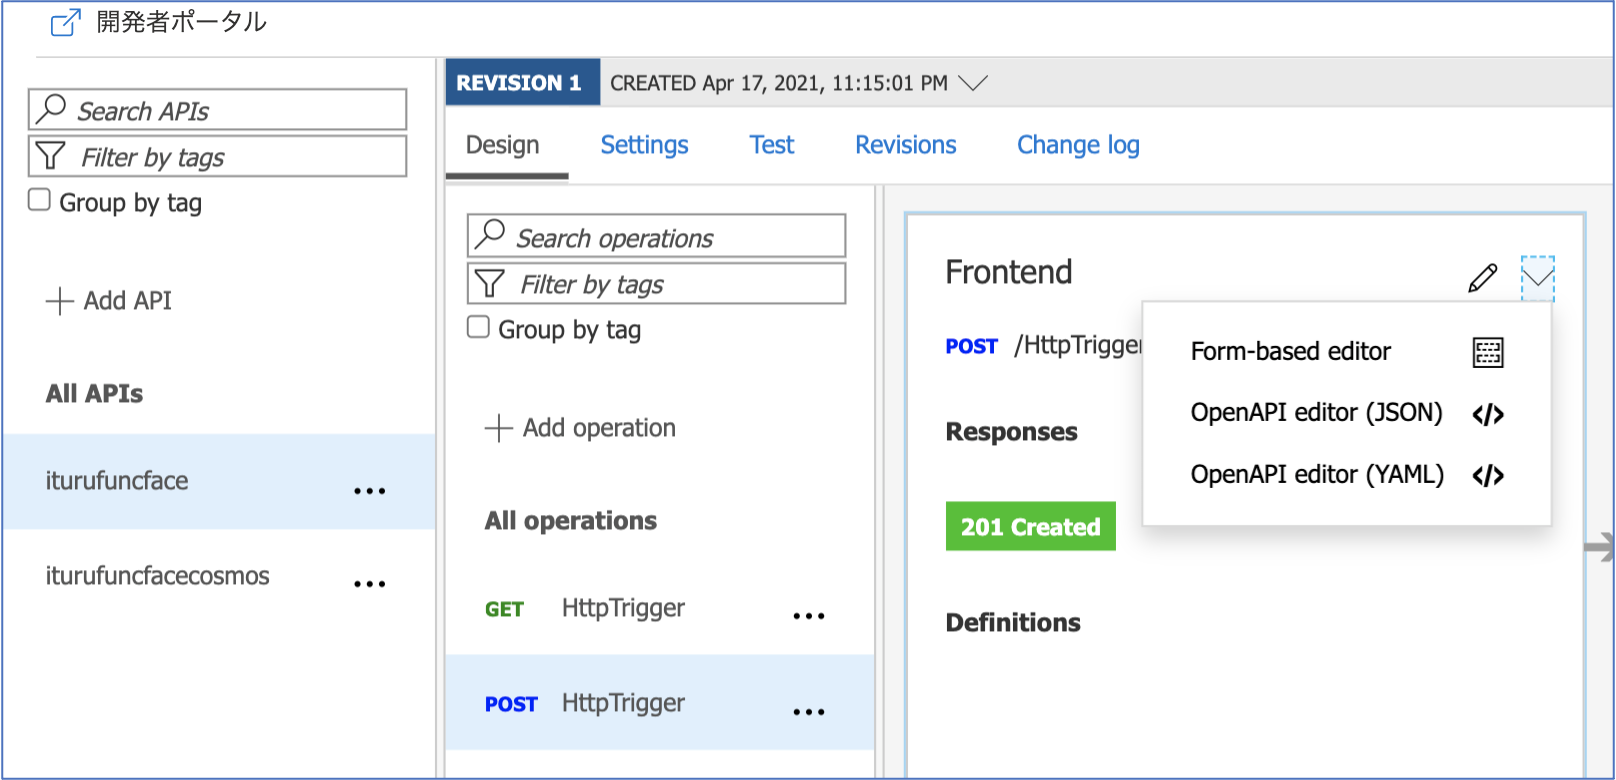
上記 「2.」で設定された内容が反映されていることを確認します(必要であれば、編集します)。
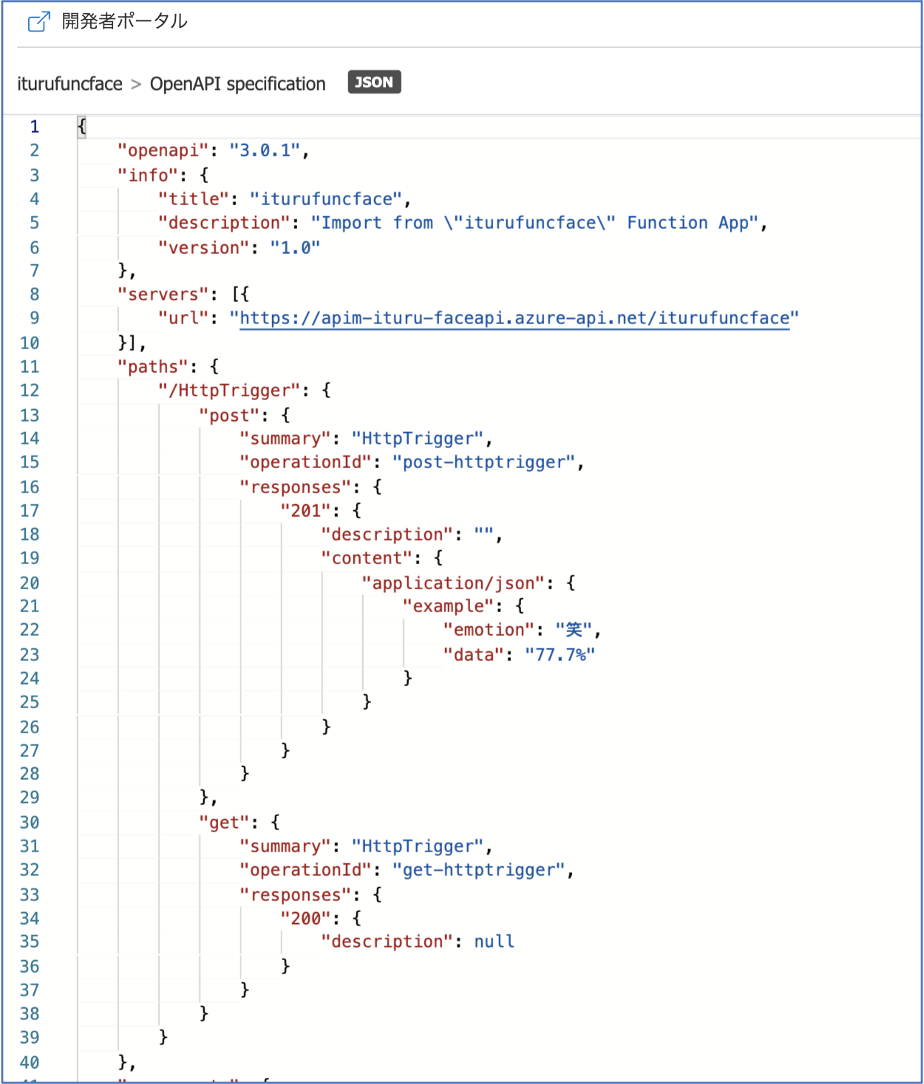
これで、APIの実装は完了です。
APIM へのアクセスプログラムの実行
動作確認のための APIM へのアクセスプログラムは以下となります。
import urllib.request
import requests
import base64

url = "https://apim-ituru-faceapi.azure-api.net/iturufuncface/HttpTrigger"
headers = {
    'Host': 'apim-ituru-faceapi.azure-api.net',
    'Ocp-Apim-Subscription-Key': 'xxxxxxxxxxxxxxxxxxxxxxxxxxxxxx',
    'Content-Type': 'application/octet-stream',
}

with open("001.png", "rb") as f:
    data = "data:image/png;base64," + base64.b64encode(f.read()).decode("UTF-8")

try:
    response = requests.post(url, headers=headers, data=data)
    print(response.text)
except Exception as e:
    print(e)
実行結果は以下となります(画像はローカルにあるものを使用)。
$ python apimPostImage.py
{"emotion": "幸", "data": "98.2%,  female,  18.0"}
問題なく処理できました。これで APIM から Functions -> FaceAPI をコールし、想定する戻り値をJSON形式で取得できていることを確認できました。
次回について
次回(第4回)は PowerApps から、本API Management 経由で Functions -> FaceAPI をコールし、同様の結果が得られることを確認してみます。
参考情報
以下の情報を参考にさせていただきました。感謝申し上げます。
API ManagementにAzure Functionsを連携してみた
AzureのAPI Gateway(API Management)を用いてOpenID Connect Providerより発行されたJWTを検証
PowerApps / PowerAutomate カスタムコネクタを OpenAPI(Swagger)Specから作成する
