インストール手順
NVIDIA 社が Jetson 用の TensorFlow pip wheel パッケージを公開しているので Jetson Nano にも TensorFlow を簡単にインストールできます。NVIDIA 社の TensorFlow For Jetson Platform ページにインストール方法が解説されていますので基本的にはその手順どおりですが、ちょっと注意点があります。
HDF5 のインストール
$ sudo apt-get install libhdf5-serial-dev hdf5-tools
pip のインストール
$ sudo apt-get install python3-pip
NVIDIA 社のページには pip インストール後に pip による pip のアップデートが示されておりますが、とりあえず現時点(2019年3月30日)ではこれを行わない方が無難だと思います。私の環境ではこれにより pip を起動できなくなりました。
$ pip3 install -U pip
以下のページを参考にさせていただき復帰しました。
【Ubuntu】pip install –upgrade pip コマンドを実行すると、その後、ImportError: cannot import name main というエラーが発生する場合の対応方法
その他パッケージのインストール
$ sudo apt-get install zlib1g-dev zip libjpeg8-dev libhdf5-dev
$ sudo pip3 install -U numpy grpcio absl-py py-cpuinfo psutil portpicker grpcio six mock requests gast h5py astor termcolor
TensorFlow のインストール
$ sudo pip3 install --pre --extra-index-url https://developer.download.nvidia.com/compute/redist/jp/v42 tensorflow-gpu
インストールを確認
$ python3
Python 3.6.7 (default, Oct 22 2018, 11:32:17)
[GCC 8.2.0] on linux
Type "help", "copyright", "credits" or "license" for more information.
>>> import tensorflow as tf
>>> print(tf.__version__)
1.13.1
>>> quit()
$
上記で TensorFlow のインストールは完了です。
TensorFlow チュートリアル・コードを動作させる
Jetson シリーズはディープニューラルネットワークを用いた推論には最適のプラットフォームと言えますが、ディープニューラルネットワークの学習にはちょっとパワー不足です 1 。但し、小規模なディープニューラルネットワークの学習ならば大丈夫です。GPU を搭載しない PC よりも速いと思います。
Get Started with TensorFlow に示されている以下のコードを動作させてみましょう。
import tensorflow as tf
mnist = tf.keras.datasets.mnist

(x_train, y_train),(x_test, y_test) = mnist.load_data()
x_train, x_test = x_train / 255.0, x_test / 255.0

model = tf.keras.models.Sequential([
  tf.keras.layers.Flatten(input_shape=(28, 28)),
  tf.keras.layers.Dense(512, activation=tf.nn.relu),
  tf.keras.layers.Dropout(0.2),
  tf.keras.layers.Dense(10, activation=tf.nn.softmax)
])
model.compile(optimizer='adam',
              loss='sparse_categorical_crossentropy',
              metrics=['accuracy'])

model.fit(x_train, y_train, epochs=5)
model.evaluate(x_test, y_test)
このコードを mnist.py というファイル名で保存して、以下のように起動します。
$ python3 mnist.py
GPU が認識されているのが分かります。
WARNING:tensorflow:From /usr/local/lib/python3.6/dist-packages/tensorflow/python/ops/resource_variable_ops.py:435: colocate_with (from tensorflow.python.framework.ops) is deprecated and will be removed in a future version.
Instructions for updating:
Colocations handled automatically by placer.
WARNING:tensorflow:From /usr/local/lib/python3.6/dist-packages/tensorflow/python/keras/layers/core.py:143: calling dropout (from tensorflow.python.ops.nn_ops) with keep_prob is deprecated and will be removed in a future version.
Instructions for updating:
Please use `rate` instead of `keep_prob`. Rate should be set to `rate = 1 - keep_prob`.
2019-03-30 17:46:10.020449: W tensorflow/core/platform/profile_utils/cpu_utils.cc:98] Failed to find bogomips in /proc/cpuinfo; cannot determine CPU frequency
2019-03-30 17:46:10.021429: I tensorflow/compiler/xla/service/service.cc:161] XLA service 0x3f14f760 executing computations on platform Host. Devices:
2019-03-30 17:46:10.021499: I tensorflow/compiler/xla/service/service.cc:168]   StreamExecutor device (0): <undefined>, <undefined>
2019-03-30 17:46:10.167789: I tensorflow/stream_executor/cuda/cuda_gpu_executor.cc:965] ARM64 does not support NUMA - returning NUMA node zero
2019-03-30 17:46:10.168088: I tensorflow/compiler/xla/service/service.cc:161] XLA service 0x3de91970 executing computations on platform CUDA. Devices:
2019-03-30 17:46:10.168145: I tensorflow/compiler/xla/service/service.cc:168]   StreamExecutor device (0): NVIDIA Tegra X1, Compute Capability 5.3
2019-03-30 17:46:10.168519: I tensorflow/core/common_runtime/gpu/gpu_device.cc:1433] Found device 0 with properties:
name: NVIDIA Tegra X1 major: 5 minor: 3 memoryClockRate(GHz): 0.9216
pciBusID: 0000:00:00.0
totalMemory: 3.86GiB freeMemory: 532.48MiB
2019-03-30 17:46:10.168575: I tensorflow/core/common_runtime/gpu/gpu_device.cc:1512] Adding visible gpu devices: 0
2019-03-30 17:46:15.464153: I tensorflow/core/common_runtime/gpu/gpu_device.cc:984] Device interconnect StreamExecutor with strength 1 edge matrix:
2019-03-30 17:46:15.475841: I tensorflow/core/common_runtime/gpu/gpu_device.cc:990]      0
2019-03-30 17:46:15.475890: I tensorflow/core/common_runtime/gpu/gpu_device.cc:1003] 0:   N
2019-03-30 17:46:15.476119: I tensorflow/core/common_runtime/gpu/gpu_device.cc:1115] Created TensorFlow device (/job:localhost/replica:0/task:0/device:GPU:0 with 75 MB memory) -> physical GPU (device: 0, name: NVIDIA Tegra X1, pci bus id: 0000:00:00.0, compute capability: 5.3)
2019-03-30 17:46:16.539100: I tensorflow/stream_executor/dso_loader.cc:153] successfully opened CUDA library libcublas.so.10.0 locally
5エポックの学習で loss: 0.0640 - acc: 0.9819という結果になりました。
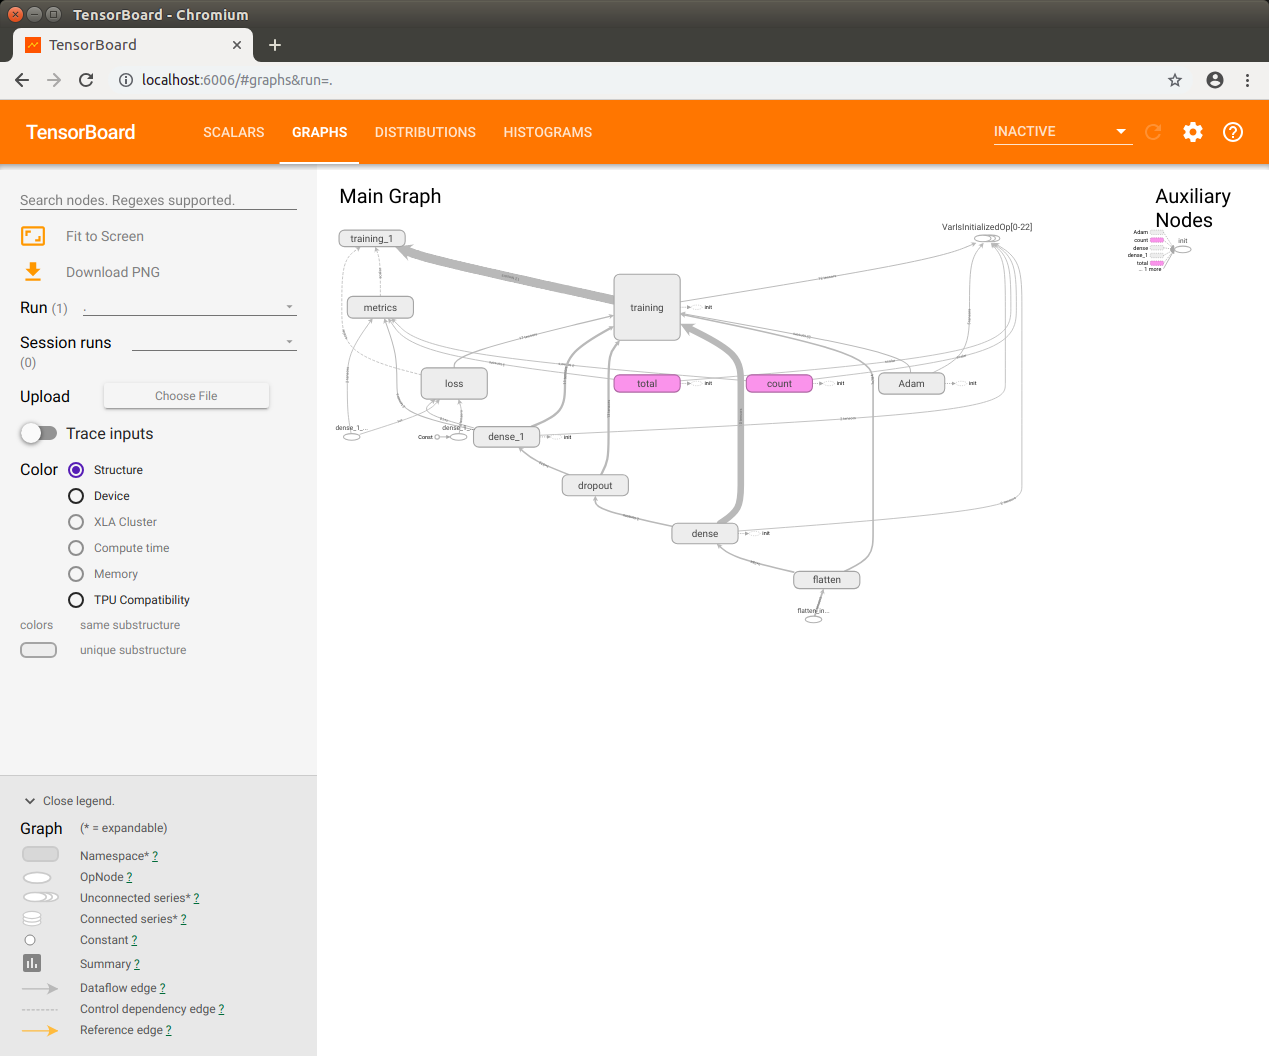
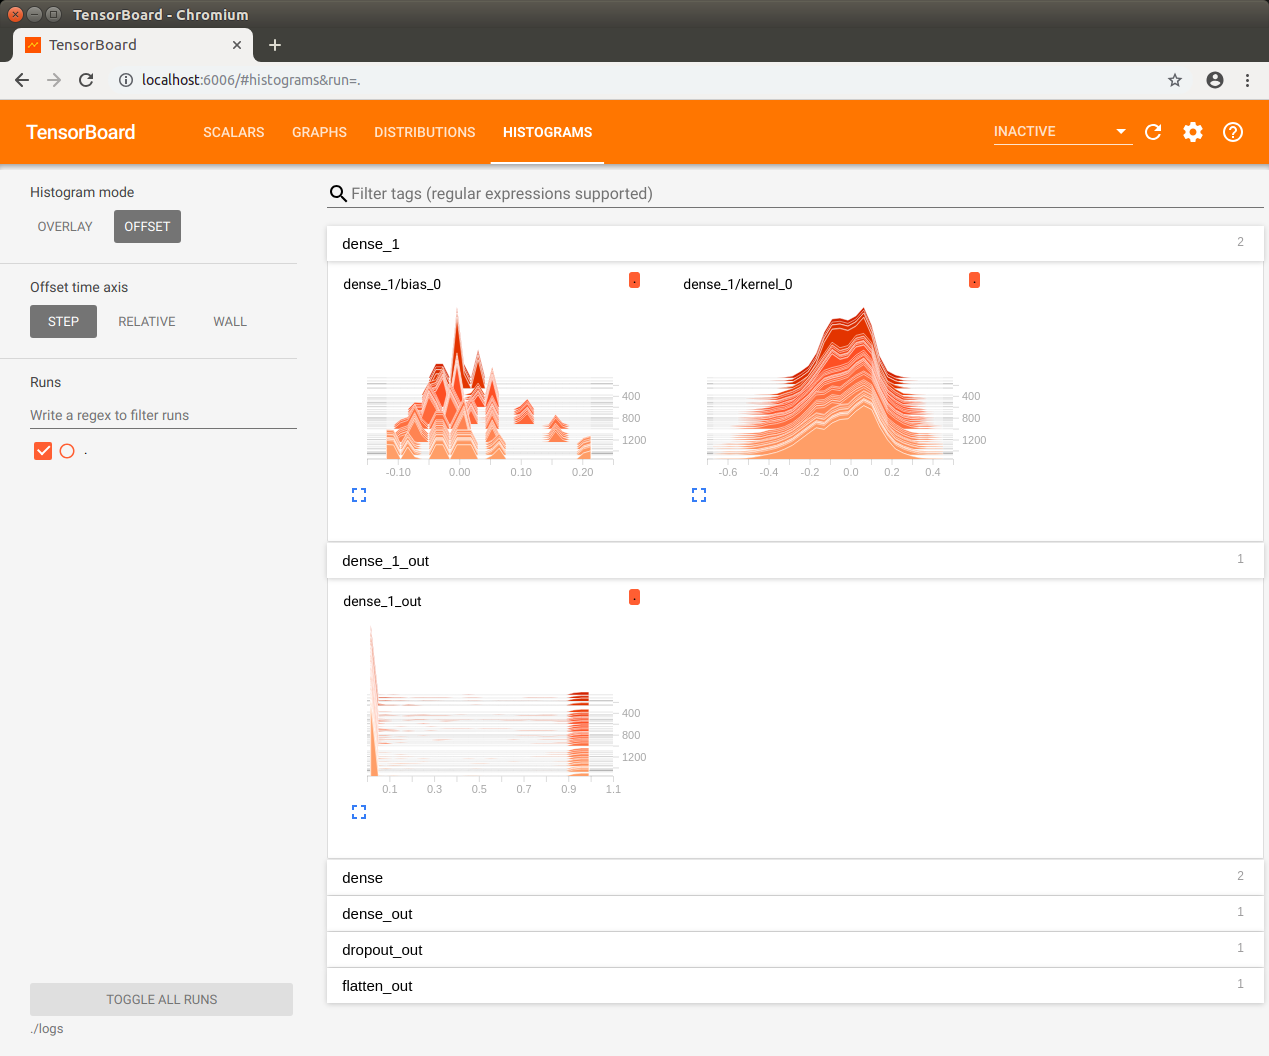
TensorBoard を使う
TensorBoard を利用したモデルの可視化だってできます。少しコードの変更が必要です。
但し、学習しながらその様子を TensorBorad で観察するのは Jetson Nano にはちょっと重過ぎでした。学習が完了してからそのログを TensorBoard で見てみましょう。
import tensorflow as tf
mnist = tf.keras.datasets.mnist

(x_train, y_train),(x_test, y_test) = mnist.load_data()
x_train, x_test = x_train / 255.0, x_test / 255.0

model = tf.keras.models.Sequential([
  tf.keras.layers.Flatten(input_shape=(28, 28)),
  tf.keras.layers.Dense(512, activation=tf.nn.relu),
  tf.keras.layers.Dropout(0.2),
  tf.keras.layers.Dense(10, activation=tf.nn.softmax)
])
model.compile(optimizer='adam',
              loss='sparse_categorical_crossentropy',
              metrics=['accuracy'])

log_filepath = "./logs/"
tb_cb = tf.keras.callbacks.TensorBoard(log_dir=log_filepath, histogram_freq=1)

model.fit(x_train, y_train, epochs=5, validation_data=(x_test, y_test), callbacks=[tb_cb])
model.evaluate(x_test, y_test)
ログ用ディレクトリを作成してから動作させます。
$ mkdir logs
$ python3 mnist.py
上記の実行が完了してから TensorBoard を起動します。
$ tensorboard --logdir=./logs
TensorBorad が起動したら Jetson Nano 上の Chromium ブラウザで localhost:6006 を開きます。
モデルの保存
学習済みモデル(ディープニューラルネットワークの重みとバイアス)を保存するには上記コードの最後に以下の行を追加します。
model.save('mnist.hdf5')
保存したモデルを Netron ブラウザ・バージョン で覗いてみましょう。

以上です。
-
ディープニューラルネットワークの学習にはパワフルな NVIDIA Tesla GPU などが使われるようです。 ↩