This article is translated from the Japanese article below.
https://qiita.com/tomotagwork/items/cac290f6435453c19b7b
(google translate was used.)
Introduction
CICS Transaction Server provides a class library called JCICS for using CICS functions from Java. This is the Java version of EXEC CICS API, which allows you to call other CICS programs with LINK and access CICS management resources such as TSQ/TDQ. By using this, you can write a CICS application in Java.
Shipped on 06/12/2020, CICS TS V5.6 now offers a new CICS API for Java called JCICSX, which is an extension of JCICS. Here, I will describe a series of flow when I tried to move the JCICSX.
Related articles
Running CICS-Java application - (1) Simple application
Running CICS-Java application - (2) Build management with Maven
Running CICS-Java application - (3) Build management with Gradle
Running CICS-Java application - (4) Spring Boot Application
Running CICS-Java application - (5) Using JCICSX
Environment
Development Environment
Windows10
Runtime Environment
z/OS V2.4
CICS Transaction Server for z/OS V5.6
Overview of JCICSX
The position of "class library for using CICS functions from Java", that is "Java version of EXEC CICS API" is the same for both JCICS and JCICSX.
What's different is that JCICSX is an API that has been extended to make it easier to test on your local PC (in the development environment).
In addition, JCICS supports a wide range of functions equivalent to EXEC CICS, but JCICSX is still limited and provides only Channel & Container and Link-related functions.
Reference:
JCICS Javadoc
JCICSX Javadoc
"Easy to test on a local PC (development environment)" has the following two points.
(1) Unit testing is possible using the testing framework

Of course, there is no CICS runtime on the local PC, so the CICS-dependent code (JCICSX part) cannot be executed as it is. When unit testing a module containing environment-dependent code such as DB access, there is a framework (Mockito etc.) that handles the external resource access part as a Mock, but it is said that it will also be applied to the CICS access part. (I think this is mainly due to the features provided by frameworks such as Mockito.)
(2) Unit test can be performe on the Liberty server on the PC
This is the main extension function of CICS, but we provide a mechanism to check the operation of JCICSX with Liberty on the local PC (in the development environment). The image is as follows.
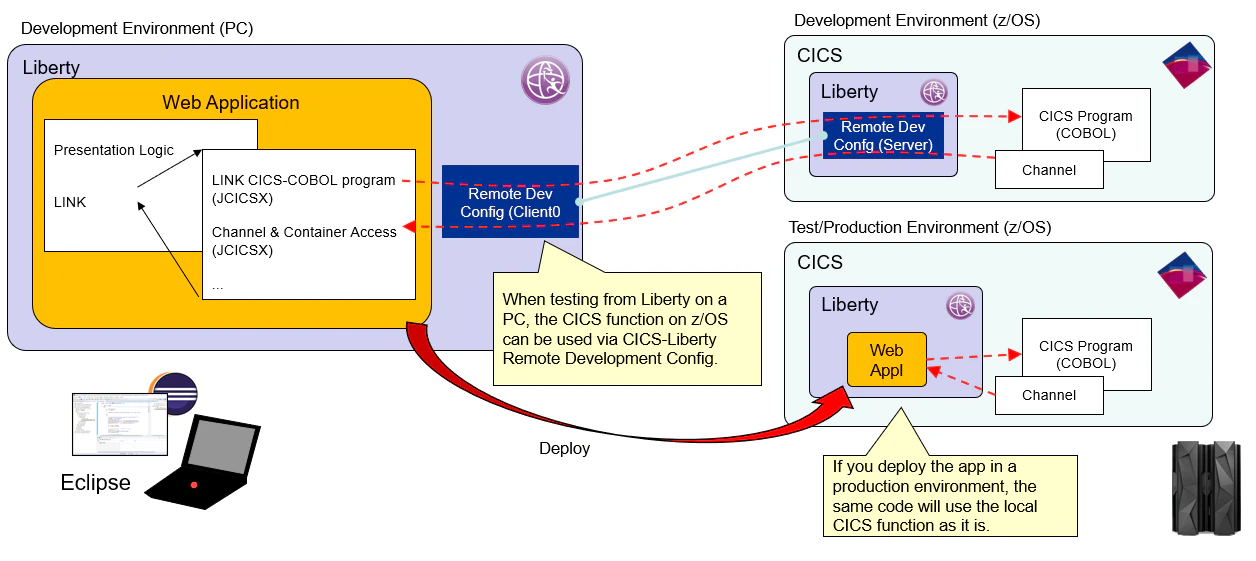
This mechanism is called "remote development". Prepare Liberty on the PC and CICS-Liberty for the development environment, and configure the features for JCICSX remote development respectively. With this configuration, Liberty on the local PC behaves as if it were running on CICS. Therefore, it is not necessary to deploy the application on the host side and check the operation every time when trying & error or testing, and you can run a detailed cycle of operation check and correction on the local PC.
Once the code is finally solidified, it can be deployed and run in the real CICS-Liberty environment for test / production.
In other words, it is convenient to use JCICSX when creating a Liberty application that passes data with Channel & Container and calls an existing application with Link (LINK passed with COMMAREA is not possible).
The following describes the configuration procedure for testing JCICSX on the Liberty server on your PC.
CICS-Liberty Remote Development Configuration
Reference: Configuring the environment for JCICSX
CICS-Liberty side (server-side) configuration
JVM Profile
Prepare the JVM profile on USS. (Properties for the JVMServer are effectively specified in a file on this USS. The JVMSERVER resource definition points to the filename of this JVM profile.)
A sample is provided, so copy it and use it.
Create a directory /var/cicsts/cicsts56/CT56B4A1/JVMProfiles and copy /usr/lpp/cicsts/cicsts56/JVMProfiles/DFHWLP.jvmprofile(sample definition for Liberty located under the CICS installation directory) to it. Customize as appropriate for your environment.
JAVA_HOME=/usr/lpp/java/J8.0_64/
WORK_DIR=/var/cicsts/cicsts56/CT56B4A1/work
WLP_INSTALL_DIR=/usr/lpp/cicsts/cicsts56/wlp
-Dcom.ibm.cics.jvmserver.wlp.autoconfigure=true
-Dcom.ibm.cics.jvmserver.wlp.server.host=*
-Dcom.ibm.cics.jvmserver.wlp.server.http.port=56461
-Dcom.ibm.cics.jvmserver.wlp.server.https.port=56471
-Xms128M
-Xmx256M
-Xmso1M
-Xgcpolicy:gencon
-Xscmx256M
-Xshareclasses:name=cicsts%g,groupAccess,nonfatal
-Xtune:virtualized
-Dcom.ibm.tools.attach.enable=no
-Dfile.encoding=ISO-8859-1
_BPXK_DISABLE_SHLIB=YES
SIT
Specify the directory where the above properties file is located in the SIT parameter "JVMPROFILEDIR".
JVMPROFILEDIR=/var/cicsts/cicsts56/CT56B4A1/JVMProfiles
Restart the region for the changes to be enabled.
JVMServer definition
Prepare the JVMSERVER resource definition.
Copy the JVMSERVER definition "DFHWLP" in the product-provided DFH$WLP group to an appropriate group with the name "DFHWLPX" and customize it.
OBJECT CHARACTERISTICS                                    CICS RELEASE = 0730
 CEDA  View JVmserver( DFHWLPX  )
  JVmserver      : DFHWLPX
  Group          : TAGGRP
  DEScription    : CICS JVM server to run WLP samples
  Status         : Enabled            Enabled | Disabled
  Jvmprofile     : DFHWLPX                                        (Mixed Case)
  Lerunopts      : DFHAXRO
  Threadlimit    : 015                1-256
 DEFINITION SIGNATURE
  DEFinetime     : 08/07/20 17:01:19
  CHANGETime     : 08/07/20 17:01:36
  CHANGEUsrid    : CICSUSER
  CHANGEAGEnt    : CSDApi             CSDApi | CSDBatch
  CHANGEAGRel    : 0730
*Jvmprofile: DFHWLPX, which means that the file DFHWLPX.jvmprofile under the directory specified in JVMPROFILEDIR of SIT is used as the JVM property file.
Install this JVMSERVER once.
It is OK if it is enabled by checking with CEMT I JVMSERVER.
I JVMS
STATUS:  RESULTS - OVERTYPE TO MODIFY
 Jvm(DFHWLPX ) Ena     Prf(DFHWLPX ) Ler(DFHAXRO )
    Threadc(012) Threadl( 015 ) Cur(65873224)
JCICSX feature / server-side configuration
Since "com.ibm.cics.jvmserver.wlp.autoconfigure=true" is specified in the JVM Profile, Liberty is automatically configured when the JVM Server is installed.
<WORK_DIR>/CT56B4A1/DFHWLPX/wlp/usr/servers/defaultServer/server.xml has been created, so edit it.
Add a feature cicsts:jcicsxServer-1.0 as follows:
...
    <featureManager>
        <feature>cicsts:core-1.0</feature>
        <feature>cicsts:defaultApp-1.0</feature>
        <feature>jsp-2.3</feature>
        <feature>wab-1.0</feature>
        <feature>transportSecurity-1.0</feature>
        <feature>cicsts:jcicsxServer-1.0</feature>
    </featureManager>
...
When you restart the JVM Server, you can see the following log as the Liberty startup message.(<WORK_DIR\>/CT56B4A1/DFHWLPX/wlp/usr/servers/defaultServer/logs/messages.log)
...
[8/7/20 8:13:40:387 GMT] 00000050 com.ibm.ws.webcontainer.osgi.webapp.WebGroup                 I SRVE0169I: Loading Web Module: com.ibm.cics.wlp.jcicsxserver.
[8/7/20 8:13:40:387 GMT] 00000050 com.ibm.ws.webcontainer                                      I SRVE0250I: Web Module com.ibm.cics.wlp.jcicsxserver has been bound to default_host.
[8/7/20 8:13:40:387 GMT] 00000050 com.ibm.ws.http.internal.VirtualHostImpl                     A CWWKT0016I: Web application available (default_host): http://xx.xx.xx:56461/jcicsxServer/
...
The URL shown here is used in the Liberty configuration on the client-side.
Liberty on local PC (client-side) configuration
Install Eclipse/Liberty
Set up the Eclipse environment on Windows 10 and install Liberty.
Please refer to appropriate document for this.
Add JCICSX related feature
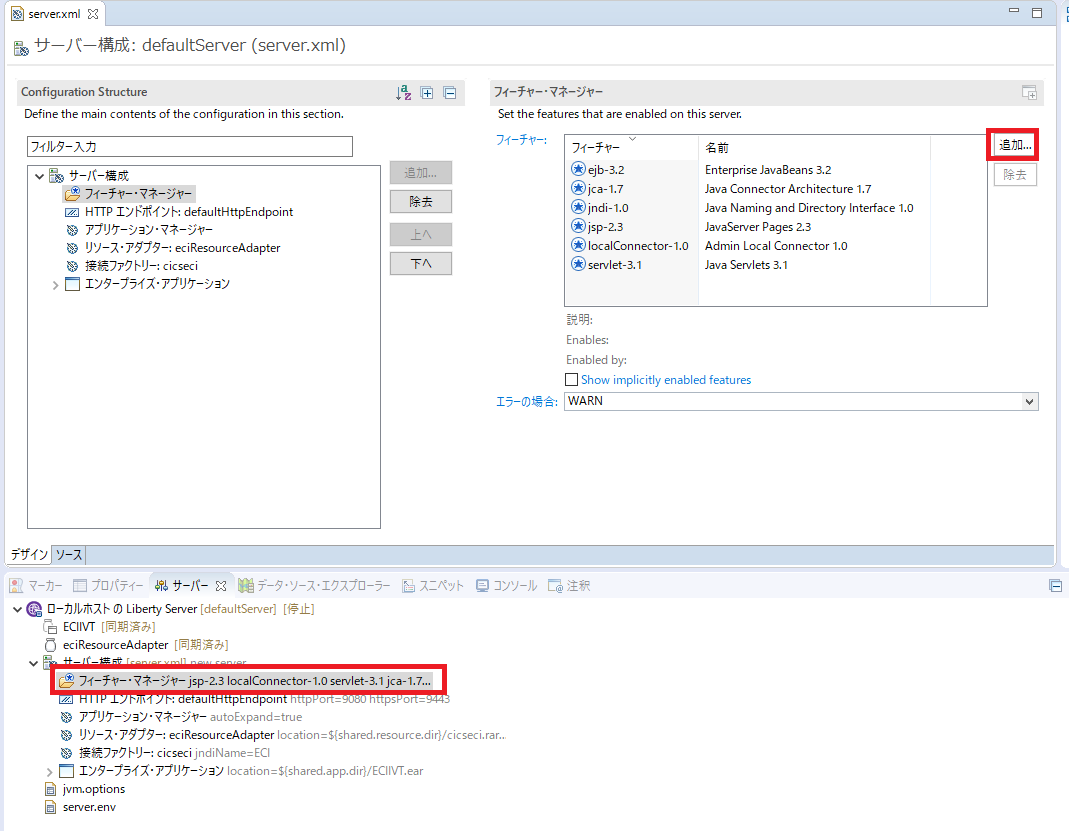
Double-click the target Liberty feature manager in Eclipse server view to open server.xml and click Add to the right of the feature list
Click "Install additional features"
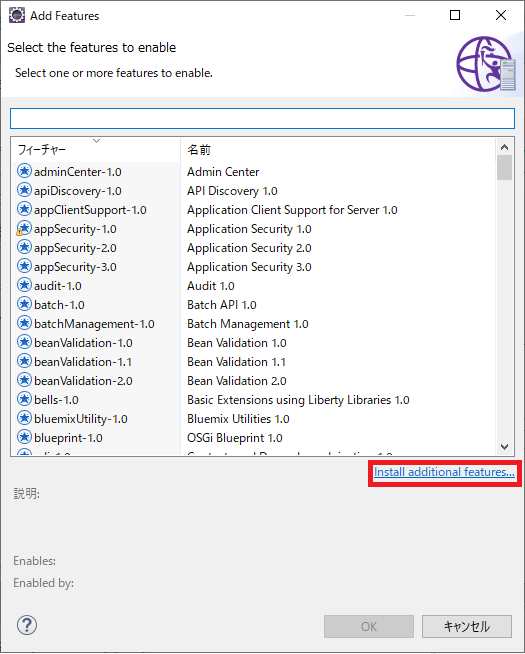
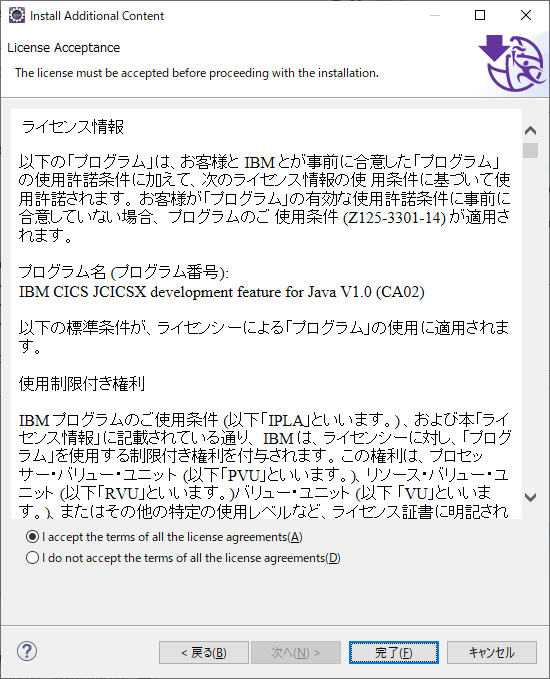
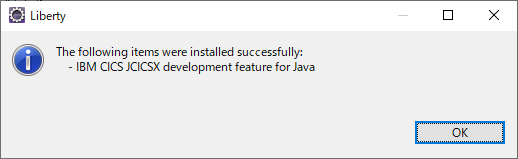
If you specify "JCICS" for the filter, the JCICSX development feature for Java will be listed. Click "Install" and "Next".
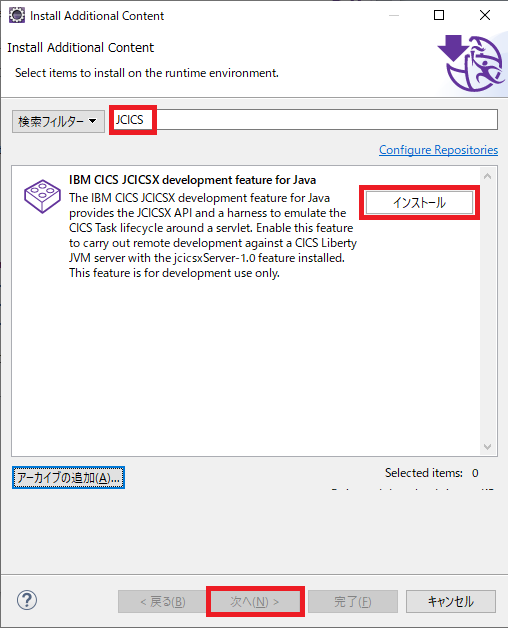
Confirm license and Finish.
Now that the feature is installed, select usr:jcicsxClient-1.0, which is filtered by jcicsx and displayed.
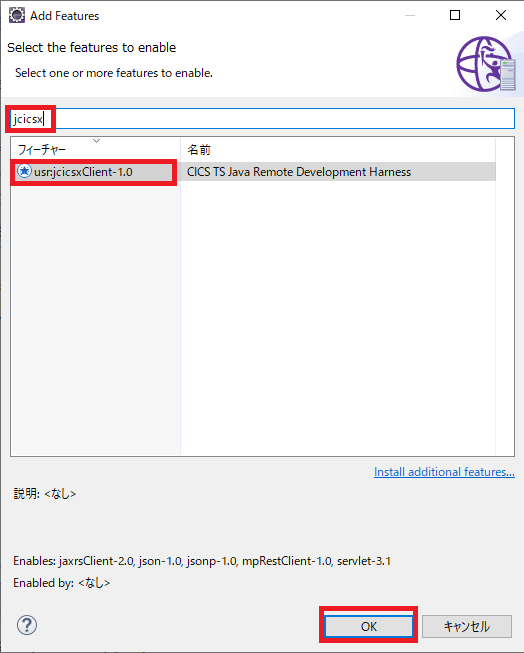
Added as a feature.
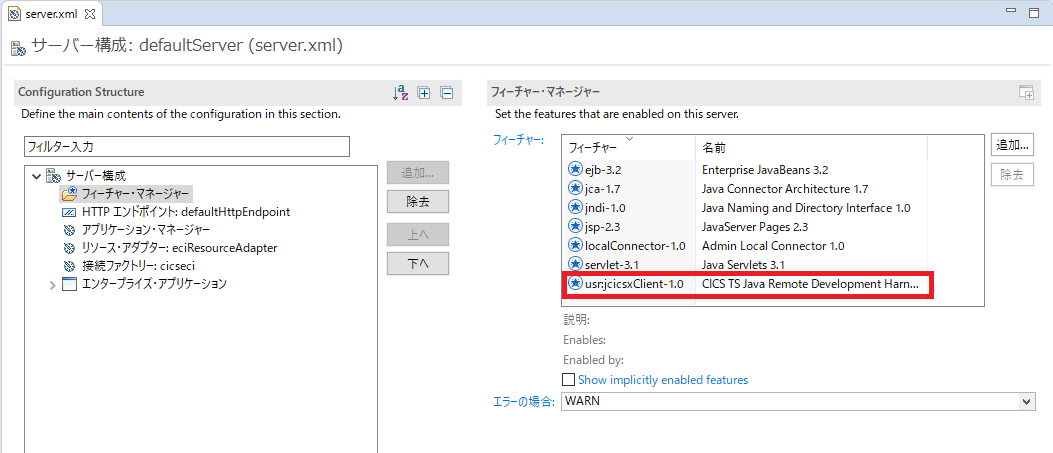
Looking at the source of server.xml, it looks like this.
    <featureManager>
        <feature>jsp-2.3</feature>
        <feature>localConnector-1.0</feature>
    	<feature>servlet-3.1</feature>
		<feature>jca-1.7</feature>
		<feature>jndi-1.0</feature>
		<feature>ejb-3.2</feature>
		<feature>usr:jcicsxClient-1.0</feature>
	</featureManager>
...
JCICSX feature / client-side configuration
Edit server.xml and add the following settings.
...
    <!-- JCICSX Client Config -->
    <usr_jcicsxClient serverUri="http://etp1:56461"/>
...
The serverUri address and port are CICS-Liberty endpoints configured for the JCICSX server.
If you look at server.xml in Design view, it will look like this:

This completes the "remote development" configuration.
Developing applications on a local PC using JCICSX
JCICSX development environment maintenance
There are several ways to provide the JCICSX class library, and it is also included in the CICS SDK for Java in CICS Explorer. If you incorporate the CICS Explorer function into Eclipse, it will be easier to manage, so we will include CICS Explorer in the Eclipse environment.
Reference: Downloading and starting CICS Explorer
Select "Help" - "Install New Software" from the Eclipse menu
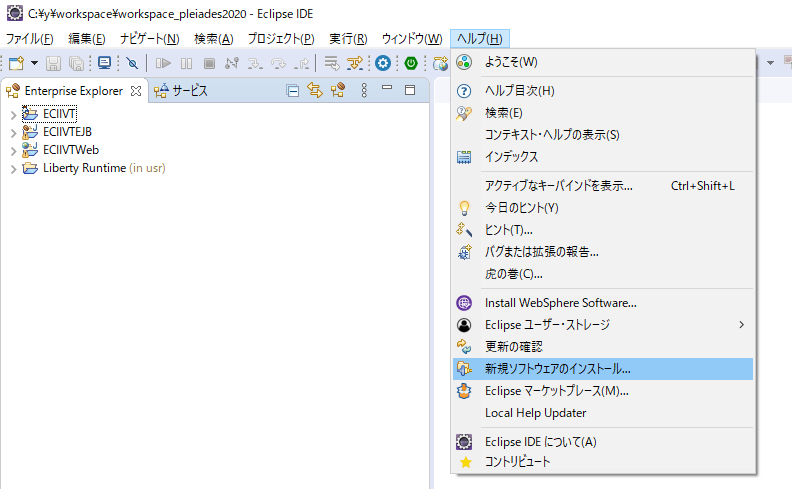
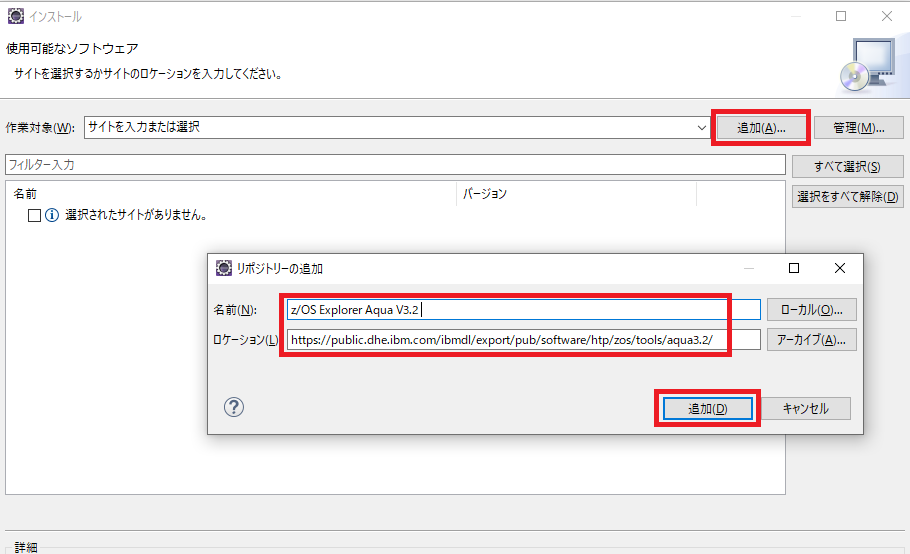
Press "Add" button to add the following repositories.
「https://public.dhe.ibm.com/ibmdl/export/pub/software/htp/zos/tools/aqua3.2/ 」
Select "IBM CICS Explorer" and Next
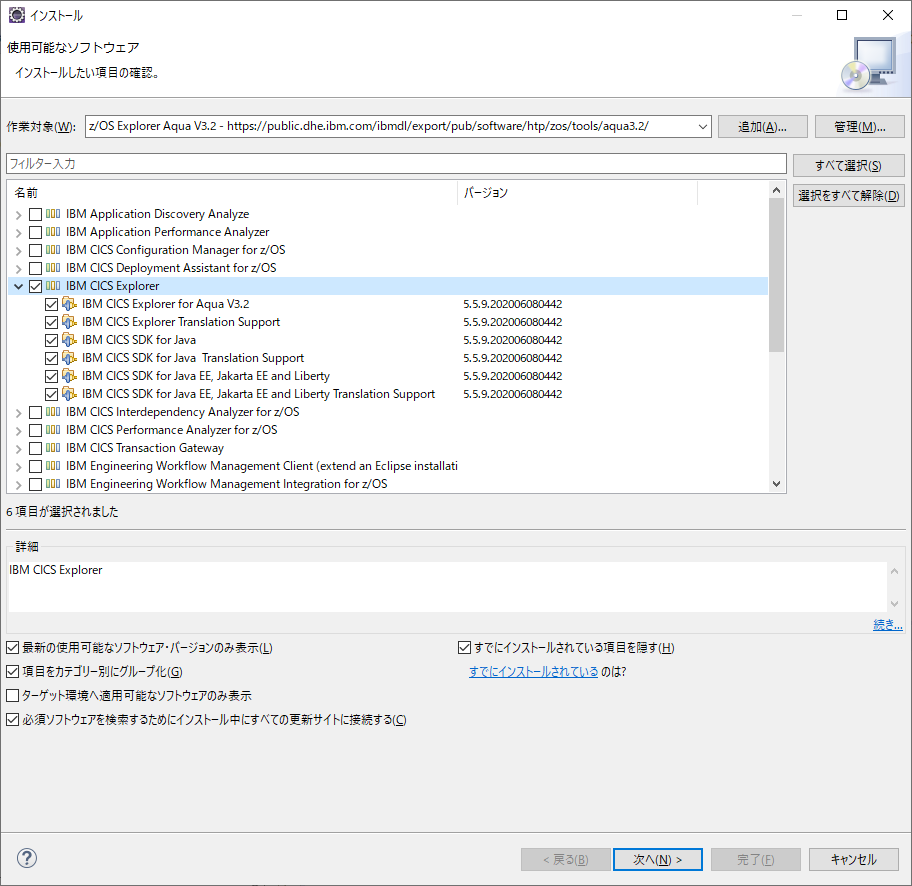
"Next"
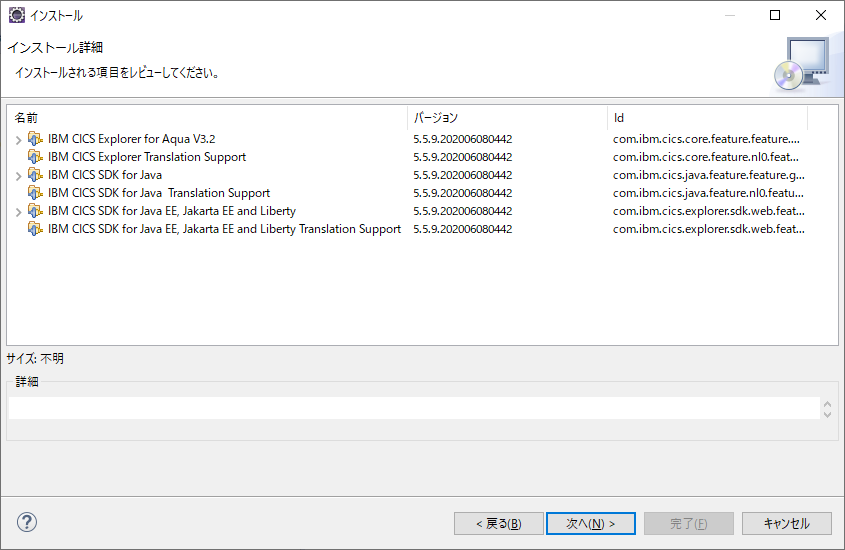
Confirm license and Finish.
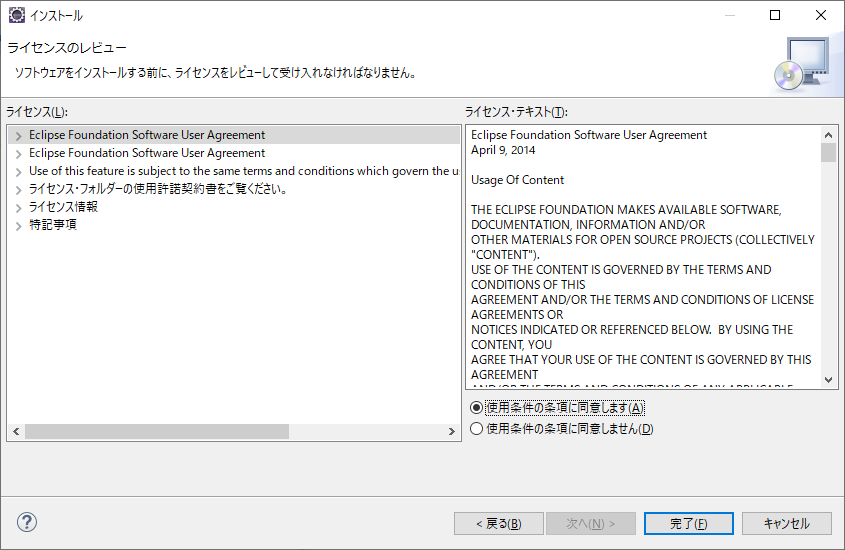
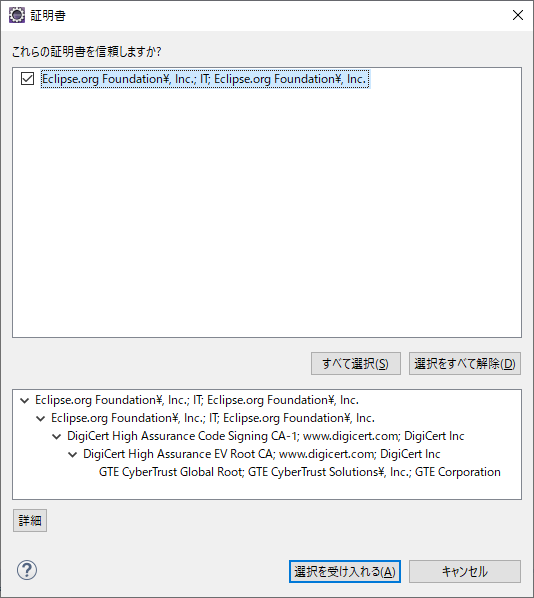
It takes a long time to install. This kind of confirmation about certification may appear on the way, so take appropriate action.
When it is completed, a pop-up prompting you to restart will appear, so restart Eclipse.
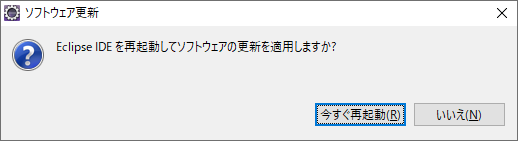
The CICS Explorer feature is now built into Eclipse.
Import sample application
Here, I will try running the sample provided on GitHub.
GitHub: cics-java-jcicsx-samples
Clone locally.
c:\y\workspace\cicsts56>git clone https://github.com/cicsdev/cics-java-jcicsx-samples.git
Cloning into 'cics-java-jcicsx-samples'...
remote: Enumerating objects: 361, done.
remote: Counting objects: 100% (361/361), done.
remote: Compressing objects: 100% (157/157), done.
Receiving objects:  76% (275/361)   ed 350 (delta 137), pack-reused 0
Receiving objects: 100% (361/361), 97.91 KiB | 331.00 KiB/s, done.
Resolving deltas: 100% (145/145), done.
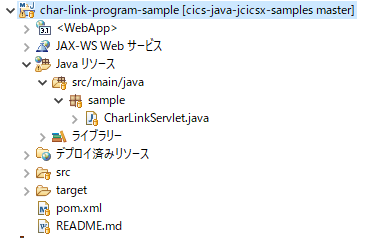
Of the several samples, import "char-link-program-sample" into Eclipse.
Right click on Enterprise Explorer view in JavaEE perspective, Select "Import"
"Maven" -"Existing Maven projects"

Select "char-link-program-sample" under the cloned directory
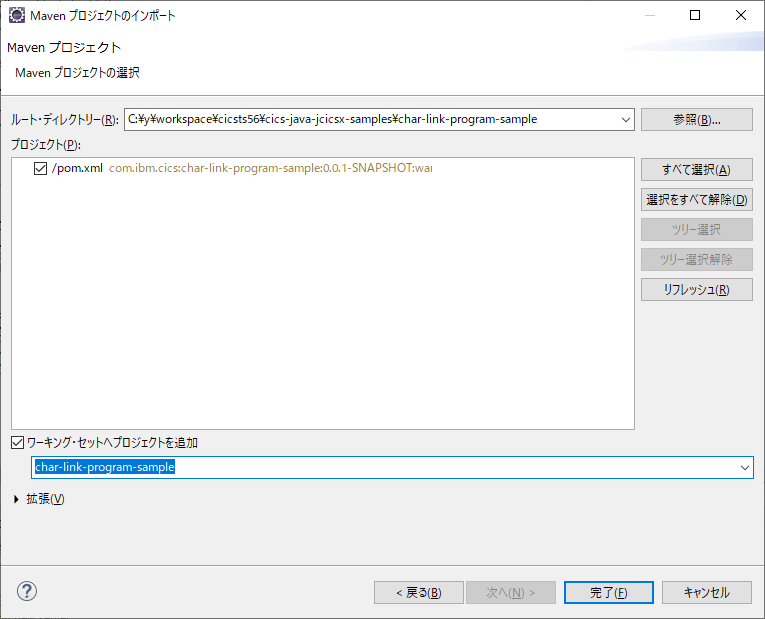
The project has been created.
Check the contents
Let's take a look at pom.xml.
<?xml version="1.0" encoding="UTF-8"?>
<project xmlns="http://maven.apache.org/POM/4.0.0"
  xmlns:xsi="http://www.w3.org/2001/XMLSchema-instance"
  xsi:schemaLocation="http://maven.apache.org/POM/4.0.0 http://maven.apache.org/xsd/maven-4.0.0.xsd">
  <modelVersion>4.0.0</modelVersion>

  <groupId>com.ibm.cics</groupId>
  <artifactId>char-link-program-sample</artifactId>
  <version>0.0.1-SNAPSHOT</version>
  <packaging>war</packaging>

  <dependencies>
    <dependency>
      <groupId>javax.servlet</groupId>
      <artifactId>javax.servlet-api</artifactId>
      <version>3.1.0</version>
      <scope>provided</scope>
    </dependency>
    <dependency>
      <groupId>javax.annotation</groupId>
      <artifactId>jsr250-api</artifactId>
      <version>1.0</version>
      <scope>provided</scope>
    </dependency>

    <!-- JCICSX dependency, used in CharLinkServlet.java -->
    <dependency>
      <groupId>com.ibm.cics</groupId>
      <artifactId>com.ibm.cics.jcicsx</artifactId>
      <version>1.000.0-5.6</version>
      <scope>provided</scope>
    </dependency>
  </dependencies>

  <build>
    <plugins>
      <plugin>
        <groupId>org.apache.maven.plugins</groupId>
        <artifactId>maven-compiler-plugin</artifactId>
        <version>3.8.1</version>
        <configuration>
          <source>1.8</source>
          <target>1.8</target>
        </configuration>
      </plugin>

      <!-- The below bundles the application as a WAR in a CICS bundle and deploys this to CICS using the CICS bundle deployment API.
           This is optional and can be removed if you don't wish to deploy the application this way -->
      <plugin>
        <groupId>com.ibm.cics</groupId>
        <artifactId>cics-bundle-maven-plugin</artifactId>
        <version>1.0.0</version>
        <executions>
          <execution>

            <!-- These goals will firstly run the war packaging on the project, and then will run the deploy goal, which will happen during the verify phase of the lifecycle by default-->
            <goals>
              <goal>bundle-war</goal>
              <goal>deploy</goal>
            </goals>

            <configuration>
              <!-- The bundle classifier indicates that the war should be packaged into a CICS bundle -->
              <classifier>cics-bundle</classifier>

              <!-- Update the default JVM server that the application will be installed into by default, This is used when creating the bundle, and goes into the CICS bundle's manifest -->
              <jvmserver>DFHWLP</jvmserver>

              <!-- Set the URL of the deploy target -->
              <url>http://yourcicsurl.com:9080</url>

              <!-- We'd recommend that you use Maven's password encryption, or supply your credentials using environment variables or properties, as shown here. -->
              <username>${cics-user-id}</username>
              <password>${cics-password}</password>

              <!-- Identify which bundle definition you're going to use from the CSD and which region and CICSPlex you want to deploy to -->
              <bunddef>DEMOBUNDLE</bunddef>
              <csdgroup>BAR</csdgroup>
              <cicsplex>CICSEX56</cicsplex>
              <region>IYCWEMW2</region>
            </configuration>
          </execution>
        </executions>
      </plugin>
    </plugins>
  </build>
</project>
A JCICSX dependency has been specified.
The settings for the BUNDLE definition are also included, but for now, leave them as they are.
Next, let's take a look at the Servlet source.
package sample;

/* Licensed Materials - Property of IBM                                   */
/*                                                                        */
/* SAMPLE                                                                 */
/*                                                                        */
/* (c) Copyright IBM Corp. 2020 All Rights Reserved                       */
/*                                                                        */
/* US Government Users Restricted Rights - Use, duplication or disclosure */
/* restricted by GSA ADP Schedule Contract with IBM Corp                  */
/*                                                                        */

import java.io.IOException;

import javax.servlet.ServletException;
import javax.servlet.annotation.WebServlet;
import javax.servlet.http.HttpServlet;
import javax.servlet.http.HttpServletRequest;
import javax.servlet.http.HttpServletResponse;

import com.ibm.cics.jcicsx.CICSConditionException;
import com.ibm.cics.jcicsx.CICSContext;

/**
 * A sample servlet to demonstrate how to use JCICSX to LINK to a CICS Program
 * with CHAR data
 */
@WebServlet("/SampleServlet")
public class CharLinkServlet extends HttpServlet {

	private static final long serialVersionUID = 1L;

	/**
	 * Name of the program to invoke.
	 */
	private static final String PROG_NAME = "EDUCHAN";

	/**
	 * Name of the channel to use.
	 */
	private static final String CHANNEL = "MYCHANNEL";

	/**
	 * Name of the container used to send data to the target program.
	 */
	private static final String INPUT_CONTAINER = "INPUTDATA";

	/**
	 * Name of the container which will contain the response from the target
	 * program.
	 */
	private static final String OUTPUT_CONTAINER = "OUTPUTDATA";

	/**
	 * Data to place in the container to be sent to the target program.
	 */
	private static final String INPUTSTRING = "Hello from Java";

	/**
	 * @see HttpServlet#doGet(HttpServletRequest request, HttpServletResponse
	 *      response)
	 */
	@Override
	protected void doGet(HttpServletRequest request, HttpServletResponse response)
			throws ServletException, IOException {
		response.setContentType("text/html");

		response.getWriter().print("Hello world! ");

		// Message to emit as the response
		String resultStr = null;

		// Gets the current CICS Context for the environment we're running in
		CICSContext task = CICSContext.getCICSContext();

		try {
			// Create a reference to the Program we will invoke and specify the channel
			// Don't syncpoint between remote links, this is the default
			// Link to the program with an input container, containing the input string of
			// "Hello from Java"
			task.createProgramLinkerWithChannel(PROG_NAME, CHANNEL).setSyncOnReturn(false)
					.setStringInput(INPUT_CONTAINER, INPUTSTRING).link();

			// Get the data from the output container as a string
			// You could remove task.getChannel(CHANNEL) and do this as one chained command
			// above, but this demonstrates how you could call this part later on in your
			// program
			resultStr = task.getChannel(CHANNEL).getCHARContainer(OUTPUT_CONTAINER).get();

			if (resultStr == null) {
				// Missing response container
				resultStr = "<missing>";
			}

			// Format the final message and print it
			String msg = "Returned from link to \'" + PROG_NAME + "\' with a text response of \'" + resultStr + "\'";
			response.getWriter().println(msg);

		} catch (CICSConditionException e) {
			response.getWriter().println("An exception has occured" + "\nRESP: " + e.getRespCode() + "\nRESP2: "
					+ e.getResp2() + "\nMessage: " + e.getMessage());
		}
	}

}
Here, the JCICSX class is used to perform operations on Channel & Container and LINK the program.
Specifically, the following operations are performed.
- Create a container "INPUTDATA" in the channel "MYCHANNEL" and enter the string "Hello from Java"
- Call the COBOL program "EDUCHAN" with "MYCHANNEL"
- Obtain data from the container "OUTPUTDATA" of "MY CHANNEL" and display the result on the screen
The COBOL source is also provided, so check that as well.
      *----------------------------------------------------------------*
      *  Licensed Materials - Property of IBM                          *
      *  SAMPLE                                                        *
      *  (c) Copyright IBM Corp. 2016 All Rights Reserved              *
      *  US Government Users Restricted Rights - Use, duplication or   *
      *  disclosure restricted by GSA ADP Schedule Contract with       *
      *  IBM Corp                                                      *
      *----------------------------------------------------------------*

      ******************************************************************
      *                                                                *
      * Module Name        EDUCHAN.CBL                                 *
      * Version            1.0                                         *
      * Date               22/10/2016                                  *
      *                                                                *
      * CICS back-end channel/container sample                         *
      *                                                                *
      * This program expects to be invoked with a CHAR container named *
      * INPUTDATA and returns the following containers:                *
      * A CHAR container containing the reversed input string          *
      * A CHAR container containing the time                           *
      * A BIT container containing the CICS return code from reading   *
      * the input container                                            *
      ******************************************************************

       IDENTIFICATION DIVISION.
       PROGRAM-ID. EDUCHAN.

       ENVIRONMENT DIVISION.
       CONFIGURATION SECTION.
       DATA DIVISION.
       WORKING-STORAGE SECTION.

      *  Container name declarations
      *  Channel and container names are case sensitive
       01 DATE-CONT          PIC X(16) VALUE 'CICSTIME'.
       01 INPUT-CONT         PIC X(16) VALUE 'INPUTDATA'.
       01 OUTPUT-CONT        PIC X(16) VALUE 'OUTPUTDATA'.
       01 LENGTH-CONT        PIC X(16) VALUE 'INPUTDATALENGTH'.
       01 ERROR-CONT         PIC X(16) VALUE 'ERRORDATA'.
       01 RESP-CONT          PIC X(16) VALUE 'CICSRC'.


      *  Data fields used by the program
       01 INPUTLENGTH        PIC S9(8) COMP-4.
       01 DATALENGTH         PIC S9(8) COMP-4.
       01 CURRENTTIME        PIC S9(15) COMP-3.
       01 ABENDCODE          PIC X(4) VALUE SPACES.
       01 CHANNELNAME        PIC X(16) VALUE SPACES.
       01 INPUTSTRING        PIC X(72) VALUE SPACES.
       01 OUTPUTSTRING       PIC X(72) VALUE SPACES.
       01 RESPCODE           PIC S9(8) COMP-4 VALUE 0.
       01 RESPCODE2          PIC S9(8) COMP-4 VALUE 0.
       01 DATE-TIME.
         03 DATESTRING         PIC X(10) VALUE SPACES.
         03 TIME-SEP           PIC X(1) VALUE SPACES.
         03 TIMESTRING         PIC X(8) VALUE SPACES.
       01 RC-RECORD          PIC S9(8) COMP-4 VALUE 0.
       01 ERR-RECORD.
         03 ERRORCMD           PIC X(16) VALUE SPACES.
         03 ERRORSTRING        PIC X(32) VALUE SPACES.


       PROCEDURE DIVISION.
      *  -----------------------------------------------------------
       MAIN-PROCESSING SECTION.
      *  -----------------------------------------------------------

      *  Get name of channel
           EXEC CICS ASSIGN CHANNEL(CHANNELNAME)
                            END-EXEC.

      *  If no channel passed in, terminate with abend code NOCH
           IF CHANNELNAME = SPACES THEN
               MOVE 'NOCH' TO ABENDCODE
               PERFORM ABEND-ROUTINE
           END-IF.


      *  Read content and length of input container
           MOVE LENGTH OF INPUTSTRING TO INPUTLENGTH.
           EXEC CICS GET CONTAINER(INPUT-CONT)
                            CHANNEL(CHANNELNAME)
                            FLENGTH(INPUTLENGTH)
                            INTO(INPUTSTRING)
                            RESP(RESPCODE)
                            RESP2(RESPCODE2)
                            END-EXEC.

      *  Place RC in binary container for return to caller
           MOVE RESPCODE TO RC-RECORD.
           EXEC CICS PUT CONTAINER(RESP-CONT)
                            FROM(RC-RECORD)
                            FLENGTH(LENGTH OF RC-RECORD)
                            BIT
                            RESP(RESPCODE)
                            END-EXEC.

           IF RESPCODE NOT = DFHRESP(NORMAL)
             PERFORM RESP-ERROR
           END-IF.

      *  Place reversed string in output container
           MOVE FUNCTION REVERSE(INPUTSTRING) TO OUTPUTSTRING.

           EXEC CICS PUT CONTAINER(OUTPUT-CONT)
                            FROM(OUTPUTSTRING)
                            FLENGTH(LENGTH OF OUTPUTSTRING)
                            CHAR
                            RESP(RESPCODE)
                            END-EXEC.

           IF RESPCODE NOT = DFHRESP(NORMAL)
             PERFORM RESP-ERROR
           END-IF.

      *  Get the current time
           EXEC CICS ASKTIME ABSTIME(CURRENTTIME)
                            END-EXEC.

      *  Format date and time
           EXEC CICS FORMATTIME
                     ABSTIME(CURRENTTIME)
                     DDMMYYYY(DATESTRING)
                     DATESEP('/')
                     TIME(TIMESTRING)
                     TIMESEP(':')
                     RESP(RESPCODE)
                     END-EXEC.

      *  Check return code
           IF RESPCODE NOT = DFHRESP(NORMAL)
               STRING 'Failed' DELIMITED BY SIZE
                            INTO DATESTRING END-STRING
           END-IF.

      *  Place current date in container CICSTIME
           EXEC CICS PUT CONTAINER(DATE-CONT)
                            FROM(DATE-TIME)
                            FLENGTH(LENGTH OF DATE-TIME)
                            CHAR
                            RESP(RESPCODE)
                            END-EXEC.
      *  Check return code
           IF RESPCODE NOT = DFHRESP(NORMAL)
             PERFORM RESP-ERROR
           END-IF.


      *  Return back to caller
           PERFORM END-PGM.

      *  -----------------------------------------------------------
       RESP-ERROR.
             MOVE 'EDUC' TO ABENDCODE
             PERFORM ABEND-ROUTINE.

           PERFORM END-PGM.

      *  -----------------------------------------------------------
      *  Abnormal end
      *  -----------------------------------------------------------
       ABEND-ROUTINE.
           EXEC CICS ABEND ABCODE(ABENDCODE) END-EXEC.

      *  -----------------------------------------------------------
      *  Finish
      *  -----------------------------------------------------------
       END-PGM.
           EXEC CICS RETURN END-EXEC.
In the COBOL program, the character strings received in the INPUTDATA container are set in the OUTPUTDATA container in the reverse order and returned. In addition, we are adding a container to store the date and time and RESP Code.
The source is used as it is without any modification.
Preparation for COBOL program
Since this sample is a scenario of creating a Java program that calls an existing COBOL program, the COBOL application must be prepared in the development environment. Transfer the COBOL source (EDUCHAN) to z/OS, compile/link it, and add the program definition in the CICS region where the CICS-Liberty configuration for remote development is performed. This is the same as the procedure for a traditional CICS-COBOL application.
Build/Deploy/Test Java application
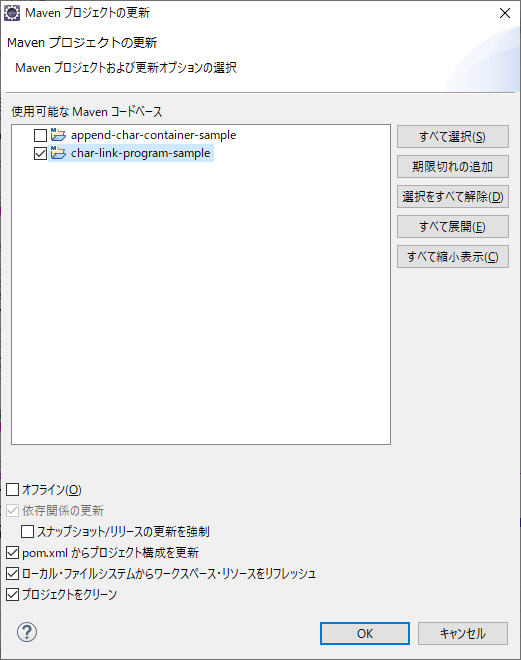
Right click on the project, and select "Maven" - "Update Project".
Select a project and OK.
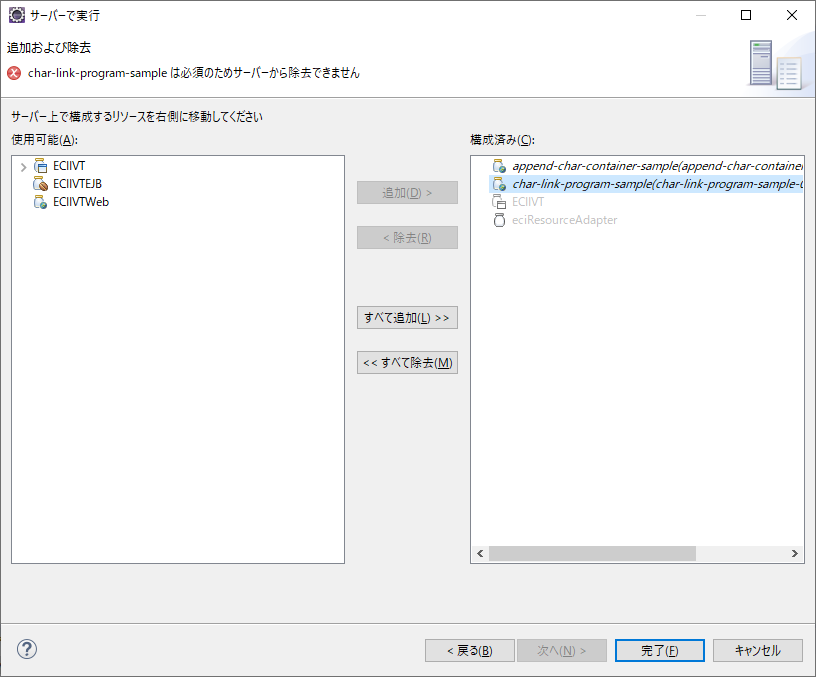
Right click on CharLinkServlet.java, and select "Run" - "Run on server".
Select Liberty Server with jcicsx configuration and Next.
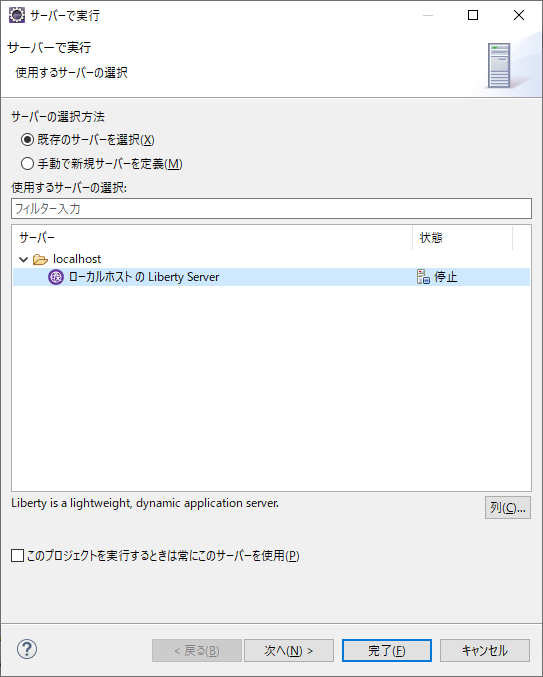
Finish
After the specified Liberty is launched and the app is deployed, the browser will open and the Servlet will be executed.
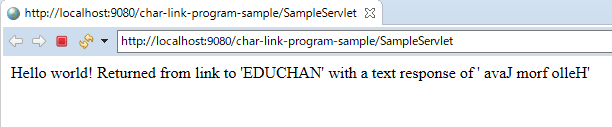
It ran successfully! The string "Hello from Java" is returned in reverse order. In other words, you can see that the COBOL program on CICS was called even though it was run on the local Liberty. It was confirmed that if you configure JCICSX for remote development in advance, you can even test on Liberty just by operating the PC side!
It means, as a normal development process, you can complete the modification, deployment, and testing your JCICSX application on your PC.