This article is translated from the Japanese article below.
https://qiita.com/tomotagwork/items/6fae5bd3440635ad26af
(google translate was used.)
Introduction
CICS TS V5.6 also supports Gradle as a build management tool for CICS-Java applications, along with Maven. Here, we will try build management of CICS-Java application using Gradle.
Related articles
Running CICS-Java application - (1) Simple application
Running CICS-Java application - (2) Build management with Maven
Running CICS-Java application - (3) Build management with Gradle
Running CICS-Java application - (4) Spring Boot Application
Running CICS-Java application - (5) Using JCICSX
Environment
Development Environment
Windows10
CICS Explorer V5.5.0.9
Runtime Environment
z/OS V2.4
CICS Transaction Server for z/OS V5.6
Preparation
This is similar to the Maven case. (Use Gradle instead of Maven)
Note: If you use Gradle for build management, the target CICS must be under CICSplex management.
Development Environment(PC)
JavaEE Development Environment
Please use something that can develop Java EE applications such as Eclipse and VS Code as appropriate.
Since we will use the sample as it is this time, we will not edit the source in particular, so we do not have to use it, but usually we will use some kind of development environment. It would be nice to be able to work with Maven, git, etc.
If you use CICS Explorer together, you can use Eclipse.
CICS Explorer
This is also not required, but it can be used to check the CICS resource definition.
Download and set up an Eclipse-based tool called CICS Explorer, referring to the following areas.
Reference: Downloading and starting CICS Explorer
- This tool is free of charge for CICS users.
Gradle
Follow the steps below to install.
Installing Gradle
Basically, just unzip the downloaded one and add the path.
As a prerequisite, Java 8 or later is required.
c:\>java -version
java version "1.8.0_144"
Java(TM) SE Runtime Environment (build 1.8.0_144-b01)
Java HotSpot(TM) 64-Bit Server VM (build 25.144-b01, mixed mode)
Download the latest version of Gradle V6.5 at the moment from the following(gradle-6.5.zip)。
Releases
Extract to a suitable directory. Here,c:\x\Gradle\gradle-6.5\.
Add bin directory (C:\x\Gradle\gradle-6.5\bin) to your PATH.
c:\>gradle -v

------------------------------------------------------------
Gradle 6.5
------------------------------------------------------------

Build time:   2020-06-02 20:46:21 UTC
Revision:     a27f41e4ae5e8a41ab9b19f8dd6d86d7b384dad4

Kotlin:       1.3.72
Groovy:       2.5.11
Ant:          Apache Ant(TM) version 1.10.7 compiled on September 1 2019
JVM:          1.8.0_144 (Oracle Corporation 25.144-b01)
OS:           Windows 10 10.0 amd64
This is OK.
git
I will get and use the sample provided on gitHub, so I also have git installed.
I omit the setup instruction.
c:\>git --version
git version 2.21.0.windows.1
Runtime Environment(z/OS, CICS)
*The z/OS side is exactly the same as the Maven case. If you have already implemented the Maven scenario, you can use the same one as it is.
Prepare a CICS region to run the sample.
For now, we'll use a region named CT56B4A1 under the control of the CICSplex.
Add a resource called JVMServer to run Java applications.
This time, we will use the sample for CICS-Liberty (JavaEE application), so create a JVMServer for Liberty.
JVM Profile
Prepare the JVM profile on USS. (Properties for the JVMServer are effectively specified in a file on this USS. The JVMSERVER resource definition points to the filename of this JVM profile.)
A sample is provided, so copy it and use it.
Create a directory /var/cicsts/cicsts56/CT56B4A1/JVMProfiles and copy /usr/lpp/cicsts/cicsts56/JVMProfiles/DFHWLP.jvmprofile(sample definition for Liberty located under the CICS installation directory) to it. Customize as appropriate for your environment.
JAVA_HOME=/usr/lpp/java/J8.0_64/
WORK_DIR=/var/cicsts/cicsts56/CT56B4A1/work
WLP_INSTALL_DIR=/usr/lpp/cicsts/cicsts56/wlp
-Dcom.ibm.cics.jvmserver.wlp.autoconfigure=true
-Dcom.ibm.cics.jvmserver.wlp.server.host=*
-Dcom.ibm.cics.jvmserver.wlp.server.http.port=56441
-Dcom.ibm.cics.jvmserver.wlp.server.https.port=56451
-Xms128M
-Xmx256M
-Xmso1M
-Xgcpolicy:gencon
-Xscmx256M
-Xshareclasses:name=cicsts%g,groupAccess,nonfatal
-Xtune:virtualized
-Dcom.ibm.tools.attach.enable=no
-Dfile.encoding=ISO-8859-1
_BPXK_DISABLE_SHLIB=YES
SIT
Specify the directory where the above properties file is located in the SIT parameter "JVMPROFILEDIR".
JVMPROFILEDIR=/var/cicsts/cicsts56/CT56B4A1/JVMProfiles
Restart the region for the changes to be enabled.
JVMServer definition
Prepare the JVMSERVER resource definition.
Copy the JVMSERVER definition "DFHWLP" in the product-provided DFH$WLP group to an appropriate group and install it.
OBJECT CHARACTERISTICS                                    CICS RELEASE = 0730
 CEDA  View JVmserver( DFHWLP   )
  JVmserver      : DFHWLP
  Group          : TAGGRP
  DEScription    : CICS JVM server to run WLP samples
  Status         : Enabled            Enabled | Disabled
  Jvmprofile     : DFHWLP                                         (Mixed Case
  Lerunopts      : DFHAXRO
  Threadlimit    : 015                1-256
 DEFINITION SIGNATURE
  DEFinetime     : 06/04/20 16:20:21
  CHANGETime     : 06/04/20 16:20:21
  CHANGEUsrid    : CICSUSER
  CHANGEAGEnt    : CSDApi             CSDApi | CSDBatch
  CHANGEAGRel    : 0730
- Jvmprofile: DFHWLP, which means that the file DFHWLP.jvmprofile under the directory specified in JVMPROFILEDIR of SIT is used as the JVM property file.
It is OK if it is enabled by checking with CEMT I JVMSERVER.
I JVMS
STATUS:  RESULTS - OVERTYPE TO MODIFY
 Jvm(DFHWLP  ) Ena     Prf(DFHWLP  ) Ler(DFHAXRO )
    Threadc(005) Threadl( 015 ) Cur(48314096)
CICS Bundle Deployment API
You must have the CICS Bundle Deployment API set up, which is available from CICS TS V5.6.
This feature was added for application deployment as one of the REST-based management APIs called CMCI.
Set up CMCI on the WUI server that manages the target CICS region, and specify the parameters for the CICS Bundle Deployment API in the CMCI JVM server properties.
Reference: [How it works: CICS bundle deployment API] (https://www.ibm.com/docs/en/cics-ts/5.6?topic=cmci-how-it-works-cics-bundle-deployment-api)
The minimum required settings are as follows.
Create a directory on USS for Bundle file placement. Here, it is /var/cicsts/cicsts56/bundles.
Set the following parameters in the JVM profile (EYUCMCIJ.jvmprofile) for WUI's CMCI JVM Server.
-Dcom.ibm.cics.jvmserver.cmci.bundles.dir=/var/cicsts/cicsts56/bundles
Running sample application
Clone locally
Create an appropriate directory and clone https://github.com/IBM/cics-bundle-gradle.git to your local PC.
C:\y\workspace\cicsts56>git clone https://github.com/IBM/cics-bundle-gradle.git
Cloning into 'cics-bundle-gradle'...
remote: Enumerating objects: 125, done.
remote: Counting objects: 100% (125/125), done.
remote: Compressing objects: 100% (87/87), done.
remote: Total 1855 (delta 43), reused 86 (delta 13), pack-reused 1730Receiving objects:  99% (1837/1855), 2.08 MiB | 2.01 MiB/s
Receiving objects: 100% (1855/1855), 4.19 MiB | 2.83 MiB/s, done.
Resolving deltas: 100% (610/610), done.
Understanding file structure
Since we will use a sample called gradle-multipart-sample under samples, move the directory and take a look at the structure of the file.
C:\y\workspace\cicsts56\cics-bundle-gradle\samples\gradle-multipart-sample>tree /f /a
フォルダー パスの一覧:  ボリューム Windows
ボリューム シリアル番号は 1866-E2FC です
C:.
|   build.gradle
|   gradlew
|   gradlew.bat
|   README.md
|   settings.gradle
|
+---gradle
|   \---wrapper
|           gradle-wrapper.jar
|           gradle-wrapper.properties
|
+---gradle-bundle-demo
|       build.gradle
|
\---gradle-war-demo
    |   build.gradle
    |
    \---src
        \---main
            +---java
            |   \---demo
            |           SimpleServlet.java
            |
            \---web-app
                |   index.html
                |   index.js
                |   style.css
                |
                +---images
                |       cics.png
                |
                \---WEB-INF
                        web.xml
There are multiple build.gradle and it has a hierarchical structure, so this is a structure called "multi-project" of Gradle.
Reference: Creating a multi-project build
Normally, when creating a CICS-Java application, create an OSGi project (jar) or Web project (WAR) that is the main body of the application, create a CICS bundle project to organize the application, and deploy these as a group package.
In this sample, the gradle-war-demo part corresponds to the project of the application body (WAR), and the gradle-bundle-demo part corresponds to the CICS bundle project. It is summarized in the gradle-multipart-sample project. The relationship of build.gradle is as follows.

It seems that you can also display the relationship of the project with the following command.
c:\y\workspace\cicsts56\cics-bundle-gradle\samples\gradle-multipart-sample>gradle -q projects

------------------------------------------------------------
Root project
------------------------------------------------------------

Root project 'gradle-multipart-sample'
+--- Project ':gradle-bundle-demo'
\--- Project ':gradle-war-demo'

To see a list of the tasks of a project, run gradle <project-path>:tasks
For example, try running gradle :gradle-bundle-demo-test04:tasks
Check/Edit contents
gradle-war-demo(JavaEE appl)
This is a web application that is supposed to run on CICS-Liberty. It is implemented with simple html and Servlet.(It looks like the same as Maven sample)
package demo;

import java.io.IOException;

import javax.servlet.ServletException;
import javax.servlet.annotation.WebServlet;
import javax.servlet.http.HttpServlet;
import javax.servlet.http.HttpServletRequest;
import javax.servlet.http.HttpServletResponse;

import com.ibm.cics.server.InvalidRequestException;
import com.ibm.cics.server.Task;

/**
 * Servlet implementation class SimpleServlet
 */
@WebServlet("/SimpleServlet")
public class SimpleServlet extends HttpServlet {
    private static final long serialVersionUID = 1L;

    /**
     * @see HttpServlet#doGet(HttpServletRequest request, HttpServletResponse response)
     */
    @Override
    protected void doGet(HttpServletRequest request, HttpServletResponse response) throws ServletException, IOException {
        response.setContentType("text/html");

        response.getWriter().print("Hello world!");
        Task task = Task.getTask();

        try {
            String userid = task.getUSERID();
            response.setContentType("text/html");
            response.getWriter().print("\nI am " + userid);
        } catch (InvalidRequestException e) {
            throw new RuntimeException(e);
        }
    }

}
The process is to acquire the object of the own task running in the Task Class of JCICS, acquire the user information executing itself from it, and display it.
There is no need to change the app itself, so just check the contents.
gradle-bundle-demo(CICS bundle)
Normally, when creating a CICS-Java application with CICS Explorer (without Gradle), you will create a CICS bundle project and set the application (WAR, OSGi, etc.) to be incorporated in it. As a result, files such as cics.xml and xxx.warbundle will be created.
This is the equivalent of the CICS bundle project, but only build.gradle exists. It seems that the Gradle plugin (cics-bundle-gradle) provided by CICS automatically creates the files required for the CICS bundle project by specifying the dependency using the Gradle mechanism. Therefore, as a user, you only need to make the necessary settings in build.gradle, and you do not have to be directly aware of the CICS bundle project.
Edit build.gradle for your environment. Changes are described in comments (1) to (7).
plugins {
    id 'com.ibm.cics.bundle' version '1.0.0'
}

group 'com.ibm.cics'
version '1.0.0'

repositories {
    mavenCentral()
}

cicsBundle {
    build {
        defaultJVMServer = 'DFHWLP' // (1)JVMSERVER name
    }
    deploy {
        cicsplex = 'C73PLX'         // (2) The CICSplex name to which the target CICS region belongs
        region   = 'CT56B4A1'       // (3) Target CICS region name
        bunddef  = 'GRDBUNDL'       // (4) Bundle resource name defined on the target CICS region
        csdgroup = 'TAGGRP'         // (5) CSD group name to which the bundle definition in (4) belongs
        url = 'http://etp1:56002'   // (6) CMCI URL for WUI
        username = 'TAG'            // (7) User and password used when issuing Deployment API by CMCI
        password = '********'       //
        //caution: uncomment the line below to disable TLS/SSL checking for certificates
        //insecure = true
    }
}

dependencies {
    cicsBundlePart group: 'org.codehaus.cargo', name: 'simple-war', version: '1.7.7', ext: 'war'
    cicsBundlePart project(path:':gradle-war-demo', configuration: 'archives')
}
Now I changed the directory name of the CICS bundle project from gradle-bundle-demo to gradle-bundle-demo-test04. This directory name will be used as the directory name when transferring materials to USS. A directory called <CICS bundle project name>_<version> is created in the directory for bundling directory placement specified by the JVM Server of WUI (here /var/cicsts/cicsts56/bundles), and various files are extracted in it.
Example: /var/cicsts/cicsts56/gradle-bundle-demo-test04_1.0.0/
Other change parameters are as follows.
(1)defaultjvmserver: Specify the JVMSERVER name to run the app. It must be installed in the target CICS region in advance.
(2)cicsplex: The CICSplex name to which the target CICS region belongs
(3)region: Target CICS region name
(4)bunddef: Bundle resource name defined on the target CICS region
(5)csdgroup: CSD group name to which the bundle definition in (4) belongs
(6)url: Specify the URL of CMCI of WUI. The CICS Bundle Deployment API must be enabled for this WUI.(There is no description of http:// in the template description, but if you do not specify this, an error will occur, so be careful!)
(7)username/password: User and password used when issuing Deployment API by CMCI
*Here, the build/deploy operation is not performed yet.
Since we've renamed the project directory, we'll modify the parent setting.gradle accordingly.
rootProject.name = 'gradle-multipart-sample'
include 'gradle-war-demo'
include 'gradle-bundle-demo-test04'
Create BUNDLE definition
Create a bundle definition according to the contents specified in the build.gradle above.
OBJECT CHARACTERISTICS                                    CICS RELEASE = 0730
 CEDA  View Bundle( GRDBUNDL )
  Bundle         : GRDBUNDL
  Group          : TAGGRP
  DEScription    : CICS-BUNDLE-DEMO
  Status         : Enabled            Enabled | Disabled
  BUndledir      : /var/cicsts/cicsts56/bundles/gradle-bundle-demo-test04_1.0
  (Mixed Case)   : .0
                 :
                 :
                 :
  BAsescope      :
  (Mixed Case)   :
                 :
                 :
                 :
 DEFINITION SIGNATURE
  DEFinetime     : 06/17/20 14:19:33
Specify the CSD group based on (5), the BUNDLE definition name (4), and the BUNDLEDIR based on the directory name and version information value of the project.
*Here, the installation operation is not performed yet.
Build/Deploy
*In the following procedure, build "gradelw build" and deploy "gradlew deployCICSBundle" are executed in two stages, but build-deploy execution is performed only with the latter command.
To build, run the following command under the gradle-multipart-sample directory.
At first, it takes time because the necessary packages are downloaded.
c:\y\workspace\cicsts56\cics-bundle-gradle\samples\gradle-multipart-sample>gradlew build
Downloading https://services.gradle.org/distributions/gradle-5.0-all.zip
...........................................................................................................................

Welcome to Gradle 5.0!

Here are the highlights of this release:
 - Kotlin DSL 1.0
 - Task timeouts
 - Dependency alignment aka BOM support
 - Interactive `gradle init`

For more details see https://docs.gradle.org/5.0/release-notes.html

Starting a Gradle Daemon (subsequent builds will be faster)

> Task :gradle-bundle-demo-test04:buildCICSBundle
Adding Java-based bundle parts from 'cicsBundlePart' dependency configuration
Adding Java-based bundle part: 'C:\Users\TomohiroTaguchi\.gradle\caches\modules-2\files-2.1\org.codehaus.cargo\simple-war\1.7.7\5f462015066db63c2e240b4fc3674c6f4910bb73\simple-war-1.7.7.war'
Adding Java-based bundle part: 'C:\y\workspace\cicsts56\cics-bundle-gradle\samples\gradle-multipart-sample\gradle-war-demo\build\libs\gradle-war-demo-1.0.0.war'
Adding non-Java-based bundle parts from 'src/main/resources'

BUILD SUCCESSFUL in 1m 12s
4 actionable tasks: 4 executed
The project is now built.
Under the gradle-bundle-demo directory, each file of the CICS bundle project and a zip file (used at the time of deployment) that archived them are generated.
c:\y\workspace\cicsts56\cics-bundle-gradle\samples\gradle-multipart-sample>tree gradle-bundle-demo-test04 /f /a
フォルダー パスの一覧:  ボリューム Windows
ボリューム シリアル番号は 1866-E2FC です
C:\Y\WORKSPACE\CICSTS56\CICS-BUNDLE-GRADLE\SAMPLES\GRADLE-MULTIPART-SAMPLE\GRADLE-BUNDLE-DEMO-TEST04
|   build.gradle
|
\---build
    +---distributions
    |       gradle-bundle-demo-test04-1.0.0.zip
    |
    \---gradle-bundle-demo-test04-1.0.0
        |   gradle-war-demo-1.0.0.war
        |   gradle-war-demo-1.0.0.warbundle
        |   simple-war-1.7.7.war
        |   simple-war-1.7.7.warbundle
        |
        \---META-INF
                cics.xml
Next, perform the deployment work.
Execute the following command under the gradle-multipart-sample directory.
c:\y\workspace\cicsts56\cics-bundle-gradle\samples\gradle-multipart-sample>gradlew deployCICSBundle

> Task :gradle-bundle-demo-test04:deployCICSBundle
Task deployCICSBundle

BUILD SUCCESSFUL in 12s
5 actionable tasks: 1 executed, 4 up-to-date
If you look at the status of bundles and bundled parts in CICS Explorer, you can see that they have been successfully installed and enabled.

In other words, the above Gradle command has performed the following processing.
1. Build: Compile Java EE application (gradle-war-demo) / Create WAR, Generate CICS bundle (gradle-bundle-demo)
2. Package: Packaging of related modules
3. Deploy: Transfer / deploy CICS bundle files to USS, install BUNDLE definition
Running the sample application
I will try accessing the application deployed on Liberty running on the target CICS from your browser.
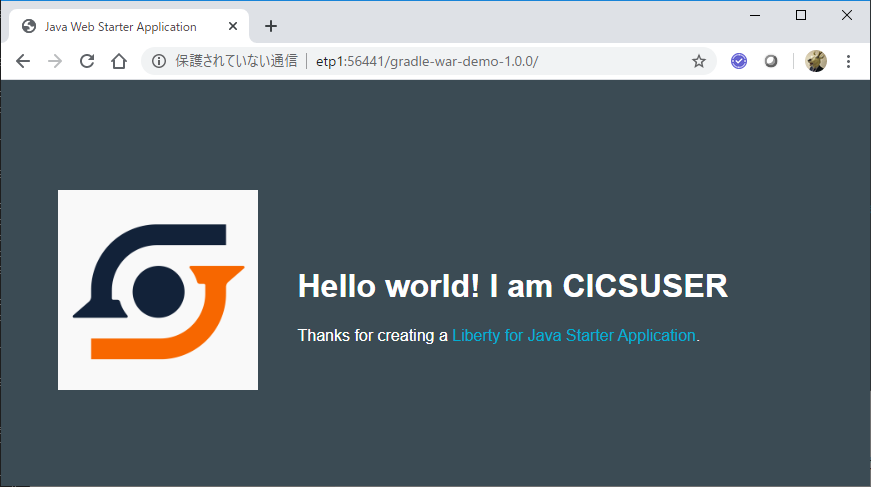
Since it is running as the default user "CICSUSER", that user name is displayed.
With this, I was able to confirm that the application works properly!