※本稿は記事:【初心者】AWSのlightsailでWordPressを導入するまでの続きとなるものです。
※本稿では、LightsailのSSL証明書、Let’s Encryptの証明書有効期限が切れた場合の更新手順を示します。
※ぜひ、こちらもご覧ください⇒【初心者】AWSのLightsailでIP固定化と独自ドメインの紐付けとSSL化
有効期限が切れた
うん。知ってた。SSL証明書の有効期限が切れるって。だってメールが来てたから。
有効期限が切れそうなときに、届くメール
- タイトルが
Let's Encrypt certificate expiration notice for domain "XXXXXX.info"というメールが、期限の切れる約20日前と約10日前の2通、FromLet's Encrypt Expiry Bot <expiry@letsencrypt.org>で届いておりました。
(メールの文頭)
Your certificate (or certificates) for the names listed below will expire in 10 days (on 11 May 21 09:39 +0000). Please make sure to renew your certificate before then, or visitors to your web site will encounter errors.
(訳 by DeepL)
以下の名前に対するあなたの証明書(または複数の証明書)は、10日後(11 May 21 09:39 +0000)に期限切れとなります。それまでに証明書を更新しないと、あなたのウェブサイトにアクセスした際にエラーが発生します。
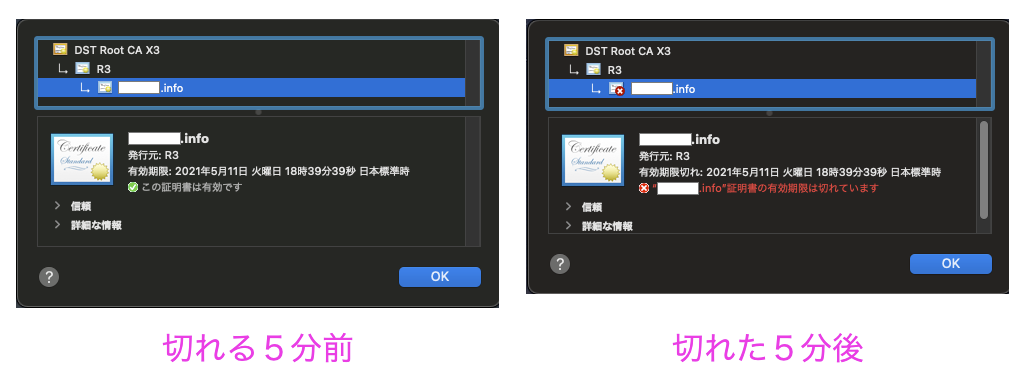
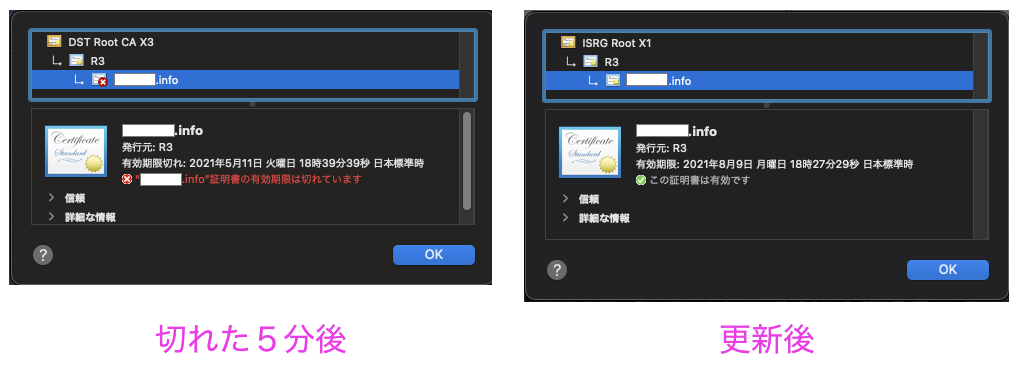
有効期限が切れる前後の比較
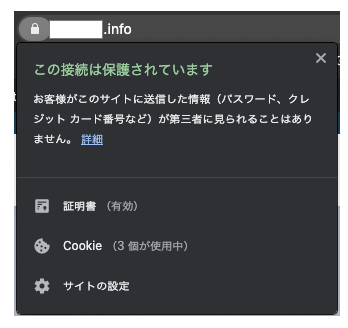
↑ 有効期限が切れても、鍵マークは健全表示でした(これは知らなかった...切れたまま時間が経てばNGになるのだろうか...?)
Let’s Encryptの有効期限を更新しよう
ココから本題です。
手順はとても単純。
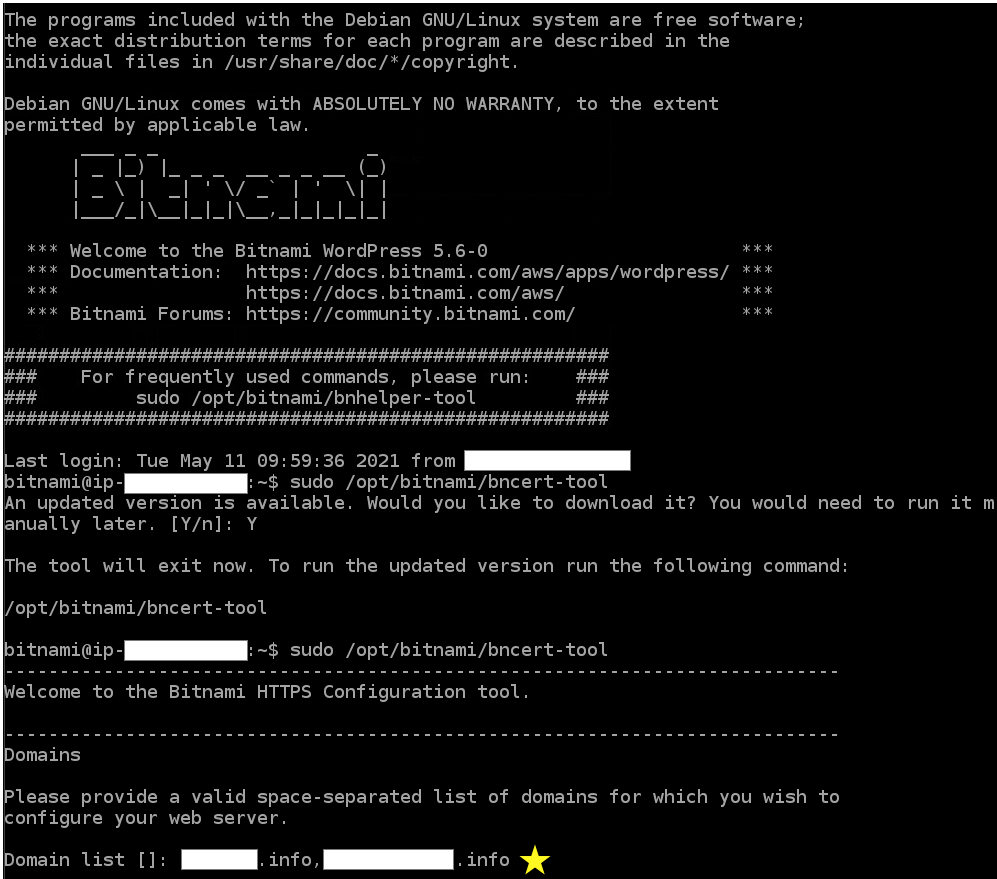
Lightsailのターミナルにアクセスし、下記のコマンドを実行するだけ
$ sudo /opt/bitnami/bncert-tool
ちなみに、このコマンドは初めてLightsailでSSL化するときと同じコマンドです。
ですので、詳細は**コチラ**を参照ください
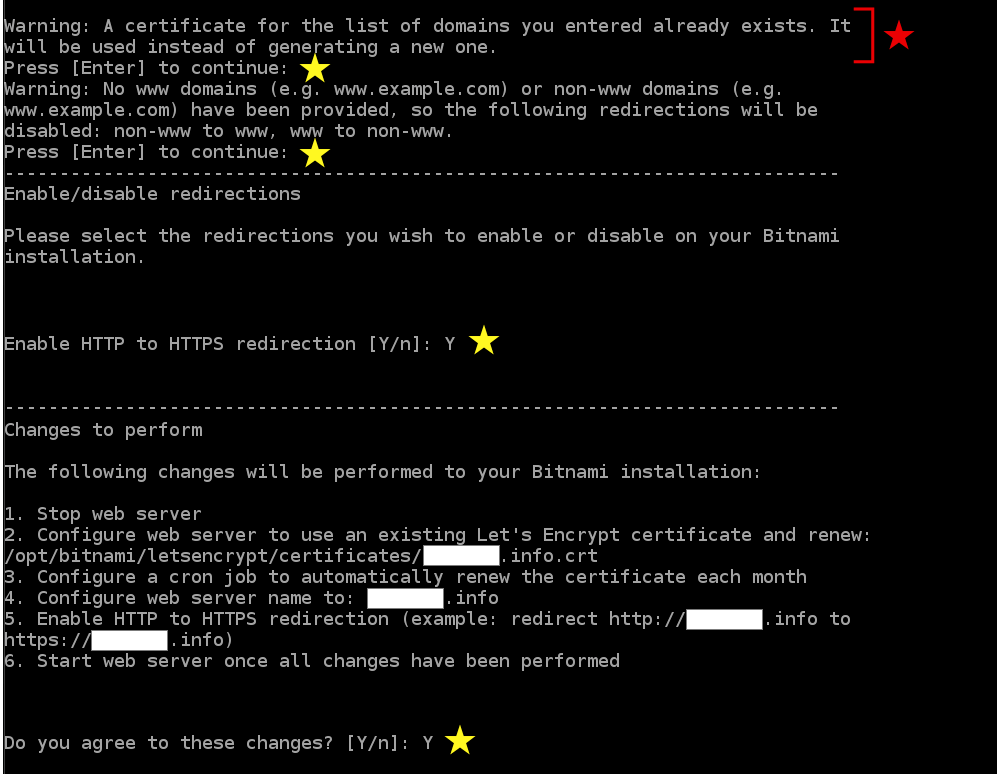
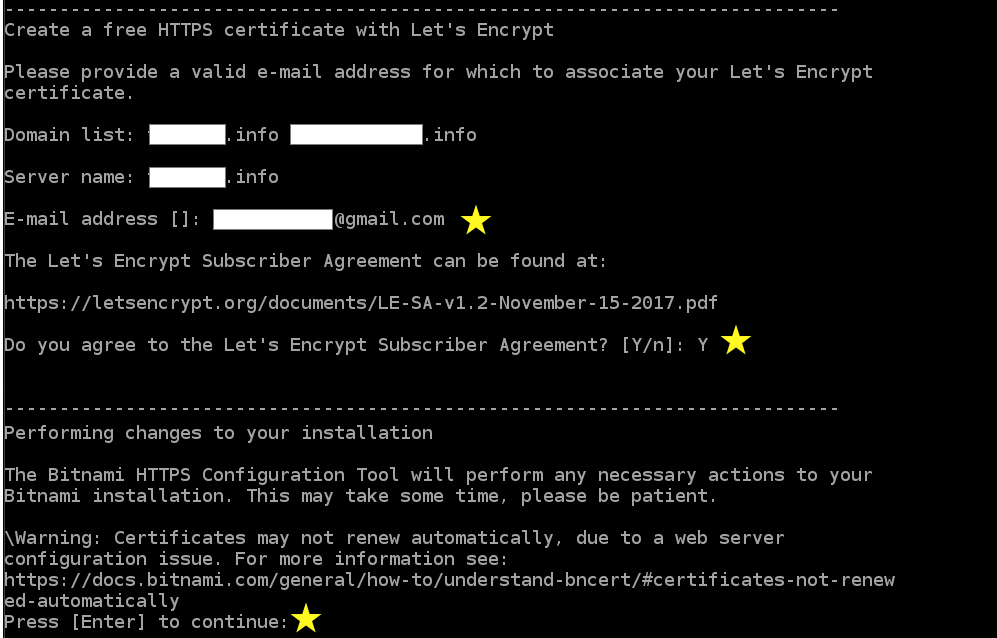
以下、更新中のスクショと、初回SSL化の際とは異なる点を記します。
黄色★マークは、何かしらの入力を求められる部分です。
私の場合は、サブドメインも使っているので、Domain listには2つ入っています。
注目すべきは赤色★マークのWarningのところ。
Warning: A certificate for the list of domains you entered already exists. It
will be used instead of generating a new one.
(訳 by DeepL)
警告です。入力されたドメインのリストに対する証明書は、すでに存在しています。この証明書は新しい証明書を生成する代わりに使用されます。
要は、更新のことを言っているのでしょう。Enterを入力して進めてください。
テキスト入力するところは、最初の方のDomain listと、中盤のE-mail addressぐらいで、あとはEnterかYの入力です。
ちょっと寄り道:自動更新されない場合
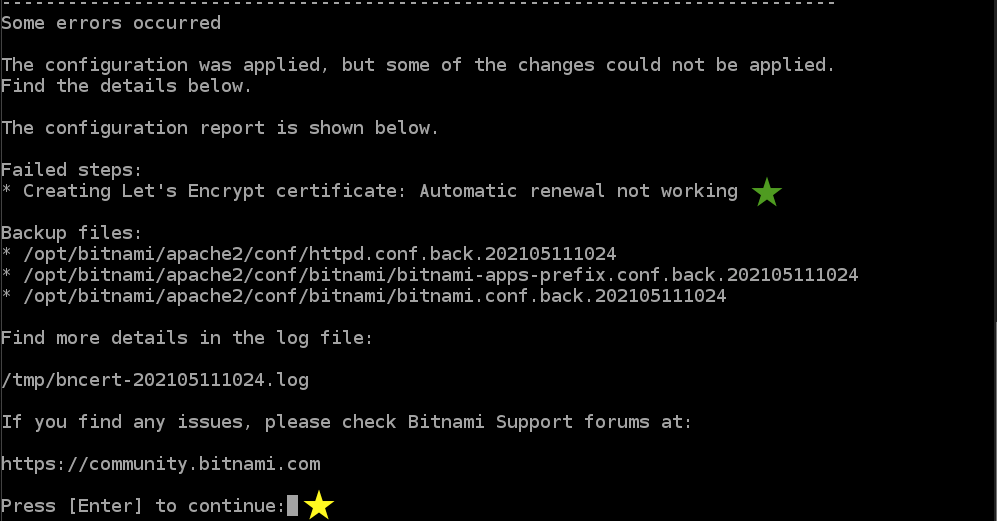
気になるところは緑色★マークのところ
Some errors occurred
The configuration was applied, but some of the changes could not be applied.
Find the details below.
Creating Let's Encrypt certificate: Automatic renewal not working
(訳 by DeepL)
いくつかのエラーが発生しました。
設定を適用しましたが、一部の変更を適用できませんでした。
詳細は以下のとおりです。
Let's Encrypt証明書の作成。自動更新が機能しません
自動更新が上手く設定できなかったようです。
解決方法が**ココ**に載っていました。
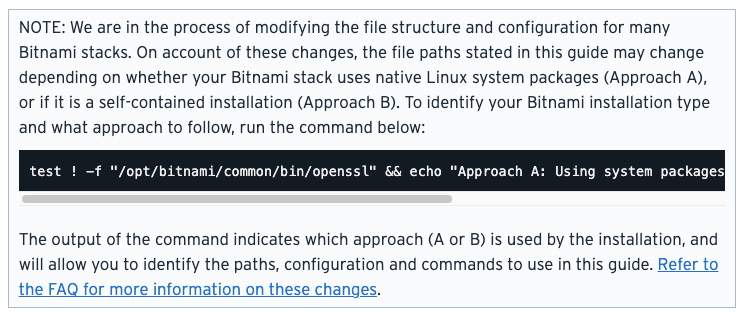
Step 1) 自身がApproach AかApproach Bかを調べる
- 以下のコマンドを実行し
Approach Bだった場合は、次のステップへ(Approach Aならココを熟読ください)
test ! -f "/opt/bitnami/common/bin/openssl" && echo "Approach A: Using system packages." || echo "Approach B: Self-contained installation."
Step 2) httpd-vhosts.confに追記する
(訳 by DeepL)
アプローチ B: 自己完結型の Bitnami インストール。アプリケーションの httpd-vhosts.conf ファイルの VirtualHost ブロック内に、以下の設定を追加します。
Alias /.well-known/ "/opt/bitnami/apps/letsencrypt/.well-known/"
<Directory "/opt/bitnami/apps/letsencrypt/.well-known">
Options +MultiViews
AllowOverride None
Require all granted
</Directory>
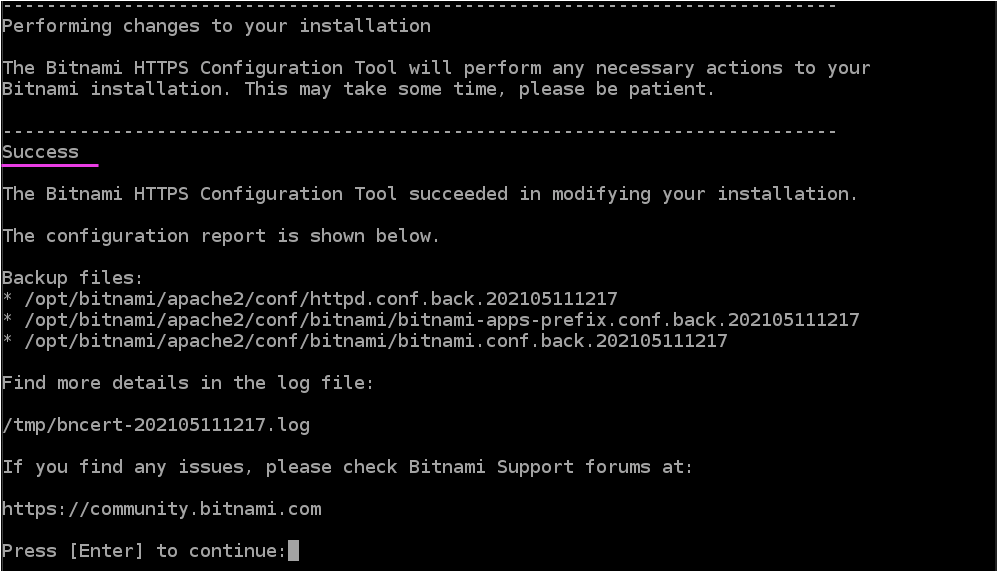
対応後、もう一度$ sudo /opt/bitnami/bncert-toolを実行
無事にSuccessになりました。今後は自動更新されるはずなので、この記事(備忘録)を見直すこともないかな?
更新の結果
ブラウザをリフレッシュしたら、ちゃんと有効期限が更新されていました。
