初めに
最近流行りというわけではないですが、AWSをついに学びました。
自分はフロントのあれやこれやが好みで、インフラは避けて生きていたのですが
今回学ぶ機会があり、いろいろ調べて実際に構築してみたのでそれを書いていきたいと思います。
すごいですねAWS(小並感)
全体で3部構成の記事になります。
第1部 「AWSを避けていたPGがALBとEC2を利用してWEBアプリケーション環境を構築してみた」←今ここ
第2部 「LambdaとCloud WatchによるEC2の夜間停止」
第3部 「ALBによるパスルーティング」
前置き
0から始めるAWS入門:概要を基本的に参考にして構築をしております。
解釈や説明の誤りなど、コメント欄に記載していただけると幸いです。
構成図
自分が今回構築するのは下記のような環境です。
VPC内にEC2を構築し、ALBによるルーティング制御を行います。

VPC
まず初めにVPCの構築をしていきたいと思います。
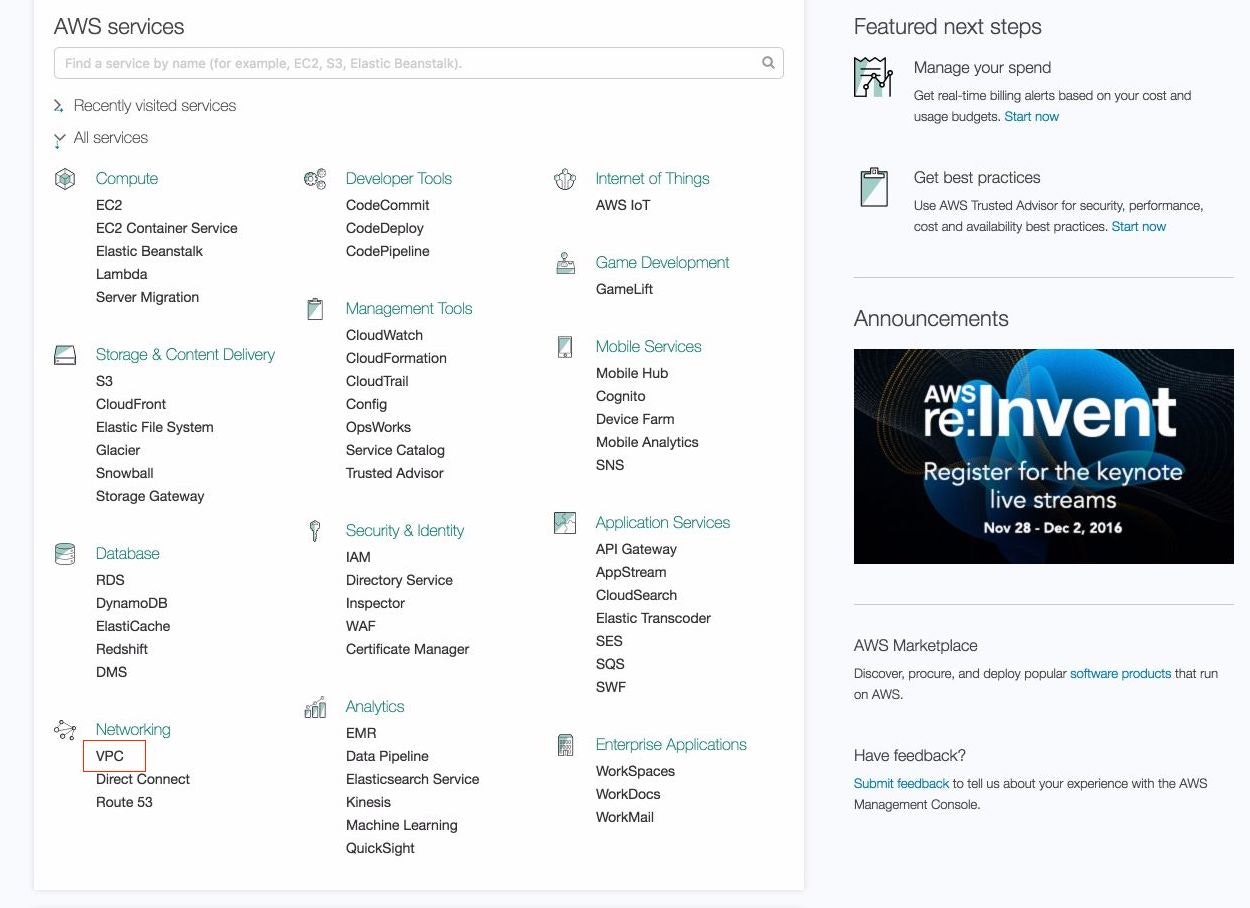
最近HOME画面が変わったのかわかりませんがHOME画面からVPCを選択。
左のメニューから「Your VPCs」を選択して「Create VPC」ボタンをクリック。

Create VPCというポップアップが出るので項目を埋めていきます。

| 項目 | 値 |
|---|---|
| Name Tag | 適当に |
| CIDR block | 10.0.0.0/16 |
| tenancy | Default |
埋め終わったら「Yes,Create」をクリックして完了。
Internet Gateways
VPCはAWSにある独立した環境なのでこのままではインターネット等でアクセスができません。
そのためインターネットとVPCを繋げるInternet Gatewaysを作成します。
VPCの画面の左のメニューから「Internet Gateways」を選択し、「Create Internet Gateways」ボタンをクリック。

Create Internet Gatewaysというポップアップが出るので項目を埋めていきます。

| 項目 | 値 |
|---|---|
| Name Tag | 適当に |
埋め終わったら「Yes,Create」をクリックして完了。
その後、「Attach to VPC」ボタンをクリック。

Attach to VPCポップアップが出るので項目を埋めていきます。

| 項目 | 値 |
|---|---|
| VPC | 先程作成したVPC |
埋め終わったら「Yes,Attach」をクリックして完了。
Route Tables
最後にRoute Tablesにルーティングの設定をして、インターネットの接続が完了します。

VPCの画面の左のメニューから「Route Tables」を選択し、先程作成したVPCのRoute Tablesを選択し、下部に表示されるタブから「Routes」を選択し、「Edit」をクリックします。

「Edit」をクリック後ルーティングの追加ができるため、項目を埋めていきます。
| 項目 | 値 |
|---|---|
| Destination | 0.0.0.0/0 |
| Target | 先程作成したInternet Gateways(補完で出るかと思います) |
埋めたら「Save」をクリックして完了。
Subnet
VPCの構築が終わったら次にSubnetを作成します。
SubnetはALBで2つ紐付けるのが必須のため、Availability Zoneで分けて2つ作成します。
VPCの画面の左のメニューから「Subnets」を選択し、「Create Subnet」ボタンをクリック。

Create Subnetというポップアップが出るので項目を埋めていきます。

1つ目
| 項目 | 値 |
|---|---|
| Name tag | 適当に |
| VPC | 先程作成したVPC |
| Availability Zone | ap-northeast-1a |
| CIDR | 10.0.0.0/24 |
2つ目
| 項目 | 値 |
|---|---|
| Name tag | 適当に |
| VPC | 先程作成したVPC |
| Availability Zone | ap-northeast-1c |
| CIDR | 10.0.1.0/24 |
埋め終わったら「Yes,Create」をクリックして完了。
EC2
VPCとSubnetの作成が終わったらいよいよEC2を作成します。
HOME画面からEC2を選択します。

左のメニューから「Instances」を選択して「Launch Instance」をクリックします。

Step 1: Choose an Amazon Machine Image (AMI)
Step 1でOSを選択します。
Amazon Linuxの右側の「Select」ボタンをクリック。

Step 2: Choose an Instance Type
次にStep 2としてインスタンスタイプを選択します。
デフォルトでチェックがついていると思いますが、t2.microの左側にチェックをいれ右下の「Next: Configure Instance Details」をクリック。

Step 3: Configure Instance Details
次にStep 3としてEC2の詳細設定をしていきます。
下記項目と値を埋めていきます。
| 項目 | 値 |
|---|---|
| Number of instances | 1 |
| Purchasing option | オフ |
| Network | 先程作成したVPC |
| Subnet | 先程作成したSubnet |
| Auto-assign Public IP | Enable |
| IAM role | None |
| Shutdown behavior | Stop |
| Enable termination protection | オフ |
| Monitoring | オフ |
| Tenancy | Shared |
下部のNetwork interfacesやAdvanced Detailsはそのままで右下の「Next: Add Storage」をクリック。

Step 4: Add Storage
次にStep 4としてストレージを設定します。
下記項目と値を埋めていきます。
SizeもVolume Typeもデフォルトのまま右下の「Next: Add Tags」をクリック。
| 項目 | 値 |
|---|---|
| Size (GiB) | 8 |
| Volume Type | General Purpose(SSD) |

Step 5: Add Tags
次にStep 5としてタグを指定します。
KeyはデフォルトのままNameにして、Valueにわかりやすいインスタンス名を入力して右下の「Next: Configure Security Group」をクリック。
| 項目 | 値 |
|---|---|
| Key | Name |
| Value | 適当に |

Step 6: Configure Security Group
次にセキュリティグループの設定をします。
今回EC2はALBからのみHTTPアクセスを受け付け、インターネット経由で直接アクセスされた場合はブロックするよう設定していきます。
また、SSHは自分のPCからのみ受け付けるよう設定します。
デフォルトではルールは一つだけのため「Add Rule」をクリックしてルールを増やします。
入力したら右下の「Review and Launch」をクリック。
※開発者がテストのため直接HTTPでアクセスしたい場合はHTTPのルールをMY IPに変更してください
SSH
| 項目 | 値 |
|---|---|
| Type | SSH |
| Protocol | TCP |
| Port Range | 22 |
| Sorce | My IP (自動でIPが設定されます) |
HTTP
| 項目 | 値 |
|---|---|
| Type | HTTP |
| Protocol | TCP |
| Port Range | 80 |
| Sorce | Custom (10.0.0.0/16) |

Step 7: Review Instance Launch
設定の確認をして、右下の「Launch」をクリック。
※画像は各タブを全て閉じています。

公開鍵、秘密鍵
最後にEC2のSSH接続のための公開鍵、秘密鍵の設定をします。
「Create a new key pair」を選択して新しい公開鍵、秘密鍵を作成します。
「Key pair name」に適当に名前を入力して「Download Key Pair」をクリックして、秘密鍵をダウンロードしてください。
秘密鍵は失くすと再発行はできないため、絶対に失くさないでください。
秘密鍵をダウンロードしたら「Launch Instances」をクリックして完了です。

SSH
インスタンスはEC2の左のメニューのInstancesから一覧で見れます。
作成したEC2を選択して「Description」タブで詳細な情報が見れます。
SSHに必要なIPは右下の「Public IP」に記載されています。

SSHは秘密鍵があるディレクトリに移動して下記コマンドを叩きます。
ssh ec2-user@【EC2のIP】 -i hoge.pem
初回時は「Are you sure you want to continue connecting (yes/no)?」と聞かれるため「yes」と入力して、SSH接続をします。
※「WARNING: UNPROTECTED PRIVATE KEY FILE!」と聞かれたら「sudo」をつけてSSHコマンドを叩いてみてください。
無事アクセスできたら、nginxをインストールして実際にEC2が起動しているのをブラウザからテストします。(テストのためセキュリティグループのHTTPにMy IPを付与している場合)
sudo yum install -y nginx
sudo /etc/init.d/nginx start
インストールして、起動したらブラウザにEC2のIPを入力して下記画面が出たらテスト完了です。

ALB
EC2も作成できたので次はALBを構築していきます。
ALBはApplication Load Balancerと呼ばれ最近発表された新しい機能です。
ELBと比べ、L7の機能が強化されています(HTTP2やWeb Socketに対応していたり、URLのパスによるルーティングを実装していたり)
ALBはELBと違ってロードバランサーにEC2を紐付けるのではなく、EC2をターゲットグループというグループでグループ化して、ターゲットグループをロードバランサーに紐付けます。
そのため、まずはターゲットグループを作成していきます。
Target Group
EC2の左のメニューから「Target Group」を選択し、「Create Target group」をクリック。

Create target groupというポップアップが出るので項目を埋めていきます。
Health check settingsとAdvanced health check settingsはそのままで「Create」をクリックして完了です。
| 項目 | 値 |
|---|---|
| Target group name | 適当に |
| Protocol | TCP |
| Port | 80 |
| VPC | 先程作成したVPC |

ターゲットグループを作成したらターゲットグループにEC2を紐付けます。
ターゲットグループを選択してTargetsタブから「Edit」をクリック。

Register and deregister instancesポップアップが出ます。
上部リストには現在紐付いているEC2の一覧、下部リストには現在起動してるEC2の一覧が表示されます。

下部リストから紐付けるEC2を選択して「Add to registerd」をクリックします。(下記画像はAdd to registerdクリック後)
EC2を紐付けたら右下の「Save」をクリックして完了です。

ALB
最後にALBを作成してALBにターゲットグループを紐付けて環境構築は完了です。
EC2の左のメニューから「Load Balancers」を選択し、「Create Load Balancer」をクリック。

ALBかELB(Classic Load Balancer)のどちらか聞かれるのでALBを選択して「Continue」をクリック(デフォルトでALBが選択されていると思います)

Step 1: Configure Load Balancer
まず、NameとSchemeを埋めます。
| 項目 | 値 |
|---|---|
| Name | 適当に |
| Scheme | internet-facing |
ListenersはHTTPを選択します。
| 項目 | 値 |
|---|---|
| Load Balancer Protocol | HTTP |
| Load Balancer Port | 80 |

Availability Zonesはまず、先程作成したVPCを選択します。
| 項目 | 値 |
|---|---|
| VPC | 先ほど作成したVPC |
VPCを選択すると、Available subnetsに先ほど作成したSubnetが2つ表示されます。
subnetの左側の「+」アイコンをクリックしてサブネットをSelected subnetsに移動させます。

移動後

移動させたら右下の「Next: Configure Security Settings」をクリック。
Step 2: Configure Security Settings
ここはListenersでHTTPSを選択した際の証明書を設置するところです。
今回はHTTPを選択しているので何もせず右下の「Next: Configure Security Groups」をクリック。

Step 3: Configure Security Groups
次にALB用のセキュリティグループを設定します。
今回はテストのため自分のIPのみ許可します。(Anywhere 0.0.0.0/0で誰からも受け付けたり良しなに変えてください)
| 項目 | 値 |
|---|---|
| Type | HTTP |
| Protocol | TCP |
| Port Range | 80 |
| Sorce | My IP (自動でIPが設定されます) |
作成したら右下の「Next: Configure Routing」をクリック。

Step 4: Configure Routing
次にALBにターゲットグループを紐付けます。
| 項目 | 値 |
|---|---|
| Target group | Existing target group |
| Name | 先程作成したターゲットグループ |
| Protocol | HTTP |
| Port | 80 |
Health checksとAdvanced health check settingsはそのままで右下の「Next: Register Targets」をクリック。

Step 5: Register Targets
ここでは登録されたEC2の一覧が表示されます。
ターゲットグループに登録されているEC2が表示されているのを確認したら右下の「Next: Review」をクリック。

Step 6: Review
最後に設定の確認をして、右下の「Create」をクリックしてALBの作成は完了です。

確認
ALBのStateがactiveになっているのを確認したらALBのDescriptionタブのDNS nameをブラウザから叩けば先程作成したEC2にアクセスにでき、nginxのwelcomeページが表示されると思います。

最後に
長くなりましたがこれで、基本的なWEBアプリケーション環境の構築は完了です。
まだ、サーバー構成などの知識はないですが、この環境にSSHの踏み台としてEC2を立ち上げたり、現状ALBがあまり役に立っていないのでターゲットグループに2つ目のEC2を紐付けたりいろいろやれることはありそうだなと実感しました。
次回はLambdaによるEC2の夜間停止を書いていきたいと思います〜。
※EC2やALBは起動していると料金が発生するので立ち上げたEC2は停止し、ALBは削除してください