Phoenix とExpoで作るスマホアプリ ①Phoenix セットアップ編 + phx_gen_auth
Phoenix とExpoで作るスマホアプリ ②JWT認証+CRUD編 <-本記事
Phoenix とExpoで作るスマホアプリ ③ファイルアップロード編
前回はelixir,phoenixのセットアップとプロジェクト作成、
phx-gen-authで認証機能付きのユーザーを作成しました
今回はGuardianを使用してフロントとのJWT認証とCRUD機能を実装していこうと思います
CRUD作成
前回の記事ではUserを作成しただけで、API周りの必要なファイルが作られていないため最初に以下のコマンドでAPI周りのファイルと一緒にCRUDも作成します
mix phx.gen.json Posts Post posts body:string user_id:references:users
通常のアプリケーションの場合は phx.gen.htmlですがAPIの場合はphx.gen.jsonを使用します
またユーザーに関連付けるのでuser_id:references:usersで外部キーと関連先を設定します
次にリレーションの設定を行っていきます
defmodule Sns.Posts.Post do
  use Ecto.Schema
  import Ecto.Changeset

  schema "posts" do
    field :body, :string
    field :user_id, :id # <- こっちは消す

    belongs_to :user, Sns.Users.User # <-こっちを書き加える
    timestamps()
  end

  @doc false
  def changeset(post, attrs) do
    post
    |> cast(attrs, [:body, :user_id]) # <- user_idを追加
    |> validate_required([:body, :user_id]) # <- user_idを追加
  end
end
defmodule Sns.Users.User do
  use Ecto.Schema
  import Ecto.Changeset

  @derive {Inspect, except: [:password]}
  schema "users" do
    field :email, :string
    field :password, :string, virtual: true
    field :hashed_password, :string
    field :confirmed_at, :naive_datetime

    has_many :posts, Sns.Posts.Post # <- これを追加
    timestamps()
  end
...
end
Guardianのセットアップ
Guardianについては こちら
mix.exsに以下を追加してmix deps.getを実行します
  defp deps do
    [
      ...
      {:guardian, "~> 2.0"}
    ]
  end
次にGuardianを こちら を参考に設定をしていきます
secret_keyは mix guardian.gen.secret で作成したものを貼り付けるか環境変数をセットしてください
config :sns, Sns.Guardian,
  issuer: "sns",
  secret_key: "Secret key. You can use `mix guardian.gen.secret` to get one"
defmodule Sns.Guardian do
  use Guardian, otp_app: :sns

  # Guardian.encode_and_sign(sign_up/sign_in)で実行
  def subject_for_token(user, _claims) do
    sub = to_string(user.id)
    {:ok, sub}
  end

  # headerのBearerのJWTを検証時(sign_up/sign_in以外のAPI)に実行
  def resource_from_claims(claims) do
    id = claims["sub"]
    resource = Sns.Users.get_user!(id)
    {:ok, resource}
  end
end
README.mdには subject_for_token, resource_from_claimsがエラー時の関数もありますが、compileで以下の警告がでるのと、エラー時には後述する guardianのerror_handlerとfallback_controllerにハンドリングされるため正常時の関数だけとしています
warning: this clause for resource_from_claims/1 cannot match because a previous clause at line 10 always matches
認証機能の実装(Model)
Guardianの設定が完了したので、認証部分を作成していきます
前回 phx-gen-authでweb画面の認証部分は作成されているので、それを流用してJWTの方も実装していきます
defmodule Sns.Users do
  ...
  alias Sns.Guardian

  @doc """
  Generates a JWT
  """
  def token_sign_in(email, password) do
    if user = get_user_by_email_and_password(email, password) do
      Guardian.encode_and_sign(user)
    else
      {:error, :unauthorized}
    end
  end
  ...
end
認証機能の実装(Controller,View)
次にコントローラーとビューを作成します
APIでよくある /api/v1みたいなフォルダ構成は controllers/api/v1とフォルダを作成し、作成したファイルのモジュール名を Sns.Api.V1.UserControllerとすれば大丈夫です
defmodule SnsWeb.Api.V1.UserController do
  use SnsWeb, :controller

  alias Sns.Users
  alias Sns.Users.User
  alias Sns.Guardian

  action_fallback SnsWeb.FallbackController

  def show(conn, _params) do
    user = Guardian.Plug.current_resource(conn)
    render(conn, "show.json", user: user)
  end

  def create(conn, %{"user" => user_params}) do
    with {:ok, %User{} = user} <- Users.register_user(user_params) do
      {:ok, token, _claims} = Guardian.encode_and_sign(user)
      conn |> render("jwt.json", token: token)
    end
  end

  def sign_in(conn, %{"email" => email, "password" => password}) do
    with {:ok, token, _claims} <- Users.token_sign_in(email, password) do
      conn |> render("jwt.json", token: token)
    end
  end
end
action_fallbackで設定しているFallbackControllerは、
controller内でエラーが起こった際に対応したエラーを返すもので、
これによっていちいちエラー処理を書かなくて良くなります
またこれとchangeset_viewはphx.gen.json で先程モデルを作成した時に一緒に作成されています
viewはログインと新規作成時に返すJWTとテスト用のshowしか無いため、必要に応じて作成してください
defmodule SnsWeb.Api.V1.UserView do
  use SnsWeb, :view

  def render("show.json", %{user: user}) do
    %{data: %{id: user.id, email:  user.email}}
  end

  def render("jwt.json", %{token: token}) do
    %{token: token}
  end
end
認証機能の実装(Router)
最後にrouter部分になります
認証が必要な箇所はjwt_authenticated pipeを通るようにします
defmodule SnsWeb.Router do
  alias SnsWeb.ApiAuthPipeline

  pipeline :jwt_authenticated do
    plug ApiAuthPipeline
  end

  scope "/api/v1", SnsWeb do
    pipe_through :api

    post "/sign_up", Api.V1.UserController, :create
    post "/sign_in", Api.V1.UserController, :sign_in
  end

  scope "/api/v1", SnsWeb do
    pipe_through [:api, :jwt_authenticated]

    get "/mypage", Api.V1.UserController, :show
    resources "/posts", Api.V1.PostController, except: [:new, :edit]
  end
end
Guardianのセットアップで作成したguardian.exとguardianのエラー時のハンドリングを行うmoduleを設定します
defmodule SnsWeb.ApiAuthPipeline do
  use Guardian.Plug.Pipeline, otp_app: :sns,
    module: Sns.Guardian,
    error_handler: SnsWeb.ApiAuthErrorHandler

  plug Guardian.Plug.VerifyHeader, realm: "Bearer"
  plug Guardian.Plug.EnsureAuthenticated
  plug Guardian.Plug.LoadResource
end
どのようなハンドリングを行うかを設定します
defmodule SnsWeb.ApiAuthErrorHandler do
  import Plug.Conn

  def auth_error(conn, {type, _reason}, _opts) do
    body = Jason.encode!(%{error: to_string(type)})
    send_resp(conn, 401, body)
  end
end
ユーザーsignup/signin 動作確認
実装は以上で終了ですので、動作確認をしていきましょう
動作確認にはPostmanを使用しました
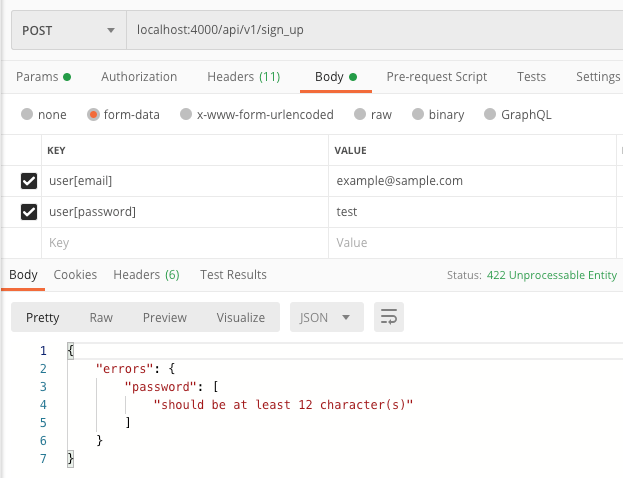
新規作成失敗時
phx-auth-genの初期設定でパスワードは12文字以上となっているのでエラーになります
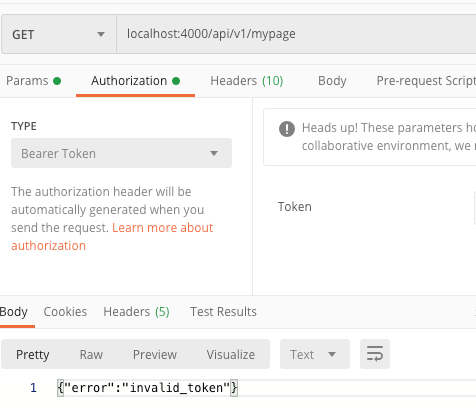
トークン認証はAuthorizationタブを選択しtypeをBearer Tokenにしてください
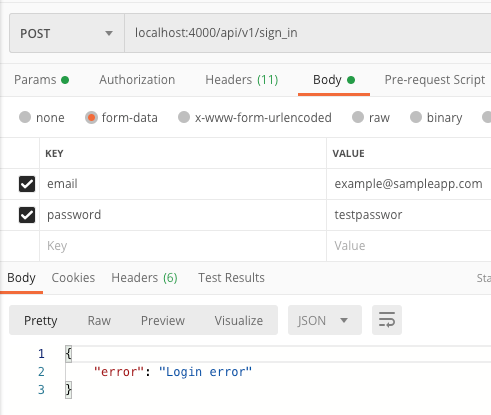
jwt認証失敗時
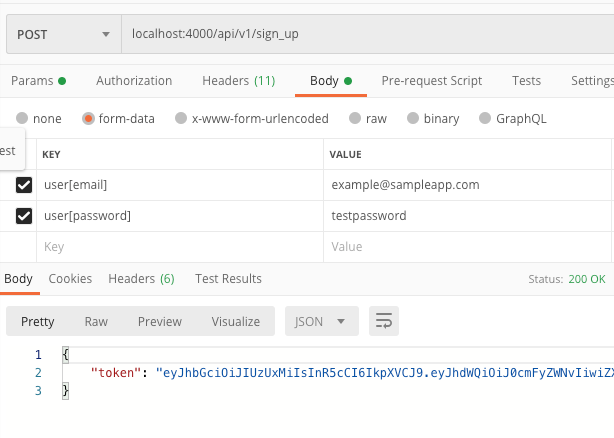
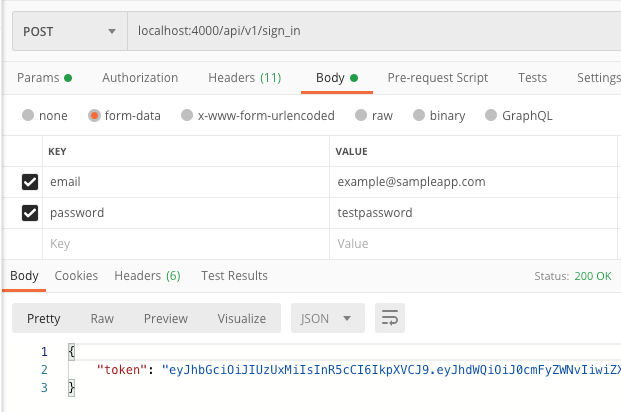
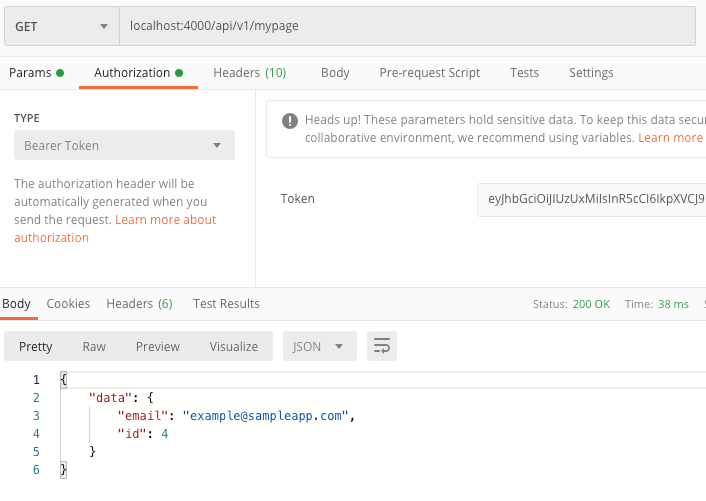
jwt認証成功時
ログイン成功か新規作成成功で取得したtokenをAuthorizationのTokenにセットしてください
正常時のレスポンスとエラー時のレスポンス両方が来ていることを確認できました
CRUD動作確認
次にCRUDの方も動作確認を行っていきますが、その前に少し細工をしていきます
Postを作成するときにuser_idが必要になるのですがそれを取得する際に
alias Sns.Guardian

def create(conn, %{"post" => params})
  post_params = Map.put(
      params,
      :user_id,
      Guardian.Plug.current_resource(conn).id
  )
  ....
end
と面倒なのでpipelineで処理を行ってconn.user_idで取得できるようにしていきます
defmodule SnsWeb.AuthHelper do
  import Guardian.Plug

  def init(opts), do: opts

  def call(conn, _opts) do
    Map.put(conn, :user_id, current_resource(conn).id)
  end
end
defmodule SnsWeb.Router do
  use SnsWeb, :router
  alias SnsWeb.ApiAuthPipeline
  alias SnsWeb.AuthHelper # <- これを追加
  import SnsWeb.UserAuth

  pipeline :jwt_authenticated do
    plug ApiAuthPipeline
    plug AuthHelper # <- これを追加
  end
  def create(conn, %{"post" => post_params}) do
    with {:ok, %Post{} = post} <- Posts.create_post(
      Map.put(post_params, "user_id", conn.user_id) # <- ここを書き換え
    ) do
      conn
      |> put_status(:created)
      |> put_resp_header("location", Routes.post_path(conn, :show, post))
      |> render("show.json", post: post)
    end
  end
これで少し楽になりました
このように全体を通して途中で処理を入れたいときはpipelineに組み込むとスッキリします
では動作確認を行いましょう
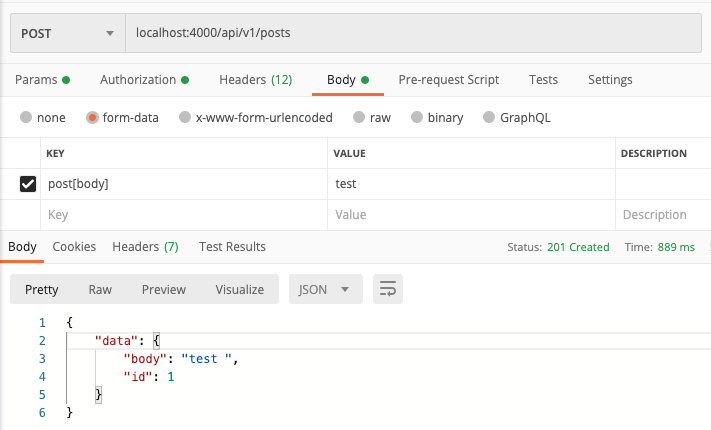
記事作成
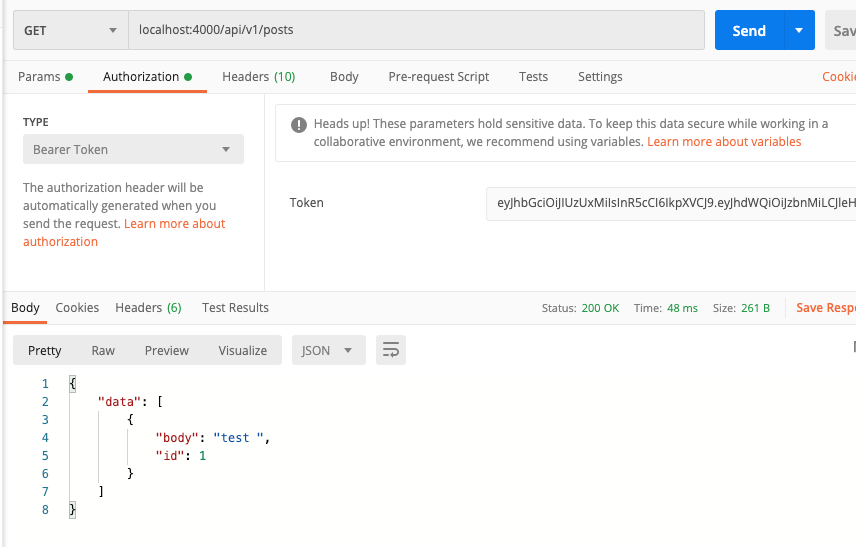
記事一覧
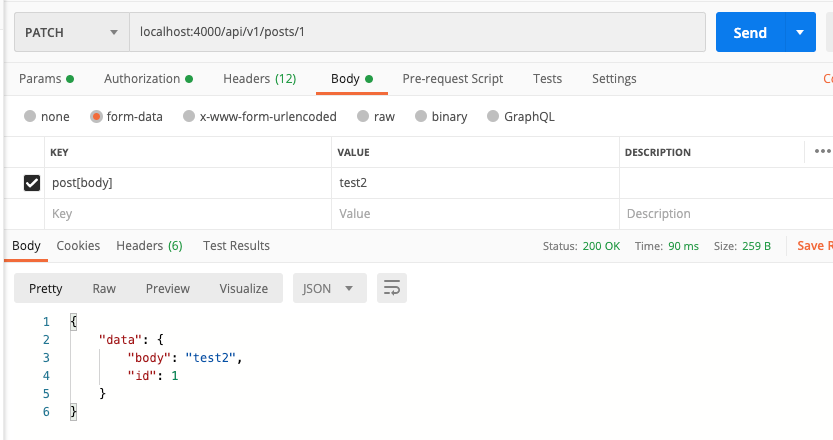
記事編集
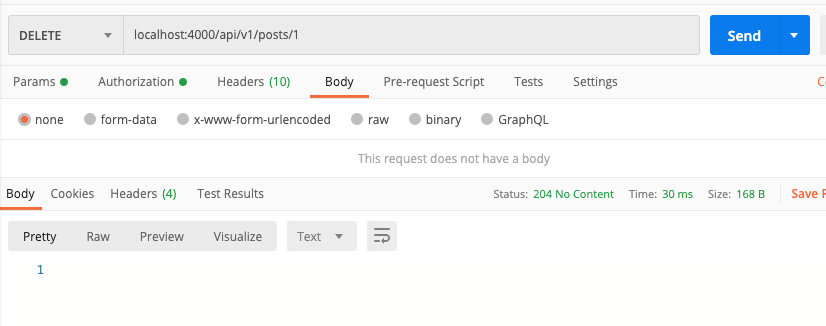
記事削除
204 no_contentが返ってきてます
CRUDが正常に動いているのが確認できました
JWT認証+CRUD編は以上になりますありがとうございました
次回はPostに画像を添付できる、ファイルアップロード部分を作成していきます
つまずきポイント
Repoでuserのレコードは取得できたがGuardianの認証がうまく行かないときに
IO.inspect(Guardian.encode_and_sign(user))
で実行した時に以下のエラーが出ていました
{:error, :secret_not_found}
原因はconfig.exs のsercret_keyのタイポでした
otp_appやissuer,app名もタイポミスしやすい箇所ですので、Guardianだけがうまく行かないというときはまずタイポを疑ってください
今回の差分
参考ページ
- https://medium.com/@njwest/jwt-auth-with-an-elixir-on-phoenix-1-3-guardian-api-and-react-native-mobile-app-1bd00559ea51
- https://medium.com/@zeke8402/your-first-versioned-api-with-phoenix-framework-da0bc7897db6
- https://github.com/ueberauth/guardian#installation
- https://elixirschool.com/ja/lessons/libraries/guardian/
- https://www.tech-note.info/entry/phoenix-7-controllers-3
- https://qiita.com/shufo/items/fadf75b13d9bef408ab0
- https://github.com/ueberauth/guardian/issues/523
