前回:Re:ゼロから始める爆速コーディング生活
前回みなくてもなんとかなるかも
gulpfile.jsファイル周り色々更新しました。
今回使うテンプレはgitに置いてます。
https://github.com/teradonburi/htmltemplate.git
とりあえずサクッと動かす
- gulp(ファイル修正時に画面リロード)
- snippetsで高速コーディング(Bracketsエディタ使います)
- less(cssにコンパイル)
次のコマンドでダウンロードします。
NodeJSを使っているので入れてない人はNodebrew経由でインストールしましょう。
バージョン管理に関して最近はNVMよりもNodebrewの方が新しいバージョン入るのでこちらのほうがいいかも
NVMを入れてた人はアンインストールして乗り換えましょう
http://qiita.com/sinmetal/items/154e81823f386279b33c
$git clone https://github.com/teradonburi/htmltemplate.git
$echo "-----------NodeJSインストール---------"
$curl -L git.io/nodebrew | perl - setup
$export PATH=$HOME/.nodebrew/current/bin:$PATH
$nodebrew install-binary v6.4.0
$nodebrew use v6.4.0
$echo "-----------ここまで-----------"
$echo "-----------ここからはNodeJSのモジュールをインストール-----------"
$npm install -g gulp@3.9.1 node-inspector
$npm install
Windowsの人はNodistで入れましょう
参考:nodistでNode.jsをバージョン管理
Bracketsのインストールはこちら
http://brackets.io/
Bracketsインストール後、snippetsプラグインをインストールします。
snippetsは記念品という意味で独自にプログラムの部品を登録して特定のキーワードで展開することができます。
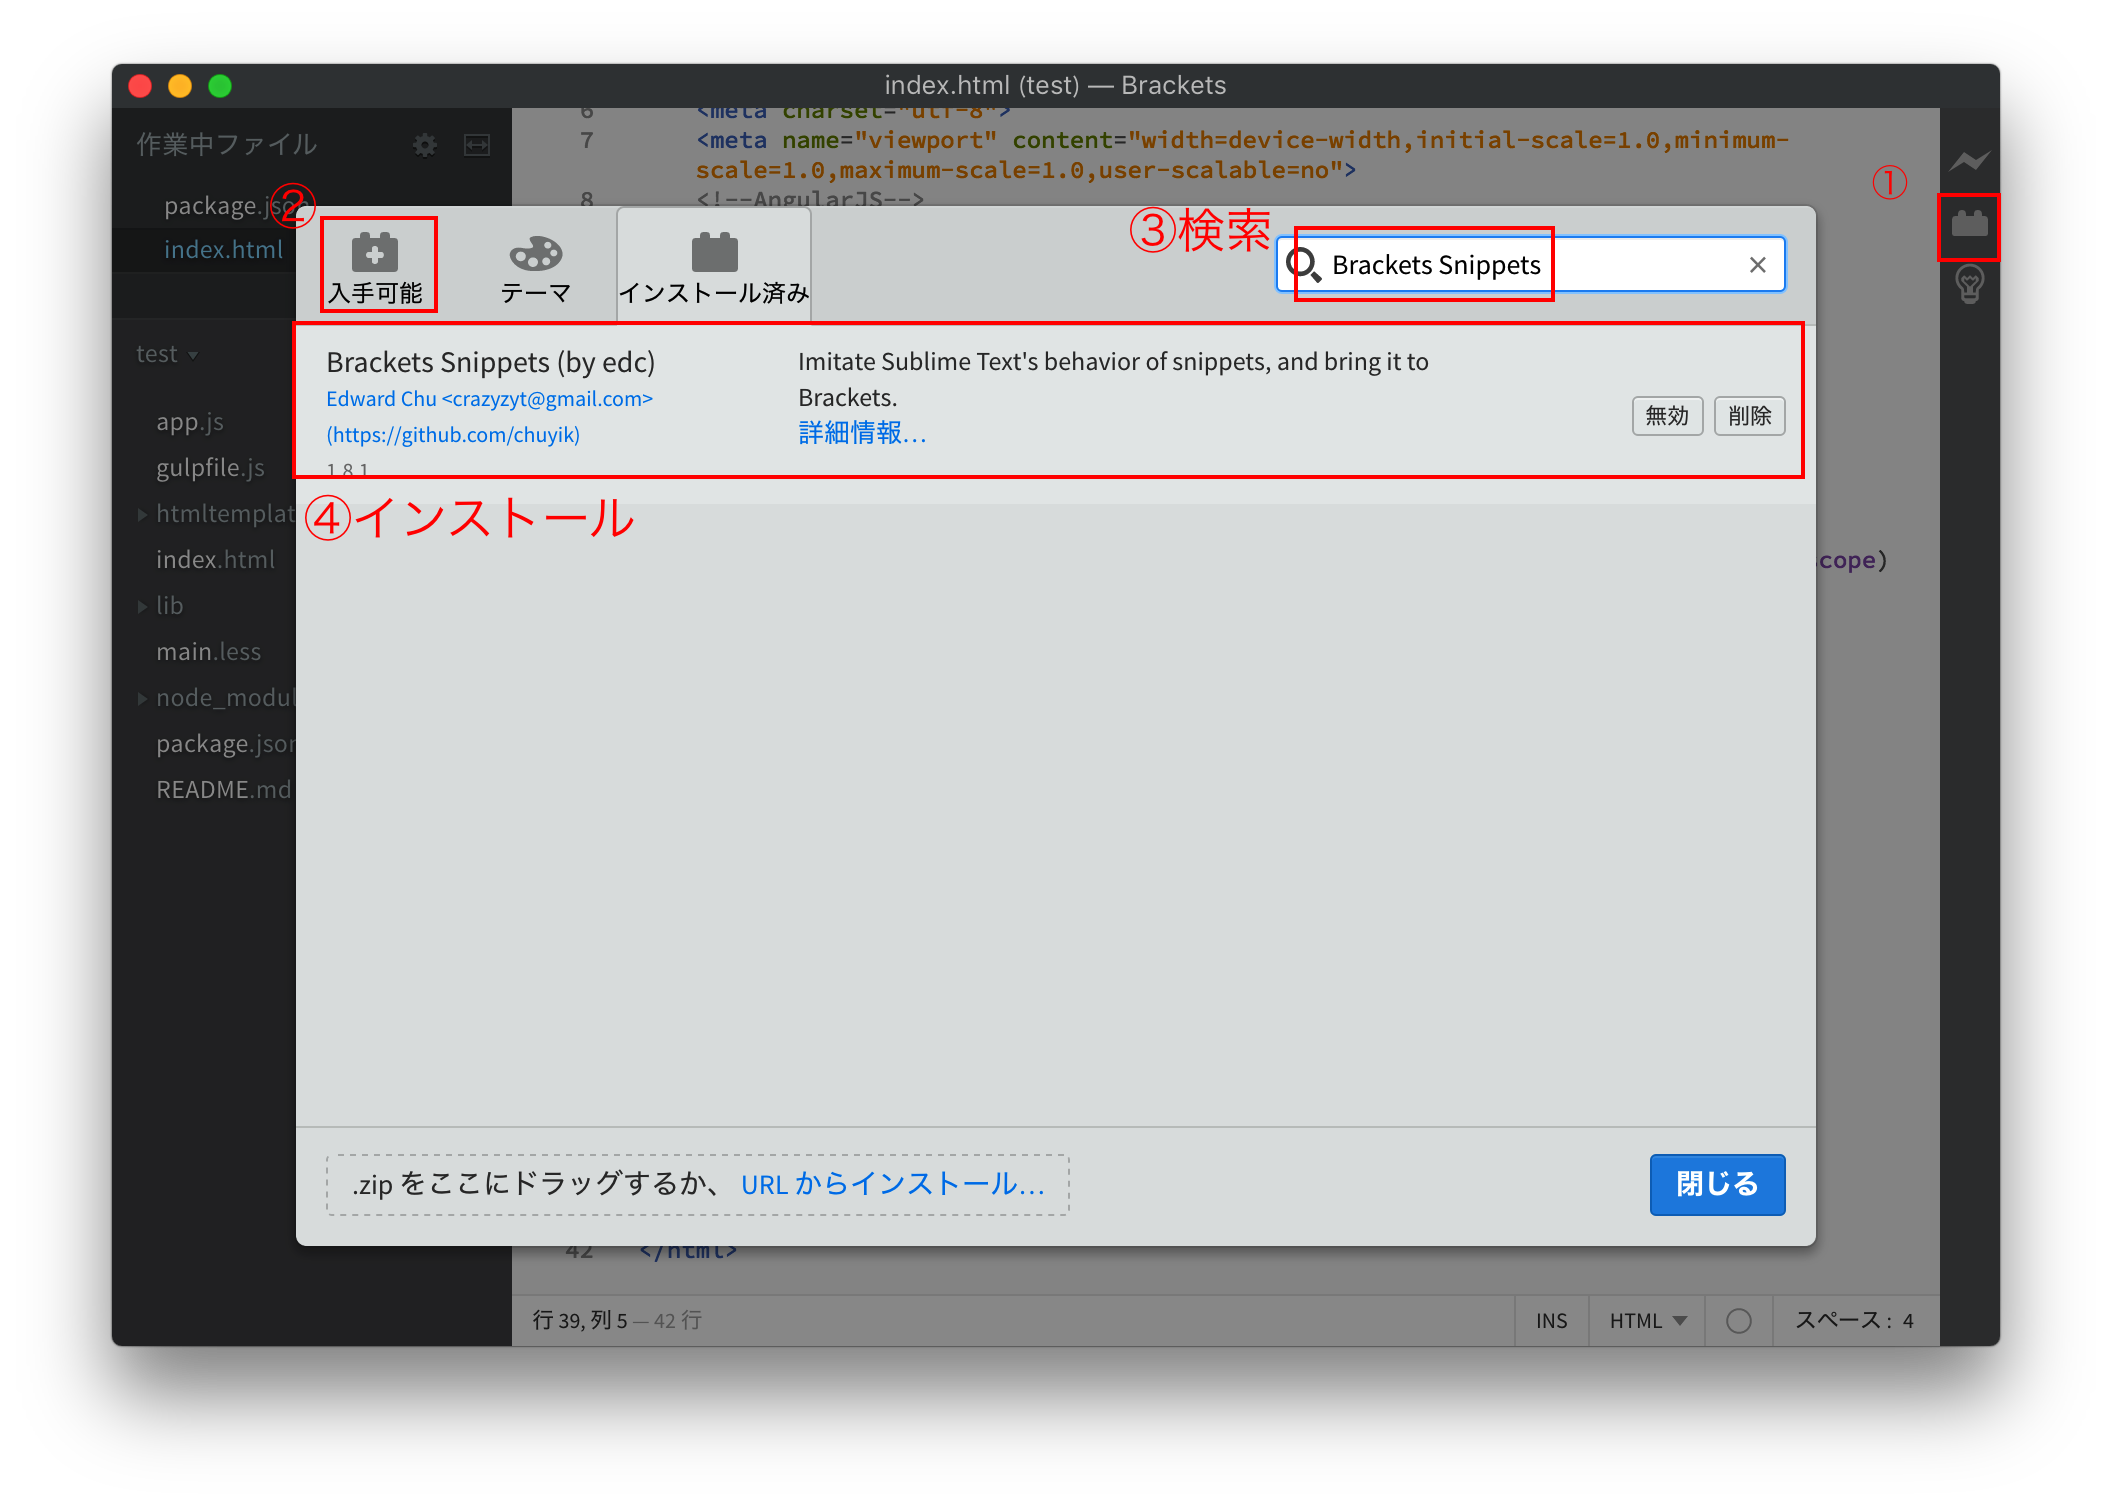
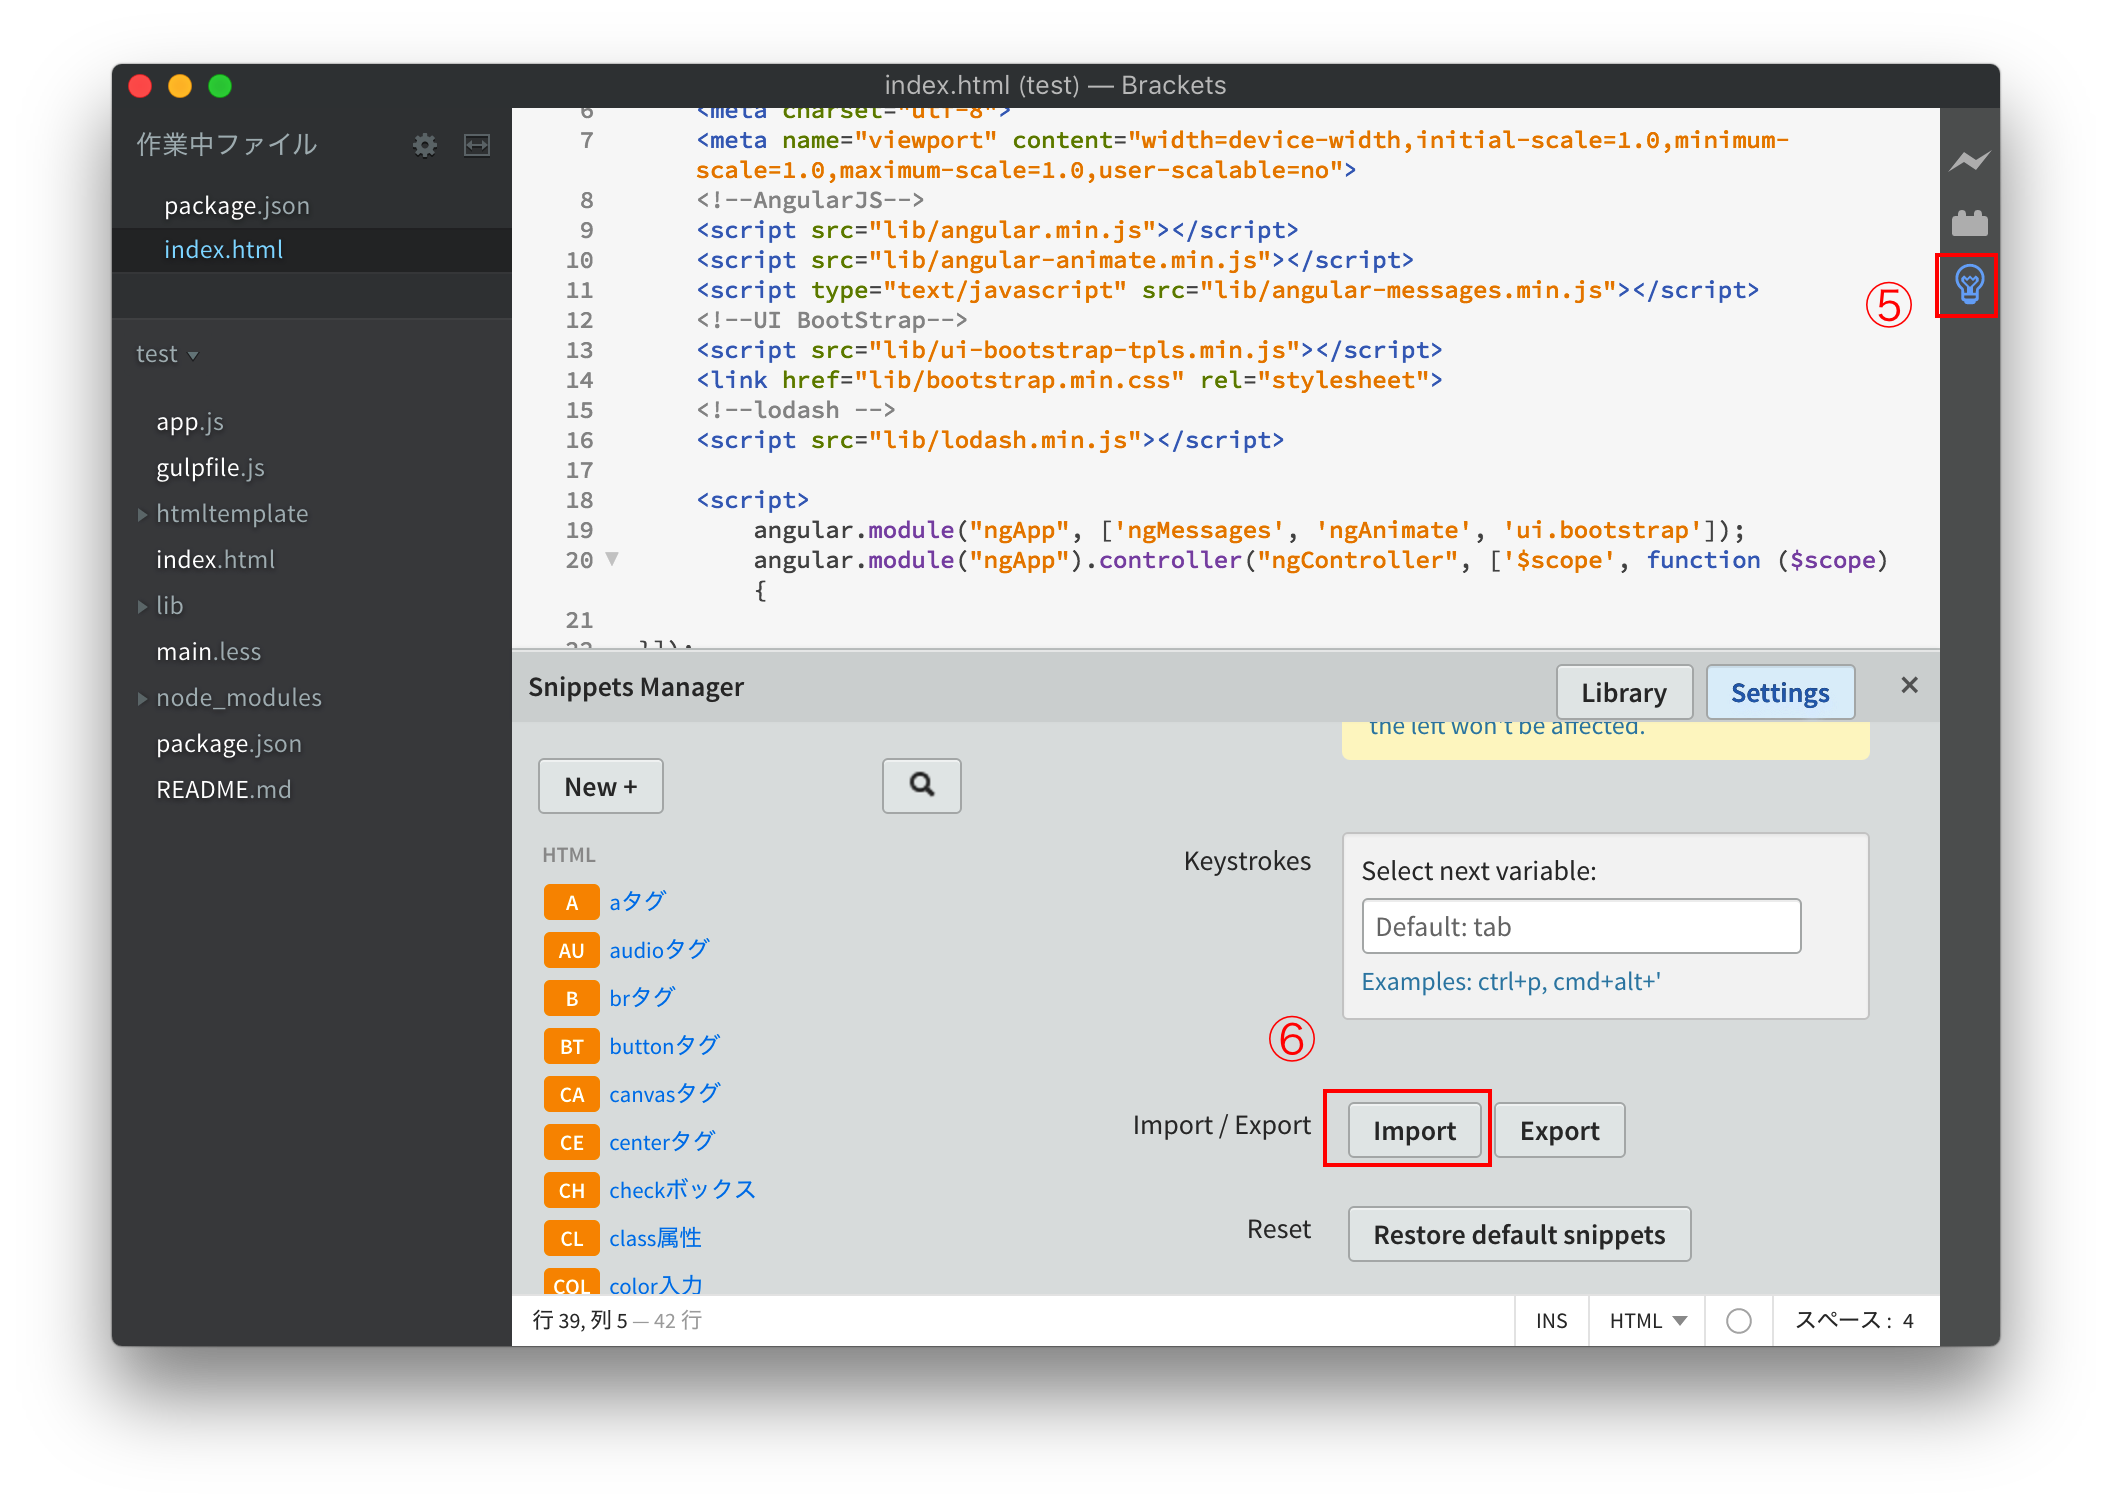
インストール後、電球アイコンをクリックして、Settings項目にてフォルダ内のexports-snippets.ymlをインポート
Bracketsメニュー欄のファイルからコマンドラインショートカットをインストールします。

次のコマンドでブラウザとBracketsが開きます(さらにWebサーバも起動します)。
$gulp
Windowsの人は動かんかもなのでその場合はgulpfile.jsの次の箇所をコメントアウトして(Mobileブラウザでのリロード用)
Ctrl+C→gulpで再起動してください。
    // Browser livereload
    stream = gulp.src('./')
        .pipe(webserver({
        //host: '0.0.0.0', // コメントアウト
index.html,main.less(とapp.js)のいずれかを編集して保存するとブラウザがリロードします。

HTML,JavaScript,lessに多数snippetsを登録してあるので色々いじってみてください
登録済みのsnippetsはsnippetsプラグインから確認、編集ができます。
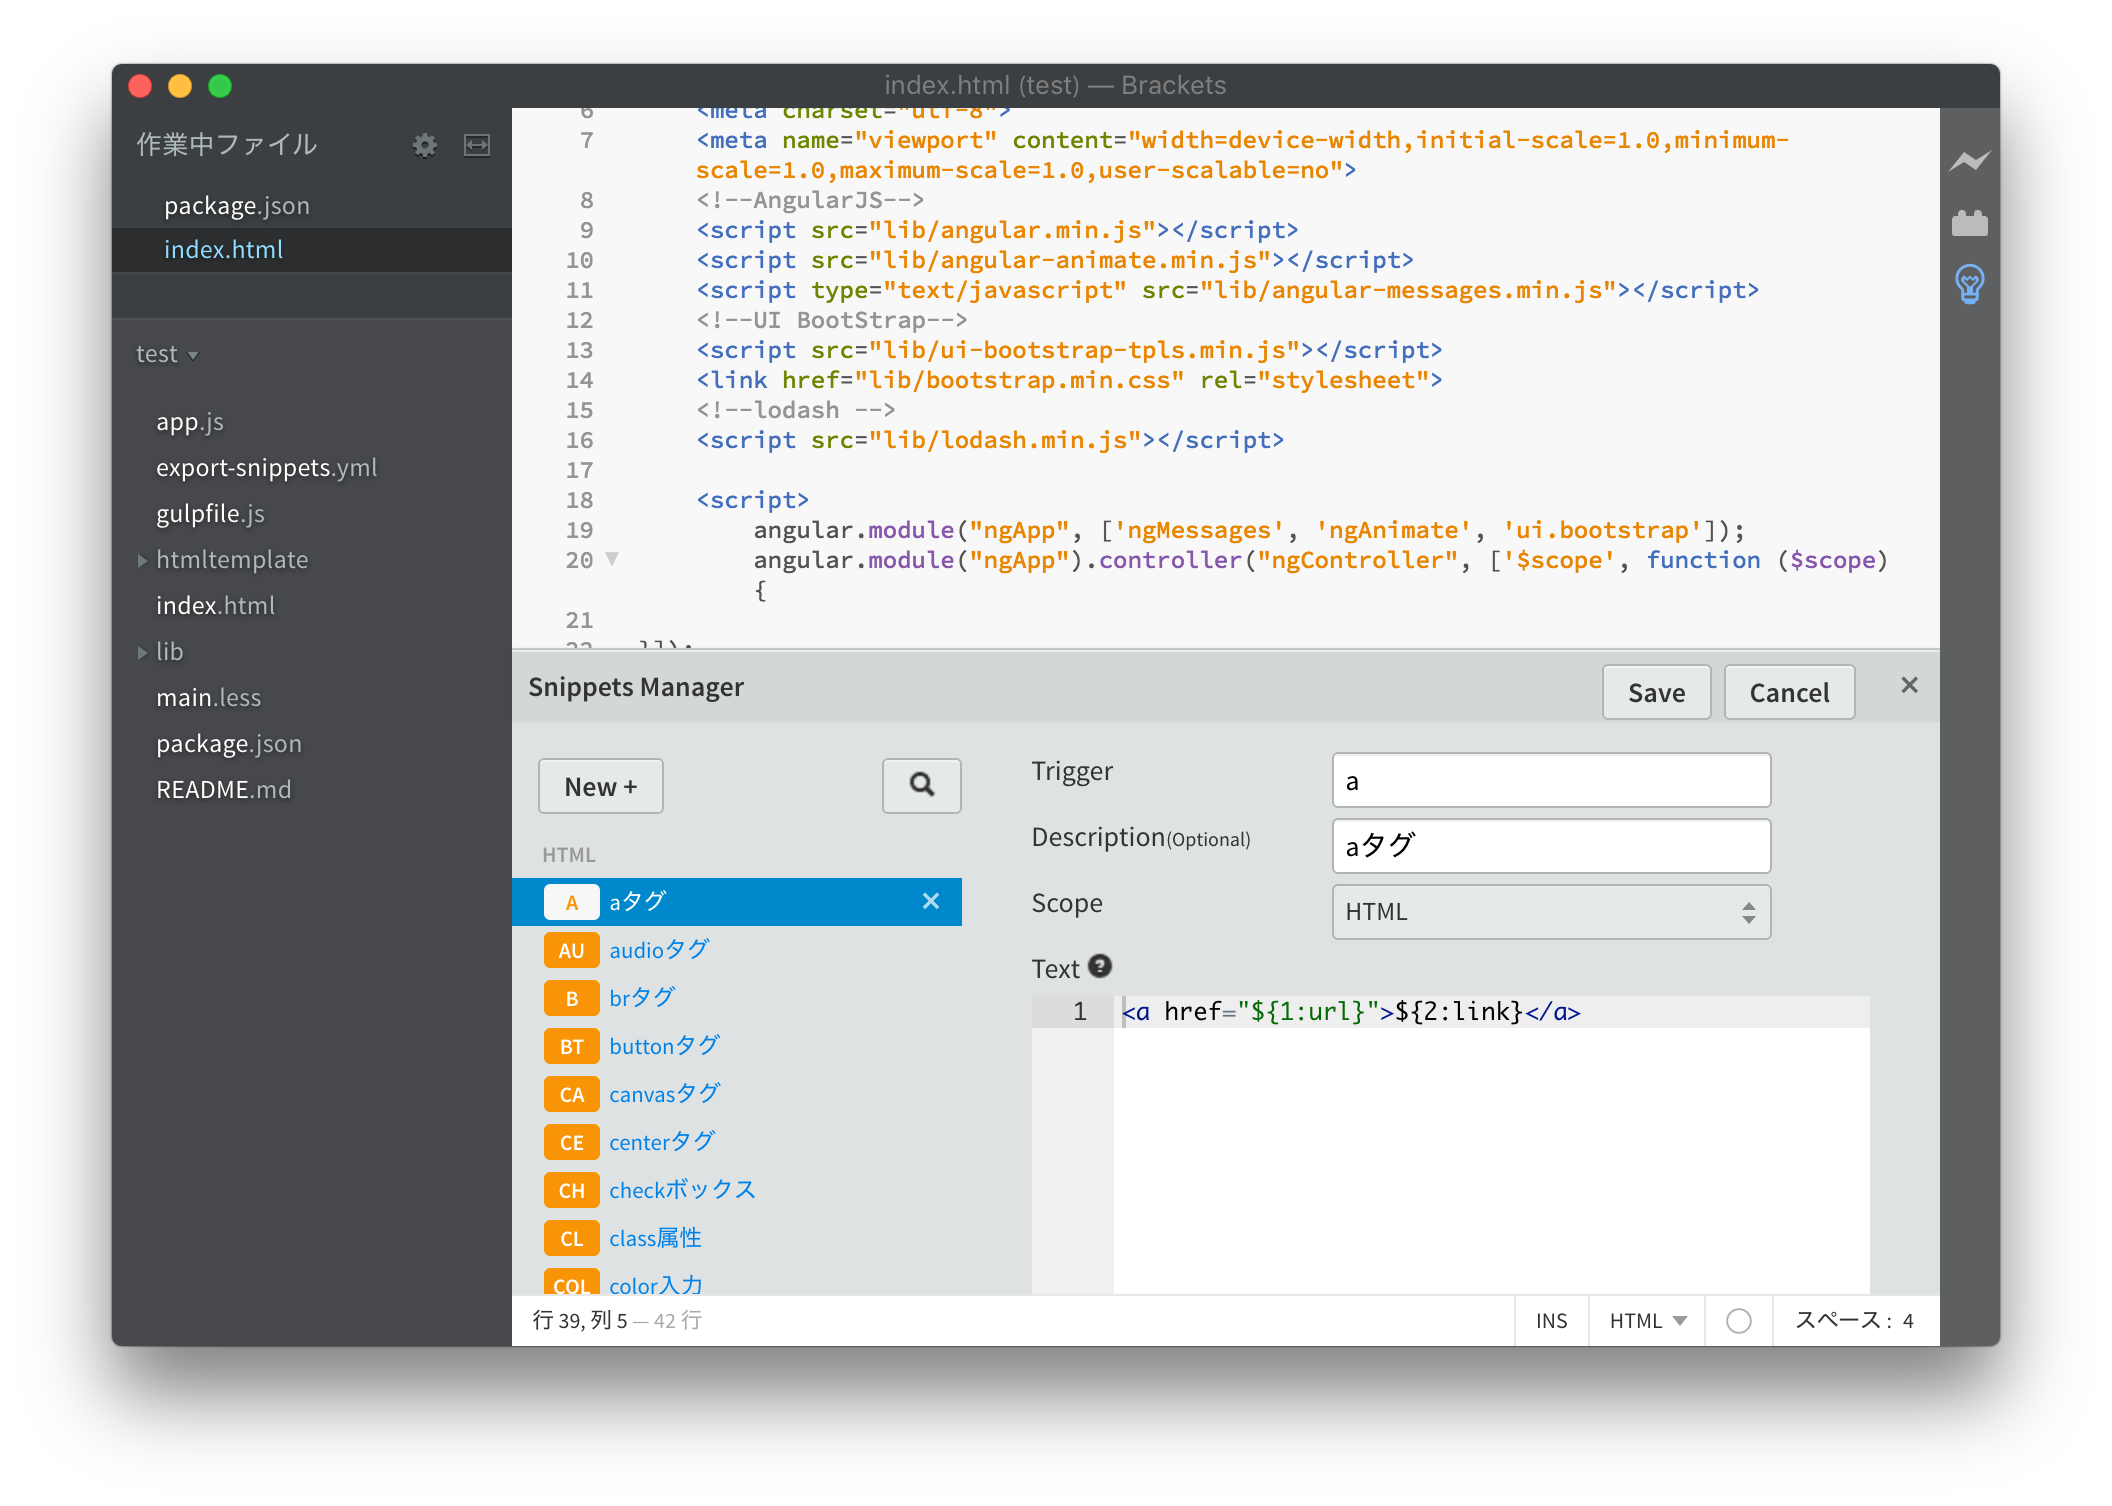
以下、私が作ったいくつか便利なsnippetsを紹介します。
画面配色
一般的にベースカラー(75%)、メインカラー(20%)、アクセントカラー(5%)
の割合で使用するといいとされています。
次のような使い分けをするとよいらしいです。
ベースカラー:背景色
メインカラー:サービスや商品のテーマの色
アクセントカラー:ボタンなどの目立たせたい要素
参考:WEBデザインで押さえるべき配色(ベース、メイン、アクセント)の基本「3つのカラー」
main.lessにて変数で定義してあります。
@base_color: #ffffff;// ベースカラー:75%(背景色)
@main_color: #0088ff; // メインカラー:20%(テーマ色)
@accent_color:spin(@main_color, 180);// アクセントカラー:5%(メインカラー色相の逆位相、もしくは黒、白などメインカラーに対して浮く色)
@support_color:#e0e0e0; // 4色目としてグレーなども使いやすい
レイアウト
flexboxを使用しております。
下記参考にさせていただきました。
参考:floatより辛くない「flexbox」でざっくりレイアウト
main.lessの次の部分が影響
/* flexbox layout */
@header_height:7rem;
@footer_height:3rem;
@sidebar_width:15rem;
.box{
    min-height: 100vh;
    height: 100%; /* for IE11 */
    .flex-display();
    .flex-direction(column);
}
.header{
    height: @header_height;
    background: @support_color;
}
.wrapper{
    .flex-display();
    .flex(1);
    height: 100%;
}
.left{
    width: @sidebar_width;
    background: @main_color;
}
.contents{
    .flex(1);
    background: @base_color;
}
.right{
    width: @sidebar_width;
    background: @main_color;
}
.footer{
    height: @footer_height;
    background: @support_color;
}


/* flexbox masonry */
@masonry-width:33.3%;
@masonry-height: 100vw;
.masonry{
    .flex-display();
    .flex-direction(column); // 縦並び
    .justify-content(flex-start); // 左寄せ
    .flex-wrap(wrap); // 折り返し
    height: @masonry-height; // vw=ビューポートの横幅、3列になるように調整

    .item{
        width: @masonry-width; // 3列
        img{
            width: 100%;
        }
    }
}
col-two
2列レイアウト
        <div class="wrapper">
            <div class="left">

            </div>
            <div class="contents">

            </div>
        </div>
row-three
ヘッダー・フッター付きレイアウト
        <div class="box">
            <div class="header"></div>
            <div class="contents"></div>
            <div class="footer"></div>
        </div>

holy-grail
サイドバー、ヘッダーフッター付きレイアウト
     <div class="box">
            <div class="header">
            </div>
            <div class="wrapper">
                <div class="left">
                </div>
                <div class="contents">
                </div>
                <div class="right">
                </div>
            </div>
            <div class="footer">
            </div>
    </div>

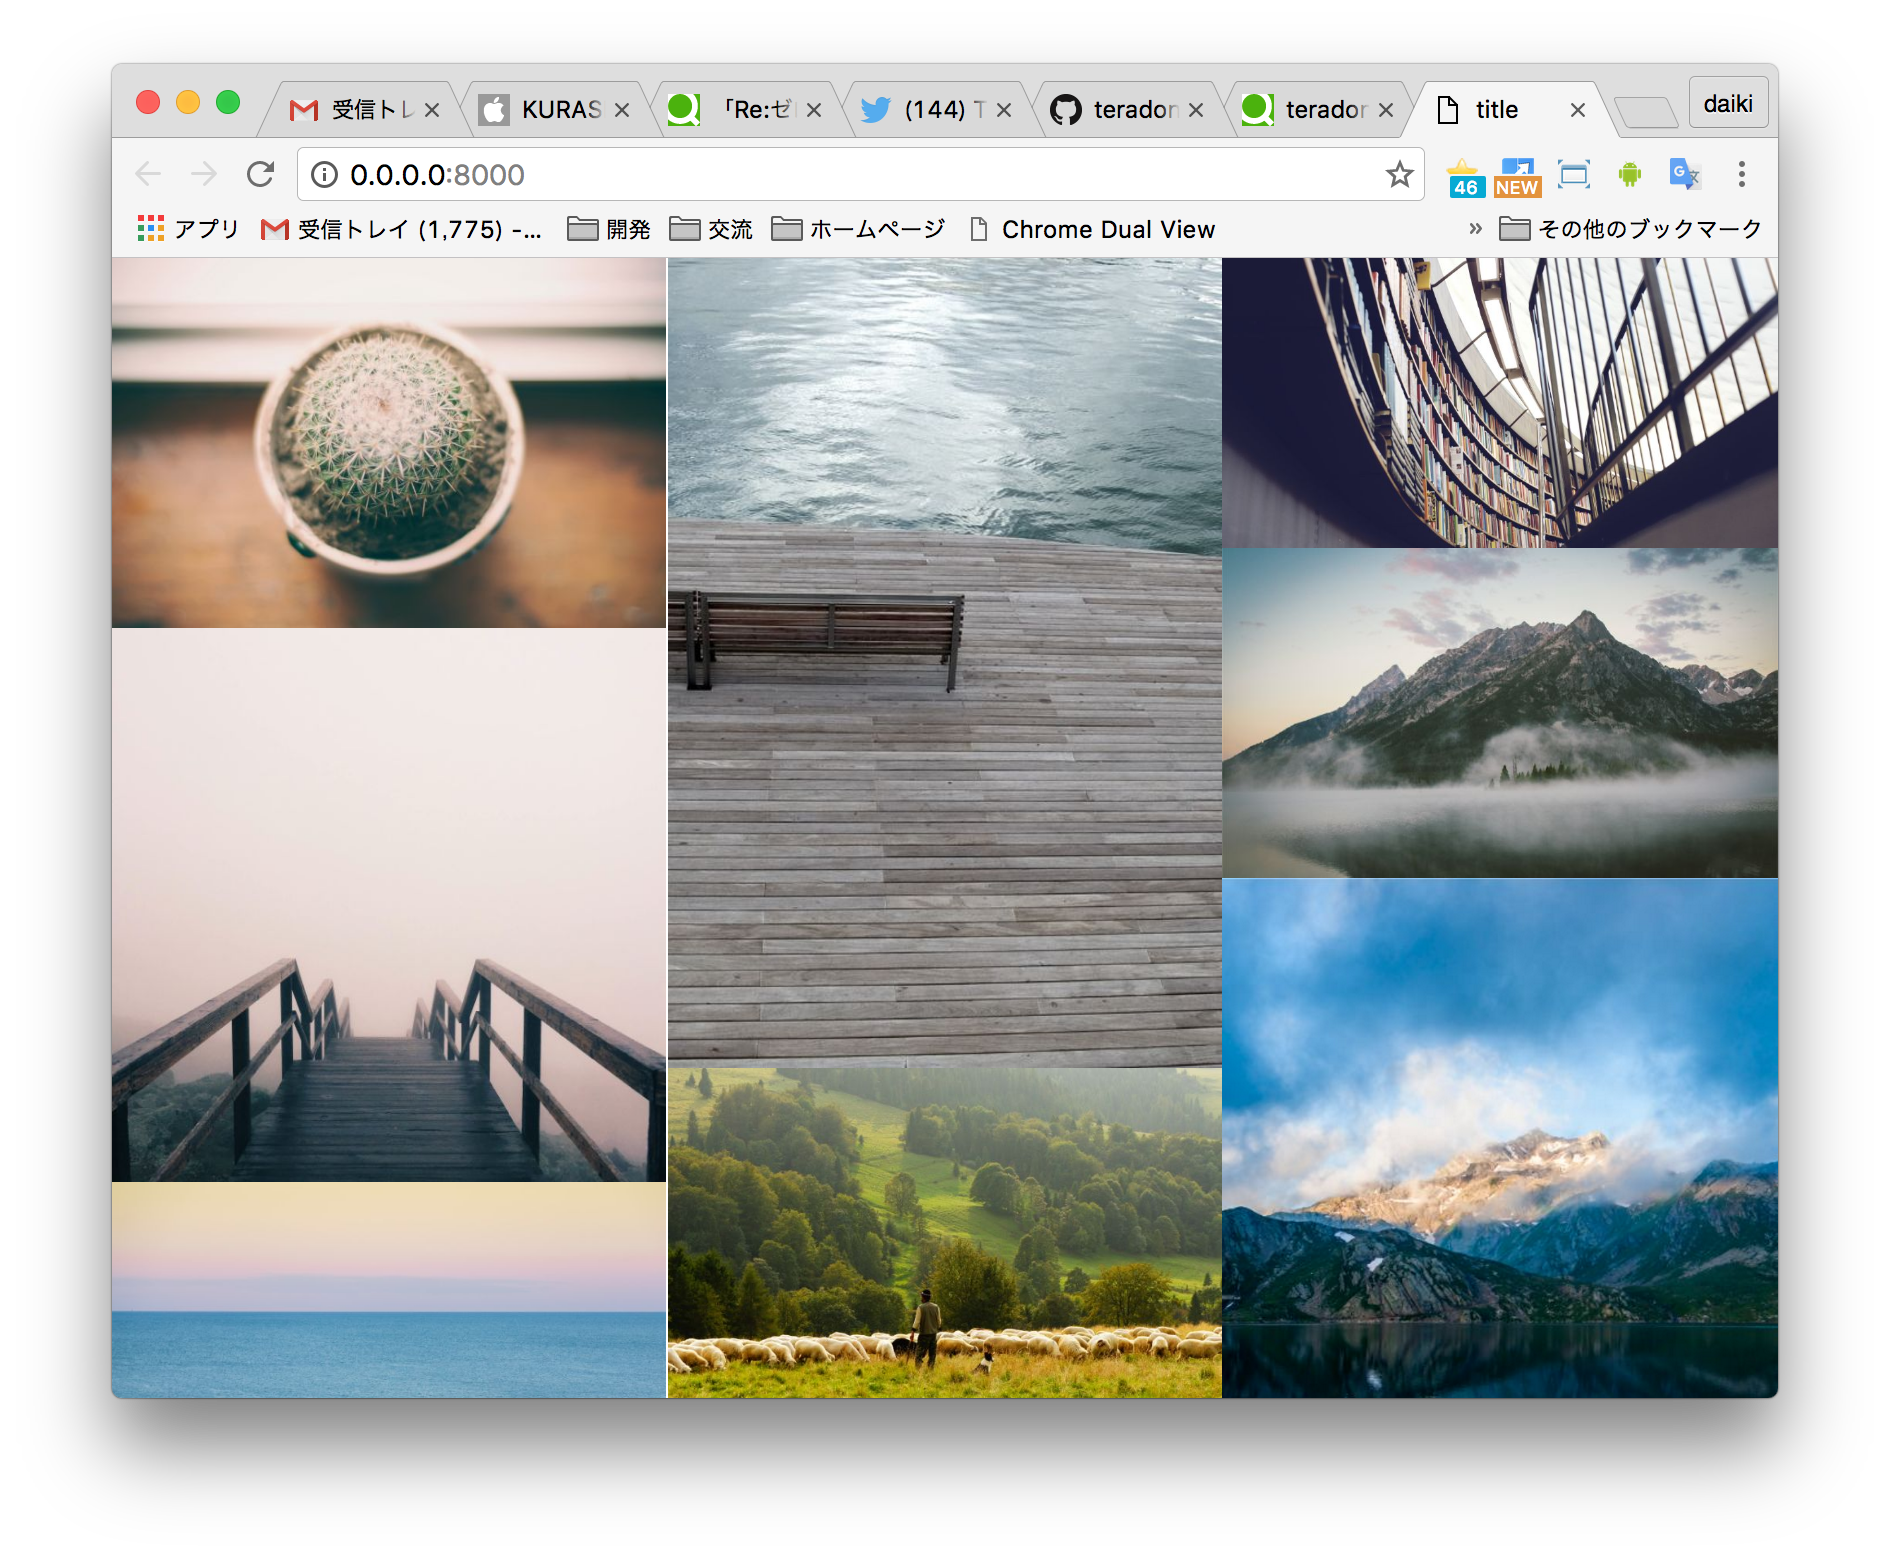
masonry
タイルレイアウト
    <div class="masonry">
            <div class="item">
                <img src="https://unsplash.it/600/400?random" />
            </div>
            <div class="item">
                <img src="https://unsplash.it/600/600?random" />
            </div>
            <div class="item">
                <img src="https://unsplash.it/720/460?random" />
            </div>
            <div class="item">
                <img src="https://unsplash.it/800/400?random" />
            </div>
            <div class="item">
                <img src="https://unsplash.it/480/700?random" />
            </div>
            <div class="item">
                <img src="https://unsplash.it/680/420?random" />
            </div>
            <div class="item">
                <img src="https://unsplash.it/740/480?random" />
            </div>
            <div class="item">
                <img src="https://unsplash.it/840/440?random" />
            </div>
            <div class="item">
                <img src="https://unsplash.it/640/380?random" />
            </div>
            <div class="item">
                <img src="https://unsplash.it/500/680?random" />
            </div>
     </div>
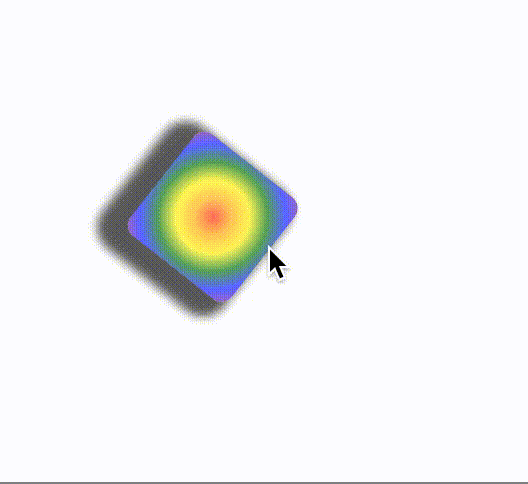
アニメーション、半透明、グラデーション、角丸、影
@ani,@key,@tra,@opa,@gra-li,@gra-ci,@br,@box-sha
main.lessに追記
.animbox{
    background-color: red;
    .animation(testanim 3s linear infinite);
    width: 10rem;
    height: 10rem;
    .box-shadow(10px 10px 10px 10px rgba(0,0,0,1));
}

.keyframes(testanim,{
    0%, 100% {
        .transform(translate(10rem,10rem) rotate(0deg) scale(1.0) );
        .opacity(1.0);
        .linear-gradient(45deg,red, orange,yellow,green,blue,purple);
        .border-radius(0.0rem);
    }
    50% {
        .transform(translate(5rem,5rem) rotate(180deg) scale(0.5) );
        .opacity(0.5);
        .radial-gradient(center,circle,red, orange,yellow,green,blue,purple);
        .border-radius(1.5rem);
    }
});
html側
        <div class="animbox">
        </div>
DOM操作
下記参考にしました。
You Don't Need jQuery
eq,ec,ecl,eaf,ebe,epr,eap,eqa,ev
scriptタグ内に記述(JavaScript)、DOM作成、DOM検索、DOM追加、DOMイベント付与
<script>
         window.onload = function (e) {

            var body = document.querySelector("body");
            for(var i=0;i<10;++i){
                var button = document.createElement("button");
                button.innerHTML = 'button' + i;
                button.classList.add("btn");
                body.insertAdjacentHTML("beforeend",button.outerHTML);
            }
            var buttons = document.querySelectorAll(".btn");
            for(var i=0;i<buttons.length;++i){
                buttons[i].addEventListener("click",function(e){
                    var button = e.target;
                    alert(button.innerHTML);
                });
            }
        }
</script>

通信
scriptタグ内に記述(JavaScript)、Ajax通信
xhr
<script>
         window.onload = function (e) {

            var xhr = new XMLHttpRequest();
            xhr.open("GET", "http://localhost:3000/api", true);
            xhr.onload = function (e) {
                if (xhr.readyState === 4) {
                    if (xhr.status === 200) {
                        console.log(xhr.responseText);
                    } else {
                        console.error(xhr.statusText);
                    }
                }
            };
            xhr.onerror = function (e) {
                console.error(xhr.statusText);
            };
            xhr.send(null);
        }
</script>
オーディオ再生
webaudio
scriptタグ内に記述(JavaScript)、WebAudio
<script>
         window.onload = function (e) {

            window.AudioContext = window.AudioContext || window.webkitAudioContext;
            var context = new AudioContext();

            // Audio用のbufferを読み込む
            var getAudioBuffer = function(url, fn) {
                var req = new XMLHttpRequest();
                // arraybufferを指定
                req.responseType = 'arraybuffer';

                req.onreadystatechange = function() {
                    if (req.readyState === 4) {
                        if (req.status === 0 || req.status === 200) {
                            // array buffer を audio buffer に変換
                            context.decodeAudioData(req.response, function(buffer) {
                                // コールバックを実行
                                fn(buffer);
                            });
                        }
                    }
                };

                req.open('GET', url, true);
                req.send('');
            };

            var playSound = function(buffer) {
                var source = context.createBufferSource();
                source.buffer = buffer;
                source.connect(context.destination);
                // 再生
                source.start(0);
            };

            getAudioBuffer("test.mp3",playSound);

        };
</scrupt>
ビデオキャプチャ
webrtc
scriptタグ内に記述(JavaScript)、WebRTC
<script>
        window.onload = function (e) {

            navigator.getUserMedia = navigator.getUserMedia || navigator.webkitGetUserMedia || navigator.mozGetUserMedia;
            var constraints = {audio: true, video: true};
            var video = document.querySelector("video");
            function successCallback(stream) {
                window.stream = stream;
                if (window.URL) {
                    video.src = window.URL.createObjectURL(stream);
                } else {
                    video.src = stream;
                }
            }
            function errorCallback(error) {
                console.log("navigator.getUserMedia error: ", error);
            }
            navigator.getUserMedia(constraints, successCallback, errorCallback);

        };
</script>
    <video src="" width="640" height="480" autoplay></video>
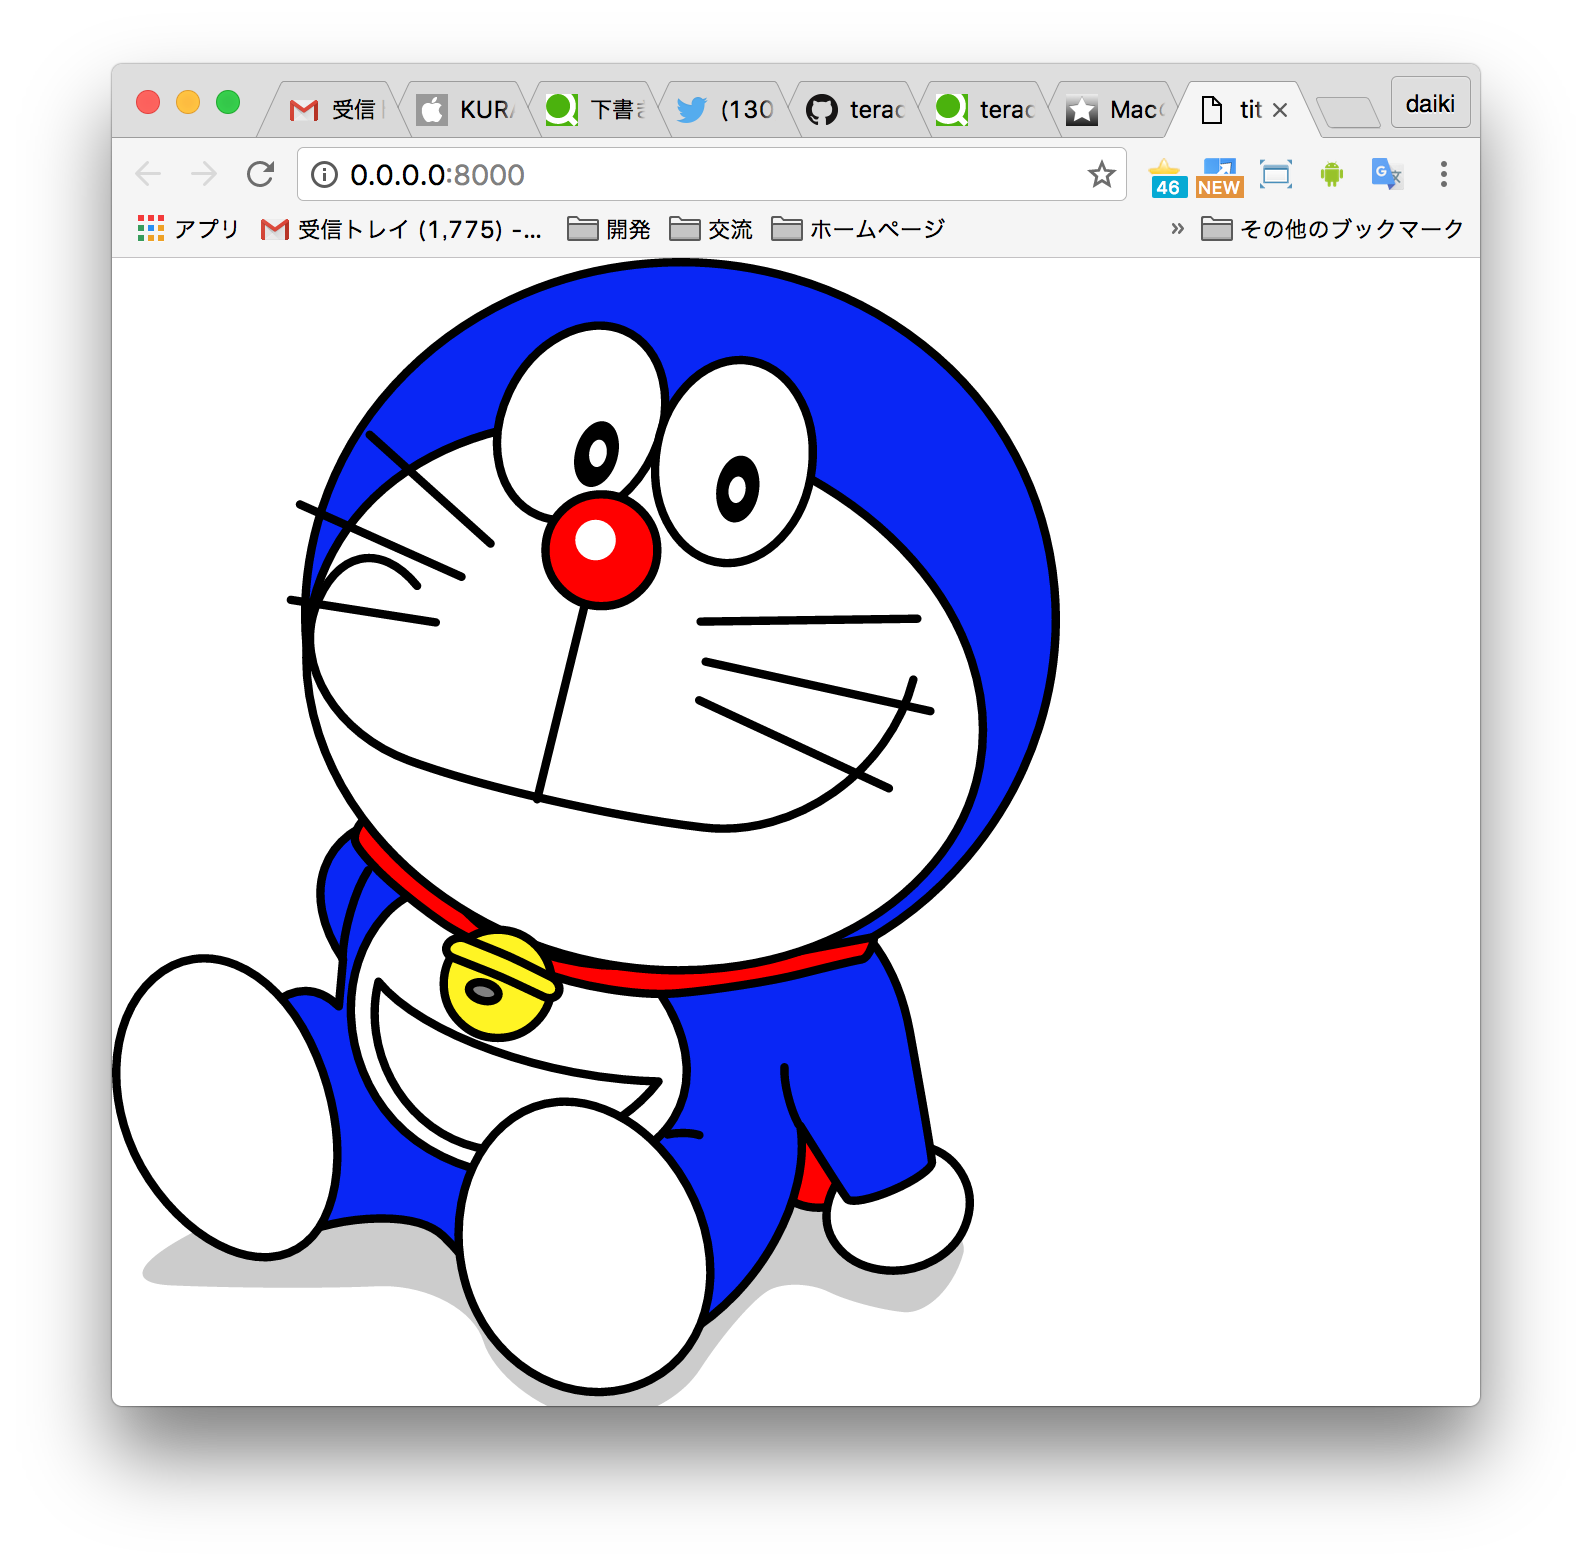
おまけ
module_doraemon
SVGどらえもん
お借りしました。
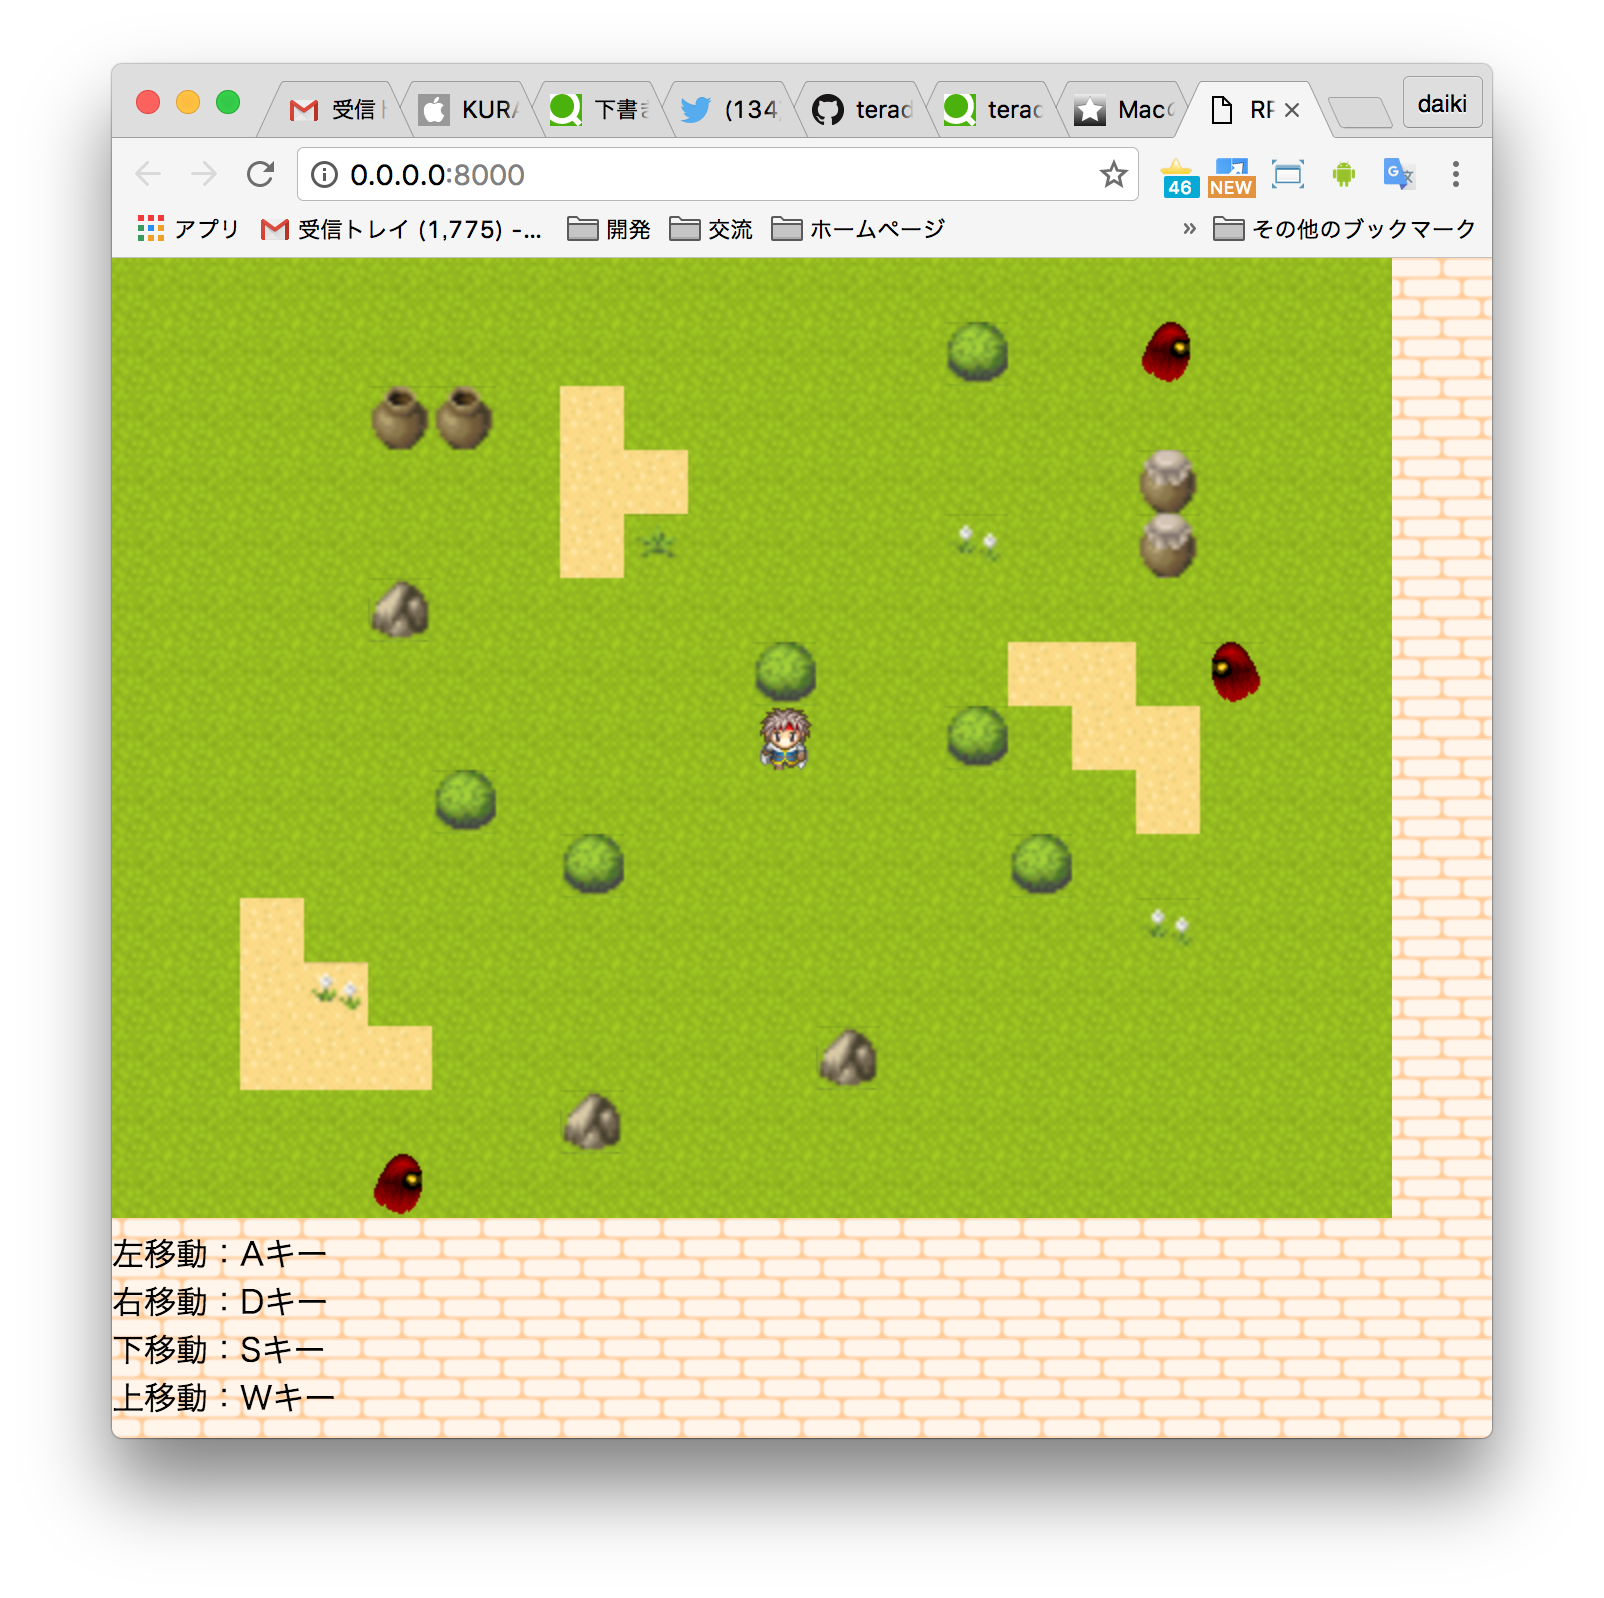
module_rpg
HTML新規ファイルで展開
ドラクエ的なマップ
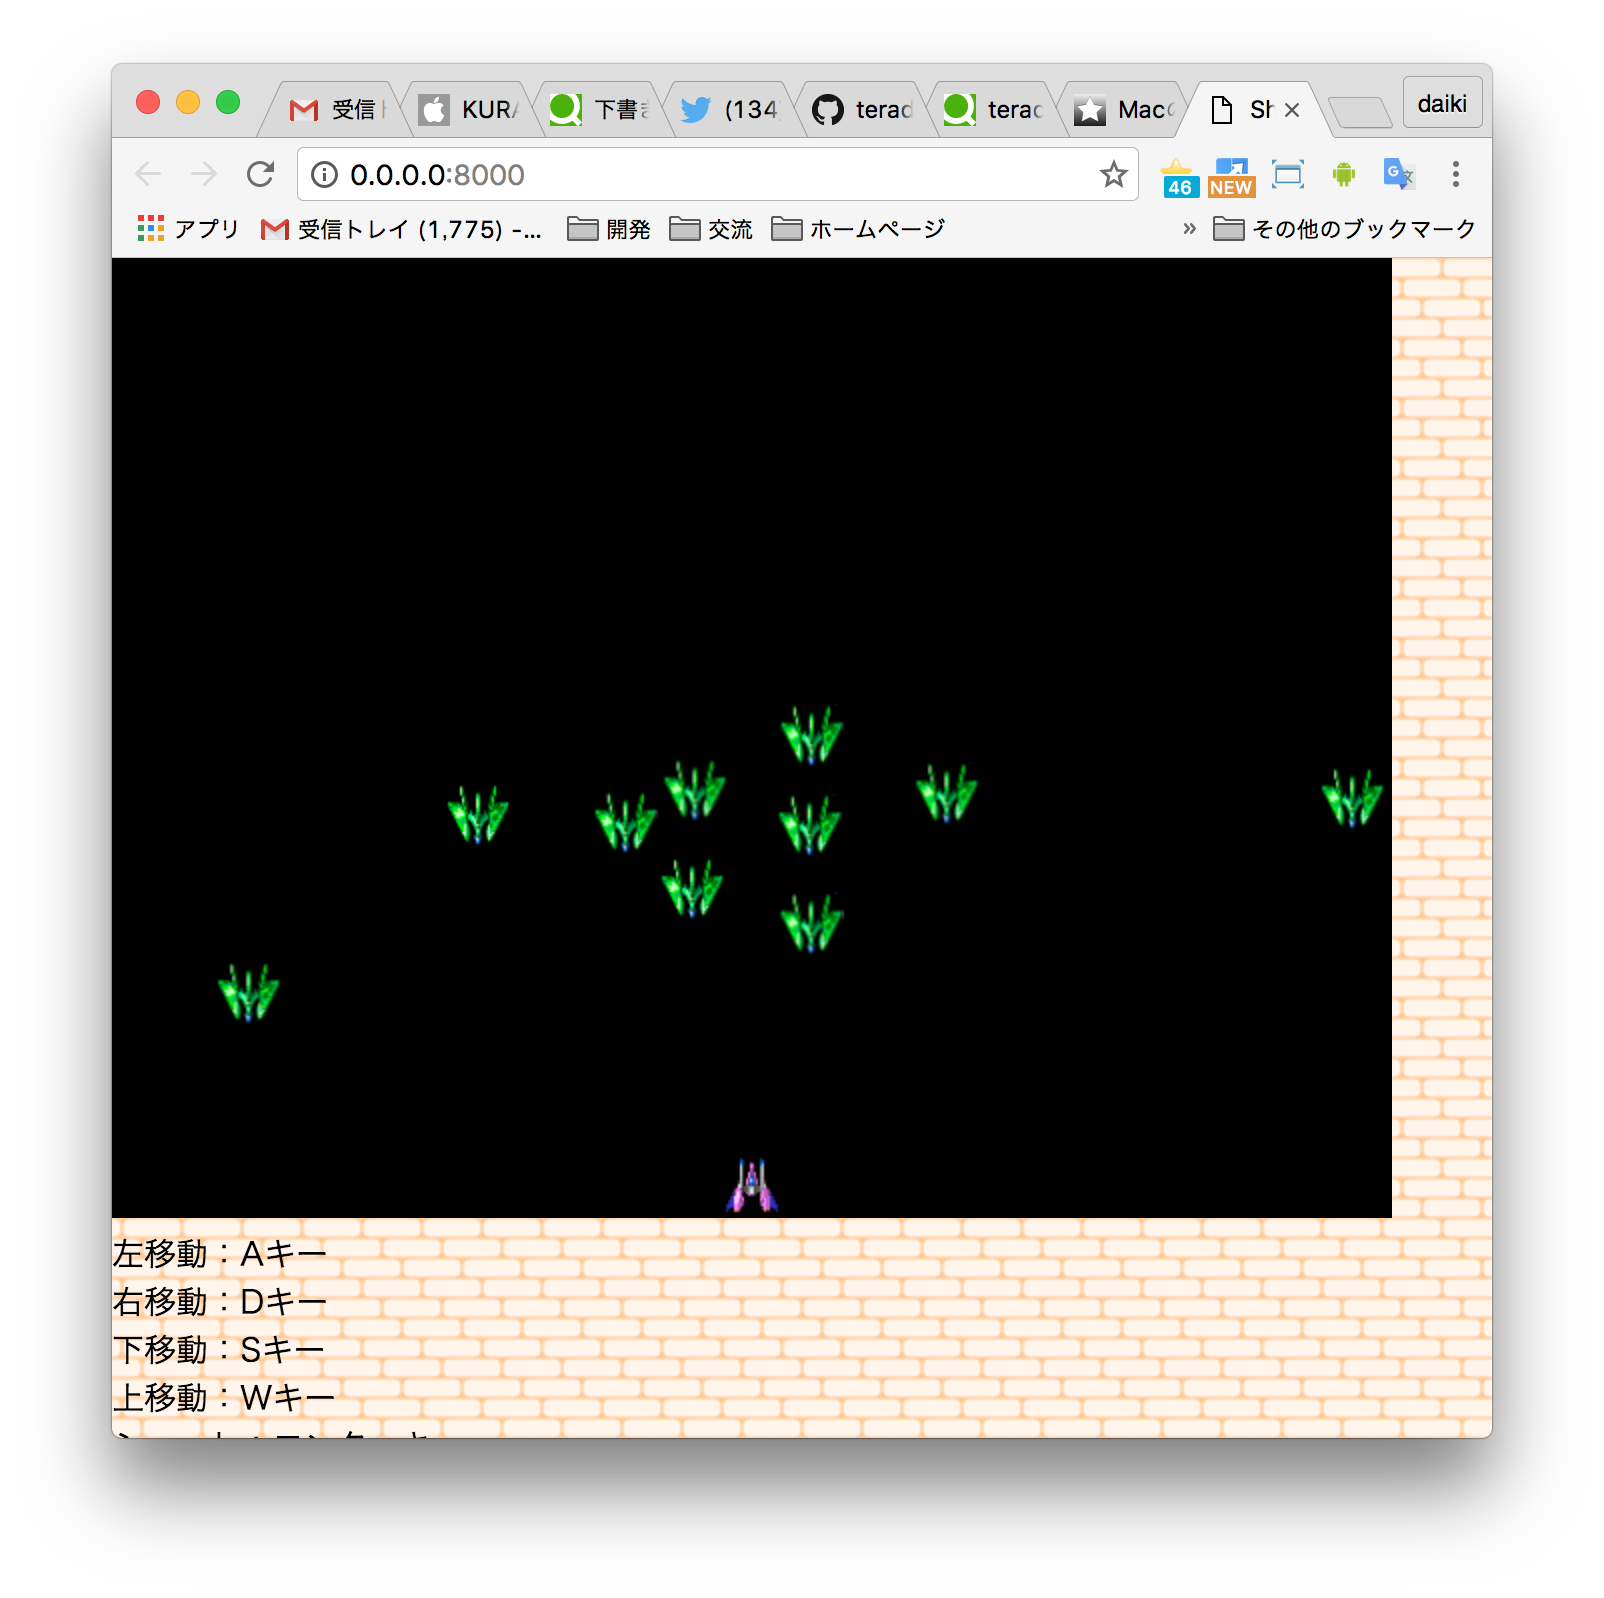
module_shooting
HTML新規ファイルで展開
シューティングもどき