はじめに
Certificate ManagerのEOSに伴い、VPN for VPCにおいてもSecrets Managerを利用いただく必要があります。本記事では、Secrets Managerを利用したClient to Site型のVPN for VPCの作成方法について記載します。
Certificate Managerを使用した設定方法は以下に記載されています。併せて参照ください。
Client VPN for VPC(Client to Site型VPN)でVPC環境に接続する
Certificate ManagerからSecrets Managerへの移行方法は以下を参照ください。
Certificate ManagerからSecret Managerへの手動移行
1. Secrets Managerをオーダー
VPN接続をセキュアに行うため証明書が必要です。証明書はSecrets Managerで管理します。
Secrets Managerをまだ利用していない場合、カタログからオーダーします。
https://cloud.ibm.com/catalog/services/Secrets%20Manager
2. VPNサービスからSecrets Managerを使えるよう権限設定
https://cloud.ibm.com/iam/authorizations にアクセスし、VPNからSecrets Managerへのアクセスを許可します。
3. 証明書の発行
下記のdocsに従い、サーバー証明書や鍵ファイルを作成します。
https://cloud.ibm.com/docs/vpc?topic=vpc-client-to-site-authentication&interface=ui#import-certificate
Easy-RSA 3 リポジトリーをローカル・フォルダーに複製
$ git clone https://github.com/OpenVPN/easy-rsa.git
Cloning into 'easy-rsa'...
remote: Enumerating objects: 4239, done.
remote: Counting objects: 100% (52/52), done.
remote: Compressing objects: 100% (35/35), done.
remote: Total 4239 (delta 22), reused 46 (delta 17), pack-reused 4187
Receiving objects: 100% (4239/4239), 27.46 MiB | 12.72 MiB/s, done.
Resolving deltas: 100% (1994/1994), done.

$ cd easy-rsa/easyrsa3
新しい PKI と CA を作成
$ ./easyrsa init-pki
Notice
------
'init-pki' complete; you may now create a CA or requests.

Your newly created PKI dir is:
* /Users/takason/easy-rsa/easyrsa3/pki

* Using Easy-RSA configuration:

* IMPORTANT: Easy-RSA 'vars' template file has been created in your new PKI.
             Edit this 'vars' file to customise the settings for your PKI.

* Using x509-types directory: /Users/takason/easy-rsa/easyrsa3/x509-types


$ ./easyrsa build-ca nopass
* Using SSL: openssl LibreSSL 2.8.3
* Using Easy-RSA configuration: /Users/takason/easy-rsa/easyrsa3/pki/vars

.......+++
...................................................................................+++
You are about to be asked to enter information that will be incorporated
into your certificate request.
What you are about to enter is what is called a Distinguished Name or a DN.
There are quite a few fields but you can leave some blank
For some fields there will be a default value,
If you enter '.', the field will be left blank.
-----
Common Name (eg: your user, host, or server name) [Easy-RSA CA]:

Notice
------
CA creation complete and you may now import and sign cert requests.
Your new CA certificate file for publishing is at:
/Users/takason/easy-rsa/easyrsa3/pki/ca.crt
VPN サーバー証明書を生成
$ ./easyrsa build-server-full vpn-server.vpn.ibm.com nopass
* Using SSL: openssl LibreSSL 2.8.3

* Using Easy-RSA configuration: /Users/takason/easy-rsa/easyrsa3/pki/vars

Generating a 2048 bit RSA private key
.....+++
.................................................................................................................................................+++
writing new private key to '/Users/takason/easy-rsa/easyrsa3/pki/3b9f96c9/temp.a403a5f9'
-----

Notice
------
Keypair and certificate request completed. Your files are:
req: /Users/takason/easy-rsa/easyrsa3/pki/reqs/vpn-server.vpn.ibm.com.req
key: /Users/takason/easy-rsa/easyrsa3/pki/private/vpn-server.vpn.ibm.com.key


You are about to sign the following certificate.
Please check over the details shown below for accuracy. Note that this request
has not been cryptographically verified. Please be sure it came from a trusted
source or that you have verified the request checksum with the sender.

Request subject, to be signed as a server certificate for 825 days:

subject=
    commonName                = vpn-server.vpn.ibm.com


Type the word 'yes' to continue, or any other input to abort.
  Confirm request details: yes

Using configuration from /Users/takason/easy-rsa/easyrsa3/pki/3b9f96c9/temp.aa0d5554
Check that the request matches the signature
Signature ok
The Subject's Distinguished Name is as follows
commonName            :ASN.1 12:'vpn-server.vpn.ibm.com'
Certificate is to be certified until Feb 26 07:56:42 2025 GMT (825 days)

Write out database with 1 new entries
Data Base Updated

Notice
------
Certificate created at: /Users/takason/easy-rsa/easyrsa3/pki/issued/vpn-server.vpn.ibm.com.crt
VPN クライアント証明書を生成
$ ./easyrsa build-client-full client1.vpn.ibm.com nopass
* Using SSL: openssl LibreSSL 2.8.3

* Using Easy-RSA configuration: /Users/takason/easy-rsa/easyrsa3/pki/vars

Generating a 2048 bit RSA private key
.................................+++
.................................................+++
writing new private key to '/Users/takason/easy-rsa/easyrsa3/pki/7f50222a/temp.622e029e'
-----

Notice
------
Keypair and certificate request completed. Your files are:
req: /Users/takason/easy-rsa/easyrsa3/pki/reqs/client1.vpn.ibm.com.req
key: /Users/takason/easy-rsa/easyrsa3/pki/private/client1.vpn.ibm.com.key


You are about to sign the following certificate.
Please check over the details shown below for accuracy. Note that this request
has not been cryptographically verified. Please be sure it came from a trusted
source or that you have verified the request checksum with the sender.

Request subject, to be signed as a client certificate for 825 days:

subject=
    commonName                = client1.vpn.ibm.com


Type the word 'yes' to continue, or any other input to abort.
  Confirm request details: yes

Using configuration from /Users/takason/easy-rsa/easyrsa3/pki/7f50222a/temp.9d45ed70
Check that the request matches the signature
Signature ok
The Subject's Distinguished Name is as follows
commonName            :ASN.1 12:'client1.vpn.ibm.com'
Certificate is to be certified until Feb 26 08:54:08 2025 GMT (825 days)

Write out database with 1 new entries
Data Base Updated

Notice
------
Certificate created at: /Users/takason/easy-rsa/easyrsa3/pki/issued/client1.vpn.ibm.com.crt

$
4. Secrets Managerへ証明書を登録
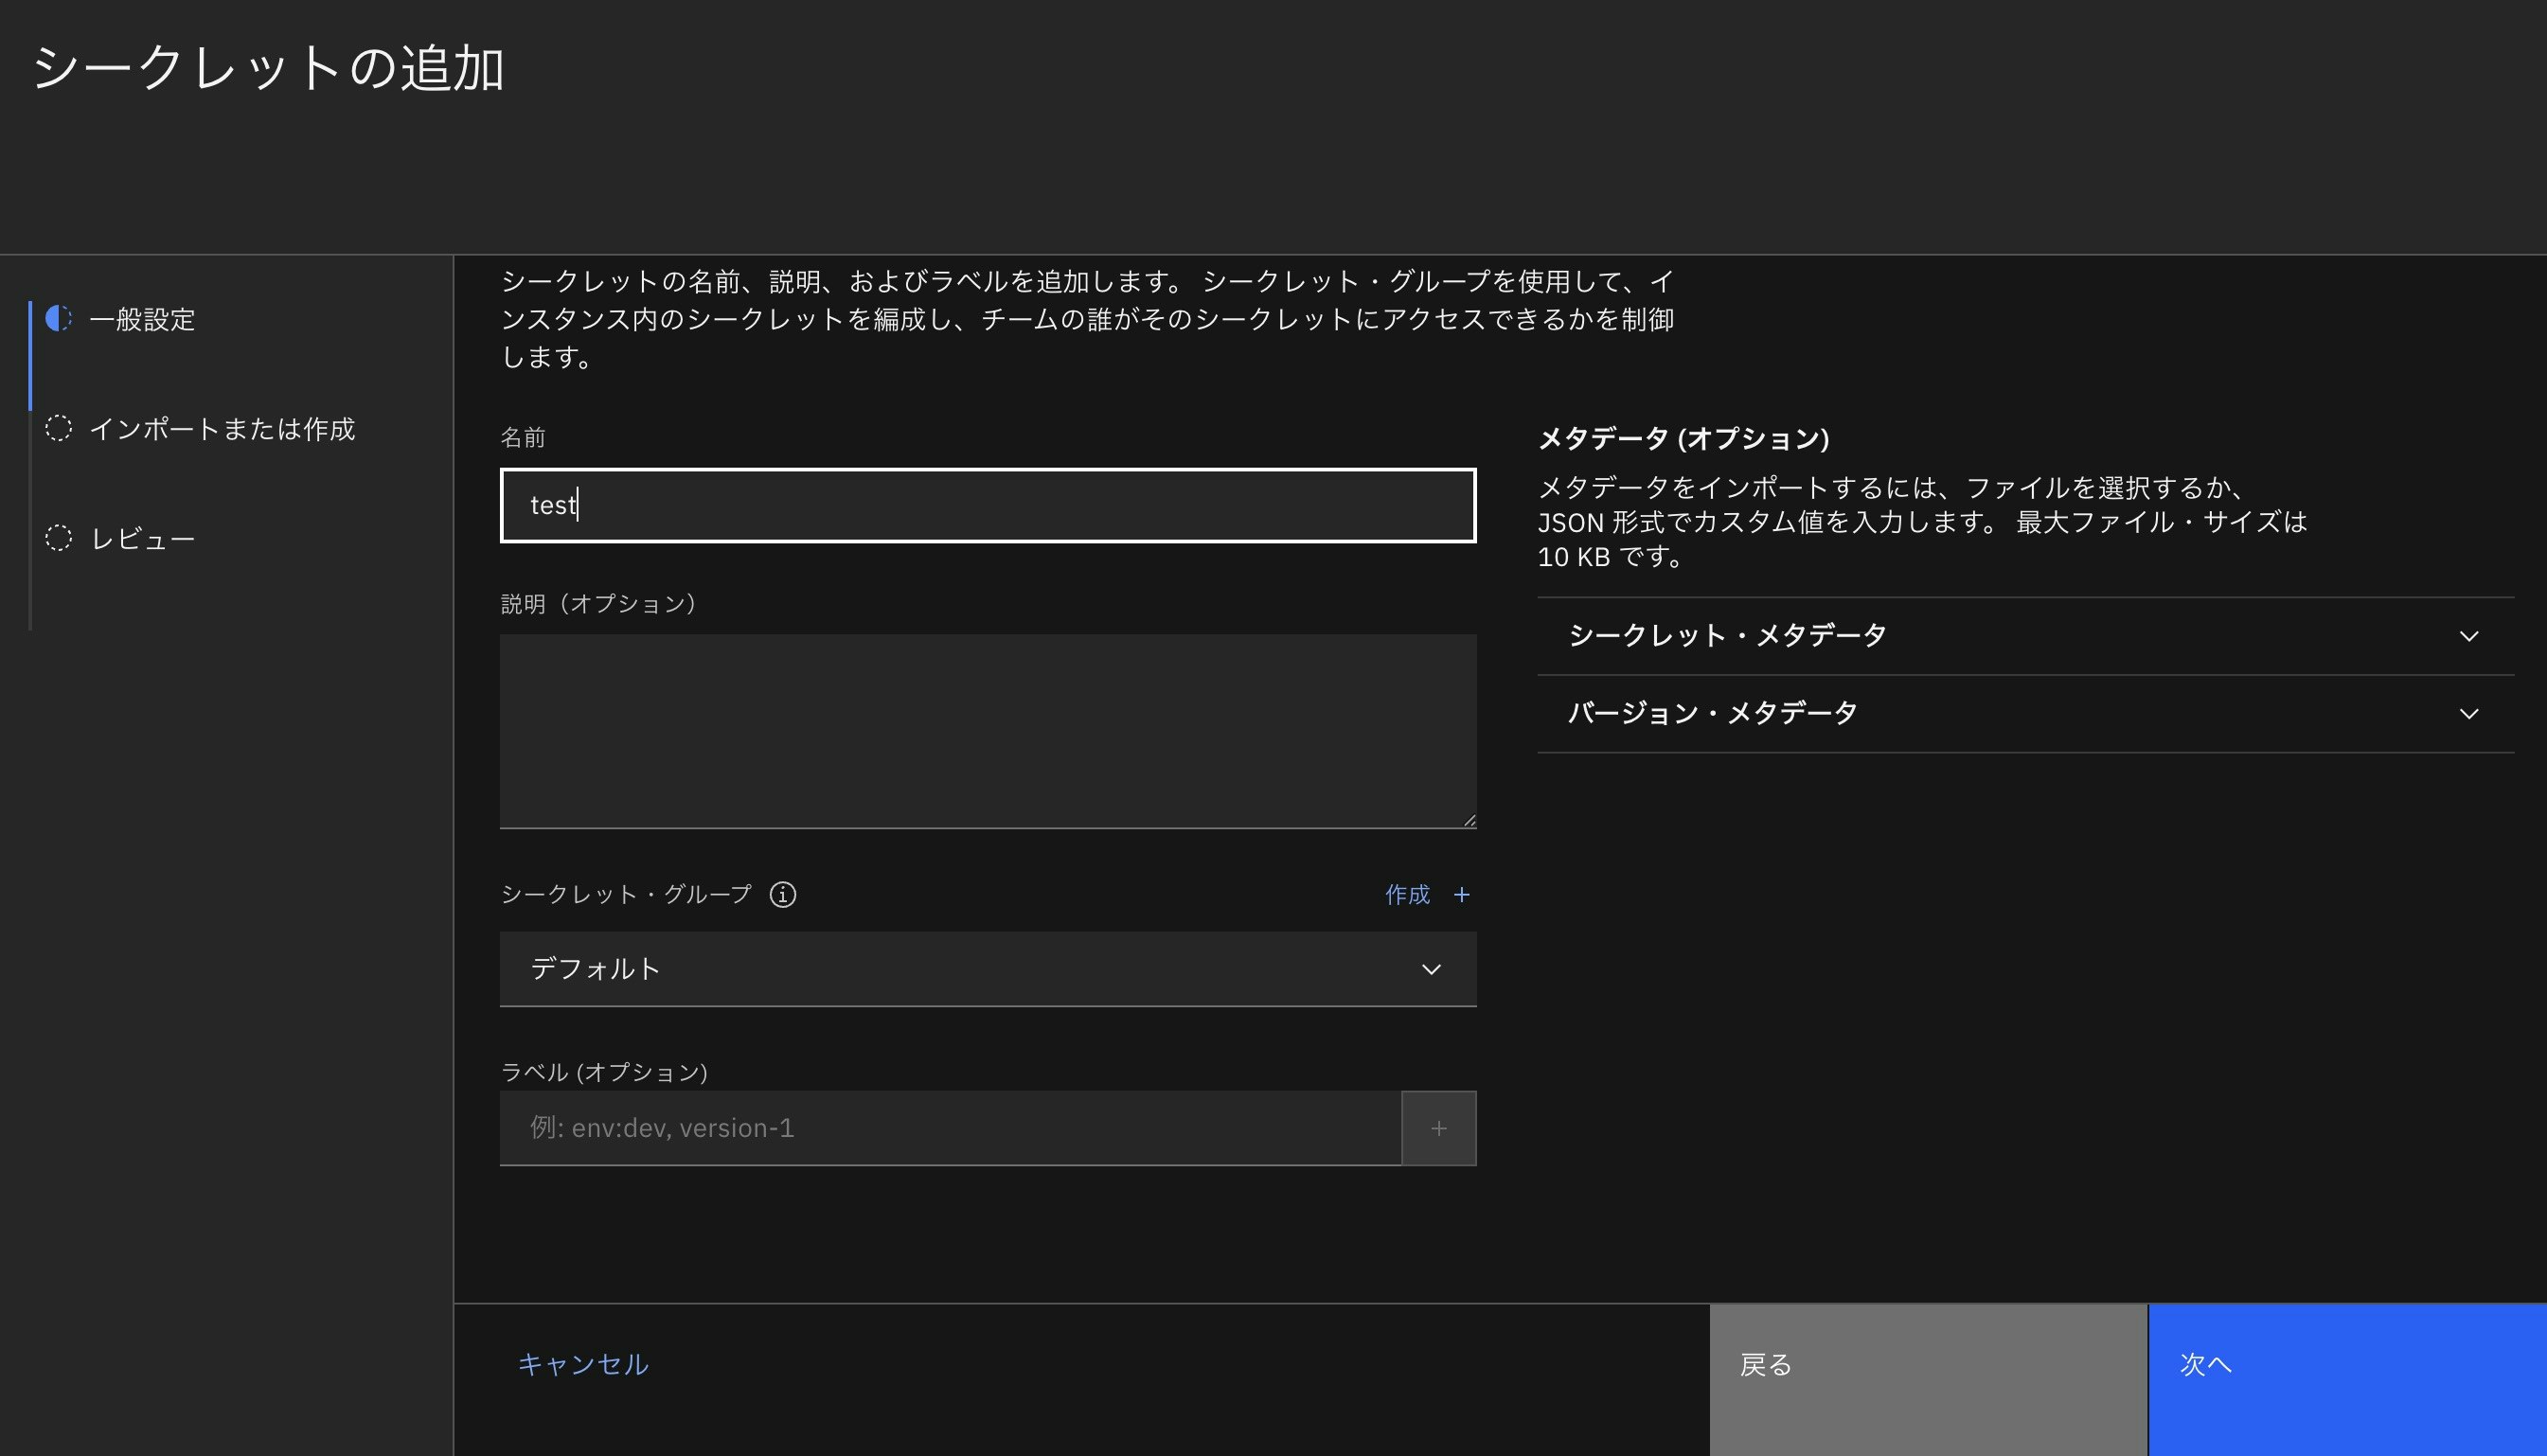
「追加」→「インポートされたTLS証明書」をクリックします。
シークレットの名前を入力し、「次へ」をクリックします。

「ファイルの選択」をクリックし、証明書ファイルとして ./pki/issued/vpn-server.vpn.ibm.com.crt を選択します。
「ファイルの選択」をクリックし、証明書の秘密鍵として ./pki/private/vpn-server.vpn.ibm.com.key を選択します。
「ファイルの選択」をクリックし、中間証明書として ./pki/ca.crt を選択します。
作成されると、以下のように格納した情報を取得するためのコマンド等が表示されます。

5. Client to SiteのVPNサーバーをオーダー
「client vpn for vpc」で検索、あるいは以下にアクセスしてオーダーします。
今回はクライアント証明書認証方式を選びました。
トンネリングモードはFull tunnelとSplit tunnelを選ぶことができます。トンネルを通さずにインターネット向き通信を行いたい場合はSplit tunnelを選択します。

6. Security Group設定
VPNサーバーに対してもSecurity Groupが適用されるため、VPN接続に必要なポートを許可します。使用するポート番号は、VPNサーバーのオーダー画面で指定します。今回はデフォルトで設定されているUDP 443です。
接続元を、クライアント端末のグローバルIPアドレス範囲のみに制限することで、よりセキュアな状態にできます。

7. VPNサーバー経路の設定
「VPNサーバー経路」タブで、VPNサーバーに到達したパケットをどうルーティングするか指定します。
https://cloud.ibm.com/docs/vpc?topic=vpc-vpn-client-to-site-routes&interface=ui

8. Client用のプロファイルをダウンロード、編集
VPNサービスのプロビジョニングが終わったら詳細プロパティ画面から、Client用プロファイルをダウンロードします。OpenVPN接続用に一般的に使われるOVPNファイルとして提供されます。
続いて、ovpnファイルをテキストエディタで開いて編集します。
今回は証明書認証をしているため、下記の部分に、クライアント証明書のファイル名を書きます。
# Uncomment the next two lines if certificate-based client authentication is enabled.
#  Ask your VPN administrator provides your client certificate and replace client_public_key
#  with your client certificate filename.
cert client1.vpn.ibm.com.crt
key client1.vpn.ibm.com.key
ダウンロードしたovpnファイルを、easyrsaコマンドで作成したクライアント証明書と鍵ファイルと同じディレクトリに保存します。
$ ls -l ./cert-dir
total 32
-rw-r--r--@ 1 takason  staff  1772 Nov 24 19:13 client-vpn-test.ovpn
-rw-------  1 takason  staff  4465 Nov 24 19:16 client1.vpn.ibm.com.crt
-rw-------  1 takason  staff  1704 Nov 24 19:16 client1.vpn.ibm.com.key
9. OpenVPNクライアントソフトにOVPNファイルを読み込み
以下のdocsに従い、手順を進めます。
IBM Cloud docs:クライアント VPN 環境のセットアップと VPN サーバーへの接続
- OpenVPNクライアントのインストール
-
.ovpnファイルのダウンロード
動作確認されているクライアントソフトについて下記に記載されています。今回はMac端末でOpenVPN Connectを使っています。
IBM Cloud docs:サポートされるVPN Client Software
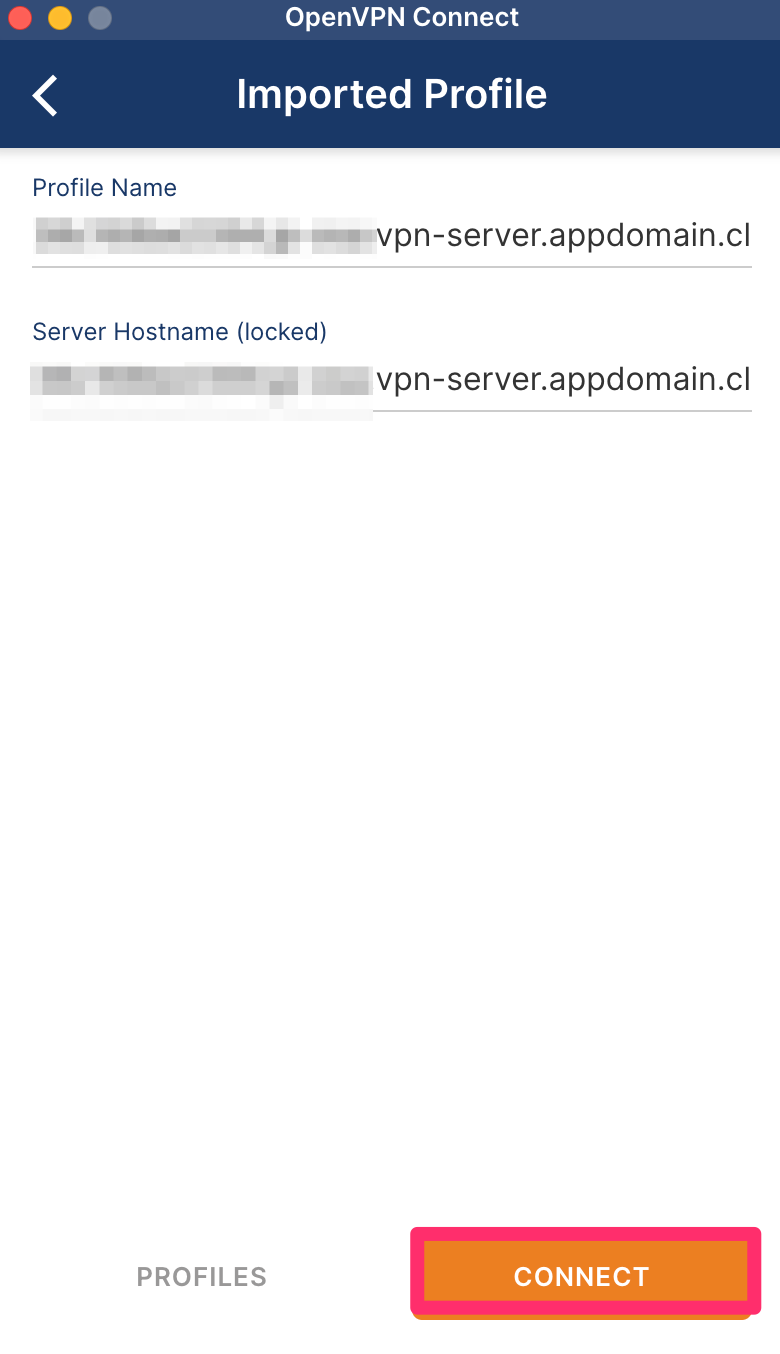
OpenVPN 設定手順
「FILE」タブを選択し、.ovpnファイルをコピー&ペーストか「BROWSE」で選択します。


