2022/12/2追記
Secrets Managerを利用した接続手順は下記にあります。
https://qiita.com/takason/items/3d04e4e31daae4def1d7
2022/7/16追記
GAしたので、タイトルからベータ版という表現を取りました。
また、この記事内で証明書管理に使っているCertificate Managerはdeprecationが発表されています。下記URLにあるように、今後はSecrets Managerをご利用ください。現在、Certificate Managerを使っている場合、2022/9/30までにSecrets Managerへの移行が必要となります。
https://cloud.ibm.com/docs/vpc?topic=vpc-client-to-site-vpn-planning#server-authentication
はじめに
IBM CloudのVPC環境に対してclient-to-site型でVPN接続できる機能がベータ版として提供が始まりました。(2022/7/16にGAしました)
https://cloud.ibm.com/docs/vpc?topic=vpc-vpn-client-to-site-overview
実体としてはOpenVPN as a serviceと考えると近いように思います。指定したVPCに、IBM Cloud管理のOpenVPNサーバーが払い出される感じです。
実際に使ってみました。
Certificate Managerをオーダー
VPN接続をセキュアに行うため証明書が必要です。証明書はCertificate Managerで管理します。
Certificate Managerをまだ利用していない場合、カタログからオーダーします。
https://cloud.ibm.com/catalog/services/certificate-manager
Certificate Managerに証明書を登録
下記の手順でサーバー証明書や鍵ファイルを作成し、Certificate Managerにインポートします。
https://cloud.ibm.com/docs/vpc?topic=vpc-client-to-site-authentication&interface=ui#import-certificate
下記のコマンドはどこで実行しても良いですが、私は自分の端末(Mac)で行いました。
証明書や鍵ファイルを生成します。
$ git clone https://github.com/OpenVPN/easy-rsa.git
Cloning into 'easy-rsa'...
remote: Enumerating objects: 2095, done.
remote: Counting objects: 100% (13/13), done.
remote: Compressing objects: 100% (11/11), done.
remote: Total 2095 (delta 3), reused 4 (delta 0), pack-reused 2082
Receiving objects: 100% (2095/2095), 11.72 MiB | 3.75 MiB/s, done.
Resolving deltas: 100% (914/914), done.
$ cd easy-rsa/easyrsa3
$ ls
easyrsa			openssl-easyrsa.cnf	vars.example		x509-types
$ ./easyrsa init-pki

init-pki complete; you may now create a CA or requests.
Your newly created PKI dir is: /Users/tama/easy-rsa/easyrsa3/pki

$ ./easyrsa build-ca nopass
Using SSL: openssl LibreSSL 2.8.3
Generating RSA private key, 2048 bit long modulus
..................................+++
.............................+++
e is 65537 (0x10001)
You are about to be asked to enter information that will be incorporated
into your certificate request.
What you are about to enter is what is called a Distinguished Name or a DN.
There are quite a few fields but you can leave some blank
For some fields there will be a default value,
If you enter '.', the field will be left blank.
-----
Common Name (eg: your user, host, or server name) [Easy-RSA CA]:

CA creation complete and you may now import and sign cert requests.
Your new CA certificate file for publishing is at:
/Users/tama/easy-rsa/easyrsa3/pki/ca.crt

$ ./easyrsa build-server-full vpn-server.vpn.ibm.com nopass
Using SSL: openssl LibreSSL 2.8.3
Generating a 2048 bit RSA private key
..................+++
....................................+++
writing new private key to '/Users/tama/easy-rsa/easyrsa3/pki/easy-rsa-44251.CBsd5o/tmp.zP4y4o'
-----
Using configuration from /Users/tama/easy-rsa/easyrsa3/pki/easy-rsa-44251.CBsd5o/tmp.6sYXuF
Check that the request matches the signature
Signature ok
The Subject's Distinguished Name is as follows
commonName            :ASN.1 12:'vpn-server.vpn.ibm.com'
Certificate is to be certified until Dec  2 01:20:16 2023 GMT (825 days)

Write out database with 1 new entries
Data Base Updated
$
VPNの認証方式としてクライアント証明書を使う場合、下記で作成します。
$ ./easyrsa build-client-full client1.vpn.ibm.com nopass
Using SSL: openssl LibreSSL 2.8.3
Generating a 2048 bit RSA private key
.............................+++
..................................................................+++
writing new private key to '/Users/tama/easy-rsa/easyrsa3/pki/easy-rsa-44379.6OBtn4/tmp.o5ProK'
-----
Using configuration from /Users/tama/easy-rsa/easyrsa3/pki/easy-rsa-44379.6OBtn4/tmp.lE4wRH
Check that the request matches the signature
Signature ok
The Subject's Distinguished Name is as follows
commonName            :ASN.1 12:'client1.vpn.ibm.com'
Certificate is to be certified until Dec  2 01:20:43 2023 GMT (825 days)

Write out database with 1 new entries
Data Base Updated

$
上記で作成したサーバー証明書(./pki/issued/vpn-server.vpn.ibm.com.crt)と鍵ファイル(./pki/private/vpn-server.vpn.ibm.com.key)、CA証明書(./pki/ca.crt)をこの後の手順でCertificate Managerに登録します。
クライアント証明書(./pki/issued/client1.vpn.ibm.com.crt)と鍵ファイル(./pki/private/client1.vpn.ibm.com.key)は、認証方式としてクライアント証明書を使う場合に、後の手順でOpenVPNクライアントソフト側で指定します。
VPNサービスからCertificate Managerを使えるよう権限設定
VPNサービスからCertificate Managerを使用できるように権限の設定をします。
https://cloud.ibm.com/docs/vpc?topic=vpc-client-to-site-authentication&interface=ui#creating-iam-service-to-service
管理ポータルの下記画面で設定します。
https://cloud.ibm.com/iam/authorizations/grant
Client to SiteのVPNサーバーをオーダー
事前準備が整ったので、今回のメインテーマであるVPNサービスをオーダーします。
カタログ上のサービス名は、Client VPN for VPCです。
VPN接続時に、クライアント端末に割り振られるIPアドレスは、このクライアント IPv4 アドレス・プールで指定した範囲から払い出されます。指定可能なサブネットのサイズは、/9から/22です。

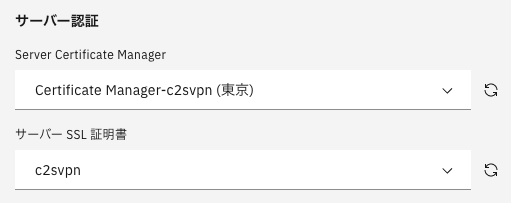
サーバー認証に、先ほど作成したCertificate Managerを指定します。
クライアント認証方式として、「クライアント証明書」か「ユーザーIDとパスコード」、あるいはその両方を選べます。今回はクライアント証明書を選択します。
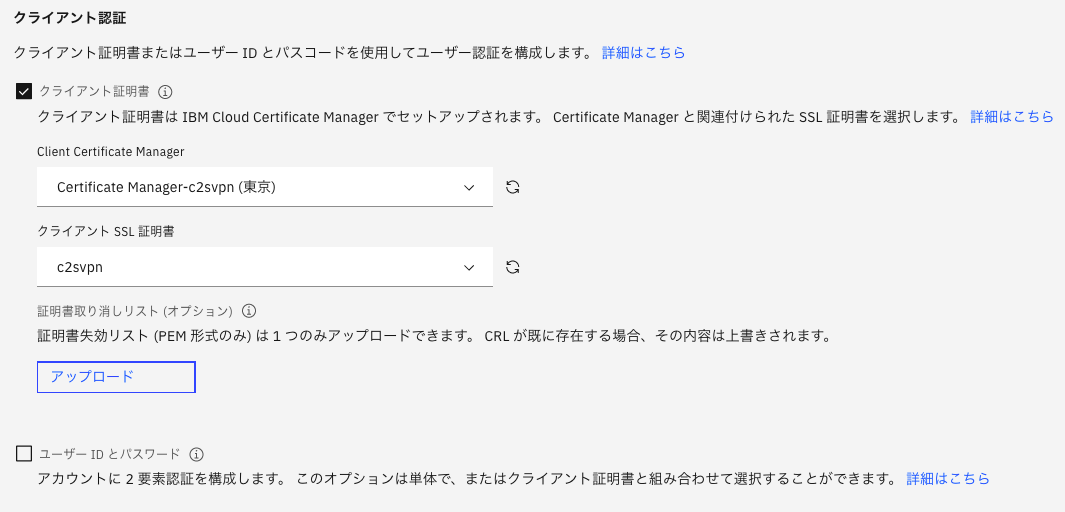
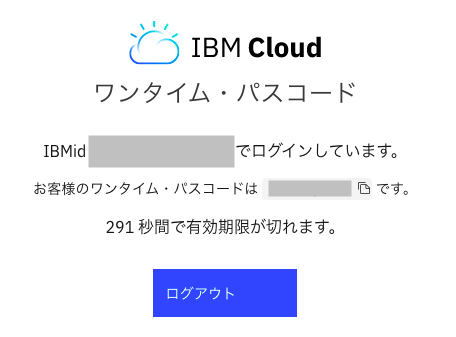
なお、「ユーザーIDとパスワード」の方式を選ぶと、IBMidとワンタイムパスコード(管理ポータルにログインした状態で、 https://iam.cloud.ibm.com/identity/passcode にアクセスして取得)の組み合わせでログインします。
両方の認証方式にチェックを入れると、クライアント証明書+IBMid&ワンタイムパスコードの組み合わせで認証が行われます。
「ユーザーIDとパスワード」を選ぶ際は、下記の設定も行う必要があります。
https://cloud.ibm.com/docs/vpc?topic=vpc-create-iam-access-group&interface=ui
インターネット向けの通信はトンネルを通さず行いたいので、今回はSplit Tunnelとします。

それ以外はデフォルトでオーダーを進めました。
Security Group設定
VPNサーバーに対してもSecurity Groupが適用されるため、VPN接続に必要なポートを許可します。
どのポートを使うかは、VPNサーバーのオーダー画面で指定します。今回はデフォルトのままにしていたので、UDP 443です。
接続元となるクライアント端末のグローバルIPアドレス範囲が分かっていれば、そこからの接続のみ許可することで、よりセキュアな状態にできます。
Client用のプロファイルをダウンロード、編集
Docsの下記に記載されている手順となります。
https://cloud.ibm.com/docs/vpc?topic=vpc-vpn-client-environment-setup
VPNサービスのプロビジョニングが終わったら詳細プロパティ画面から、Client用プロファイルをダウンロードします。
OpenVPN接続用に一般的に使われるOVPNファイルとして提供されます。
OVPNファイルをテキストエディタで開いて編集します。
今回は証明書認証をしているため、下記の部分に、クライアント証明書のファイル名を書きます。
# Uncomment the next two lines if certificate-based client authentication is enabled.
#  Ask your VPN administrator provides your client certificate and replace client_public_key
#  with your client certificate filename.
cert client1.vpn.ibm.com.crt
key client1.vpn.ibm.com.key
先ほどeasyrsaコマンドで作成したクライアント証明書と鍵ファイルを、OVPNと同じフォルダに配置します。

OpenVPNクライアントソフトにOVPNファイルを読み込み
クライアント端末に、OpenVPNクライアントをインストールします。
動作確認されているクライアントソフトについて下記に記載されています。今回はMac端末でTunnelblickを使っています。
https://cloud.ibm.com/docs/vpc?topic=vpc-client-to-site-vpn-planning#vpn-client-software
OVPNファイルをダブルクリックしてTunnelblickに読み込ませます。
「接続」を押すと、無事、VPN接続されました。
VPNトンネルは確立しましたが、次の手順でVPNサーバー経路を設定するまで、IBM Cloud上のサーバーとは通信できません)
VPN接続が完了すると、オーダー画面のアドレスプールで指定したプールから、IPアドレスがクライアントに付与されています。
utun3: flags=8051<UP,POINTOPOINT,RUNNING,MULTICAST> mtu 1500
	inet 172.16.100.2 --> 172.16.100.2 netmask 0xffffff00
管理ポータルのVPNサービス詳細画面で過去1時間の接続状況を確認できます。

なお、先述したように、クライアント認証方式として「ユーザーIDとパスワード」の方式を選んでいた場合、IBMidとワンタイムパスコード(管理ポータルにログインした状態で、https://iam.cloud.ibm.com/identity/passcode にアクセスして取得)をOpenVPNクライアントに入力し、ログインします。
https://iam.cloud.ibm.com/identity/passcode
VPNサーバー経路の設定
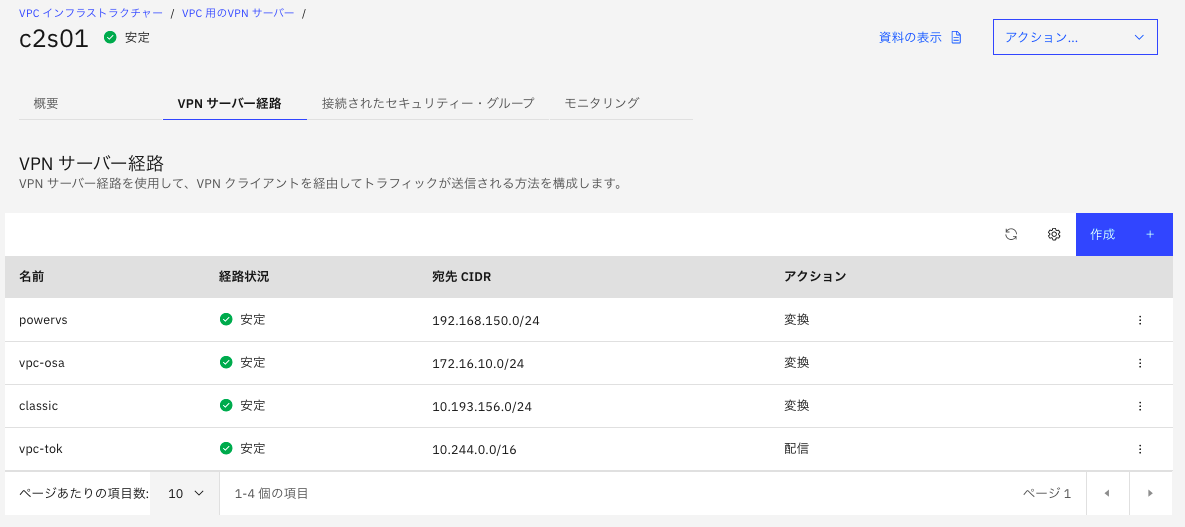
「VPNサーバー経路」タブで、VPNサーバーに到達したパケットをどうルーティングするか指定します。
https://cloud.ibm.com/docs/vpc?topic=vpc-vpn-client-to-site-routes&interface=ui
アクションには「配信(Deliver)」「ドロップ(Drop)」「変換(Translate)」の3つがあります。

「配信」にすると、「Source IP=アドレスプールから払い出された端末のIP」で宛先サーバーにパケットが届きます。VPNサービスと同じVPCのサーバーへのアクセスであれば、これで問題ありません。
宛先がTransit Gateway経由で異なるVPCやClassicの場合、あるいはDirect Link 2.0経由でオンプレミスやPower Systems Virtual Serverの場合のように、通信先がVPNサーバーと同じVPCのサーバーでない場合、戻りのパケットが戻れず、通信できません。
その場合、アクションを「変換」とすることで、Source NATされ、送信元IPがVPNサーバーがあるVPCのサブネットに変換されて宛先に届くので、戻りのパケットが戻って来られるようになり、通信可能となります。
- VPNサーバーと同じVPCへの接続 -> Deliver(配信)
- VPNサーバーと異なるVPCへの接続(Transit Gateway経由) -> Translate(変換)
- Classic環境への接続(Transit Gateway経由) -> Translate(変換)
- Power Systems Virtual Server環境への接続(Direct Link Connect 2.0経由) -> Translate(変換)
以上です。


