この記事を読む前に
下記記事が実施されていることを前提に作成しています。
Payjpでクレジットカード登録と削除機能を実装する(Rails)
実装する機能と前提条件
Payjp(Pay.jp)から既に__顧客IDとカードIDを取得済みでの購入__を想定しています。
実装するものとしては下記のとおりです。
- 自作のカード登録フォーム(前回)
- カード情報とユーザーの紐づけ(前回)
- ユーザーとカードの登録と削除(前回)
- 商品の購入(←今回)
バージョン情報
- ruby 2.3.1
- Rails 5.0.7
前提条件
- devise/hamlが導入済みでログインができている(devise/haml導入編はこちら)
- payjpのアカウントが既に取得できていて、ユーザーとカードの登録が完了しており、cardテーブルに以下の情報が登録されている(カード登録編はこちら)
- user_id ... UserテーブルのID
- customer_id ... payjpの顧客ID
- card_id ... payjpのデフォルトカードID
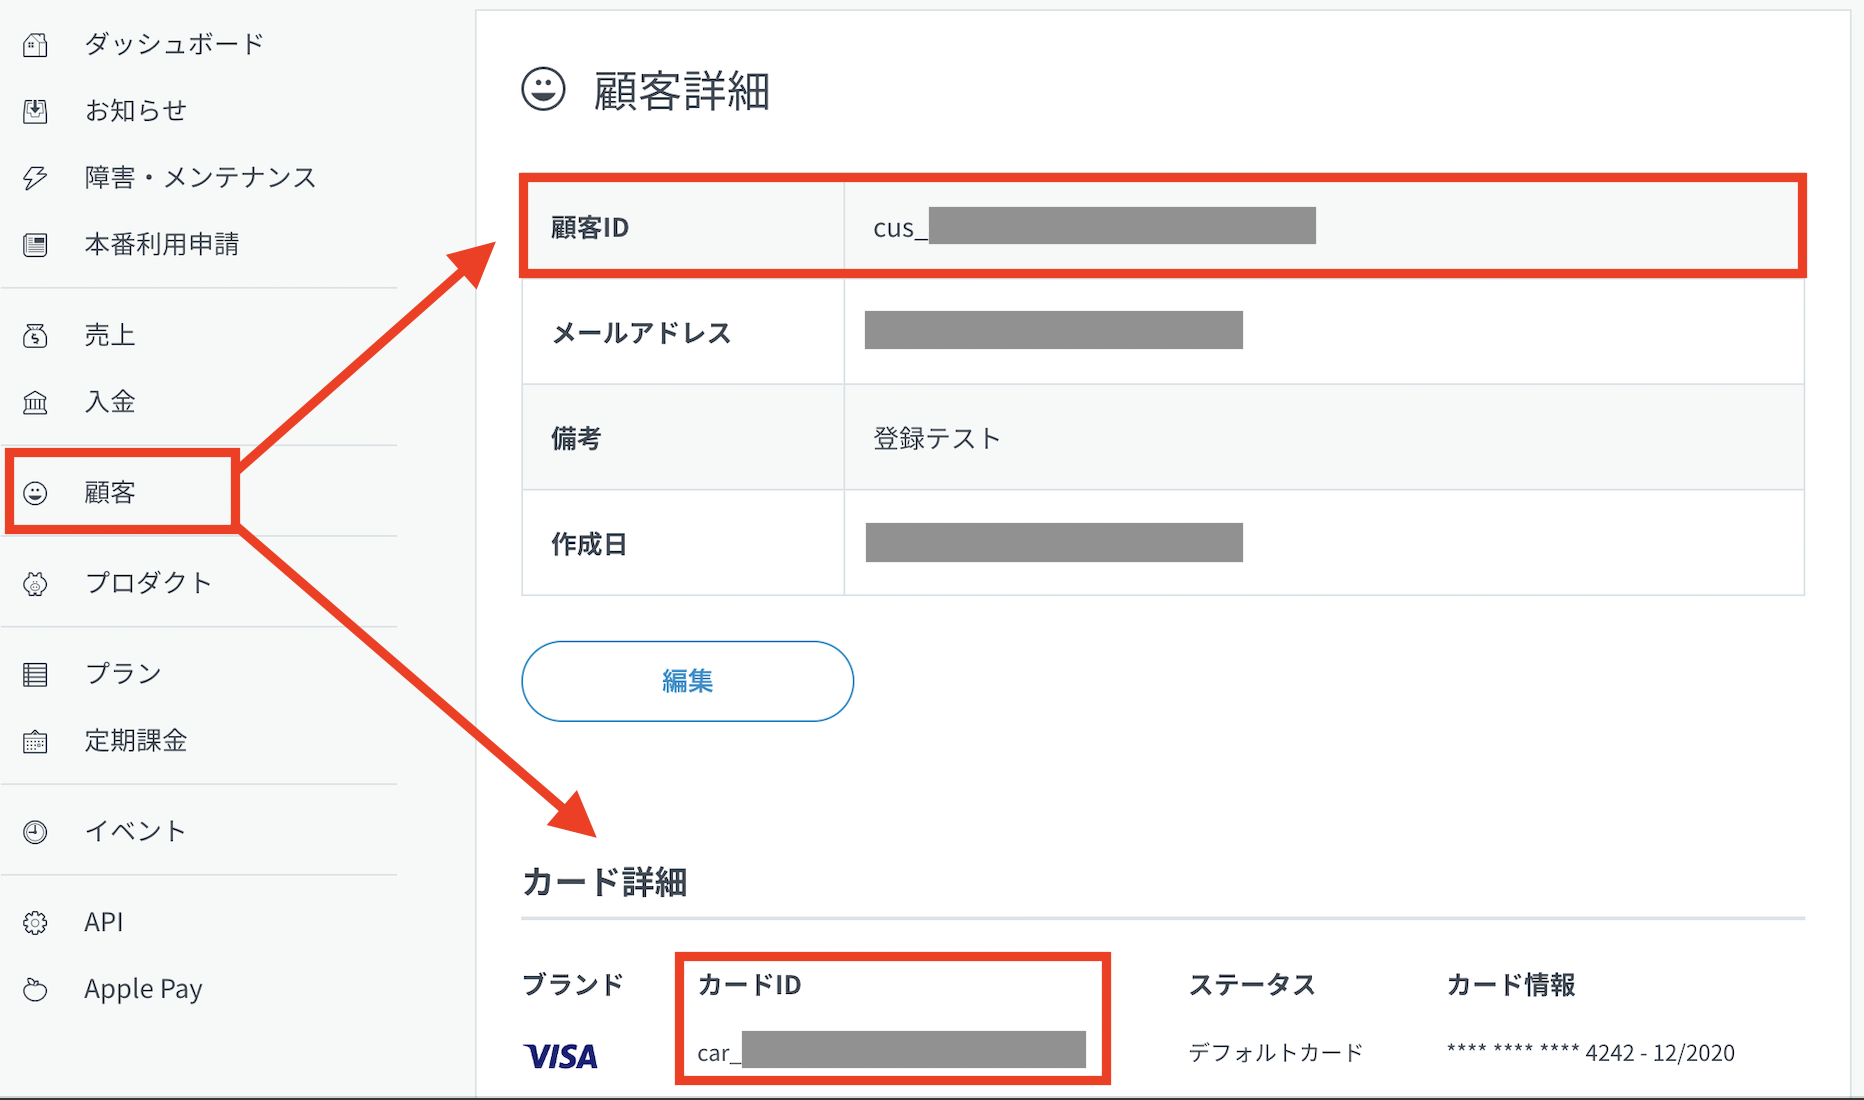
顧客IDとデフォルトカードIDは以下の画面で顧客ごとに確認できます。
もしDBを作成していなかったり可動しなかったりする場合はID直打ちでトライしてみましょう。
顧客詳細確認画面

1.コントローラーを作成しよう
コントローラとビュー(indexとdone)を作成するため、下記コマンドを実行します。
$ rails g controller purchase index done
コントローラーの中身を編集します。
app/controllers/purchase_controller.rb
class PurchaseController < ApplicationController

  require 'payjp'

  def index
    card = Card.where(user_id: current_user.id).first
    #Cardテーブルは前回記事で作成、テーブルからpayjpの顧客IDを検索
    if card.blank?
      #登録された情報がない場合にカード登録画面に移動
      redirect_to controller: "card", action: "new"
    else
      Payjp.api_key = ENV["PAYJP_PRIVATE_KEY"]
      #保管した顧客IDでpayjpから情報取得
      customer = Payjp::Customer.retrieve(card.customer_id)
      #保管したカードIDでpayjpから情報取得、カード情報表示のためインスタンス変数に代入
      @default_card_information = customer.cards.retrieve(card.card_id)
    end
  end

  def pay
    card = Card.where(user_id: current_user.id).first
    Payjp.api_key = ENV['PAYJP_PRIVATE_KEY']
    Payjp::Charge.create(
    :amount => 13500, #支払金額を入力(itemテーブル等に紐づけても良い)
    :customer => card.customer_id, #顧客ID
    :currency => 'jpy', #日本円
  )
  redirect_to action: 'done' #完了画面に移動
  end

end
2.購入画面と完了画面を作成しよう
購入画面
app/views/purchase/index.html.haml
%h2 購入を確定しますか?
%p Apple MacBook Pro 13インチ
%p ¥135,000(送料込み)
%br
%h3 支払い方法
- if @default_card_information.blank?
  %br /
- else
  -#以下カード情報を表示
  = "**** **** **** " + @default_card_information.last4
  - exp_month = @default_card_information.exp_month.to_s
  - exp_year = @default_card_information.exp_year.to_s.slice(2,3)
  = exp_month + " / " + exp_year
%br
= form_tag(action: :pay, method: :post) do
  %button 購入する
 ちなみにexp_monthはカードの期限月、exp_yearは期限年、last4はカードの下4桁を取得します。
https://pay.jp/docs/api/#顧客のカード情報を取得
完了画面
app/views/purchase/done.html.haml
%h2 購入が完了しました!
%p Apple MacBook Pro 13インチ
%p ¥135,000(送料込み)

3.ルートを設定しよう
config/routes.rb
  #今回設定分
  resources :purchase, only: [:index] do
    collection do
      get 'index', to: 'purchase#index'
      post 'pay', to: 'purchase#pay'
      get 'done', to: 'purchase#done'
    end
  end
これで実装は完了です!
サーバーを起動して下記リンクから画面変遷を確認してみましょう。
http://localhost:3000/purchase/index
4.購入データが登録されているか確認しよう
画面変遷はできたら、実際にpay.jpに購入情報が登録ができているか確認しましょう。
売上一覧の画面で確認できます!
