はじめに
普段は、Perl で AtCoder を楽しんでいます。
しかし、いつ何時 Perl がロックダウンされるかもしれませんのでそれに備え、Ruby の環境を整えたいと思います。
Ruby to Perl
Ruby のロックダウンを心配されている方は、
Perl Git による入園式
PerlのAtCoder向けVSCode設定(tasks.json)
にて、簡単に環境構築できます。
構築順
VSCode インストール
Visual Studio Code (Windows版) のインストール
msys2 インストール
msys2をWindowsにインストールしてPerlを使う
Ruby インストール
上記、msys2 インストール後に、pacman で Ruby をインストールします。
>pacman -Syu mingw-w64-x86_64-ruby-native-package-installer
msys/mingw32/mingw64 の3種類があると思われますが、Windowsが64bitの場合、mingw64 を選択します。
VSCode tasks.json 設定
| Ctrl + Shift +B |
|---|
で、Ruby を実行できるように tasks.json を設定します
{
    // See https://go.microsoft.com/fwlink/?LinkId=733558
    // for the documentation about the tasks.json format
    "version": "2.0.0",
    "tasks": [
        {
            "label": "ruby",
            "type": "shell",
            "command": "C:\\msys64\\mingw64\\bin\\ruby.exe",
            "args": [
                "${workspaceFolder}\\main.rb"
            ],
            "presentation": {
                "echo": true,
                "reveal": "always",
                "focus": true,
                "panel": "shared",
                "showReuseMessage": false,
                "clear": true
            },
            "group": {
                "kind": "build",
                "isDefault": true
            }
        }
    ]
}
"command": "C:\msys64\mingw64\bin\ruby.exe"、ruby.exe のパスを設定します。
これで Ruby が実行可能になり AtCoder や もっとプログラム脳を鍛える数学パズル を楽しむことができます。
デバッグの構築
上記構成で、VSCode から Ruby が実行可能になりますが、動作確認でデバッグも実行可能になるよう構築を続けます。
gcc インストール
pacman で gcc をインストールします。
これを入れないと、後程の gem インストールに失敗します。
>pacman -Syu mingw-w64-x86_64-gcc
bundler のインストール
>gem install bundler
windows版の gem は Windows コマンドスクリプトです
Gemfile の編集
# frozen_string_literal: true

source "https://rubygems.org"

git_source(:github) {|repo_name| "https://github.com/#{repo_name}" }

# gem "rails"
gem "ruby-debug-ide"
gem "debase"
ruby-debug-ide と debase を追記します
bundle install の実行
>bundle install
launch.json の設定
{
    // Use IntelliSense to learn about possible attributes.
    // Hover to view descriptions of existing attributes.
    // For more information, visit: https://go.microsoft.com/fwlink/?linkid=830387
    "version": "0.2.0",
    "configurations": [
        {
            "name": "Debug Local File",
            "type": "Ruby",
            "request": "launch",
            "program": "${workspaceRoot}/main.rb",
            "stopOnEntry": true
        }
    ]
}
これで F5 を押下するとデバッグ実行します.
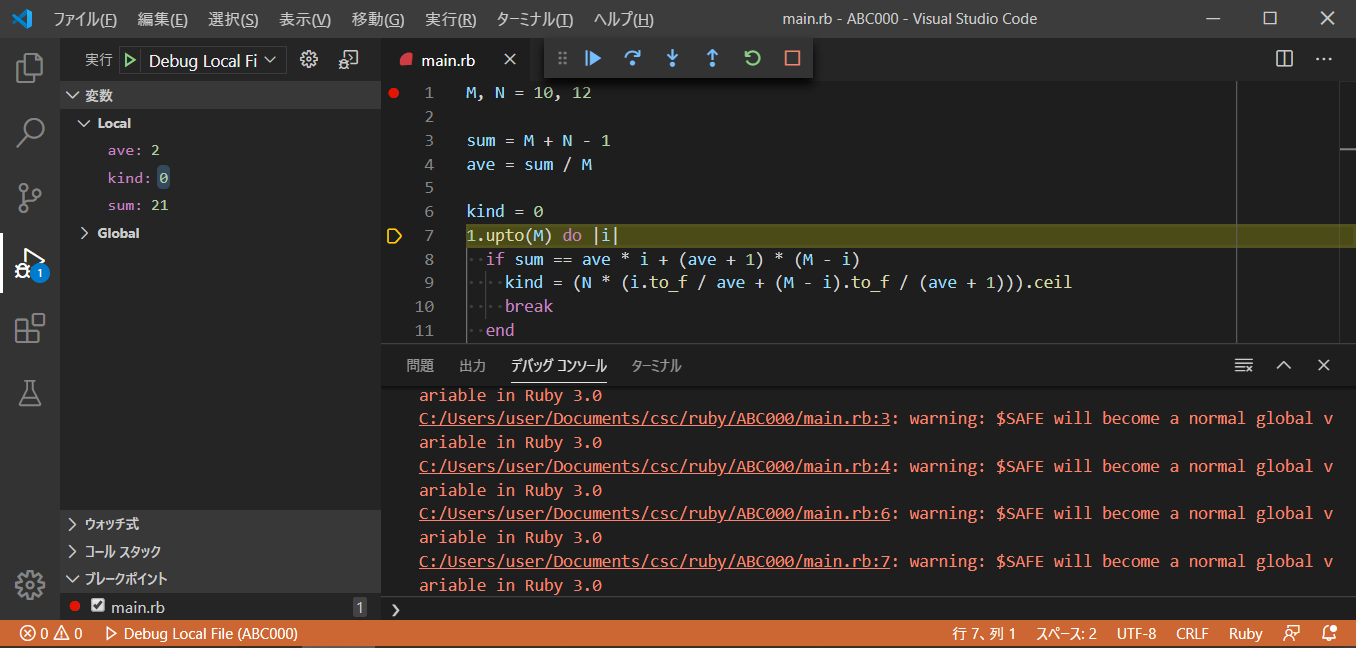
課題
デバッグ実行時に、標準入力の受け取りができない状態です。
出来次第、追記します。
まとめ
- Windows10 の VSCode の Ruby でデバッグができるようになった
- これで Perl がロックダウンされても安心
- 後半走りすぎ
- RubyInstaller を使用していないけど、まあいいや
追記
GitHubがやりたくてターミナルをbash.exeにする設定と、tasks.jsonのみcmd.exeを使用する設定は、*こちら*を参照
参照したサイト
VSCodeでRubyを気軽に実行する環境を作る。
Visual Studio Codeで「プロを目指す人のためのRuby入門」の例題を動かしてみた(動画付き)
VSCodeでRubyコードのデバッグができる環境を構築する(2017年2月現在)
PerlのAtCoder向けVSCode設定(tasks.json)
Visual Studio Code 15.1の統合シェルをMSYS2のbashにする